


.jpg?format=pjpg&auto=webp)


Utility
The Utility action connector helps to manage your automation workflow. With the wait action, you can put your automation on hold for some time before the following automation action runs.
Set up Utility
Perform the following steps to set up the Utility connector. You can set up three actions: Wait, Continue Automation If, and Continue Repeat If.
Note: Continue Repeat If action can be used only inside the Repeat Path step.
- Click Configure Action Step from the left navigation panel.
- Click Action Step to configure third-party services.
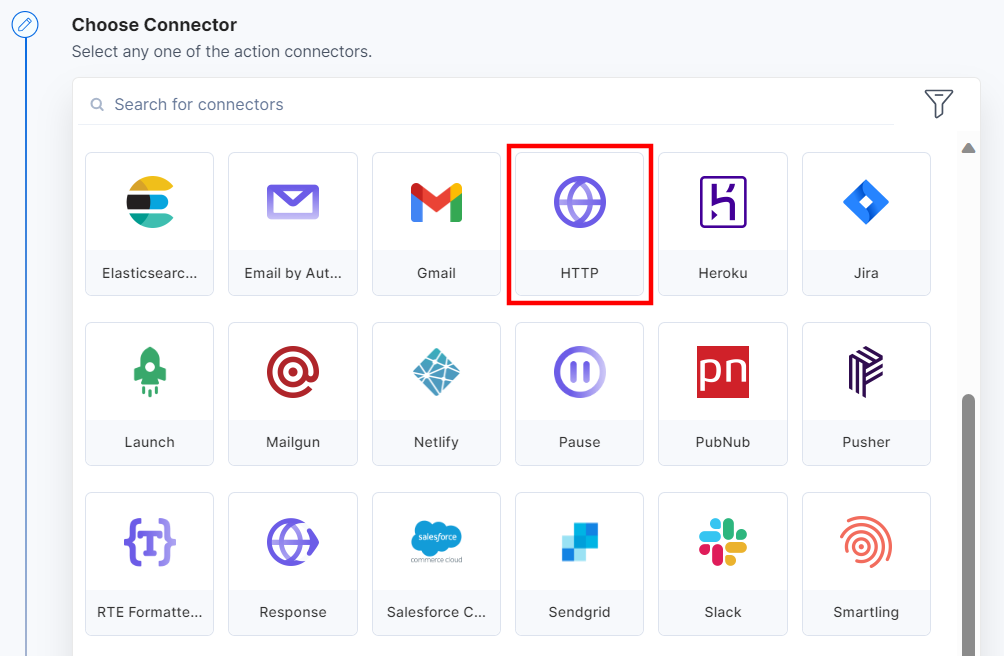
- Within the Configure Action Step, click the Utility connector.
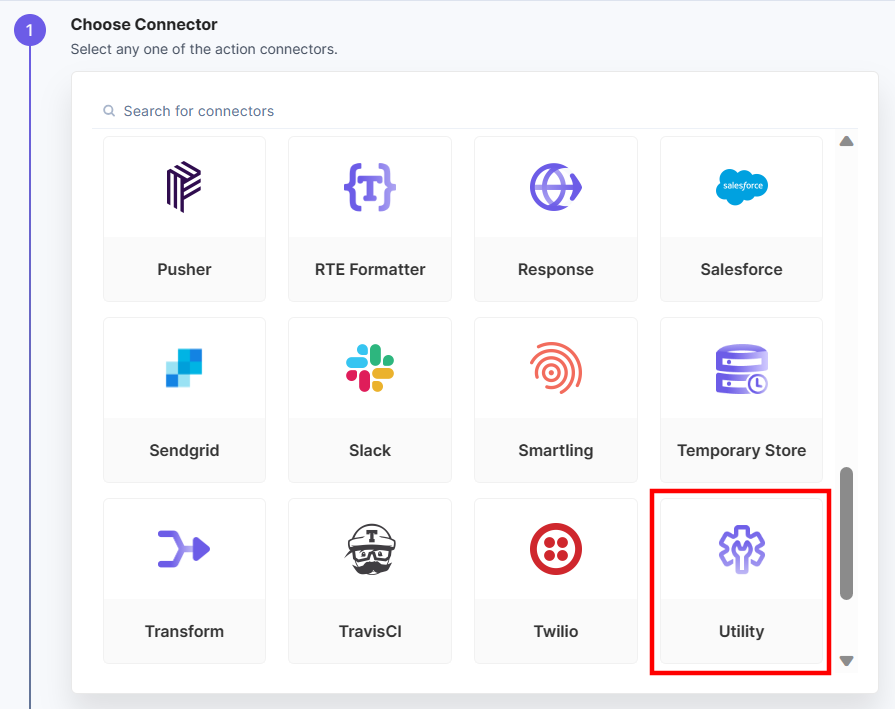
- You will see three actions under the Choose an Action tab: Wait, Continue Automation If, and Continue Repeat If (inside Repeat Path only).
Let's look at each of them in detail.
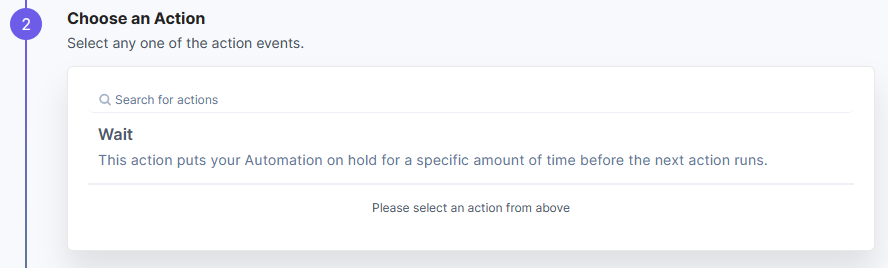
Wait Action
- Under Choose an Action tab, select the Wait action.
- In the Wait dropdown, select the timeout value to delay the automation execution.
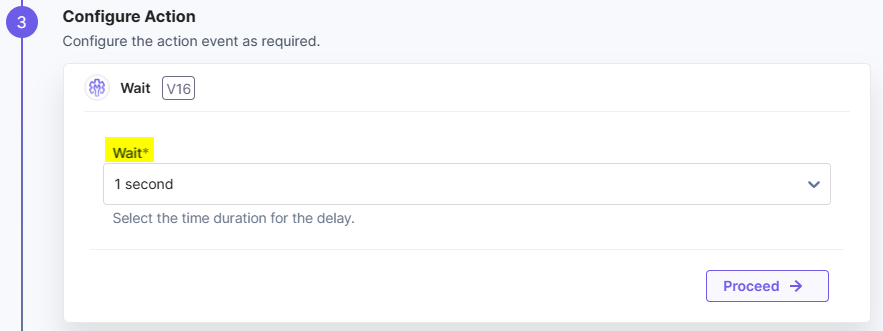
- Click the Proceed button.
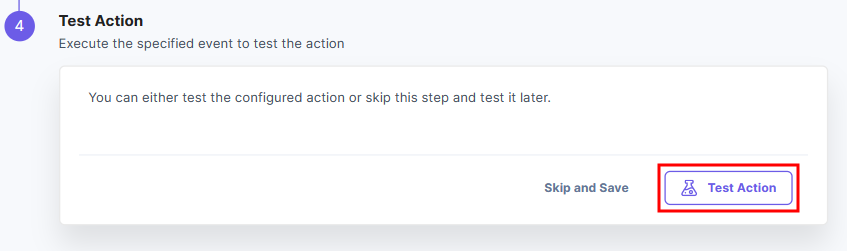
- To test the configured action, click the Test Action button.
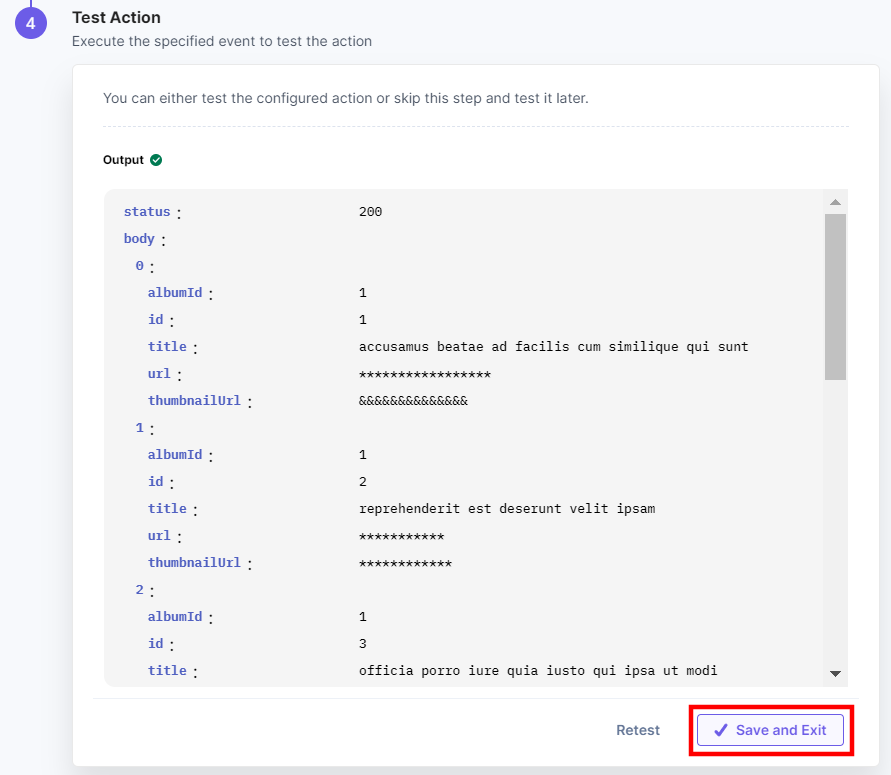
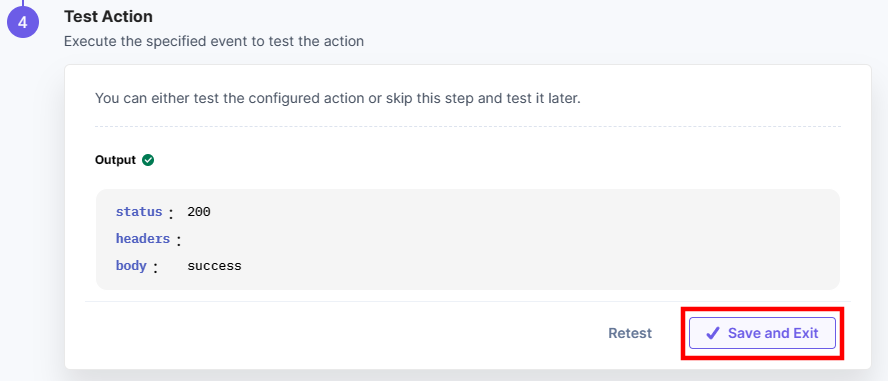
- On successful configuration, you can see the below output. Click the Save and Exit button.

Let’s see a simple use-case of the Utility connector using Repeat Path.
Wait action is useful while working with bulk data. Previously, if the number of API requests exceeded the defined limitation, the automation failed automatically due to rate limiting.
In this example, we are sending bulk data through the HTTP action with a limitation of 5 API requests per second, and we will use the Wait action to delay the API request per second in order to create multiple entries in Contentstack. We will also see how the user receives an error message in the Execution Log section for exceeding the rate limit.
Note: Rate Limit is organization based and needs to be set as per the requirement.
- Configure the HTTP Trigger connector. For more details, refer to the HTTP Trigger connector documentation.
- Once the trigger is configured, configure an Action Step and click the HTTP action connector.
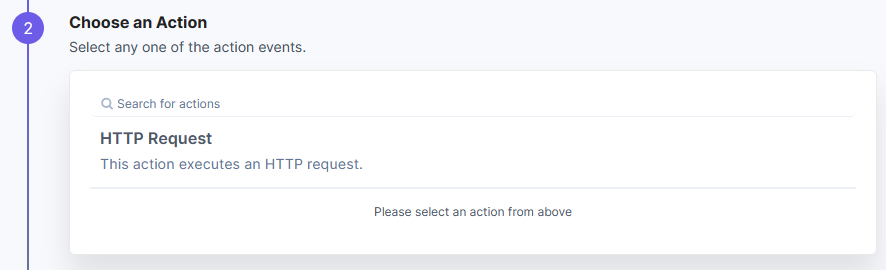
- Under Choose an Action step, select the HTTP Request action.
- Provide a URL to fetch the bulk data. In this example, we have set the limit to 20, i.e. the URL will fetch the data as per the limit.
Note: You can provide any URL that can fetch bulk data from a source.
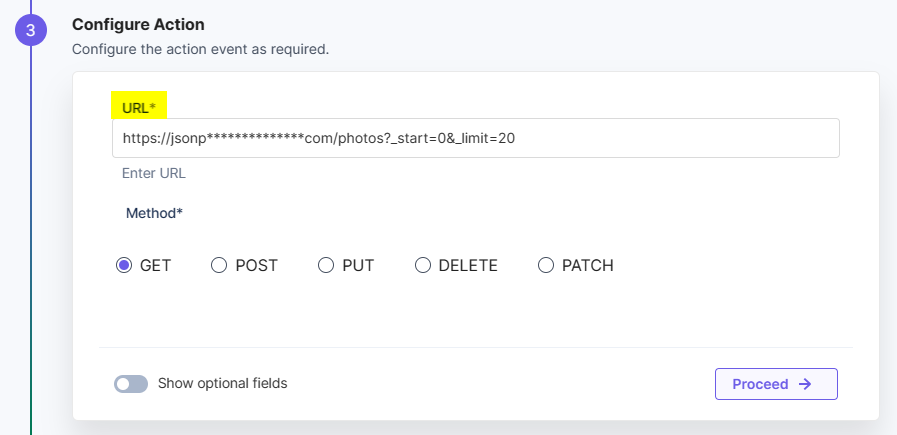
- Click the Proceed button.
- Click the Test Action button.
- You will be able to see the entire data in the output. Click the Save and Exit button.
Once the data is fetched, configure the Repeat Path step to bring the data from the HTTP action. To do so, follow the steps below:
Note: The specific use of Repeat Path in this use-case is to iterate through the bulk data and create multiple entries in Contentstack. It will help if you define your content type schema as per the data fetched in the HTTP action.
- Click + Add New Step to add a new step.
- Click Configure Action Step from the left navigation panel.
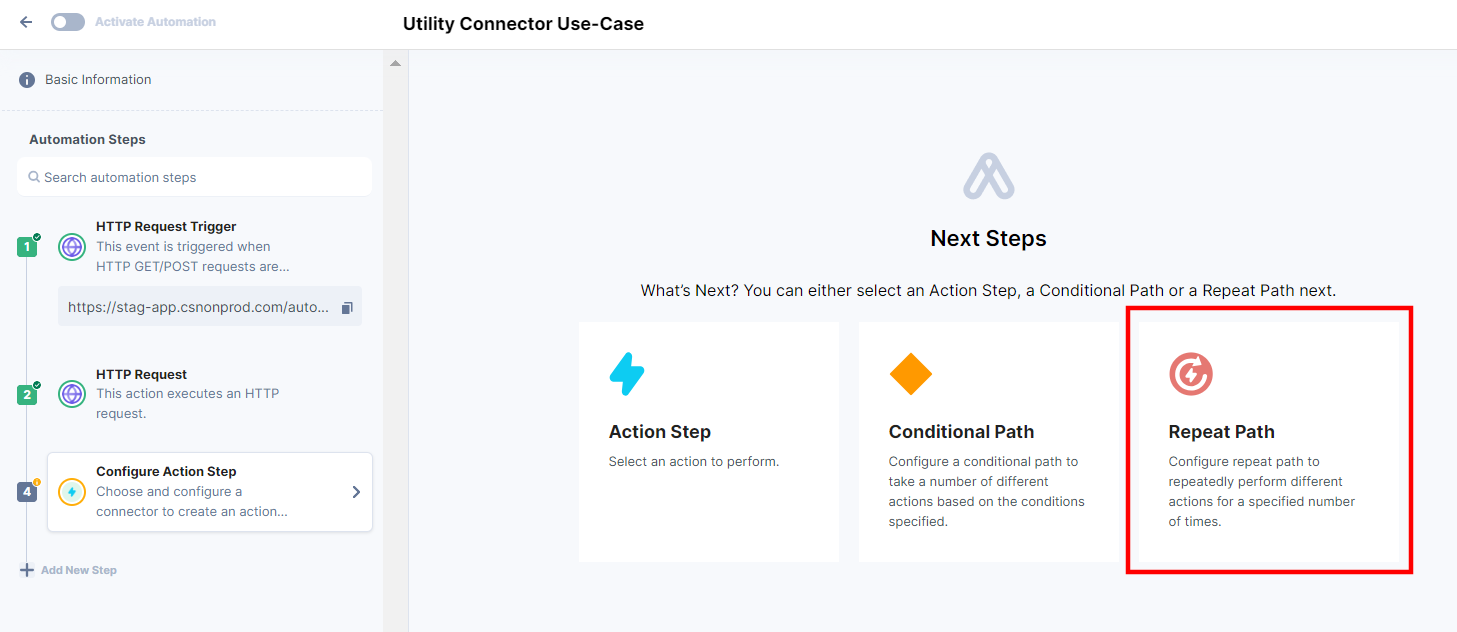
- Click Repeat Path to configure repeat path.
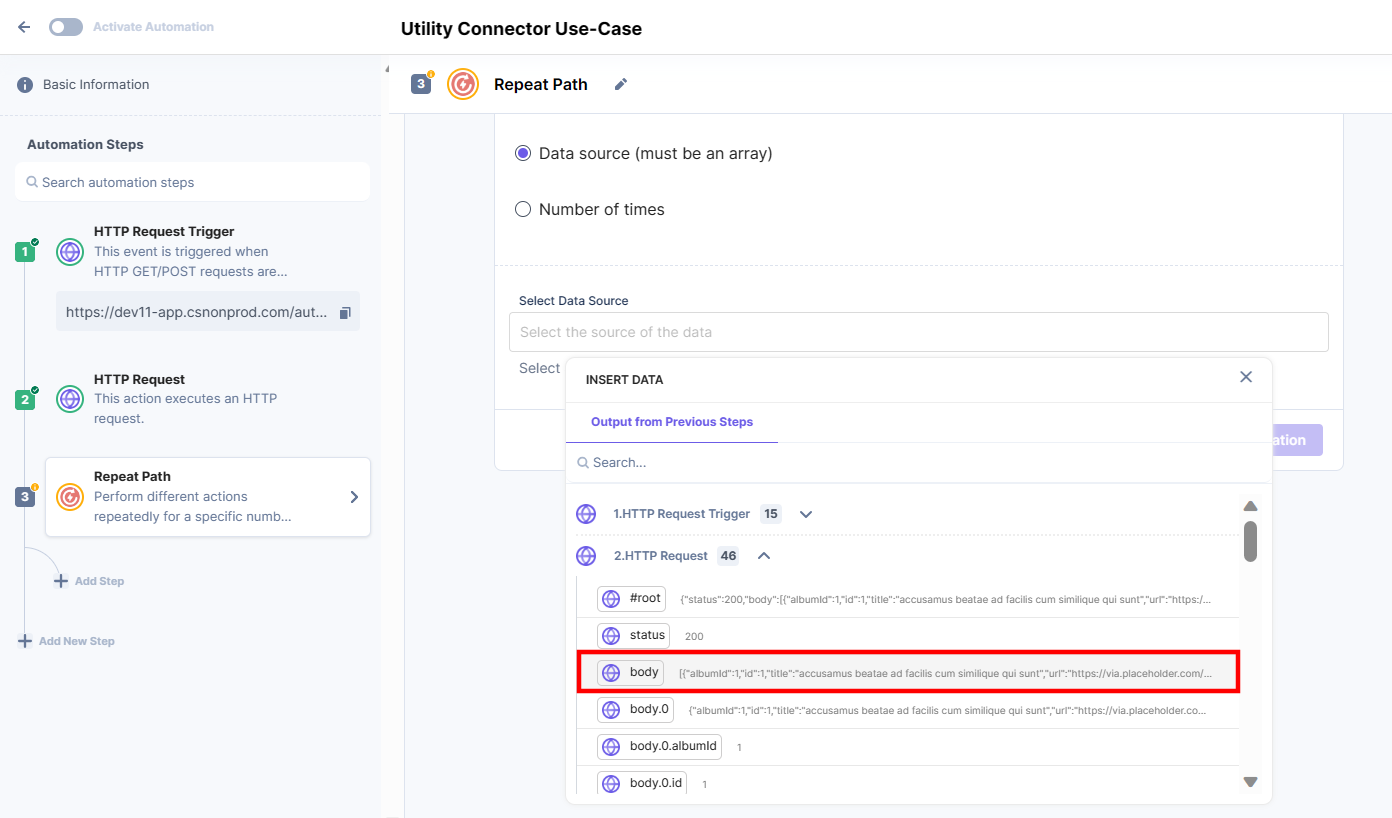
- In the Repeat Path Configurations, select the Data source to fetch the array of data configured previously.
- Click Save Configuration to save the Repeat Path configuration.
On successful completion, use the Create Entry action inside Repeat Path. Follow the steps below:
- Click + Add Step.
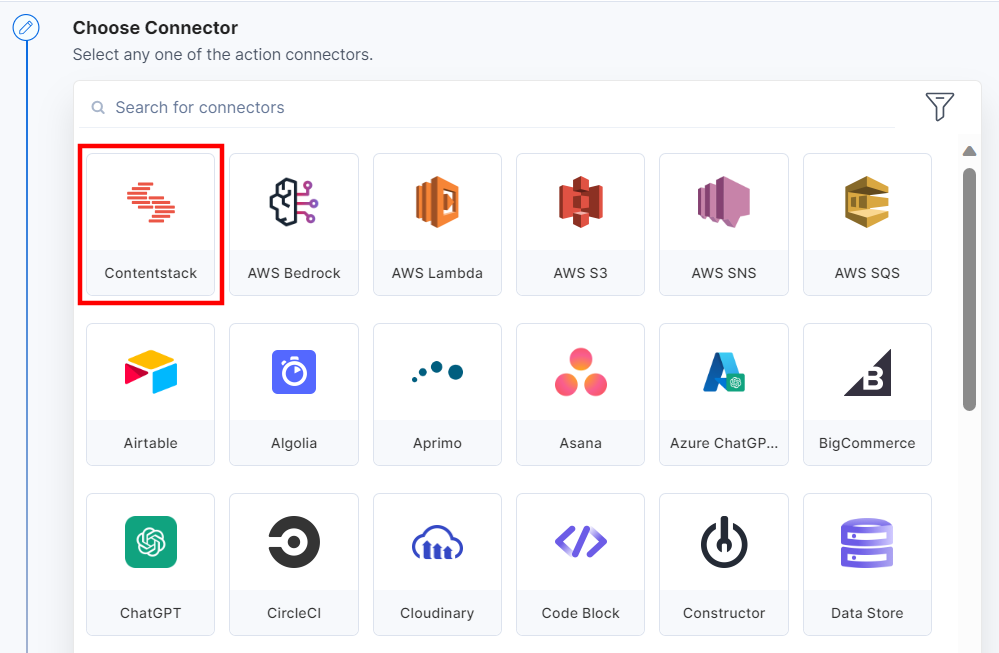
- In the Configure Action Step, click the Contentstack connector.
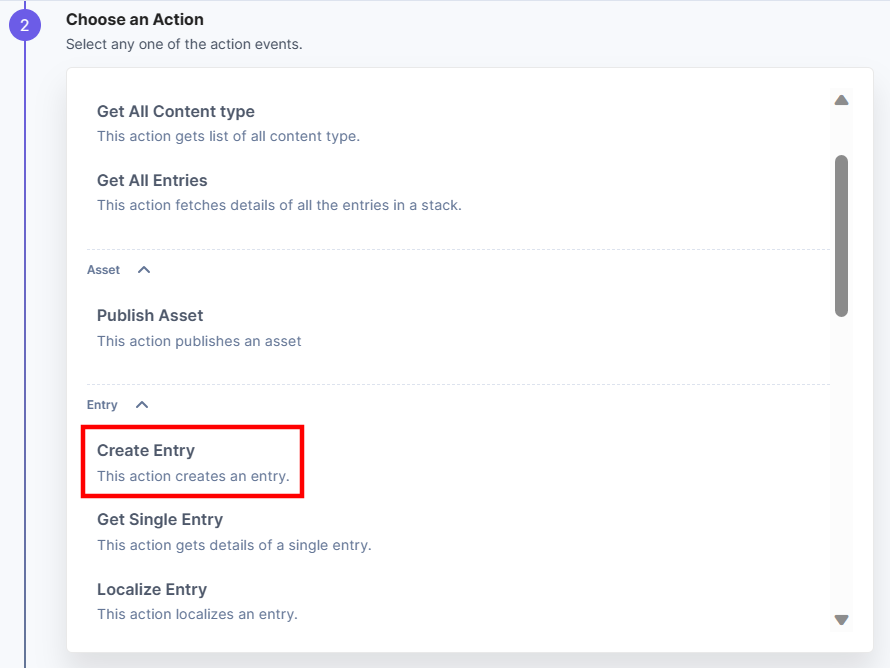
- Under Choose an Action step, select the Create Entry action.
- Add your Contentstack account. For more information, refer to the Contentstack action connector document.
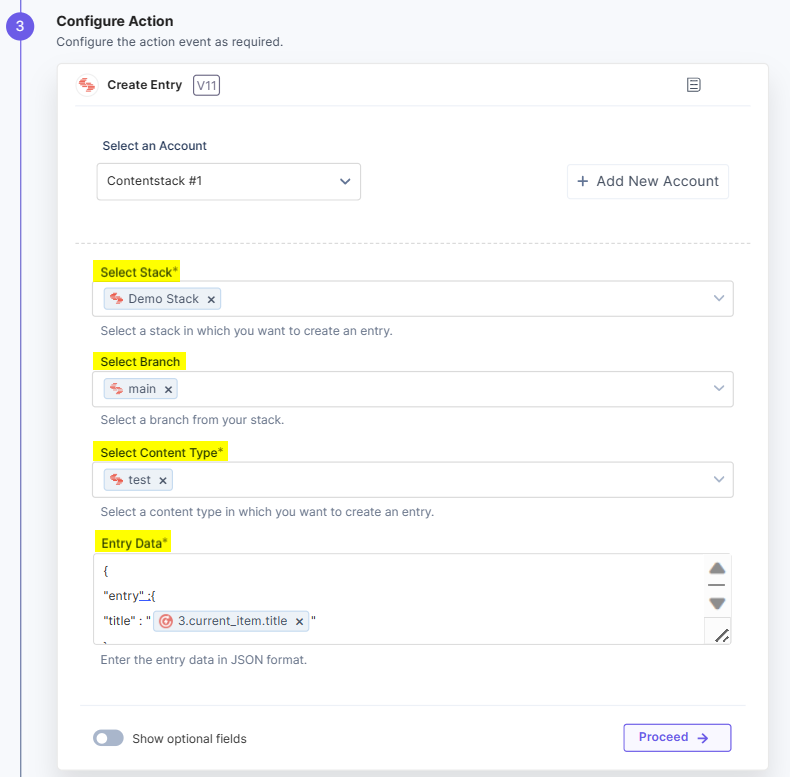
- Select the Stack, Branch, Content Type, and Entry Data to create an entry in Contentstack.
- Click the Proceed button.
- Click the Test Action button to test the configured action.
- Navigate to your stack. An entry will be created. Click the Save and Exit button.
Let’s see what happens if we do not configure the Wait action.
- Activate the automation.
- Hit the HTTP trigger URL.
- Navigate to the Execution Log section. You will see that the automation fails. Click to view the details of the failure.
- You will see the error message “Rate limit exceeded.”
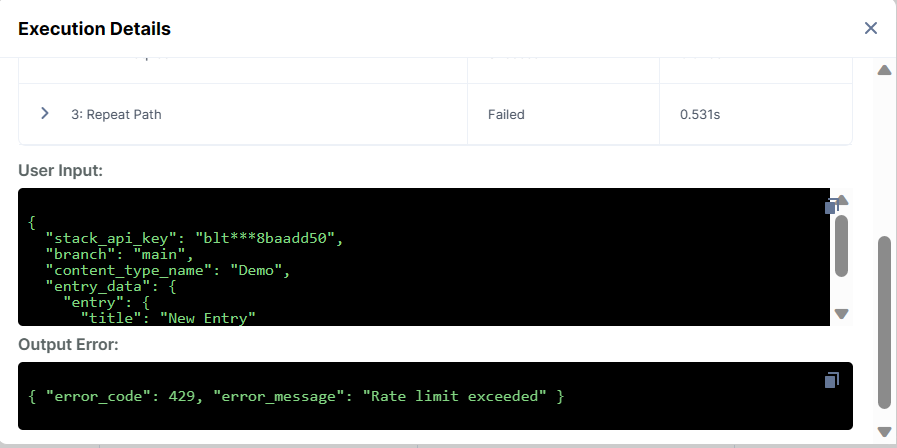
Note: Rate limit exceeds based on the organization plan. The user gets this error if the number of API calls made in a second exceeds the maximum limit defined in a particular organization.
Let’s see how to configure the Utility connector. To do so, follow the steps below:
- Click + Add Step.
- Click Configure Action Step from the left navigation panel.
- Click Action Step to configure third-party services.
- Within the Configure Action Step, click the Utility connector. Select the Wait action.
- Select the timeout duration for each API request from the dropdown.
- Click the Proceed button.
- Click the Test Action button to test the configured action.
- Click the Save and Exit button.
Let’s see what happens when we configure the Wait action.
- Activate the automation.
- Hit the HTTP trigger URL.
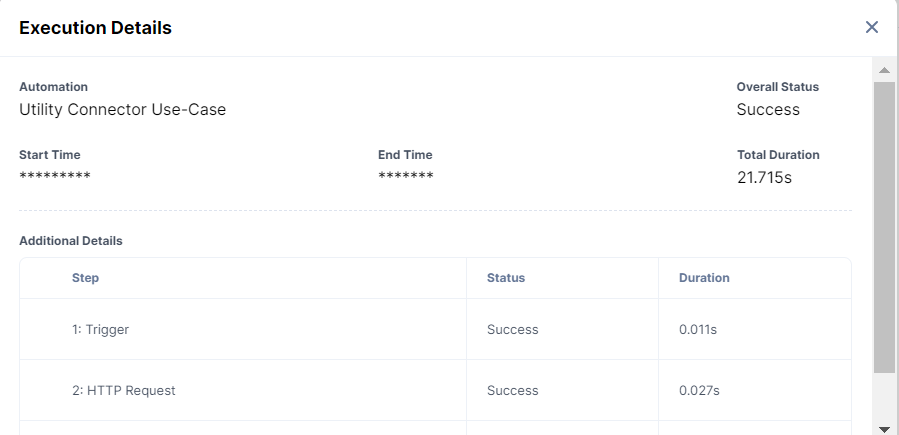
- Navigate to the Execution Log section. You will see a success message. Click to view the details of the execution.
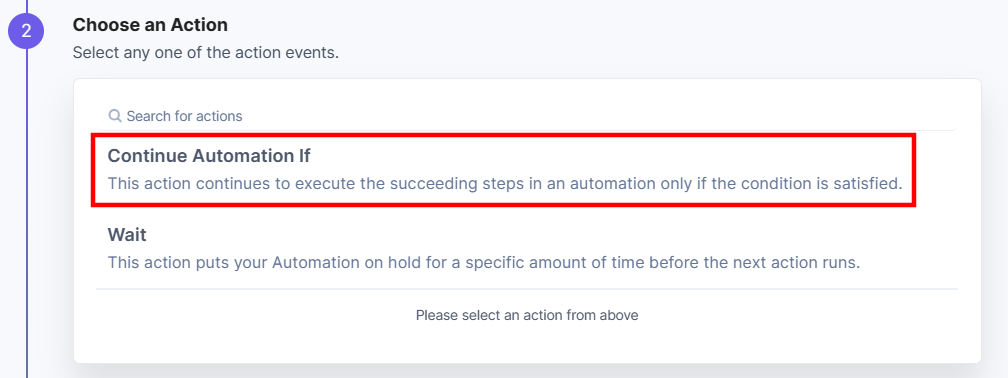
Continue Automation If
Continue Automation If will execute the automation based on the defined conditions. It will exit out of automation completely if the condition(s) is not met or it will continue to execute the automation if the condition(s) is met.
- Under Choose an Action tab, select the Continue Automation If action.
- Provide the conditions you want to set up in the input box.
Suppose you want to continue the automation only if the entry title is John. If the condition matches, automation continues to execute; otherwise, the automation terminates.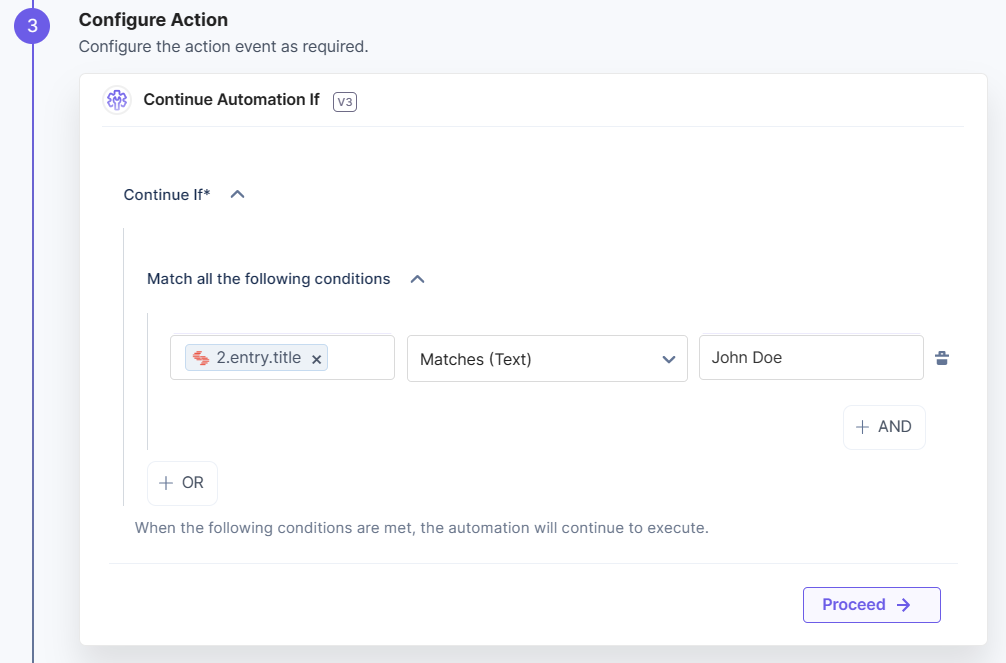
- Click the Proceed button.
- To test the configured action, click the Test Action button.
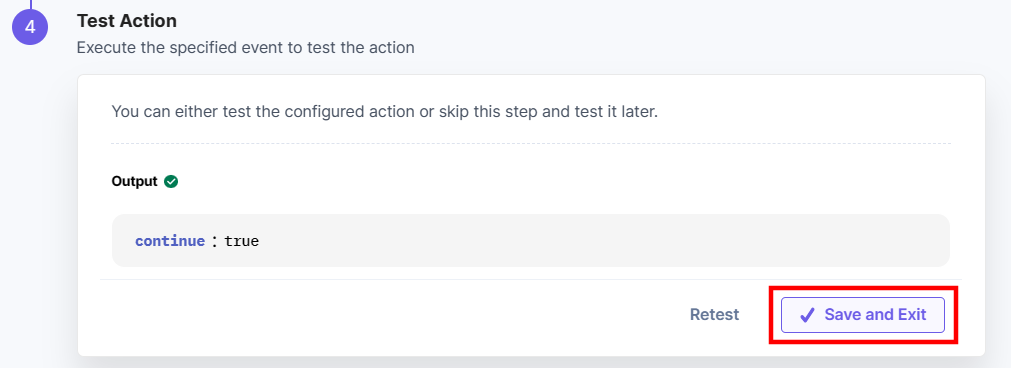
- On successful configuration, you can see the below output. Click the Save and Exit button.
Let's see a simple use case of the Continue Automation If action.
Note: Continue Automation If action can be used inside Repeat Path, Conditional Path, or as a separate Action Step.
In this use case, we send data via Postman and fetch the data in the HTTP trigger to create an entry in Contentstack. Once the data is fetched, you need to configure Continue Automation If action to provide the conditions for the automation. You need to configure the Transform action to execute, if the condition matches.
The condition(s) provided in the Continue Automation If is checked, and if it matches, the Transform action gets executed.
If the condition(s) does not match, the automation exits completely.
Sample data:
{
    "title": "Art 2323",
    "body": "body",
    "tags": ["tag1", "tag2"],
    "pdf": "yes"
}
Note: The primary differences between a Conditional Path Statement and Continue Automation If are:
- Conditional Path is a special action with a defined flow, which executes actions based on the condition, and Continue Automation If is a simple action to continue the execution of an automation only if the condition(s) is met.
- In the Conditional Path, conditions are checked, and if the condition matches, the IF block is executed; if not, the flow moves to the ELSE block. Whereas in Continue Automation If, if the condition is true, it executes the succeeding step, and if it is false, the automation exits completely.
- Configure the HTTP Trigger connector.
Additional Resources: Refer to the HTTP Trigger connector documentation for more details.
- Under the Choose Trigger tab, select the HTTP Request Trigger action. Select HTTP Request Trigger. This trigger will be activated whenever you make an HTTP GET/POST request to a specific webhook URL.
- Select a Method, i.e., GET/POST.
- You will find the applicable input “URL.” This URL will be the webhook URL to trigger the automation. You can send your Postman data via this trigger URL.
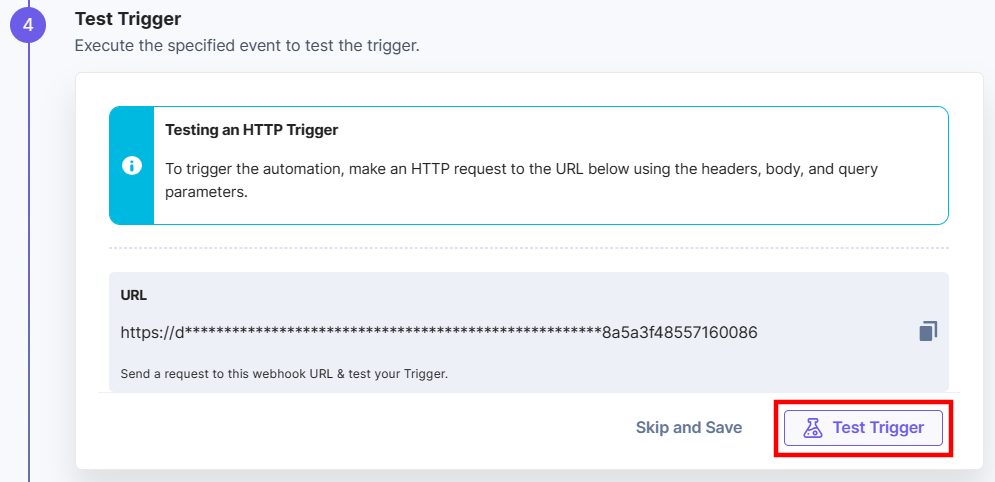
- Click the Test Trigger button.
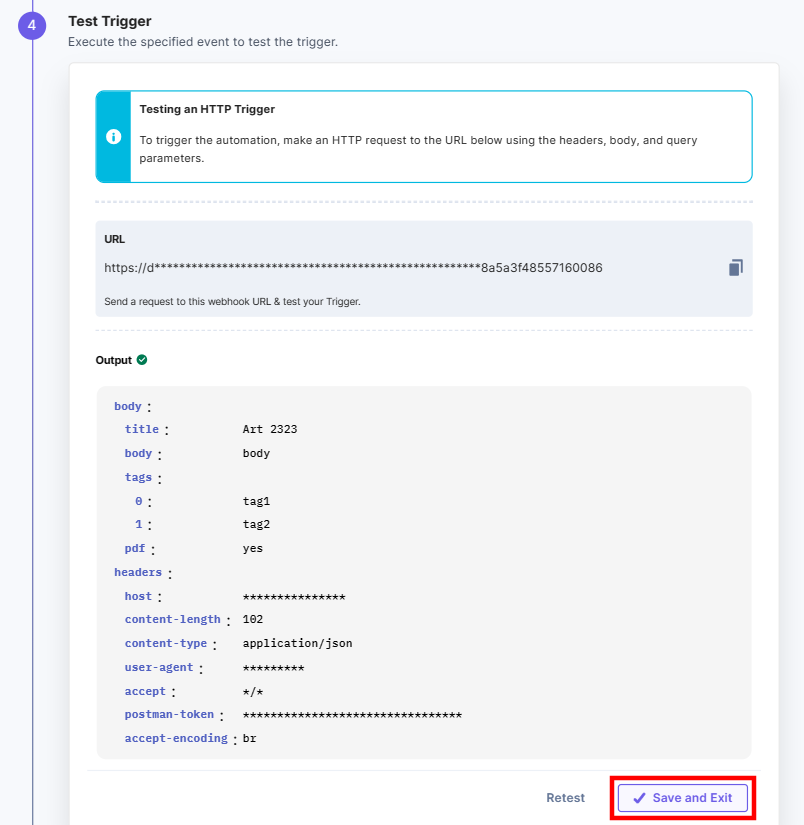
- You will be able to see the entire data in the output. Click the Save and Exit button.
Once the data is fetched, configure the Create Entry action to create an entry in Contentstack with the data fetched in the trigger.
- Click + Add New Step to add a new step.
- Click Configure Action Step from the left navigation panel.
- Within the Configure Action Step, click the Contentstack connector.
- Under Choose an Action tab, select the Create Entry action.
- In the Configure Action tab, click + Add New Account to add your Contentstack account.
Additional Resources: For more details on how to add an account, refer to the Contentstack Action documentation.
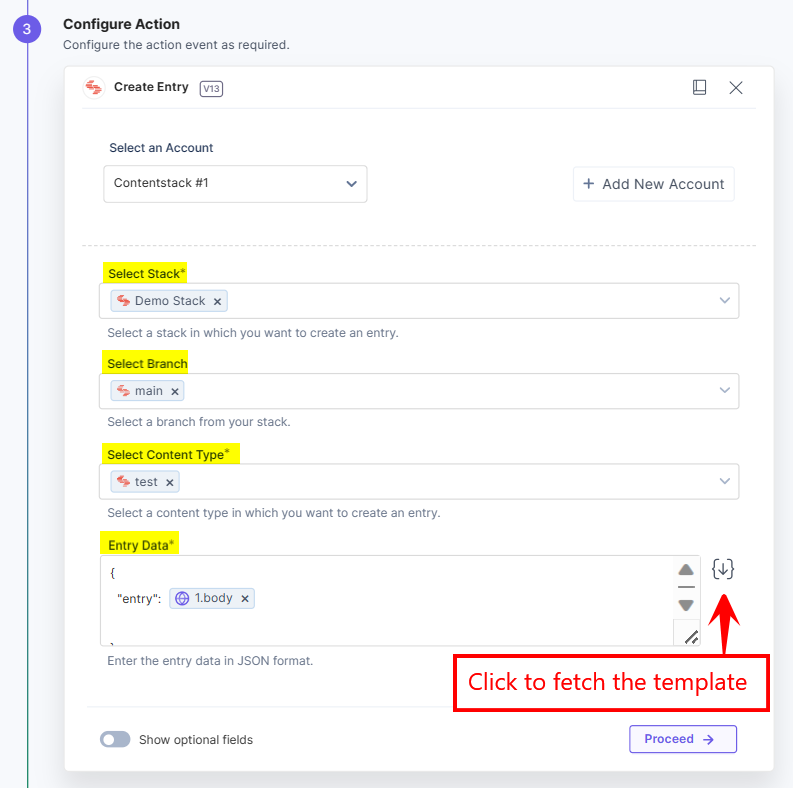
- Select a Stack, Branch, and Content Type from the Lookup list.
In the Entry Data field, fetch the data output from the HTTP trigger.
Note: In the Entry Data field, you can add a predefined schema template for your entry data. You must manually configure the entry data for JSON Rich Text Editor, Custom, and Experience Container fields.
- Click the Proceed button.
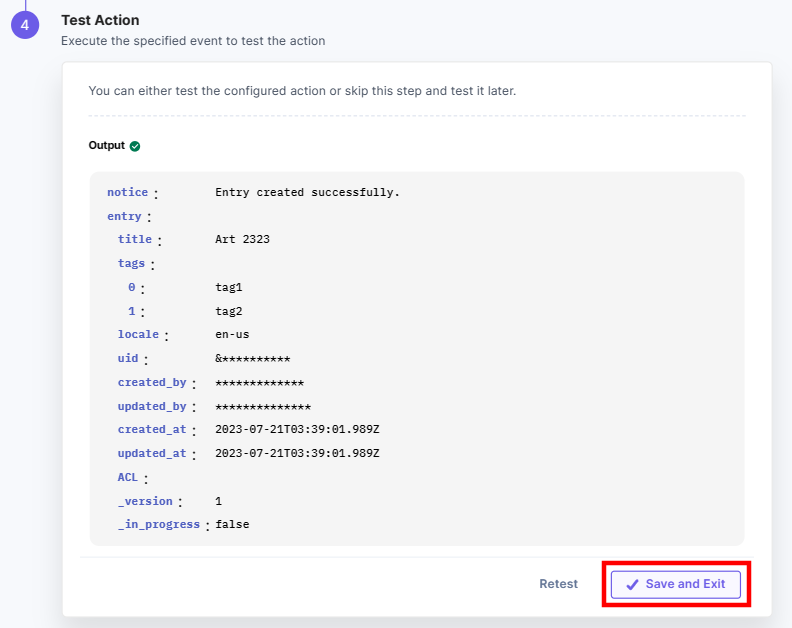
- Click the Test Action button.
- Click the Save and Exit button.
Once the entry is created, configure the Continue Automation If action inside the Utility connector.
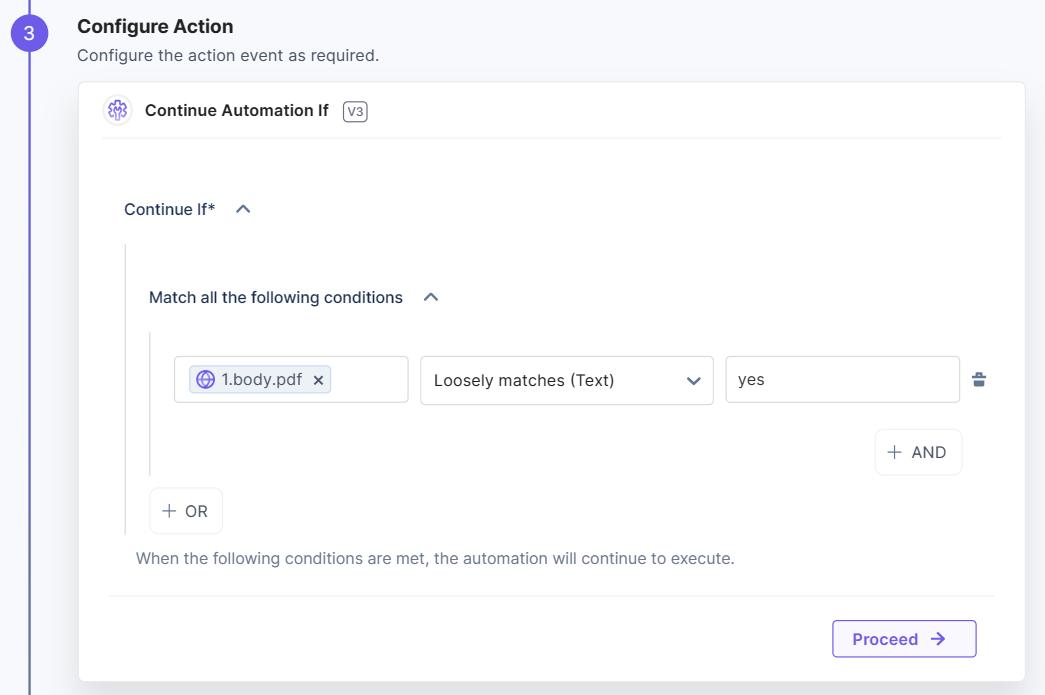
- Under Choose an Action tab, select the Continue Automation If action.
- Click + Add Condition. In the Select Input box, select the pdf field UID from the HTTP Request Body. Select Loosely Matches (Text), and provide the value “yes.”
This means Continue Automation If checks the value for the pdf field based on the trigger data sent via Postman. If the value is yes, i.e.. the condition matches, the automation continues to execute. If the value is no, i.e., the condition does not match; the automation exits completely.
- Click the Test Action button.
- You will see the output if the condition is met. Click the Save and Exit button.

Let's configure a Transform action to execute if the condition is true.
- Click + Add New Step to add a new step.
- Click Configure Action Step from the left navigation panel.
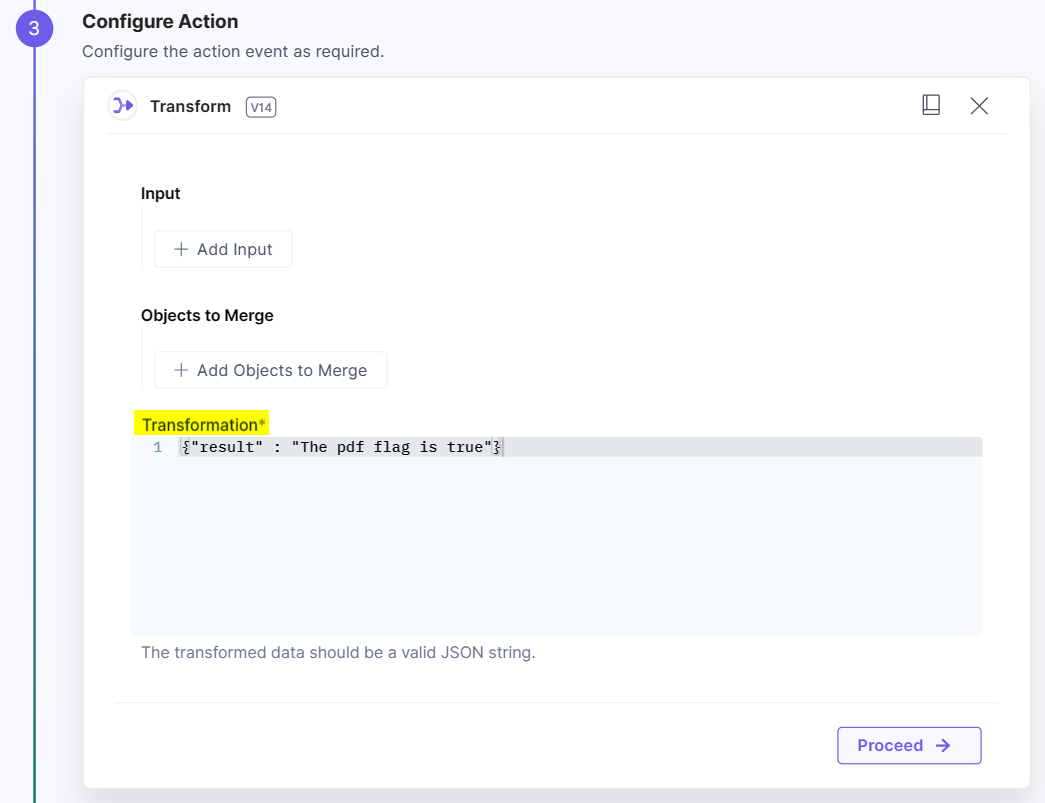
- Within the Configure Action Step, click the Transform connector.
- Under Choose an Action tab, select the Transform action.
- In the Transformation Box, provide a value as shown below:
- Click the Proceed button.
- Click the Test Action button.
- Click the Save and Exit button.
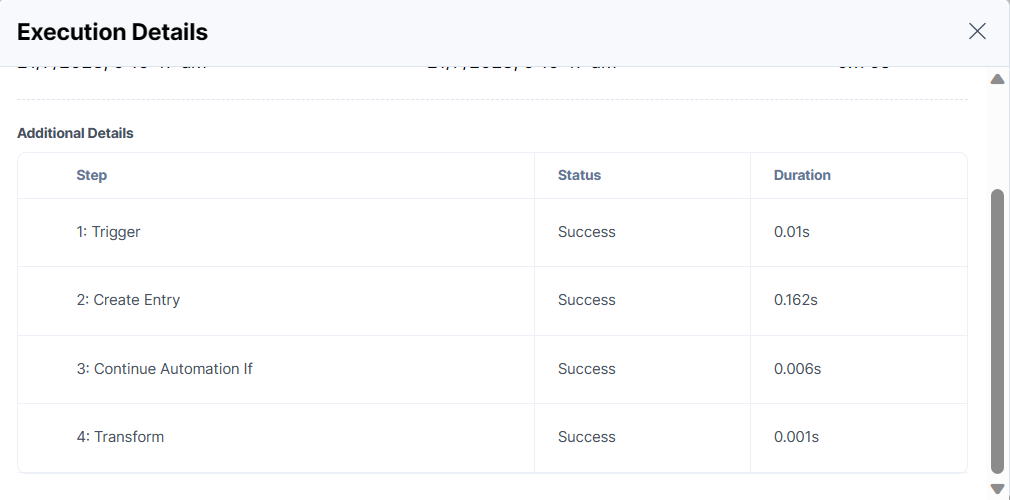
Let's see what happens if the condition is true.
- Navigate to the Execution Log section.
- Click the Continue Automation If execution details.
- A pop-up appears. In the Additional Details section, you will see the number of steps executed for the automation. The succeeding step, i.e., the Transform action will run completely.
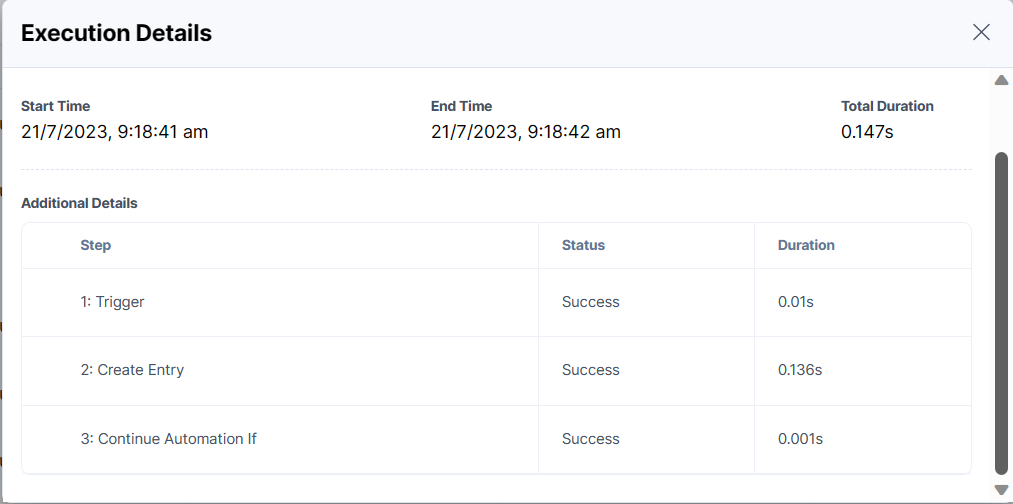
Let's see what happens if the condition is false.
- Navigate to the Execution Log section.
- Click the Continue Automation If execution details.
- A pop-up appears. In the Additional Details section, you will see that the automation breaks completely after the Continue Automation If step without executing the Transform action step.
Continue Repeat If
Continue Repeat If executes the automation based on the defined conditions. You must select the exit behavior to exit out of the Repeat Path or current iteration.
Note: Continue Repeat If action can be configured only inside a Repeat Path step.
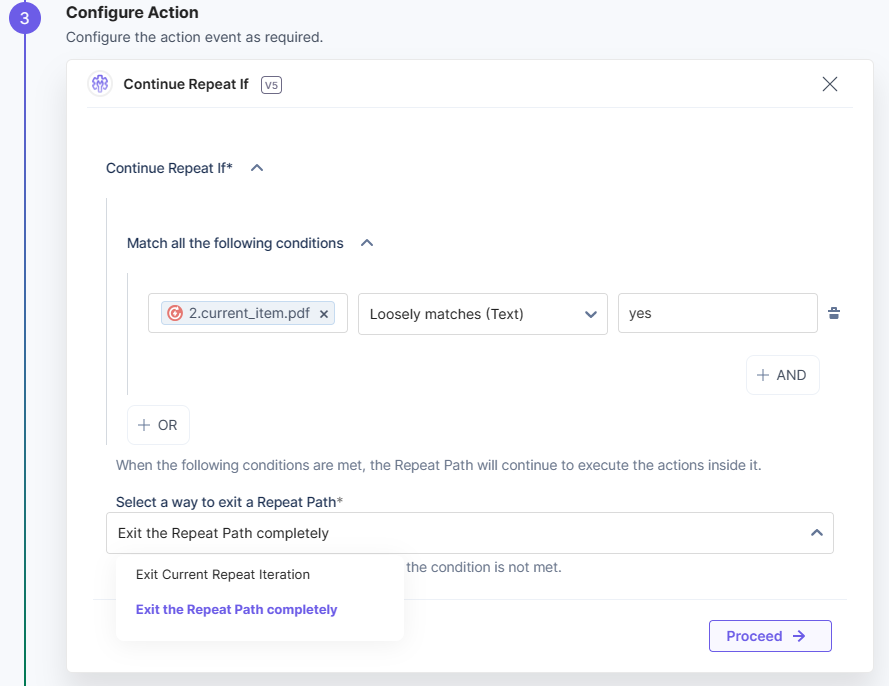
- Under Choose an Action tab, select the Continue Repeat If action.

- Provide the conditions you want to set up in the input box.
Suppose you want to execute succeeding steps inside of a Repeat Path only if the condition is true, i.e., the value of the pdf field is yes, then the succeeding steps after the Continue Repeat If action will execute inside the Repeat Path. - Select the exit behavior in case the condition is not met. You can either exit the Repeat Path completely, i.e, the steps outside the Repeat Path will continue to execute or you can exit the current iteration and continue with the next iteration in the Repeat Path.
- Click the Proceed button.
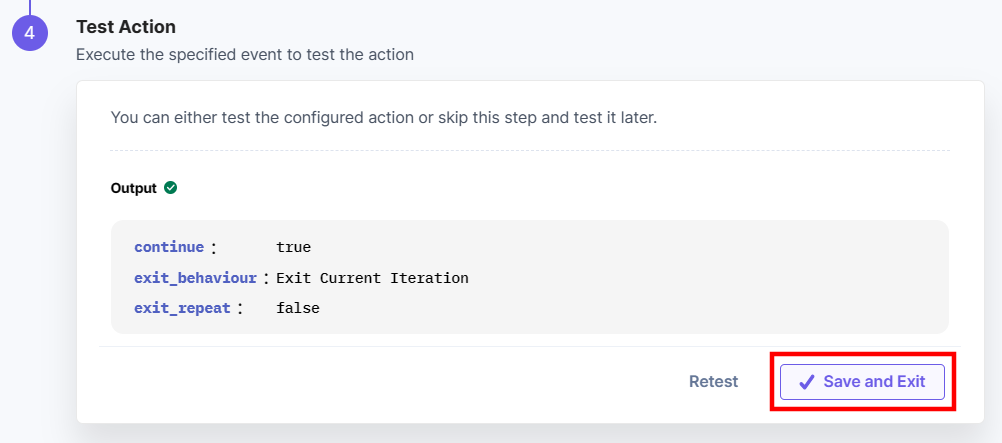
- To test the configured action, click the Test Action button.

- On successful configuration, you can see the below output. Click the Save and Exit button.
Let's see a simple use case of the Continue Repeat If action.
In this use case, we send bulk data via Postman and fetch the data in the HTTP trigger to create entries in Contentstack. On each iteration, an entry is created, and the conditions provided in the Continue Repeat If are checked; if it is true, the Transform action will execute.
If the condition(s) is not met, there are two exit ways to select. You can exit the current iteration or completely exit out of the Repeat Path. In the latter situation, the action outside the Repeat Path will execute.
Note: With the Continue Automation If action, if the condition is not met, the automation exits completely, whereas with Continue Repeat If, the flow breaks out of the Repeat Path (not terminating the entire automation).
Sample data to be sent via Postman:
{
    "entries": [
        {
            "title": "Article 183",
            "pdf": "yes"
        },
        {
            "title": "Article 184",
            "pdf": "no"
        },
        {
            "title": "Article 185",
            "pdf": "yes"
        }
    ]
}
- Configure the HTTP Trigger connector.
Additional Resources: Refer to the HTTP Trigger connector documentation for more details.
- Under the Choose Trigger tab, select the HTTP Request Trigger action. Select HTTP Request Trigger. This trigger will be activated whenever you make an HTTP GET/POST request to a specific webhook URL.
- Select a Method, i.e., GET/POST.
- You will find the applicable input “URL.” This URL will be the webhook URL to trigger the automation. You can send your Postman data via this trigger URL.

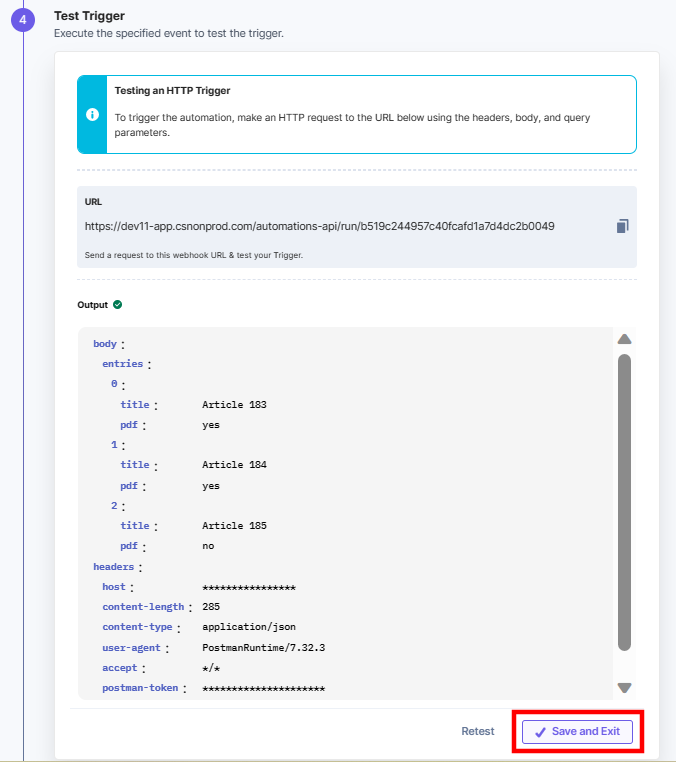
- Click the Test Trigger button.
- You will be able to see the entire data in the output. Click the Save and Exit button.
Let's configure the Repeat Path to use Continue Repeat If action.
- Click Configure Action Step from the left navigation panel.
- Click Repeat Path to configure and select the Repeat Type.
- In the Repeat Path Configurations, select the Data source to fetch the entries data to iterate the array received in the trigger.
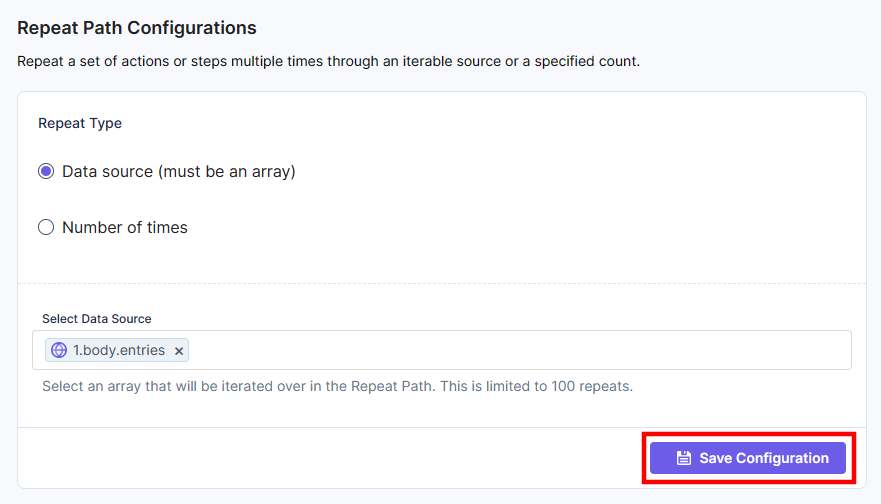
- Click the Save Configuration button.
After the Repeat Path configurations are done, configure the Contentstack connector within the Repeat Path step and configure the Create Entry action.
Configuring an action step inside the Repeat Path will iterate and run the action until the end of the data source is reached.
- Click + Add Step under the Repeat Path from the left navigation panel.
- Click Configure Action Step from the left navigation panel.
- Within the Configure Action Step, click the Contentstack connector.
- Under Choose an Action tab, select the Create Entry action.
- In the Configure Action tab, click + Add New Account to add your Contentstack account.
Additional Resources: For more details on how to add an account, refer to the Contentstack Action documentation.
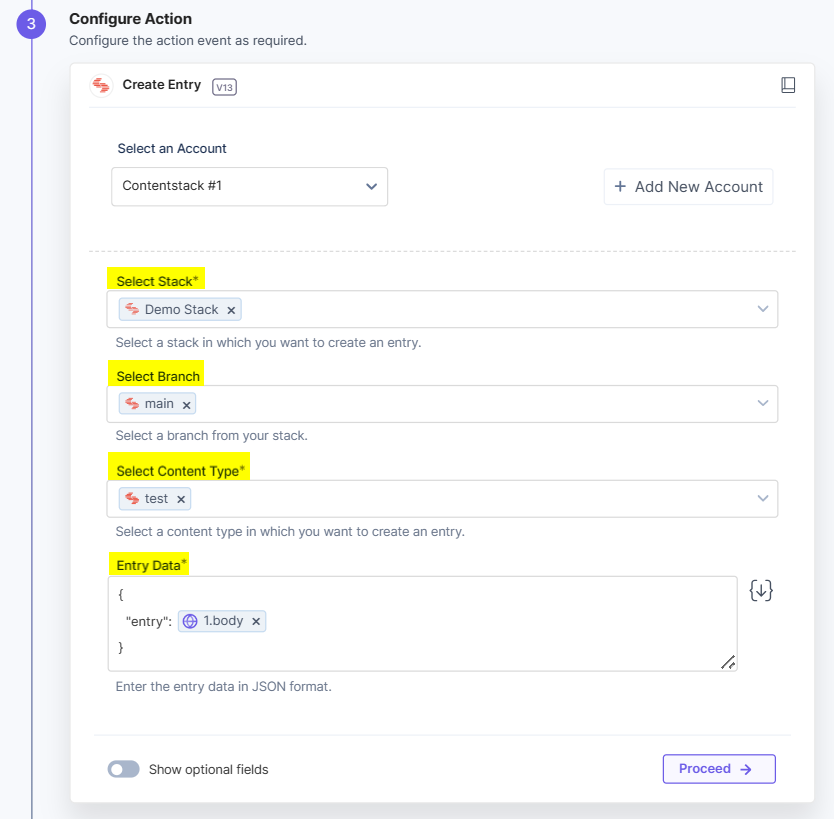
- Select a Stack, Branch, and Content Type from the Lookup list.
In the Entry Data field, fetch the data output from the HTTP trigger as shown below:
Note: In the Entry Data field, you can add a predefined schema template for your entry data. You must manually configure the entry data for JSON Rich Text Editor, Custom, and Experience Container fields.
 æ
æ - Click the Proceed button.
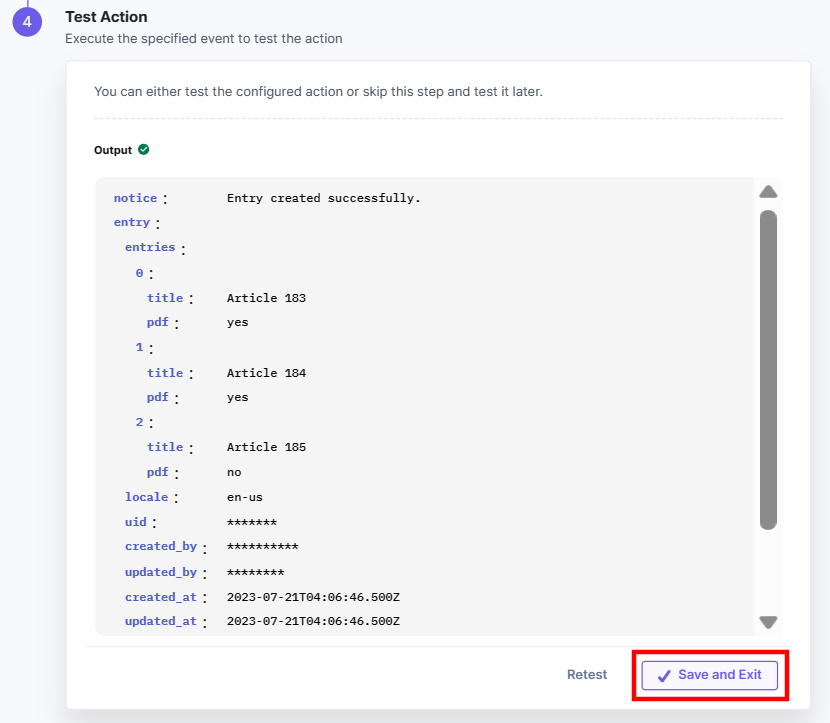
- Click the Test Action button.
- Click the Save and Exit button.
Once the entry is created, configure the Continue Repeat If action present in the Utility connector.
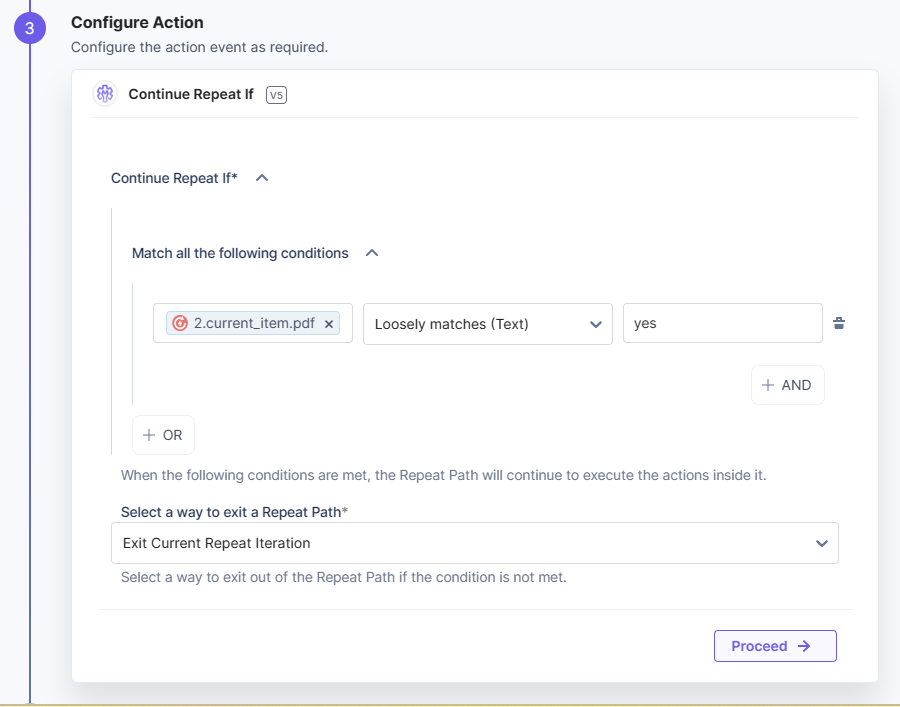
- Under Choose an Action tab, select the Continue Repeat If action.
- Click + Add Condition. In the Select Input box, enter the UID of the pdf field from the HTTP trigger step. Select Loosely Matches (Text), and provide the value “yes.”
This means Continue Repeat If will continue to iterate through the array data if the value for the pdf field is yes for an entry. If the value is yes, i.e., the condition matches, the Repeat Path will execute the succeeding action and continue to iterate through the array data.
If the value is no i.e. the condition does not match, then based on the exit behavior defined in the configuration, Repeat Path will break and execute the succeeding action in the automation or it will break the current iteration and continue to create entries as per the defined conditions.
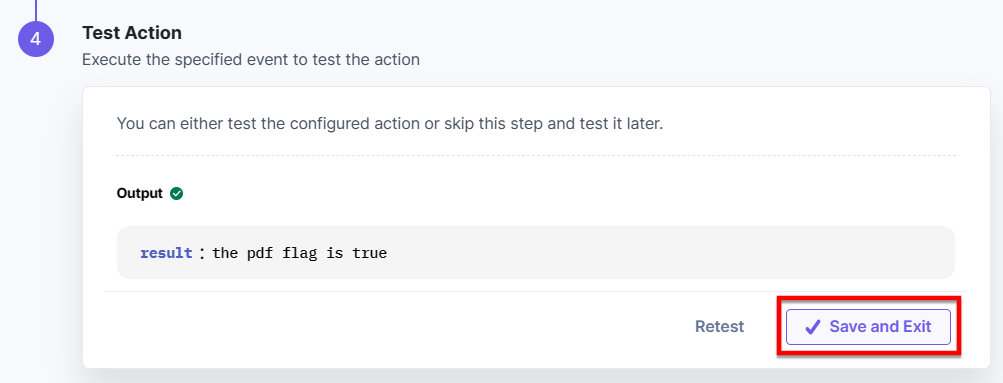
- Click the Test Action button.
- You will see the output as shown below. Click the Save and Exit button.
Let's configure a Transform action to execute if the condition is true.
- Under Choose an Action tab, select the Transform action.
- In the Transformation Box, provide a value as shown below:

- Click the Proceed button.
- Click the Test Action button.
- Click the Save and Exit button.
Now, let's configure the Response connector to see what happens if the exit behavior is Exit the Repeat Path completely.
- Click + Add New Step to configure third-party services.
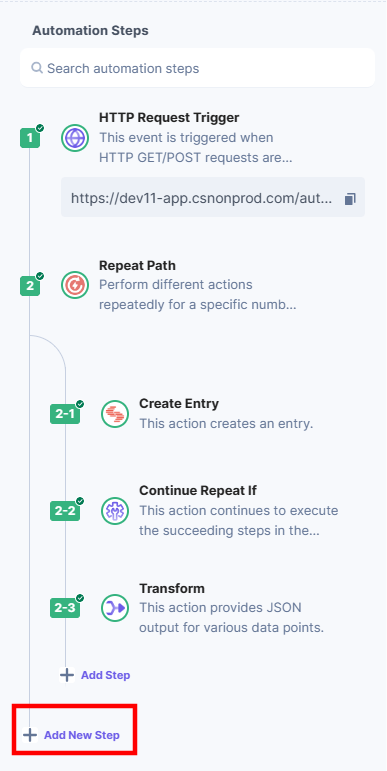
- Click Action Step to configure third-party services.
- Within the Configure Action Step, click the Response connector.
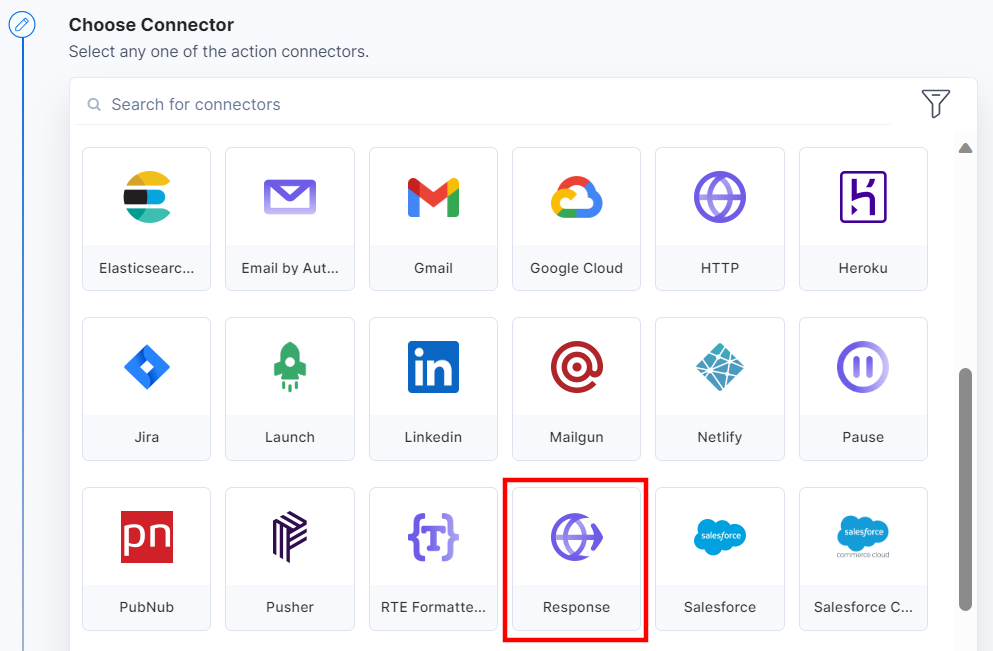
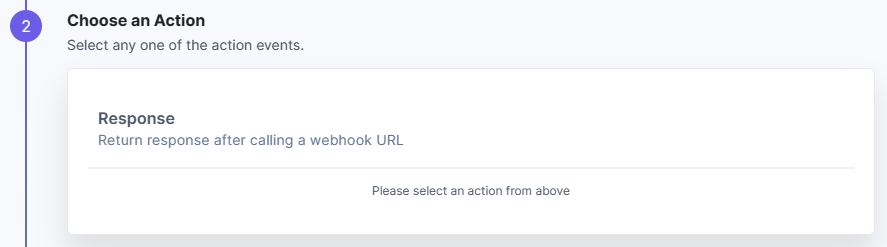
- Under Choose an Action tab, select the Response action.
- In the Response Body field, you can add the data that you want to send as the response.
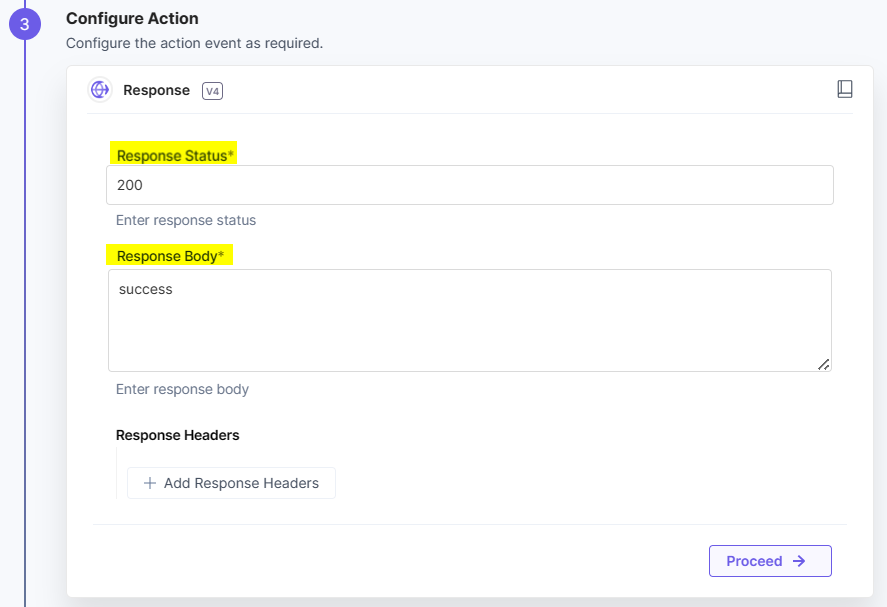
- Click Proceed.
- To execute and test the configured action, click Test Action.
- On successful configuration, you can see the below output. Click Save and Exit.
Let's see what happens if the exit option is - Exit the Repeat Path completely
- Navigate to the Execution Log section.
- Click the Continue Repeat If execution details.
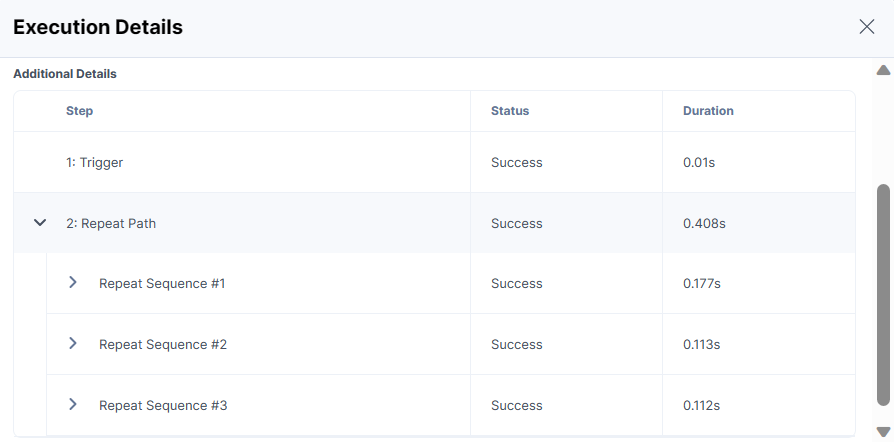
- A pop-up appears. In the Additional Details section, you will see the sequence of actions executed based on the array data as shown below:

Let's see what happens if the exit option is - Exit Current Repeat Iteration
- Navigate to the Execution Log section.
- Click the Continue Repeat If execution details.
- A pop-up appears. In the Additional Details section, you will see that the third iteration for the Repeat Path is skipped and the loop exits the Repeat Path completely.
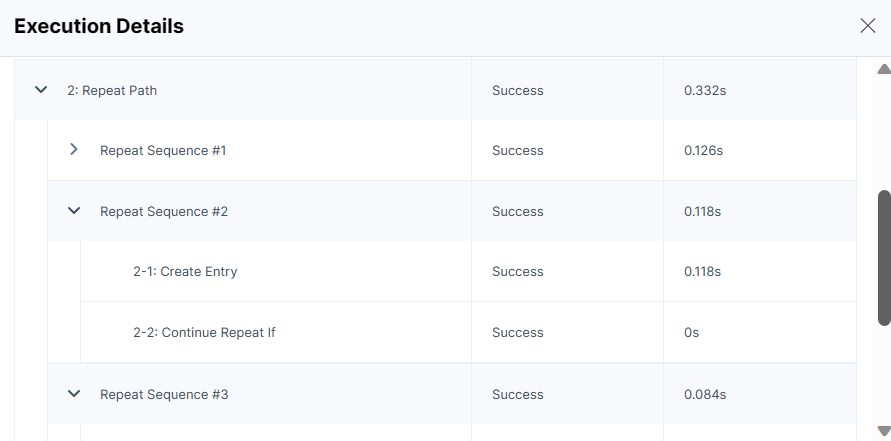
As per the sample data, the pdf flag for second data is no. So the Repeat Sequence did not execute the Transform action and moved to the next iteration.
This sets the Utility action connector.
More articles in "Utility"
