


.jpg?format=pjpg&auto=webp)


Auto Publish to Staging on Workflow Approval
The proposed solution will leverage a Workflow trigger that will execute on a transition step from READY FOR PREVIEW → APPROVED FOR STAGING:
The automation will be tied to a given stack and to a given workflow progress, which means that if you need the same behavior in other stacks or for other workflows you will need to reuse the configuration described in the following sections in this document.
Diagram Walkthrough
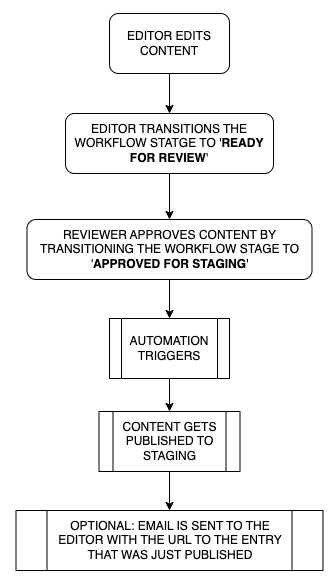
Note: the optional step described in the diagram is out of the scope of this recipe, but it’s here to illustrate the potential evolution of this automation. Alternatively, you could notify via slack, sms, etc…
Automate Configuration
Prerequisites
TO-DO: ADD CONTENTSTACK ACCOUNT FOR CONTENTSTACK ACTIONS
The following sections describe how to configure Automate to accomplish the goals described above. You can read more about Automate in our documentation.
1. Connector & Trigger
| Connector Type | Contentstack | |||
| Trigger | Workflow Trigger | |||
| Configuration | ||||
Select an Account | Select your Contentstack account you configured | |||
Select and Event | Workflow Stage Changed | |||
Select Stack | Select the stack you want the automation to run in. It should be the same stack where the workflow is available. | |||
Select Branch | Select the branch you want the automation to run in. | |||
Select Content Type | Select the content type the workflow is associated with. | |||
Select Workflow | Select the workflow that has the stages described above (or at least the stage where you want the automation to trigger the publishing action) | |||
Select Workflow Stage | Select the workflow stage where you want the publishing action to take place. | |||
Show optional fields | Toggled | |||
EXAMPLE CONFIGURATION
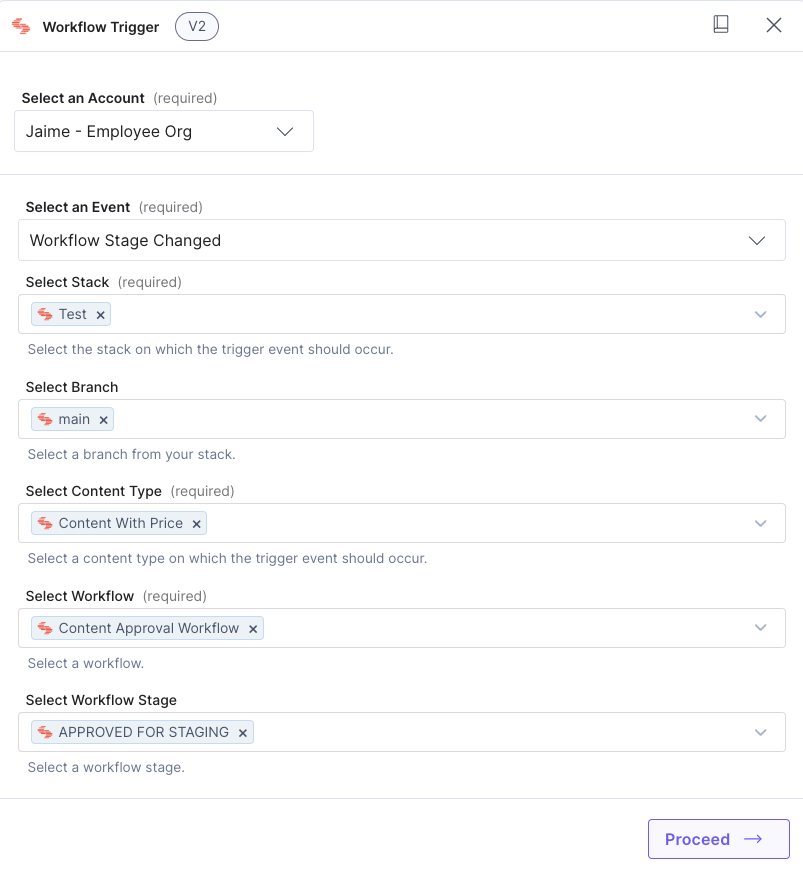
Once you have the trigger configured, click Proceed →.
Next, you can test your trigger by clicking Test Trigger.
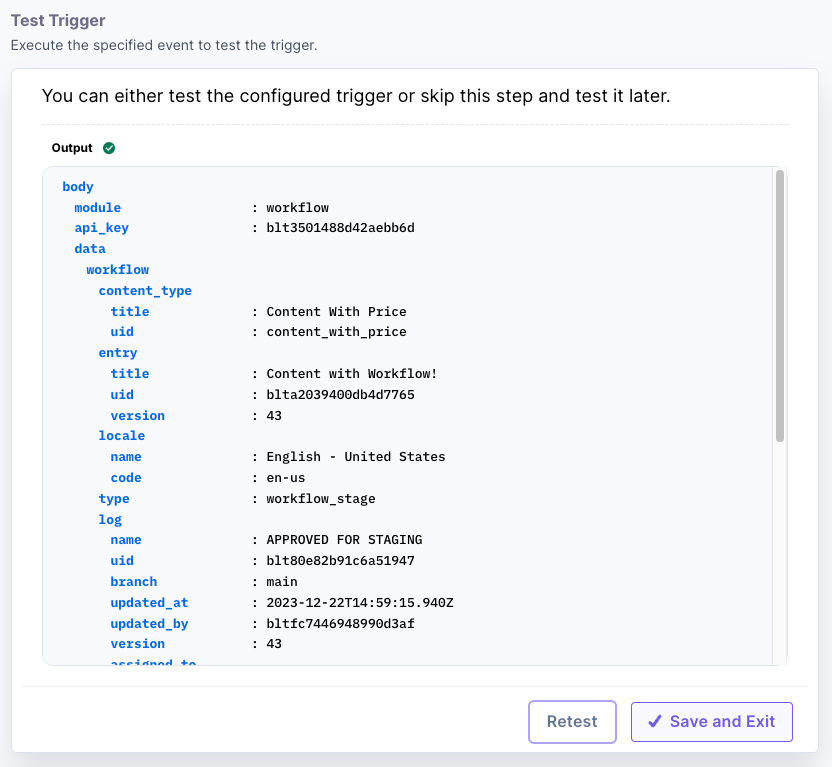
You might see something like this:
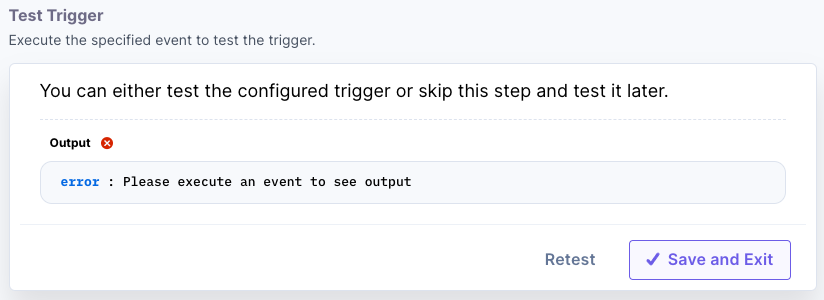
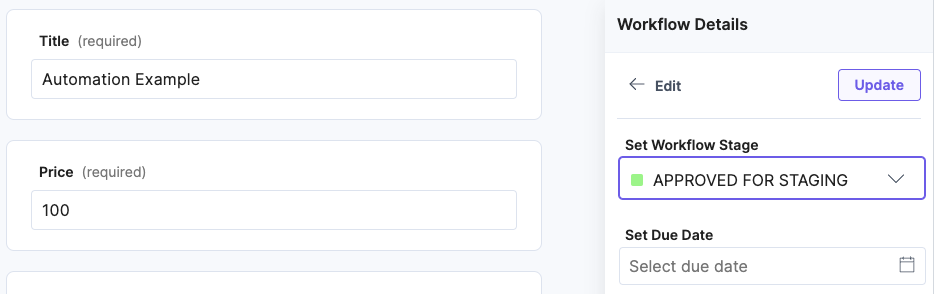
To solve the problem, follow these steps: First, check if the trigger works correctly. Then, make sure you perform the workflow transition. To do this, create a basic content entry and move it to the "APPROVED FOR STAGING" stage
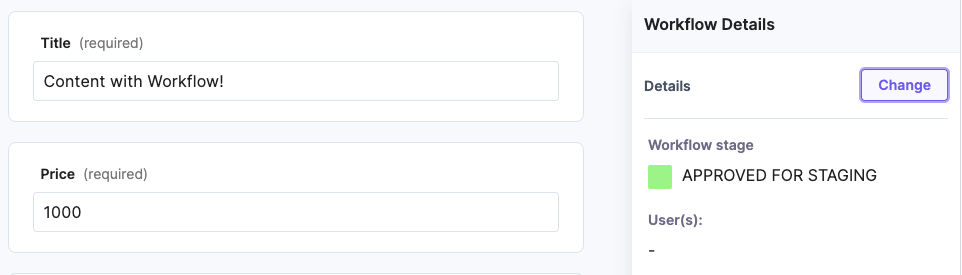
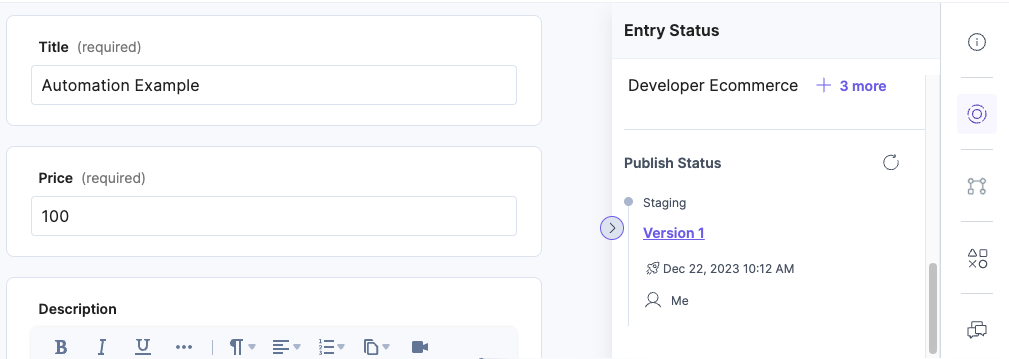
Once you do that, you should see something like this upon testing again:
Next, click Save and Exit.
Next, you can skip the Apply Trigger Conditions section, as no trigger conditions are necessary for this automation. Simply click Save and Exit again.
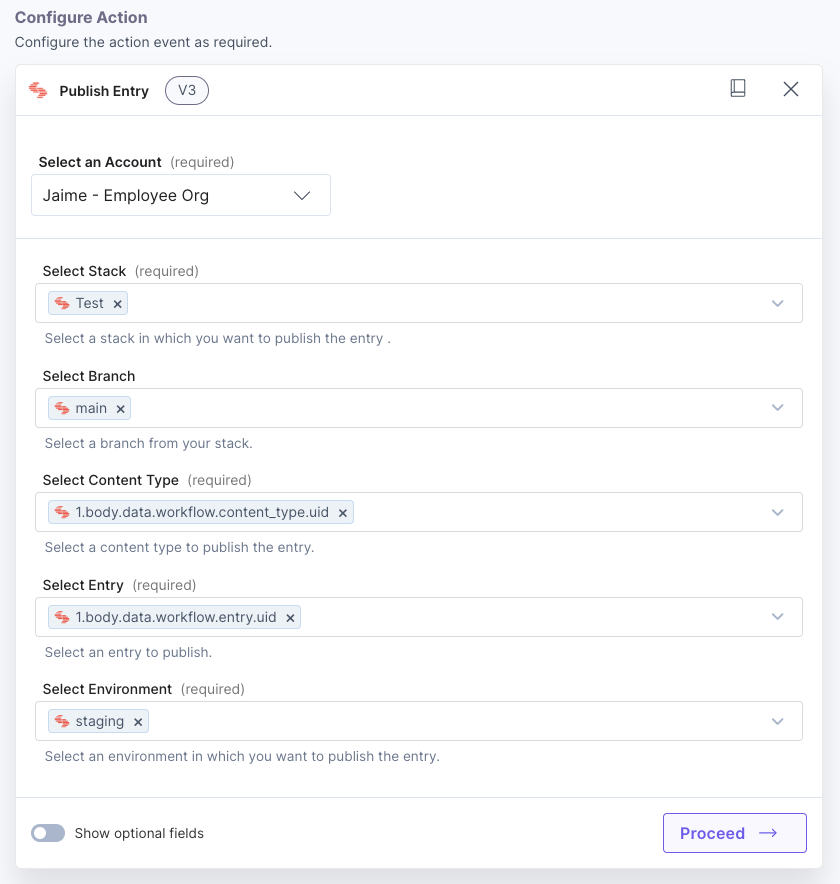
2. Configure Action Step
| Step Type | Action Step | |||
| Connector | Contentstack | |||
| Action | Publish Entry | |||
| Configuration | ||||
Select an Account | Select the stack you want the automation to run in. It should be the same stack where the workflow is available. | |||
Select Stack | Select the branch you want the automation to run in. | |||
Select Content Type | Select the content type from the trigger payload: 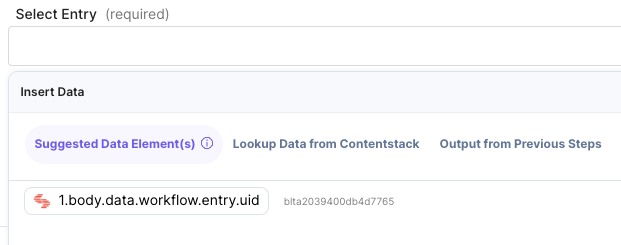 | |||
Select Entry | Select the entry from the trigger payload: 1.body.data.workflow.entry.uid | |||
Select Environment | Select your “Staging” environment | |||
Show Optional fields | Untoggled | |||
| EXAMPLE CONFIGURATION | ||||
 | ||||
Once you have the action configured, click Proceed →.
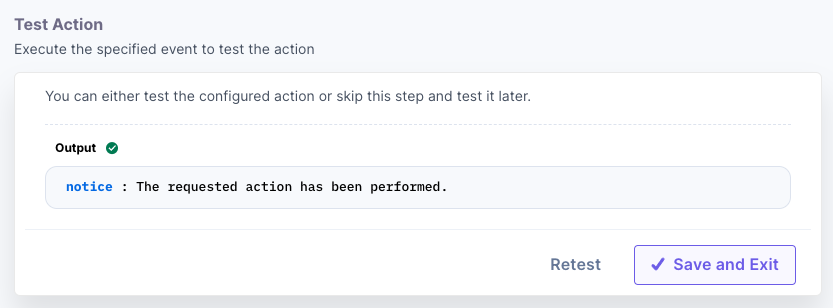
You should see something like this:
Next, click Save and Exit.
At this point, your automation is ready to be tested. But first, you need to Activate the automation. You can do so by toggling the button on the top right corner of your screen:

 |  |
Once your automation is active, you can test it by transitioning an entry to the ‘APPROVED FOR STAGING’ stage. Once you do that you should be able to see the entry being published to staging, and also you can review the automation log.
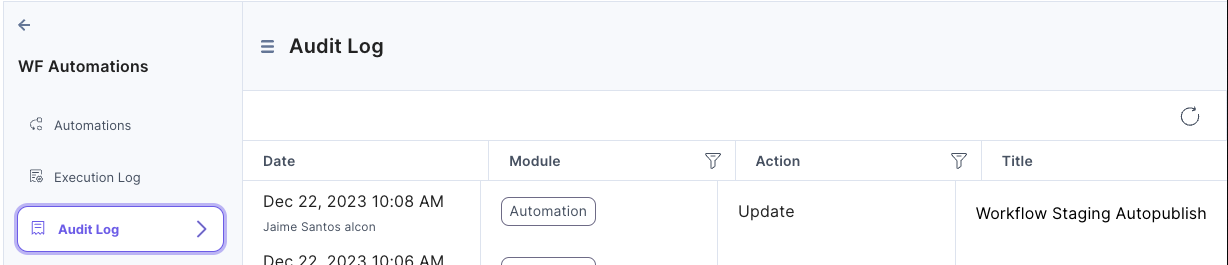
To check the automation execution log, go back to Automate, choose your project, and then choose the Audit Log option in the left panel, you should see a log for your automation that just triggered:
Additional Best Practices:
As a best practice, it is recommended to name your trigger an action with a descriptive name, so developers or Automate managers can get an understanding of the automation at a glance, for example:
Workflow Trigger rename:

Publish Entry rename:

Note: keep in mind that to make modifications to your actions and trigger names you will need to first deactivate the automation.
More articles in "Work with Teams"
