

.svg?format=pjpg&auto=webp)
.svg?format=pjpg&auto=webp)
.png?format=pjpg&auto=webp)


.png?format=pjpg&auto=webp)
Build a Product Catalog App Using Ruby on Rails, GraphQL Client, and Contentstack GraphQL APIs
Ruby on Rails is an open-source web application framework built using the Ruby programming language. By using Rails, developers can build simple to complex apps and websites.
In this tutorial, we will walk you through the steps involved in creating a product catalog website using Contentstack GraphQL APIs, GraphQL Clients, and Ruby on Rails. The app is built using Rails and uses Contentstack to store and deliver the content of the website.
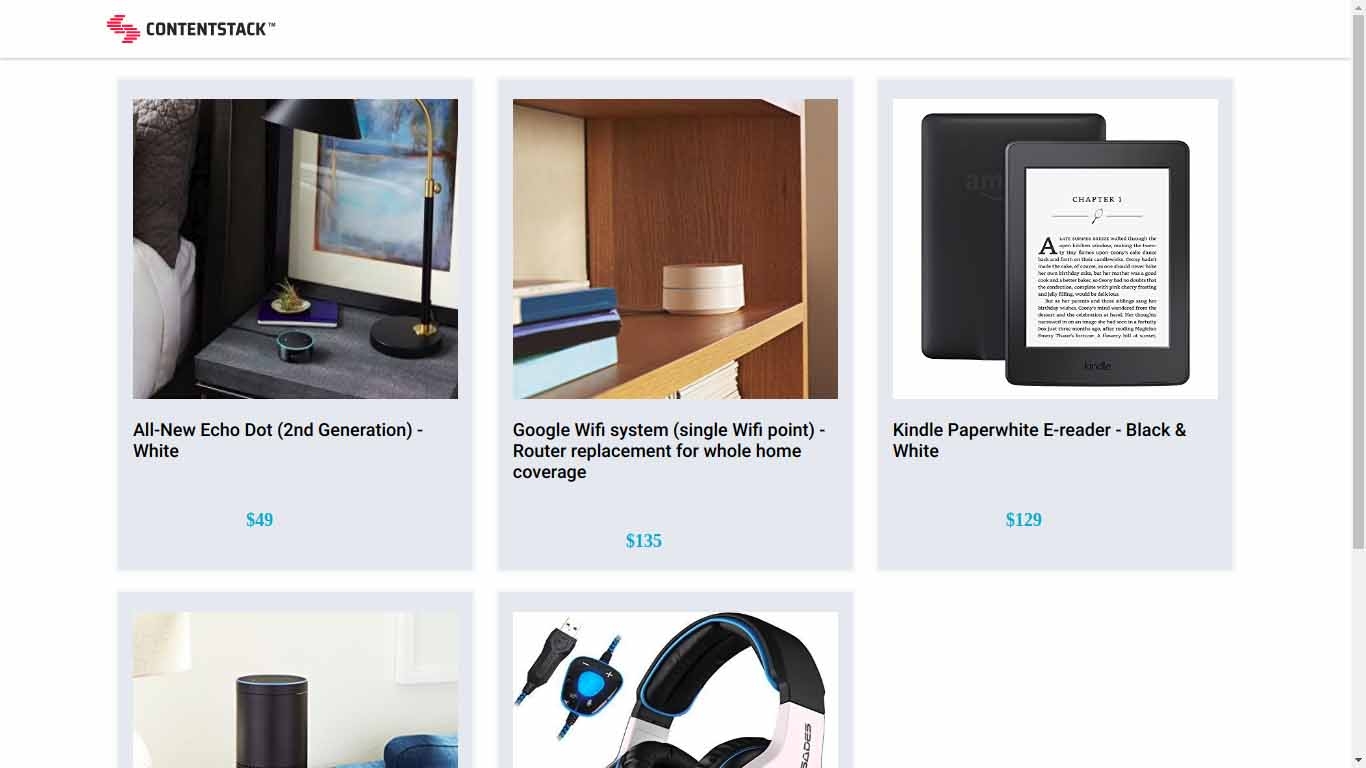
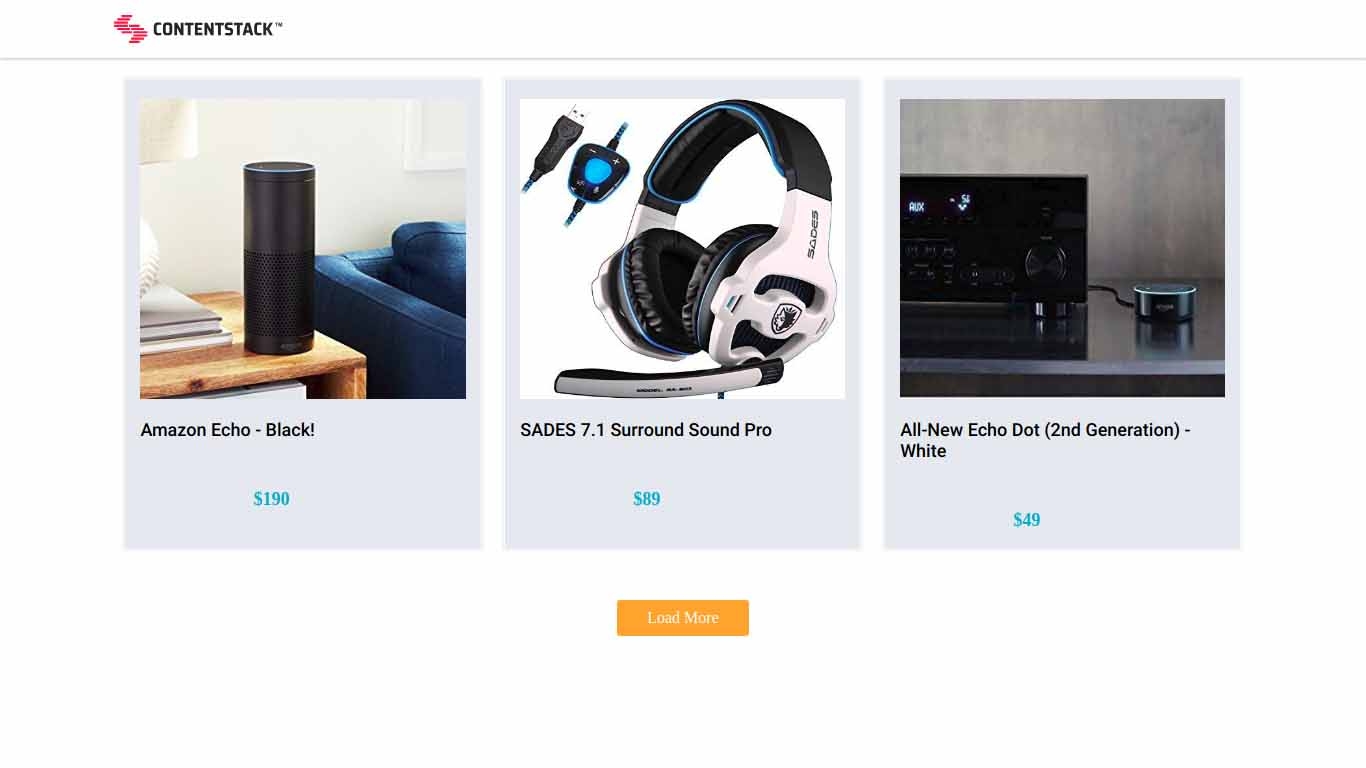
Screenshots
Warning: This sample app is no longer maintained. It remains available for reference. If you have questions regarding this, please reach out to our support team and we will do our best to help!
Here’s a quick guide on how to create a product catalog website using Contentstack's Ruby SDK, GraphQL Client, and GraphQL APIs.
Prerequisites
Note: For this tutorial, we have assumed that you are familiar with Contentstack and Ruby on Rails (RoR). If not, then please refer to the docs (Contentstack and RoR) for more details.
In this tutorial, we will first go through the steps involved in configuring Contentstack, and then look at the steps required to customize and use the presentation layer.
Create a Stack
Log in to your Contentstack account and create a new stack. This stack will hold all the data, specific to your website.
Add a Publishing Environment
To add an environment in Contentstack, navigate to Settings and then Environment. Click on the + New Environment tab. Provide a suitable name for your environment, say “staging.” Specify the base URL (e.g., ‘http://YourDomainName.com’), and select the language (e.g., English - United States). Then, click on Save.
Import the Content Type
A content type is like the structure or blueprint of a page or a section of your web or mobile property. For this app, we need one content type named Product. We need this content type to add the product content for your app.
For quick integration, we have already created the content type. Download the content type and import it to your stack. You can also create your own content type if required. Now that your content type is ready, let’s add some content for your Product app.
Add Content
Create and publish entries for the “Product” content type that you just downloaded and imported as discussed in the above step.
Now that we have created the sample data, it’s time to configure the presentation layer.
Write your GraphQL Queries
Contentstack provides a GraphQL playground, which is a GraphQL interface, to test your GraphQL queries in your browser. Use this interface to write and test your queries.
To do that, open any browser of your choice and hit the URL and enter the required details. Now to get the list of all entries of the Product content type, paste the following query in the interface:
query { all_product(locale:"en-us") { items { title description price featured_imageConnection (limit: 10){ edges{ node { ...AssetFile } } } } } } fragment AssetFile on SysAsset { filename url }Tip: If you have pieces of data that you may want to reuse in multiple places, make use of fragments. Refer the Using fragments doc for more details.
Install Ruby, Rails framework, and Create the App
To install Ruby, follow the steps provided in the official documentation. Now open the command prompt and install the Rails framework by using the following command:
gem install rails
The above command will install the required modules of the Rails framework. Let's now build a web page using Ruby on Rails. Execute the following command in your terminal:
rails new contentstack-ruby-graphql-example cd contentstack-ruby-graphql-example rails serverNote: If you get an error regarding webpacker.yml, run the rails webpacker:install command to install webpacker.
The above command will initiate the app. Now open the browser and hit the following port:
http://localhost:3000
You will see the Rails welcome page.
Install GraphQL Client
Open this project in any code editor, add graphql-client to your Gemfile , and then run bundle install in the command prompt as shown below:
#Gemfile
gem 'graphql-client'
Download GraphQL Schema Using Contentstack Schema Download
Download the GraphQL schema for your content model using Contentstack GraphQL Schema Download repository. Follow the mentioned steps to get the schema file and place it in the db folder.
Now open the schema.json file and change the structure:
From
 {
   "__schema": {
     ...
   }
 }
To
{
     "data": {
        "__schema": {
          ...
        }
     }
}
Configure GraphQL Client
To configure GraphQL Client, create a secrets.yml file within the config folder, and add the following code in it:
  development:
    host: <HOST_NAME>
    api_key: <API_KEY>
    delivery_token: <ENVIRONMENT_SPECIFIC_DELIVERY_TOKEN>
    environment: <ENVIRONMENT_NAME>
Now open the application.rb file, which is inside /config/, and update it with following lines:
  require_relative 'boot'
  require 'rails/all'
  require "graphql/client"
  require "graphql/client/http"

  module ContentstackRubyGraphqlExample
  class Application < Rails::Application
    config.load_defaults 6.0

  end
  unless host = Application.secrets.host
    fail 'Host name missing'
  end
  unless api_key = Application.secrets.api_key
    fail 'API Key name missing'
  end
   unless environment = Application.secrets.environment
    fail 'Environment missing'
  end
  HTTPAdapter = GraphQL::Client::HTTP.new("https://#{host}/stacks/#{api_key}?environment=#{environment}") do
    def headers(context)
      unless delivery_token = context[:access_token] || Application.secrets.delivery_token
        fail 'Delivery token missing'
      end
      {
        "access_token": "#{delivery_token}",
      }
    end
  end

  Client = GraphQL::Client.new(
    schema: Application.root.join("db/schema.json").to_s,
    execute: HTTPAdapter
  )
  end
Create the Product List Page
To create a product list page, we need to generate a Controller named products by using the following command:
rails g controller products
Now open the app/controllers/products_controller.rb file and add the following code:
 class ProductsController < ApplicationController
    # define query for Products list
    Query = ContentstackRubyGraphqlExample::Client.parse <<-'GRAPHQL'
        query {
            all_product(locale:"en-us",limit:10) {
                total
                items {
                    title
                }
            }
        }
    GRAPHQL

    def index
        response = ContentstackRubyGraphqlExample::Client.query(Query)

        render "products/index", locals: {
            all_product: response.data.all_product
        }
    end
 end
Go to app/views/products and create an index.html.erb file inside this directory with the following code:
<div class="product">

      <strong>Your product Count: <%= all_product.total %></strong>
  <ul class="list-group">

      <% all_product.items.each do |product| %>


         <li class="list-group-item"> <%= product.title %></span>
      <% end %>
    </li>
  </ul>
</div>
Open the routes.rb file, inside the config folder, and update it with following lines:
Rails.application.routes.draw do
  resources :products do
  end
  get "/", to: redirect("/products")
end
Now run the app by using the following command:
rails server
If you get the ActionView::Template::Error: Webpacker can't find application in /app/public/packs/manifest.json error, run the following commands:
$   rm -rf node_modules
$   rake webpacker:clobber
$   yarn --check-files
$   rake webpacker:compile
$   bundle exec rails webpacker:install
$   rails server
This will initiate the app. Open your browser and go to http://localhost:3000 where you will find the Rails welcome page.
Note: If you face the NoMethodError error while running the code, open the \app\views\layouts\application.html.erb file, replace the <%= javascript_pack_tag 'application', 'data-turbolinks-track': 'reload' %> line with <%= javascript_tag 'application', 'data-turbolinks-track': 'reload' %>, and try reloading the app.
Clone and Configure the App
To get your app up and running quickly, we have created a sample Ruby on Rails app for this project. You need to download it and change the configuration. Download the app using the command given below:
$ git clone https://github.com/contentstack/contentstack-ruby-graphql-example.gitOnce you have downloaded the project, add your stack API Key and Delivery Token and the environment name.
Now create a secrets.yml file inside the config folder and enter your credentials as shown below:
development:
    host: <HOST_NAME>
    api_key: <API_KEY>
    delivery_token: <DELIVERY_TOKEN>
    environment: <ENVIRONMENT_NAME>
Run the app by using the following command:
$ rails server
This command will start the app. Open the browser and go to http://localhost:3000 where you will find the Rails welcome page.
Additional Resource: We have built a similar app using the GraphQL client and .Net. Read our Build a Product Catalog App Using GraphQL Client and .Net guide for more details.
