


.jpg?format=pjpg&auto=webp)


Launch
Launch is a deployment platform that enables you to host your Contentstack-powered website instantly. To get started, simply create a new project in Launch and link it with your GitHub repository.
The Launch connector in Automation Hub lets you trigger deployments of projects created in the Contenstack Launch platform. With the Revalidate CDN Cache action, you can revalidate the CDN cache of your Launch environment by providing a revalidation path.
Using the Revalidate CDN Cache Action will allow you to refresh the cache of specific site URLs and show new content where previously cached content was published. This is especially useful in the case where you do not want to rebuild and redeploy your entire website to make minor content changes.
The steps below will help you set up your Launch Connector, set up a Deployment Action, and set up automatic cache revalidation.
Set up Launch
Perform the following steps to set up the Launch action connector:
- Click Configure Action Step from the left navigation panel.
- Click Action Step to configure third-party services.
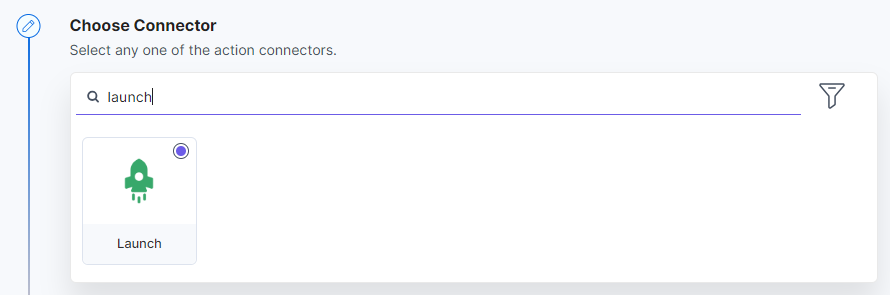
- Within the Configure Action Step, click the Launch connector.
Note: You can sort and search the connector(s) based on the filter.
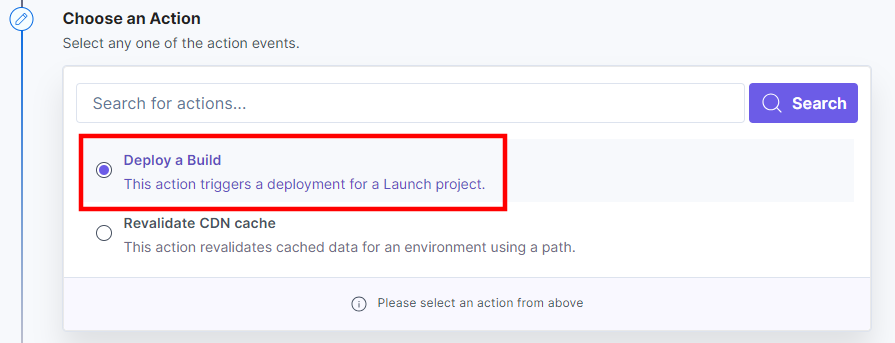
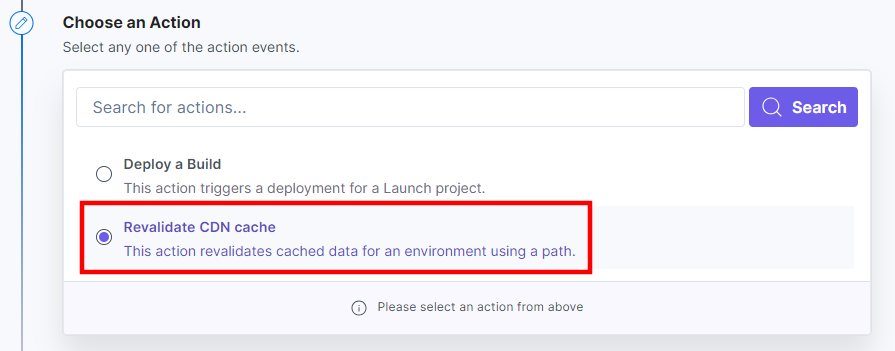
- Under Choose an Action tab, you will see two actions:
- Under Choose an Action tab, select the Deploy a Build action.
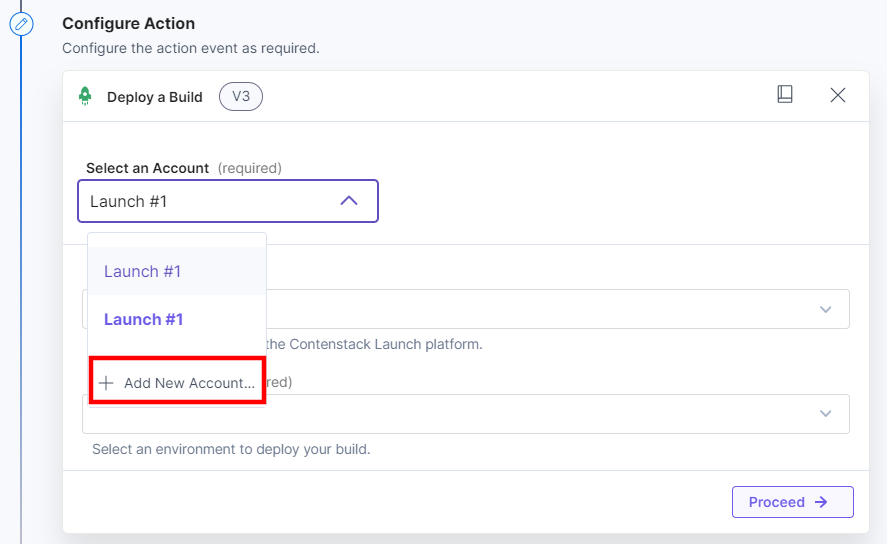
- Click the + Add New Account button to add your Launch account.
- In the pop-up window, mark the checkboxes for all the OAuth permissions and then click the Authorize button.
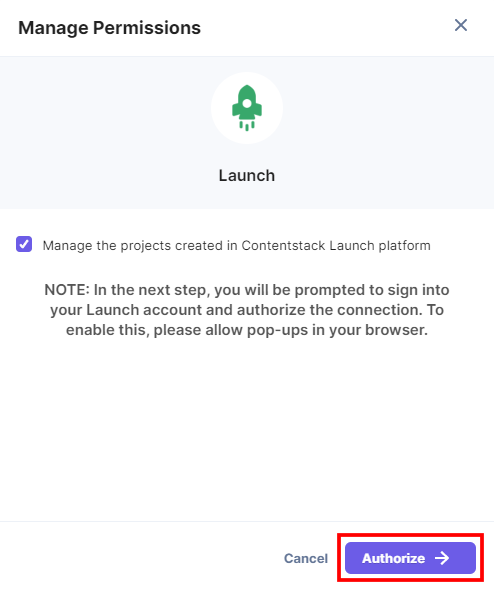
- In the pop-up that appears, select your organization to complete the authorization.

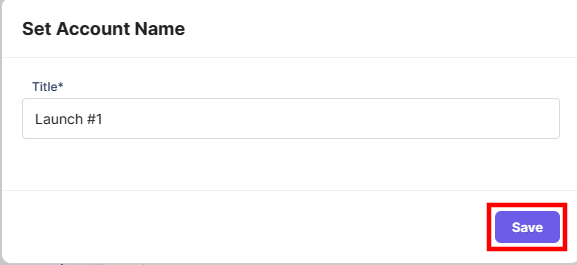
- Enter an Account Name and then click Save.
- Select a Project created in the Launch platform from the Lookup dropdown.
- Select an Environment where you want to deploy your build from the Lookup dropdown.
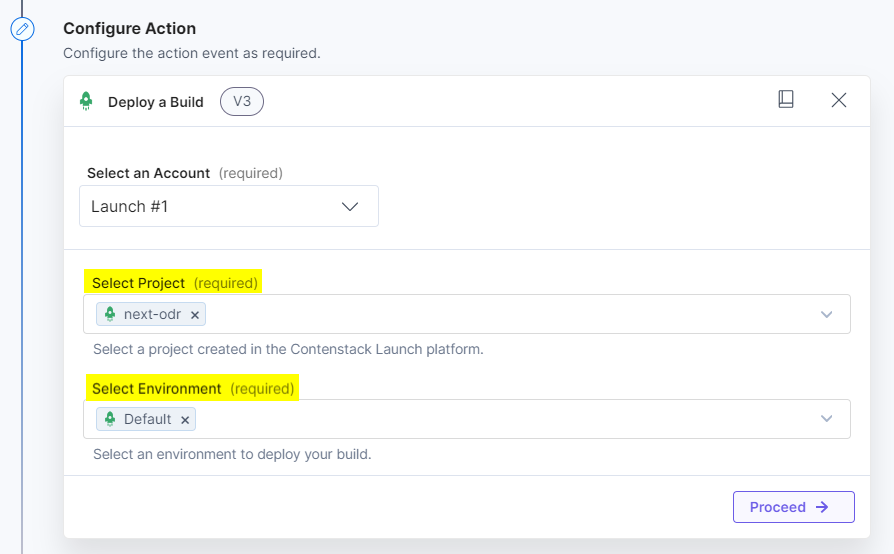
- Click Proceed.
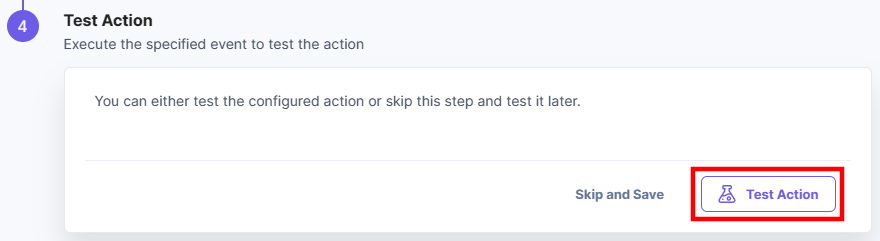
- Click Test Action to test the configured action.
Note: If a deployment is ongoing and you trigger a new one in the same instance, then the previous deployment will show as “Failed” in Launch.
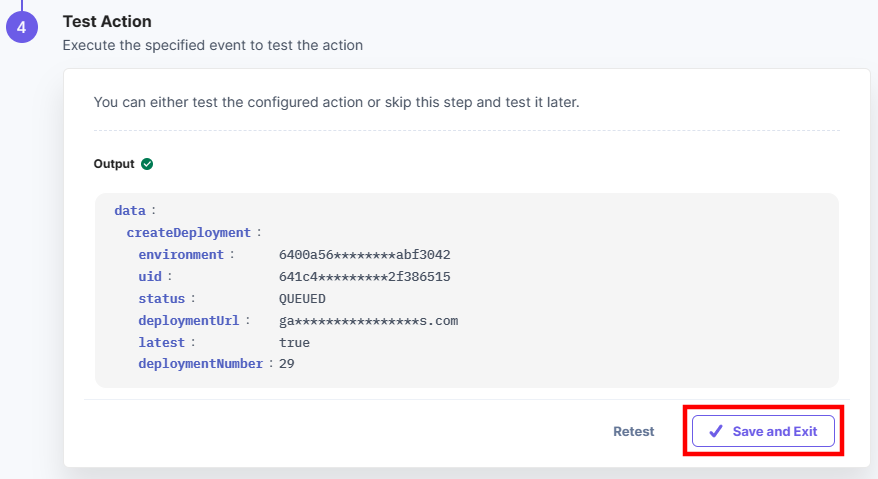
- Once set, click Save and Exit.
- Navigate to the Launch platform to view the deployment status of your project in the Deployments tab.
- Under Choose an Action tab, select the Revalidate CDN Cache action.
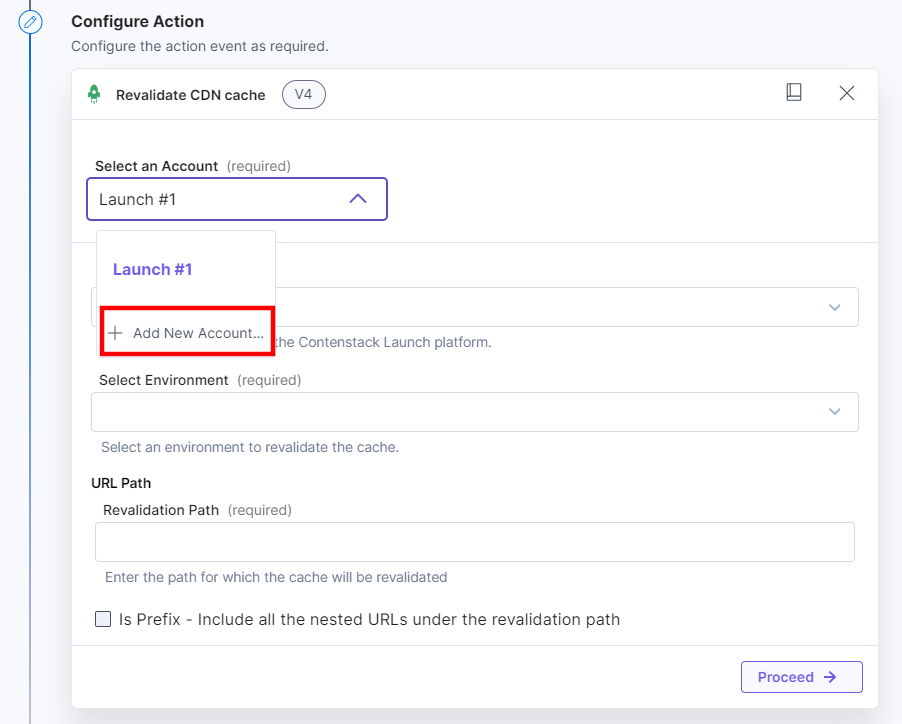
- Click the + Add New Account button to add your Launch account. If you have already connected your account, then skip to Step 6.
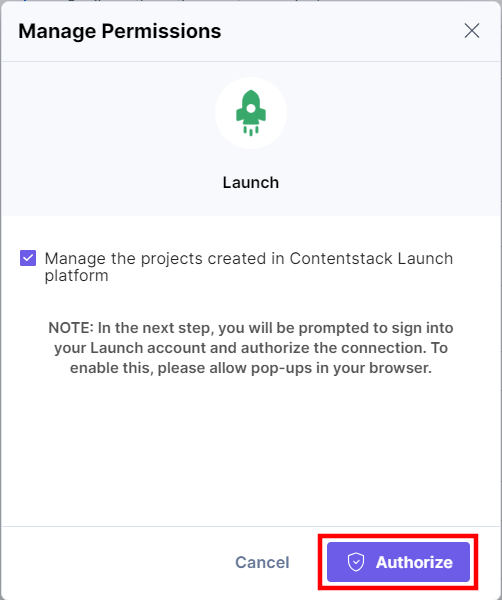
- In the pop-up window, mark the checkboxes for all the OAuth permissions and then click the Authorize button.
- In the pop-up that appears, select your organization to complete the authorization.
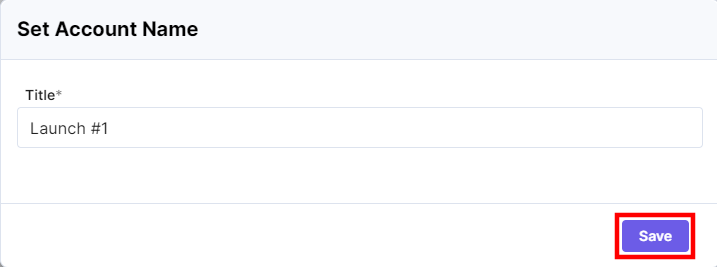
- Enter an Account Name and then click Save.
- Select a Project created in the Launch platform from the Lookup dropdown.
- Select an Environment where you want to revalidate the cache from the Lookup dropdown.
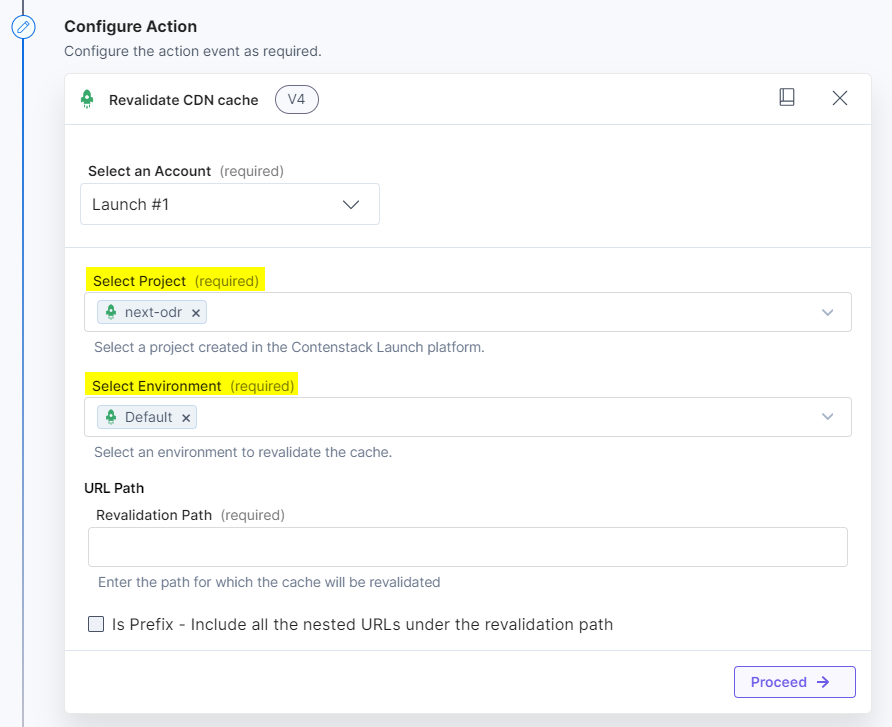
- In the Revalidation Path, enter the URL for which you want to revalidate the CDN cachet. You can optionally mark the Is Prefix - Include all the nested URLs under the revalidation path checkbox to revalidate all the nested URLs under the revalidation path.
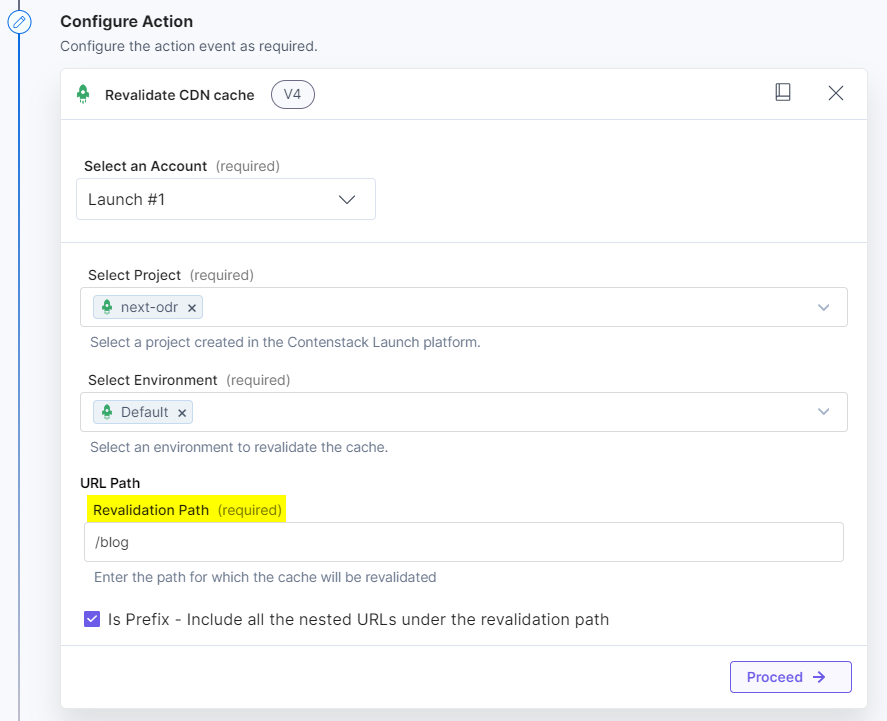
- Click Proceed.
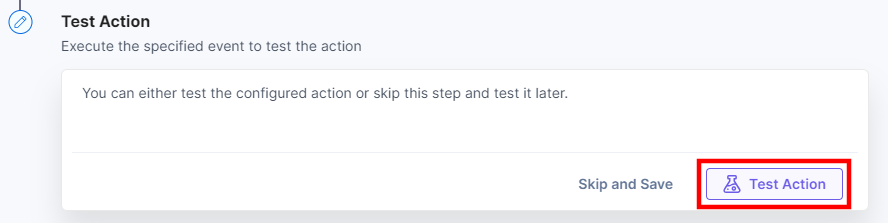
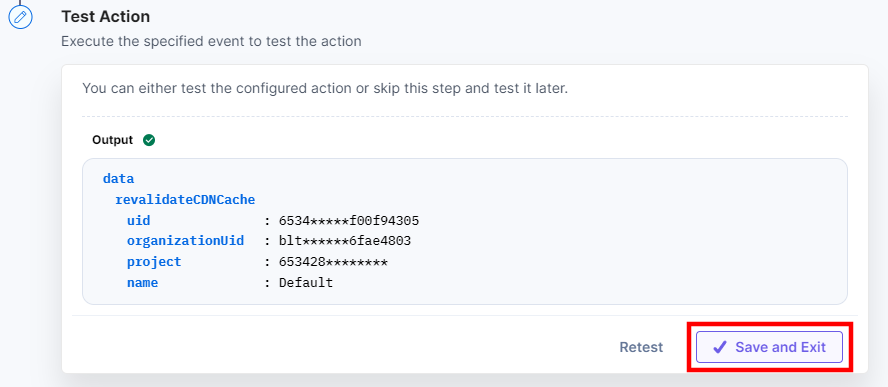
- Click Test Action to test the configured action.
- Once set, click Save and Exit.
- Navigate to your website and reload the page to see the updated content.
Let’s look at each of them in detail.
Action 1: Deploy a Build
Action 2: Revalidate CDN Cache
This sets the Launch action connector.
More articles in "Hosting"
