


.jpg?format=pjpg&auto=webp)


Azure ChatGPT
The Azure ChatGPT connector lets you generate the content via chat responses and prompt responses using the Azure cloud network.
Enterprises and businesses can deploy their ChatGPT versions on the Azure cloud and use the Azure ChatGPT connector to generate responses by integrating their Azure account within the Azure ChatGPT connector.
Set up Azure ChatGPT
Perform the following steps to set up the Azure ChatGPT action connector:
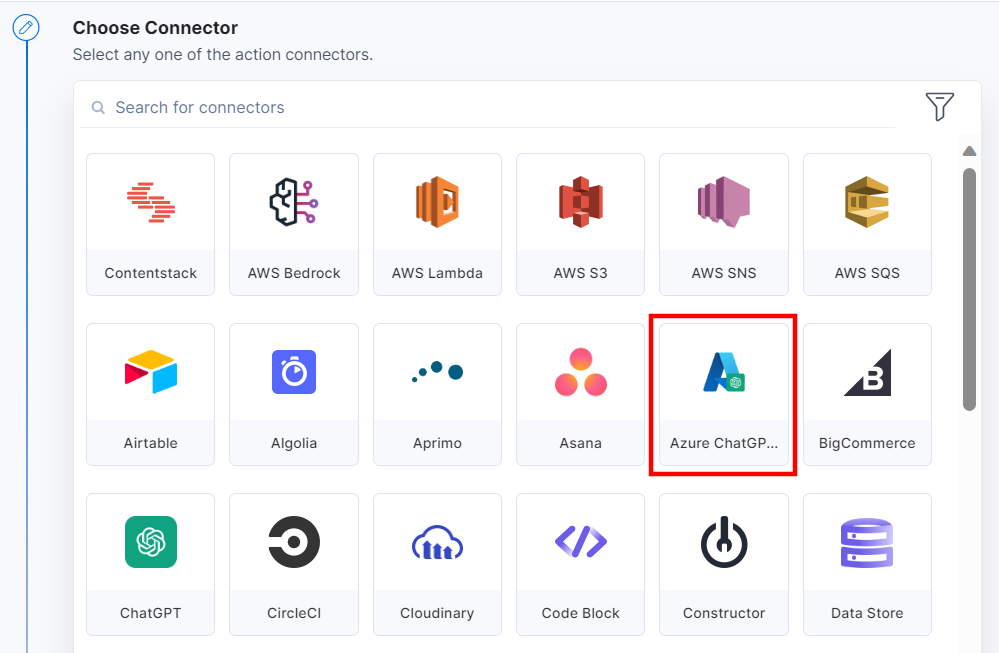
- Click Configure Action Step from the left navigation panel.
- Click Action Step to configure third-party services.
- Within the Configure Action Step, click the Azure ChatGPT connector.
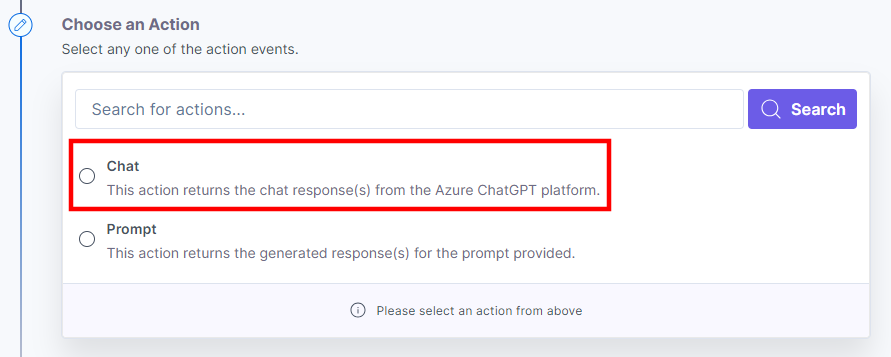
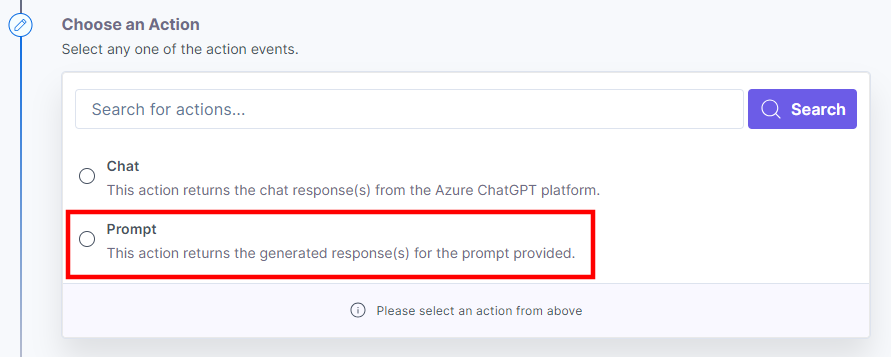
- You will see two actions under the Choose an Action tab: Chat and Prompt. Let’s look at each of them in detail.
Chat Action
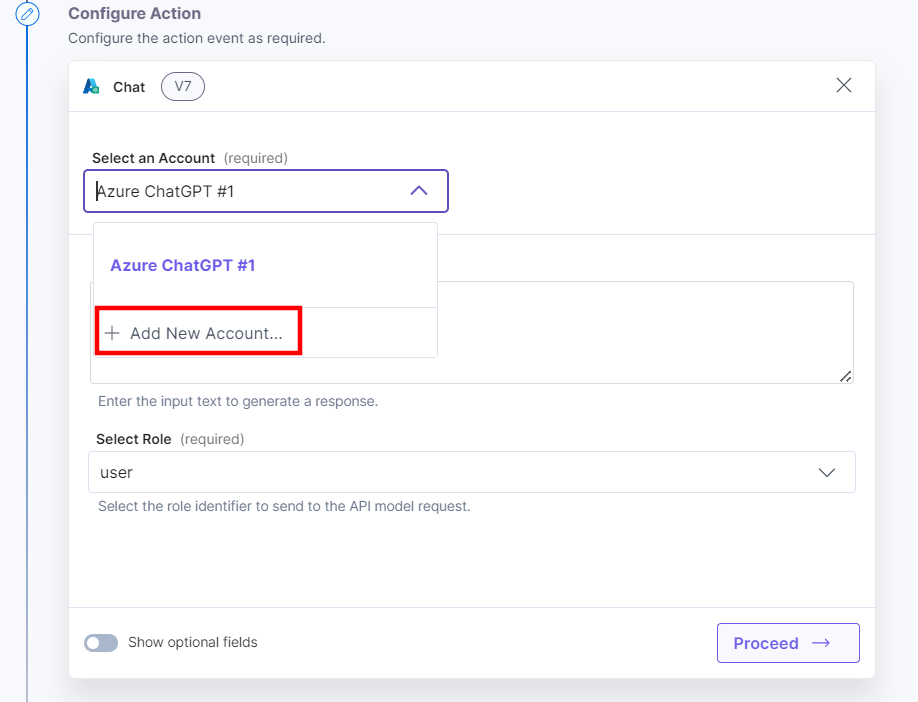
- Under Choose an Action tab, select the Chat action.
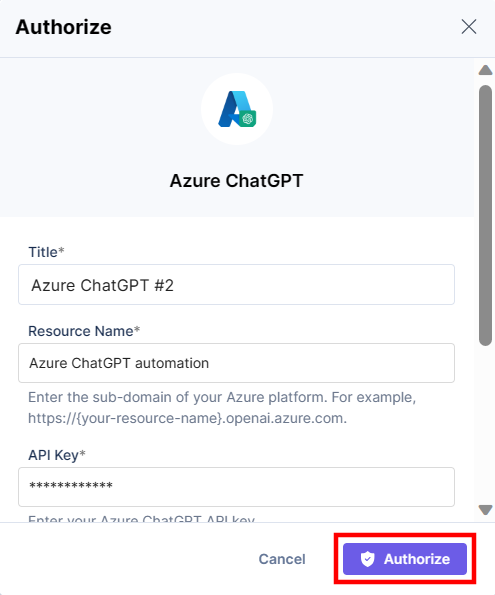
- Click the + Add New Account button to add your Azure ChatGPT account.
- In the Authorize modal, enter the Title, Resource Name, API Key, Deployment Name/ID, and API Version retrieved from the Azure platform.
- Log in to the Azure Platform.
- You must create a resource (if not created already). Click + Create Resource.
- Click the resource created. Click to manage the keys or create one in the Manage Keys section.
- In the Model Deployments section, click Manage Deployments -> Authorize your account. You will see a list of all the deployments created in the Azure platform. Click + Create new deployment to create a new deployment.
Note: Refer to the Azure OpenAI Service REST API Reference document for more information on API Version.
- Click the Authorize button.
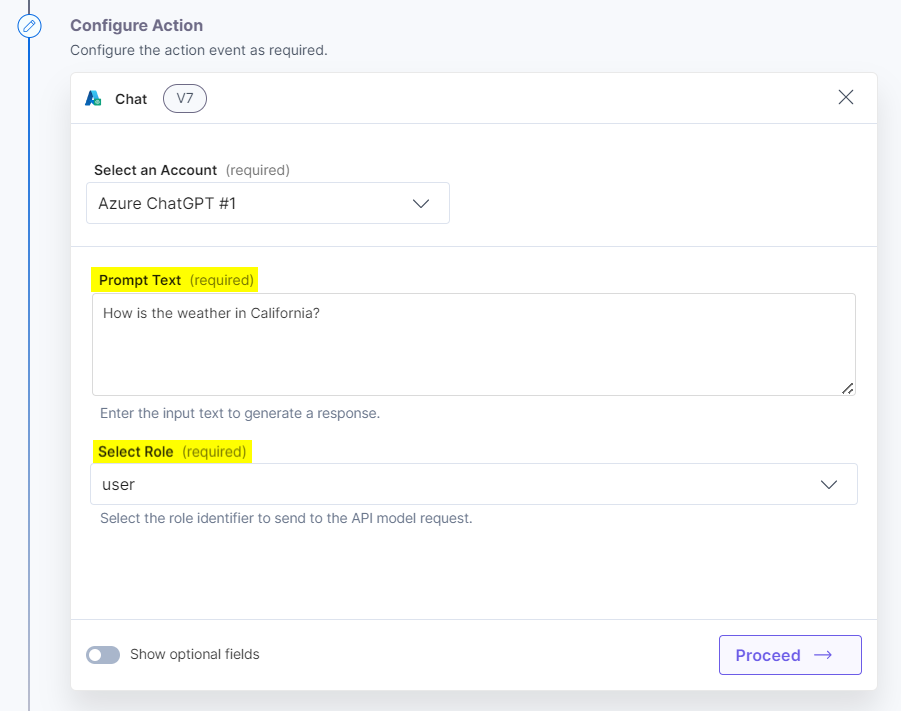
- In the Prompt Text field, provide your query to generate the chat response(s).
- Select the Role from the dropdown options to send to the API model request. By default, the role is set to the user.
Additional Resource: There are three types of roles provided by the OpenAI platform. The system role sets the response context, the assistant role provides the response content, and the user role asks the prompt.
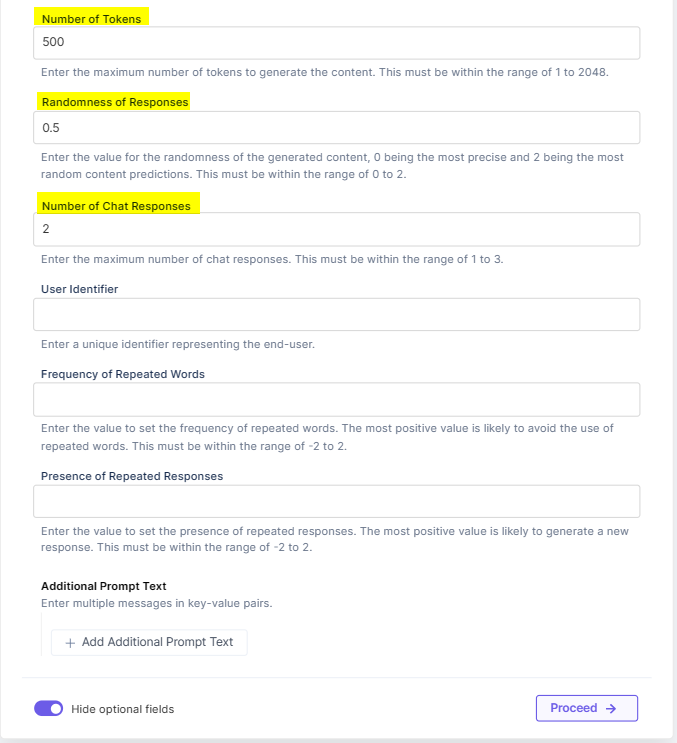
- Enable the Show optional fields toggle button to display the Number of Tokens, Randomness of Responses, Number of Chat Responses, User Identifier, Frequency of Repeated Words, Presence of Repeated Responses, and Additional Prompt Text fields.
- Enter the Number of Tokens to generate the content. This must be within the range of 1 to 2048.
- Enter a value for the Randomness of Responses of the generated content. 0 being the most precise and 2 being the most random content predictions. This must be within the range of 0 to 2.
- Enter the Number of Chat Responses you want to be generated in the automation response. This must be within the range of 1 to 3.
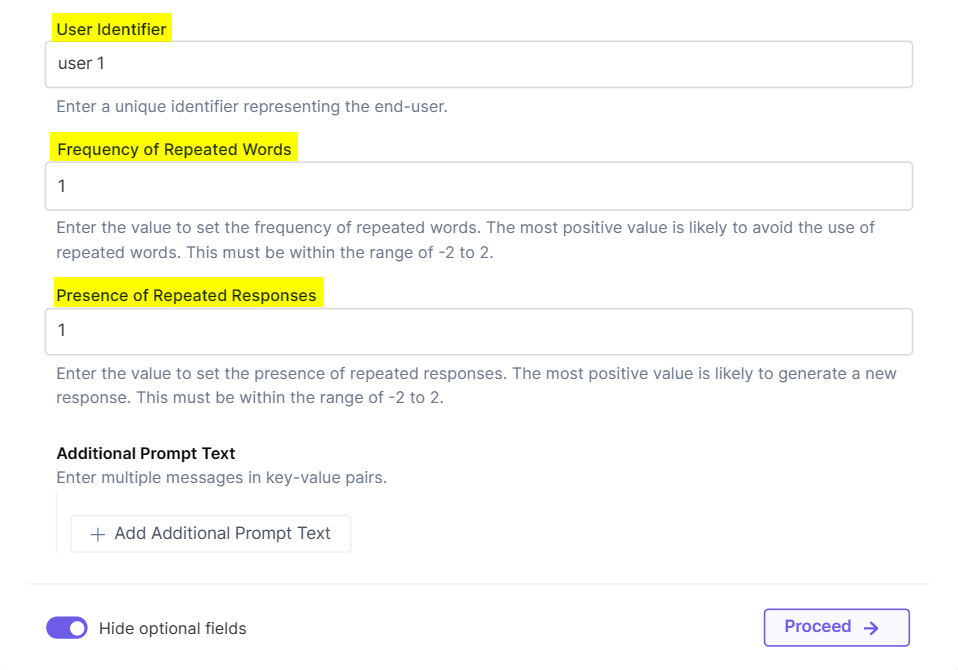
- Provide the User Identifier name, which helps the OpenAI platform to monitor and detect abuse.
- Provide the value to set the Frequency of Repeated Words. The most positive value is likely to avoid the use of repeated words. This must be within the range of -2 to 2.
- Provide the value to set the Presence of Repeated Responses. The most positive value is likely to generate a new response. This must be within the range of -2 to 2.
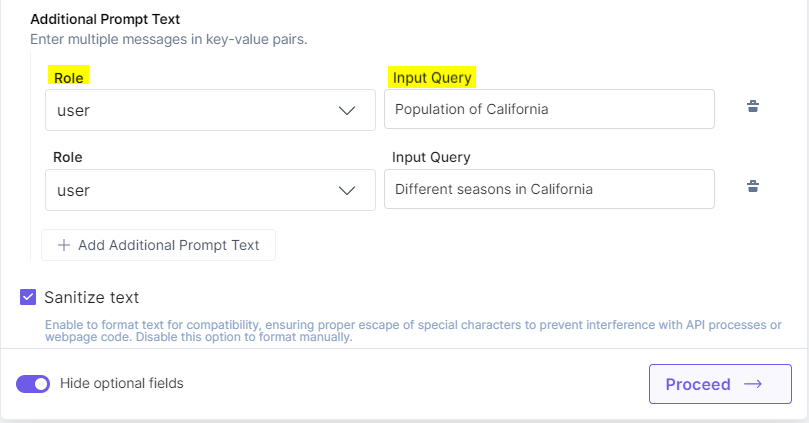
- With the Additional Prompt Text field, you can add multiple queries based on the Role. The output generates a combined response provided in the Prompt Text field and adds the response(s) for your queries afterwards.
- You can mark the Sanitize text checkbox to remove special characters or spaces from the chat response. By enabling this checkbox, any special characters or spaces in the chat response will be eliminated, resulting in a clean and compatible text.
- Click Proceed.
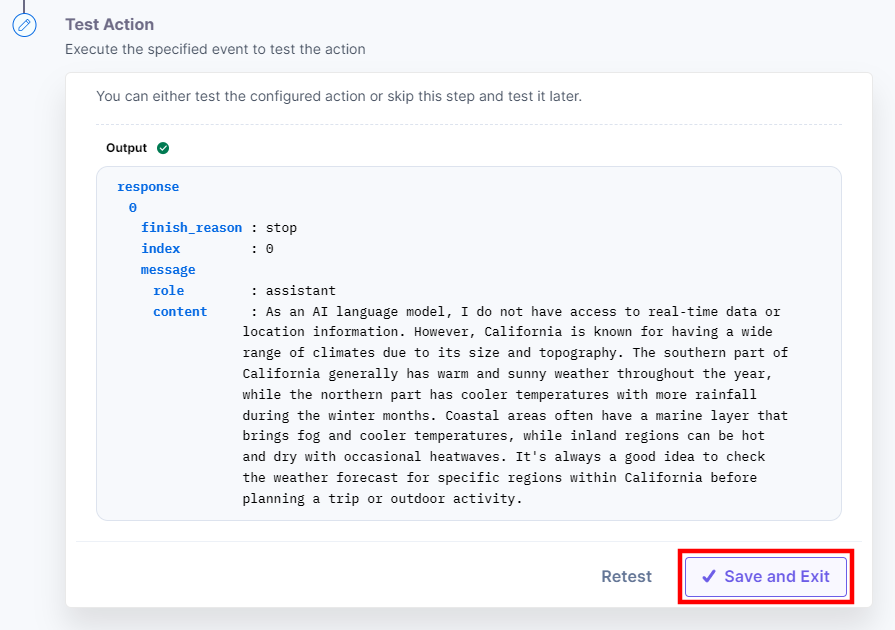
- To test the configured action, click the Test Action button.
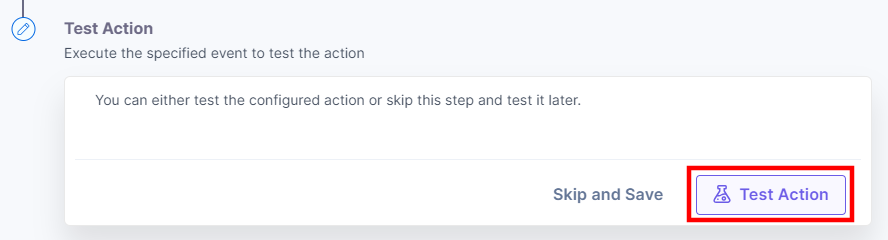
- You will get the response(s). Once set, click the Save and Exit button.
Prompt Action
- Under Choose an Action tab, select the Prompt action.
- Click the + Add New Account button to add your Azure ChatGPT account.
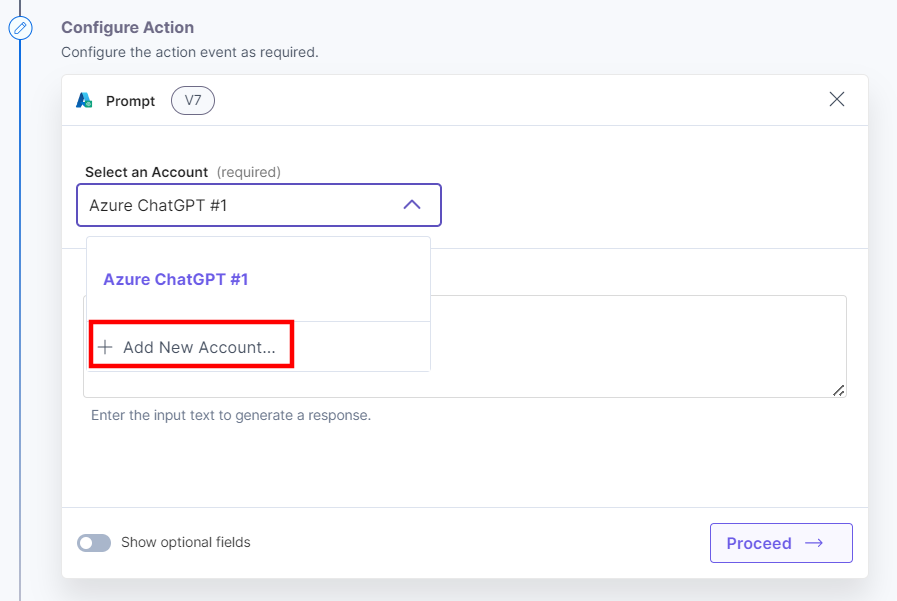
- In the Authorize modal, enter the Title, Resource Name, API Key, Deployment Name/ID, and API Version retrieved from the Azure platform.
- Log in to the Azure Platform.
- You must create a resource (if not created already). Click + Create Resource.
- Click the resource created. Click to manage the keys or create one in the Manage Keys section.
- In the Model Deployments section, click Manage Deployments -> Authorize your account. You will see a list of all the deployments created in the Azure platform. Click + Create new deployment to create a new deployment.
Note: Refer to the Azure OpenAI Service REST API Reference document for more information on API Version.
- Click the Authorize button.
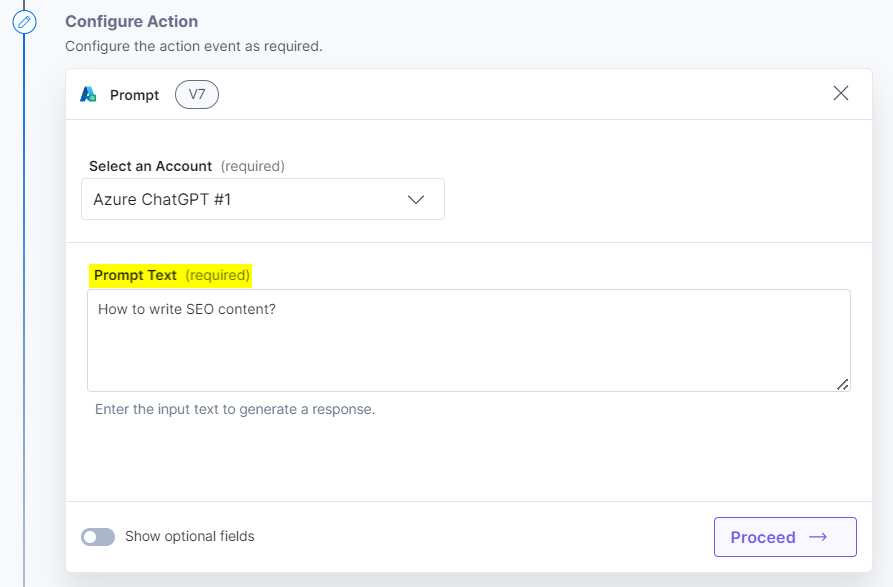
- Provide the Prompt Text to generate response(s).
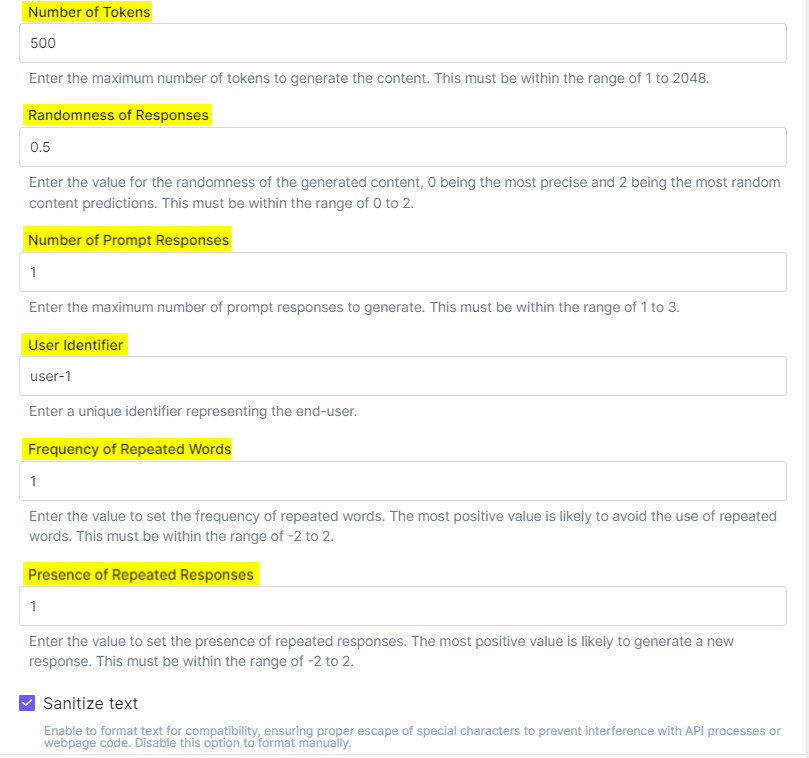
- Enable the Show optional fields toggle button to display the Number of Tokens, Randomness of Responses, Number of Prompt Responses, User Identifier, Frequency of Repeated Words, and Presence of Repeated Responses fields.
- Enter the Number of Tokens to generate the content. This must be within the range of 1 to 2048.
- Enter a value for the Randomness of Responses of the generated content. 0 being the most precise and 2 being the most random content predictions. This must be within the range of 0 to 2.
- Enter the Number of Prompt Responses you want to be generated in the automation response. This must be within the range of 1 to 3.
- Provide the User Identifier name which helps the OpenAI platform to monitor and detect abuse.
- Provide the value to set the Frequency of Repeated Words. The most positive value is likely to avoid the use of repeated words. This must be within the range of -2 to 2.
- Provide the value to set the Presence of Repeated Responses. The most positive value is likely to generate a new response. This must be within the range of -2 to 2.
- You can mark the Sanitize text checkbox to remove special characters or spaces from the chat response. By enabling this checkbox, any special characters or spaces in the chat response will be eliminated, resulting in a clean and compatible text.
- Click Proceed.
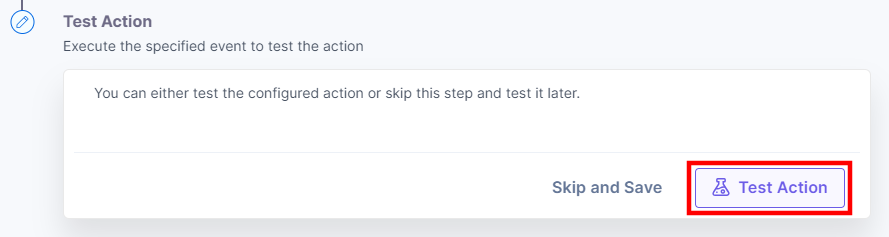
- To test the configured action, click the Test Action button.
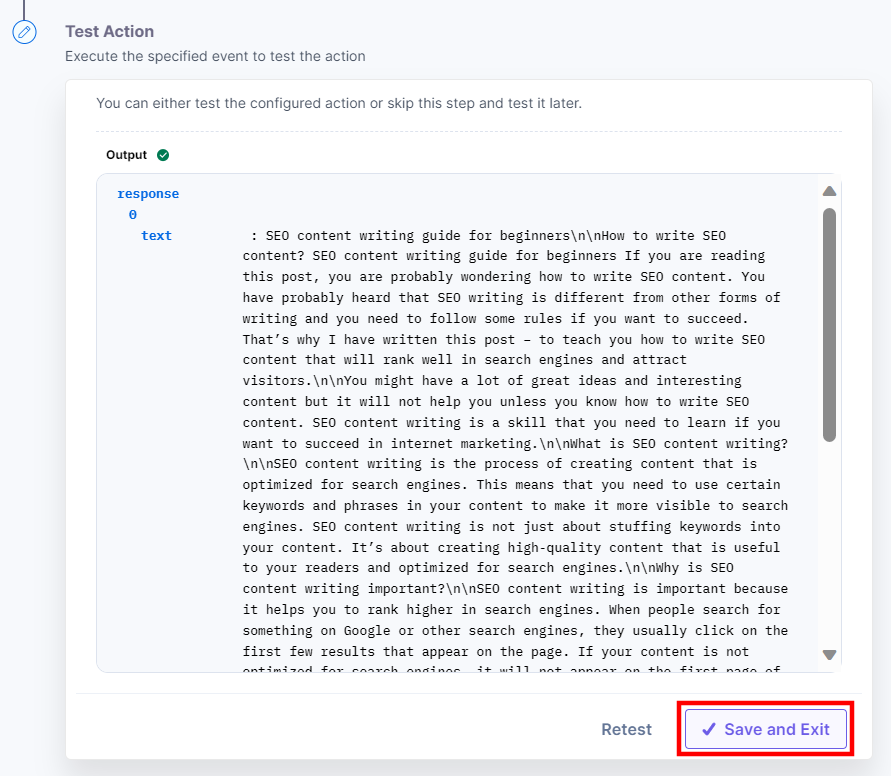
- You will get the response(s). Once set, click the Save and Exit button.
This sets the Azure ChatGPT action connector.
More articles in "Artificial Intelligence"
