Account Configuration
Before you can collect data, build profiles, or activate audiences, you need a properly configured account. That means setting up security policies, creating the right user roles, generating API tokens for your integrations, and installing the SDKs that will send data into the platform. Getting this foundation right prevents problems downstream — misconfigured security leaves your account exposed, missing API tokens block integrations, and an improperly installed tag means no behavioral data flowing in. This module walks you through every step of account setup so you can move into data collection with confidence.
Account Settings
Learning Objectives
By the end of this section, you will be able to:
- Navigate to the Vault and identify each settings category
- Configure account details including name, domain, and API access
- Apply security policies for login sessions, passwords, and two-factor authentication
- Manage users, assign roles, and control access to PII
- Generate, manage, and revoke API access tokens
- Create and monitor third-party authorizations
Accessing the Vault
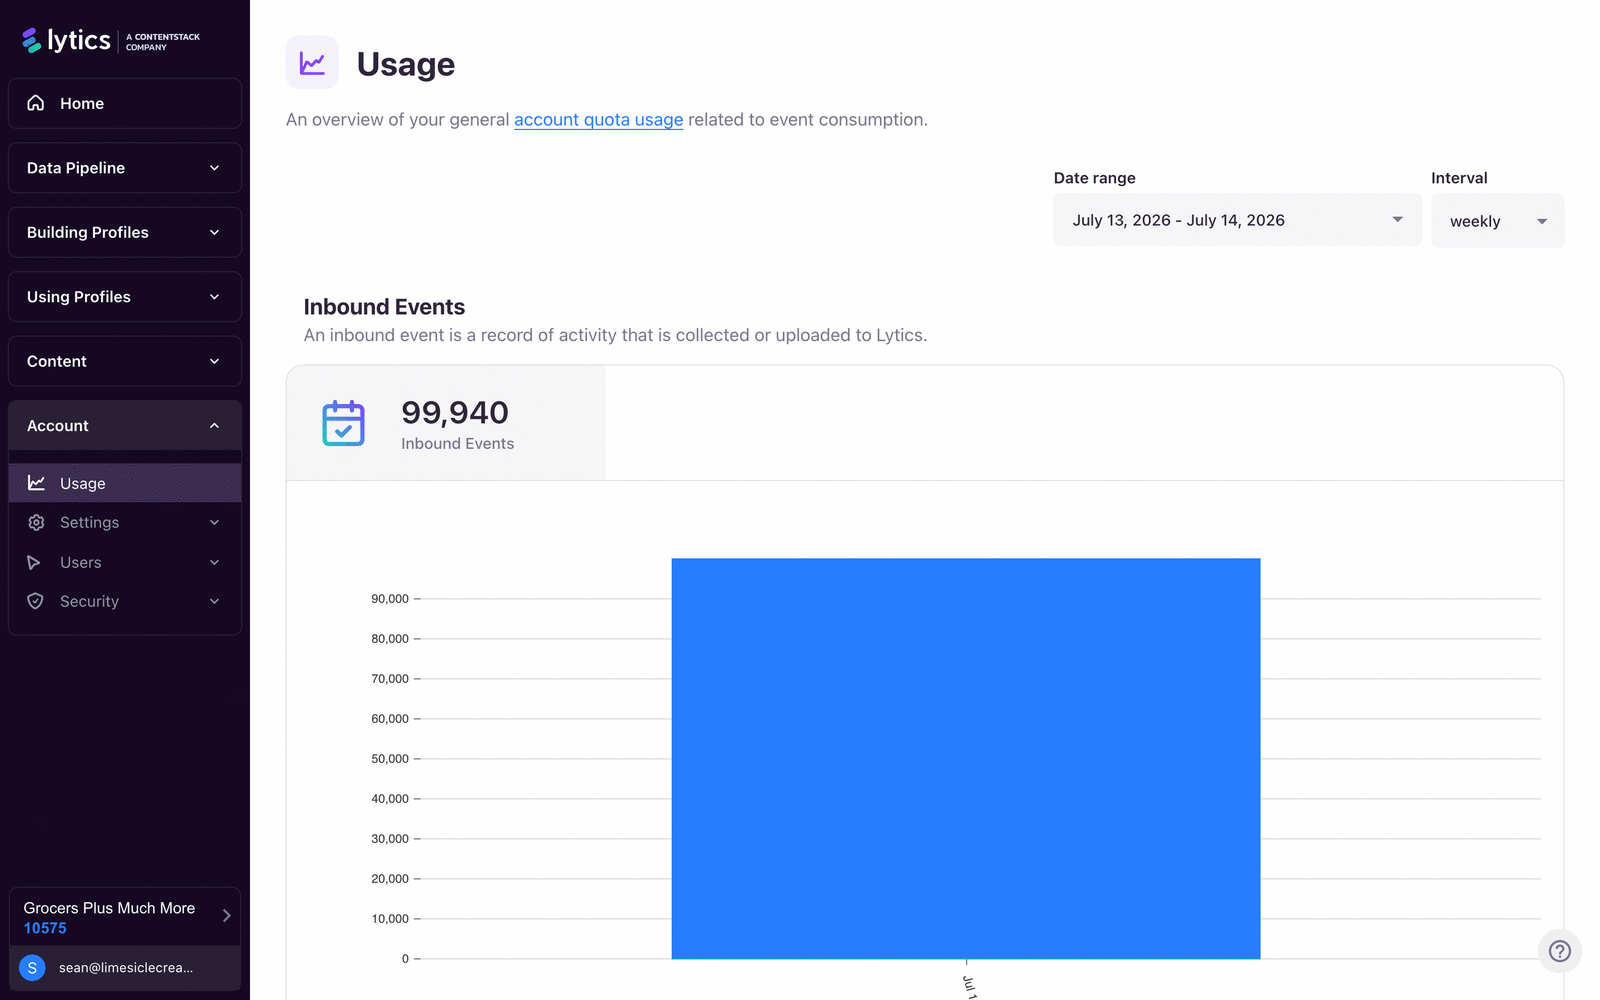
The Vault — Lytics' centralized account administration area — is where you manage settings, users, security, and SDK setup. You access it by clicking the Product Switcher in the top navigation and selecting Vault, or by clicking Account Settings from the secondary account menu in the bottom-left corner of the UI.
The Vault is organized into five top-level sections:
| Section | Path | What You Configure |
|---|---|---|
| Usage | /vault/usage |
Account quota overview and consumption metrics |
| Settings | /vault/settings/... |
Account details, JavaScript Tag, API, Content, Security, Data Science, Schema, Company Profile, Audiences |
| Users | /vault/users |
User accounts, roles, and permissions |
| Security | /vault/security/... |
Access tokens and third-party authorizations |
| Setup | /vault/setup/js |
JavaScript Tag installation on your website |
Account Details
Navigate to Settings > Account Details (/vault/settings/details) to configure your core account information.
| Field | Editable | Description |
|---|---|---|
| Account Name | Yes | Label shown in the account switcher for multi-account users |
| Domain | Yes | Primary domain associated with your account |
| Contact | Yes | Email address of your primary account contact |
| Allow Access via API | Yes | Enables profile data sharing via the Personalization API — required for integrations like Google Analytics that read profile data client-side |
| Account ID | No | Unique identifier used in all API calls (cid parameter) |
| Account Number | No | Unique account number for quick reference |
Your Account ID is the value you pass as
cidwhen installing the JavaScript Tag. Copy it from this page when setting up SDKs.
Settings Categories
Beyond Account Details, the Settings section contains category-specific configuration pages. Each page controls a distinct area of platform behavior:
| Category | Path | Sub-Categories |
|---|---|---|
| JavaScript Tag | /vault/settings/tag |
v3 Configuration, Legacy v2 Configuration, Client Side Integrations, Personalization Settings, Data Collection |
| Lytics API | /vault/settings/api |
API Security, Data Collection, Public API |
| Content | /vault/settings/content |
Content Topics, Content Enrichment, Content Affinities, Content Recommendations |
| Security | /vault/settings/security |
Login Sessions, Login Policies |
| Data Science | /vault/settings/data_science |
EntQL fields, decisioning triggers, scoring streams |
| Schema | /vault/settings/schema |
Private fields, promoted fields, field hiding |
| Company Profile | /vault/settings/onboarding |
Company information from onboarding |
| Audiences | /vault/settings/audience |
Audience similarity enforcement |
The JavaScript Tag and API settings are covered in detail in the SDKs section below. The remaining categories are introduced here and covered in depth in their respective academy topics.
Content Settings
Content settings control how Lytics classifies and indexes your web content. Key options include:
- Content topic allowlist / blocklist — Control which topics appear in your content taxonomy
- Content domains allowlist / blocklist — Restrict which domains Lytics classifies
- Content paths allowlist / blocklist — Filter URLs by path substring
- Content created since date — Only include content after a specified date
- Supported content languages — Languages permitted during enrichment (empty defaults to English only)
- Observe robots.txt — Options:
robotstxt,meta, ornone
For more on content classification, see Content.
Schema Settings
Schema settings control which fields are treated as sensitive and which are surfaced for data science:
- Private fields — Fields containing PII. These are hidden from users without Admin, Data Manager, or User Search roles.
- Promoted fields — Fields outside the defaults that you want leveraged in data science modeling and reporting.
- Hide Private Fields — When enabled, hides PII from exports and segment scans for non-privileged users.
Verify with Lytics Support that field hiding in the segment scan is also enabled for your account to ensure private fields are hidden everywhere.
Data Science Settings
Data Science settings control AI-driven features:
- EntQL Fields — Fields evaluated via EntQL in the merger before indexing an entity
- Enable Decisioning Triggers — Auto-trigger Experiences configured for decisioning
- Streams to Allow for Scoring — Custom streams containing behavioral signals for scoring
- Enable Decisioning Scores — Enrich profiles with
needs_messagescore andnext_eventtimestamp per stream
Security Settings
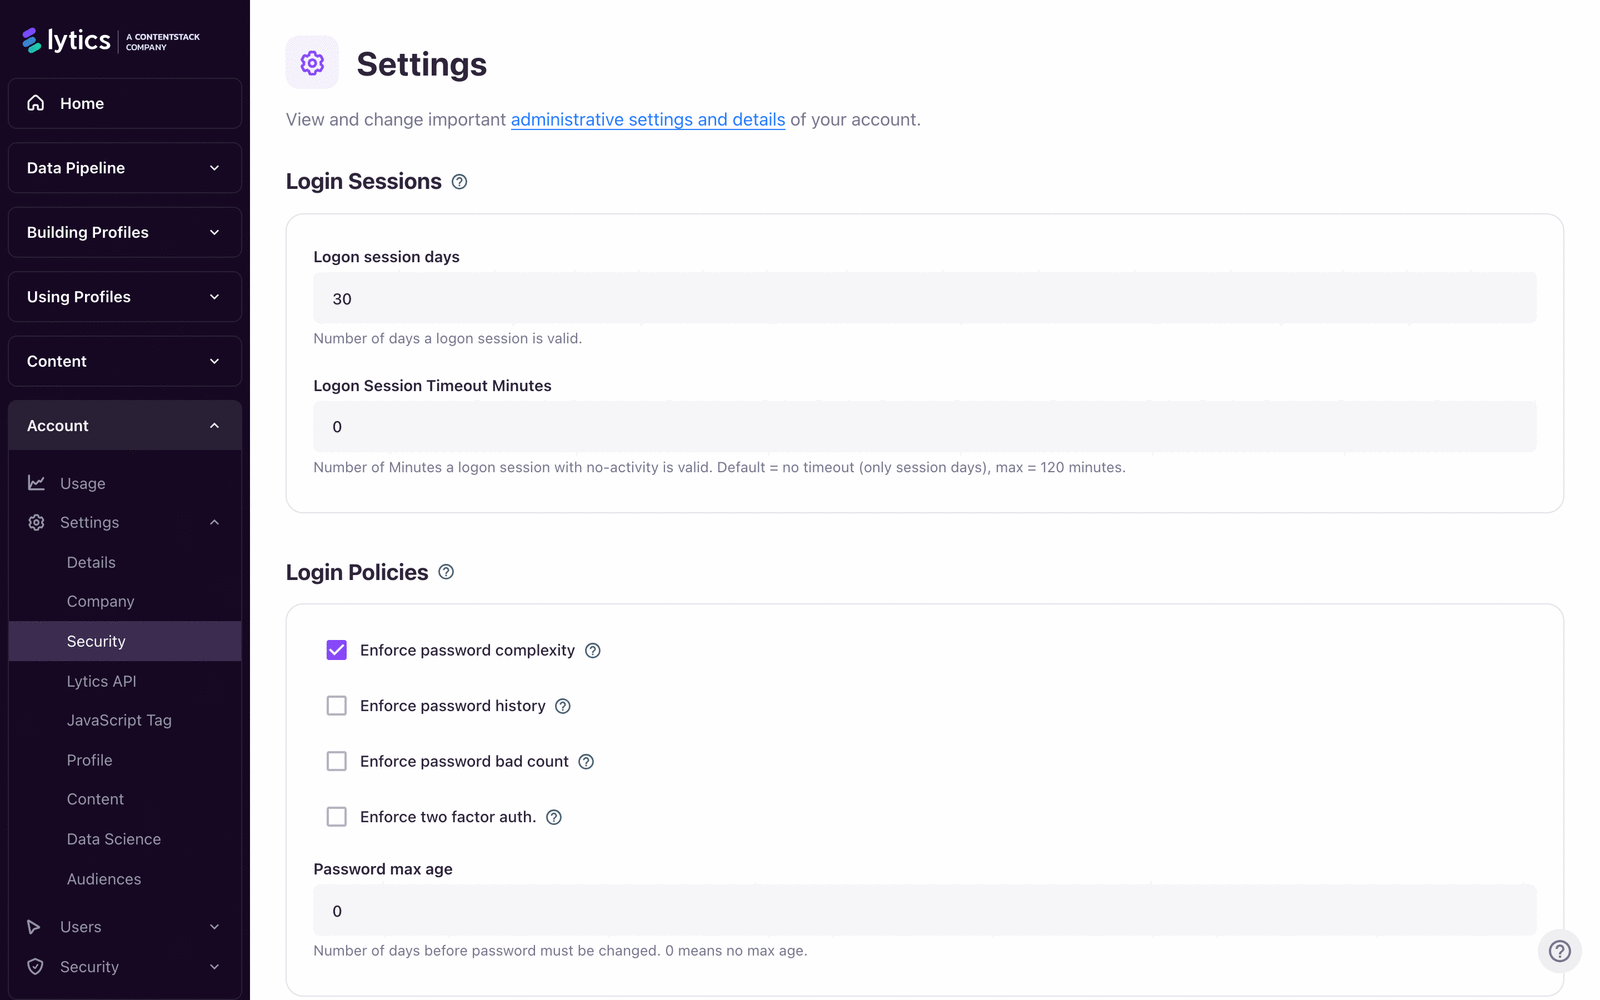
Navigate to Settings > Security (/vault/settings/security) to configure login and password policies.
Login Sessions
| Setting | Description |
|---|---|
| Logon session days | Number of days before forcing re-authentication |
| Logon session timeout minutes | Minutes of inactivity before forcing re-authentication |
Login Policies
| Setting | Description |
|---|---|
| Enforce password complexity | Requires minimum 8 characters, at least 1 uppercase (A–Z), 1 lowercase (a–z), 1 digit (0–9), and 1 special character (!@#$&*) |
| Enforce password history | Prevents re-use of previous passwords per user |
| Enforce password bad count | Locks account after too many failed login attempts |
| Password max age | Maximum days before a password change is required (set to 0 to disable) |
| Enforce two-factor authentication | Requires 2FA for all account users via Authy SoftToken — users must provide a phone number |
Enable 2FA for all production accounts. It adds a second authentication factor (a code that changes every 20 seconds) after the standard password step.
Single Sign-On (SSO)
Lytics supports SAML-based SSO using Google Cloud Identity Platform as the service provider. SSO is SP-initiated only (IdP-initiated is deprecated). To configure SSO, contact Lytics Support and provide:
- Entity ID from your identity provider
- Sign In URL from your identity provider
- X509 Signing Certificate from your identity provider
Lytics provides the ACS URL, Service Provider Entity ID, and Sign-in URL in return.
SSO supports role assignment via group names in the format lytics_<ACCOUNT_ID>_<role> (for example, lytics_123_admin or lytics_123_content_manager). Lytics has published configuration guides for both Okta and OneLogin.
User Management
Navigate to Users (/vault/users) to manage who has access to your account.
Inviting Users
- Click Create New from the user list.
- Enter the user's email address.
- Select one or more roles.
- The user receives an email with a login link.

Roles and Permissions
Lytics provides granular role-based access control. Each user can be assigned one or more roles:
| Role | Access Level |
|---|---|
| Admin | Full read/write access to all features and management functions |
| Data Manager | Read/write access to schemas, queries, users, content, integrations; includes PII access |
| Audience Manager | Read/write access to audiences |
| Campaign Manager | Read/write access to campaigns and audiences; no PII, cannot publish campaigns |
| Content Manager | Read/write access to content classification, collections, topics |
| Experience Manager | Read/write access to Experiences |
| Goal Manager | Read/write access to Goals and Experiences |
| Marketer | Read/write access to audiences and campaigns; no PII |
| Observer | Read-only access to audiences and campaigns |
| User Search | Ability to search users and view profiles |
| Discovery Insights | Access to explore discovery insights |
Only users with Admin, Data Manager, or User Search roles can view fields marked as private (PII). Assign roles deliberately to limit PII exposure across your team.
Managing Your Profile
Each user can manage their own profile by navigating to Manage My User from the account menu. You can update your name, email, and phone number (required for 2FA). Password changes are self-service — navigate to Manage My Profile > Change Password. Changing your password immediately invalidates all current sessions.
Access Tokens
Navigate to Security > Access Tokens (/vault/security/tokens) to manage API tokens. An access token is a credential that authenticates API requests to Lytics — each token is scoped to specific roles and has a configurable expiration.
Creating a Token
- Click Create New.
- Fill in the required fields:
| Field | Required | Options |
|---|---|---|
| Name | Yes | Descriptive label for the token |
| Description | No | Explain the token's purpose and which system uses it |
| Expiration | Yes | 90 days, 30 days, 7 days, or No expiration |
| Roles | Yes | Fine-grained permission selection matching user roles |
- Click Create. The token value appears in a one-time dialog.
- Copy the token immediately — you cannot view it again after dismissing the dialog.

Token Best Practices
- Name tokens descriptively — include the system or integration that uses the token (for example,
segment-export-prodorgtm-data-collection). - Set expiration dates — use 90-day or shorter expirations for production tokens and rotate before they expire.
- Use least-privilege roles — scope each token to only the permissions it needs.
- Store securely — keep tokens in a secrets manager or environment variable, never in source code.
- Delete unused tokens promptly — deletion is irreversible and immediately breaks dependent processes, so confirm which systems rely on a token before removing it.
Managing Tokens
The token list is sortable and filterable by name, description, creator, and expiration status. Click any token to view its assigned roles, creation date, and expiration date.
Authorizations
Navigate to Security > Authorizations (/vault/security/authorizations) to manage credentials for third-party integrations. An authorization is a stored credential that grants Lytics permission to exchange data with a third-party service (email provider, ad platform, data warehouse, etc.).
Creating an Authorization
- Click Create New to open the authorization wizard.
- Choose the provider — select the third-party tool you are connecting to.
- Select the authorization method — some providers offer a single method, others offer multiple (API key, OAuth, personal/business user tokens). The method you choose determines which job types (real-time vs. bulk) are available.
- Add a name, description, and complete the configuration specific to that provider.

Authorization Health
Lytics checks authorization status daily and reports one of three states:
| Status | Meaning |
|---|---|
| Healthy | Authorization is valid and active |
| Unhealthy | Authorization is invalid or expired — jobs using it will fail |
| Unknown | Status could not be determined |
Managing Authorizations
- Edit — You can rename and revise the description, but you cannot change the configuration (credentials). To change credentials, create a new authorization.
- Delete — You can only delete an authorization if no active jobs (running, sleeping, or paused) reference it.
- Activity Metrics — For select providers (Facebook, Iterable, Salesforce, SendGrid, and others), you can view request counts on hourly, daily, weekly, and monthly timescales.
- Associated Jobs — Each authorization's detail page shows a table of all active jobs using it.
Monitoring and Alerts
You can configure alerts on any job or authorization to receive notifications when failures occur. Alert channels include:
- Slack
- Microsoft Teams
Alerts include the latest error message for quick diagnosis. For detailed troubleshooting, use the Job Logs API.
Platform Limits
Lytics enforces limits that affect account configuration decisions. Key limits to keep in mind:
| Resource | Limit |
|---|---|
| Max user profile size | 1 MB |
| Max profile identifier size | 256 bytes |
| Max user attribute values | 1,000 (includes complex field types) |
| Max stitched identifiers per profile | 50 |
| Max single event input size | 4 KB |
| Max batch record size | 16 KB |
| Max total batch size | 1 GB |
| Max audiences | 500 |
| Max conditions per audience | 1,000 |
| Max active import integrations | 100 |
| Max active export integrations | 200 |
| Max integration creations per hour | 10 |
| Max Cloud Connect data models | 100 |
| Completed job retention | 90 days |
Summary
The Vault is the centralized hub for all account administration. Account details (name, domain, API access) and security policies (session timeouts, password complexity, 2FA, SSO) establish your account's baseline configuration. User management follows a role-based access model where each user gets the minimum permissions needed — only Admin, Data Manager, and User Search roles can access PII. Access tokens authenticate API integrations and should be named descriptively, scoped to least-privilege roles, and rotated on a schedule. Authorizations store credentials for third-party services and should be monitored for health status. Platform limits (max audiences, profile size, integration counts) should inform your configuration decisions from the start.
Documentation Links
SDKs
Learning Objectives
By the end of this section, you will be able to:
- Install the Lytics JavaScript Tag on a web property
- Configure the tag with required and optional parameters
- Identify the available mobile SDKs and their configuration patterns
- Verify that the SDK is correctly collecting and transmitting event data
- Use the Chrome DevTools extension for debugging
JavaScript Tag Installation
The JavaScript Tag (jstag) — Lytics' client-side SDK for web properties — is the primary mechanism for collecting behavioral data from your website. It tracks user behavior, resolves identity, surfaces profile data for personalization, and loads the Pathfora SDK for web experiences. Version 3 is the current recommended version.
Installation Methods
Direct installation — Copy the tag snippet from Setup > Website (JS Tag) (/vault/setup/js) in the Vault and paste it into your site's <head> section:
<script type="text/javascript">
  !function(){"use strict";var o=window.jstag||(window.jstag={}),r=[];function n(e){o[e]=function(){for(var n=arguments.length,t=new Array(n),i=0;i<n;i++)t[i]=arguments[i];r.push([e,t])}}n("send"),n("mock"),n("identify"),n("pageView"),n("unblock"),n("getid"),n("setid"),n("loadEntity"),n("getEntity"),n("on"),n("once"),n("call"),o.loadScript=function(n,t,i){var e=document.createElement("script");e.async=!0,e.src=n,e.onload=t,e.onerror=i;var o=document.getElementsByTagName("script")[0],r=o&&o.parentNode||document.head||document.body,c=o||r.lastChild;return null!=c?r.insertBefore(e,c):r.appendChild(e),this},o.init=function n(t){return this.config=t,this.loadScript(t.src,function(){if(o.init===n)throw new Error("Load error!");o.init(o.config),function(){for(var n=0;n<r.length;n++){var t=r[n][0],i=r[n][1];o[t].apply(o,i)}r=void 0}()}),this}}();

  jstag.init({
    src: 'https://c.lytics.io/api/tag/YOUR_ACCOUNT_ID/latest.min.js'
  });

  jstag.pageView();
</script>
Replace YOUR_ACCOUNT_ID with the Account ID from your Account Details page.
Google Tag Manager — If you use GTM:
- Log into your GTM account.
- Click New Tag > Tag Configuration.
- Under Custom, select Custom HTML.
- Paste the Lytics JavaScript Tag snippet.
- Name the tag
Lytics JavaScript Tag. - Set the trigger to All Pages.
- Click Save, then Submit to publish.

What the Tag Does
When the tag loads on a page, it performs four functions:
- Tracks behavior — Automatically collects page views, referral data, device information, and user language. Each event is sent to the Lytics collection endpoint.
- Resolves identity — Manages the
_uidcookie to maintain a persistent anonymous identifier across sessions. When you send known identifiers (email, user ID), the tag associates them with the anonymous profile. - Surfaces profile data — Retrieves the current user's profile from the Personalization API, including audience membership and behavioral scores, making it available client-side for personalization logic.
- Loads Pathfora — When enabled, loads the Pathfora SDK to evaluate and display web Experiences (modals, bars, slideouts) based on audience membership.
Automatically Collected Fields
The tag automatically collects these fields on every event:
| Field | Example | Description |
|---|---|---|
_e |
pv |
Event type (pv = page view) |
_ref |
www.lytics.com |
Referral domain |
_tz |
-7 |
Timezone offset from UTC |
_ul |
en-US |
User language |
_sz |
2560x1440 |
Display size |
_ts |
1504306728695 |
Timestamp (milliseconds since epoch) |
_nmob |
t |
Mobile device indicator |
_device |
desktop |
Device type |
url |
www.example.com/page |
Current page URL |
_uid |
74481.3222228897 |
Lytics cookie ID |
_v |
3.0.2 |
JavaScript Tag version |
JavaScript Tag Configuration
The jstag.init() call accepts a configuration object with required and optional parameters.
Required Parameters
| Key | Type | Description |
|---|---|---|
src |
string | URL of the tag script: https://c.lytics.io/api/tag/{YOUR_ACCOUNT_ID}/latest.min.js |
The
cid(Account ID) is embedded in thesrcURL. You do not need to pass it separately in v3.
Optional Parameters
| Key | Type | Default | Description |
|---|---|---|---|
loadid |
boolean | false |
Enable cross-domain user identification using third-party cookies |
stream |
string | getlytics |
Name of the data stream for collection |
sessecs |
integer | 1800 |
Session timeout in seconds — time between requests before a new session starts |
qsargs |
string[] | — | Array of URL query parameters to capture (e.g., ['utm_source', 'utm_medium']) |
serializer |
string | default |
Serializer type (default or legacy for v2 compatibility) |
cookies |
object | — | Cookie domain configuration for cross-subdomain tracking |
Custom User Identification
When you have an authenticated user, pass their identifier at initialization to link anonymous and known profiles:
var user = getAuthenticatedUser();
var config = {
  src: 'https://c.lytics.io/api/tag/YOUR_ACCOUNT_ID/latest.min.js'
};

if (user) {
  config.entity = {
    byFieldKey: 'custom_uuid',
    byFieldValue: user.uuid
  };
}

jstag.init(config);
Sending Custom Events
Use jstag.send() to send custom event data beyond automatic page views:
// Send user identity data
jstag.send({
  email: '[email protected]',
  name: 'Jane Doe',
  company: 'Acme Corp'
});

// Send a custom event
jstag.send({
  event: 'purchase_complete',
  currency: 'USD',
  value: 49.99
});

// Send to a specific stream with a callback
jstag.send('custom_stream', { action: 'signup' }, function(response) {
  console.log(response);
});
Single Page App (SPA) Configuration
For single page applications, you need to manually trigger page views and re-fetch the profile on route changes:
var onRouteChange = function() {
  // Track route change as a page view
  jstag.pageView();

  // Re-fetch profile and re-evaluate Experiences
  jstag.loadEntity(function(profile) {
    console.log(profile.data);
  });
};
Account-Level Tag Settings
In addition to the client-side init() configuration, you control tag behavior through account settings at Settings > JavaScript Tag (/vault/settings/tag). These settings are organized into sub-categories:
v3 Configuration — Core settings for the current tag version:
- JavaScript Tag TTL — Cache duration in seconds (lower for testing, higher for production)
- Enable pageview event on first send — Automatically adds a _e: pv event type on the first send call per page load
Client Side Integrations — Enable or disable automatic data sync with third-party platforms. Configurable integrations include Amazon DSP, Criteo, Google Ads, GA4, DV360, Lotame, Taboola, The Trade Desk, and Yahoo Ads. Additional integrations (AdRoll, Facebook Ads, Google Analytics, GTM, Pathfora, and others) activate automatically.
Personalization Settings — Control Pathfora and Experiences behavior:
- Allow Pathfora — Enable or disable the Pathfora personalization library
- Allow Event Block — 0 (off), 1 (active Experiences only), 2 (permanently on)
- Global Stylesheet URL — Custom CSS for Lytics-managed Experiences
- URL Allowlist for Orchestration — Restrict which URLs evaluate Experiences
Data Collection — Control how the tag collects incoming data:
- Custom Cookie Keys — Cookie names to automatically collect
- Custom Data Layer — JavaScript variables to automatically collect
- Integrations Blocklist — Prevent specific integrations from syncing
Mobile SDKs
Lytics provides native mobile SDKs for iOS, Android, and React Native. Each SDK follows the same core pattern: initialize with your API token, then use track, identify, and consent methods.
iOS SDK
Requirements: iOS 14.0+, Xcode v14.2+
Installation: Add the Swift package from https://github.com/lytics/ios-sdk via Xcode's File > Add Packages.
Lytics.shared.start(apiToken: "YOUR_API_TOKEN") { configuration in
    configuration.defaultStream = "ios_sdk"
    configuration.logLevel = .debug
    configuration.maxQueueSize = 10
    configuration.uploadInterval = 10
    configuration.sessionDuration = 1200
}
Android SDK
Requirements: Android 8+, Android Studio v2021.3.1+
Installation: Add the JitPack repository and the dependency com.github.lytics:android-sdk:<VERSION>.
Lytics.init(applicationContext, LyticsConfiguration(
    apiKey = "YOUR_API_TOKEN",
    defaultStream = "android_sdk",
    logLevel = LogLevel.DEBUG,
    maxQueueSize = 10
))
React Native SDK
Installation: yarn add react-native-lytics
import { start } from 'react-native-lytics';

start({
  apiToken: 'YOUR_API_TOKEN',
  defaultStream: 'react_native_sdk',
  logLevel: LogLevel.debug,
  maxQueueSize: 10
});
Common Mobile SDK Configuration Parameters
All three mobile SDKs share these configuration options:
| Parameter | Default | Description |
|---|---|---|
apiKey / apiToken |
— | Your Lytics API token (required) |
defaultStream |
SDK-specific | Default stream name for events |
primaryIdentityKey |
_uid |
Strongest identifier key for identity resolution |
uploadInterval |
10 seconds |
How often the SDK flushes queued events |
maxQueueSize |
10 |
Maximum events queued before an automatic flush |
sessionDuration |
1200 seconds |
Inactivity timeout before starting a new session |
requireConsent |
false |
When true, no data is sent until the user opts in |
enableSandbox |
false |
When true, events are validated but not persisted |
logLevel |
.error |
Logging verbosity (.error, .info, .debug) |
Mobile SDK Core Methods
Each SDK provides the same core methods:
track— Send a custom event with propertiesidentify— Associate the current device with a known user identityconsent— Record proof of user consent with document referencesoptIn/optOut— Enable or disable data collection (useful for consent management)
For detailed mobile SDK documentation, see the Lytics developer documentation.
Verification and Testing
After installing any SDK, verify that it is working correctly.
Browser Console Verification (JavaScript Tag)
Open your browser's developer console on a page where the tag is installed and run these checks:
// Check that the tag is loaded
jstag.isLoaded
// Expected: true

// Check the tag version
jstag.config.version
// Expected: "3.x.x"

// Check audience membership
jstag.getSegments()
// Expected: array of audience slugs

// Get the anonymous ID
jstag.getid(function(id) {
  console.log(id);
});
// Expected: Lytics _uid value
Network Verification
- Open Developer Tools > Network tab.
- Filter requests for
lytics.io. - Look for requests to the
/cendpoint (data collection) — these confirm events are being sent. - Look for requests to the
/personalizeendpoint — these confirm profile data is being retrieved.
Entity Ready Callback
To verify that the full profile (including audience membership and Experiences) is being returned:
jstag.call('entityReady', function(profile) {
  console.log('Audiences:', profile.data.user.segments);
  console.log('Experiences:', profile.data.experiences);
});
Testing Best Practices
- Use incognito mode — This clears cookies and caches, giving you a clean anonymous user for each test.
- Document test results — Record the date, time, and results of each verification check.
- For known users — Use unique test email addresses. You can leverage email punctuation (e.g.,
[email protected]) to create distinct identities. - For anonymous users — Retrieve the cookie ID with
jstag.getid(id => console.log(id))to look up the test profile in the Lytics UI.
Chrome DevTools Extension
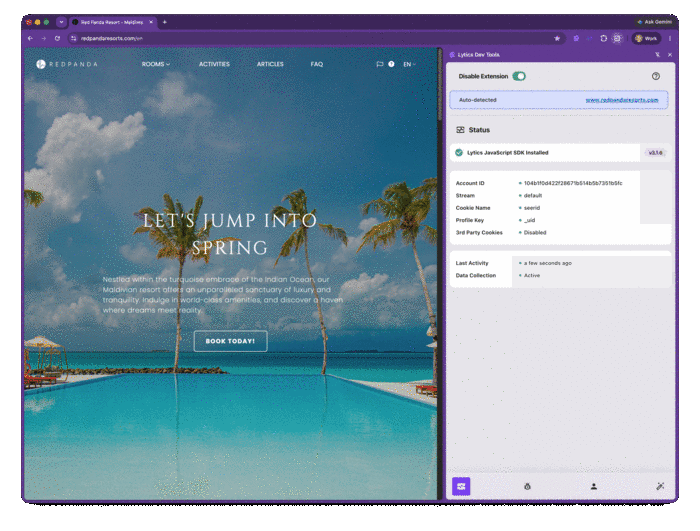
Install the Lytics Dev Tools Extension from the Chrome Web Store for a visual debugging experience. The extension provides four tabs:
| Tab | What It Shows |
|---|---|
| Status | Real-time SDK installation and operational status |
| Debugger | Active configuration, live event monitoring, installation validation |
| Profile | Current visitor's profile: behavioral scores, custom attributes, audience membership |
| Personalization | Log of active Lytics Experiences and campaigns evaluated for this visitor |
Hosting the Tag Locally (Advanced)
In strict security compliance or air-gapped environments, you can host the tag on your own infrastructure:
- Navigate to Setup > Website (JS Tag) and copy the
srcURL. - Open the URL in a browser and save the file.
- Host the file on your web server.
- Update the
srcparameter injstag.init()to point to your hosted copy.
Hosting the tag locally voids SLAs, requires manual updates for bug fixes, and disables dynamic account settings. Only use this approach when required by compliance.
Subresource Integrity (SRI)
For environments that require SRI verification, you can host the tag files yourself and add integrity attributes. The four files you need to host and verify are:
- Core Tag —
//c.lytics.io/api/tag/{ACCOUNT_ID}/latest.min.js - Pathfora JS —
//c.lytics.io/static/pathfora.min.js - Pathfora CSS —
//c.lytics.io/static/pathfora.min.css - Experience Config —
//c.lytics.io/api/experience/candidate/{ACCOUNT_ID}/config.js
Summary
The JavaScript Tag (v3) is the primary data collection mechanism for web properties — it tracks behavior, resolves identity, retrieves profile data for personalization, and loads Pathfora for web experiences. Installation is either direct (paste the snippet) or via Google Tag Manager. Account-level tag settings in the Vault control caching, client-side integrations, personalization behavior, and data collection parameters. For mobile apps, native SDKs for iOS, Android, and React Native follow the same pattern: initialize with an API token, then use track, identify, and consent methods. Always verify installation using browser console commands, network inspection, and the Lytics Dev Tools Chrome extension.
Documentation Links
- JavaScript Tag Overview
- JavaScript Tag Configuration
- iOS SDK
- Android SDK
- React Native SDK
- Chrome DevTools Extension
What You've Learned
You now know how to configure a Lytics account from scratch. You've walked through the Vault's five top-level areas — Usage, Settings, Users, Security, and Setup — and understand how to configure account details, enforce security policies, manage users with role-based access, create and rotate API tokens, and set up third-party authorizations. You've also installed and configured the JavaScript Tag for web data collection, learned the available mobile SDKs and their shared configuration patterns, and verified that data is flowing correctly using console commands, network inspection, and the Chrome DevTools extension.
Key Terms
📘 Vault — The centralized account administration area in Lytics where you manage settings, users, security, and SDK setup.
📘 Access Token — A credential used to authenticate API requests to Lytics. Each token is scoped to specific roles and has a configurable expiration.
📘 Authorization — A stored credential that grants Lytics permission to exchange data with a third-party service (email provider, ad platform, data warehouse, etc.).
📘 JavaScript Tag (jstag) — The Lytics client-side SDK for web properties. It tracks user behavior, resolves identity, surfaces profile data for personalization, and loads the Pathfora SDK for web experiences.
📘 Account ID — The unique identifier for your Lytics account, passed as the
cidparameter in API calls and embedded in the JavaScript Tag'ssrcURL.📘 Personalization API — The client-side API that returns the current user's profile data, including audience membership and behavioral scores, for use in personalization logic.
📘 Pathfora — The Lytics web personalization SDK that evaluates and displays Experiences (modals, bars, slideouts) based on audience membership.
Next step: Proceed to Data Flow to understand how data moves through the platform's collection and processing pipeline.
