Add an Environment
An Environment is a content delivery destination where you publish and deploy your application or website content. It acts as a platform through which content is served to end users.
Note: Only the stack Admin and Developer can add an environment.
To add an Environment, log in to your Contentstack account and perform the following steps:
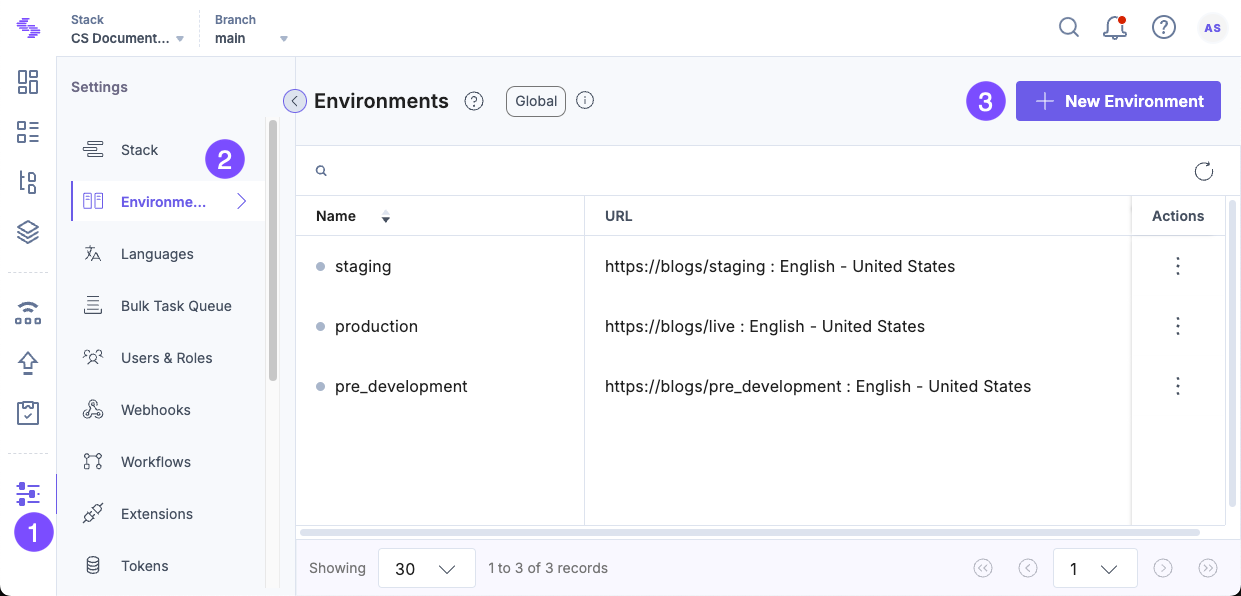
- Go to your stack and click the “Settings” icon in the left navigation panel or use the shortcut key “S” (for Windows and Mac OS users).
- Navigate to Environments or use the “alt + E” shortcut key for Windows and “option + E” for Mac OS.
- Click on + New Environment.

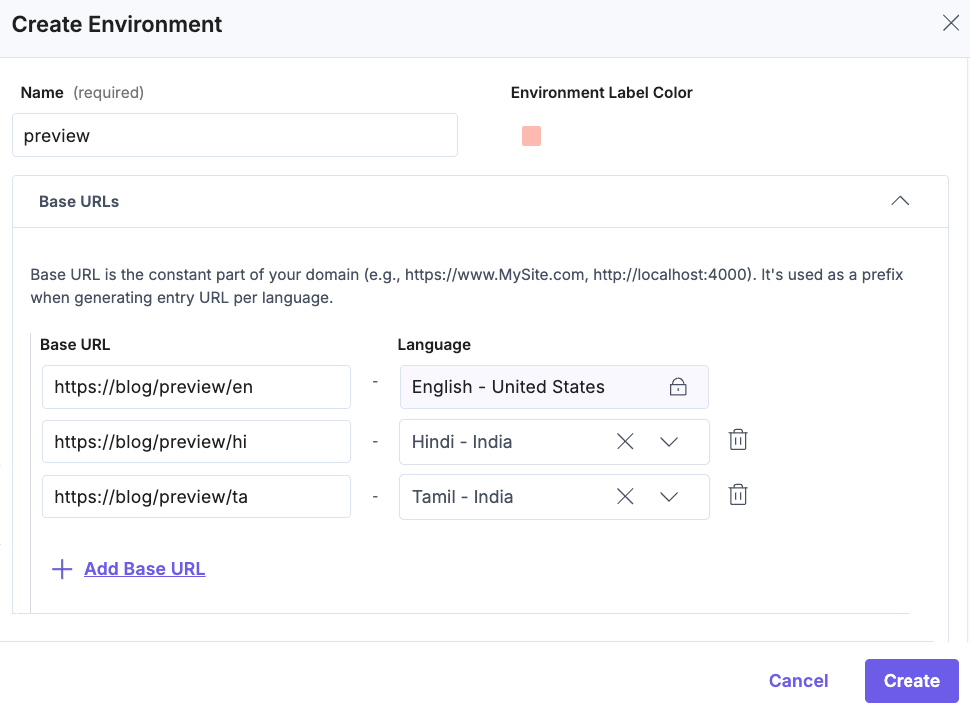
- In the Create Environment modal, enter the following details:
- Name: Enter a name for the environment (e.g., staging).
- Environment Label Color: Select a color to represent the environment.
- Base URLs:
- Enter the base URL where content will be published (e.g., http://localhost:4000 or http://www.my-site.com).
- The first Base URL is assigned to English - United States by default (non-editable).
- To add language-specific URLs, click + Add Base URL and select a language (e.g., Hindi, Tamil).
Note: Each Base URL is linked to a specific language and acts as a prefix for entry URLs.
- Click Create to save the environment.

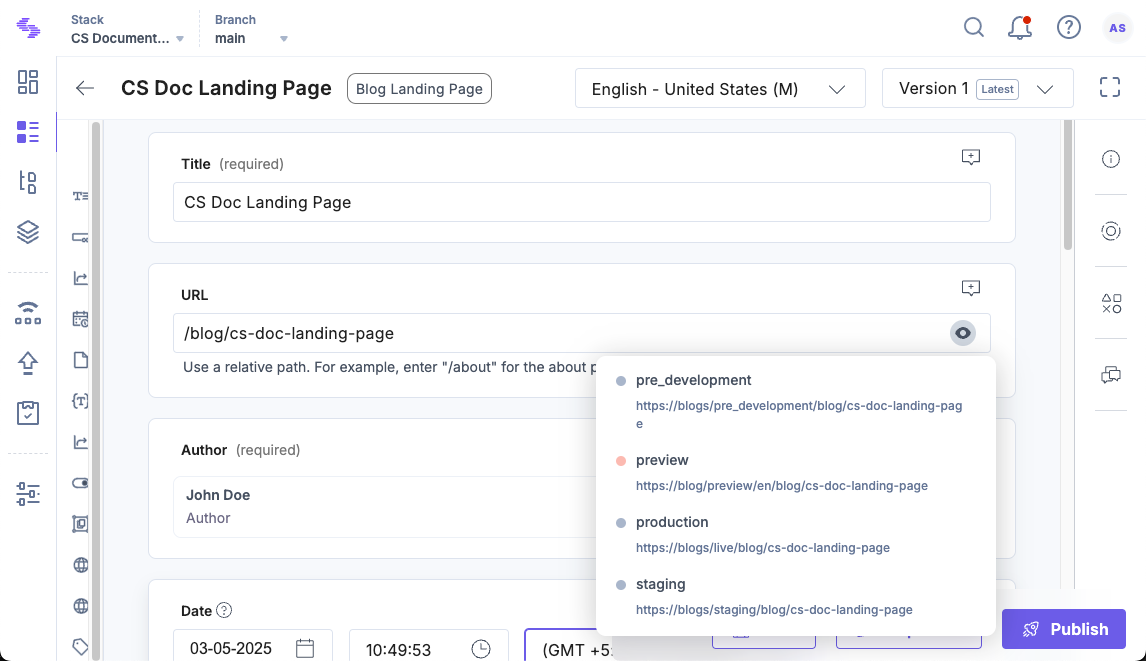
To preview your published content, navigate to http://localhost:4000/{relative-url-of-the-published-entry} in your browser. Alternatively, hover over the “preview eye” icon in the URL field of your published entries to retrieve the URL.

Note: You can use Webhooks to trigger deployments to multiple web servers each time you publish content to an environment.
API Reference
To add an environment via API, refer to the Add an Environment request.


.svg?format=pjpg&auto=webp)
.svg?format=pjpg&auto=webp)
.png?format=pjpg&auto=webp)


.png?format=pjpg&auto=webp)