

.svg?format=pjpg&auto=webp)
.svg?format=pjpg&auto=webp)
.png?format=pjpg&auto=webp)


.png?format=pjpg&auto=webp)
Export Content to .CSV File
The cm:export-to-csv command allows users to export the following data into a CSV file:
- Stack Entries
- Organization users’ details
- Organization teams' details
- Taxonomy details
This facilitates users in executing various tasks such as creating content backups, conducting data analytics, and so on.
To export the content of a stack, you need to have access to it. Likewise, to export an organization’s user data or teams data, you must be the organization “Owner” or “Admin”.
You can export content into a .csv file by performing the following two steps:
Prerequisites
- Contentstack account
- CLI installed on your machine
Log in to the CLI Session
Note: By default, the CLI session uses the AWS North America region. To set the AWS Europe, AWS Australia, Azure North America, Azure Europe, Google North America, or Google Europe region, refer to the Set Region command for more details.
You will need an authtoken to use the export-to-csv command. To generate the authtoken, open your terminal, and run the following command to log in to your Contentstack account:
csdx auth:loginIt will ask you to provide the e-mail address and password of your Contentstack account.
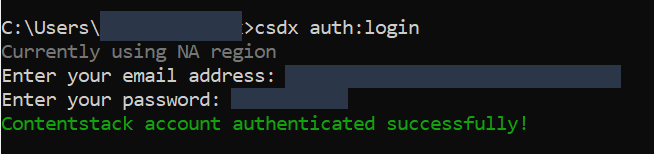
Once you log in successfully, an authtoken will be generated and saved to the CLI session until you log out from this session.
Additional Resource: To learn more about the login command, refer to the Login command section.
Use the ‘cm:export-to-csv’ command
Now that you are logged in to Contentstack, let’s export content from the source stack in a .CSV file by running the following command in your terminal:
csdx cm:export-to-csvThis command will prompt the following options as follows:
- Export entries to a .CSV file: Export all entries of a stack to a .CSV file. Please note that to do this, you should have access to the stack.
This option will ask you to select the following:- Organization where your stack resides.
- Stack where the content type resides.
- Branch of the stack, if the organization is branch-enabled.
- Content type(s) to which the entries belong.
- Language of the entries to be exported.
The .CSV file gets generated in the following format:
<stack_name>_<content_type>_<language>_entries_exports.csv
You can also export entries to CSV using the Management Token alias.
- Export organization users' data to a .CSV file: Export the organization users’ details to a .CSV file. To use this option, you should either be an Organization Owner or the Organization Admin. This option lists the organization(s) of which you are either an owner or an admin.
Note: You must be logged in to the Contentstack app to export organization users.
When you select this option, it asks you to select the organization in which the data of the user you want to export resides. Once you select it, the .CSV file gets generated in the following format:
<orgName>_users_exports.csv
- Export organization teams’ data to a .CSV file: Export teams data from a given organization.
This option generates three .CSV files that contain the following data:
- File 1: Contains a list of all the teams of a given organization.
The CSV file is generated in the following format:
<org-name>_teams_export.csv
- File 2:
- Contains a list of all the users in a particular team if the team-uid flag is passed.
The CSV file is generated in the following format:
<org-name>_team_<team-uid>_User_Details_export.csv
- Contains a list of all the users in all the teams if the team-uid flag is not passed.
The CSV file is generated in the following format:
<org-name>_team_User_Details_export.csv
- Contains a list of all the users in a particular team if the team-uid flag is passed.
- File 3:
- Contains a list of all the stack role details of a particular team if the team-uid flag is passed.
The CSV file is generated in the following format:
stack_role_mapping_<team-uid>.csv
- Contains a list of all the stack role details of all the teams if the team-uid flag is not passed.
The CSV file is generated in the following format:
stack_role_mapping.csv
- Contains a list of all the stack role details of a particular team if the team-uid flag is passed.
- File 1: Contains a list of all the teams of a given organization.
- Export taxonomies to a .CSV file: Export taxonomies and related terms to .CSV files.
This option will ask you to select the following:
- Organization in which your stack resides.
- Stack in which the taxonomy you wish to export resides.
The CSV file gets generated in the following formats:
<stack-name>_taxonomies.csv
<stack-name>_<taxonomy-name>_<taxonomy-uid>_terms.csv
- Exit: Stop this command from further execution.
Once you select any one of the above-mentioned options, the “data” folder is auto-generated in the current working directory (folder), and the corresponding .CSV files are stored within this “data” folder.
- Export entries to a .CSV file: Export all entries of a stack to a .CSV file. Please note that to do this, you should have access to the stack.
The alternate way of using the command is by providing the required parameters after the command in a single line as shown below:
csdx cm:export-to-csv -a <alias_of_management_token> -n <name_of_the_stack> --action <<entries_or_users_or_taxonomies>> --org <organization_UID> --org-name <name_of_the_organization> --locale <name_of_the_locale> --content-type <content_type_name> --delimiter <value>- -a,--alias=alias: Alias of the management token.
- -n,--stack-name=stack-name: Name of the stack that needs to be created as CSV filename.
- --action=action: Option to export data. [options: entries|users|taxonomies].
- --taxonomy-uid=taxonomy-uid: Provide the taxonomy UID of the related terms you want to export.
- --delimiter=delimiter: [default: ,] [optional] Provide a delimiter to separate individual data fields within the CSV file. For example: cm:export-to-csv --delimiter '|'
- --team-uid=team-uid: Provide the UID of a specific team in an organization.
- --org=org: Provide organization UID to clone org users.
- --org-name=org-name: Name of the organization that needs to be created as CSV filename.
- --locale=locale: Locale of entries that will be exported.
- --content-type=content-type: Content type of entries that will be exported.
- --branch=branch-name: Branch from which entries will be exported.
Note: You must have access to the Branches feature to use the branch flag in CLI. Please contact the Support team to add the Branches feature in your plan.
Examples:
- Exporting entries to a .CSV file:
csdx cm:export-to-csv --action <entries> --locale <locale> --alias <management-token-alias> --content-type <content-type> - Exporting entries to a .CSV file with stack name provided:
csdx cm:export-to-csv --action <entries> --locale <locale> --alias <management-token-alias> --content-type <content-type> --stack-name <stack-name> - Exporting organization users to a .CSV file:
csdx cm:export-to-csv --action <users> --org <org-uid> - Exporting organization users to a .CSV file with organization name provided:
csdx cm:export-to-csv --action <users> --org <org-uid> --org-name <org-name> - Exporting all the teams of a given organization:
csdx cm:export-to-csv --action <teams> --org <org-uid> - Exporting all the data of a specific team:
csdx cm:export-to-csv --action <teams> --team-uid <team-uid> - Exporting all the data of a specific team of a given organization by providing the organization UID and name:
csdx cm:export-to-csv --action <teams> --org <org-uid> --org-name <org-name> --team-uid <team-uid> - Exporting taxonomies and related terms to a .CSV file by providing the taxonomy UID:
csdx cm:export-to-csv --action <taxonomies> --alias <management-token-alias> --taxonomy-uid <taxonomy-uid> - Exporting taxonomies and respective terms to a .CSV file:
csdx cm:export-to-csv --action <taxonomies> --alias <management-token-alias> - Exporting taxonomies and respective terms to a .CSV file with a delimiter:
csdx cm:export-to-csv --action <taxonomies> --alias <management-token-alias> --delimiter <delimiter> - Exporting entries to a .CSV file with branch name provided:
csdx cm:export-to-csv --action <entries> --locale <locale> --alias <management-token-alias> --content-type <content-type> --stack-name <stack-name> --branch <branch-name>
More articles in "Content Migration Commands"
