Migrate Content from HTML RTE to JSON RTE using CLI
The JSON Rich Text Editor (RTE) field stores and returns the data in the JSON format. You can add the JSON RTE field to an existing content type by editing it or by creating a new content type.
If you already have data in the HTML RTE and want to migrate to JSON RTE, you can use the Contentstack CLI. By using a few commands in our CLI, you can easily perform the required migration.
Prerequisites
- Contentstack account
- CLI installed on your machine
Note: By default, the CLI uses the AWS North America region. To set the AWS Europe, AWS Australia, Azure North America, Azure Europe, Google North America, or Google Europe region, refer to the Set Region command for more details.
Firstly, open your terminal and add a management token to the CLI session. To do this, use the following single-line command:
csdx auth:tokens:add --management -a <<alias>> -k <<api_key>> --token <<mgmt_token>>- -a,--alias=alias: Alias (name) you want to assign to the token.
- -k,--stack-api-key=stack-api-key: API Key of the stack where the token exists.
- --token=token: Value of your management token.
Make note of the alias (token-name) you assign for the management token, we will require it in the next step.
After successfully adding the management token, let's proceed to migrate the content from HTML RTE to JSON RTE.
In this guide, we will discuss the steps required to perform this migration by using the following two methods:
Using a Config File to Pass the Commands
Let's learn how to use this method through the following steps:
- Log in to your Contentstack account and go to your stack.
- Then, create a content type in your stack and add the HTML Rich Text Editor (RTE) field in it. Save and Close the content type and create an entry in this newly created content type.
- Add some content inside the RTE field that you have added. Then, save the entry and close it.
- Edit the same content type and add a new JSON RTE field under the existing RTE content editor field and save your changes.
- Now let's migrate the content from the existing HTML RTE to the new JSON RTE using the config file.
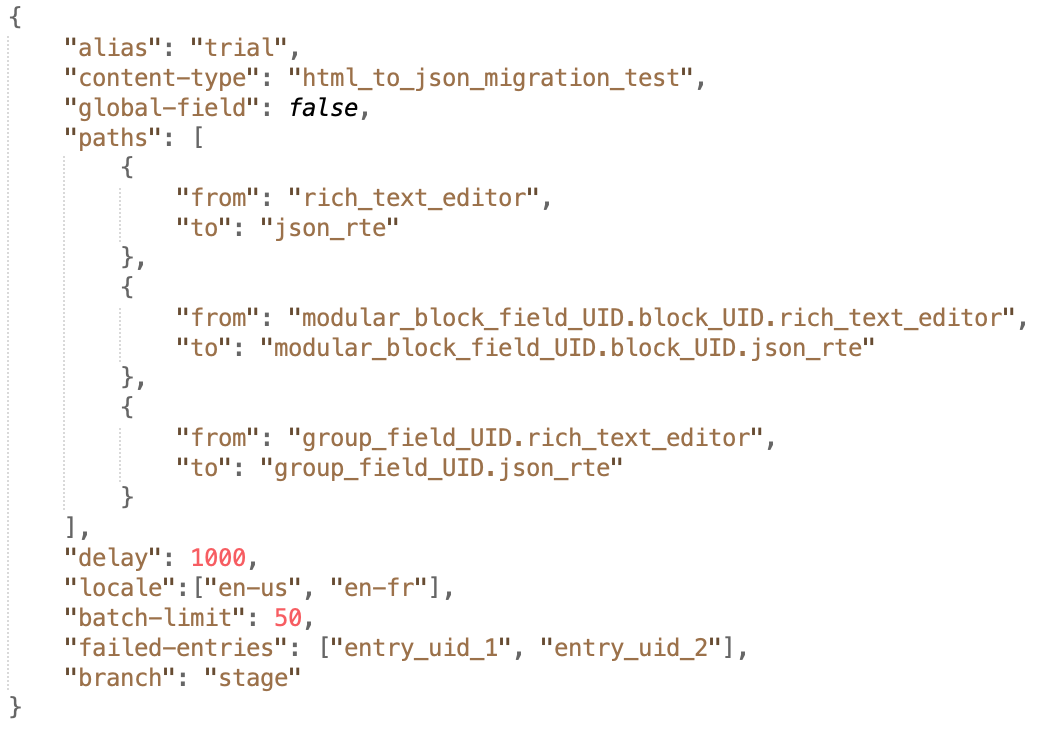
For this exercise, we have created a sample config code to help you add various parameters to it and easily migrate your content.{ "alias": "trial", "content-type": "author", "global-field": false, "paths": [ { "from": "rich_text_editor", "to": "json_rte" } ], "delay": 1000, "locale":["en-us","en-fr"], "batch-limit": 50, "branch": "stage" "failed-entries": ["entry_uid_1","entry_uid_2"] } - Copy the above config code, open any code editor, paste the code and add the required parameters as shown below:
- alias: Enter the alias name.
- content-type: Specify the UID of the content type of which you want to migrate the HTML RTE content.
- global-field: Set this flag to true if the content type is a global field. It is set to false by default.
Note: Remember to set the global-field flag to true in your config file if you are migrating RTE content present in the global field.
- from: Enter the path to the HTML RTE field of which you want to migrate content.
- to: Enter the path to the JSON RTE field to which you want to migrate the HTML RTE content.
- delay (optional): Set the interval time between the migration of HTML RTE to JSON RTE in subsequent entries of a content type. The default value is 1,000 milliseconds.
- locale (optional): Enter the locale codes of the localized entry versions of which you want to migrate the HTML RTE content. If this key is not specified, Contentstack CLI migrates HTML RTE content of the master language entry.
- batch-limit (optional): Set the limit for the number of entries to be fetched in a single batch for migrating HTML RTE content to avoid any timeout issues. You can pass any value that is less than or equal to 50.
- branch (optional): Enter the name of the branch where the changes are to be made.
- failed-entries (optional): If migration fails for the HTML RTE content of certain entries during initial execution, you can pass this key to rerun the activity. Specify the UIDs of the entries that failed the HTML RTE migration process against the failed-entries key to migrate RTE content only for those specific entries.
Note: The locale, batch-limit, and failed-entries keys are only supported when running the migration command using a config file.
Note: The path to the JSON or HTML RTE is usually the UID of that specific field. However, if the HTML and JSON RTE fields are nested within another field, then specify the path to your RTE in the following format:
{parent_field_UID}.{rte_field_UID}
For example, if your HTML RTE field is nested within a Modular Blocks field, provide the RTE path as follows:{modular_block_field_UID}.{block_UID}.{rte_field_UID} - After adding the above parameters, save the config file and run the following command in the CLI.
csdx cm:entries:migrate-html-rte -c <<path_of_the_config_file>>Option:
-c,--config-path=config-path: Specify the path where your config file is located.Example:
csdx cm:entries:migrate-html-rte -c “/home/admin/Desktop/config.json"Tip: Enclose the config file path in inverted commas if you are using a Windows system and the path to your respective RTE field contains a "space".
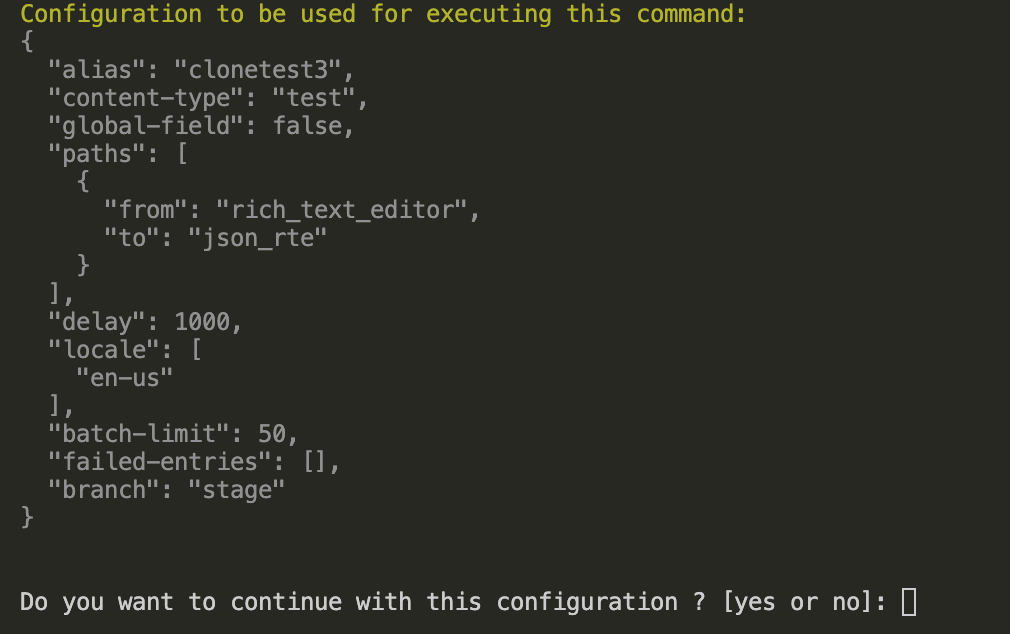
- After running the above command, the CLI will display the config file you specified and ask if you would like to continue with the configuration. Type "yes" to initiate the migration process.

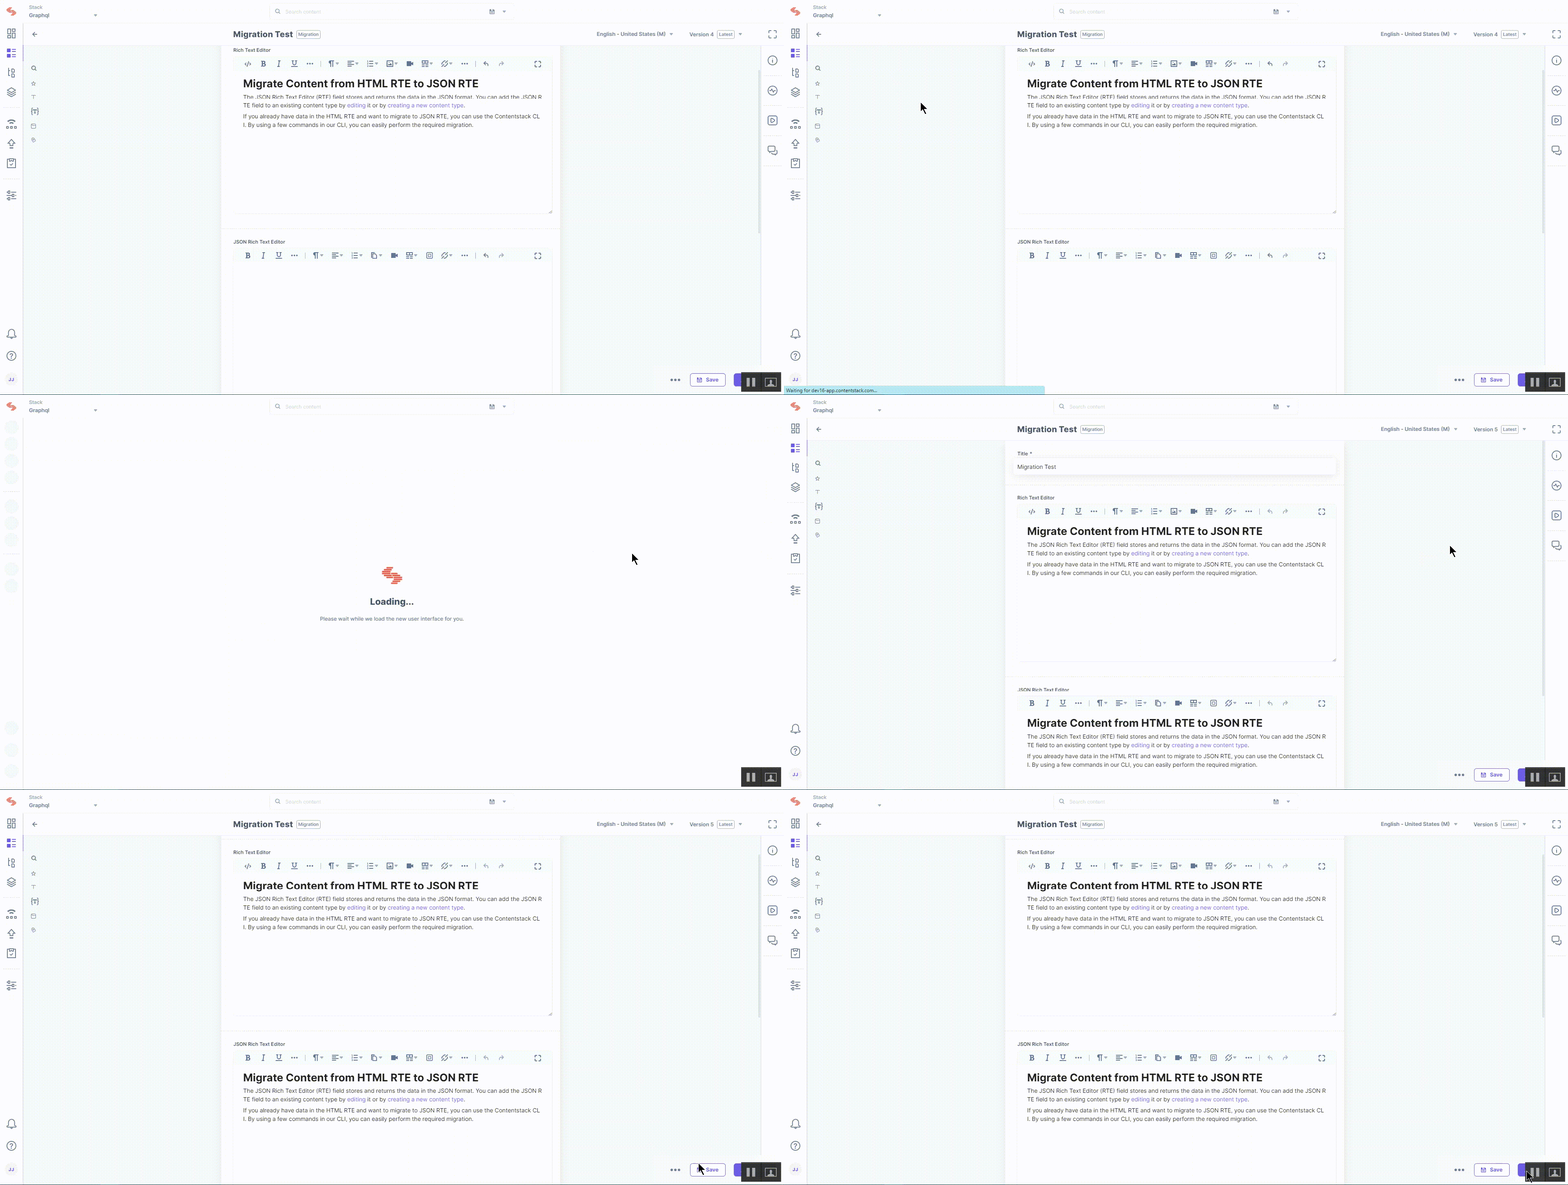
- Now go to your stack and refresh the page; the content from your existing RTE field will reflect in the JSON RTE field as shown below:

This completes your content migration process using the CLI. Your content is migrated to the new JSON RTE field by using the parameters you specified in the config file.
Note: Using the config file to migrate content allows developers to add joins to the existing parameters and perform multiple HTML RTE to JSON RTE migrations at the same time.

Alternatively, you can avoid downloading and editing the config file and use flags to migrate the content. Let's discuss this next.
Using Flags to Migrate Content
In this method, we will discuss how to migrate content from your existing HTML RTE to the new JSON RTE using flags.
After successfully creating the management token in step 1, run the following command to start the data migration process.
Several parameters/flags are combined in the following command:
If RTE is in the content type.
csdx cm:entries:migrate-html-rte -a <alias> --content-type <content_type_uid> --html-path <html_path> --json-path <json_path> -y(optional) --delay 1000OR
If RTE is in the global field.
csdx cm:entries:migrate-html-rte -a <alias> --content-type <global_field_uid> --global-field --html-path <html_path> --json-path <json_path> -y(optional) --delay 1000
- -a, --alias=alias: Enter the alias name. You must use either the --alias flag or the --stack-api-key flag.
- --stack-api-key=stack-api-key: API key of the source stack. You must use either the --stack-api-key flag or the --alias flag.
- --branch=branch: The name of the branch to be used.
- --content-type=content-type: Specify the UID of the content type of which you want to migrate HTML RTE content.
- --global-field: Checks whether the specified UID belongs to a content type or a global field.
- --html-path=html-path: Enter the path to the HTML RTE of which you want to migrate content.
- --json-path=json-path: Enter the path to the JSON RTE to which you want to migrate the HTML RTE content.
- -y,--yes (optional): To avoid reconfirmation of your configuration, add this flag.
- --delay=delay (optional): To set the interval time between the migration of HTML RTE to JSON RTE in subsequent entries of a content type. The default value is 1,000 milliseconds.
Note: The path to the JSON or HTML RTE is usually the UID of that specific field. However, if the HTML and JSON RTE fields are nested within another field, then specify the path to your RTE in the following format:
{parent_field_UID}.{rte_field_UID}
For example, if your HTML RTE field is nested within a Modular Blocks field, provide the RTE path as follows:{modular_block_field_UID}.{block_UID}.{rte_field_UID}
The above command will initiate the migration process. Now, go to your stack and refresh the entry page. You will see that the JSON RTE field reflects the same data as present in your HTML RTE.

Points to Remember
To successfully perform the JSON RTE migration, remember the following rules:
- The migration only works when both the HTML and the JSON RTE fields are at the same field depth level.
- Both the RTE fields should have the same type of instances. If the JSON RTE is marked as multiple and HTML RTE is of single type, then you won't be able to migrate content.
- To run a successful migration, the HTML RTE and JSON RTE should allow embedded entries from the same set of referenced content types. If the referenced content types differ, you cannot migrate content between the rich text editors.
- After running the command, RTE content is migrated across each entry of the specified content type.


.svg?format=pjpg&auto=webp)
.svg?format=pjpg&auto=webp)
.png?format=pjpg&auto=webp)


.png?format=pjpg&auto=webp)