

.svg?format=pjpg&auto=webp)
.svg?format=pjpg&auto=webp)
.png?format=pjpg&auto=webp)


.png?format=pjpg&auto=webp)
Error Notification
The Error Notification feature warns users when they encounter an error during automation configuration. Execution log records this error, and the recipient is notified via email.
Follow the steps below to configure the error notification settings for your automation:
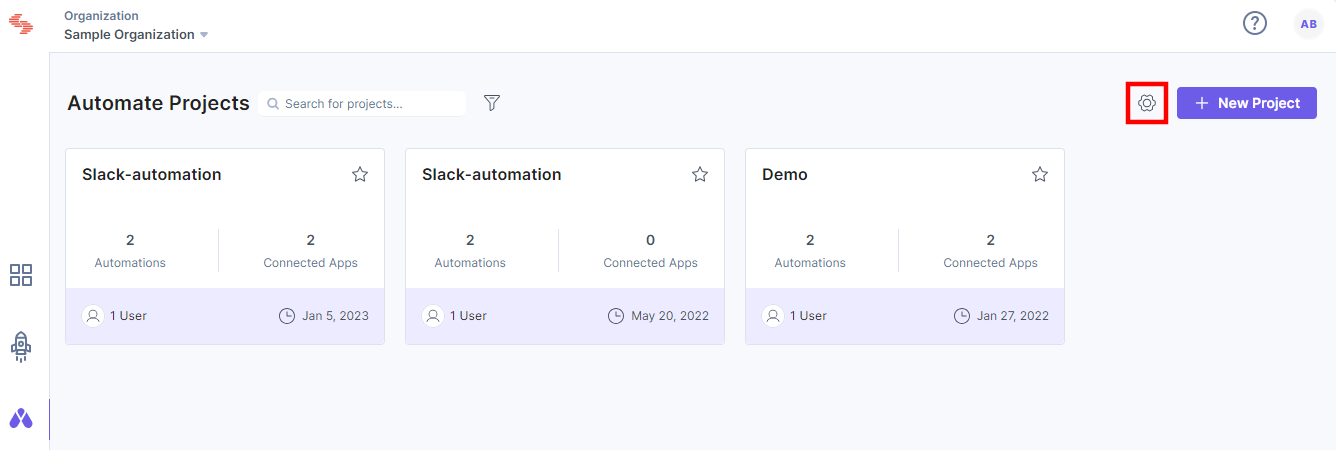
- Log in to your Contentstack account.
- In the left navigation panel, click Automate.
- Within the Projects page, click the Settings icon next to the + New Project button.
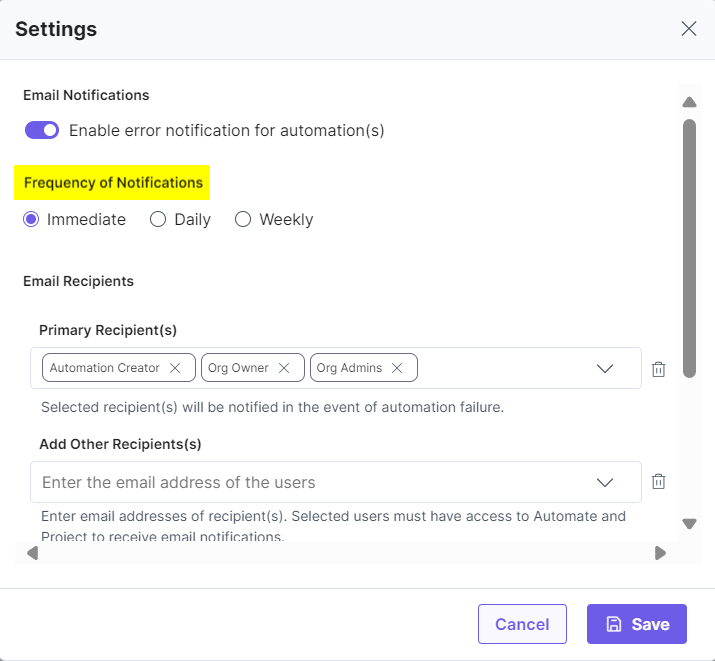
- Within the Automate Settings modal, enable the Email Notifications toggle button to send an email notification to the recipients. You can select multiple users to send emails at once. Choose the Primary Recipient(s) from the dropdown, i.e., Automation Creator, Org Owner, or Org Admins. You can also select other users who can access Automate and the respective Project from the Add Other Recipients(s) dropdown. After adding recipients, click Save to save your settings.
If you select the recipient as Automation Creator, Org Owner, or Org Admins, then the email notification will be sent to the creator of that automation, owner, or admins of the organization.Note: By default, the setting is disabled. You can enable it from the Projects landing page.
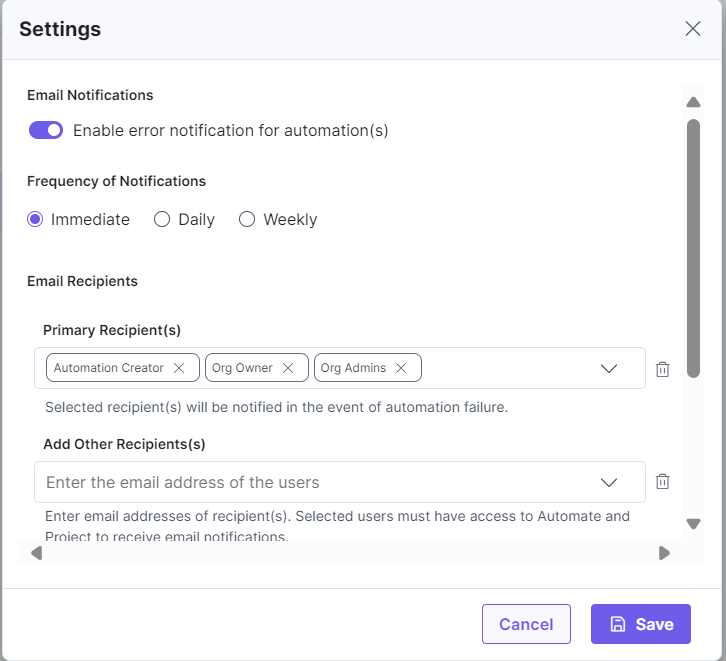
- By setting the Frequency of Notifications, you can send email notifications to the recipients Immediately, Daily, and on a Weekly basis.
Note: A report will be generated if you select Daily or Weekly frequency to send the notifications.
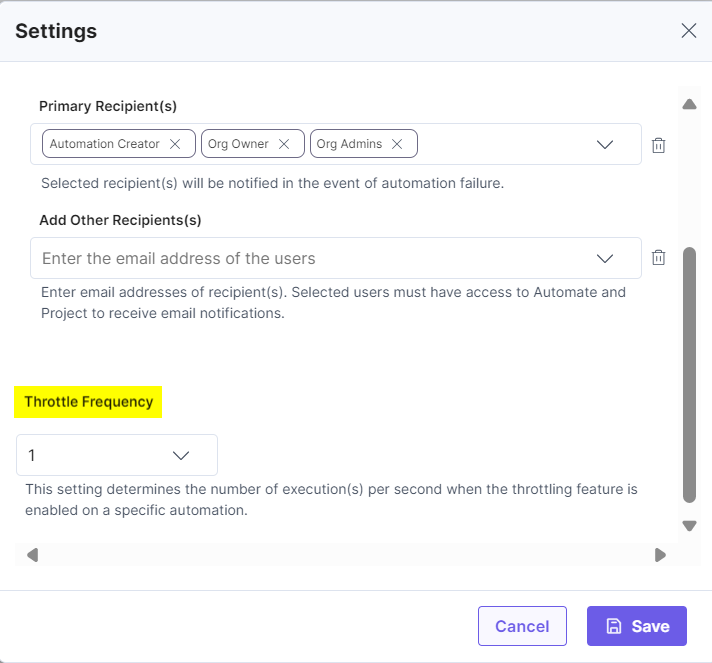
- Select the number of execution(s) per second for the Throttle Frequency to enable throttling for the organization. You can define the frequency of executing an automation if the throttling feature is enabled on a specific automation.
Suppose you select three executions per second; then, three requests will be executed in one second, which increases the speed of execution.
Note: You must enable the Throttle Execution toggle button that is available in the Settings of your automation to activate it.
Let’s understand how a recipient is notified via email through a simple use case. Create a new automation and follow the steps given below:
Configure Trigger
- In the Configure Trigger section, click HTTP.
- Select HTTP Request Trigger and click Proceed.
Note: You can add security to the HTTP trigger using an API key. To do so, enable the toggle button.
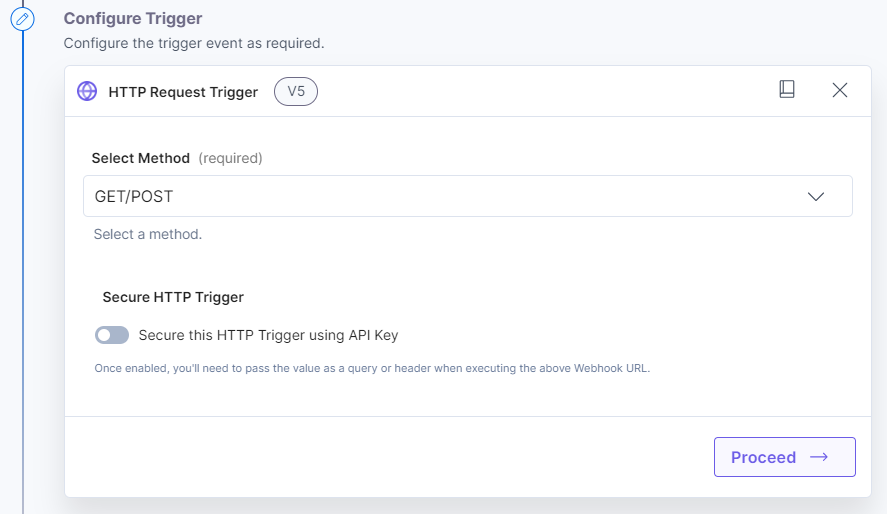
- Send a request to the URL mentioned. Once done, click Test Trigger.
- Click Save and Exit.
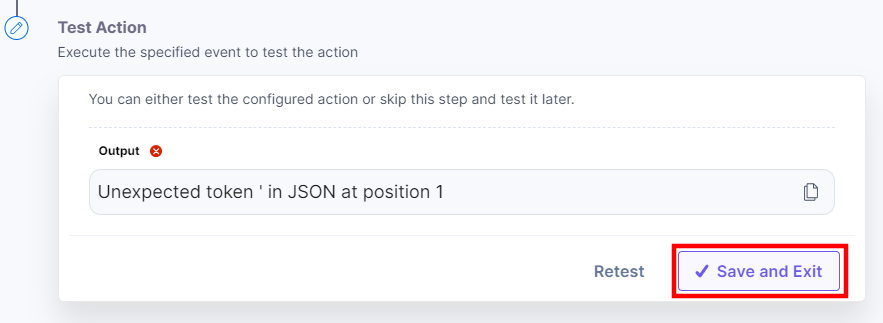
Configure Action
Select the Transform connector and the Transform action.
- In the Transformation box, input the data as for ex: {'name': 'Error Notification'}. The JSON syntax for the transformation box data is incorrect. It is kept so to check if the user gets error notification for the same. Click Proceed.
- Click Test Action. You will get an error message. Click Save and Exit.
- Once done, enable the automation and navigate to the Execution Log section.
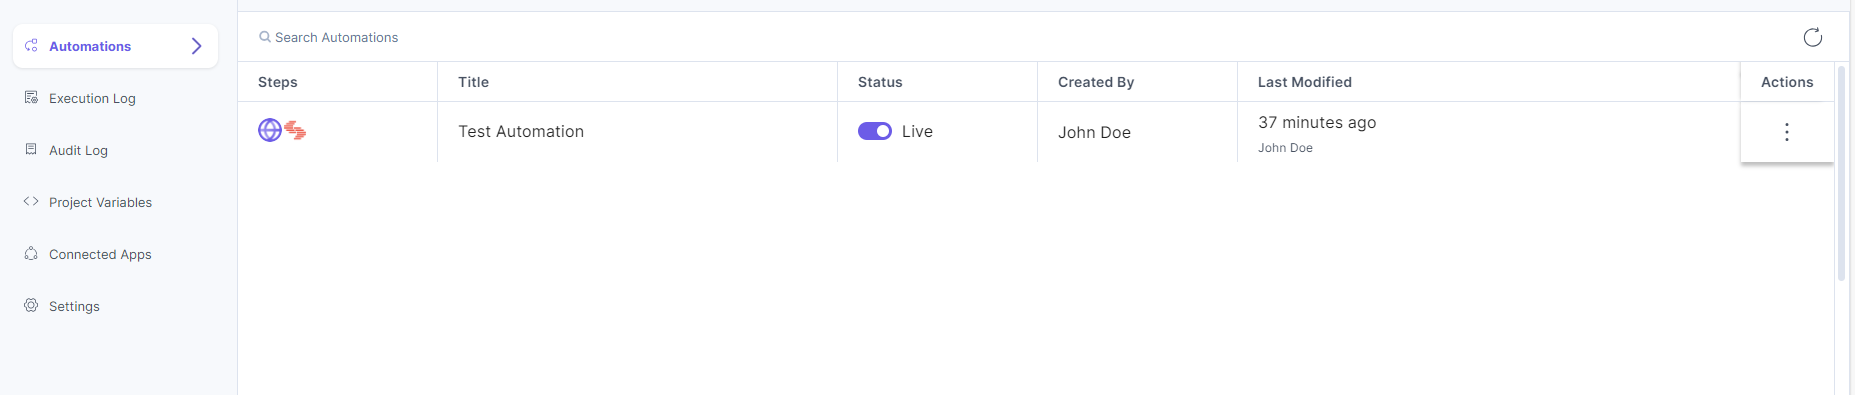
Send the request to the URL mentioned in the HTTP Trigger to execute the automation.
- You will see a failed execution in Execution Log.

- Navigate to the email client to check the email received for this error.
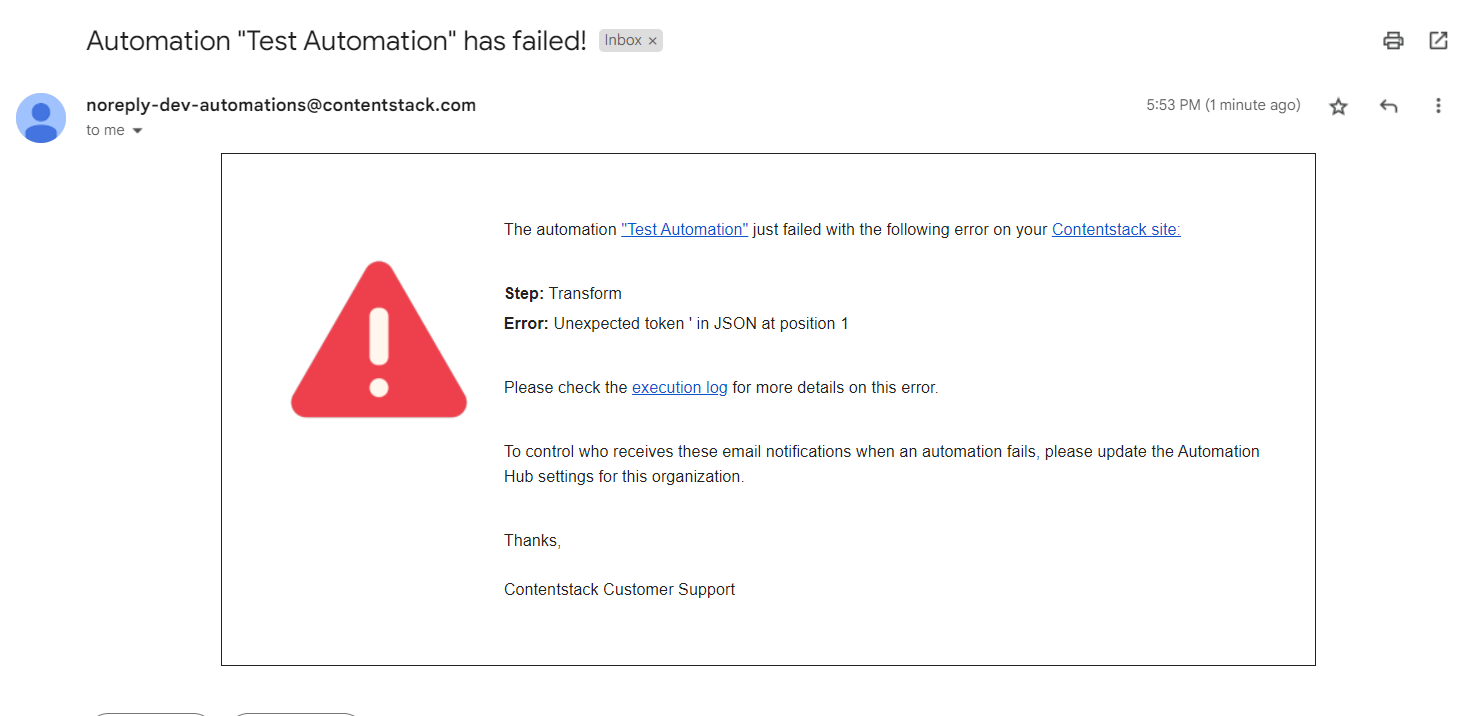
With Error Notification, you can get an instant response for your failed or unsuccessful automations.
More articles in "More about Automate"
