How to Export Audiences
Learn how to export audiences as a CSV for custom integrations.
Exporting Audiences via CSV
Introduction
Note: On January 10, 2023, we upgraded our UI with a new, refreshed interface. All of the underlying functionality is the same, but you will notice that things look a little different from this Academy guide. The most notable change is that the navigation menu has moved from the top of the app to the left side. We appreciate your patience as we work on updating our Academy.
In this tutorial, we'll introduce how to export audiences from Lytics to external sources, using the Lytics Custom Integration for SFTP and Email exports.
- How to export a CSV from the Audiences section of the UI
- How to export a CSV from the Jobs section of the UI
This option is recommended when debugging or exporting to third-party systems that do not have a direct integration with Lytics. Custom exports can be made via CSV.
There are many out-of-the-box integrations to run export jobs from Lytics to external sources, this is just one. The basic principles described in the following sections are standard when using any one of our integrations.
Find the full list of supported integrations on Learn Lytics.
Video Tutorial
Watch the "How to Export Audiences" video (3.5 mins) for a walk through of how to export an audience as a CSV from the audiences tab in Lytics.
If no fields are selected to export in the configuration, then ALL user fields will be included.
A. True
B. False
Answer: True
Which of the following are configuration options?
A. User limit
B. File compression
C. Custom delimiter
D. All of the above
E. None of the above
Answer: D
Start a New Export
Now we'll show another way you can export audiences via CSV starting from the Jobs section of the Lytics UI.
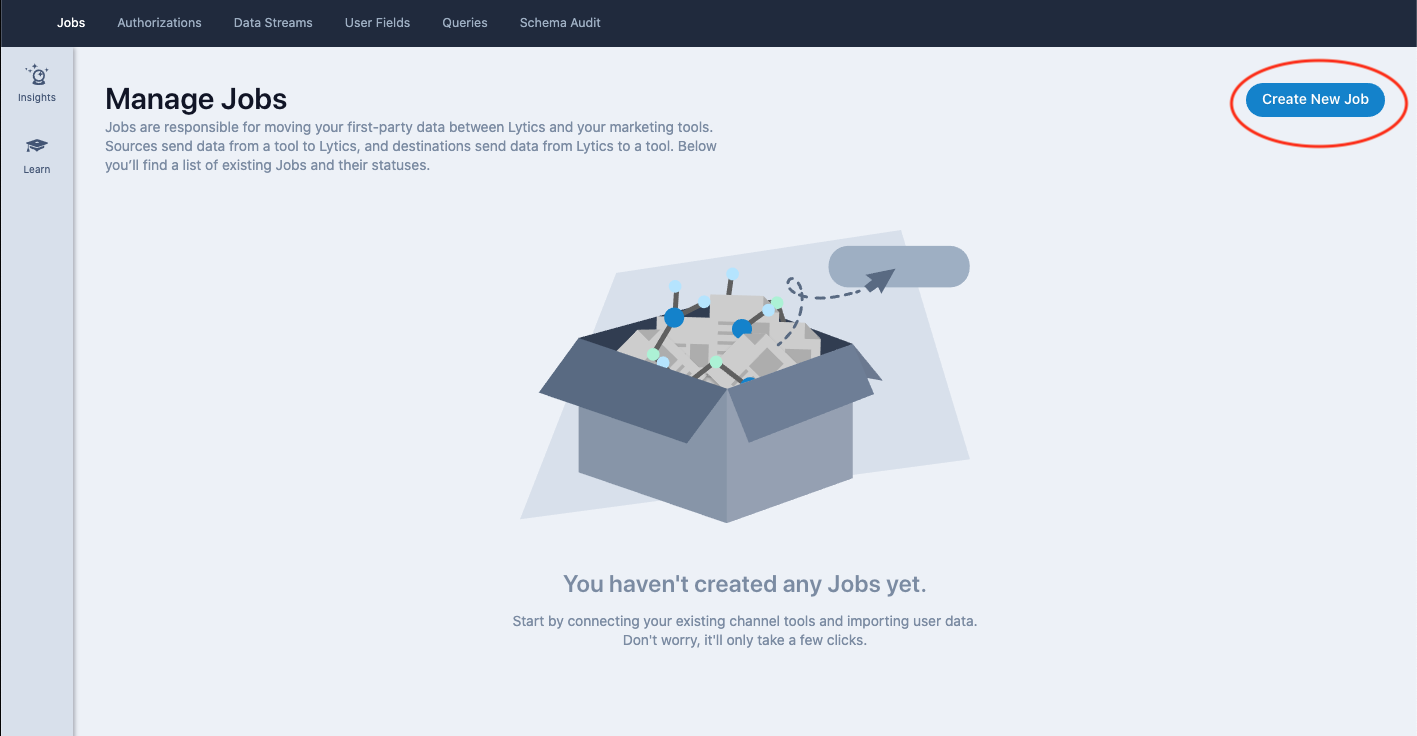
- In your Lytics account, navigate to Data > Jobs and click the Create New Job button in the upper right corner.
Select the integration tile (use the search bar at the top for faster results).
In this example we will select Custom Integrations, which will export CSV data to either an email address or to a SFTP account.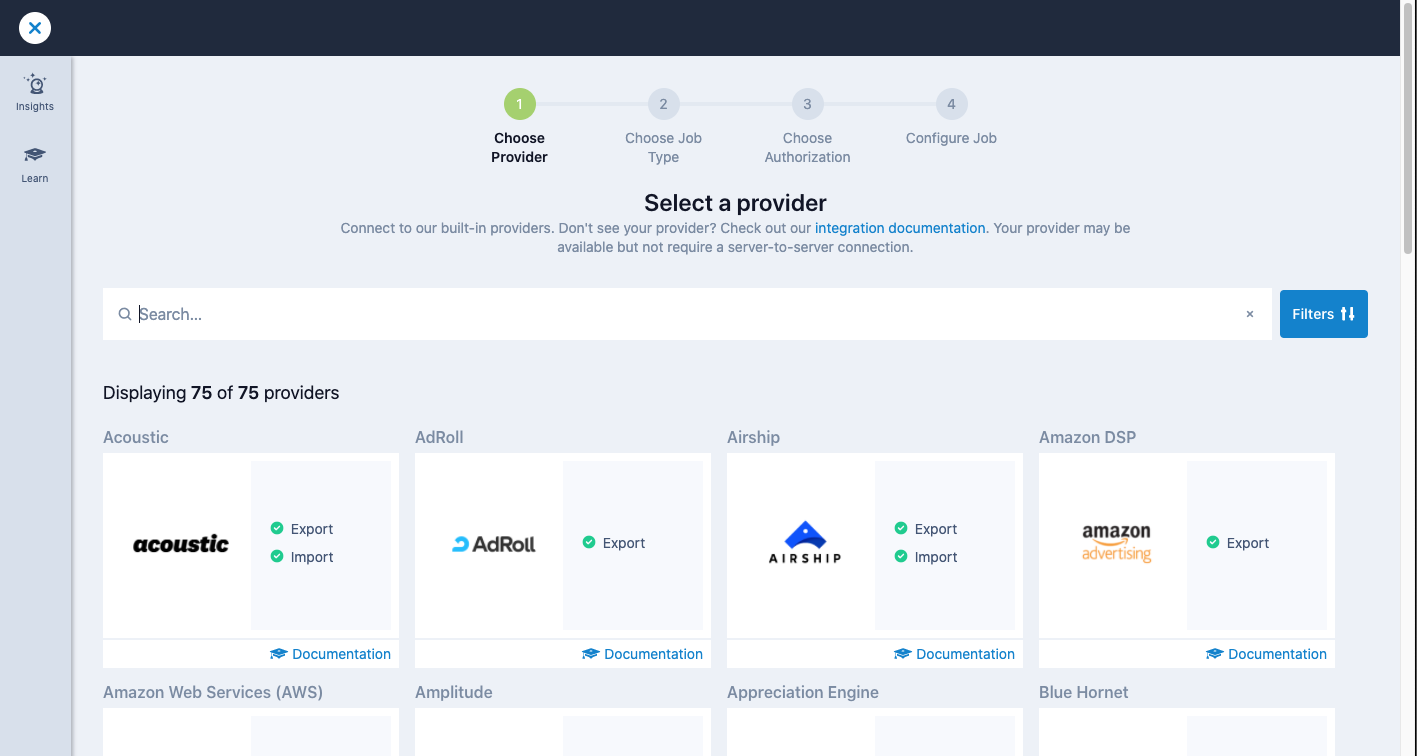
Authorize Custom Export
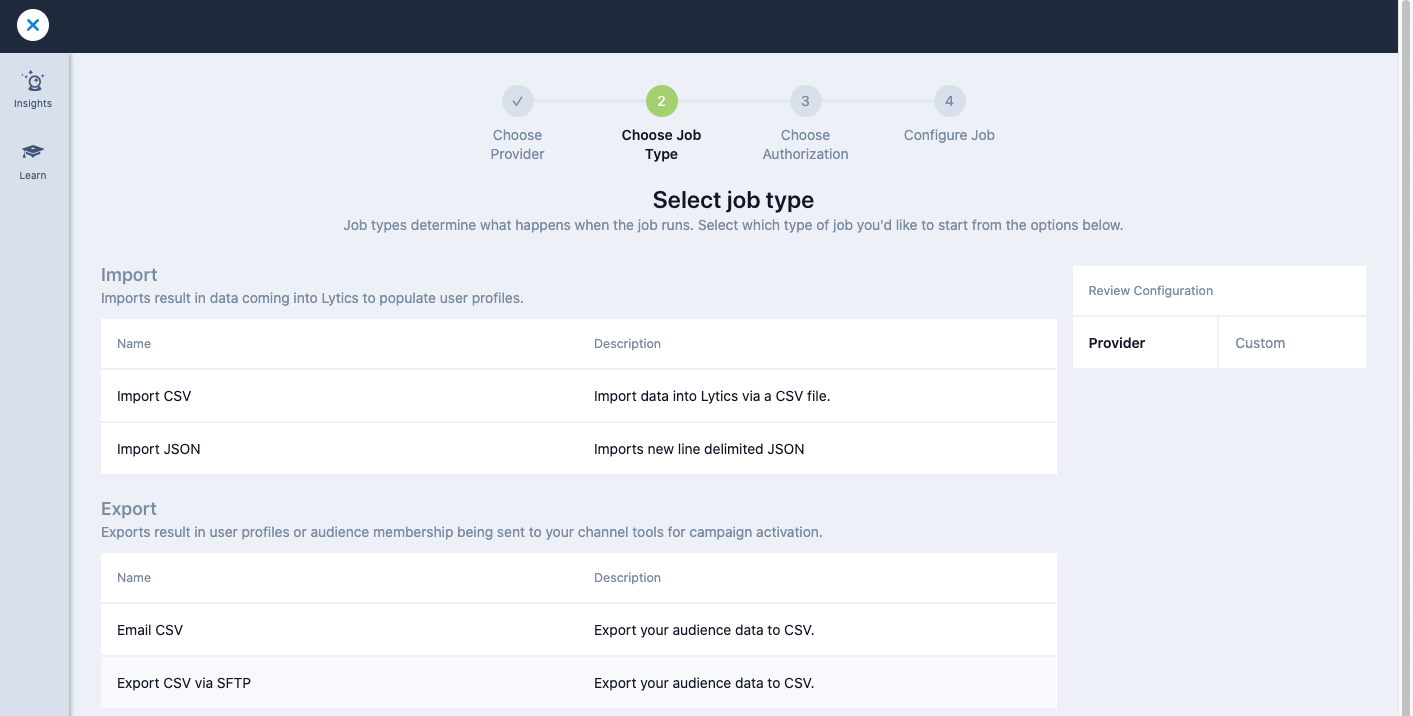
- Under the Export options select CSV via SFTP.
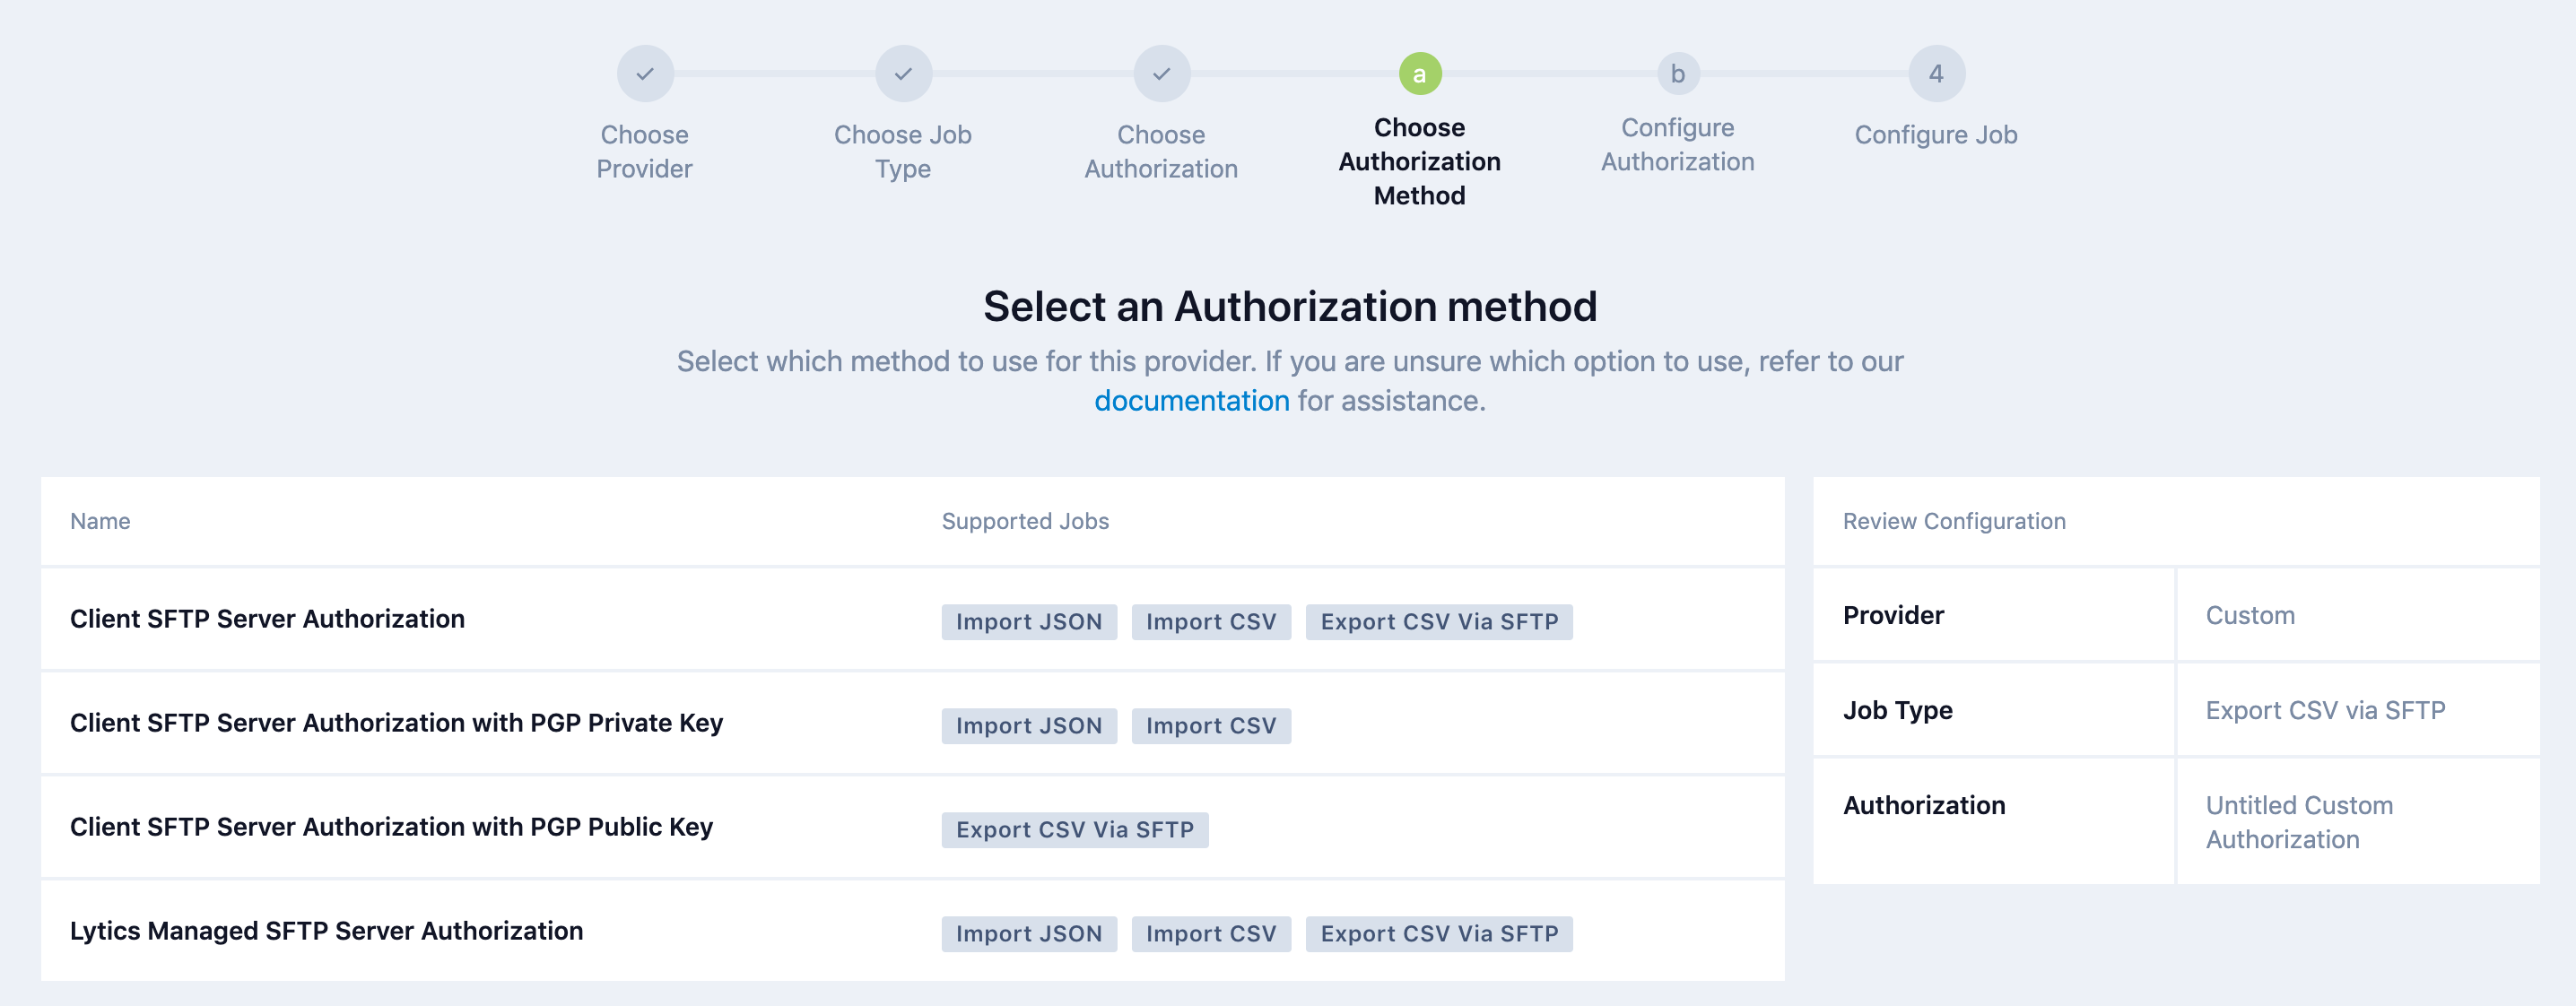
- If an authorization for an SFTP account has not been established or you do not have access to the SFTP authorizations listed to extract the file, click the Create New Authorization button.
- When setting up a new authorization there are several options. In this case we will create a Lytics Managed SFTP Server Authorization which will generate an SFTP account you can access via an external SFTP tool.
- Fill out the label and Description with meaningful detail and create a username and password. Remember the username and password since you will need this to access the SFTP account via FTP client.
Do you need to have an authorization setup for a Custom Export to a SFTP instance?
A. Yes
B. No
Answer: A
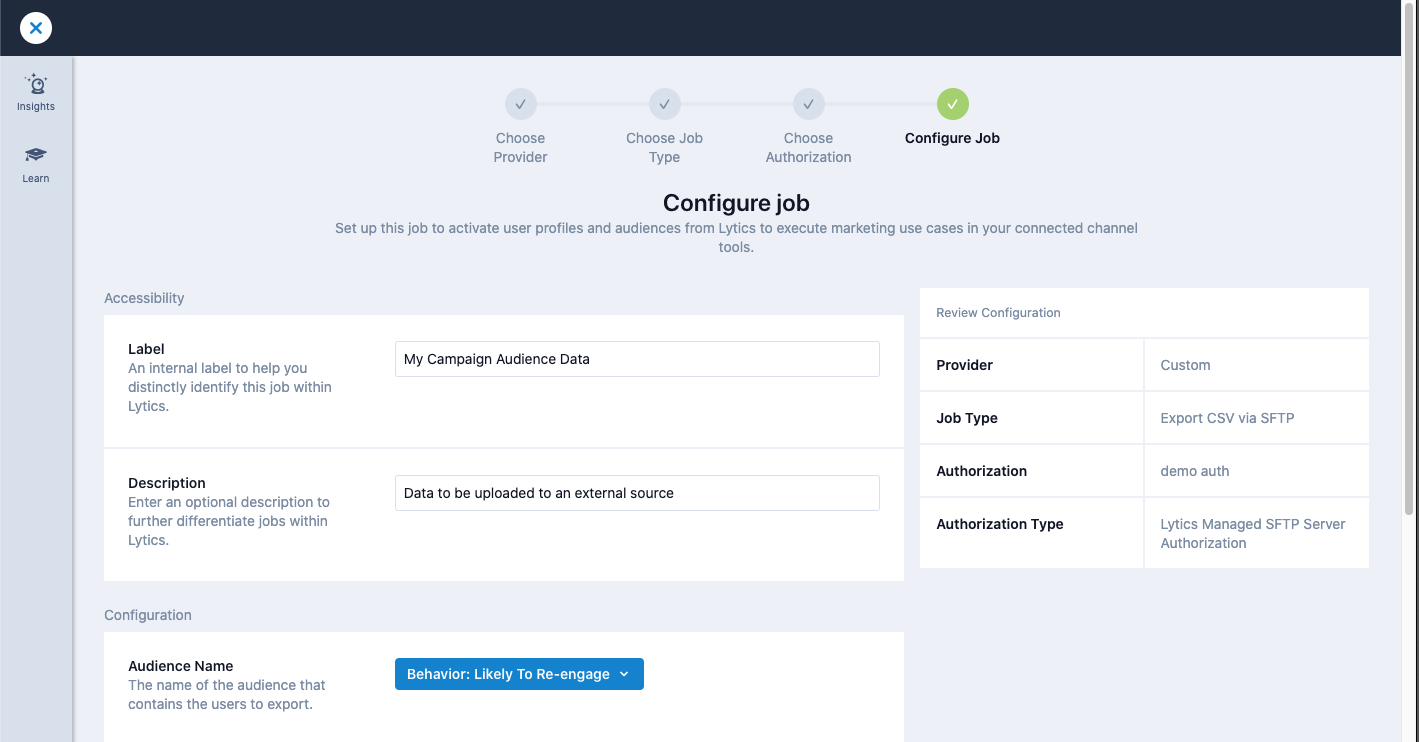
Configure Export
- After a SFTP Server Authorization has been created, you can use this for more exports as needed.
- The last step is to configure the job to export an audience. Depending on the needs such as a one-time export or continuous export, the job will have to be set up differently. Please see our Custom Integrations: CSV Export documentation for all configuration options.
If you select the continuous export option, you have three options for how often to export the file: daily, weekly, or monthly.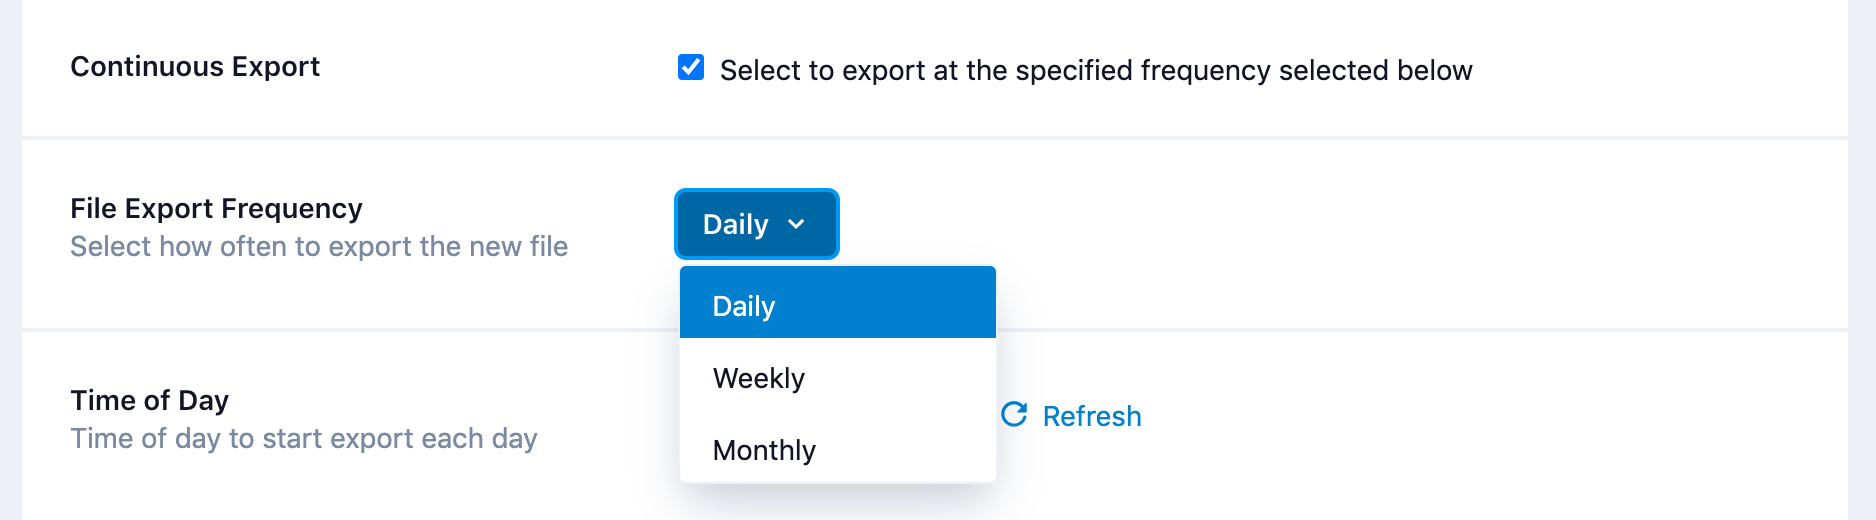
You can export new files continuously on a _____ basis. Select all that apply.
A. Hourly
B. Daily
C. Weekly
D. Monthly
Answer: B, C, D
Export Results
- Once the export has been completed, it will sit in the job queue list under Data > Jobs, where you can see its current status.
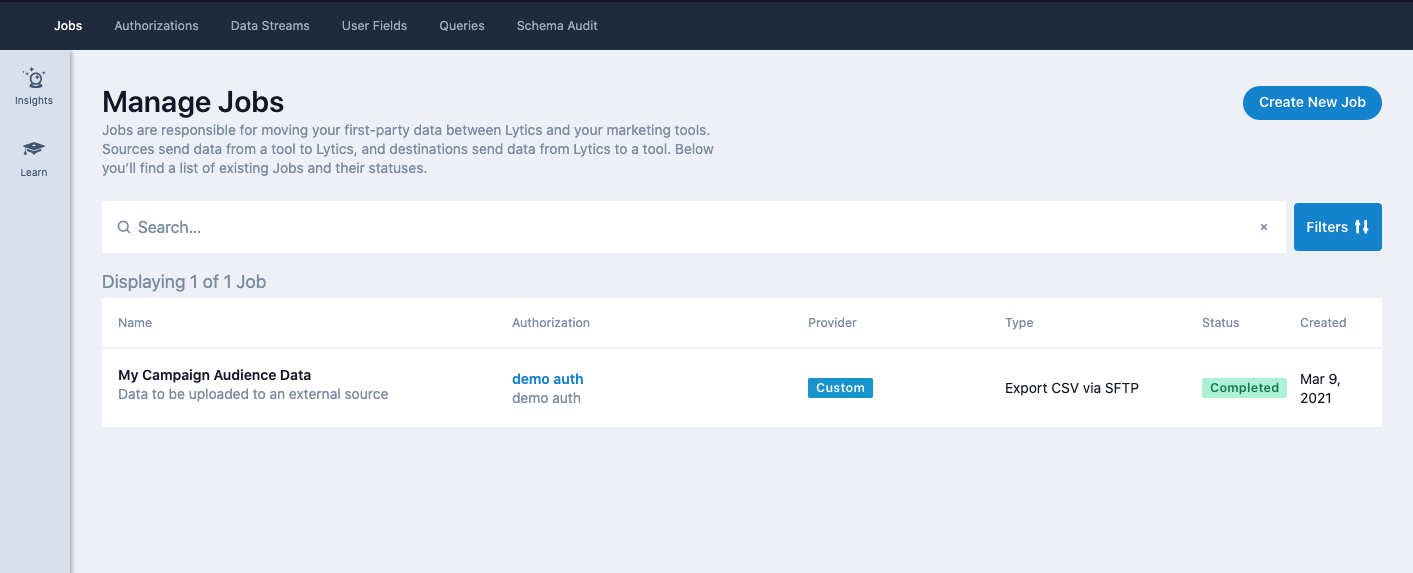
- Once the audience export is ready the status will be Completed in the Jobs section and you can go to an FTP client and access the data.
Simply add the host name (sftp.lytics.io), port number (22), user name <what you chose>, and password <what you chose>.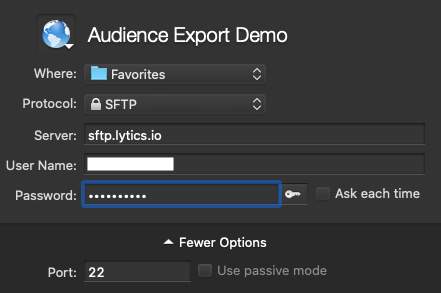
Thanks for completing this tutorial on how to export audiences as a CSV. Below are recommended resources to continue learning.
Academy Courses
- Connecting Integrations
- Jobs and Authorizations