

.svg?format=pjpg&auto=webp)
.svg?format=pjpg&auto=webp)
.png?format=pjpg&auto=webp)


.png?format=pjpg&auto=webp)
Shopify App Installation Guide | Old Version
Shopify is a leading commerce platform for businesses of all sizes. It allows you to set up an online store to sell your products.
With the Contentstack Marketplace Shopify app, you can use and refer to the products from your Shopify account within your Contentstack entries.
Prerequisites
- Shopify account
- Shopify store
- Contentstack account
- Access to the Contentstack Organization/Stack as the Owner/Admin
This step-by-step guide explains how to install and configure Shopify within your stack.
The steps to be performed are as follows:
- Get your Storefront API access token from Shopify
- Install and Configure Shopify in Contentstack Marketplace
- Use Shopify within your Stack
-
Get your Storefront API access token from Shopify
To get your credentials from Shopify, follow the steps given below:
- Log in to your Shopify account.
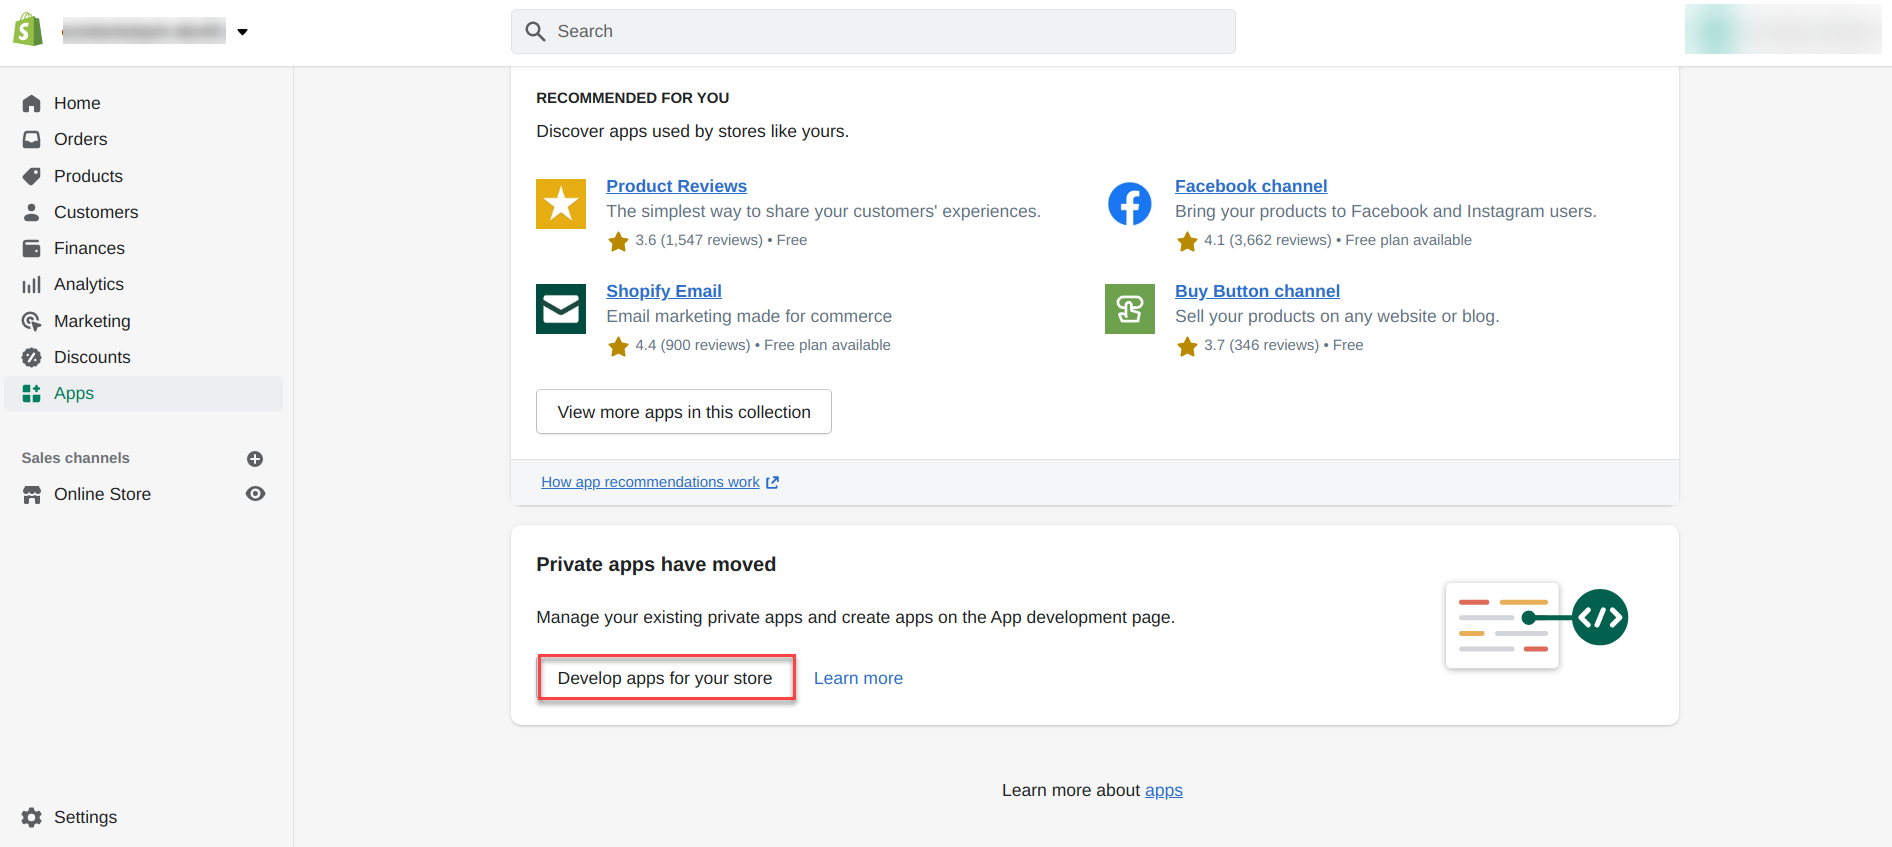
- On the Admin portal page, click Apps from the left navigation menu.
- Navigate to the bottom of the Apps page and click the Develop apps for your store link.
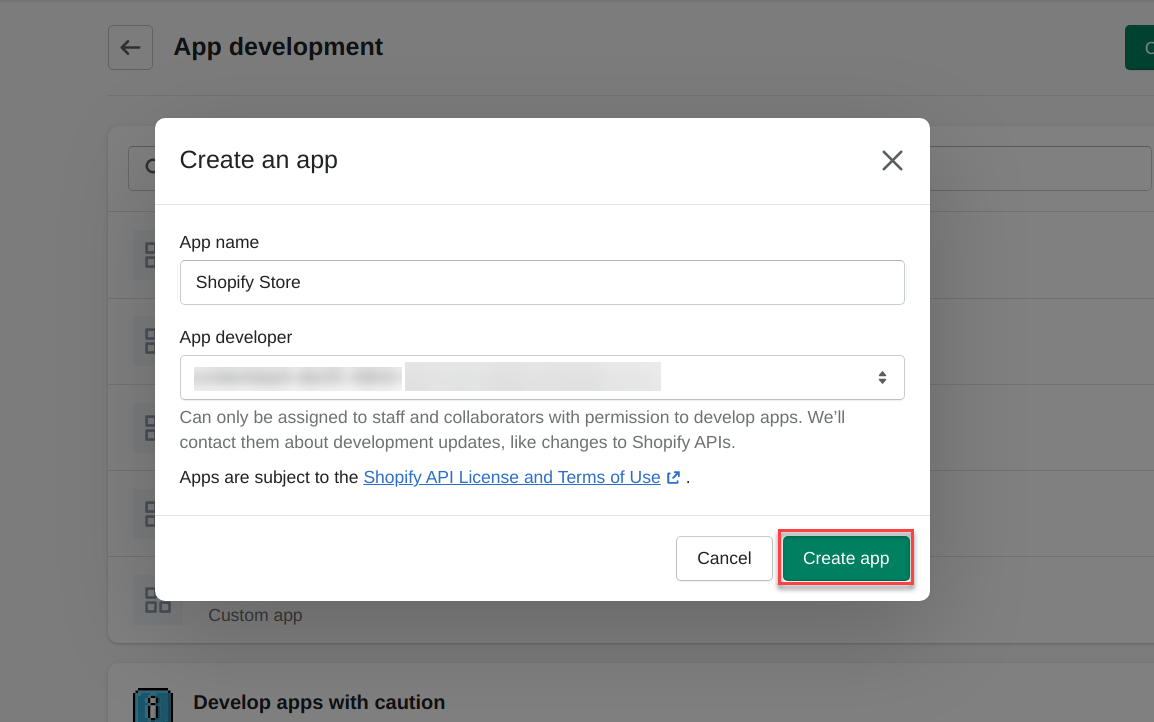
- On the App Development page, click Create an app. Mention your App name and select the App developer of your app, then click the Create app button.
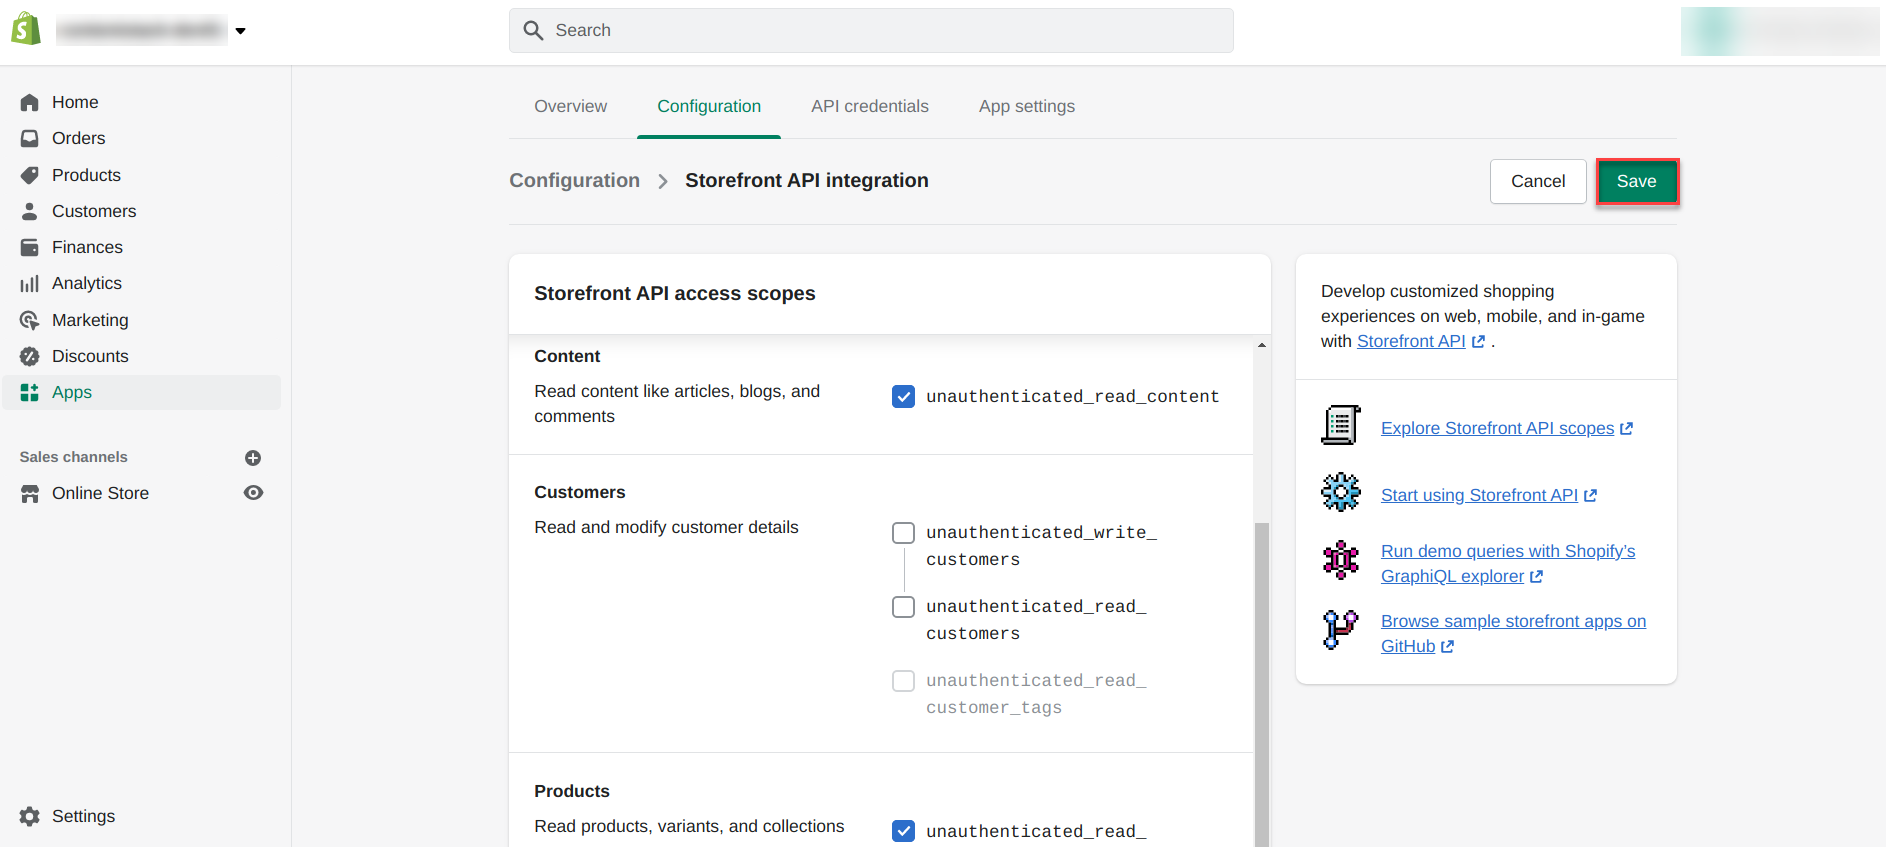
- On the next screen, navigate to the Configuration section and configure the Storefront API integration for your app.
- Select the access scopes for your Storefront API and Save your configuration.
- Finally, click the Install app button, confirm your installation, and proceed to get the Storefront API access token.
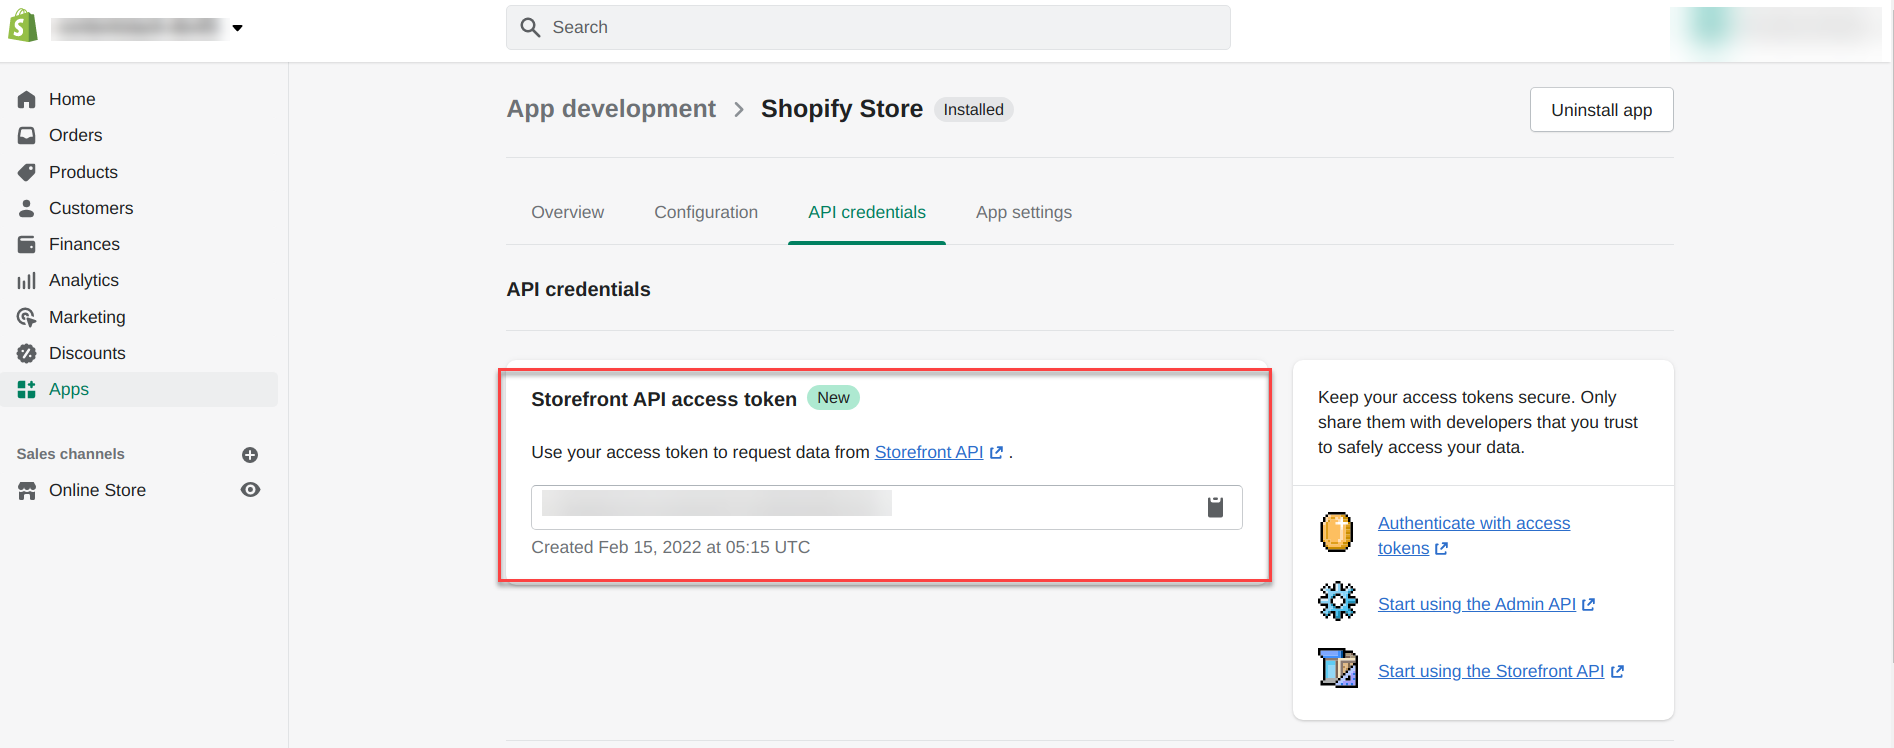
Note: The Storefront API access token is required to connect your store with Contentstack. Make a note of this access token to be used in the next step.
Install and Configure Shopify in Contentstack Marketplace
To install the application in Contentstack, follow the steps below:
- Log in to your Contentstack account.
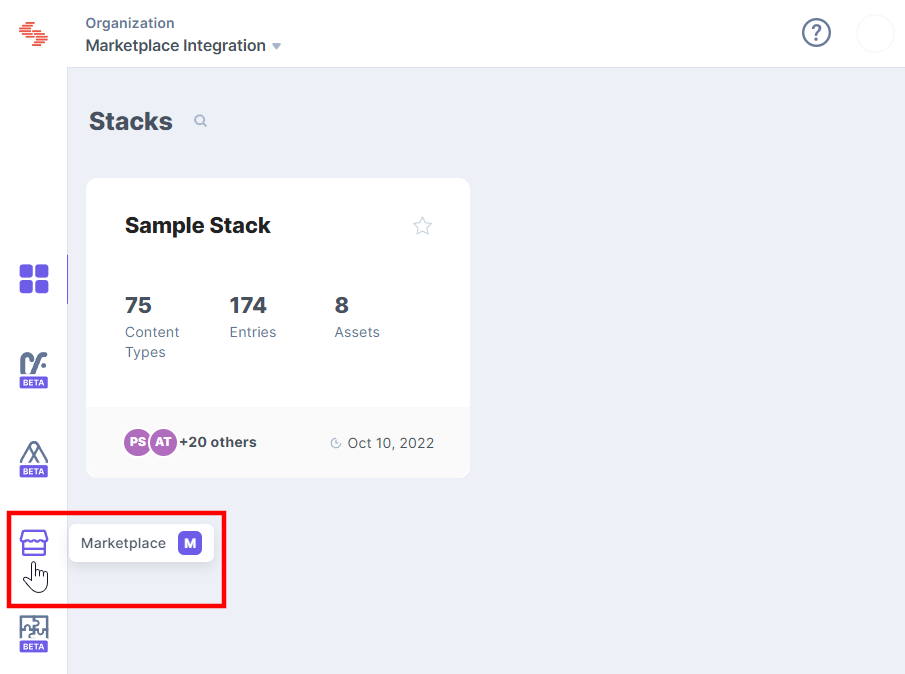
- In the left-hand side primary navigation, click the Marketplace icon to go to the Marketplace.
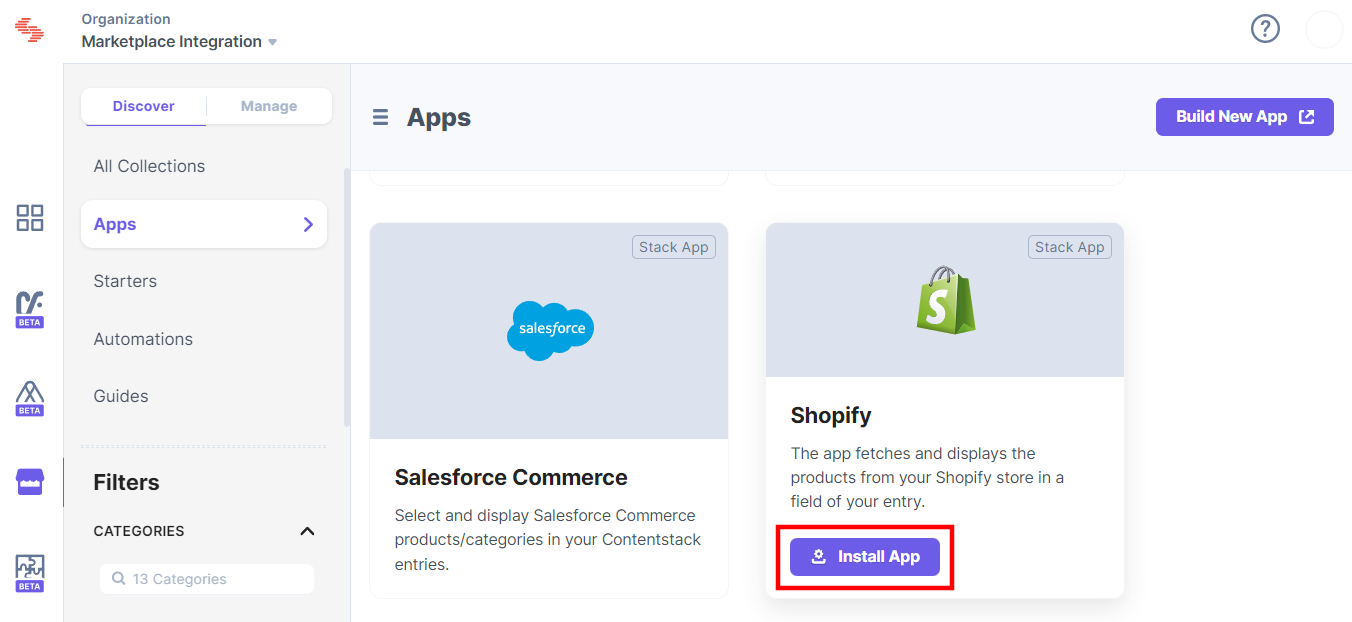
- Within the Marketplace, you can see all the apps available; hover over the Shopify app and click the Install App button.
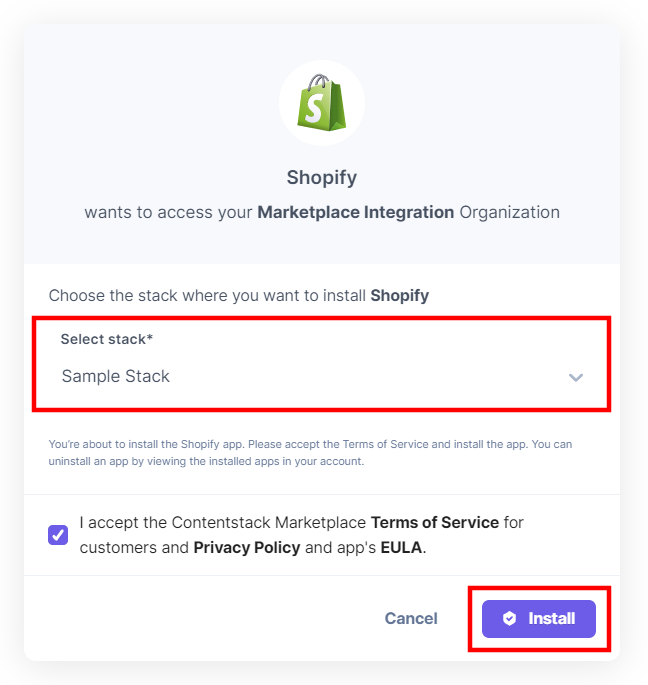
- Select the stack for which you want to install the Shopify app and click the Install button.
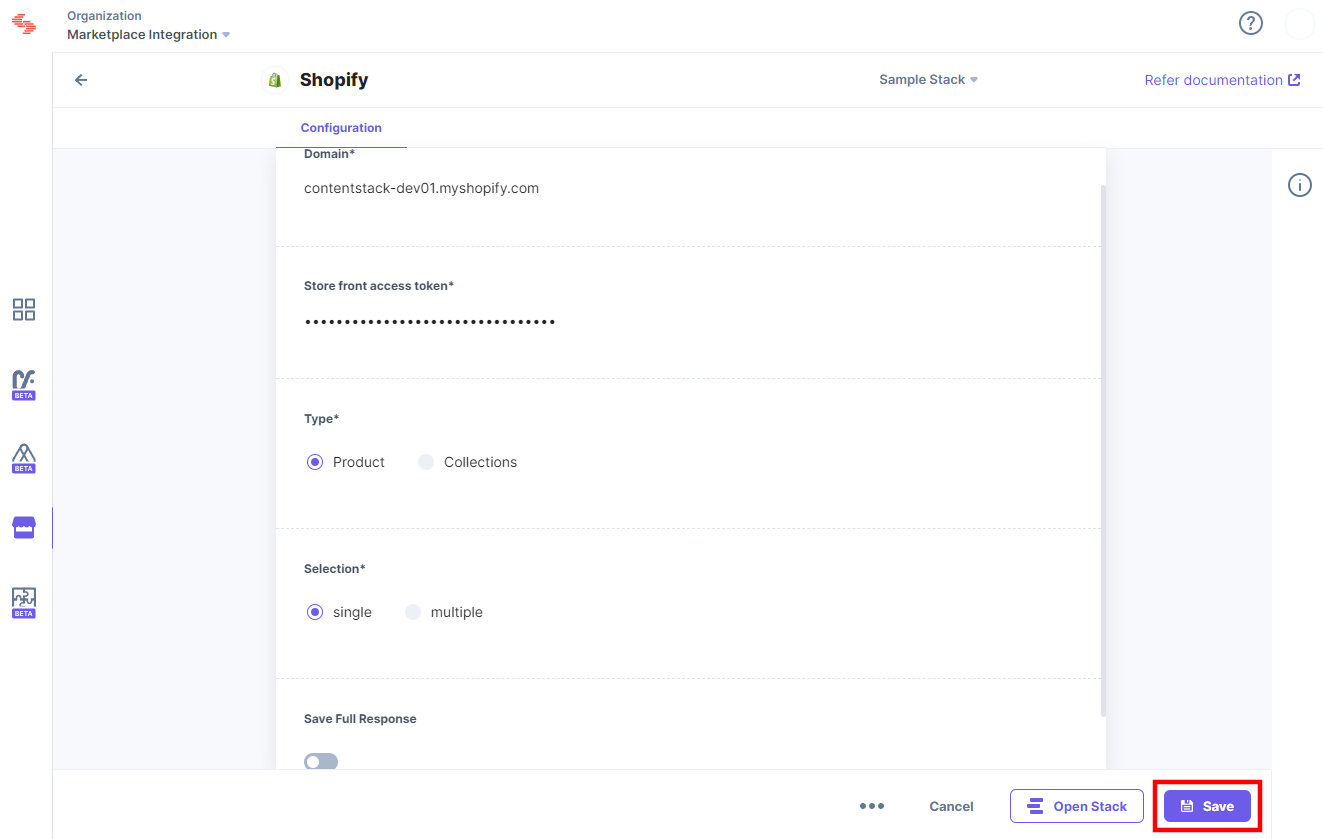
- Enter the Domain and Storefront API access token on the resulting Configuration page and click the Save button.
- Click the Open Stack button to start using the Shopify application.
Use Shopify within your Stack
To use the Shopify application within an entry of your stack, follow the steps given below:
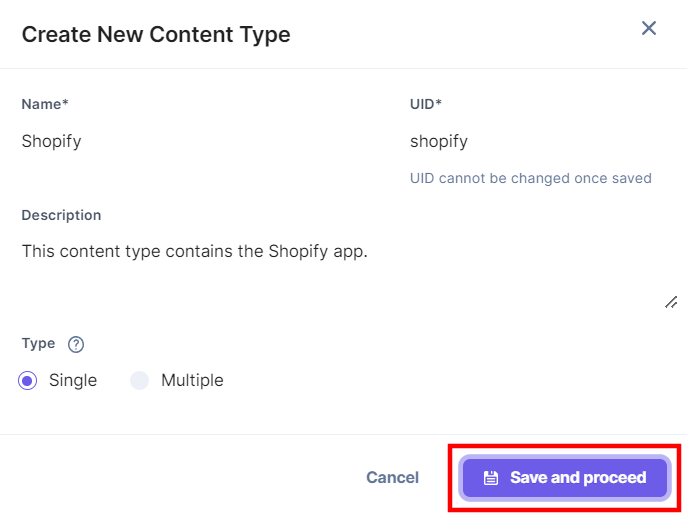
- Go to your stack and click the Content Models icon on the left navigation panel, and click the + New Content Type button.
- Create a content type by adding relevant details as displayed below:
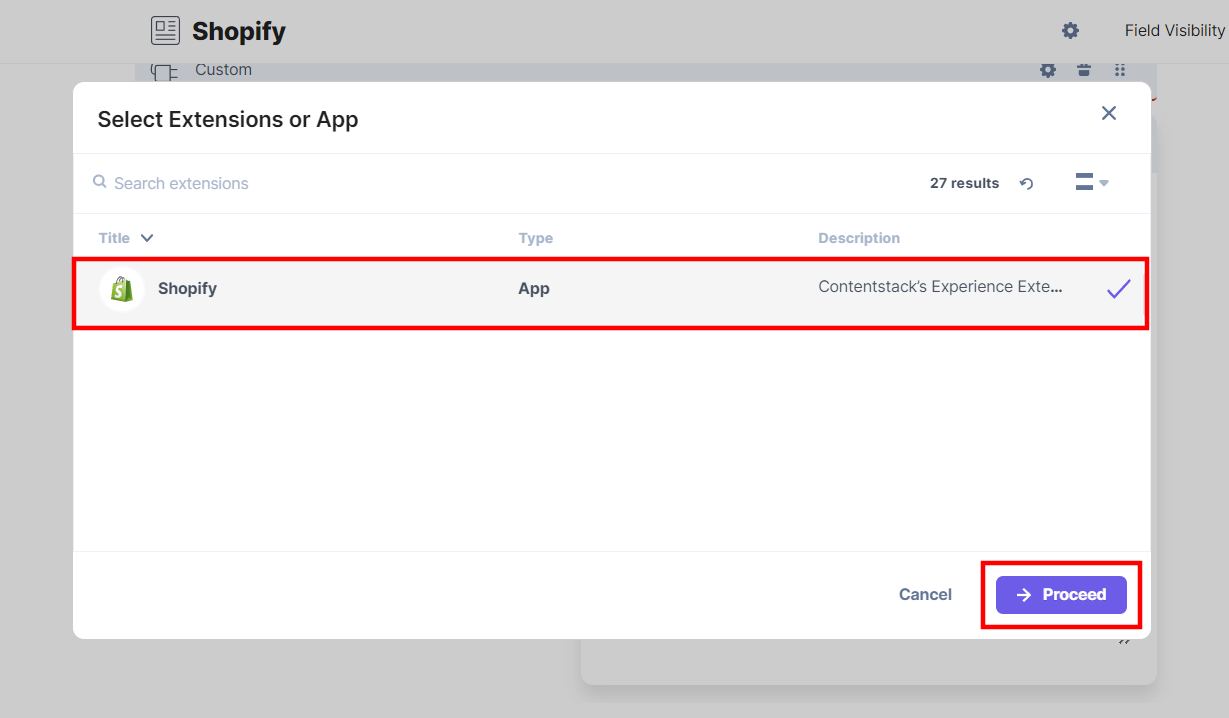
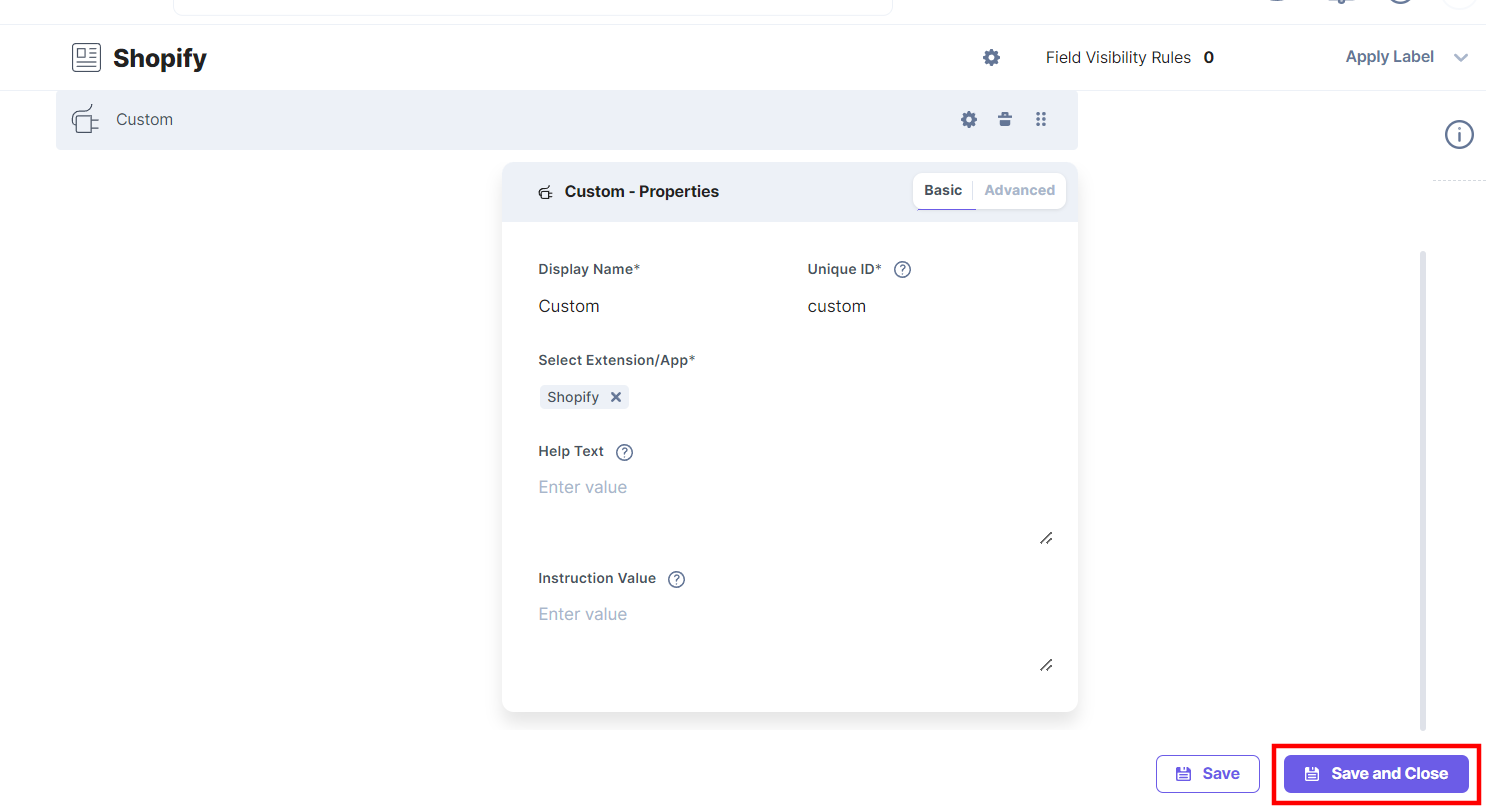
- In the Content Type Builder page, add a Custom field in your content type by clicking the Insert a field link represented by a + sign.
- Under Select Extension/App, select Shopify and click the Proceed button.
- After adding the app, click Save or Save and Close to save your changes.
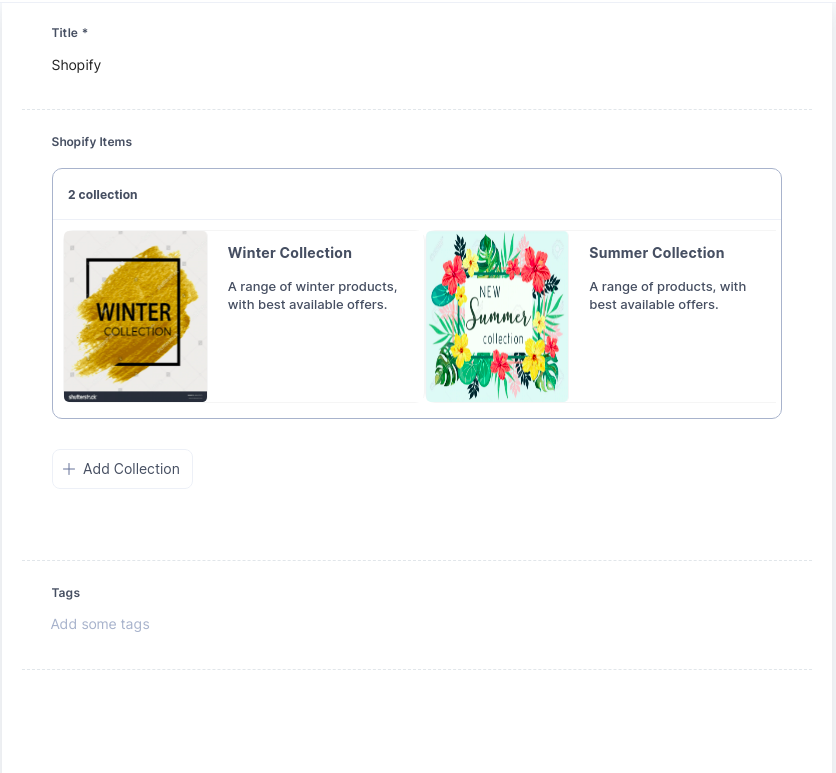
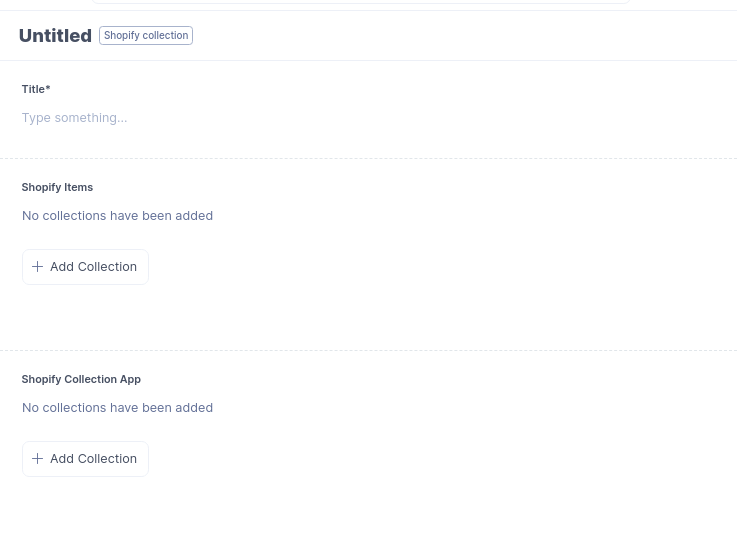
- To use the Shopify app, create an entry for this content type, and you will see the Shopify custom field on your entry page as shown below:
- Click the Add Collection button, to select collections from your Shopify account and add them to your entry.
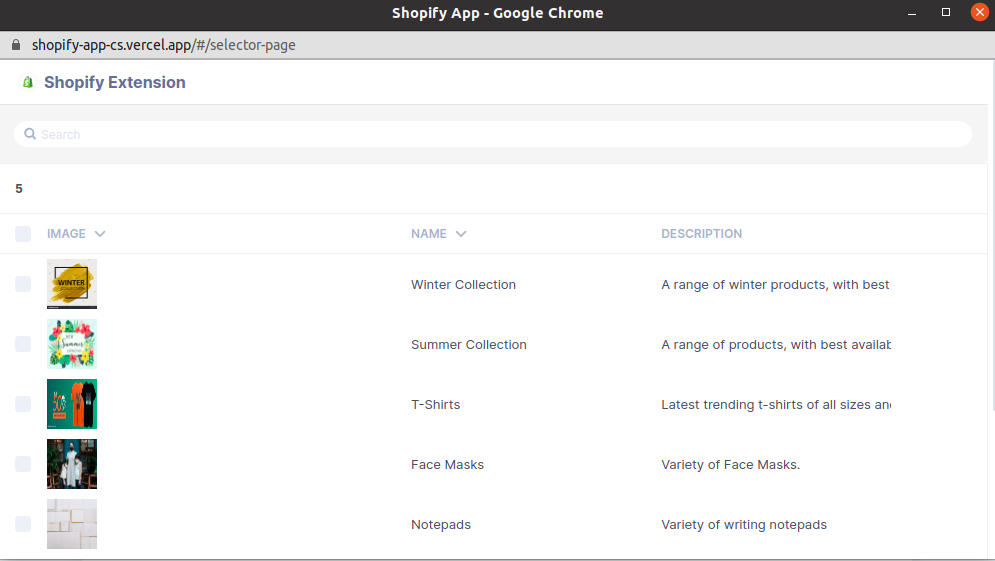
- The collections you select are referenced within your entry. You can add more collections by clicking the Add Collection button. Finally, Save your entry.
More articles in "Commerce"
