

.svg?format=pjpg&auto=webp)
.svg?format=pjpg&auto=webp)
.png?format=pjpg&auto=webp)


.png?format=pjpg&auto=webp)
Akeneo App Installation Guide
Akeneo is an open-source product information management system that enables enterprises to create, maintain, and distribute their entire product catalog across multiple channels. It simplifies translation workflows, ensures consistency across every channel, streamlines collaboration on product information, and provides intuitive analytics to optimize product selection.
With the Contentstack Marketplace Akeneo app, you can add products and categories from Akeneo account within your Contentstack entries via Custom Fields. You can also view the product details and search for the products directly in the Sidebar Widget.
Prerequisites
- Akeneo account
- Contentstack account
- Access to the Contentstack Organization/Stack as the Owner/Admin
Let's follow this step-by-step guide to install and configure the Akeneo app within your stack.
Steps for Execution
- Retrieve Configuration Details from Akeneo
- Install and Configure the Akeneo app in Contentstack Marketplace
- Use Akeneo within your Stack
-
Retrieve Configuration Details from Akeneo
To get your configuration details for Akeneo, follow the steps given below:
- Log in to the Akeneo account using your Akeneo account credentials.
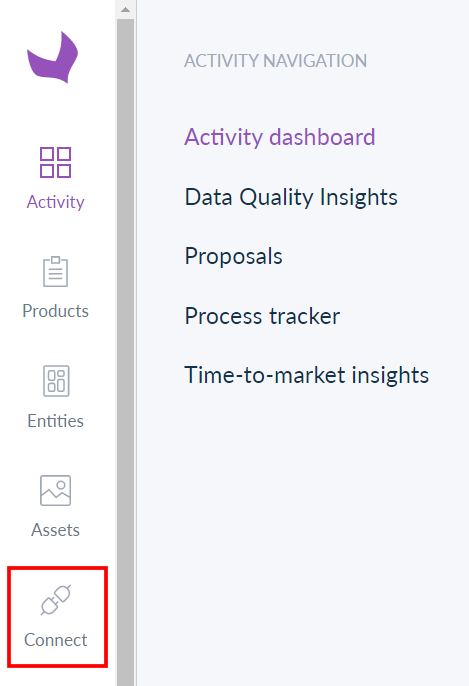
- In the left navigation panel, click Connect.
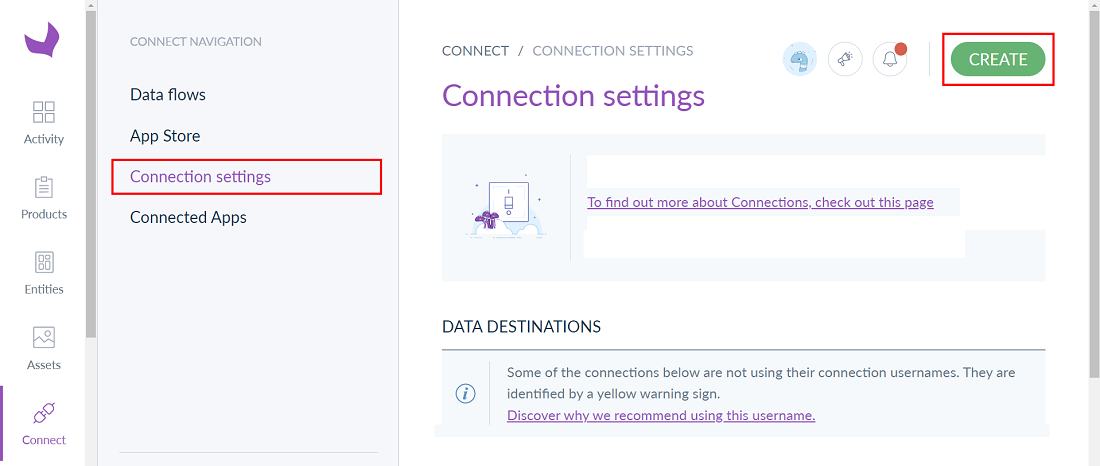
- Click Connection settings from the left-hand side Connect Navigation panel, and then click the CREATE button.
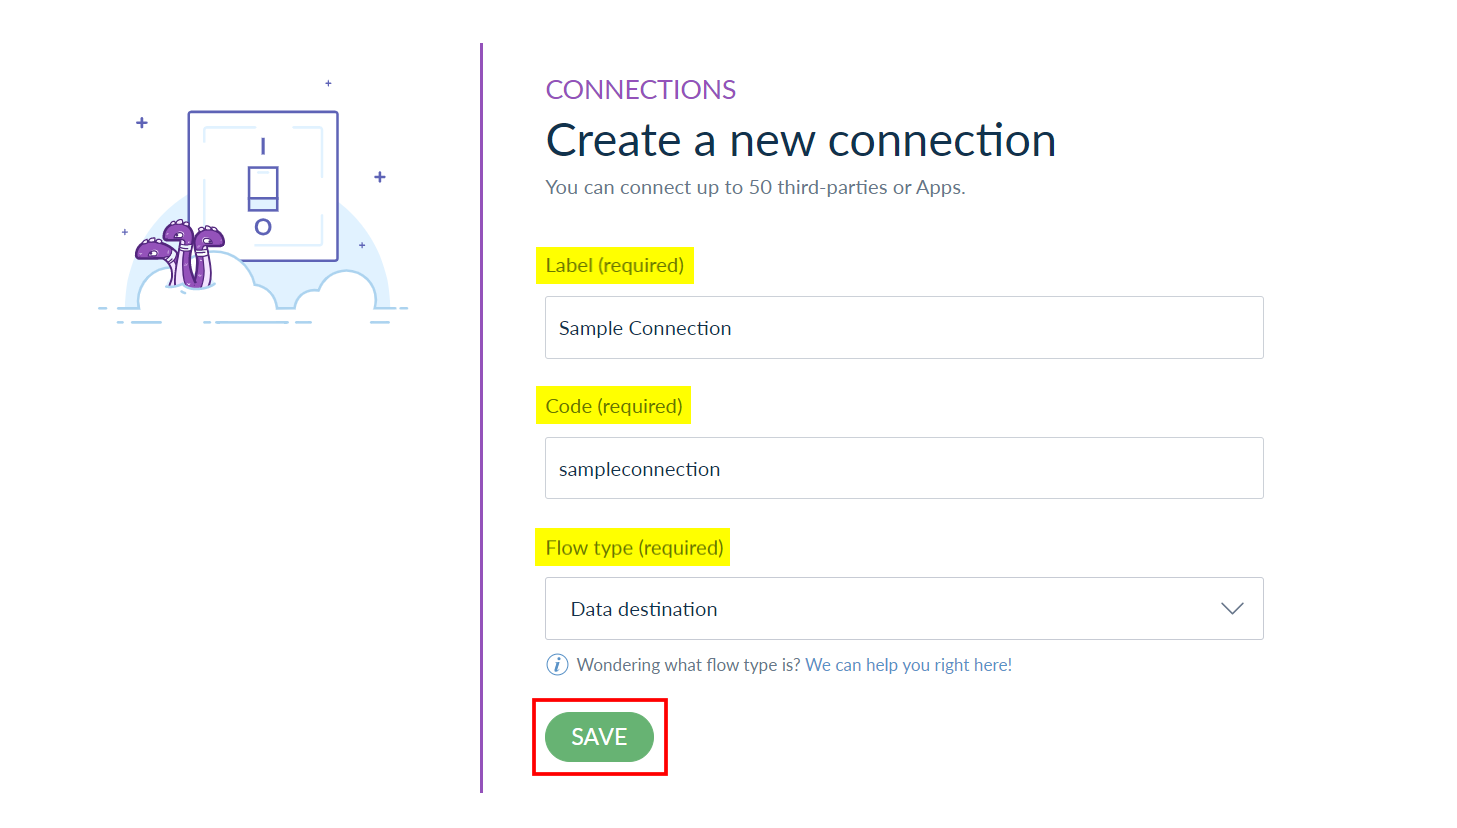
- Enter the Label, Code, and Flow Type as Data destination, then click the SAVE button.
- You can see the Akeneo app configuration details - Client ID, Secret, Username, and Password. Copy and paste the information to your clipboard.

Note: The Password is visible only once when you are creating a connection.
You can view your newly created connection under the Data Destination section.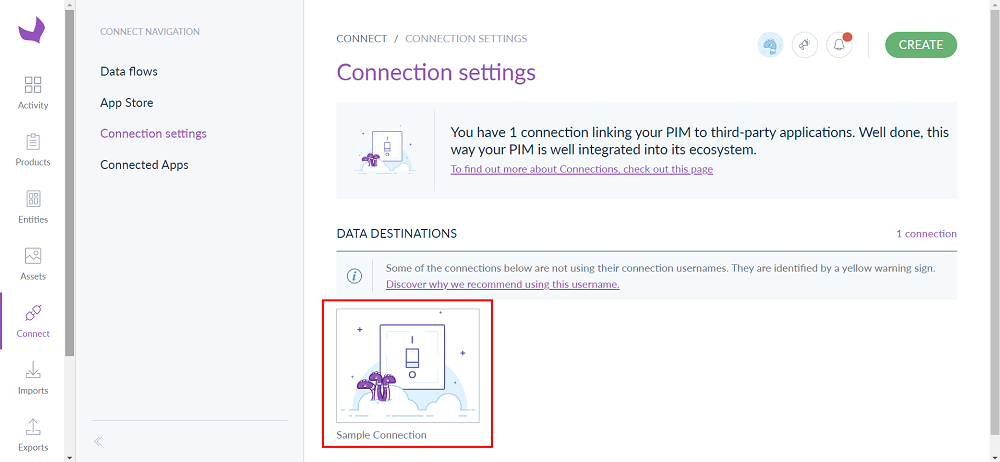
Note: Existing connection(s) can be directly viewed under the Data Destination section.
-
Install and Configure the Akeneo app in Contentstack Marketplace
Follow the steps to install the application in Contentstack.
- Log in to your Contentstack account.
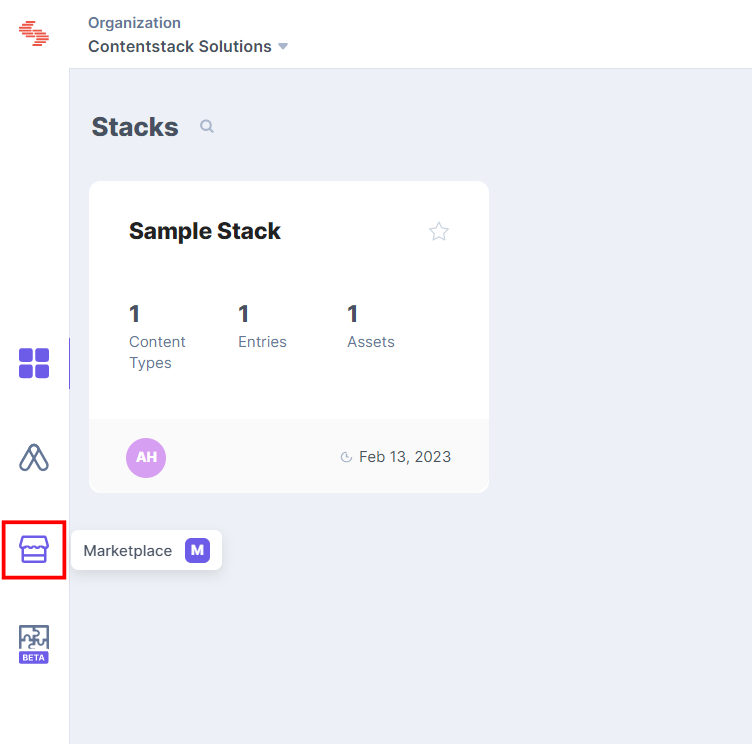
- In the left-hand side primary navigation, click the Marketplace icon to go to the Marketplace.
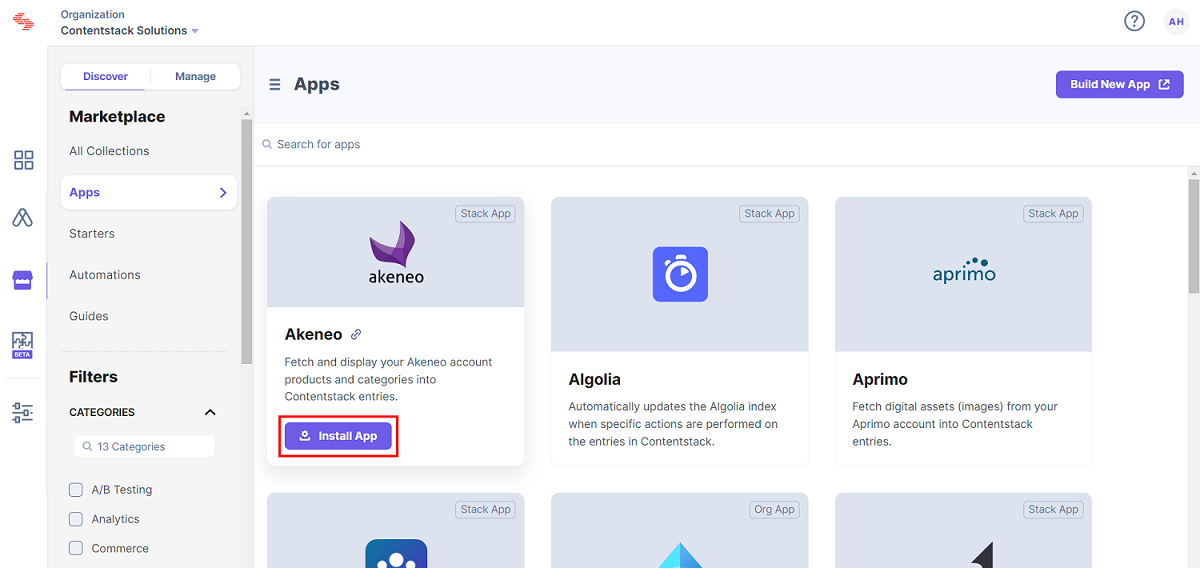
- Click Apps from the left panel.
- Within the Marketplace, you can see all the available apps. Hover over the Akeneo app and click Install App.
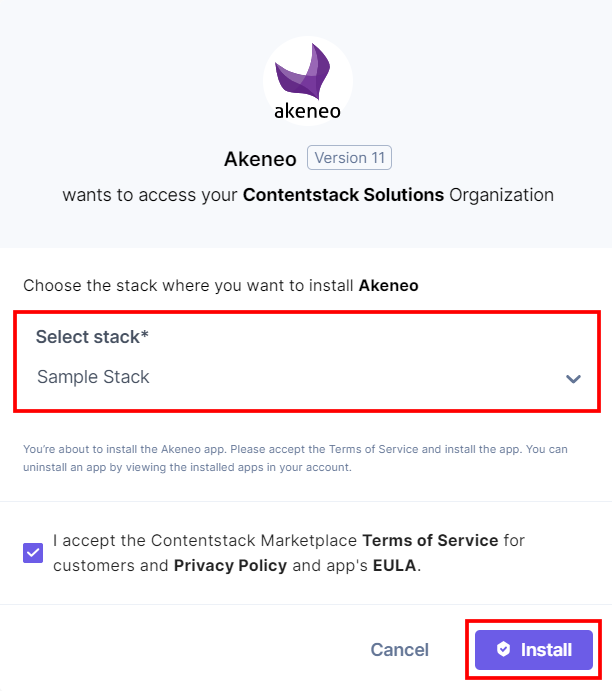
- In the popup window, select the stack where you want to install the Akeneo app and click the Install button.
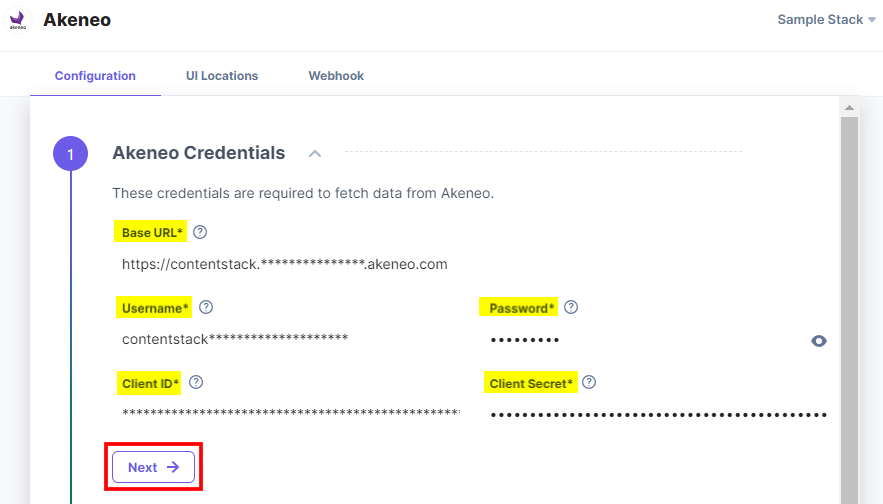
- On the Configuration screen, enter the following details:
- Akeneo Credentials:
- Enter the Base URL which is used to log in to your Akeneo Account. Akeneo provides you with your Base URL when you sign up.
- Enter the Username, Password, Client ID, and Client Secret retrieved from your Akeneo Account in step 1.
- Click the Next button.
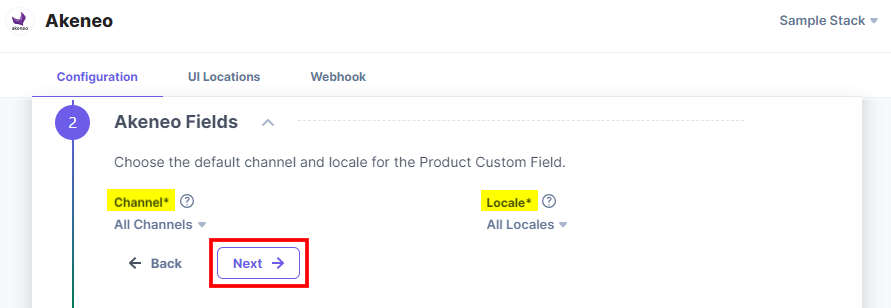
- Akeneo Fields:
- Select the default Channel from the dropdown from which the products will be fetched.
- Select the default Locale from the dropdown to display the product details.
- Click the Next button.
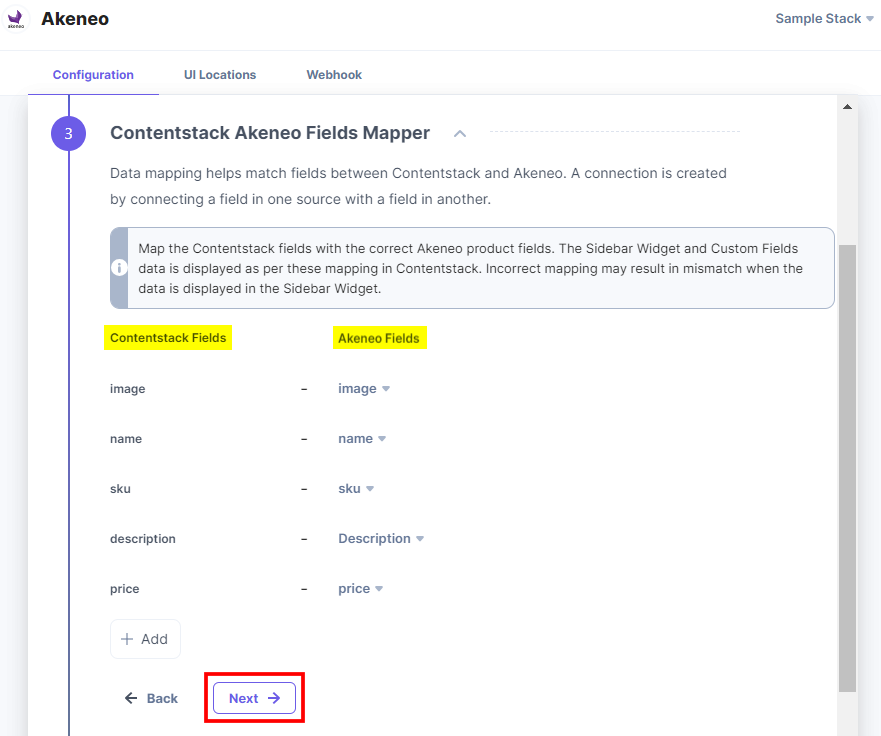
- Contentstack Akeneo Fields Mapper: Map the Contentstack fields with the Akeneo fields to fetch the product details. Image, name, sku, price, and description are the mandatory fields. You can also add and map other Contentstack Fields with their relevant Akeneo Fields.
Note: Contentstack fields display the product details in the Sidebar Widget and Custom fields. To avoid any mismatch, map the Contentstack fields with the correct Akeneo product fields.
- Click the Next button.
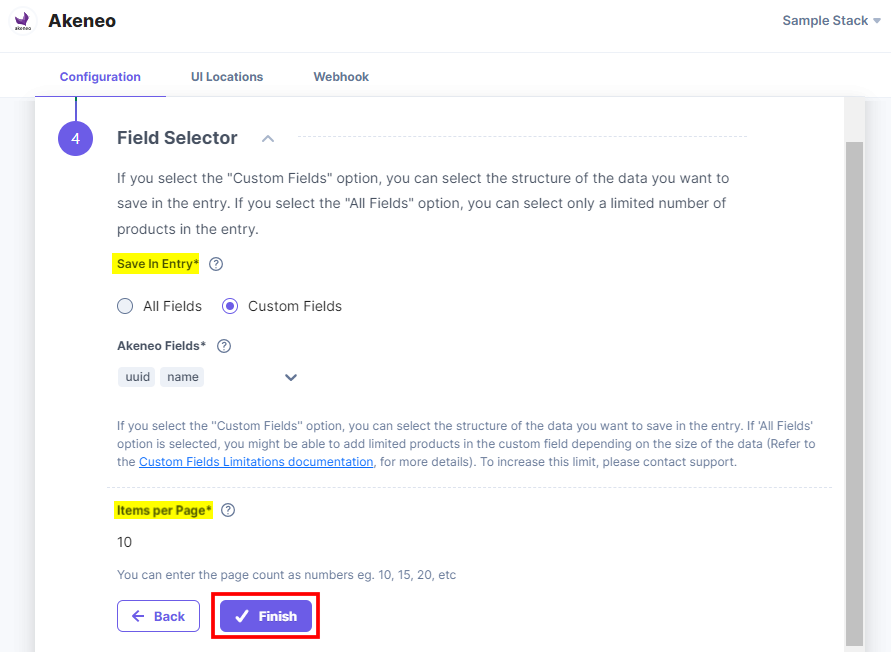
- Field Selector:
- Save in Entry: Choose how to save the data fetched from the Akeneo account in Contentstack entries.
- If you select the All Fields option, you can select only a limited number of products in the entry.
- For Custom Fields, you can search and add specific Akeneo Fields you want to save in entries. By default, the uuid and name of the products are selected.
- Items per Page: Enter the number of items you want to fetch and display on the Akeneo app selector page at a time.
Note: You can enter the page count as numbers, for example, 10, 15, 20, etc. The minimum page count should be ten.
- Save in Entry: Choose how to save the data fetched from the Akeneo account in Contentstack entries.
- Click the Finish button.
- Akeneo Credentials:
- On the UI Locations tab, you can see the predefined app locations. You can use the toggle button corresponding to each UI location to enable or disable it based on your requirements.
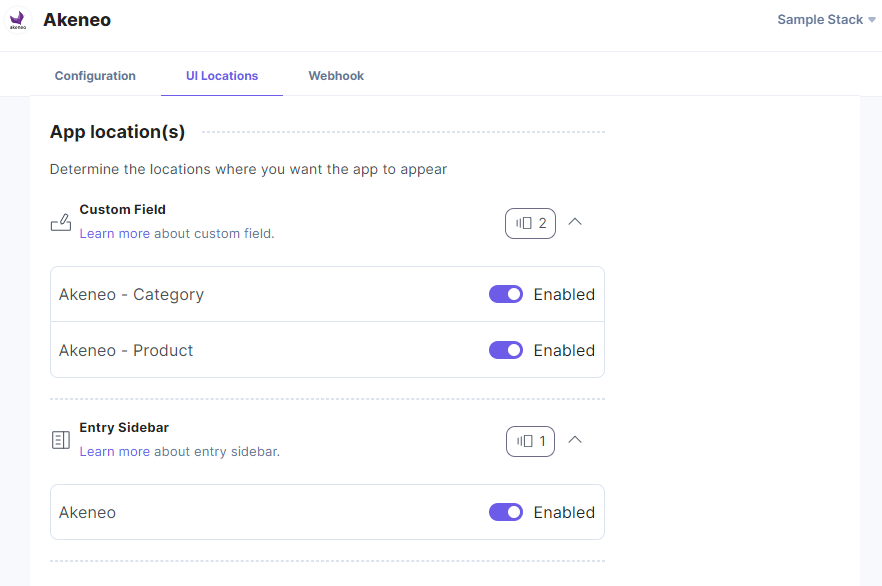
- If the webhook is enabled for your app, you can view the webhook logs under the Webhook tab.
- After configuring all the details, click the Save button.
- Click the Open Stack button to start using the Akeneo application.
Additional Resource: For more information on UI location and webhooks, please refer to the Installed Apps guide.
-
Use Akeneo within your Stack
To use the Akeneo application within an entry of your stack, follow the steps given below:
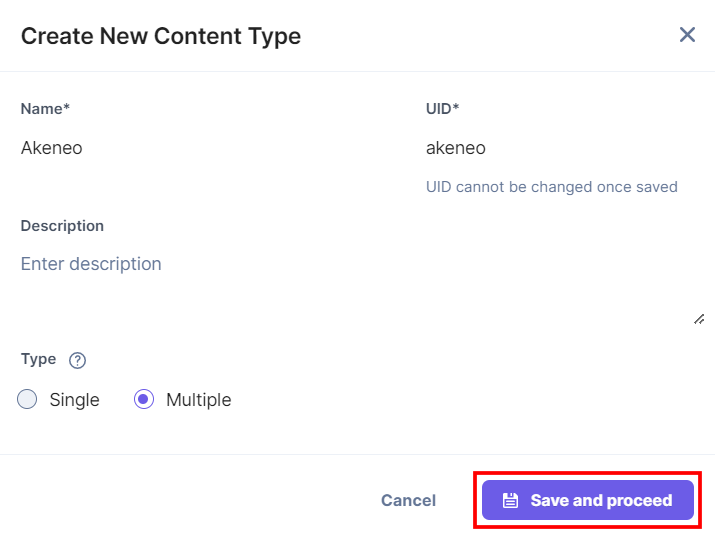
- Go to your stack, click the Content Models icon in the left navigation panel, and click the + New Content Type button.
- Create a content type by adding relevant details as displayed below:
- In the Content Type Builder page, add a Custom field for product in your content type by clicking the Insert a field link represented by a + sign.
- Under Select Extension/App, select Akeneo - Product, and then click the Proceed button.
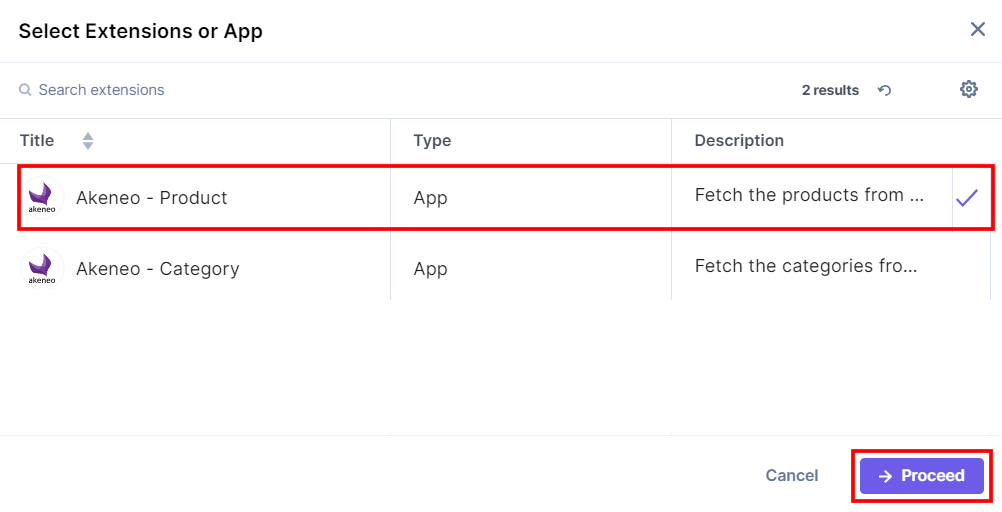
This adds Akeneo - Product in the custom field.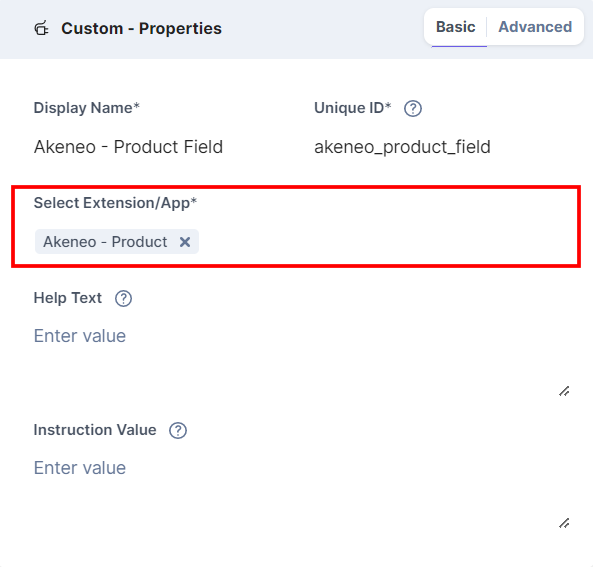
- Add another Custom field for category in your content type by clicking the Insert a field link represented by a + sign.
- Under Select Extension/App, select Akeneo - Category, and then click the Proceed button.
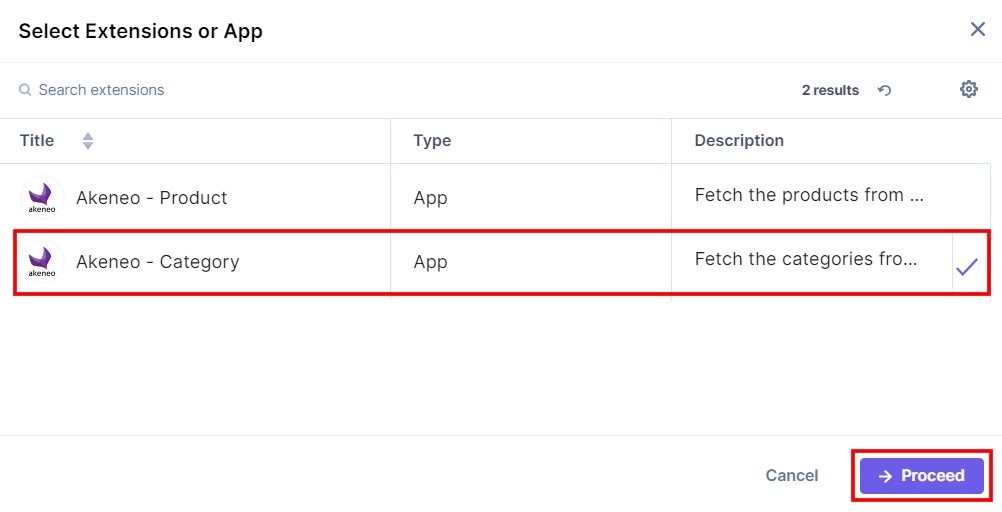
This adds Akeneo - Category in the custom field.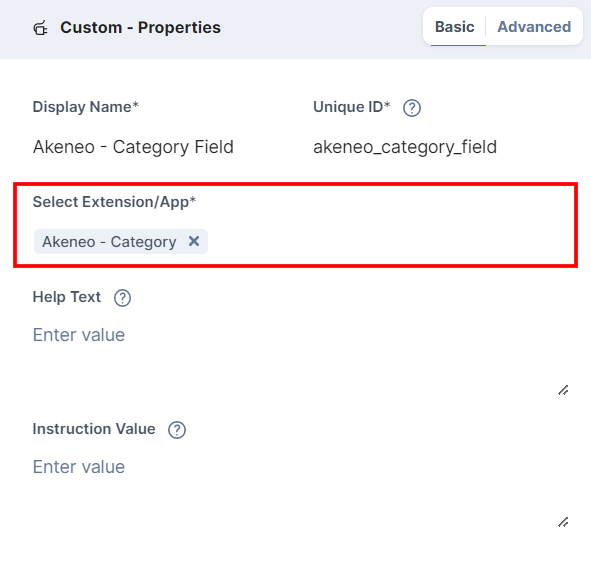
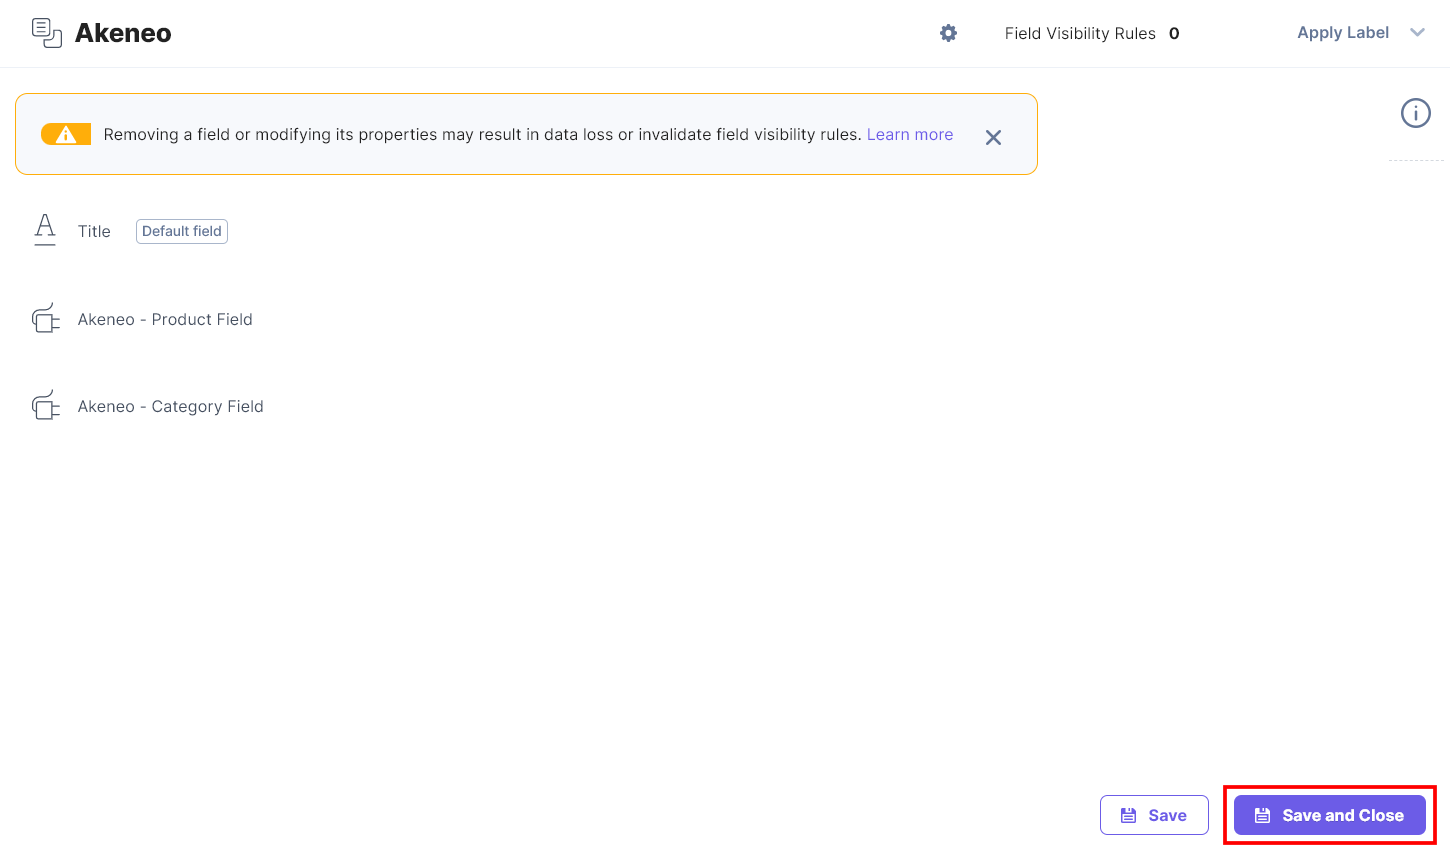
- After adding the custom fields for the app, click Save or Save and Close to save your changes.
- To use the Akeneo app, create an entry for this content type. In the left navigation panel, navigate to the Entries page, click + New Entry to create a new entry for the above content type, and then click Proceed.
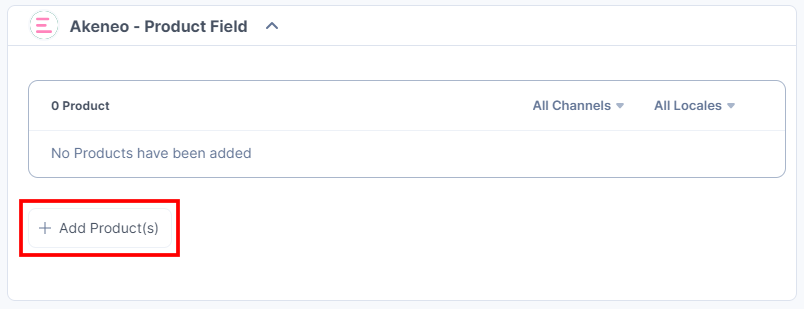
You can see the Akeneo app’s custom fields on your entry page as shown below:
- Click the + Add Product(s) button to choose the product(s).
- Select the product(s) from your Akeneo selector page to add them to your entry.
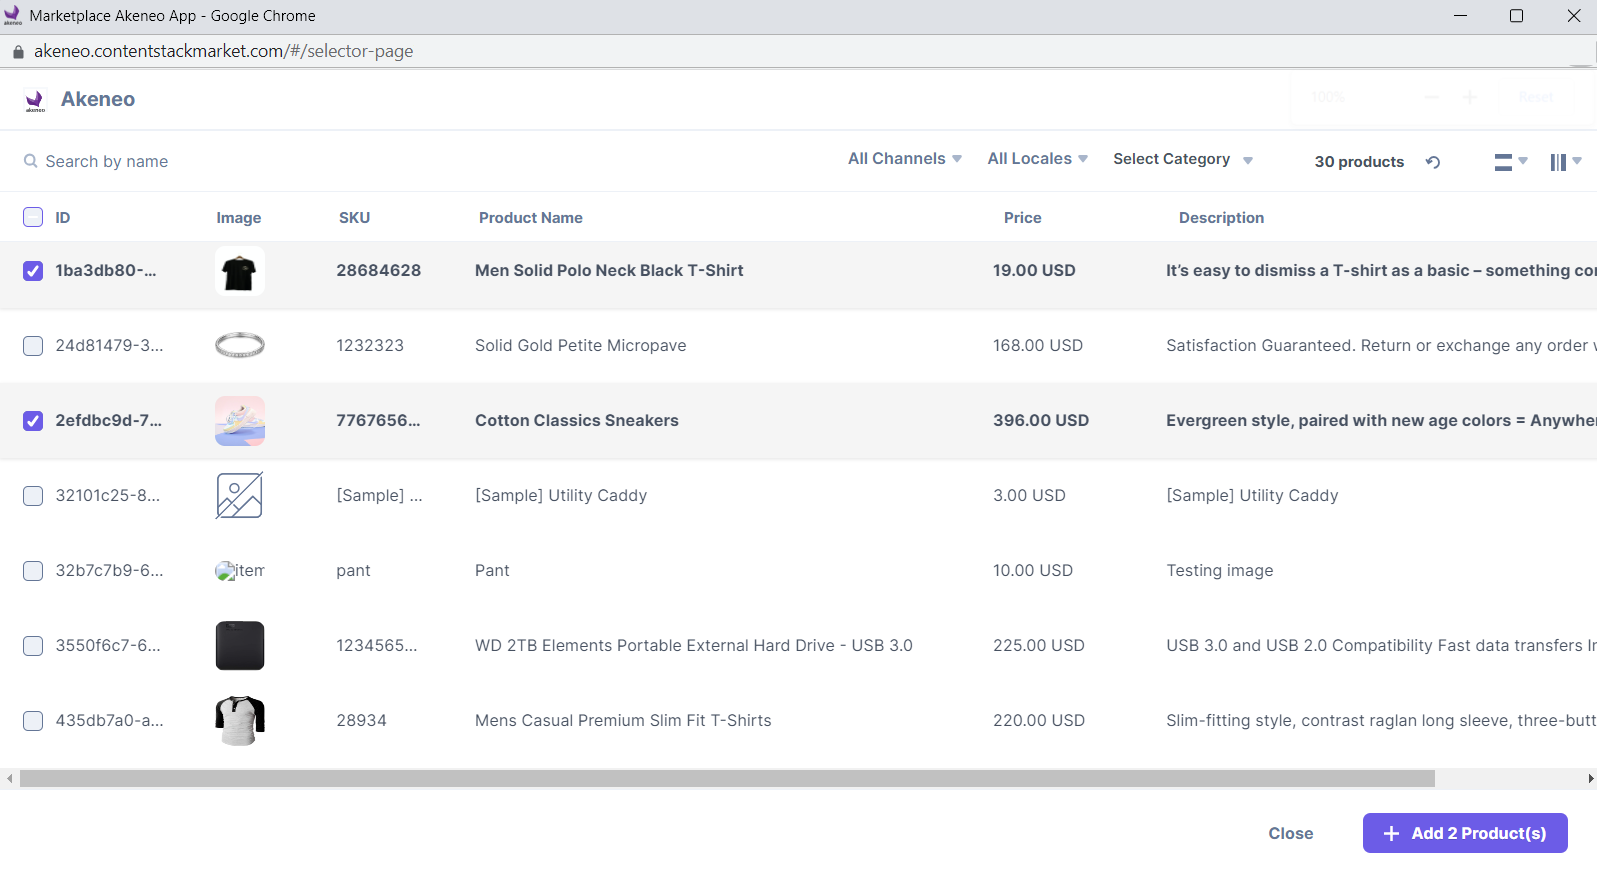
You can filter products based on channels. By default, the channel configured at the time of installation in step 2 is selected.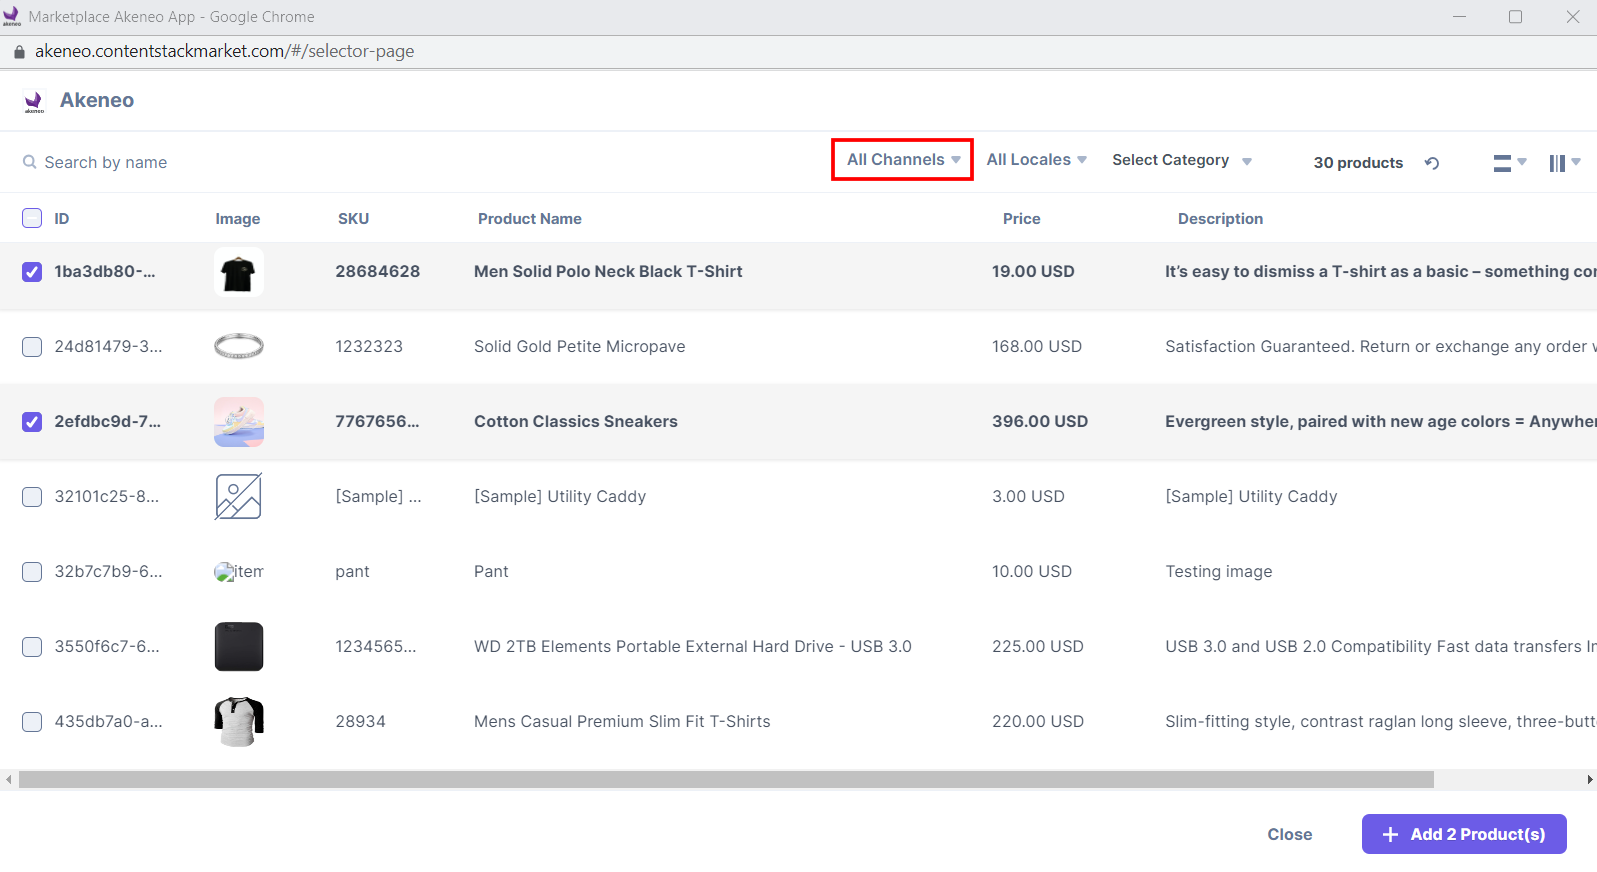
Click the Channel dropdown and choose the option. In the popup, click Proceed to change the channel and select the products.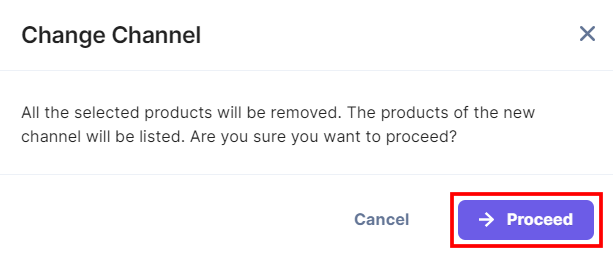
You can also view the products in different locales. By default, the locale configured at the time of installation in step 2 is selected.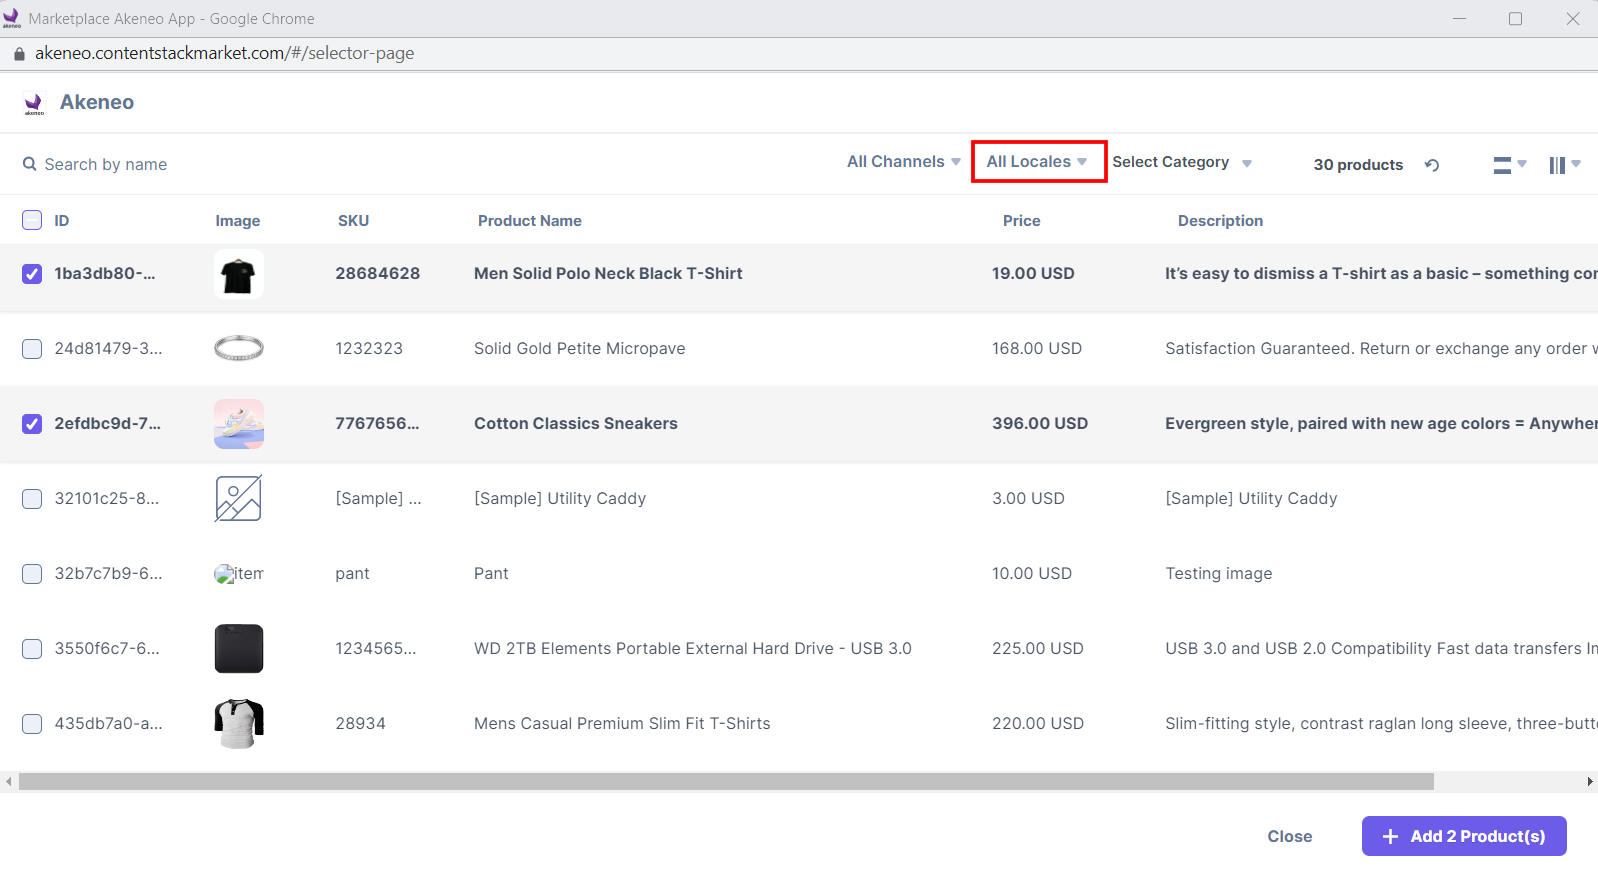
Click the Locale dropdown and choose the option. In the popup, click Proceed to change the locale and select the products.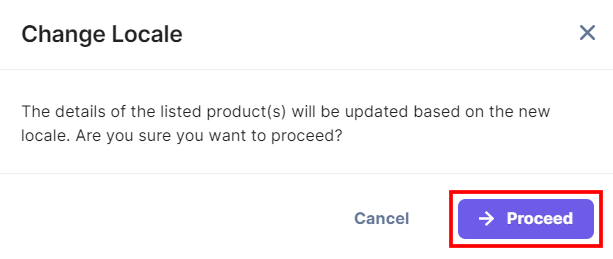
You can filter products based on categories. Click the Select Category dropdown and choose the category(s) to filter products.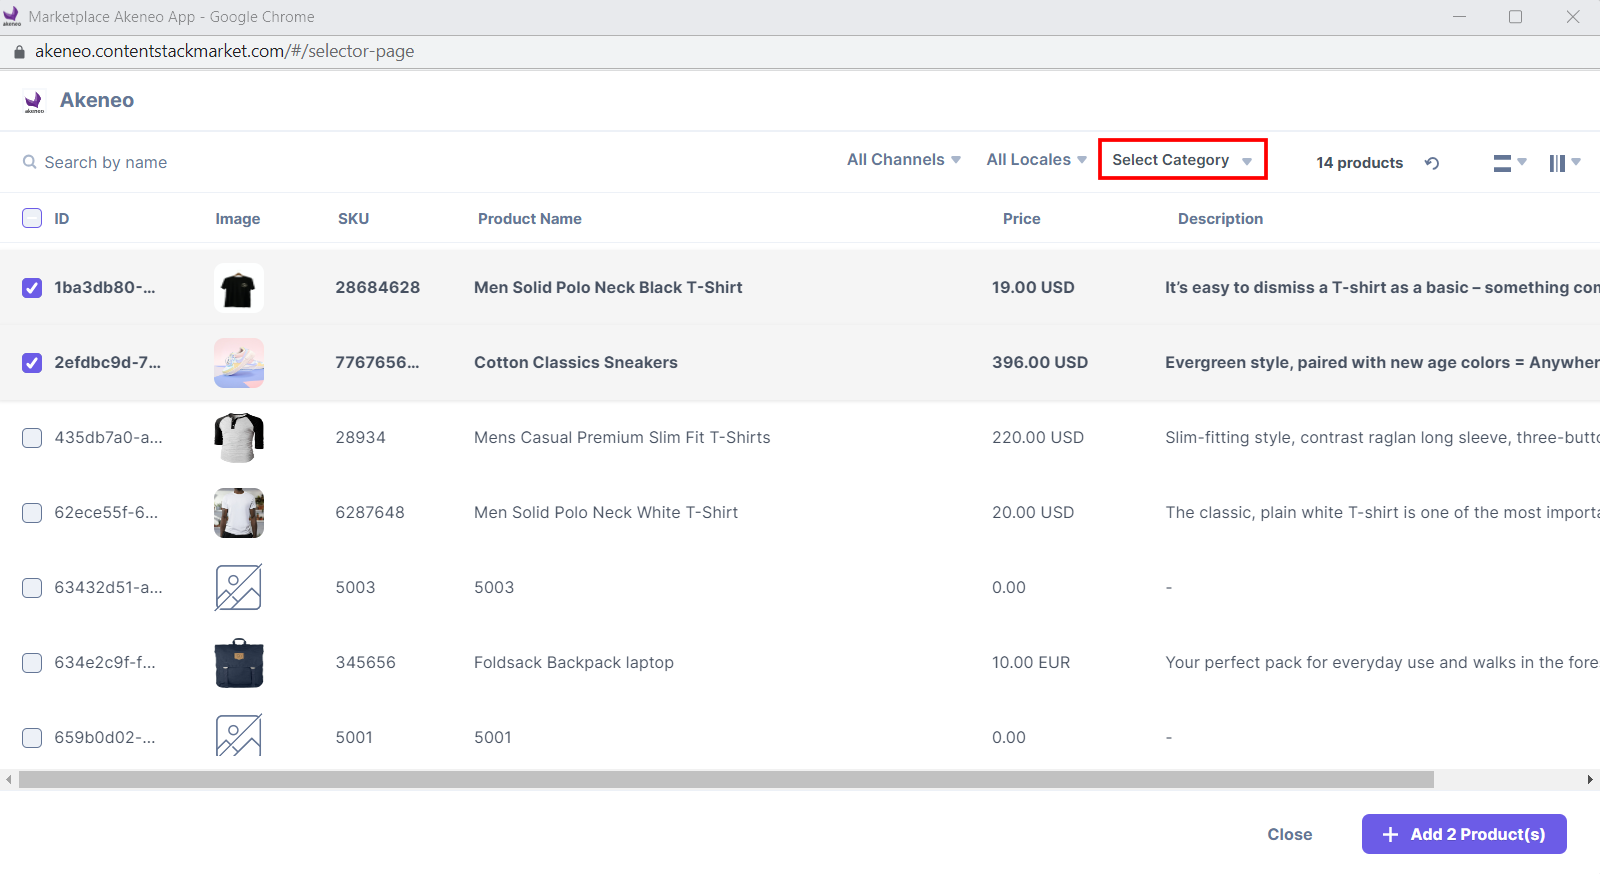
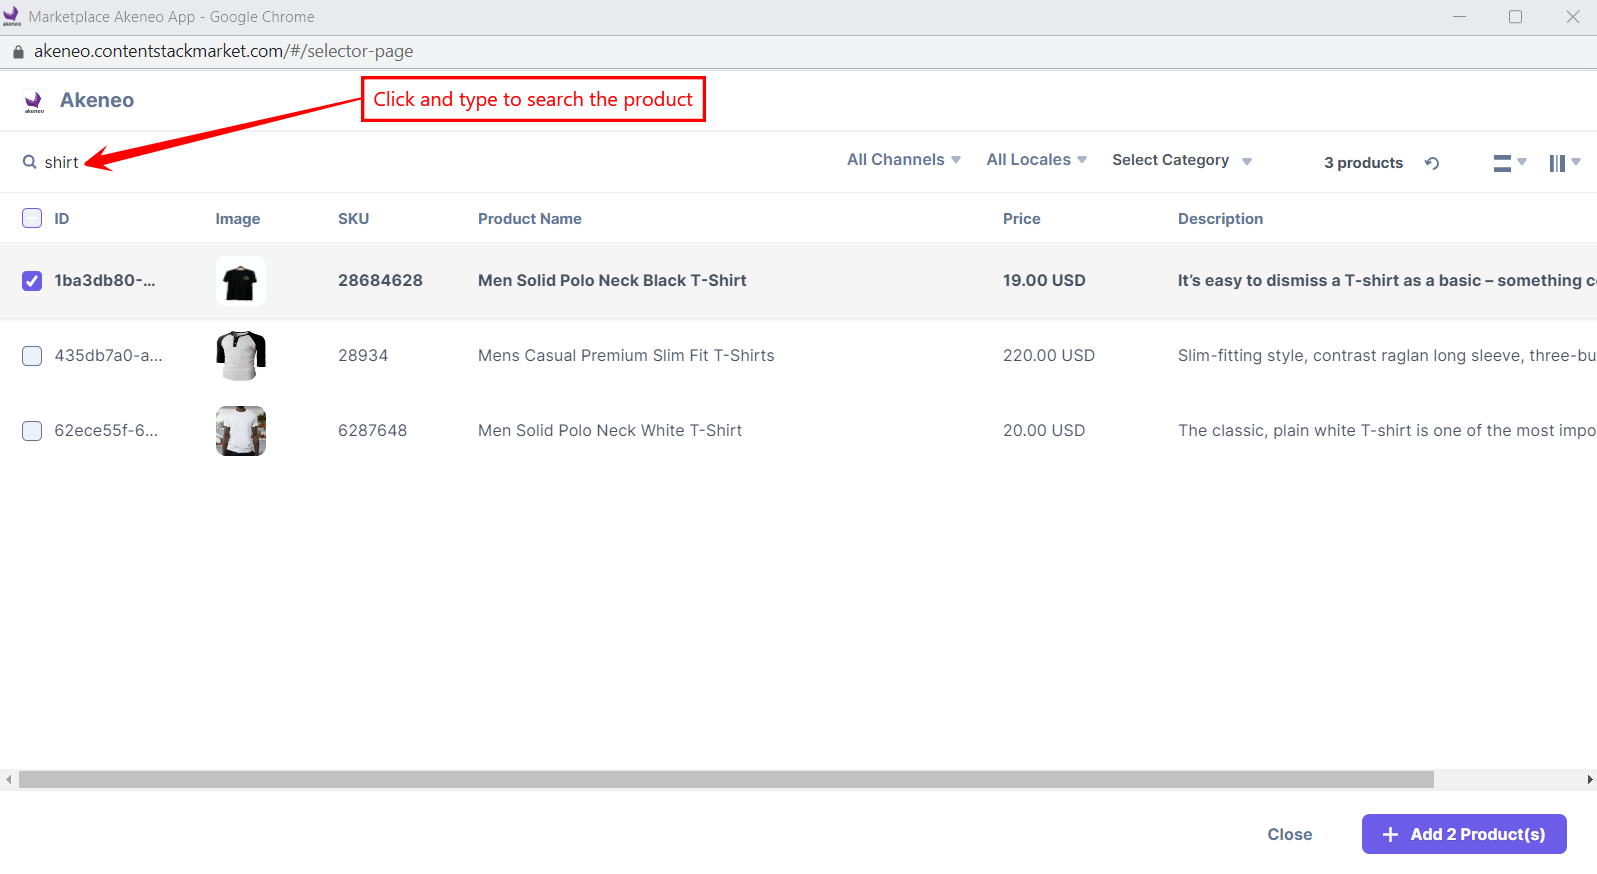
You can also search for products in the Akeneo selector page based on the product name.
Hover over the product on the Akeneo selector page, and you can see the View in Akeneo option to go directly to the Akeneo platform.

Click the Add Product(s) button to add products to your entry.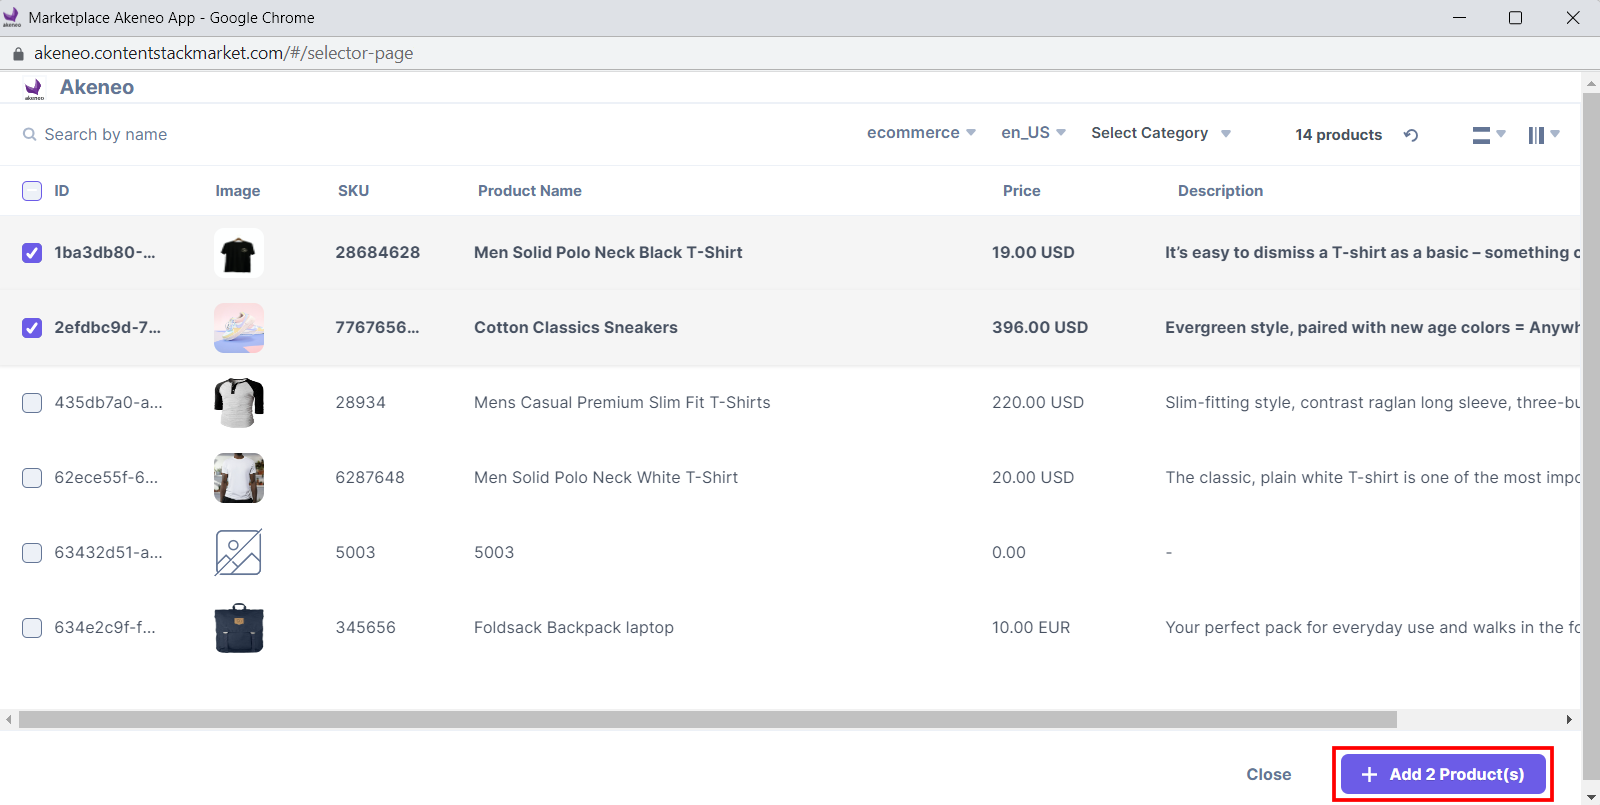
The products you selected are referenced within your entry in the thumbnail view.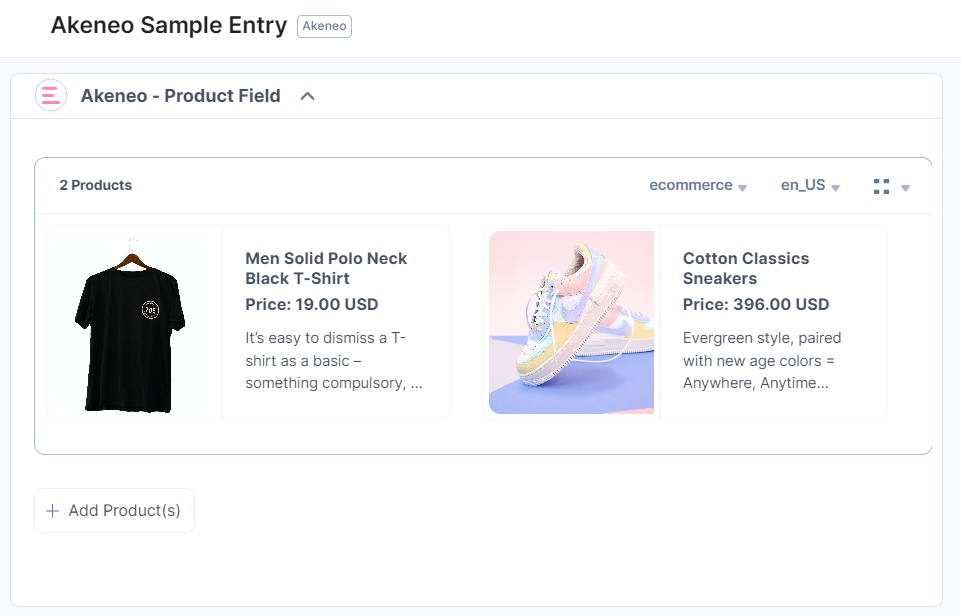
Note: You can change the Channel and Locale from the respective dropdowns. All the unavailable products will be permanently removed from the entry as per the selected channel.
Select the list view option from the dropdown to view the products in the list view.
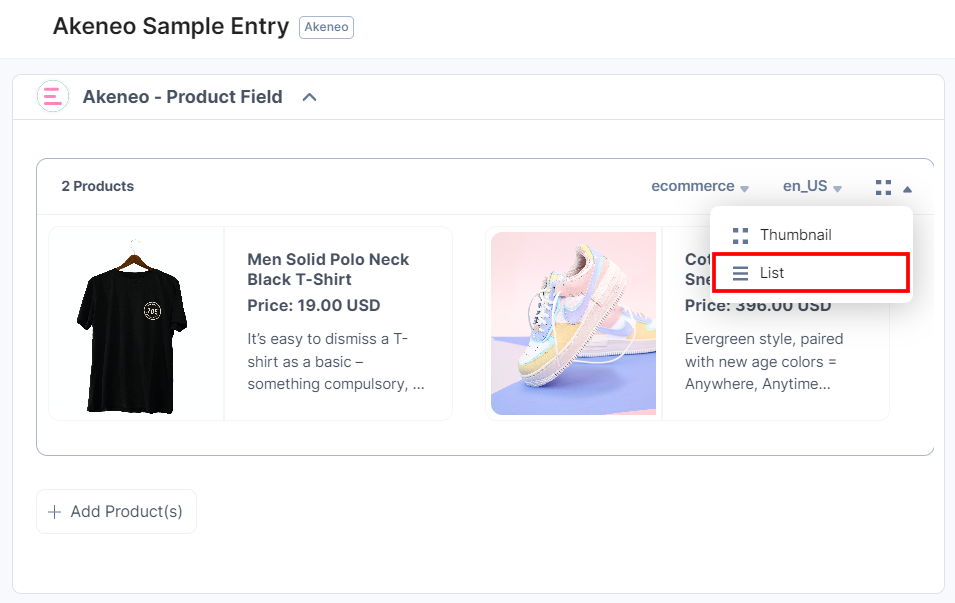
The products you selected are referenced within your entry in the list view.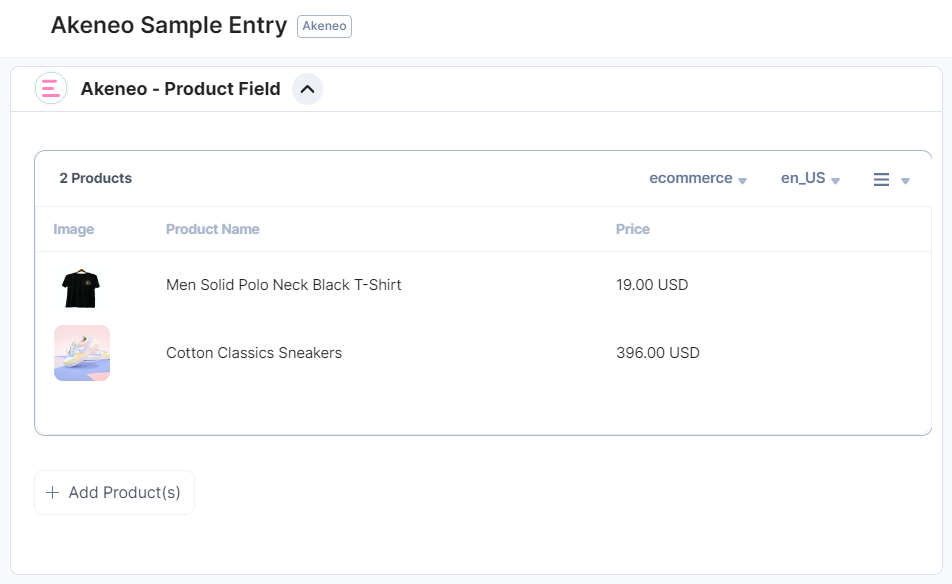
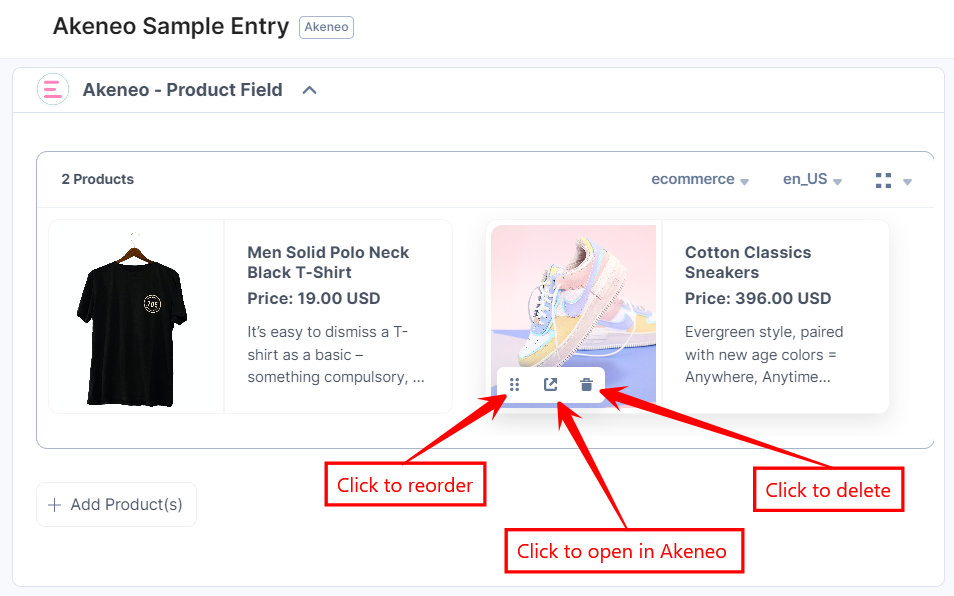
- To reorder, open in Akeneo, or delete the selected product, hover over the product to get the available options, then perform the following:
- Click the Reorder icon to drag and reorder the product.
- Click the Open in Akeneo icon to open the product in the Akeneo app.
- Click the Delete icon to delete the product.
Thumbnail View
List View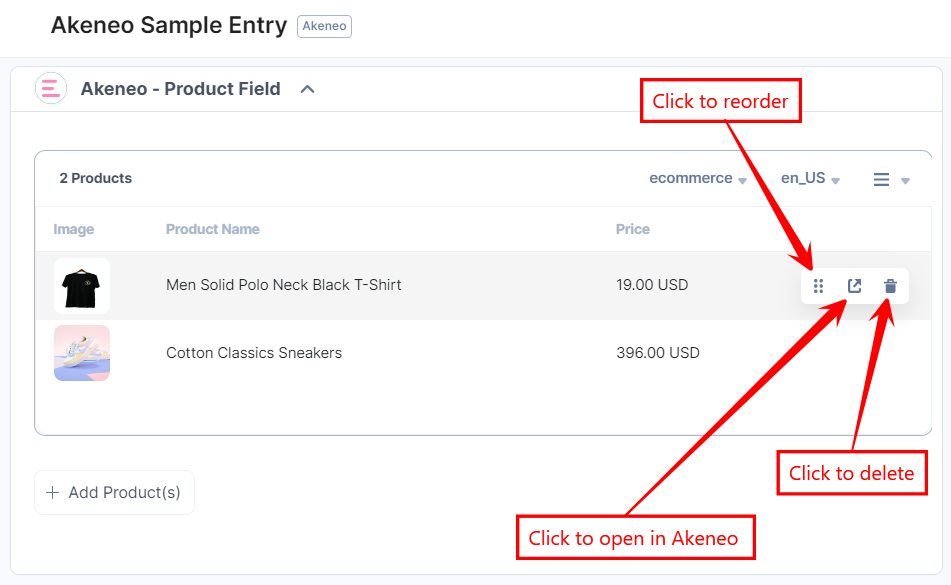
- Click the Save button to save your entry.
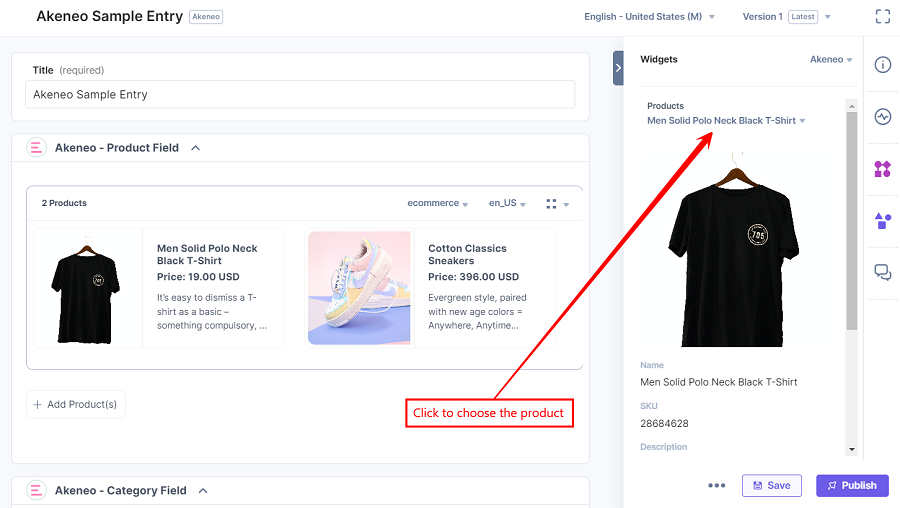
You can view more product details in the Sidebar Widget.Note: You must first save your entry to get the product details in the Sidebar Widget.
- In the right navigation panel, select Widgets, select Akeneo, and then select the product to view the product details. By default, the Sidebar Widget displays the details of the first product added in the custom field.
- You can also search for products by typing the product name in the dropdown and view the product details.
Click the Products dropdown to view the Search bar, type the name of the product, and then click the preferred product to view the details.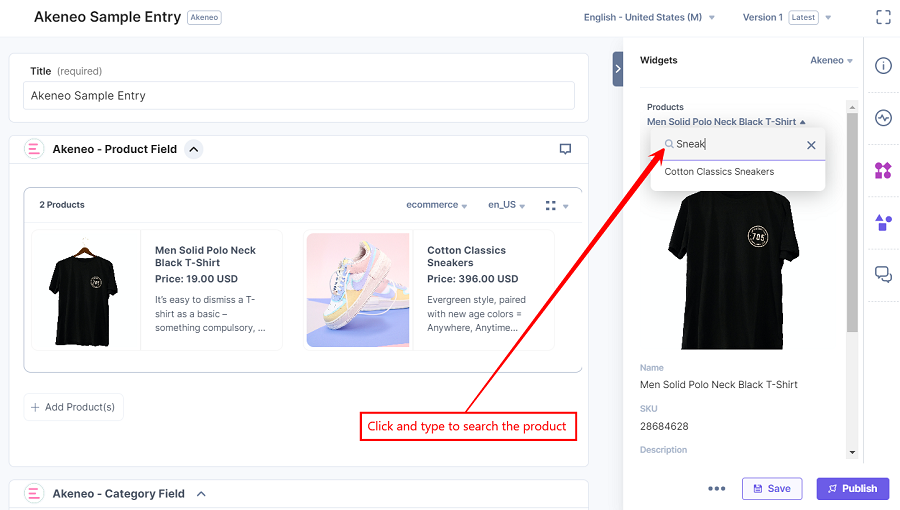
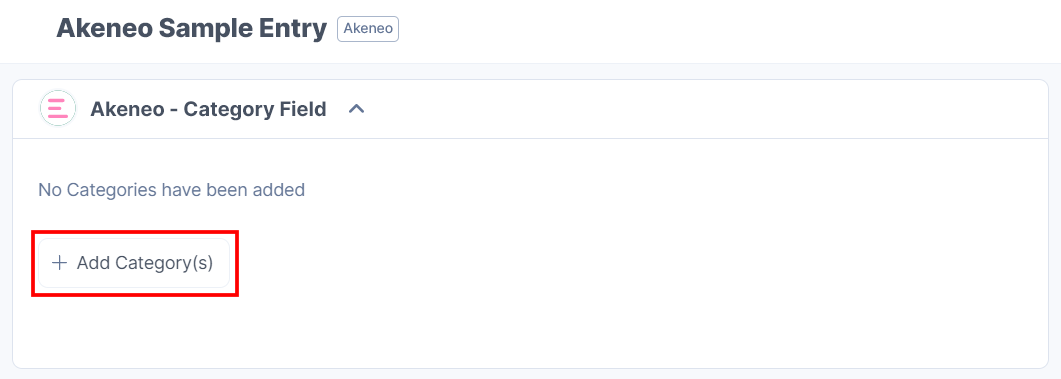
- Click the + Add Category(s) button to choose the category(s).
- Select the category(s) from your Akeneo selector page and click the Add Category(s) button to add them to your entry.
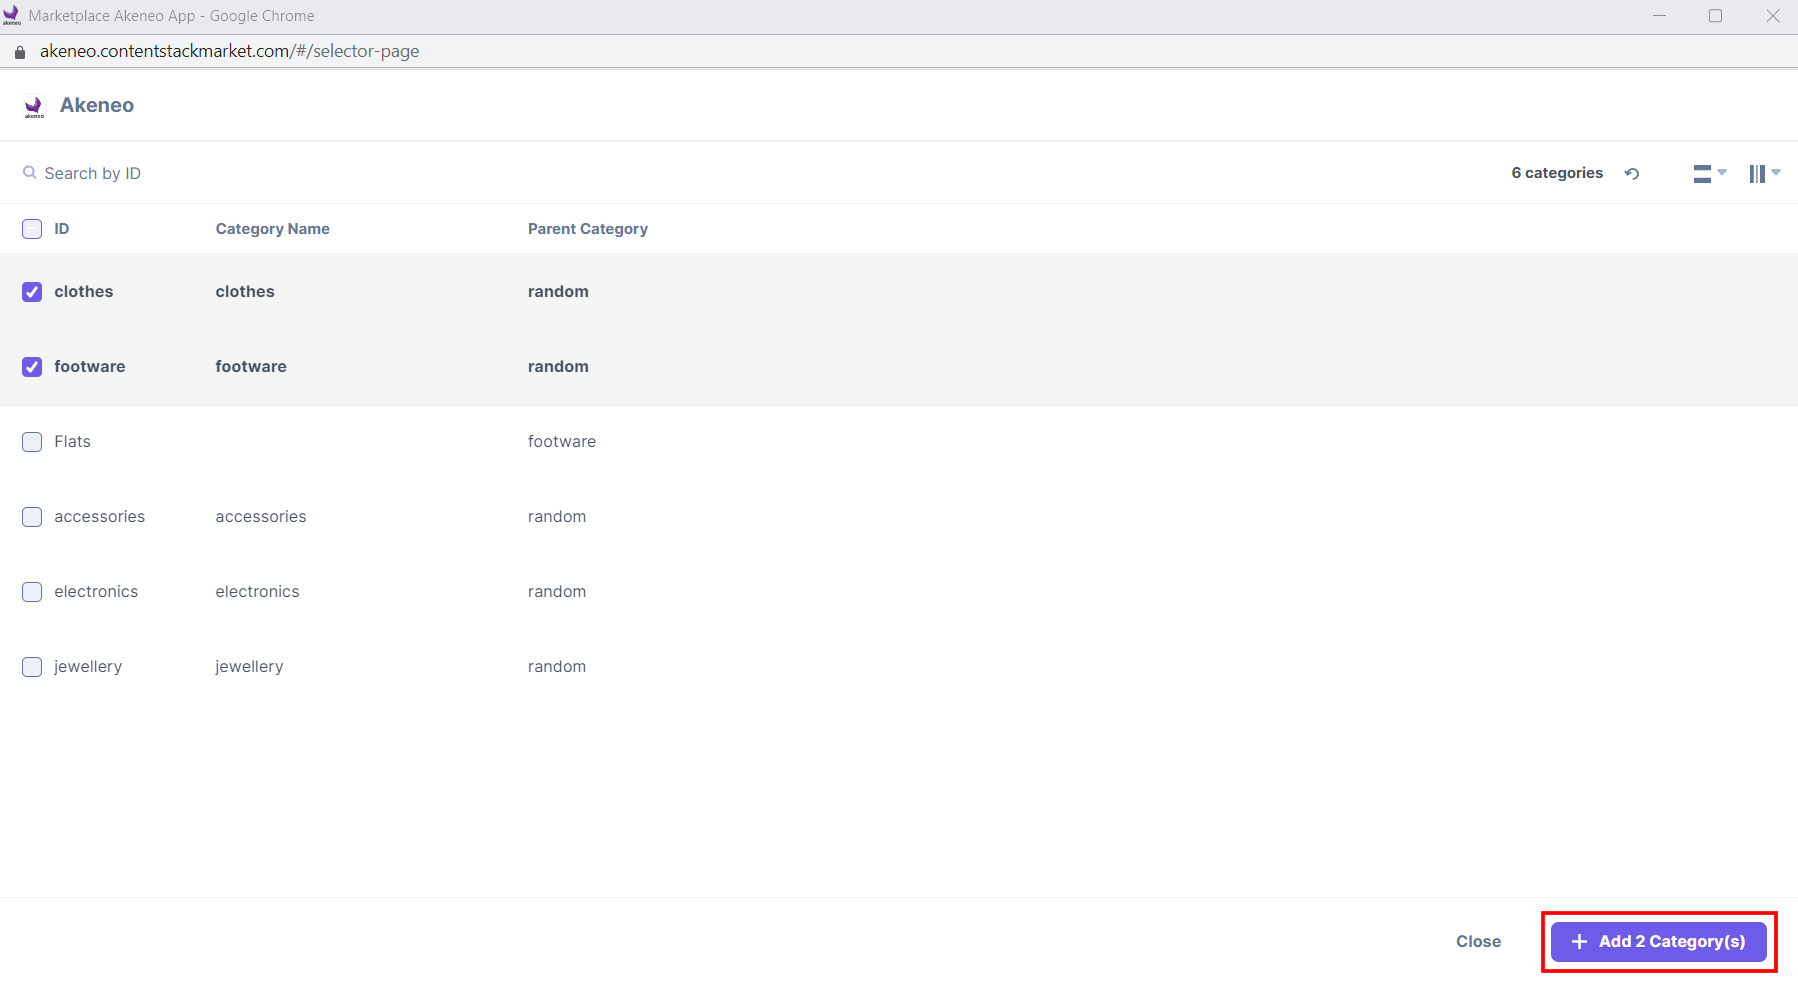
You can also search and filter categories in the Akeneo selector page using a full-text search based on the category ID.
Hover over the category on the Akeneo selector page, and you can see the View in Akeneo option to go directly to the Akeneo platform.
The category(s) you selected are referenced within your entry in the thumbnail view.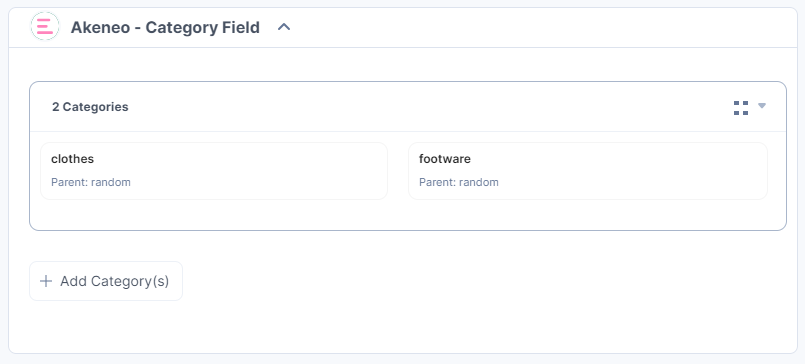
Select the list view option from the dropdown to view the category(s) in the list view.

The category(s) you selected are referenced within your entry in the list view.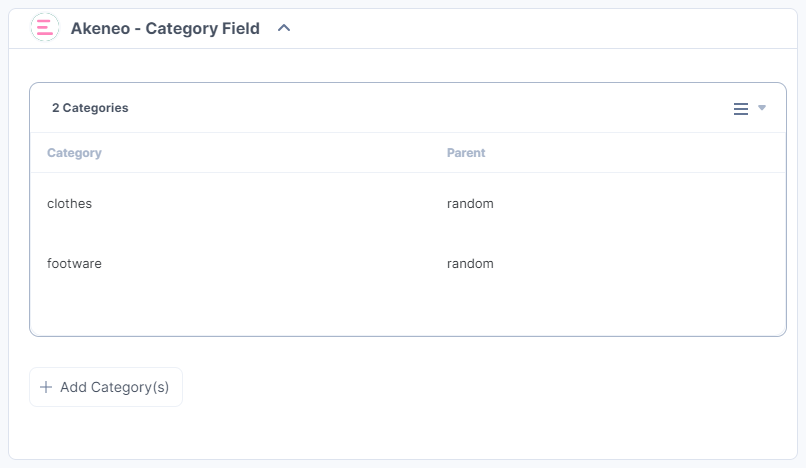
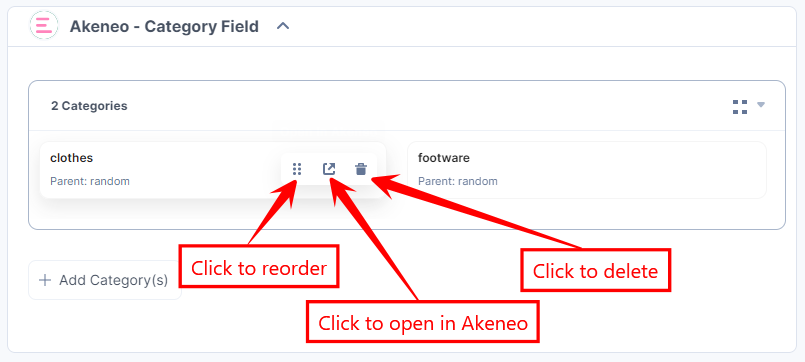
- To reorder, open in Akeneo, or delete the selected category, hover over the category to get the available options, then perform the following:
- Click the Reorder icon to drag and reorder the category.
- Click the Open in Akeneo icon to open the category in the Akeneo app.
- Click the Delete icon to delete the category.
Thumbnail View
List View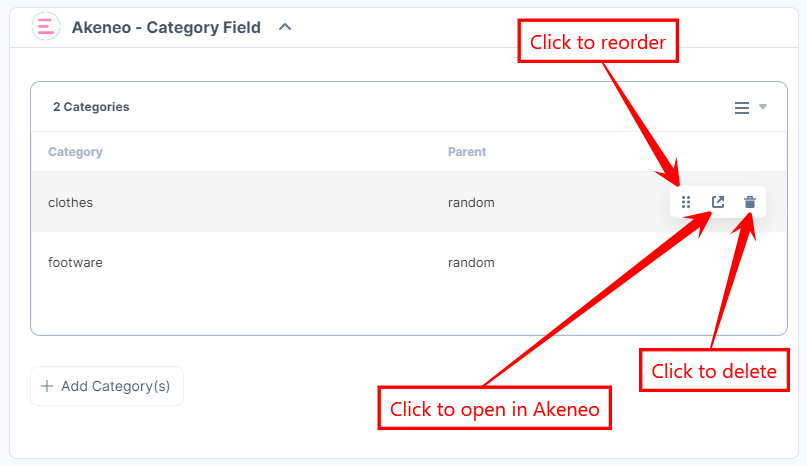
- After adding the category(s), Save and Publish your entry.
More articles in "Commerce"
