Elastic Path App Installation Guide
Elastic Path Commerce Cloud is a flexible, cloud-based e-commerce platform designed for enterprises that need to create highly customized, scalable, and innovative digital commerce experiences. It is a headless API-driven platform that can be integrated with various front-end technologies, such as web and mobile applications, to create customized and engaging digital storefronts.
With the Contentstack Marketplace Elastic Path Commerce Cloud app, you can add products and hierarchies from your Elastic Path Commerce Cloud account within your Contentstack entries. You can also view the product details and search for the selected products directly in the Sidebar Widget.
Prerequisites
- Elastic Path Commerce Cloud account
- Contentstack account
- Access to the Contentstack Organization/Stack as the Owner/Admin
This step-by-step guide explains how to install and configure the Elastic Path Commerce Cloud app within your stack.
The steps to be performed are as follows:
- Retrieve Configuration Details from Elastic Path Commerce Cloud
- Install and Configure Elastic Path Commerce Cloud in Contentstack Marketplace
- Use Elastic Path Commerce Cloud within your Stack
-
Retrieve Configuration Details from Elastic Path Commerce Cloud
To get your configuration details for Elastic Path Commerce Cloud, follow the steps given below:
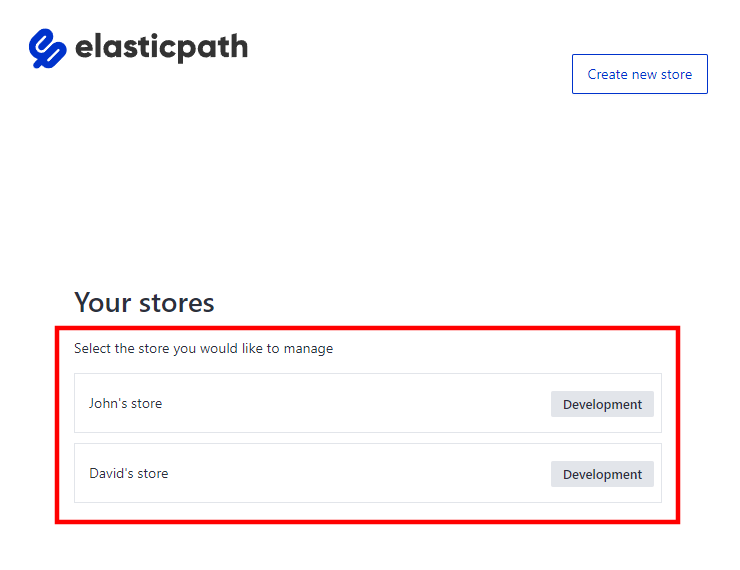
- Log in to the Elastic Path Portal using your Elastic Path Commerce Cloud account credentials.
- Select your store from a list of stores you have created before.
-
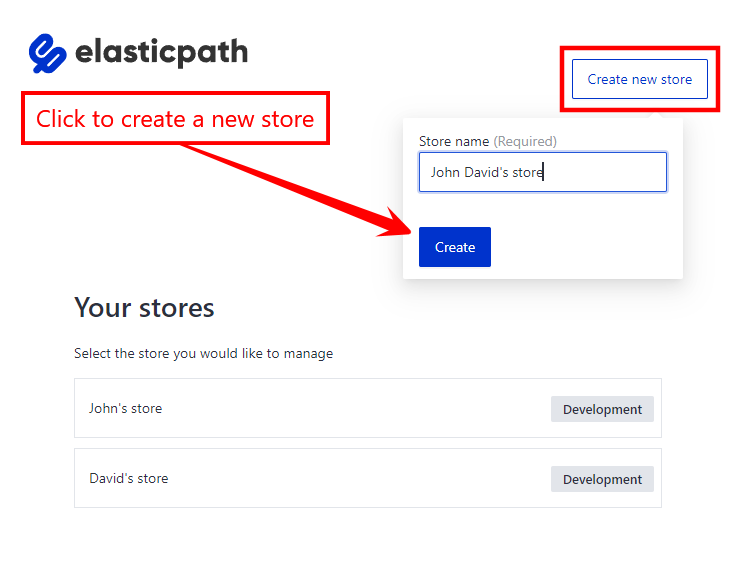
Alternatively, you can create a new store. To do this, follow the steps below:
- Click the Create new store button.
- Enter the name of the store.
- Click the Create button.
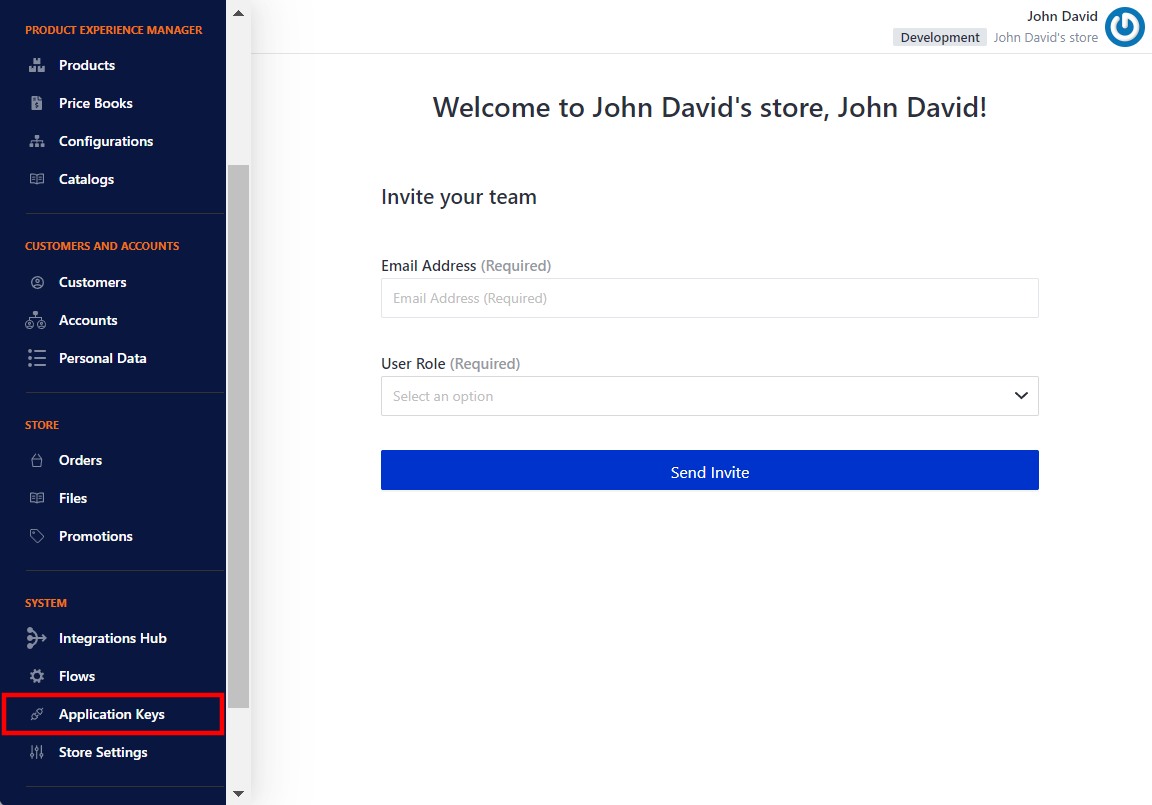
- To integrate Elastic Path Commerce Cloud in Contentstack, we need the Login Base URL, API Base URL, Client ID, and the Client Secret of the store. To retrieve these values, under the System options, click Application Keys in the left panel.
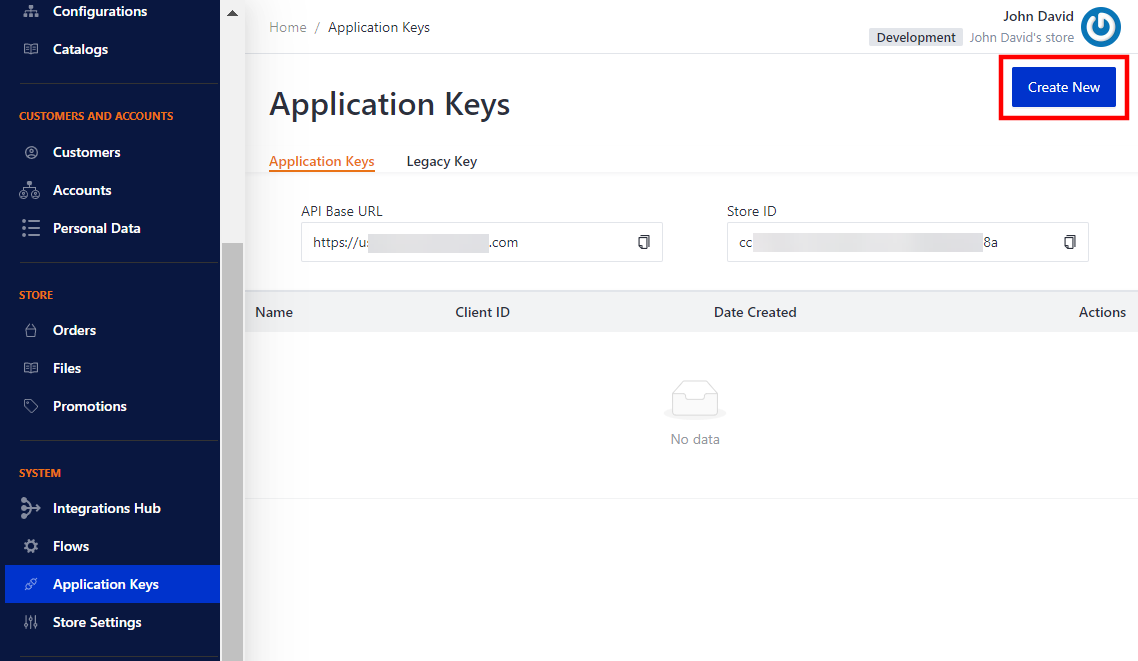
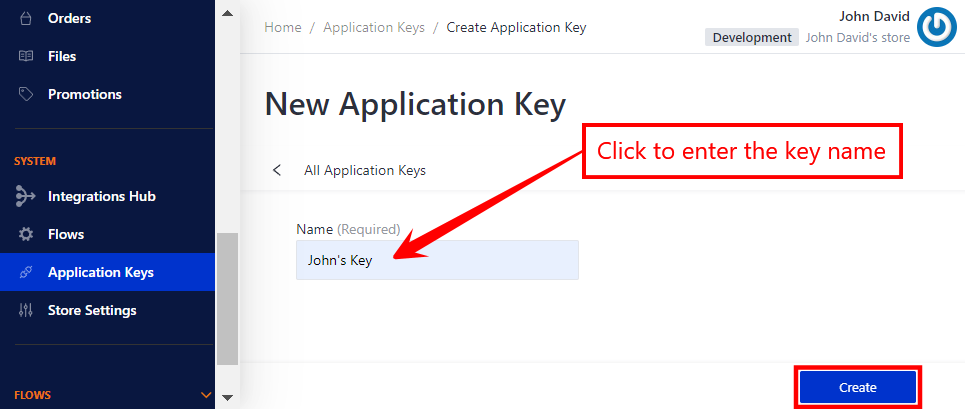
- To create new Application Keys, click the Create New button.
- In the new screen, enter the name of the Application Key and click the Create button.
-
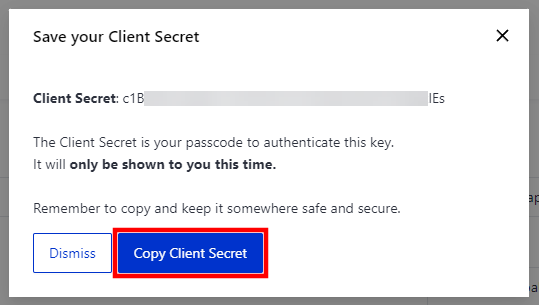
The new Application Key is generated. A pop-up displays the Client Secret.
- Click the Copy Client Secret button to copy the Client Secret.
- Click the Dismiss button.
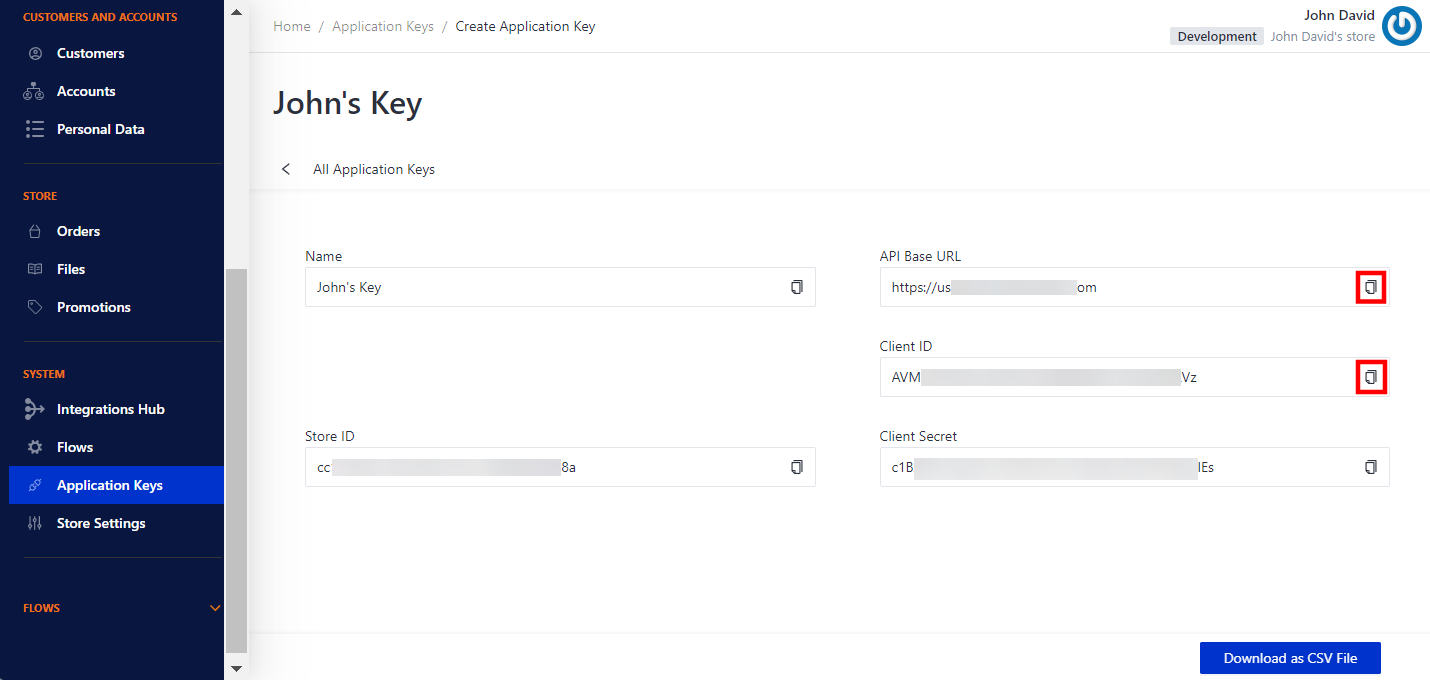
You can see your API Base URL, Client ID, and Client Secret displayed on the screen. - Click the copy icon next to the API Base URL and Client ID to store the values for future use.
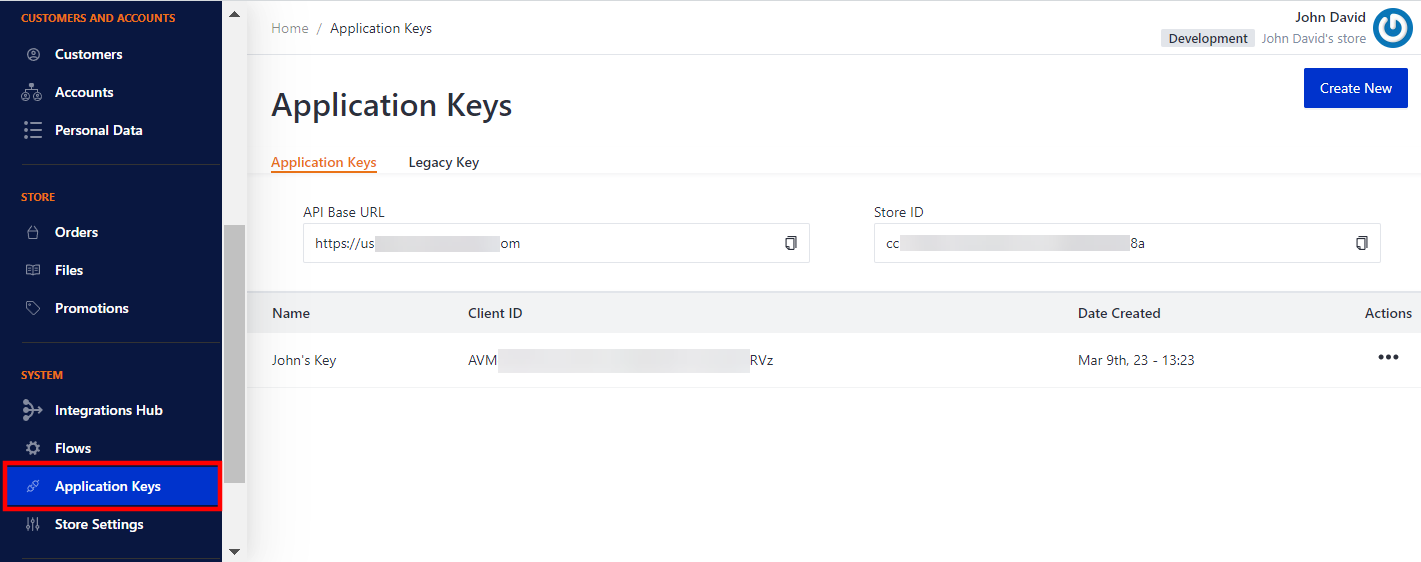
- Now click Application Keys in the left panel to see the list of all Application Keys generated for your store.
Note: Elastic Path Commerce Cloud provides you with your Login Base URL when you sign up.
Note: Since the Client Secret is confidential, it is displayed only once. In case you do not copy it to your clipboard, you will need to create a new Application Key.
Note: Keep the Client Secret safe for future use.
Repeat the process from Step 5 if you want to add more Application Keys to your store.
-
Install and Configure Elastic Path Commerce Cloud in Contentstack Marketplace
To install the application in Contentstack, follow the steps below:
- Log in to your Contentstack account.
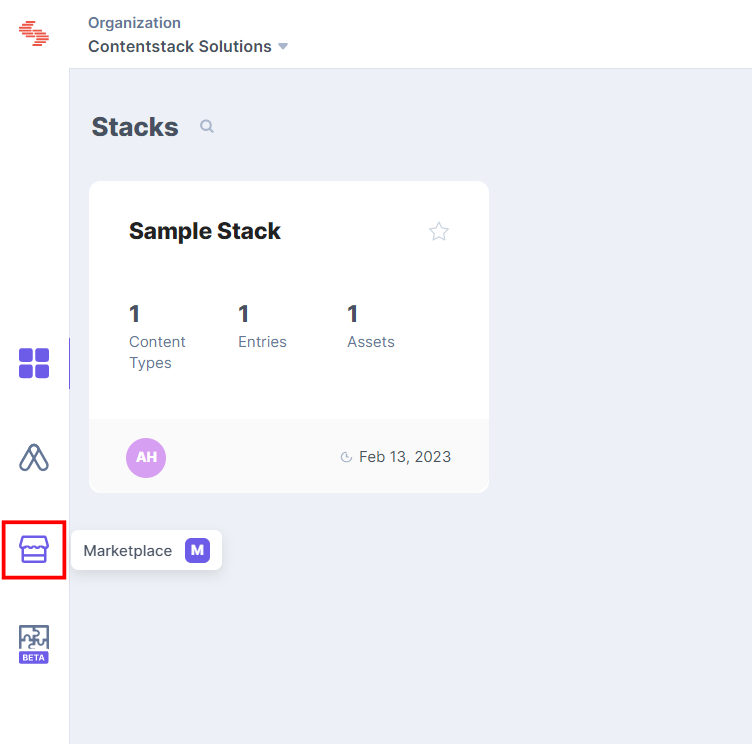
- In the left-hand side primary navigation, click the Marketplace icon to go to the Marketplace.
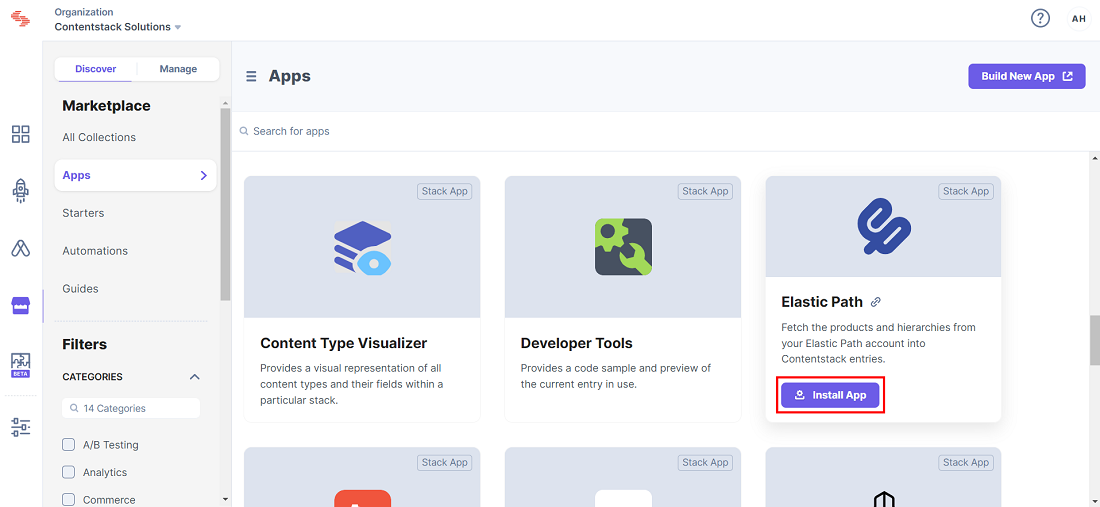
- Click Apps from the left panel.
- Within the Marketplace, you can see all the available apps. Hover over the Elastic Path Commerce Cloud app and click the Install App button.
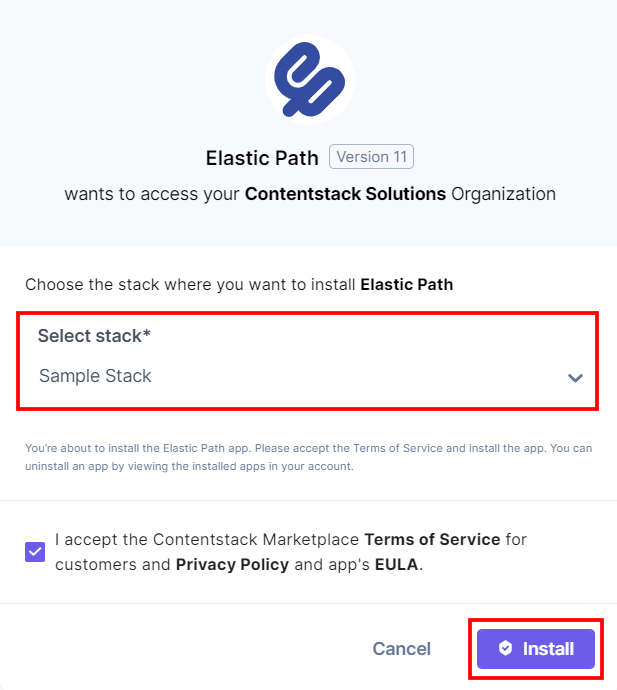
- In the popup window, select the stack where you want to install the Elastic Path Commerce Cloud app and click the Install button.
-
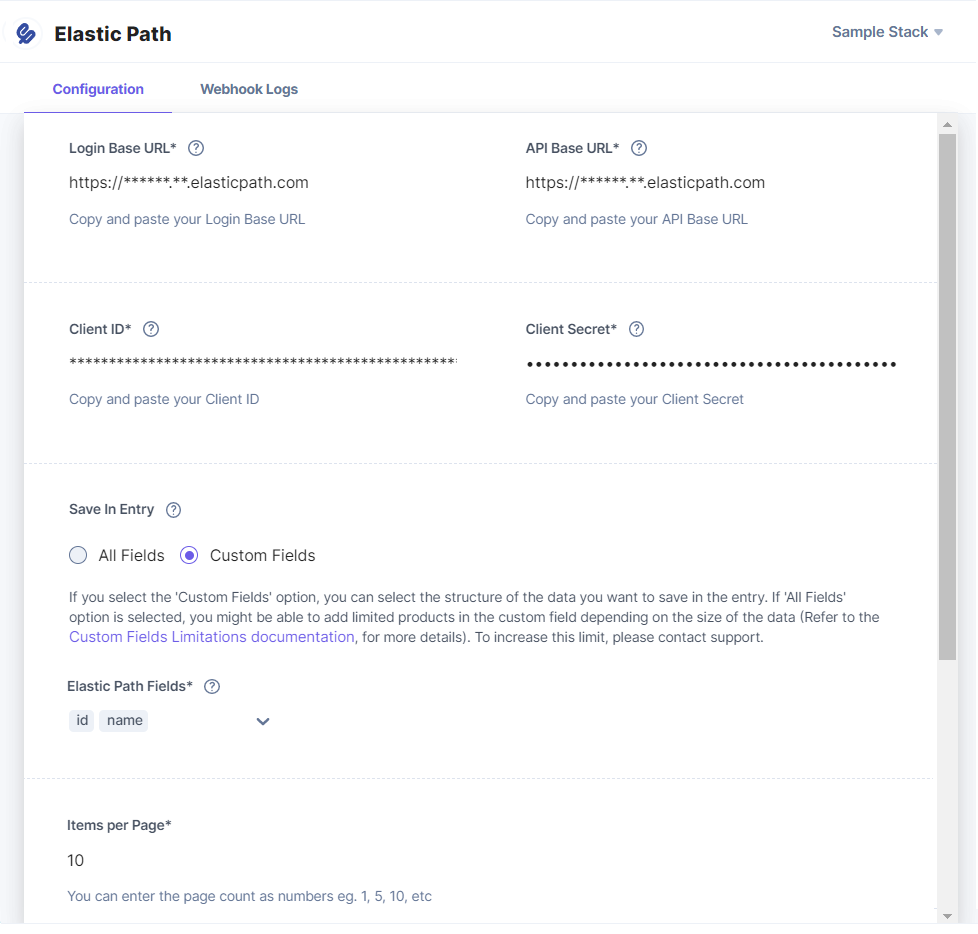
On the Configuration screen, enter the following details retrieved from your Elastic Path Commerce Cloud Account:
- Login Base URL: The URL used to log in to the Elastic Path Commerce Cloud account.
- API Base URL: The API Base URL retrieved from the Elastic Path Commerce Cloud account.
- Client ID: The Client ID retrieved from the Elastic Path Commerce Cloud account.
- Client Secret: The Client Secret retrieved from the Elastic Path Commerce Cloud account.
-
Save in Entry: Choose how to save the data fetched from Elastic Path Commerce Cloud in Contentstack entries.
- If you select All Fields, you can select only a limited number of products.
- For Custom Fields, you can search and add specific Elastic Path Fields you want to save in entries. By default, the id and name of the products are selected.
- Items per Page: Enter the number of products and hierarchies to display in the selector page based on the hierarchies or catalog filters or upon search or refresh.
- Click the Save button.
- Click the Open Stack button to start using the Elastic Path Commerce Cloud application.
-
Use Elastic Path Commerce Cloud within your Stack
To use the Elastic Path Commerce Cloud application within an entry of your stack, follow the steps given below:
- Go to your stack, click the Content Models icon in the left navigation panel, and click the + New Content Type button.
- Create a content type by adding relevant details as displayed below:
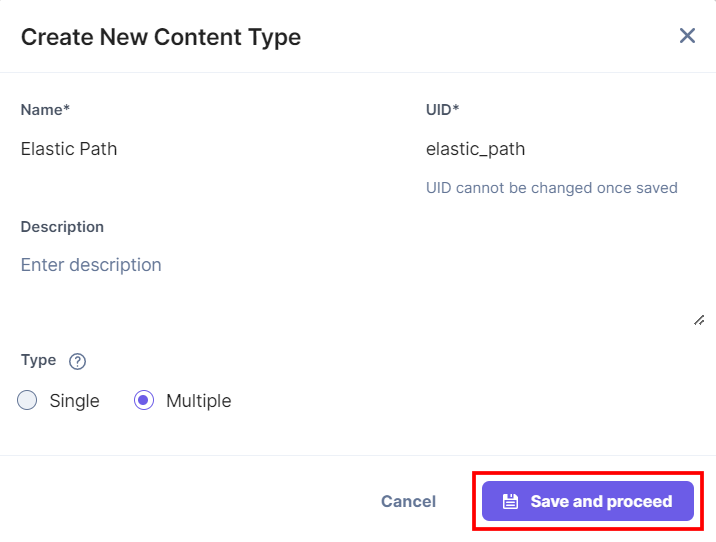
- In the Content Type Builder page, add a Custom field for hierarchy in your content type by clicking the Insert a field link represented by a + sign.
- Under Select Extension/App, select Elastic Path - Hierarchy Field and click the Proceed button.
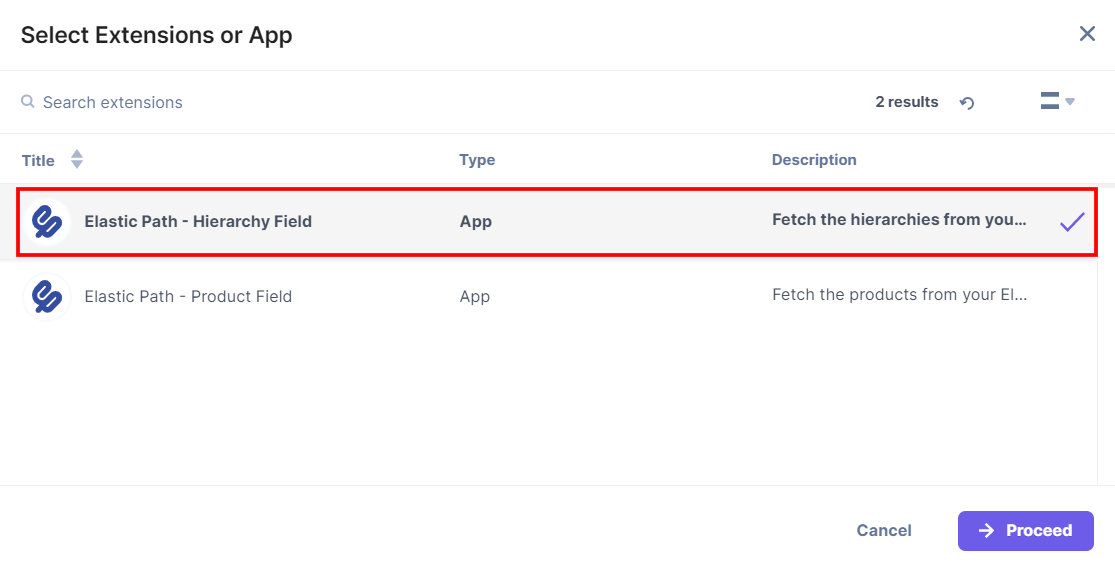
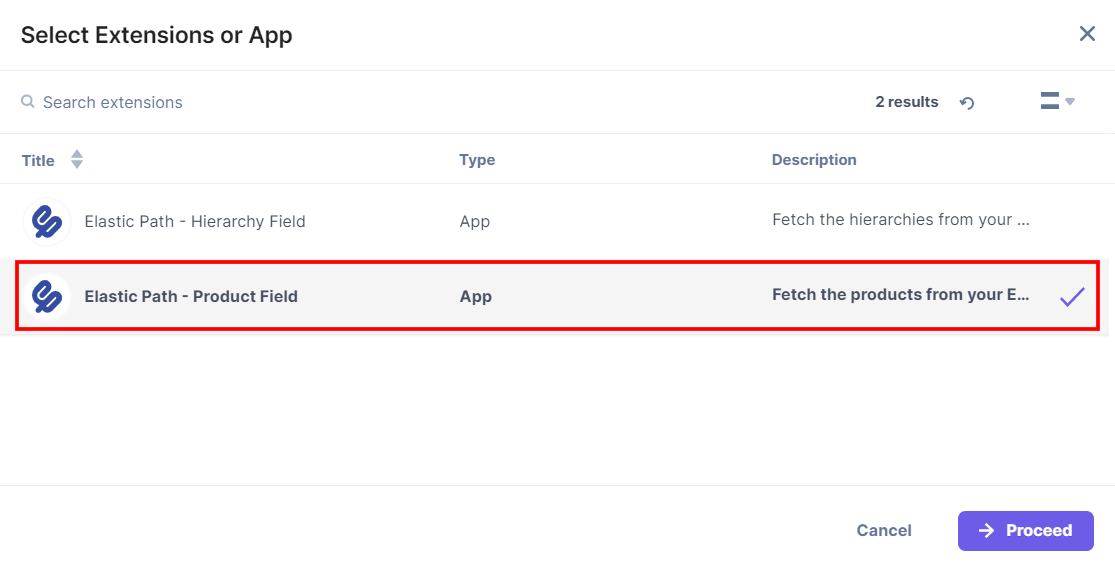
- Add another Custom field for product in your content type by clicking the Insert a field link represented by a + sign.
- Under Select Extension/App, select Elastic Path - Product Field and click the Proceed button.
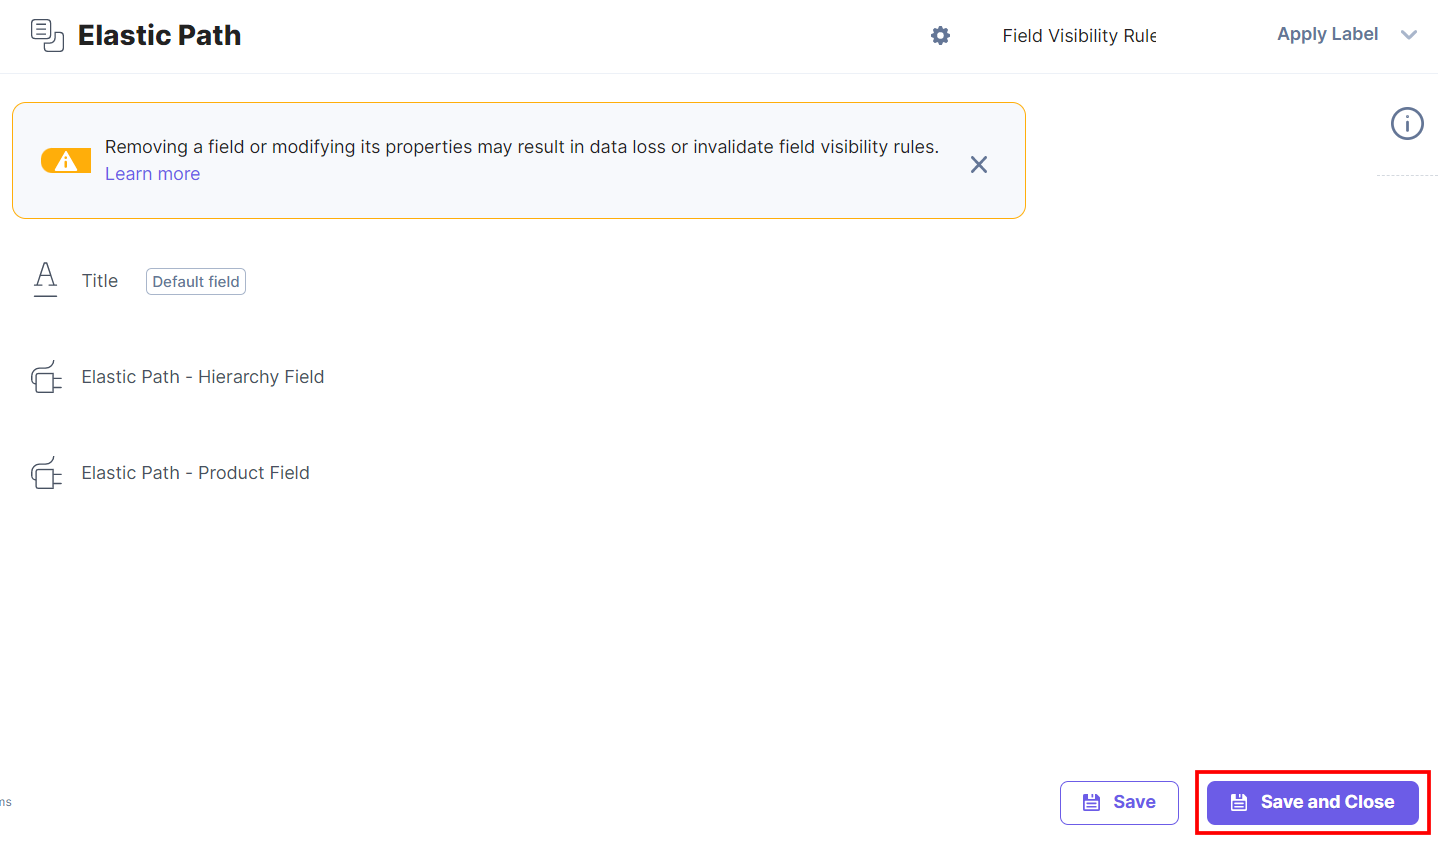
- After adding the custom fields for the app, click Save or Save and Close to save your changes.
- In the left navigation panel, navigate to the Entries page and click + New Entry to create a new entry for the above content type. And then click Proceed.
You will see the Elastic Path Commerce Cloud app's custom fields on your entry page, as shown below: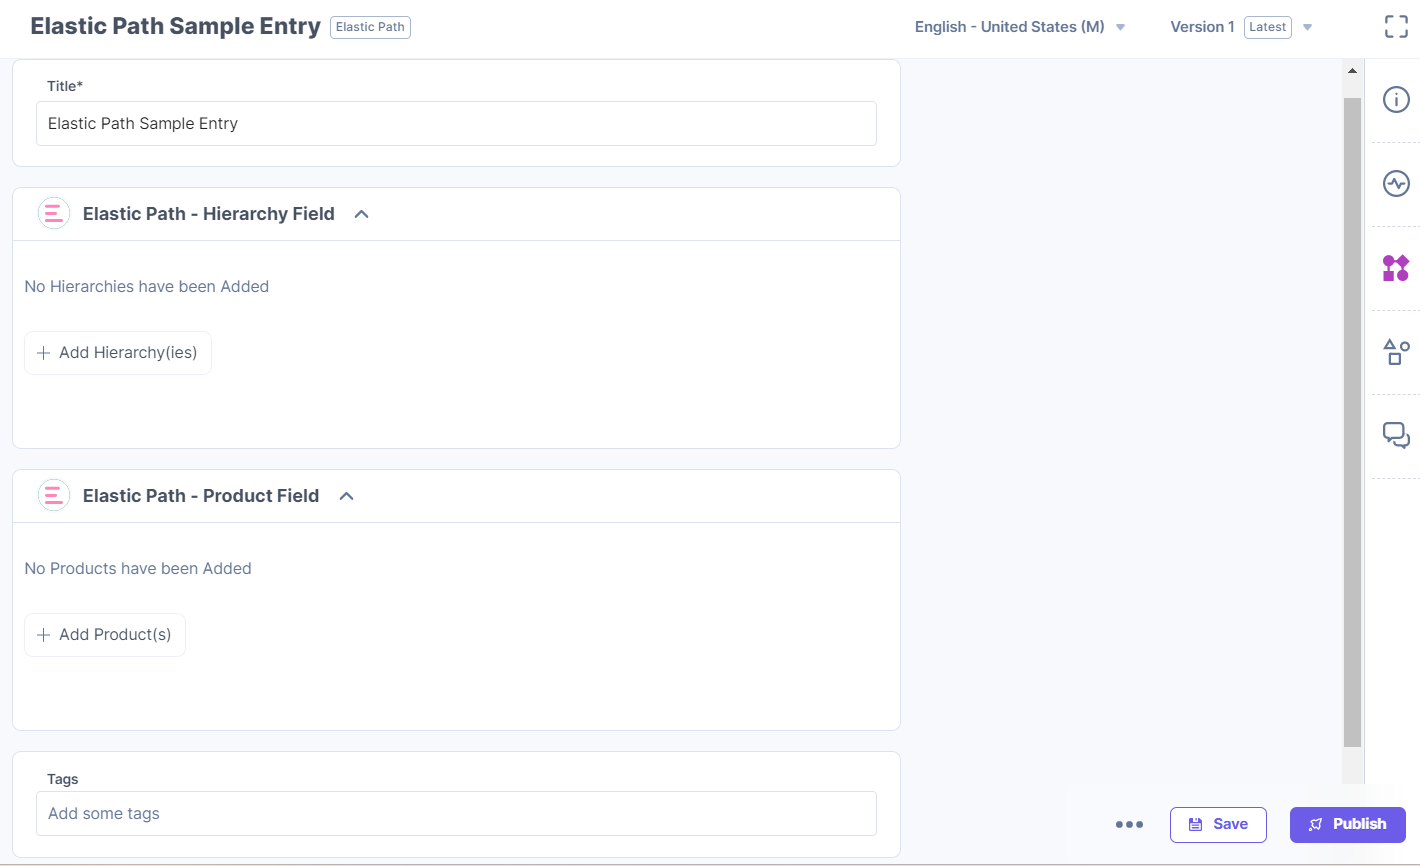
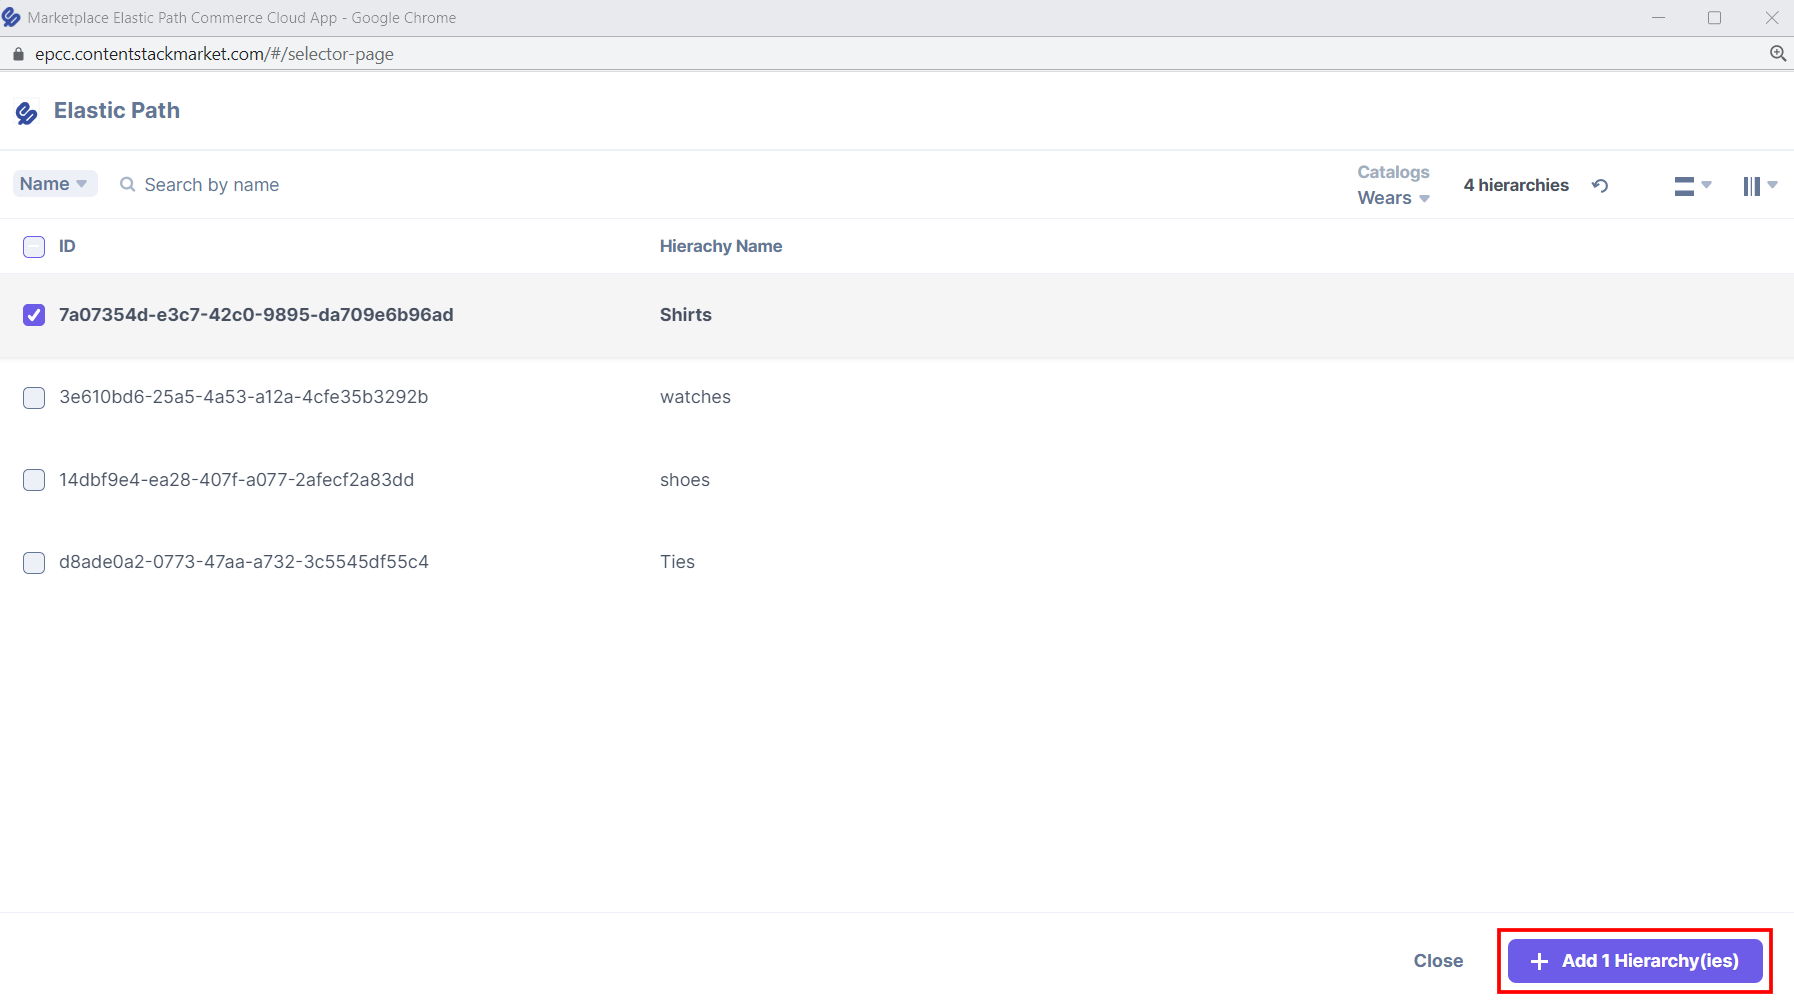
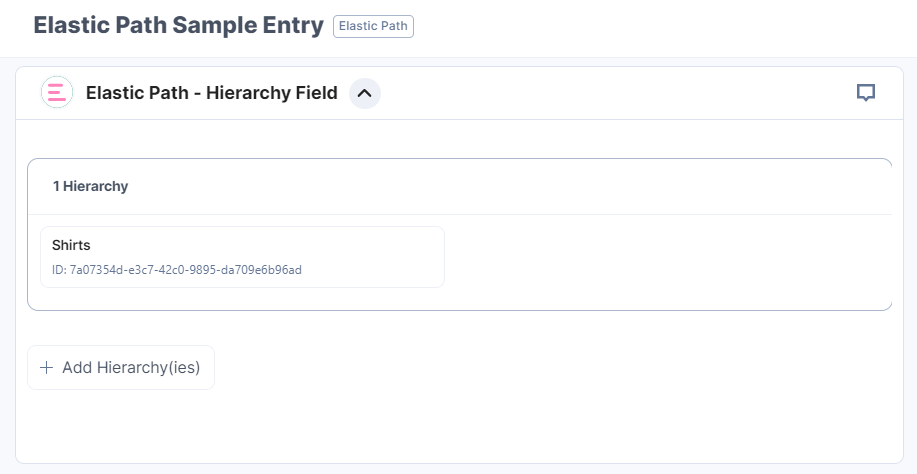
- Click the Add Hierarchy(ies) button, select the hierarchies from your Elastic Path Commerce Cloud store, and add them to your entry.
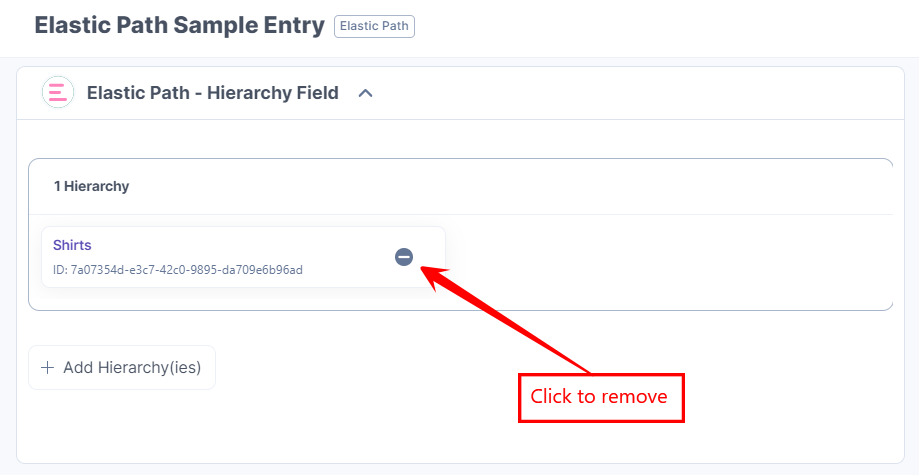
- To remove the selected hierarchy, hover over the hierarchy and click the Remove icon.
- Click the Save button to save your entry.
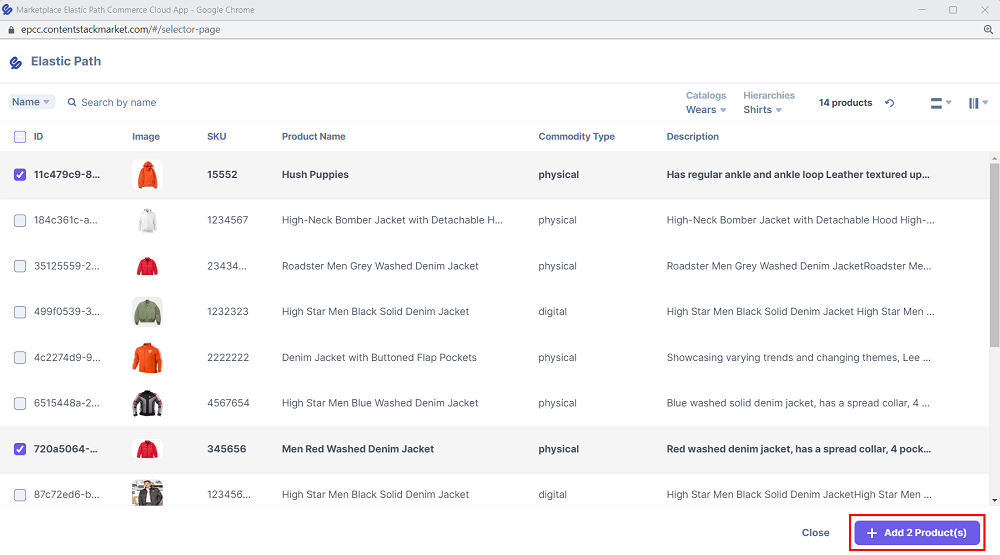
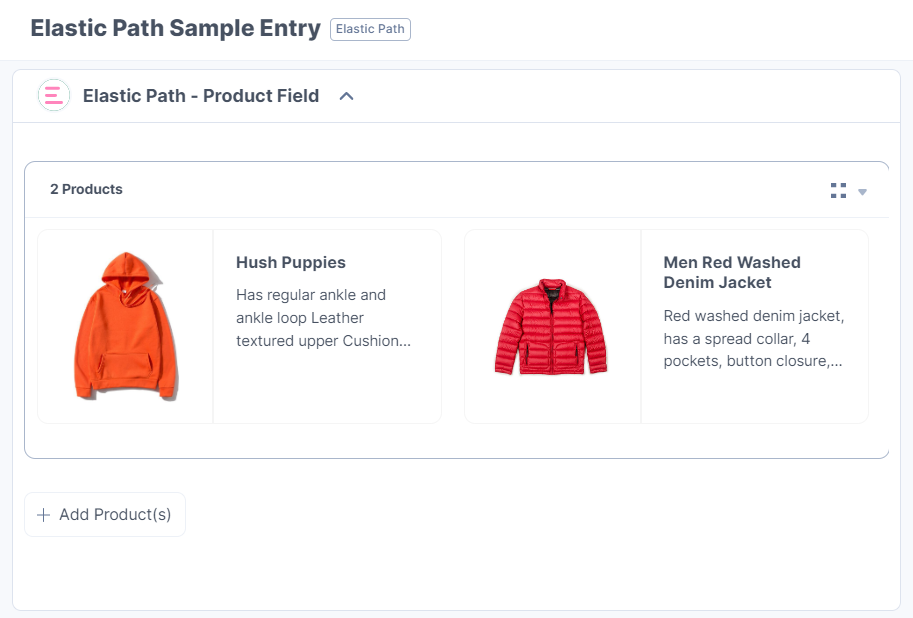
- Click the Add Product(s) button, select the products from your Elastic Path Commerce Cloud store, and add them to your entry.
-
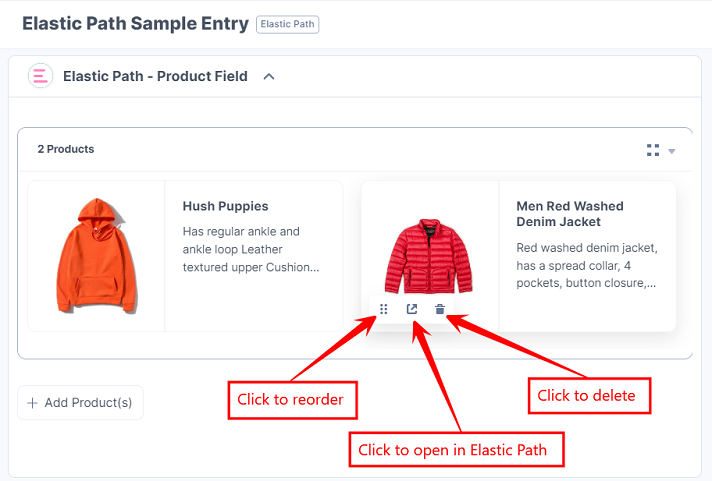
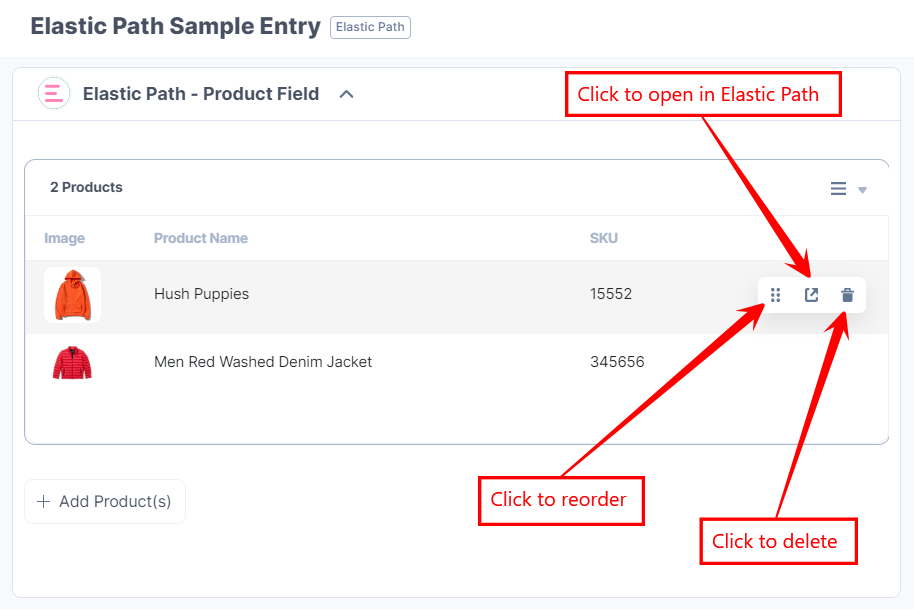
To reorder, open in Elastic Path Commerce Cloud or delete the selected product, hover over the product to get the options available, then perform the following:
- Click the Reorder icon to drag and reorder the product.
- Click the Open in Elastic Path Commerce Cloud icon to open the product in the Elastic Path Commerce Cloud app.
- Click the Delete icon to delete the product.
Note: Ensure that you are logged in to your Elastic Path Commerce Cloud account and have selected the store which contains all the imported products.
- Click the Save button to save your entry.
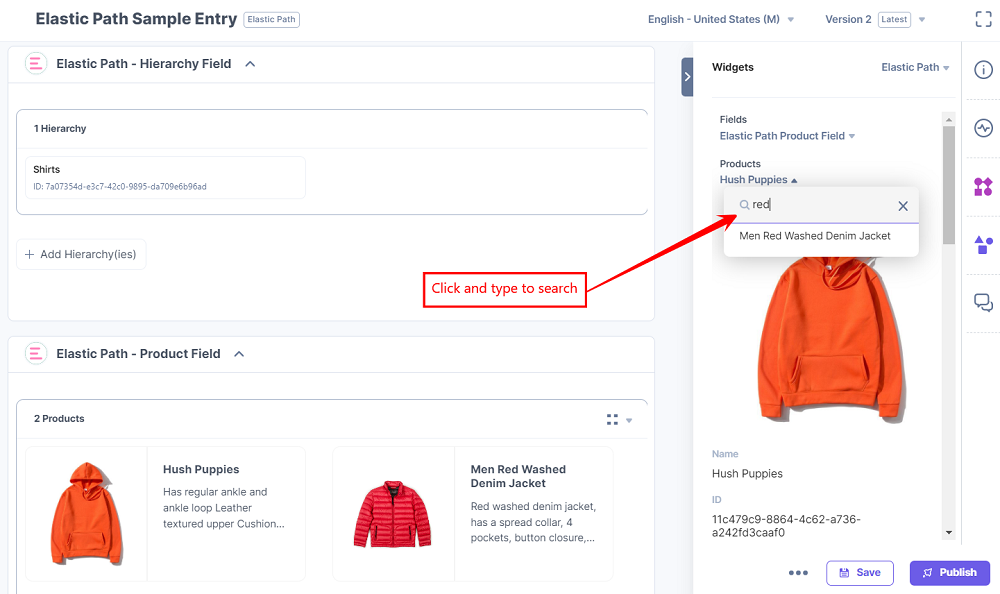
- In the right navigation panel, select Widgets, and then select Elastic Path Commerce Cloud to view the product details.
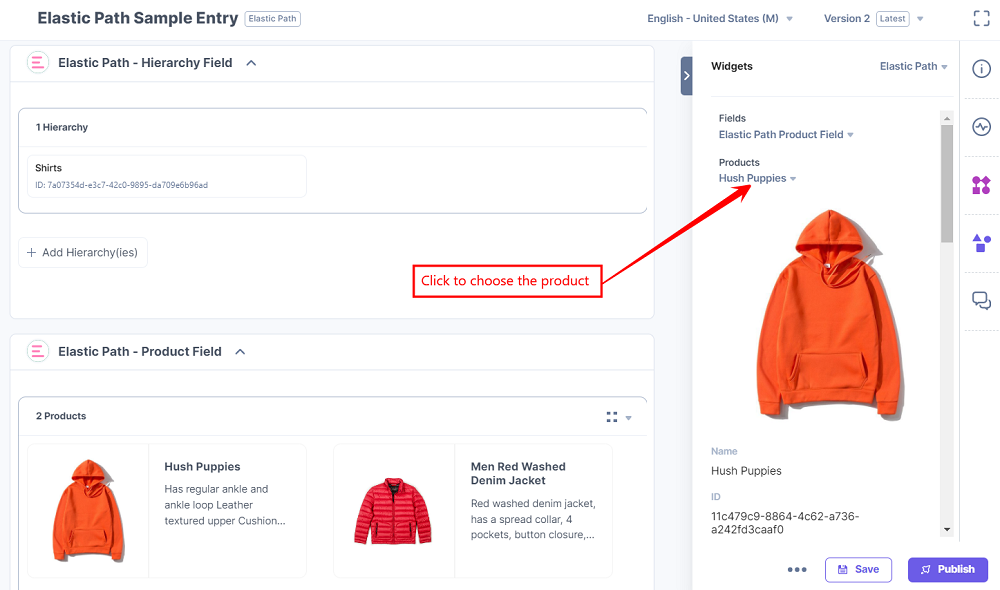
- Enter the product name in the dropdown to search and view the product details.
- Click the Publish button to publish your entry.
Note: You can filter hierarchies by catalog or by a full-text search based on ID or name.
The hierarchies you selected are referenced within your entry.
Note: You can filter products by catalog and hierarchies or by a full-text search based on SKU or name.
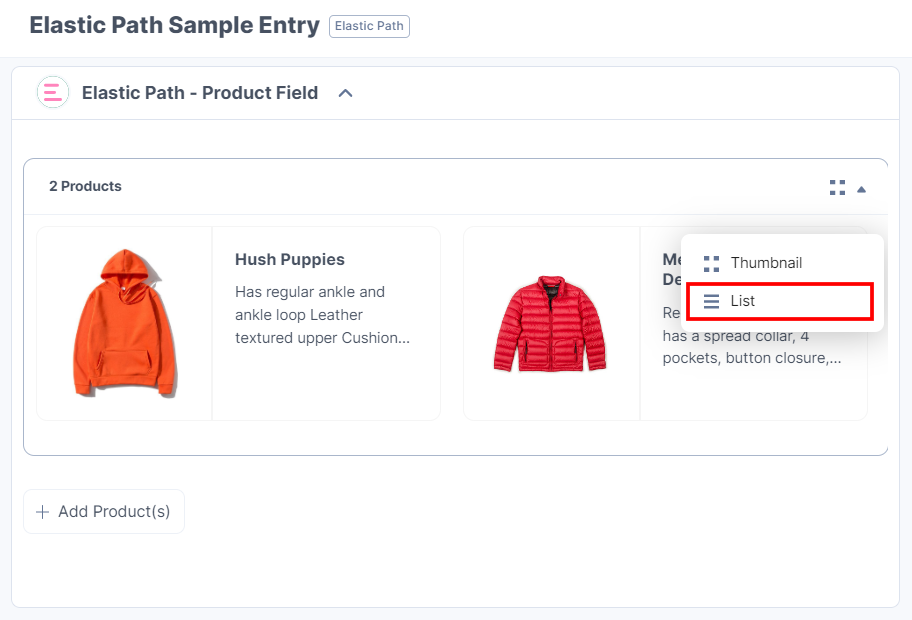
The products you selected are referenced within your entry in the thumbnail view:
To view the products in list view, select the list view option from the dropdown as given below:
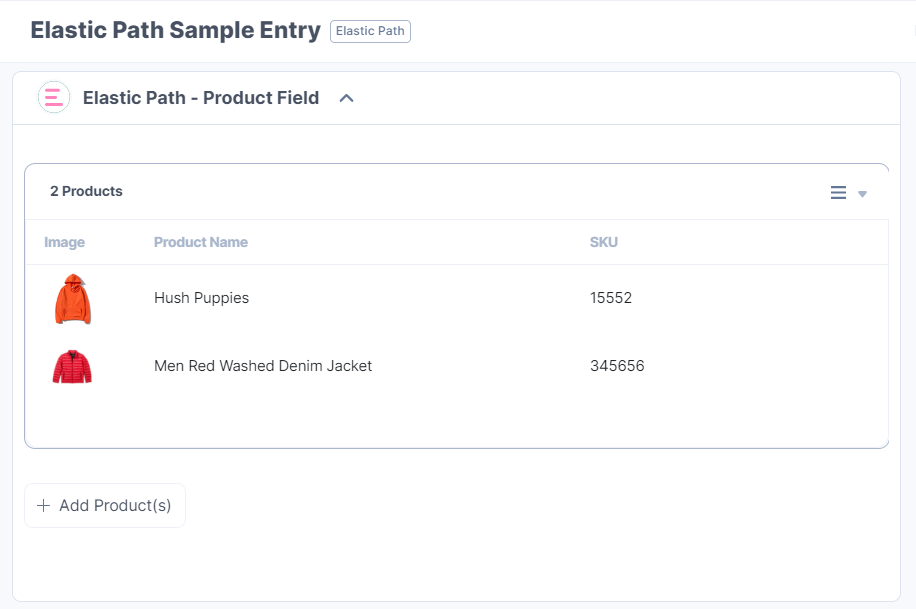
The products you selected are referenced within your entry in the list view:
Thumbnail View
List View
You can view more product details in the Sidebar Widget.
Note: You must save your entry to get the product details in the Sidebar Widget.


.svg?format=pjpg&auto=webp)
.svg?format=pjpg&auto=webp)
.png?format=pjpg&auto=webp)


.png?format=pjpg&auto=webp)