

.svg?format=pjpg&auto=webp)
.svg?format=pjpg&auto=webp)
.png?format=pjpg&auto=webp)


.png?format=pjpg&auto=webp)
Frontify App Installation Guide
Frontify is an asset management platform many brands use to organize all digital assets in one place. You can upload, store, and manage images, videos, icons, logos, and documents for a collaborative workflow. With asset personalization, you can govern and set the accessibility of certain assets within your team.
Contentstack Marketplace lets you install the Frontify application and use it within your stack to fetch and display assets from Frontify within your entries.
Prerequisites
- Frontify account
- Contentstack account
- Access to the Contentstack Organization/Stack as the Owner/Admin
Let's follow this step-by-step guide to install and configure Frontify within your stack.
Steps for Execution
- Fetch Credentials from Frontify
- Install and Configure Frontify in Contentstack Marketplace
- Use Frontify within your Stack
-
Fetch Credentials from Frontify
You must fetch the credentials from the Frontify dashboard to configure the app. Follow the steps to do so:
- Go to Frontify and create a new account.
- To fetch the Domain URL, click the profile icon on the bottom left corner, then click Domain Management. You will find the list of domain URLs under Domain. Use the accessible domain.
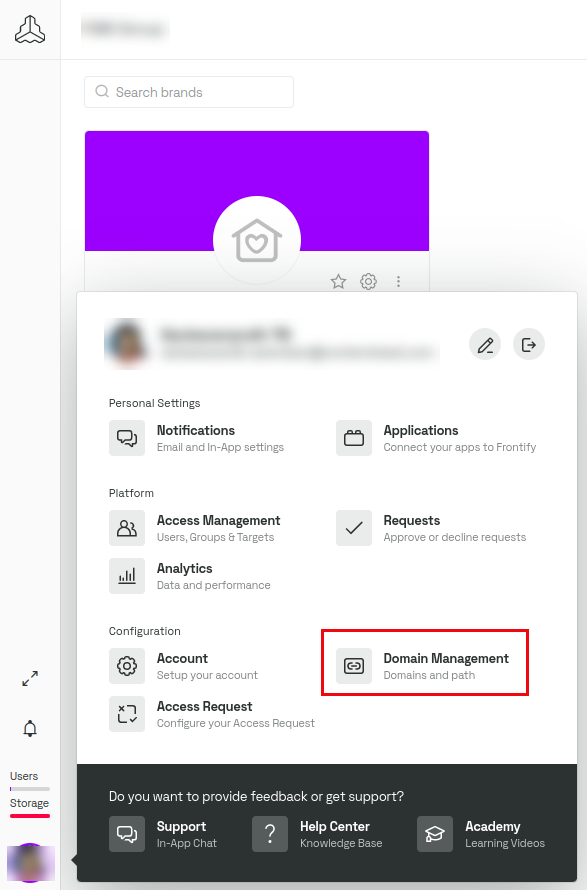
Note: While using the Domain URL, precede it with https://. For example, https://frontify.example.com

Additional Resource: Refer to the Domain Path documentation to know more about domain management for Frontify.
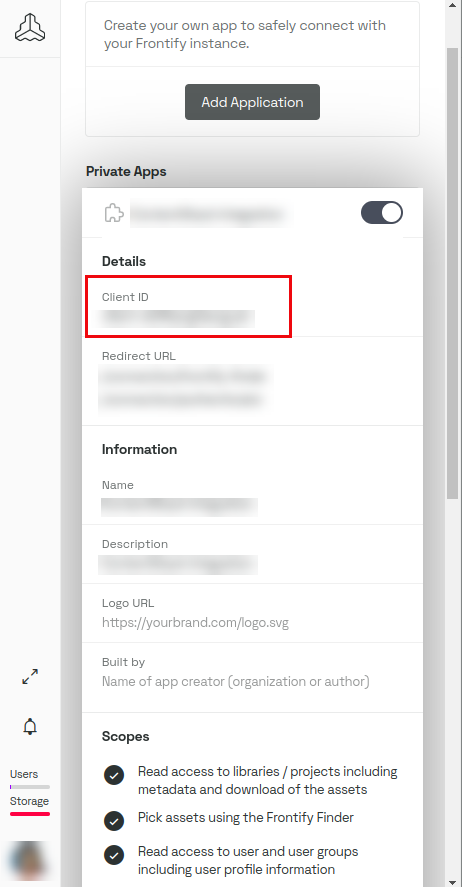
- To get the Client ID, you need to create an application. To do so, click the profile icon at the bottom left corner.
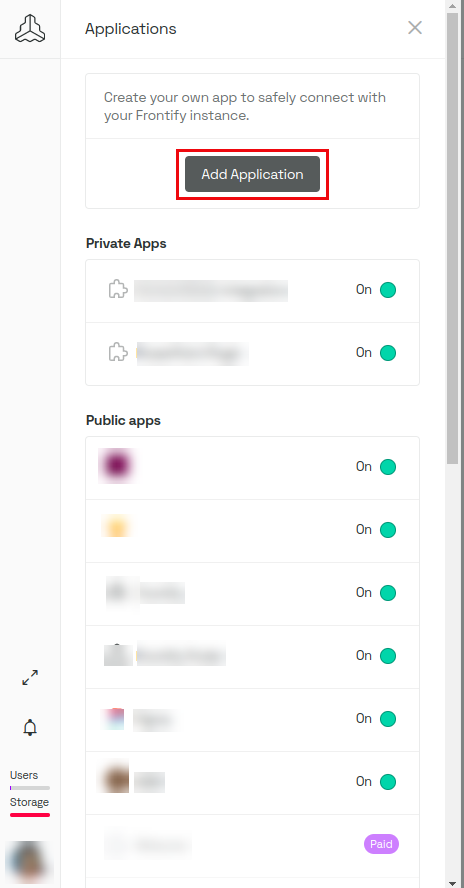
- Under user profile, click Applications.

- Click Add Application.
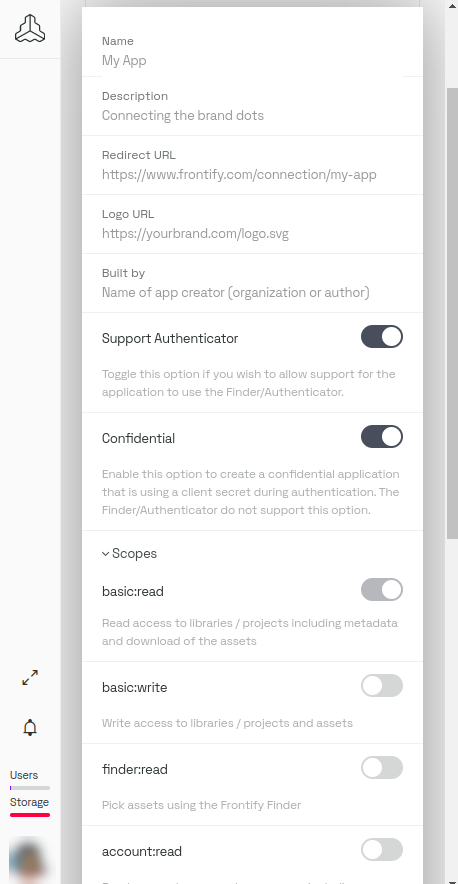
- Enter details such as Name, Description, enable Support Authenticator, disable Confidential Option, and add the scopes as basic:read and finder:read.
- After filling up the details, click the Create App button to create the app.
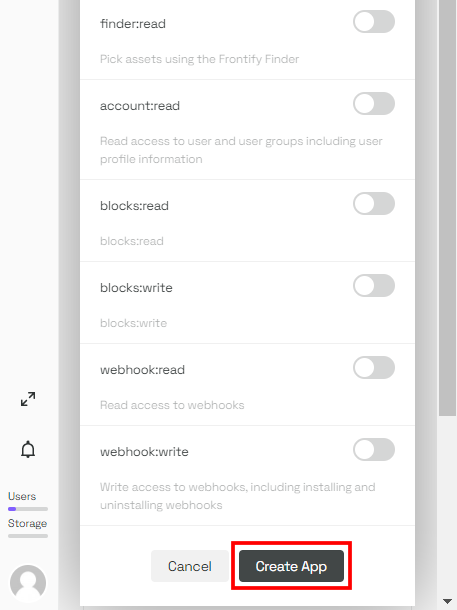
- Once done, click the app to view the Client ID.
Additional Resource: For more information, refer to Learn how to generate your own OAuth 2 Client to use the Finder.
-
Install and Configure Frontify in Contentstack Marketplace
Follow the steps to install the application in Contentstack.
- Log in to your Contentstack account.
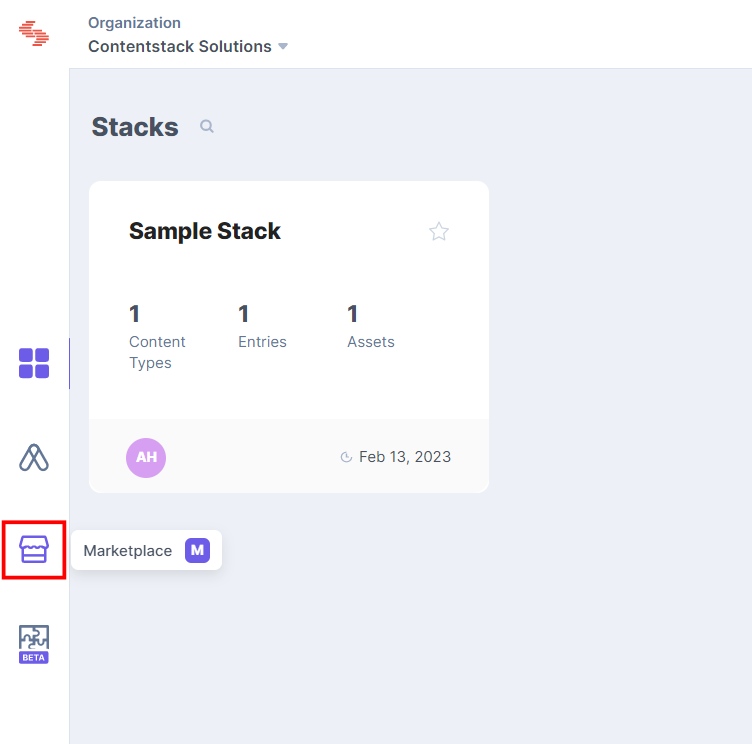
- In the left-hand side primary navigation, click the Marketplace icon to go to the Marketplace.
- Click Apps from the left panel.
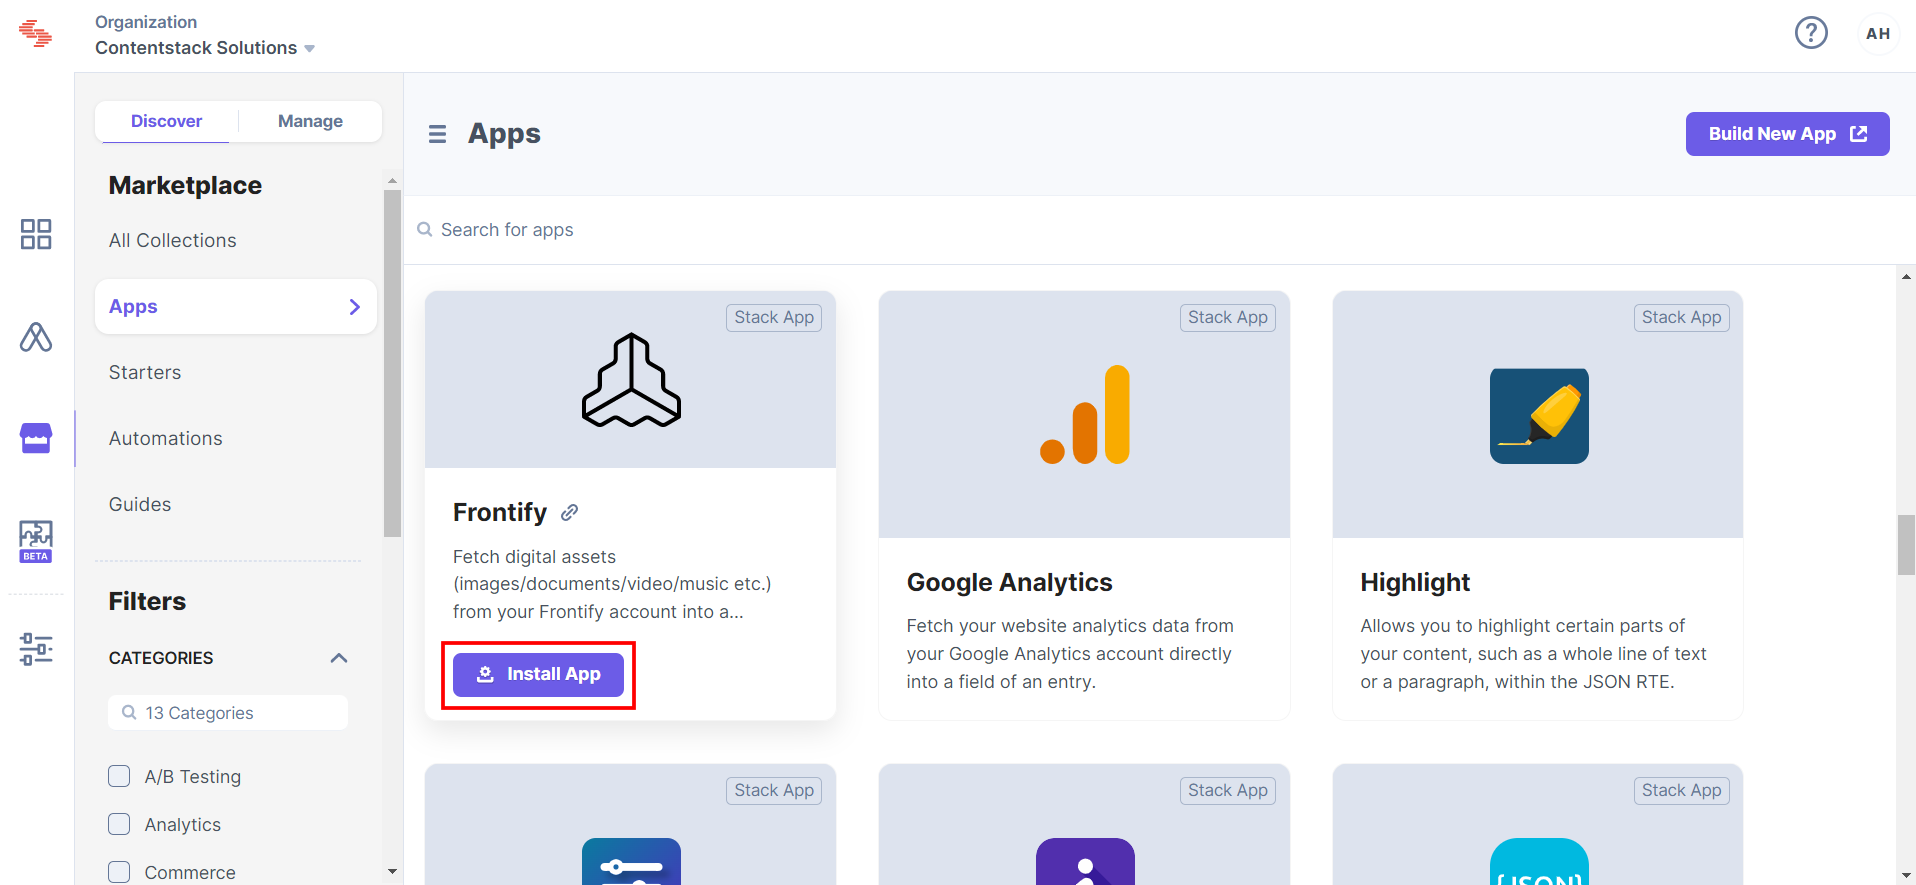
- Within the Marketplace, you will be able to see all the available apps. Hover over the Frontify app and click Install App.
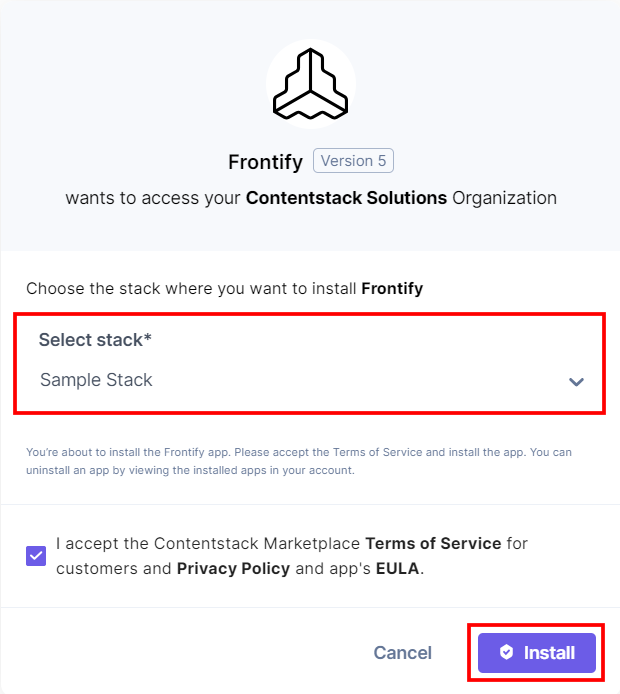
- In the popup window, select the stack where you want to install the Frontify app and click the Install button.
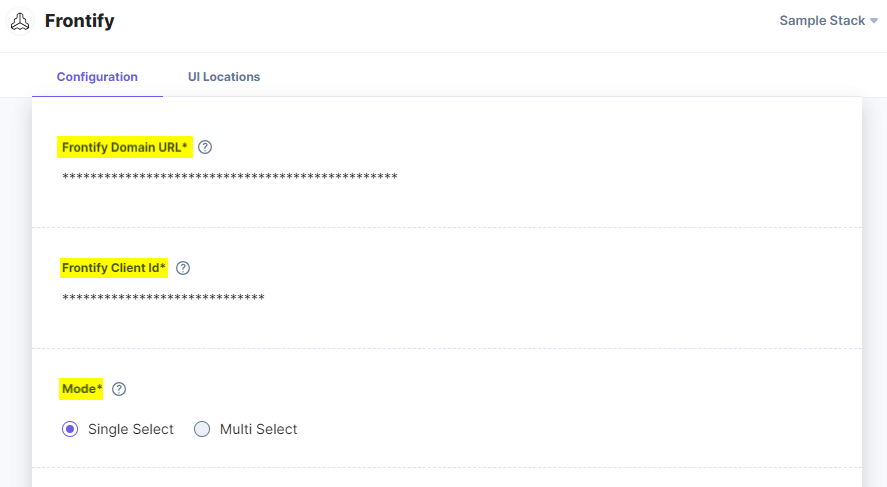
- On the Configuration page, enter the following details:
- Enter the Frontify Domain URL and Frontify Client ID retrieved from Frontify in step 1.
- Select a Mode.
- With Multi Select, you can select multiple assets at a time from your media gallery.
- With Single Select, you can select a single asset at a time from your media gallery.
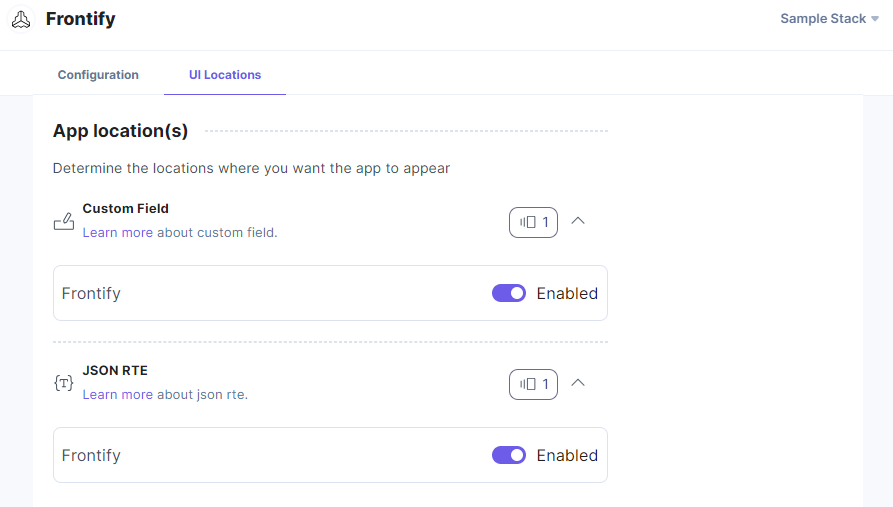
- On the UI Locations tab, you can see the predefined app locations. You can use the toggle button corresponding to each UI location to enable or disable it based on your requirements.
- Click the Save button.
- Click Open Stack to start using the Frontify application.
Additional Resource: For more information on UI locations, please refer to the Installed Apps guide.
-
Use Frontify within your Stack
- Go to your stack, and click the Content Models icon in the left navigation panel.
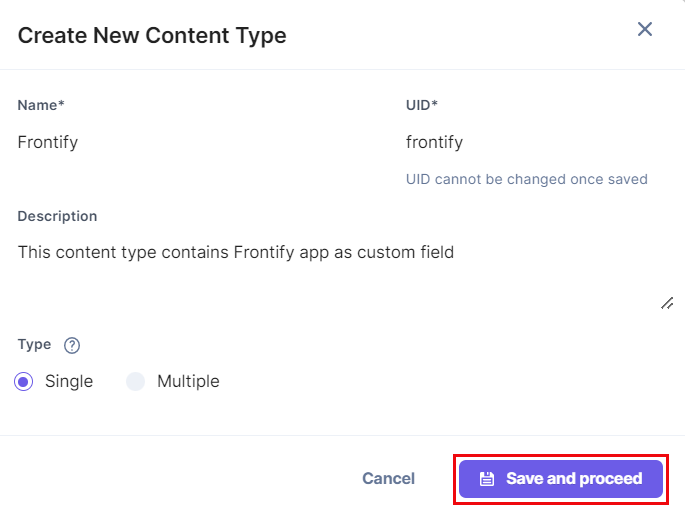
- Click the + New Content Type button to create a new content type.
- Add relevant details and click the Save and proceed button.
There are two ways to use the Frontify application in your entry.
Steps to use the Frontify application using a Custom field:
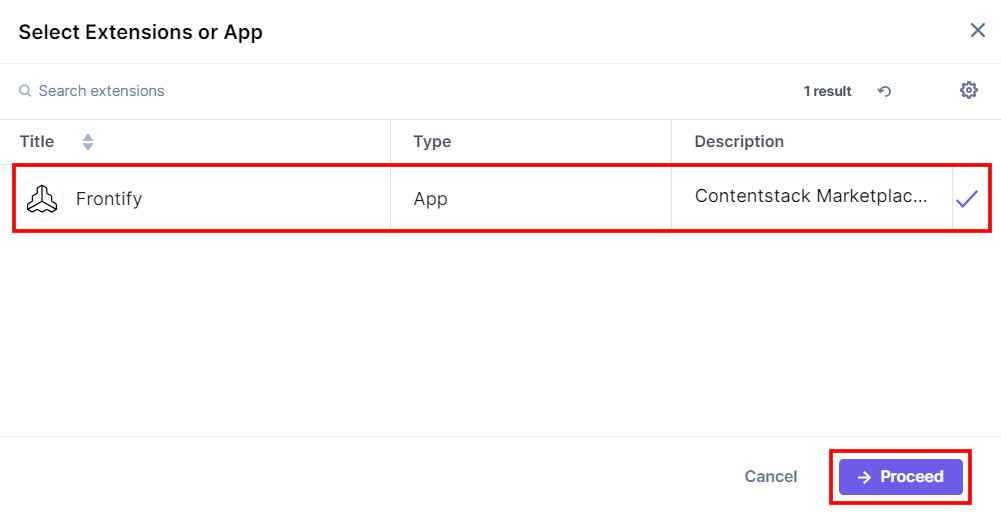
- Click the Insert a field link represented by a + sign to add a custom field.
- Under Select Extension/App, select Frontify, and then click Proceed.
Add Configuration to Frontify’s Custom Field
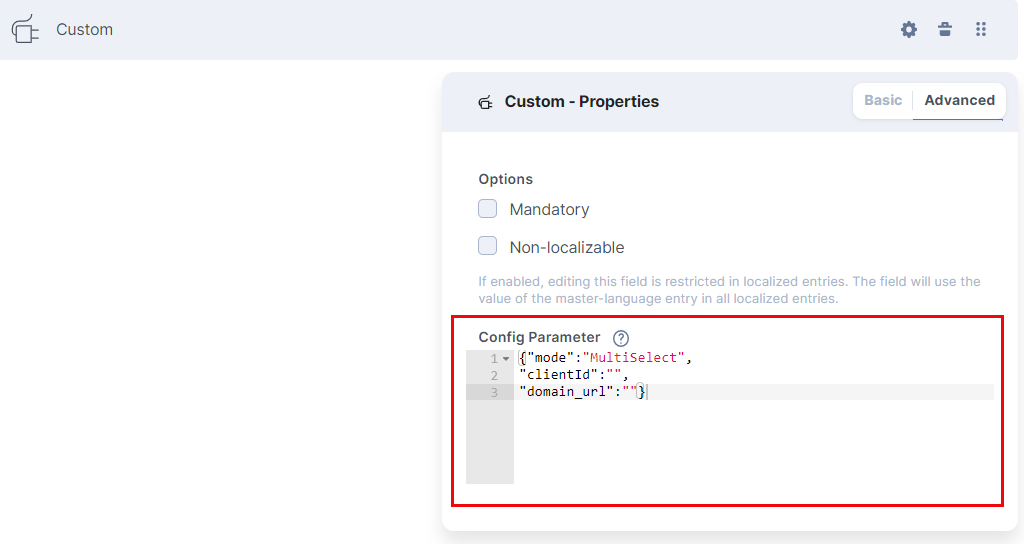
To customize the configuration for a specific custom field added in a content type, follow the steps given below:- Click the Properties icon of the Custom field.
- Go to Advanced.
- Under Config Parameter, add the configuration for that custom field (in object format).
For example:
{
"mode": "MultiSelect",
"clientId": "",
"domain_url": ""
}
Config parameters for Frontify Marketplace App are mode, clientId, and domain_url.
Here are the possible values you can use for mode in the configuration:
- MultiSelect
- SingleSelect
Note: You can override the default app configuration for a particular custom field of content type by adding the required configuration in the Config Parameter under Properties of custom field. The key:value passed in the configuration object overrides the default app configuration.
If any configuration value is not added or the value is empty in the configuration object entered in the custom field of the content type, then the Contentstack Frontify app will use the default app configuration from the app’s configuration specified during step 2.
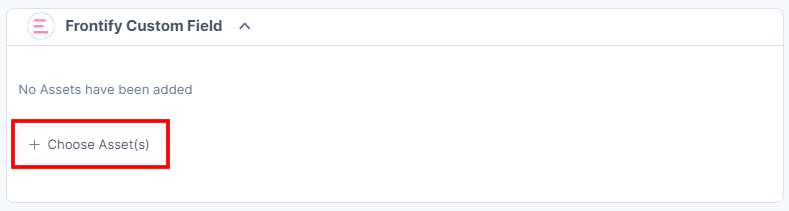
- To use the Frontify app, create an entry for the above content type, and you will see the Frontify custom field on your entry page as shown below:
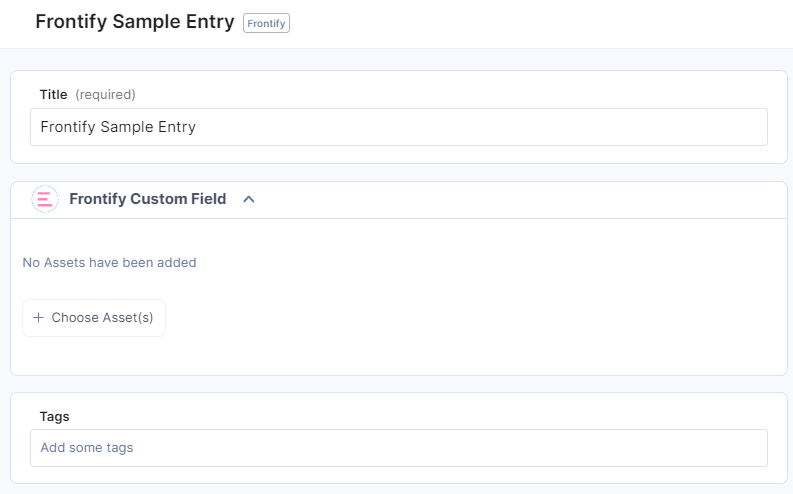
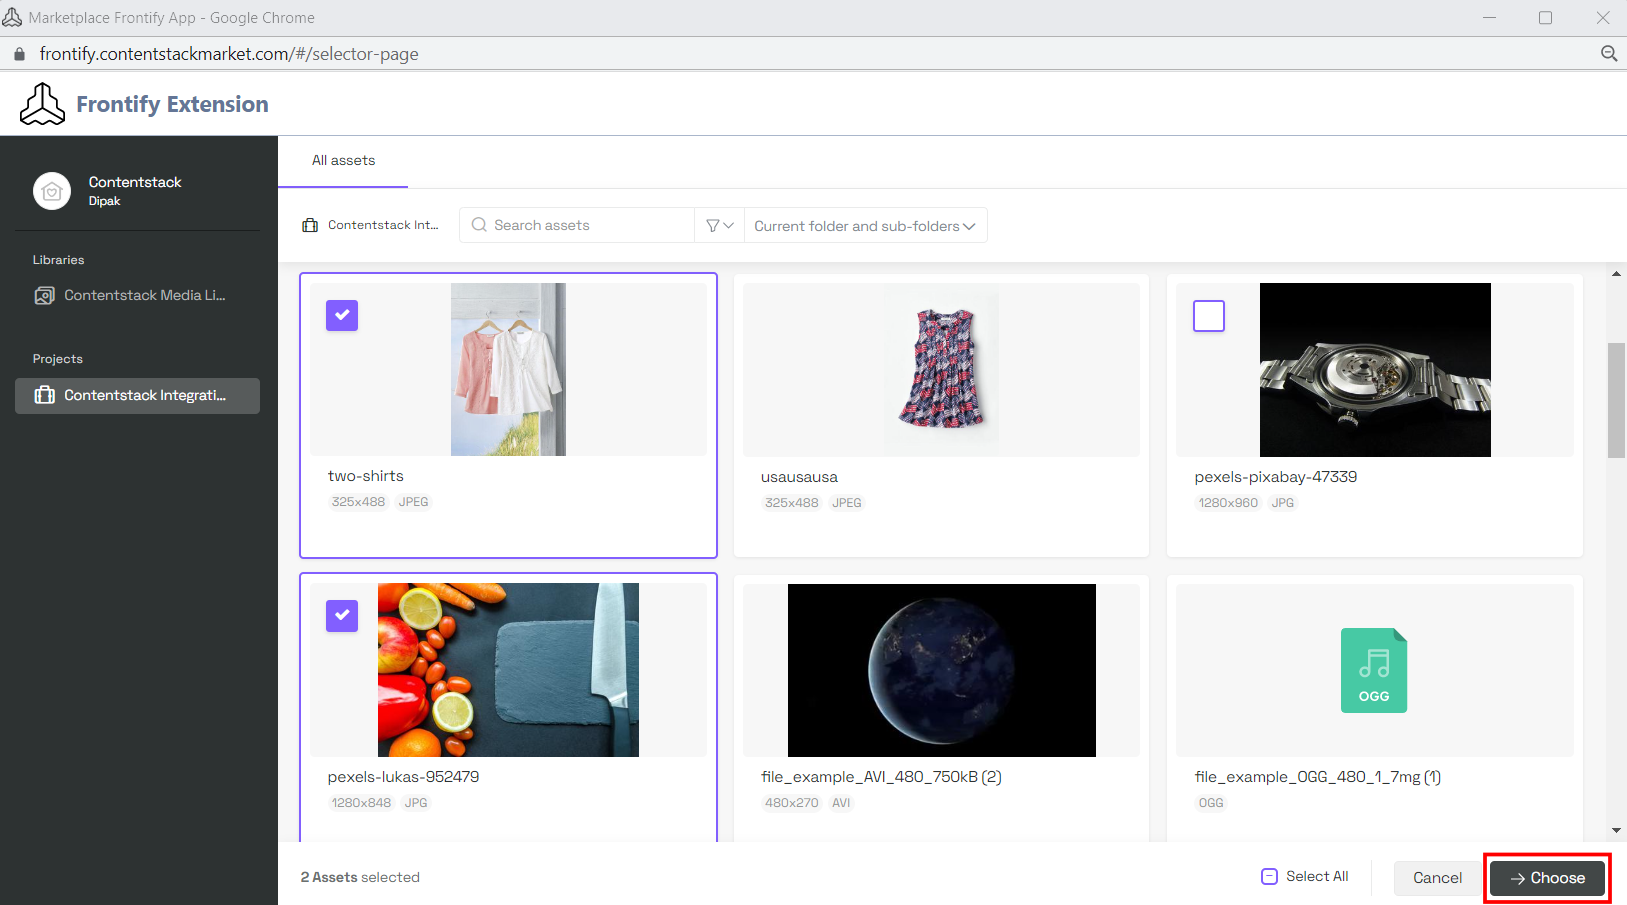
- Click + Choose Asset(s) to select assets or files from your Frontify account and add them to your entry.
- For Single Select mode, you can select one asset and click Choose to add to your entry.
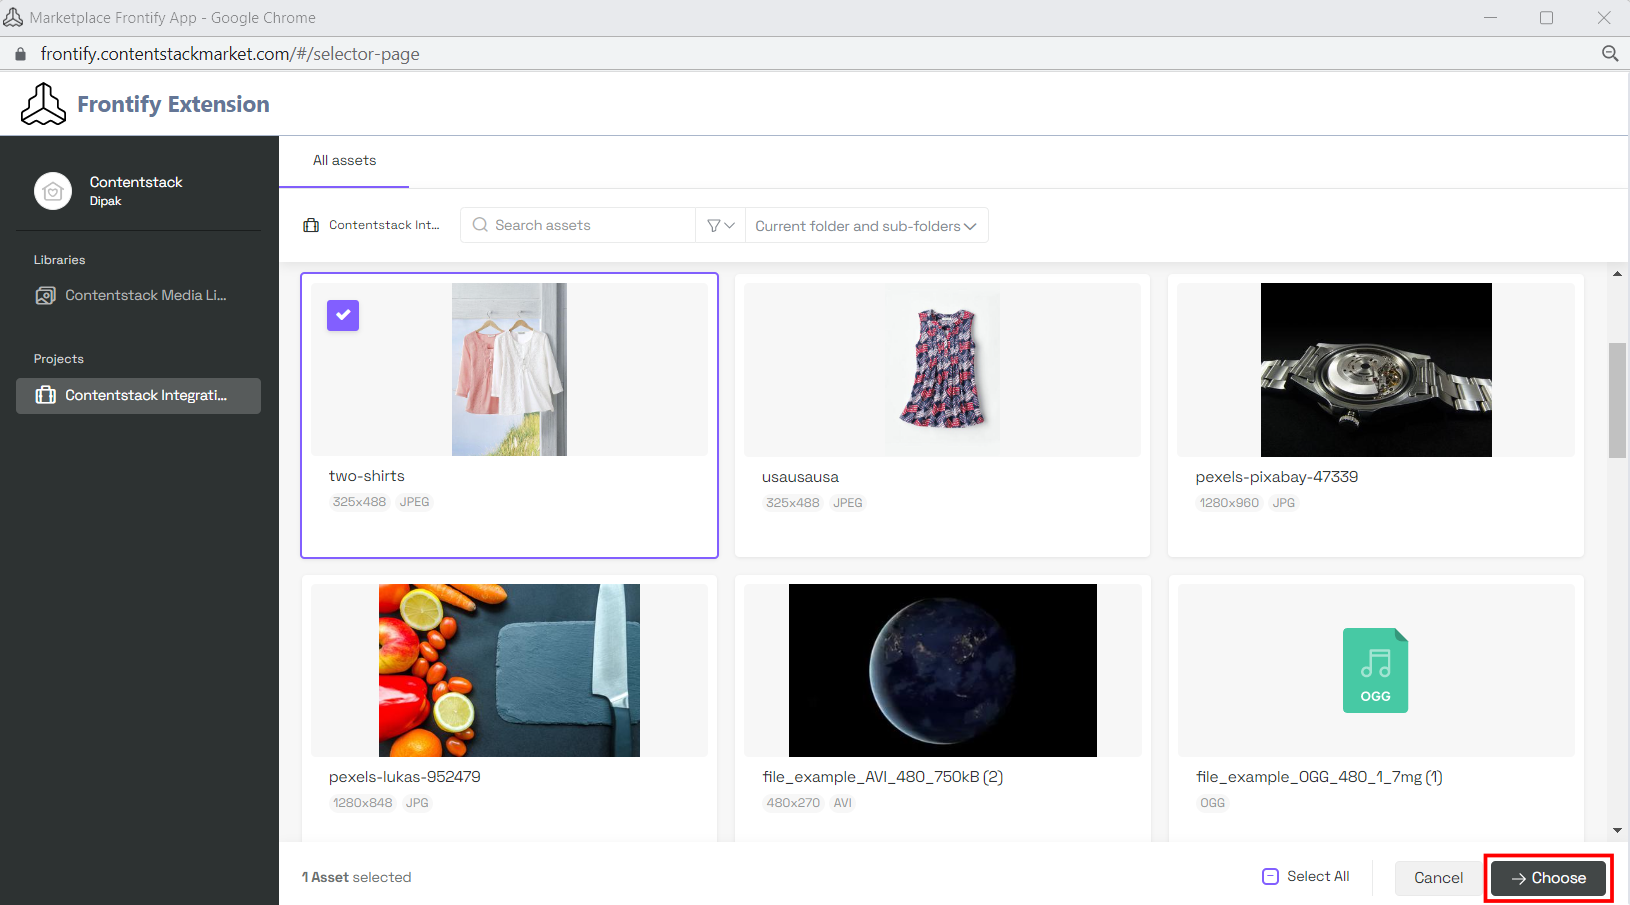
- For Multi Select mode, you can select multiple assets and click Choose to add to your entry.
Note: While selecting the images from the media gallery, an authentication screen will appear for the first-time, asking the user to authenticate the application by entering the username and password. After authentication, the user needs to authorize the application in order to fetch the assets from their Frontify account.
- For Single Select mode, you can select one asset and click Choose to add to your entry.
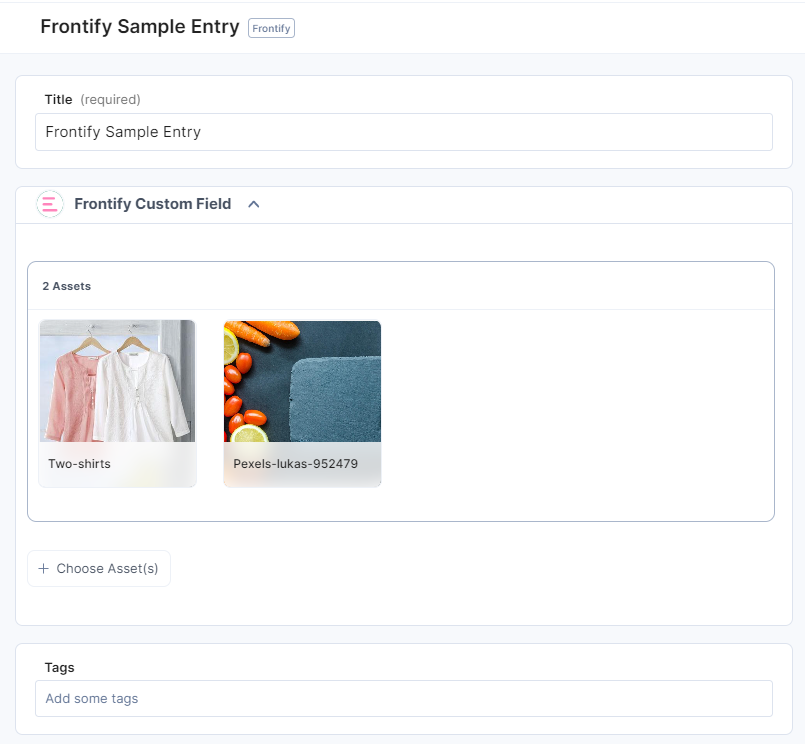
- The assets you select are added within your entry.
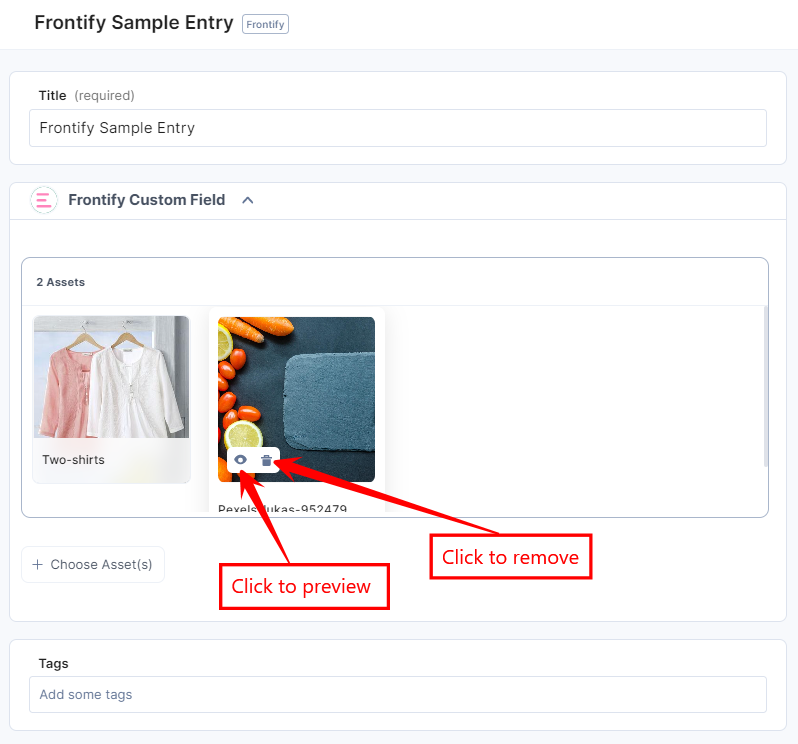
- Hover over the image to view the options to remove or preview the image.
- Click the Preview icon to view the image.
- Click the Remove icon to delete the selected image.
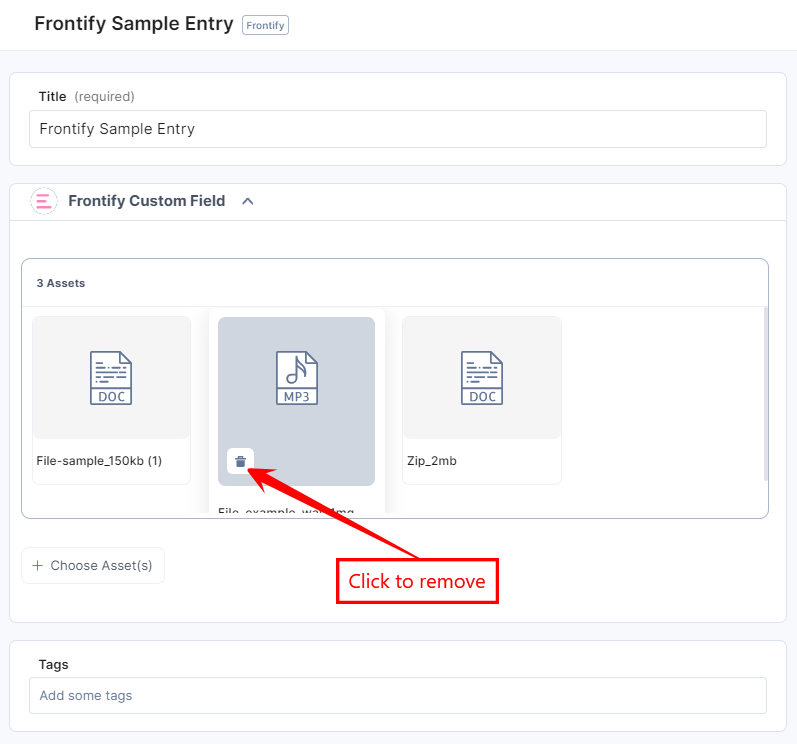
- For documents or files, hover over the document to view the remove option.
- Click the Remove icon to delete the document/media asset.
- Click the Remove icon to delete the document/media asset.
- After adding the asset(s), Save and Publish your entry.
Steps to use the Frontify application using a JSON Rich Text Editor field:
- In the Content Type Builder page, add JSON Rich Text Editor in your content type by clicking on the Insert a field link represented by a + sign.
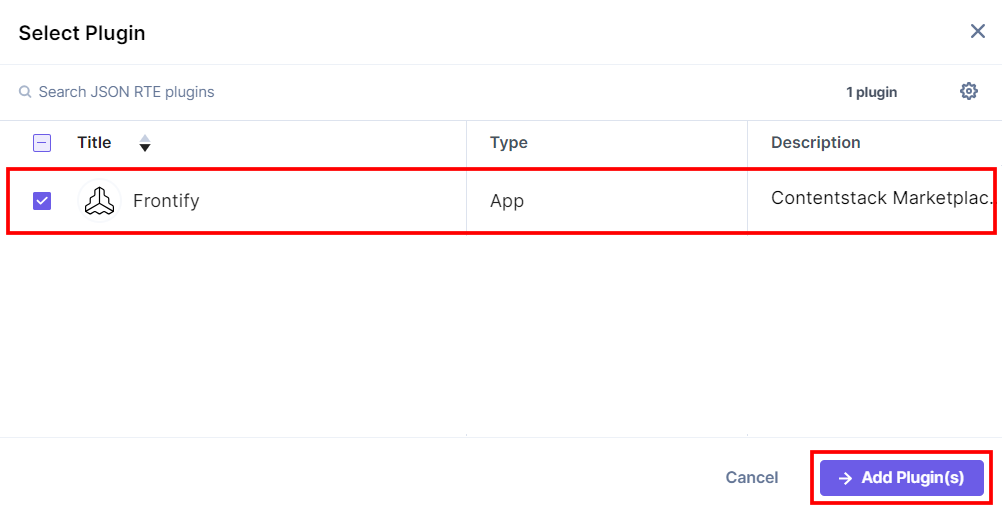
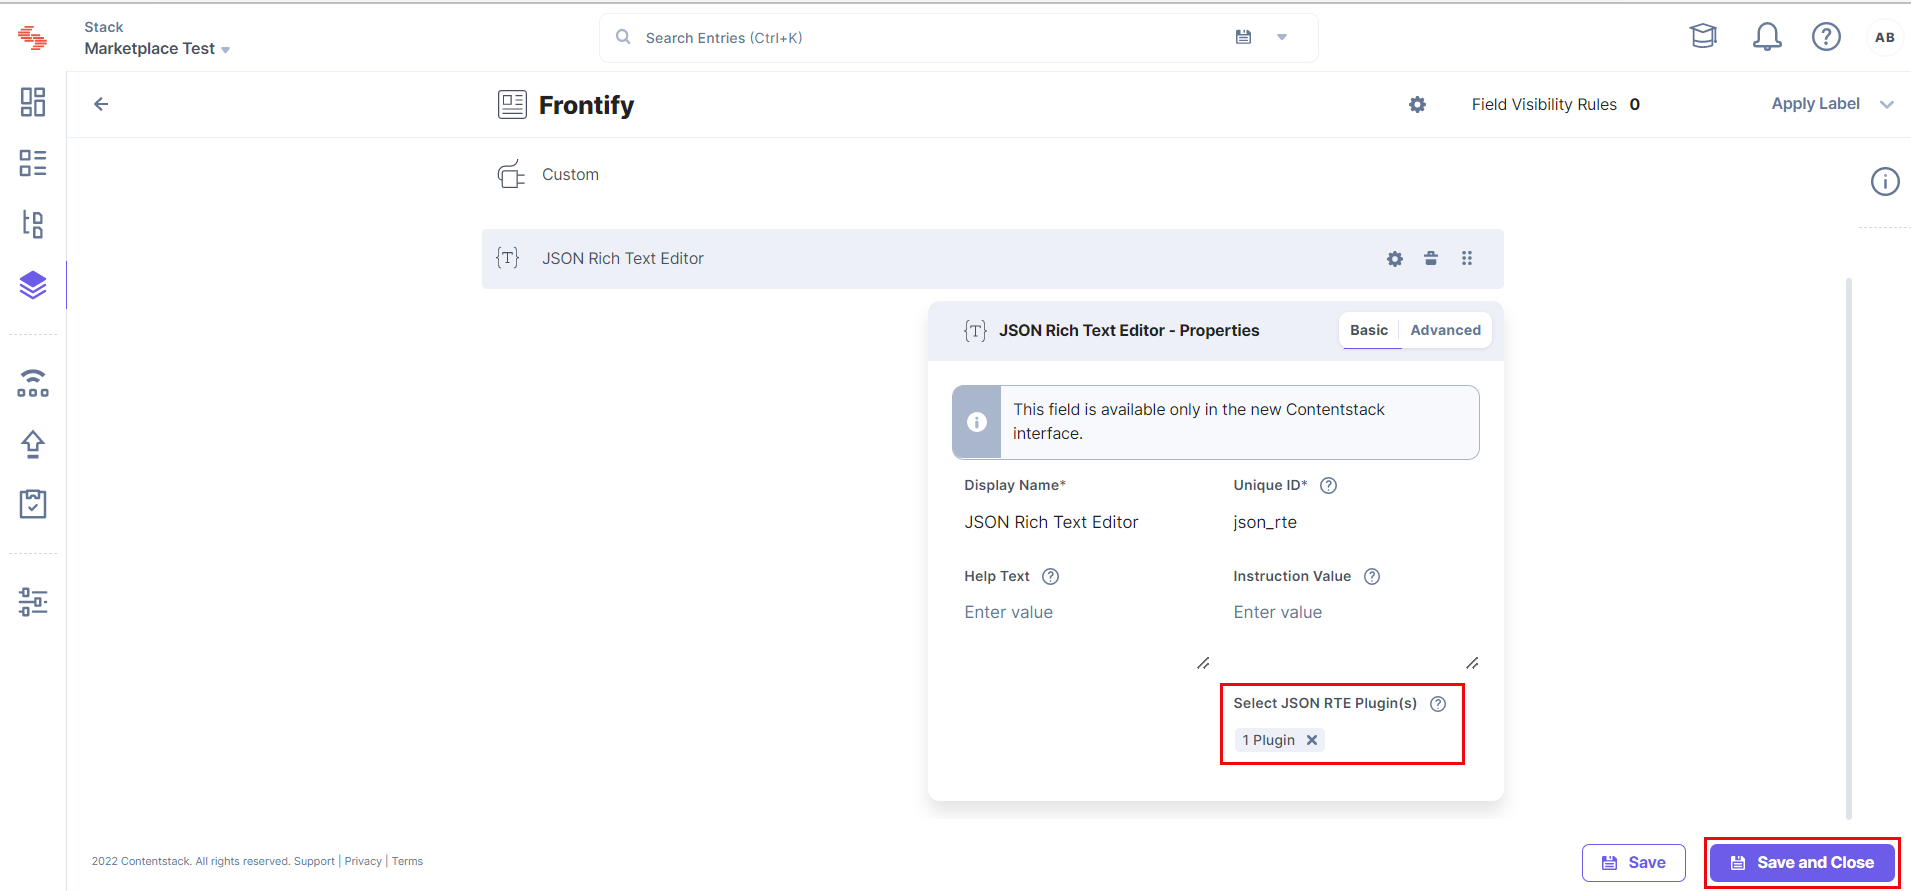
- To add the Frontify plugin in JSON RTE, click the Properties icon of JSON RTE, and under Select JSON RTE Plugin(s), choose the Frontify app, and then click the Add Plugin(s) button.
- After adding the plugin, click Save or Save and Close to save your changes.
- To use the Frontify app as a JSON RTE plugin, create an entry for this content type, and you will see the Frontify app icon in the JSON RTE field on your entry page, as shown below:
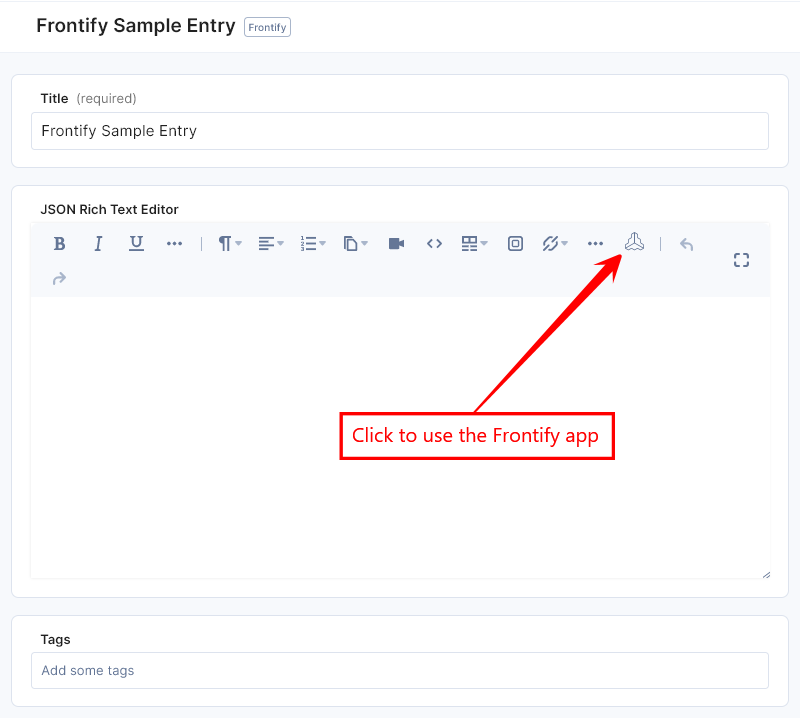
- Click the Frontify app icon to open the Media Library.
- Choose one or more products from the Media Library and add them to your entry.
- For Single Select mode, you can select one asset and click Choose to add to your entry.
- For Multi Select mode, you can select multiple assets and click Choose to add to your entry.
- For Single Select mode, you can select one asset and click Choose to add to your entry.
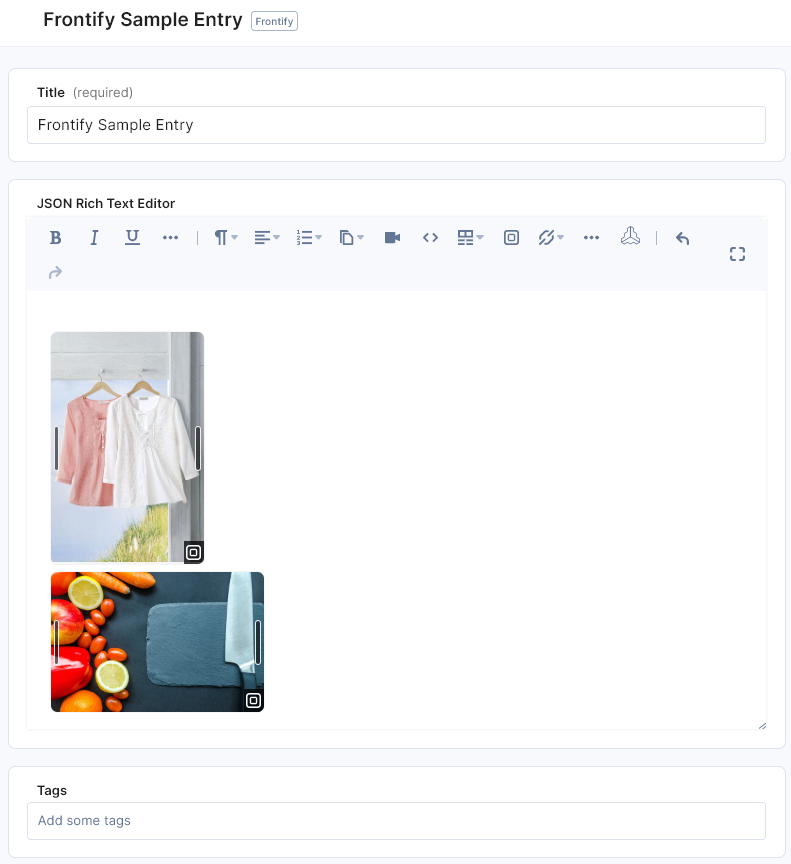
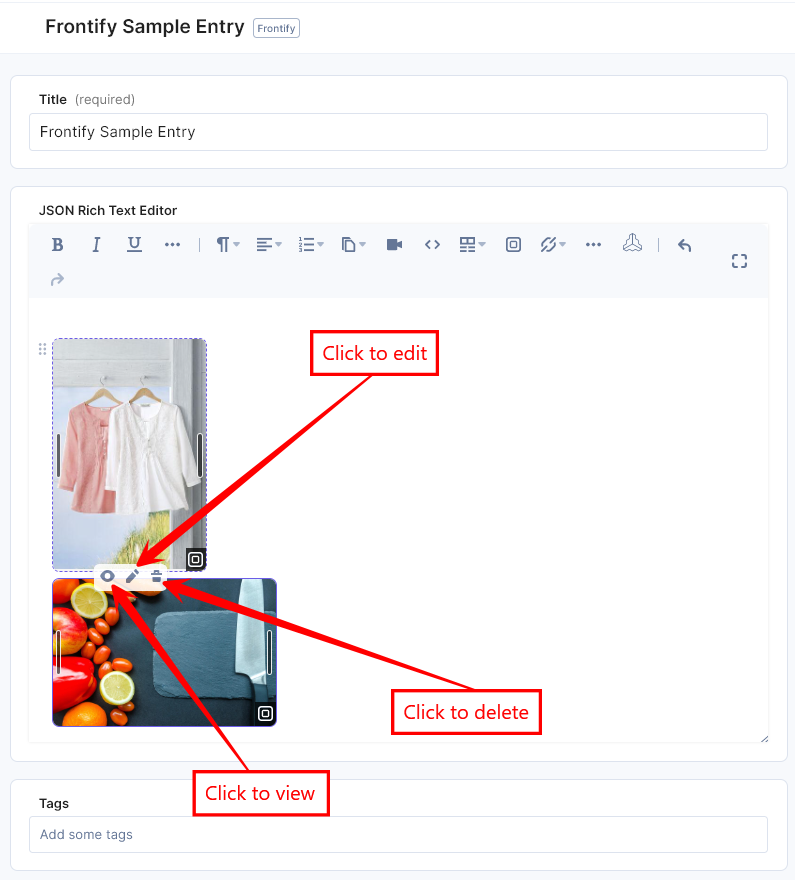
- The selected asset(s) is displayed in the JSON RTE editor:
- To resize the image, drag the corner of the image and adjust the size as per your need.
- Hover over the image to perform the view, edit and delete operations.
- Click the View icon to view the image(s).
- Click the Edit icon to edit the asset in the Frontify app.
- Click the Delete icon to delete the selected image.
- To edit the image, click the Edit icon, make the necessary changes and click Save.
- After adding the asset(s), Save and Publish your entry.
Note: In order to use the Frontify application, you need to have the below browser settings:
- Pop-ups should be enabled.
- Third-party cookies should be enabled.
More articles in "Digital Asset Management"
