

.svg?format=pjpg&auto=webp)
.svg?format=pjpg&auto=webp)
.png?format=pjpg&auto=webp)


.png?format=pjpg&auto=webp)
Personalize Your Contentstack-powered Website Using Uniform Optimize
Uniform is an optimization platform that helps businesses tailor personalized experiences for their users. It uses signals to enhance personalization based on the user's intent.
A user visiting your wesite has a reason or an intent to accomplish something, and the goal of personalization is to simplify this task for your user.
A signal in Uniform helps you identify the user's intention. For example, you can capture real-time user behavior such as pages viewed by the user, the number and type of pages visited by the user, etc.
Additional resources: Learn more about intent and signals in Uniform or refer to Uniform’s architecture to understand how it works.
In this guide, we will walk you through the steps involved in personalizing experiences for your website visitors using Uniform and Contentstack. This guide will help you get set up for the following three use cases.
- Default variation: When regular users visit your website, they will see the default content of the home page.
- Variation for event attendees: When visitors come to your site after registering for an event, they will see the event details section page.
- Variation for visitors interested in your products: Visitors who come searching for your product will see the products page.
Let's discuss how we can set up this personalization in Uniform and Contentstack.
Prerequisites
- Contentstack account
- Uniform account
- The latest version of Node.js installed on your computer
- Basic understanding of Contentstack features such as working with stacks, content type, and entries
- Working knowledge of APIs
Steps for Execution
- Create a Uniform account
- Create and configure intents and signals in Uniform
- Generate the Uniform API Key
- Set up the essentials in Contentstack
- How it works
- Next steps
-
Create a Uniform Account
Start with creating an account in Uniform. To do this, perform the following steps:
- Navigate to the Uniform app. Click the Sign up link and create an account.
 You can also sign up using your Gmail or GitHub account.
 - Once you log in, accept Uniform's terms of use and privacy policy. After reading through them, click Continue as shown below:
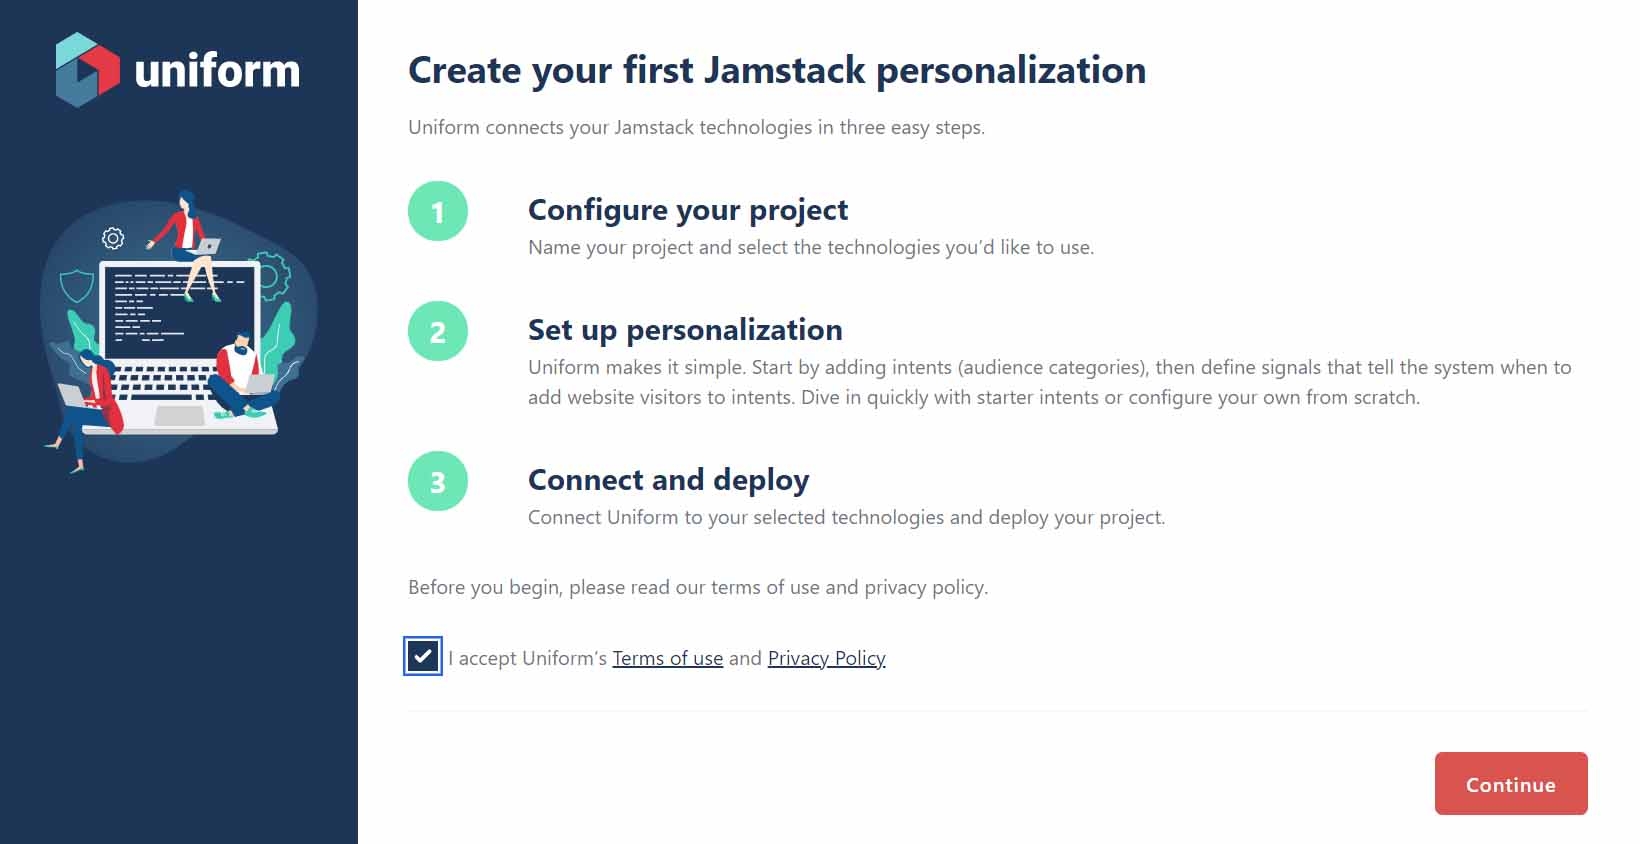
With these steps, the account setup process is complete. You can now create intent and signals in Uniform.
- Navigate to the Uniform app. Click the Sign up link and create an account.
-
Create and Configure Intents and Signals in Uniform
An ‘intent’, in Uniform, refers to the reason a visitor comes to your site. Defining an intent would mean specifying the type of audience along with the goal that they intend to achieve. For example, marketers who want to read cases, or partners interested in a quick product overview. And a ‘signal’ is something that will help you determine the intent of the visitors.
Once you set up your Uniform account, you need to set up your first project in Uniform. In this example, we will be creating two intents in our project:
- Annual Event Registration to manage users coming through the annual event invitation.
- Know More for users who land on our product page.
Let's follow the steps given below and add intents and signals for our project.
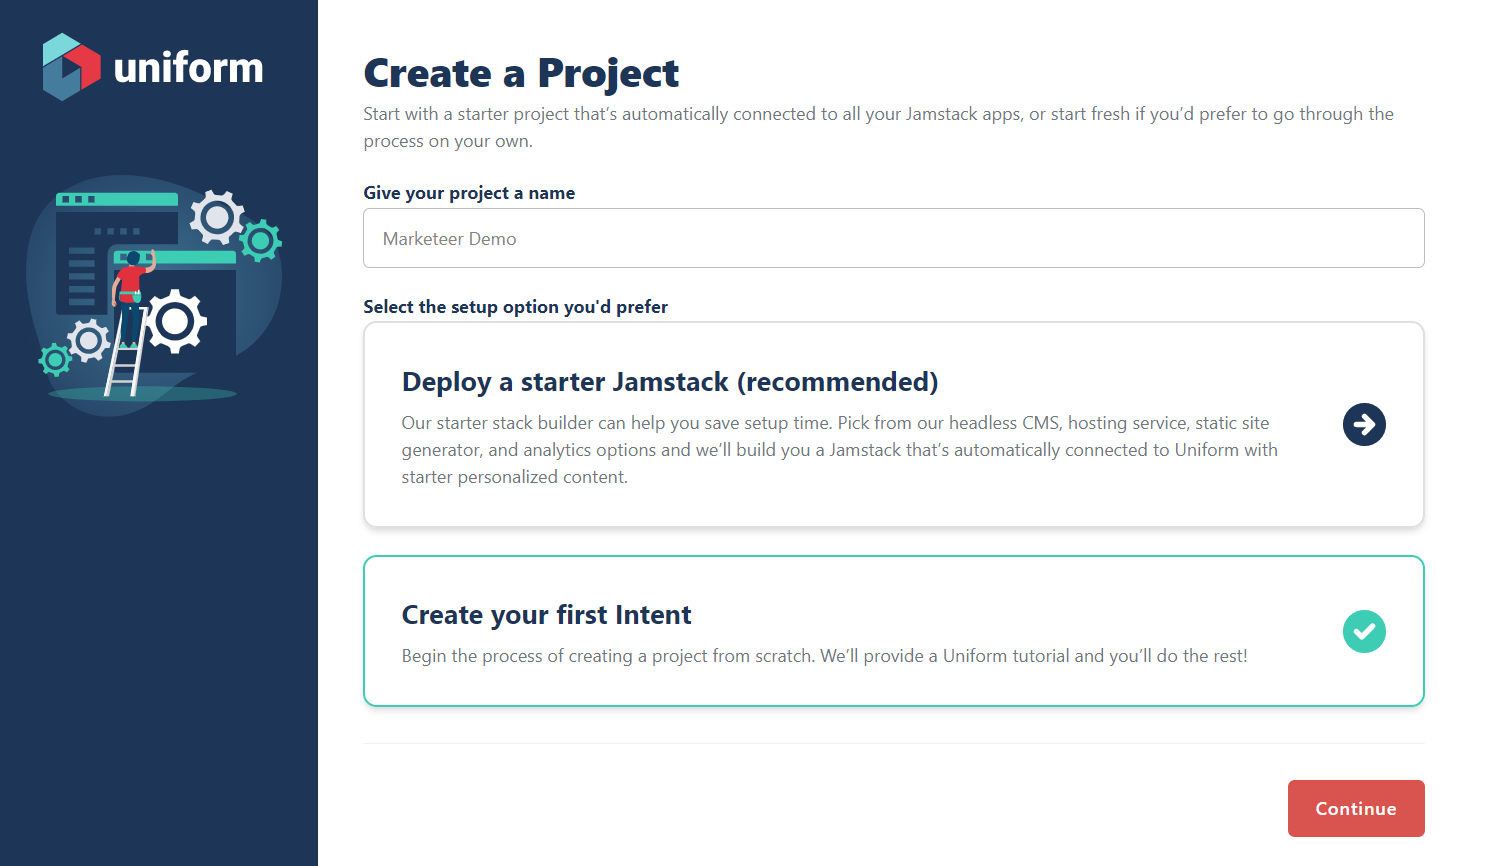
- On the Create a Project screen, provide a suitable name for your project, select the Create your first Intent option, and then click Continue as shown below:
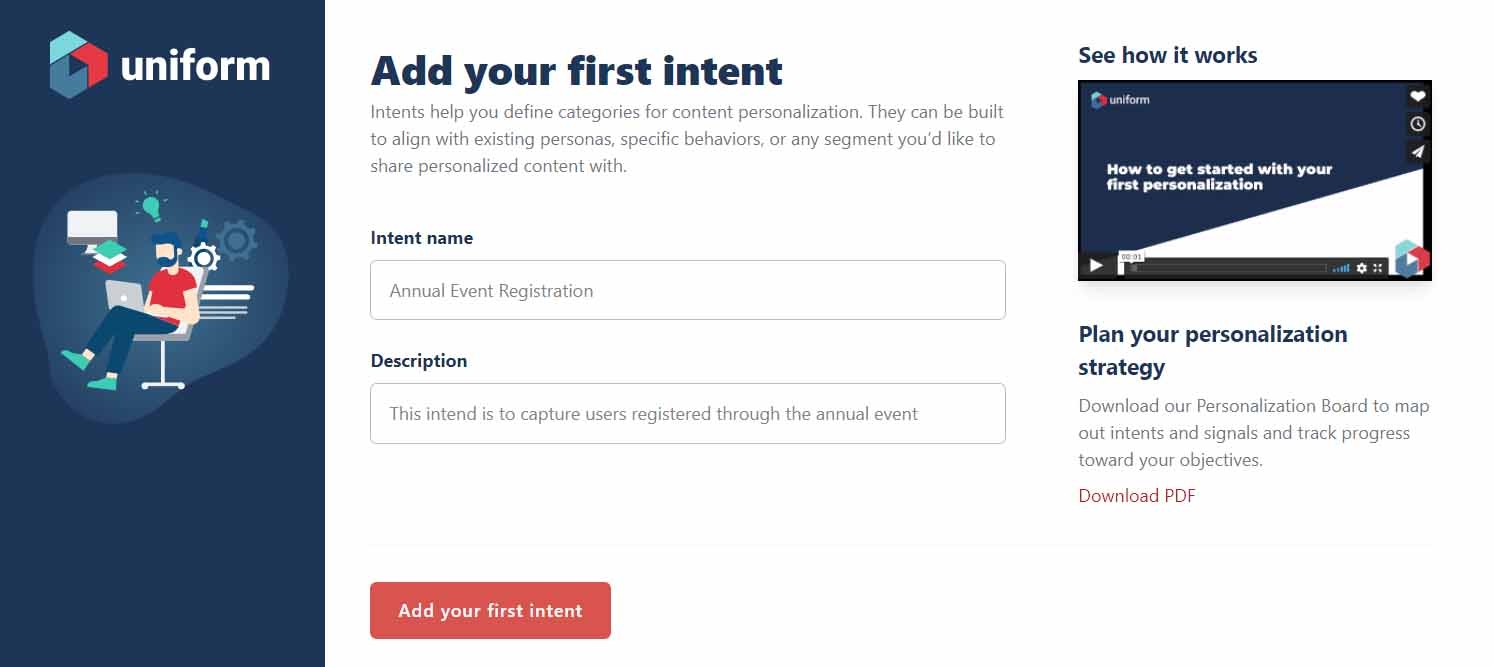
- On the Add your first intent page, provide the intent name and an optional description. You can watch the video named See how it works to understand the concept in detail.
- Once you click Add your first intent, you need to select a signal type for your intent. You can choose from the available options. For our example, we will add the following two signals for this intent:
- Behavior: To track intent's specific content that the visitor consumes in real time.
- Query String: Specific actions or attributes provided by the visitor to help us personalize content.
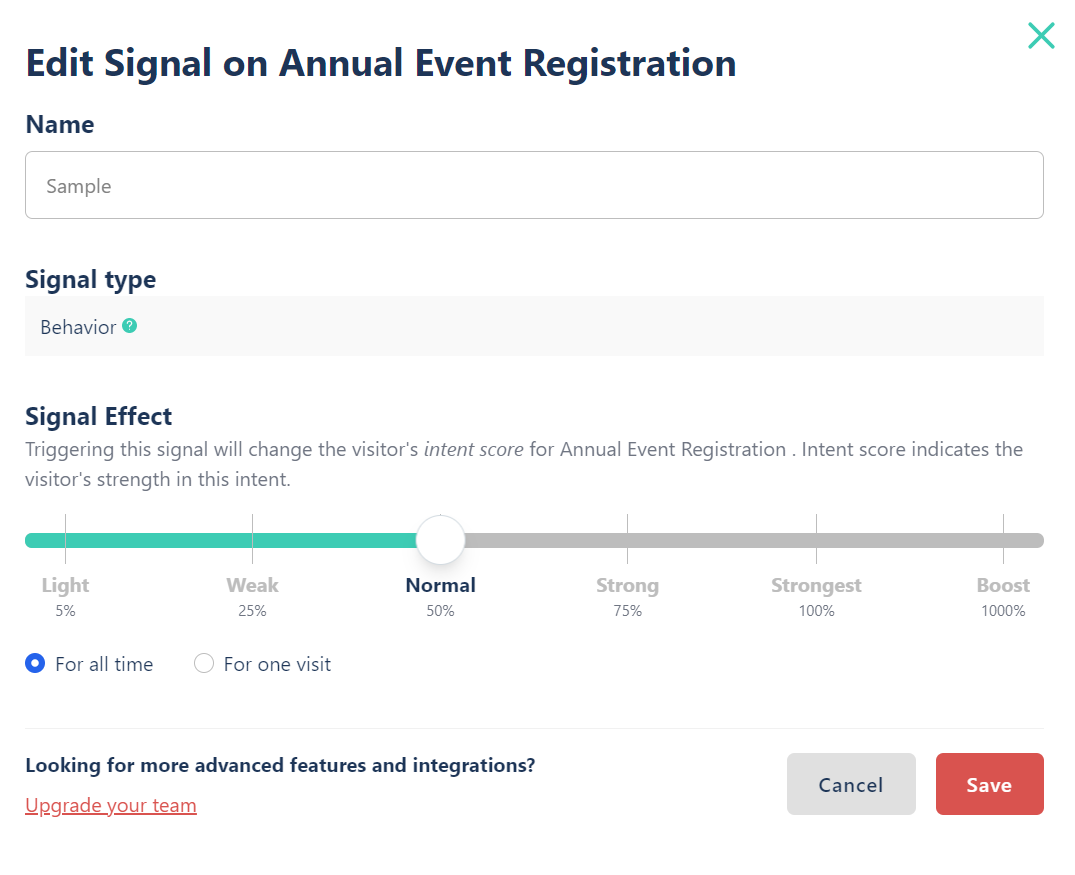
- Click Behavior and set it up as shown below:
- Name: Enter a suitable name for your signal. We have added a Sample behavior for this example.
- Signal type: Behavior will be selected by default. You can click the help icon to learn more about behavior.
- Signal Effect: You can define the strength of this signal. For our example, we have kept it to Normal.
- Scope: Lastly, define the scope of this signal. You can choose between For all time (intent score applicable for all visits) and For one visit (intent score applicable for the current visit). For our example, we have kept it to For all time as shown below:
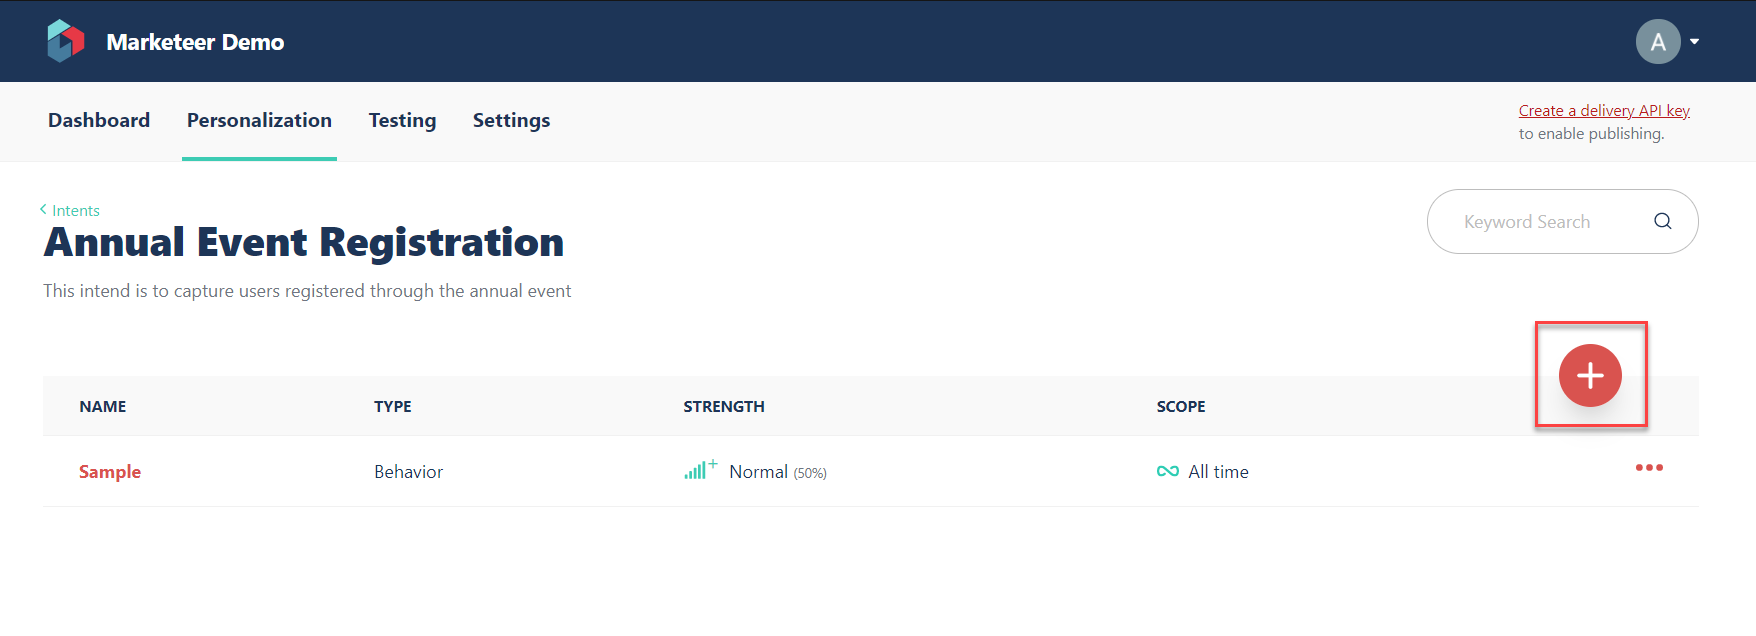
- Click Save to add the first signal for your intent. Let's add the Query String signal by clicking on the "+" icon as shown below:
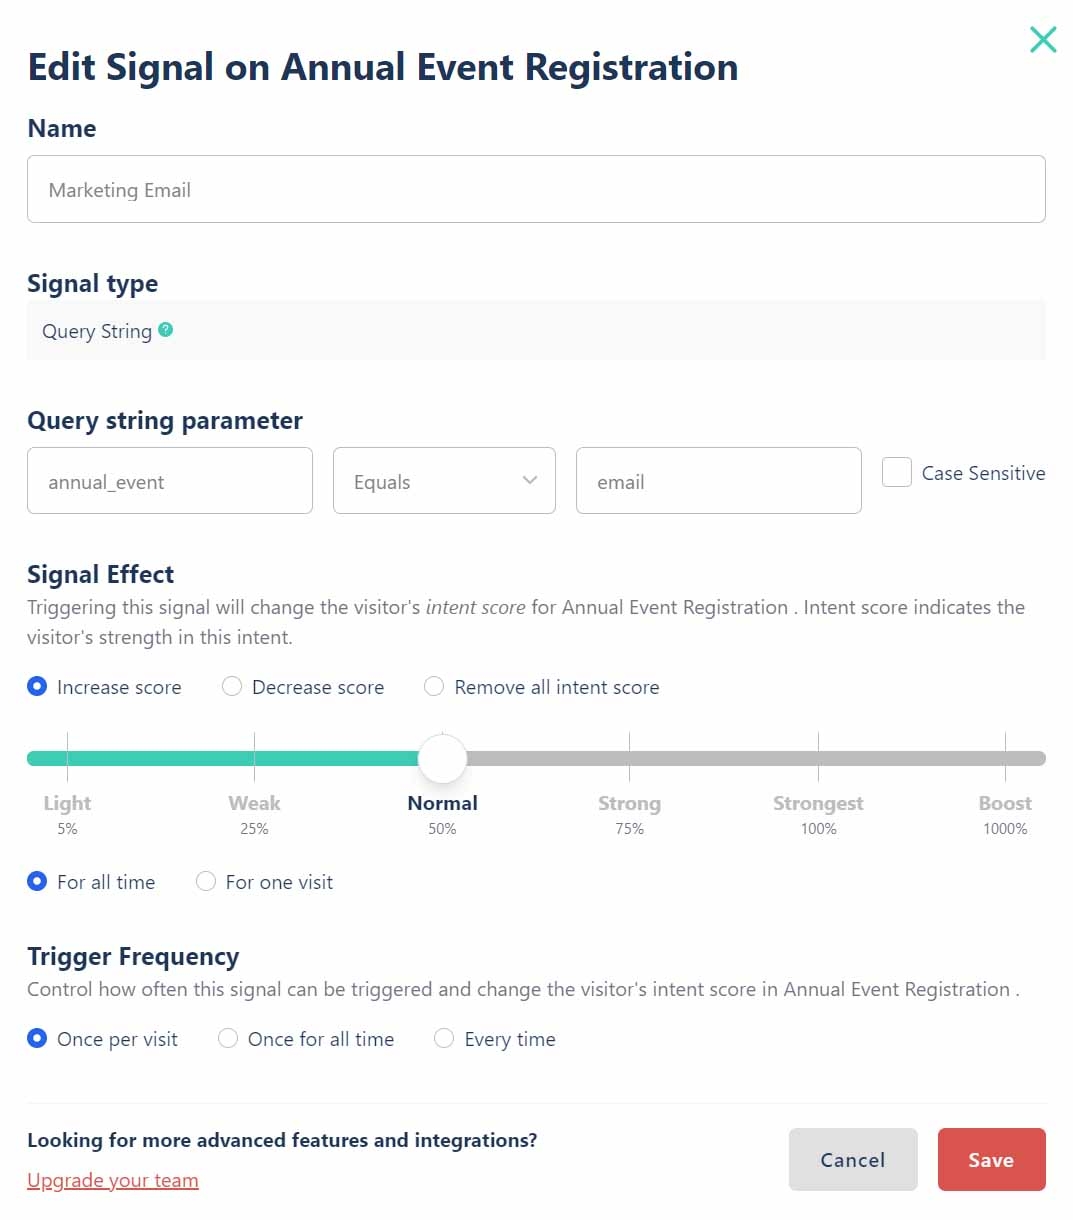
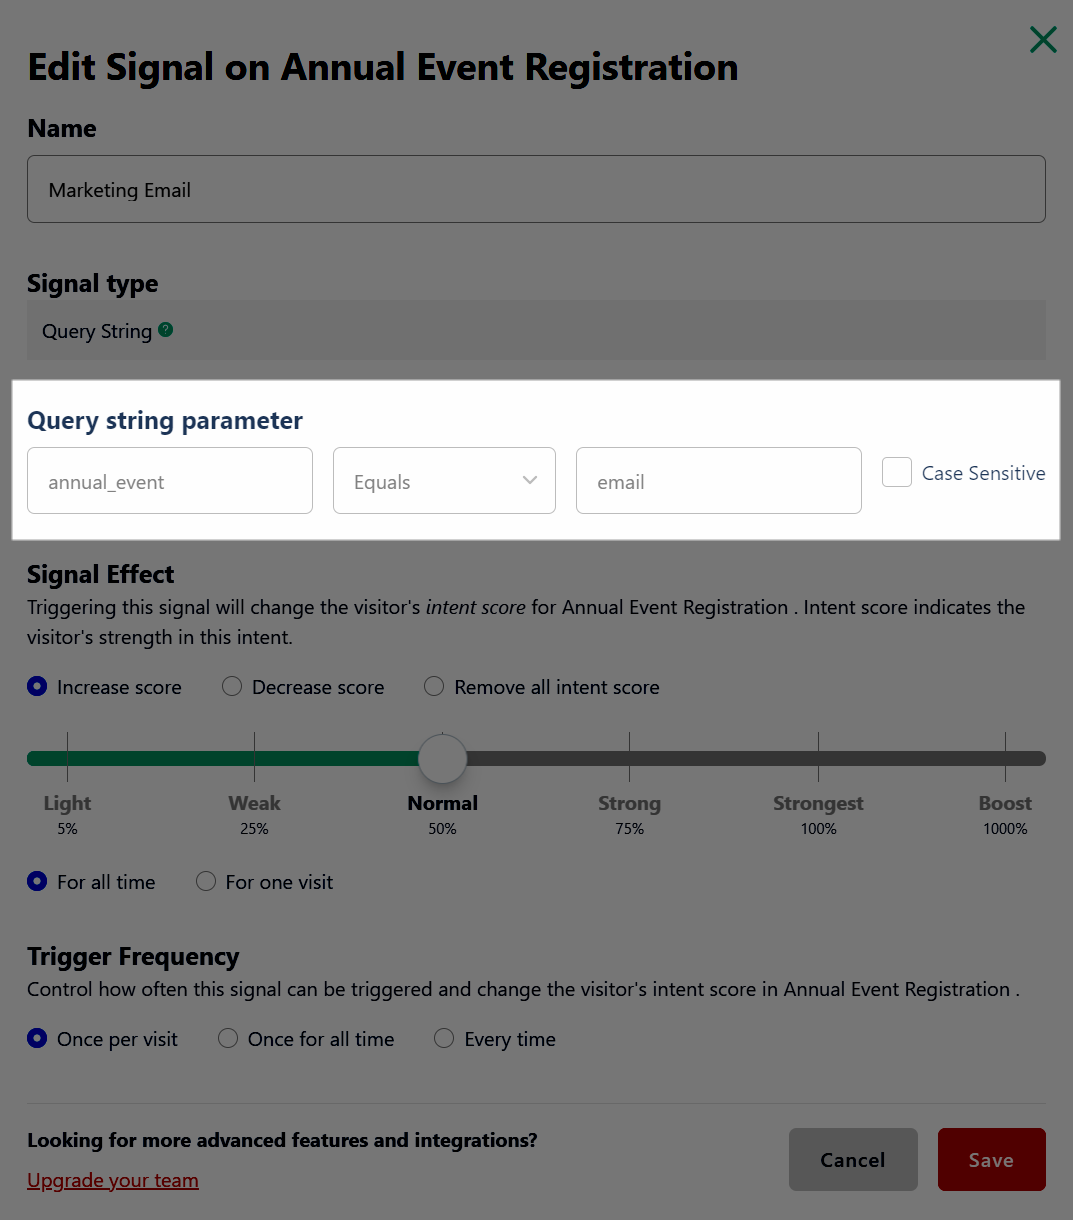
- Select Query String and set it up as shown below:
- Name: Enter a suitable name for your signal. We have added Marketing Email for this example.
- Signal type: Query String will be selected by default. You can click the help icon to learn more about it.
- Query string parameter: Enter the query string, for example, annual_event Equals email. This means, users who have registered for the annual event through an email invitation.
- Signal Effect: You can define the strength of this signal. For our example, we have kept it to Normal.
- Scope: Lastly, define the scope of this signal. You can choose between For all time (intent score applicable for all visits) and For one visit (intent score applicable for the current visit). For our example, we have kept it to For all time.
- Trigger Frequency: You can control how often this signal can be triggered. For this example, we have selected the Once per visit option as shown below:
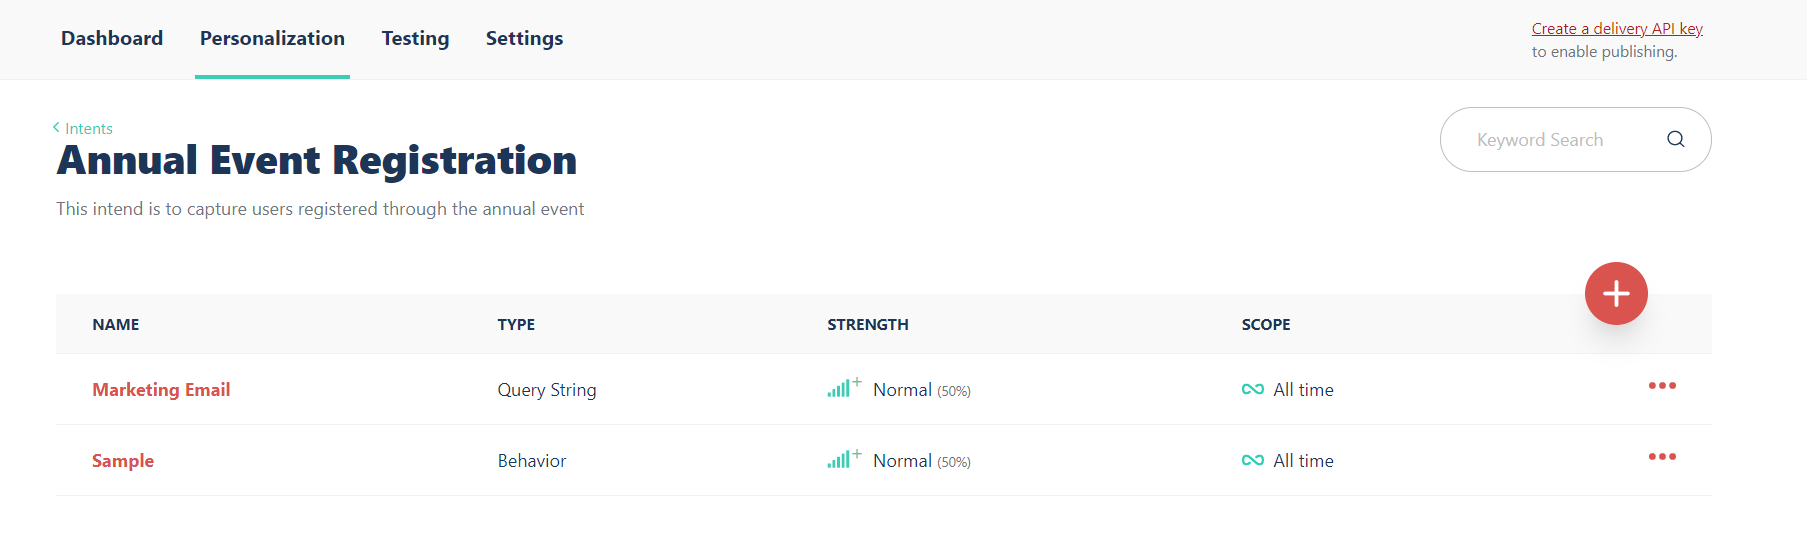
- Once you have configured your signal as per the settings above, click Save. Similarly, you can add more signals to your intent as required.
- We have added two signals for our intent and will be displayed under the Personalization tab in Uniform as shown below:
- Let's add another intent for our project by clicking on the Intents link, just above the name of your first intent, and then the "+" icon.
- For our example, we have created another intent named Know More and added the following two signals to it:
- Page Visited: Indicates a specific page a user visits in a session.
- Behavior: Tracks intent's specific content that the visitor consumes in real-time.
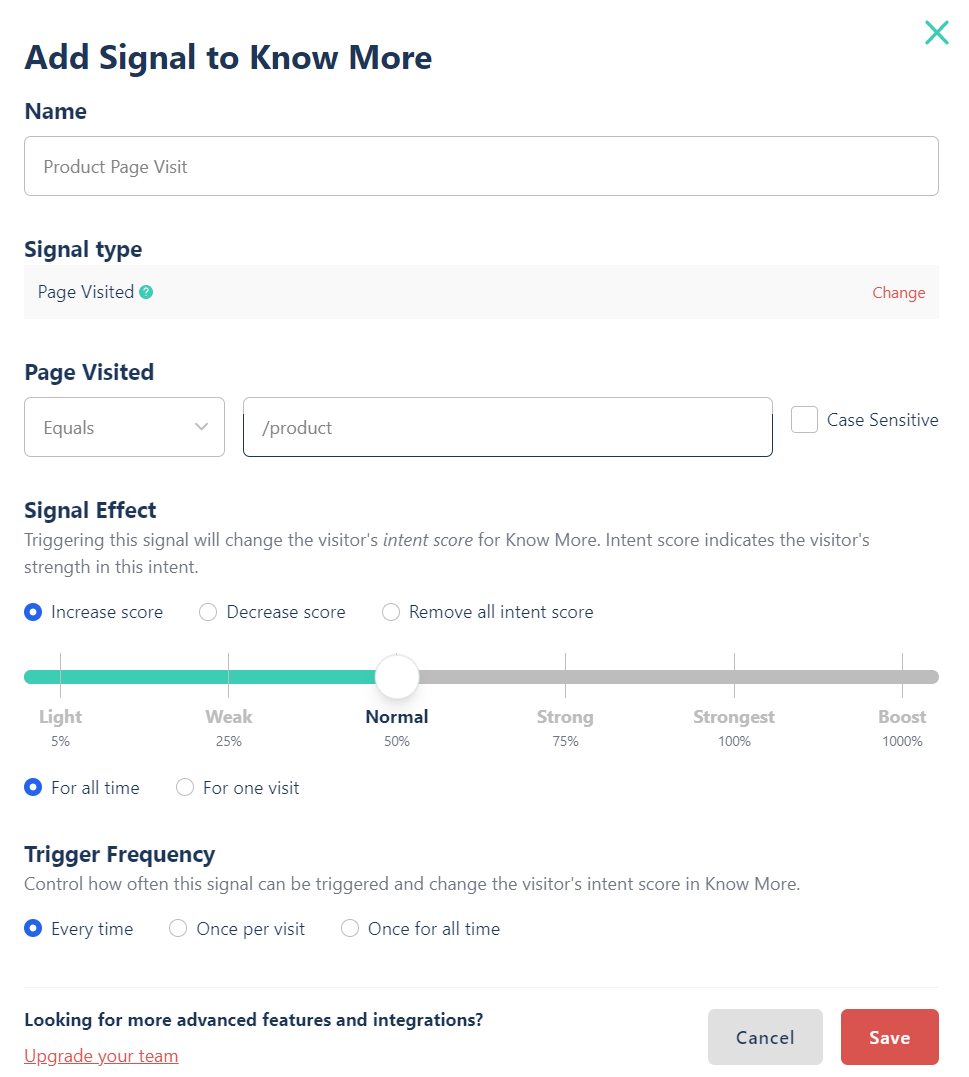
- Click the "+" icon and add the Page Visited signal. Configure it with the following details:
- Name: Provide a suitable name. We have named it Product Page Visit for the demonstration purpose.
- Signal type: Shows Page Visited by default.
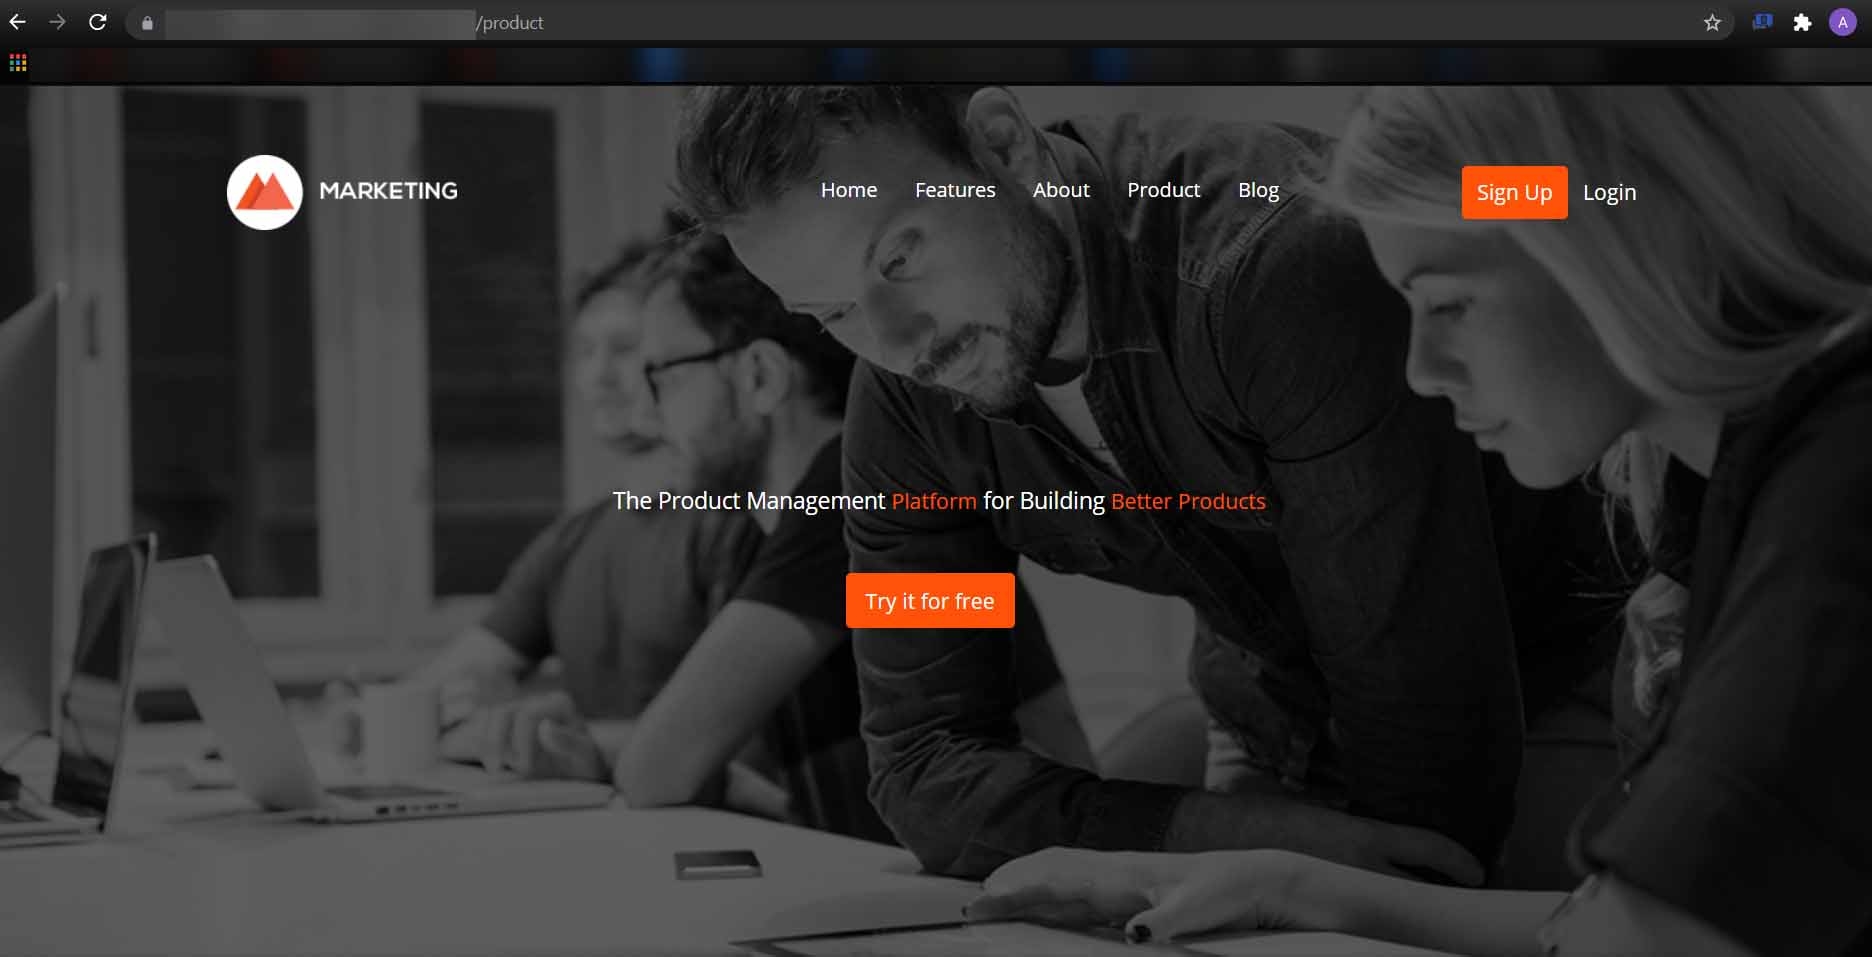
- Page Visited: Here, you need to specify the page that the user should see on site visit. For our example, since we want to show the Products page to the user, we have the product path or the URL /product.
- Signal Effect: You can define the strength of this signal. For our example, we have kept it to Normal.
- Scope: Lastly, define the scope of this signal. You can choose between For all time (intent score applicable for all visits) and For one visit (intent score applicable for the current visit). We have used For all time.
- Trigger Frequency: You can control how often this signal can be triggered.
- Add the Product Behavior signal (as we did earlier) with a similar configuration. After that, you will see the signals for this intent. Now click the Intent link just above Know More. You'll be directed to the Intents page.
-
Generate the Uniform API Key
The intents we have added aren’t ready to use yet. We will have to publish them so we can use them for our purpose.
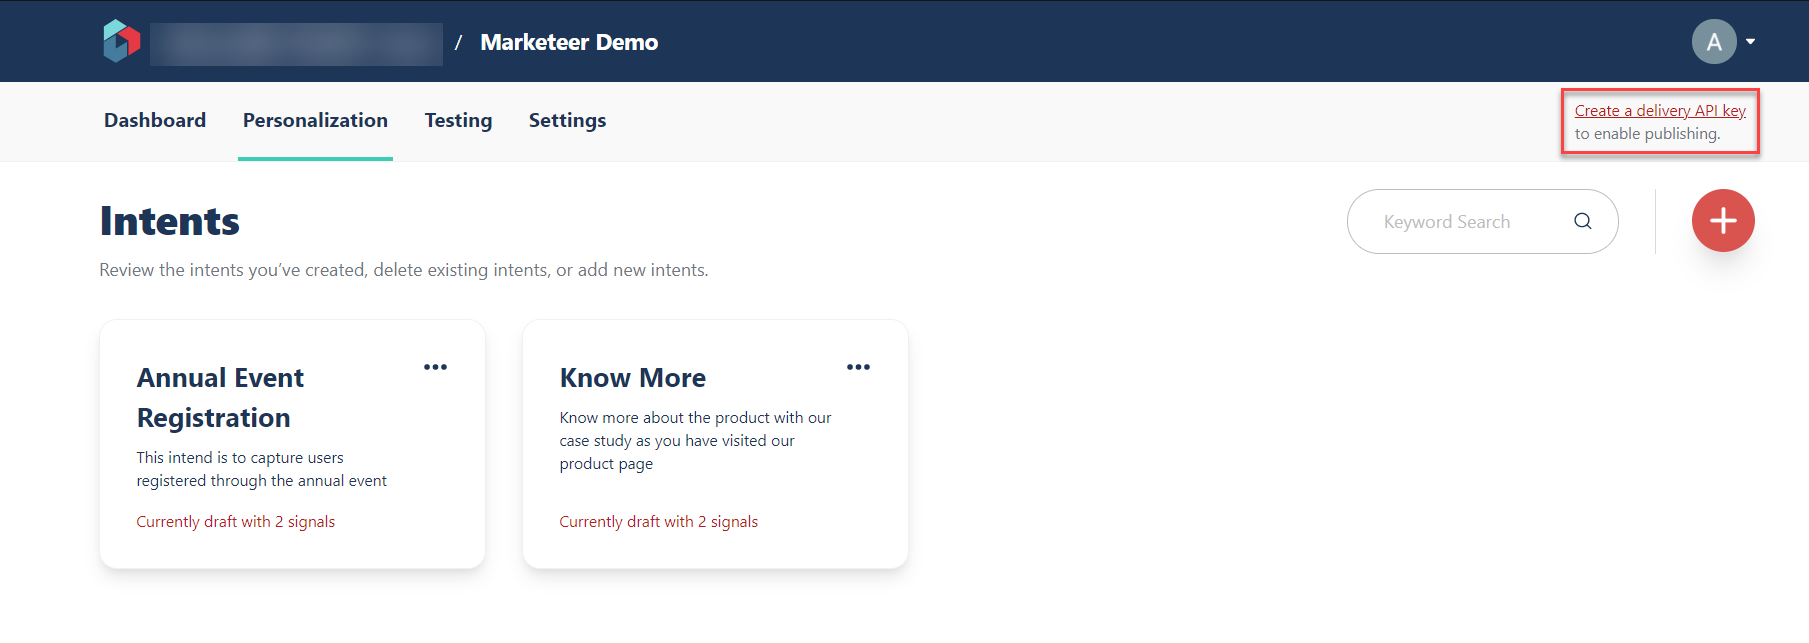
- Click the Create a delivery API key at the top right corner as shown below:
- You'll be directed to the API Keys section under the Settings tab, as shown below. Provide a name for your API Key and select the permissions as desired. For the Uniform extension to work, we need both Delivery and Preview to be selected under Permissions.
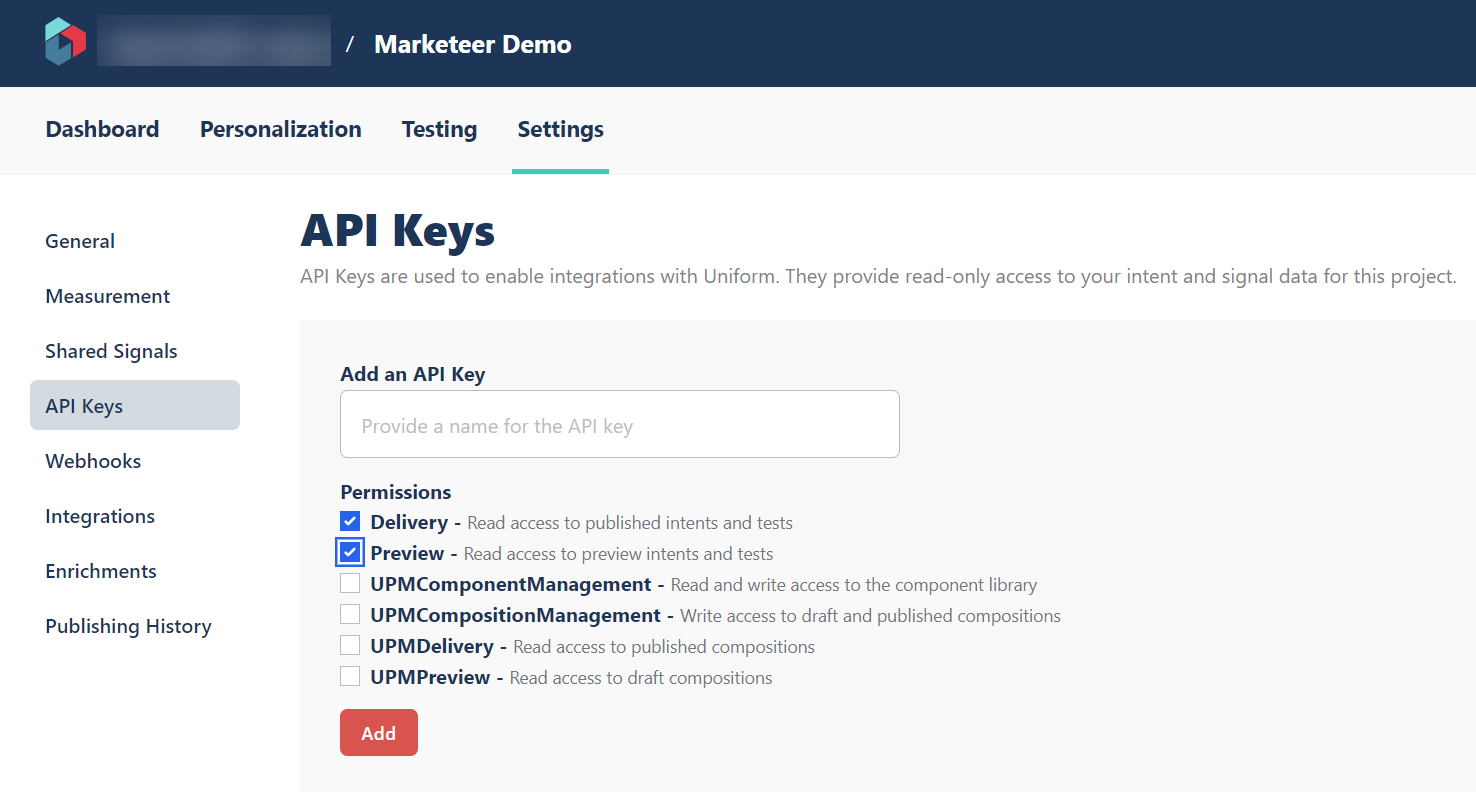
- Click the Add button. The API key will be generated with the name you entered along with the permissions applicable for it. Please make a note of it. We will add it to our code later in the guide.
- You will also see a Publish button at the top right corner, click it.
Note: Please note that every time you make changes to the current intents and signals, you will have to publish your changes to see them in action.
With these steps, we have created and configured intents and signals in Uniform. Let's now look at the steps to perform in Contentstack.
- Click the Create a delivery API key at the top right corner as shown below:
-
Set up the Essentials in Contentstack
We will now set up the essentials in Contentstack. Log in to your Contentstack account and then follow the steps given below:
- For this exercise, create a new stack.
- Add a management token for your newly created stack. This management token will be required when we authenticate our stack in CLI.
- Then, install the Contentstack CLI by following the steps mentioned in the Install the CLI guide.
- Before using any of our CLI commands, you need to authenticate your stack. To do so, follow the steps mentioned in the CLI Authentication guide.
- For this exercise, we have created the code for our sample app. You can download or clone it from our GitHub repository.
- Once you have downloaded the code, unzip and open it in any code editor or you choice. You'll see the contents folder. Let's import this content to our new stack.
- Now in your command prompt, use the following command to import content to your destination stack:In the above command, enter the path of your "contents" folder.
csdx cm:import -a <management_token_alias> -d <path_of_folder_where_content_is_stored> - After the successful completion of this command, go to your stack and click the Content Models option on the left. You will see that content has been imported to your new stack:
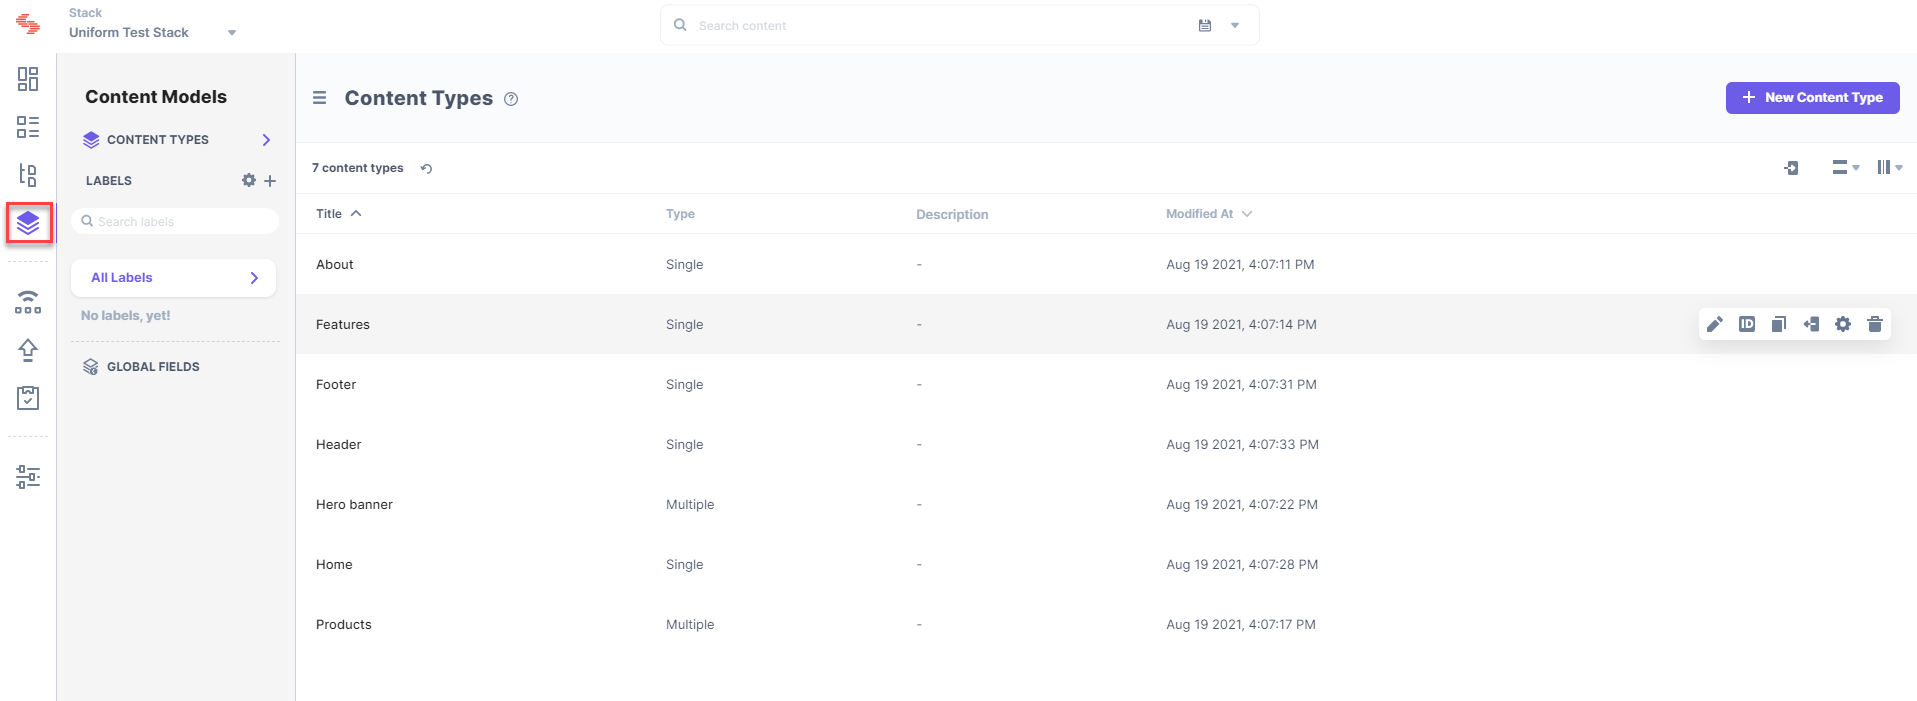
- Along with this, two environments named development and preview, and an extension named Uniform extension will get imported to your stack.
- Click the Settings icon and select Extensions. You will see our imported extension. Click it.
- Go to the Config Parameter section, enter the Uniform API Key (generated earlier in the guide) as the value of the OPTIMIZE_API_KEY parameter, and click Save.
- Now add a delivery token for the development environment. This token will help us fetch content published on this environment.
You can follow the steps mentioned in the Enabling Optimize on an Existing Contentstack Stack guide to create a Custom Field Uniform Integration. - For this exercise, we have created content types where variations are running. Let's discuss the structures of these content types in detail.
The first is the Hero banner content type of type Web Page and Multiple, having the following structure: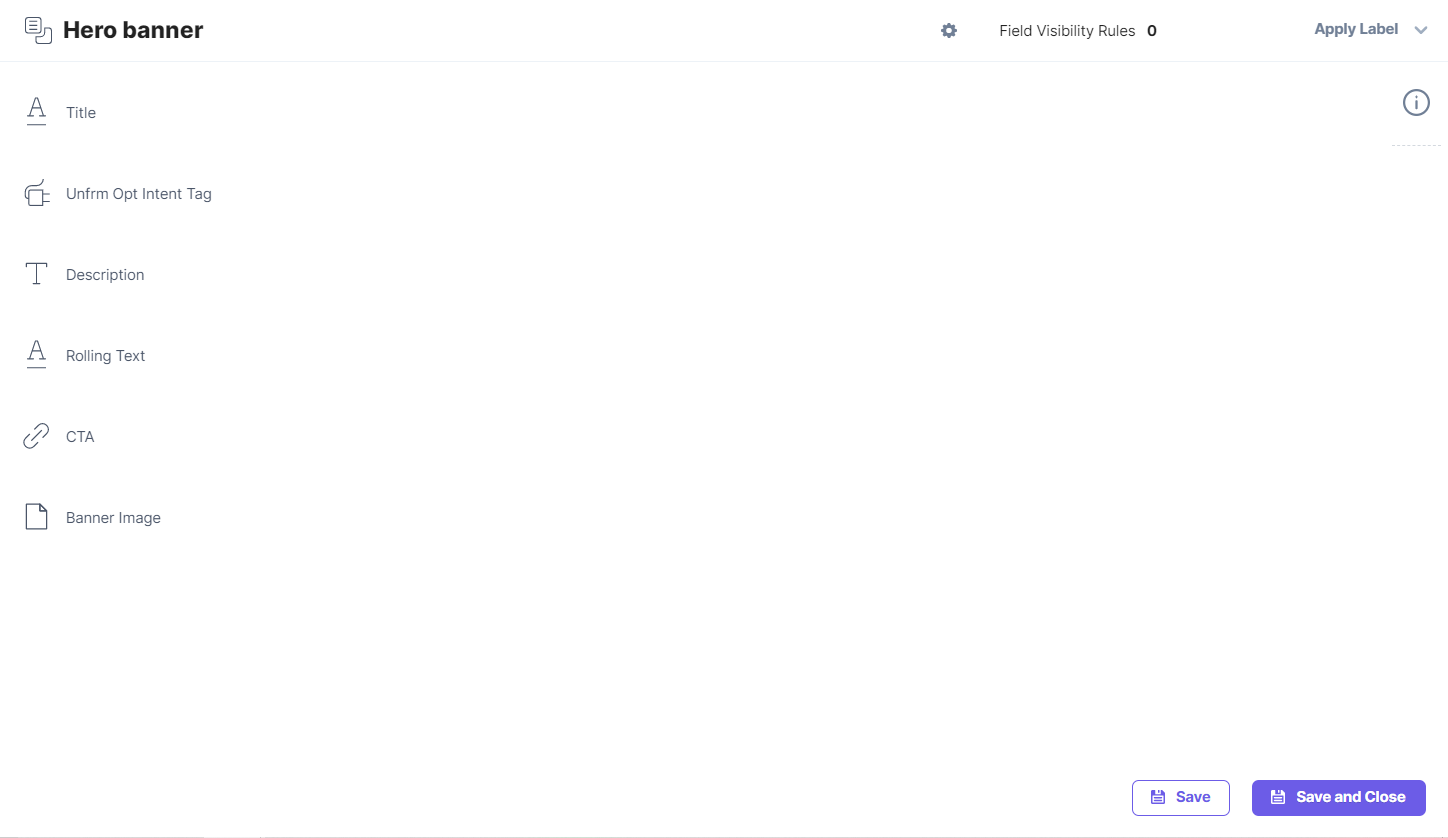 You can see that we have added a Title field, a Custom field (Uniform Opt Intent Tag), an RTE field (Description), a Single Line Textbox field (Rolling Text), a Link field (CTA), and a File field (Banner Image).
We have created three entries inside the Hero banner content type, as shown below: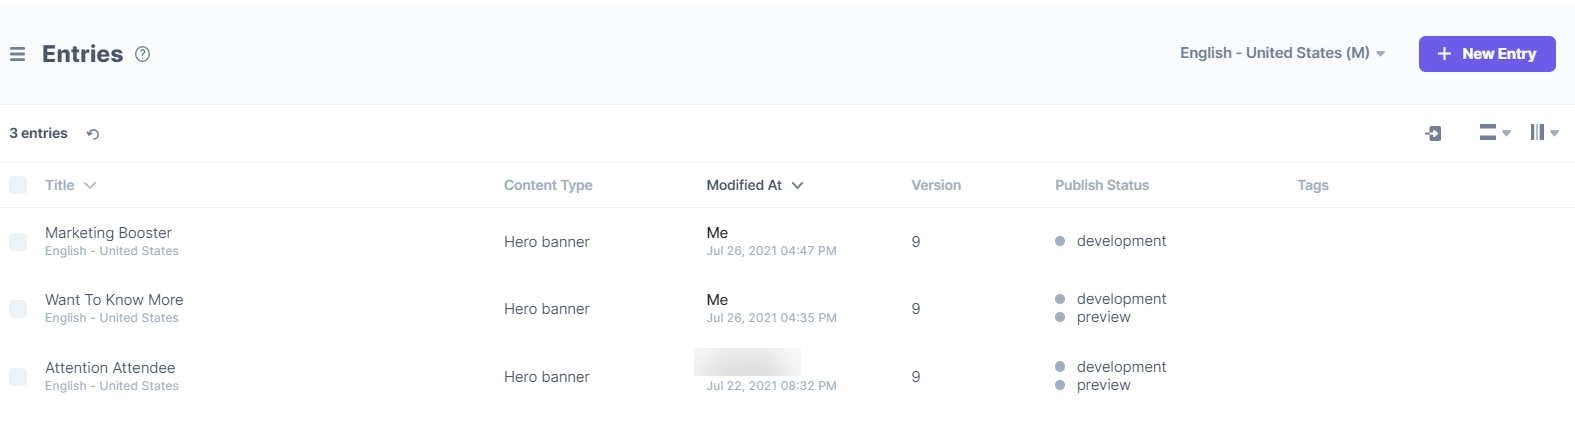 You don't have to select any intent inside Uniform Opt Intent Tag in the Marketing Booster entry, as shown below. So this entry will become the default entry.
 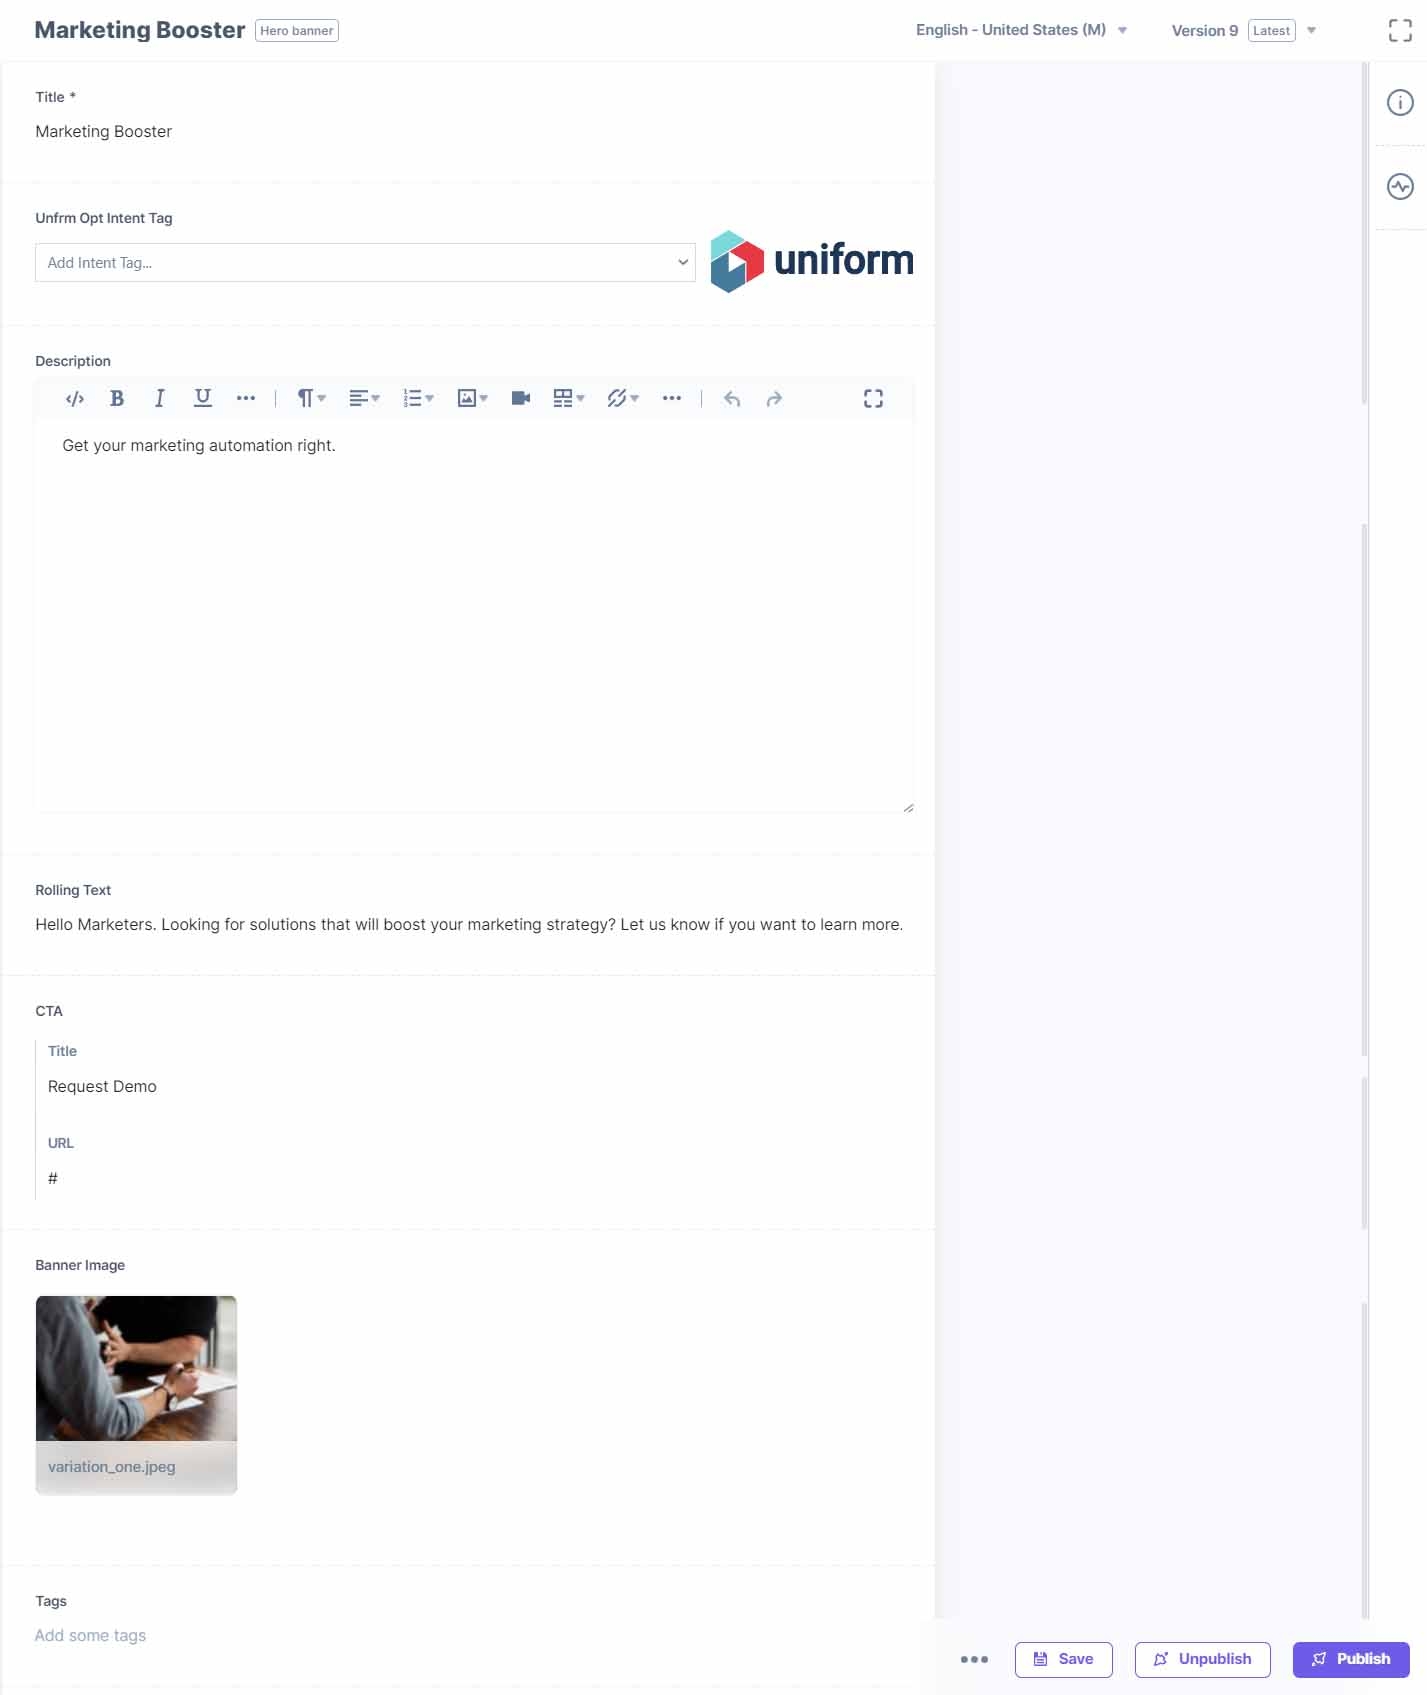 In the other two entries, Want To Know More and Attention Attendee, the custom field that we added (Uniform Opt Intent Tag), fetches the data from our intents (Annual Event Registration and Know More) that we created in the Uniform app earlier. You can add the intent relevant for this entry and also change a few settings from here if you want to:
- The second one is the Home content type of type Web Page and Single, having the following structure:
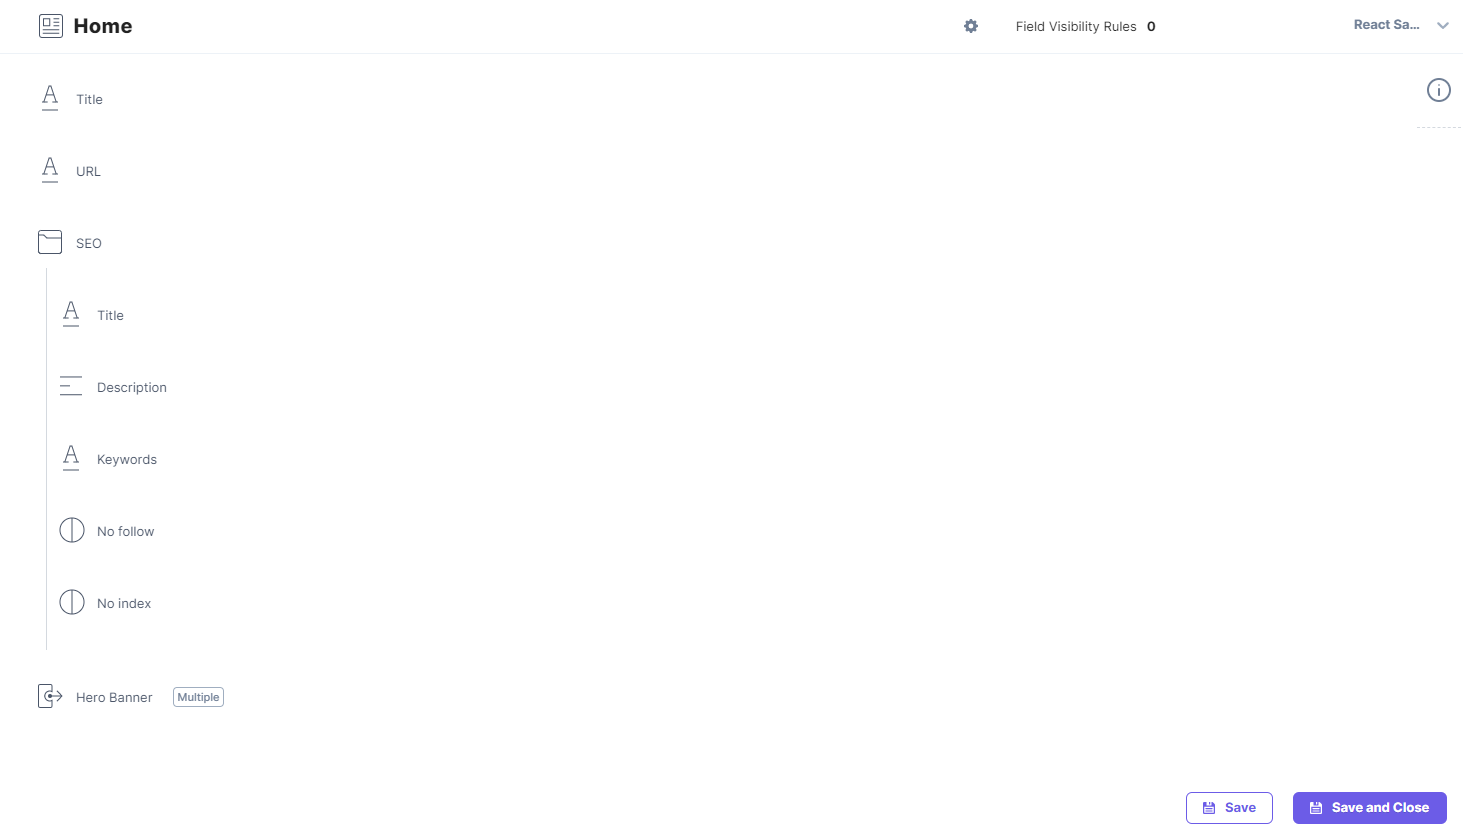 We have added the Title, URL, Group (SEO), and Reference (Hero Banner) fields in this content type. The Hero Banner reference field refers to the entries from the Hero banner content type:
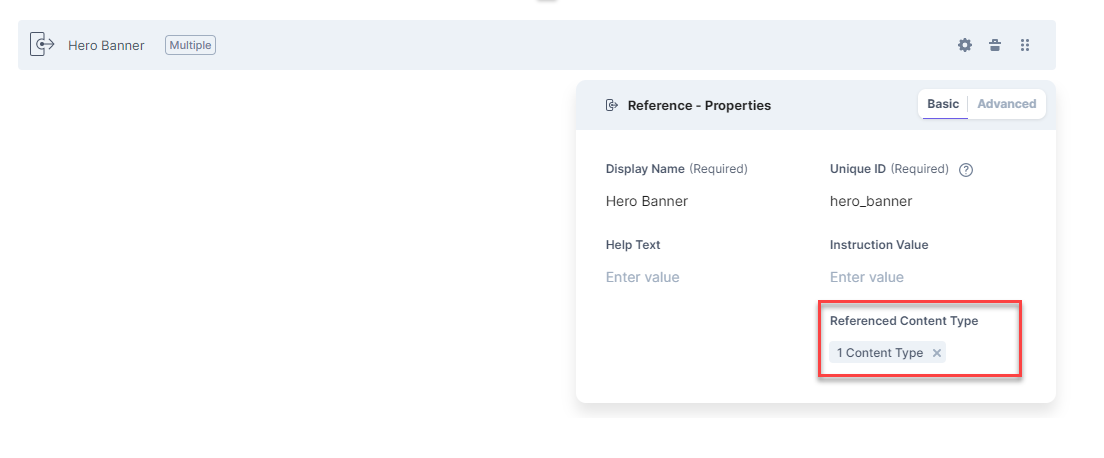 We have added an entry for the Home content type:
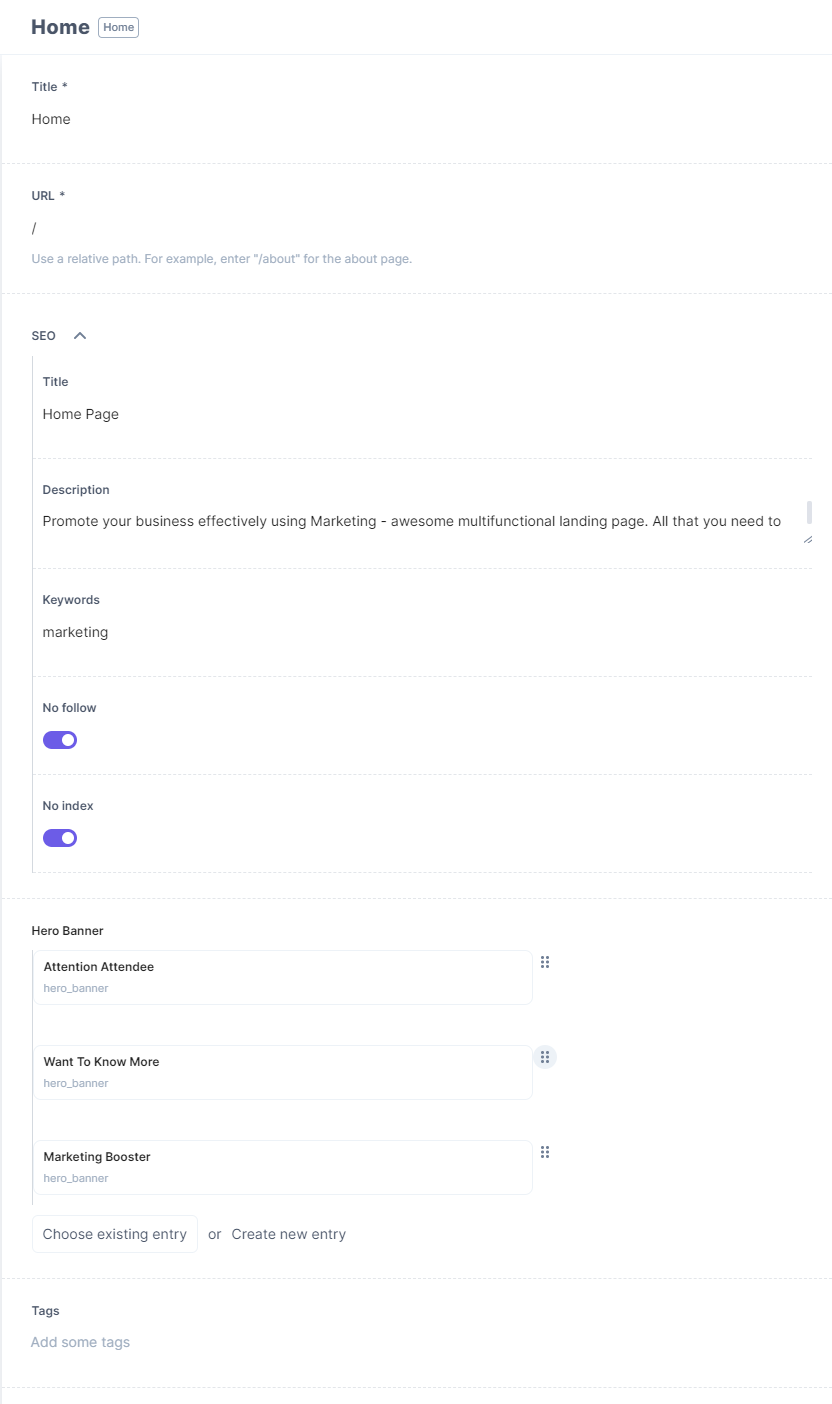 You can see that Hero Banner is referencing entries from the Hero banner content type.
 - Now open the code in any text editor of your choice, and move to the .env file. Provide your stack API Key, delivery token and its corresponding environment name, and the Uniform API key (we generated above) as shown below:
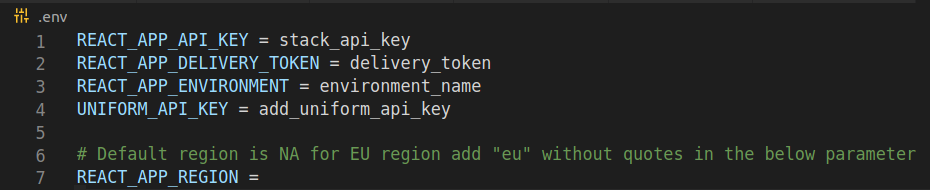
Note: Do not enter any value for the REACT_APP_REGION parameter in the .env file if you are using the NA region. If you are using the Europe region, enter eu as the value for this parameter. Similarly, to use the Azure North America region, enter the value as azure-na, and to use the Azure Europe region, enter the value as azure-eu.
- Save the file and go to the command prompt. Move inside the project root folder and execute the following command:
npm install
- Then, start the app using the following command:
npm start
- The app will start on localhost port 3000 (http://localhost:3000).
- The sample app running on the localhost can also be deployed by using Contentstack Launch, Contentstack’s web hosting platform. For more details, refer to the Contentstack Launch documentation.
Alternatively, you can use Vercel to host your website. To do so, you need a Vercel account before you start deploying.Note: During deployment, to use the Europe region, add an environment variable named REACT_APP_REGION and set its value to eu. Similarly, for Azure NA region, set the value to azure-na, and for Azure EU region, set the value to azure-eu.
With these steps, the entire setup is ready. Let's learn more about how it works.
-
How It Works
Now that we have everything ready and the app is also running, let's understand how it works in the background for the following three use cases.
Use Case 1: Default Content
The first use case is when a regular user visits your website, he/she sees the default entry page (i.e., Marketing Booster). This type of user is not assigned any personalization, and therefore they see the default text as shown below:

Note: We have not selected any intent for this default variation. Therefore, the regular users will see this page whenever they visit the website.
Use Case 2: Annual Event Attendees
In the second use case, let's assume that there's an event being organized by a company, so it sends out marketing emails. As per our setup, anyone who registers for an event, after receiving the email, will be automatically shown the annual event page as shown below

If users click Event Calendar, they are directed to the event list page. Note the query in the URL in the above image. It's the same Query String signal that we added in the Uniform app.
This behavior is managed and controlled by Uniform and the users registered for the event see this page when they visit the website.
Use Case 3: A User Visiting the Product Page
In this use case, if a user finds your product's page via organic search or through any other direct link, and then navigates to the Home page, you may want to show more details about your product.
-
Next Steps
Now that we have seen how this integration works, you can create your own code and see how the setup works.
Install Core Tracker Packages
- Install the core tracker packages using the following command in your CLI:
npm install @uniformdev/optimize-tracker-browser
- Then, install the Uniform CLI as follows that will help you download the intent manifest file:
npm install -g @uniformdev/cli
- Now use the following command to download the intentManifest.json file:In the above command, "output" is the location where you want to download the manifest file and "Uniform_API_Key" specifies the Uniform API key that we generated earlier in the guide.
"generate:intents": "uniform optimize manifest download --output ./src/lib/intentManifest.json --apiKey $UNIFORM_API_KEY"Note: You have to generate the manifest file every time you make changes to the intent or signals and publish them in the Uniform app.
- Once the manifest file is downloaded, import it to create the tracker instance:
import { createDefaultTracker } from '@uniformdev/optimize-tracker-browser';
import intentManifest from './intentManifest.json';
const localTracker = createDefaultTracker({
  intentManifest,
});
export default localTracker;
Install React Component Packages and Then Personalize
- If you are using React for your project, you need to install the React component package using the following command:
npm install @uniformdev/optimize-tracker-react
- Now create a tracker context to handle initialization and tracking calls as follows:Above, we have wrapped the application in the UniformTracker context.
import React from 'react'; import ReactDOM from 'react-dom'; import { UniformTracker } from '@uniformdev/optimize-tracker-react'; import localTracker from './local-tracker'; function MyApp() { return <UniformTracker trackerInstance={localTracker}>Optimize all the things!</UniformTracker>; } ReactDOM.render(<MyApp />, document.getElementById('my-container-element')); - The <personalize /> component in Uniform accepts the list of all possible variations and invokes the rendered React component for the variation most relevant to the visitor. The following interface must be implemented by the variation data:
// TypeScript interface PersonalizableListItem { // `intentTag` tells which intents this variation is relevant to, // which is used when evaluating whether or not a variation meets personalization criteria. // Variations with no intent tag are considered 'default' and are shown to anyone. intentTag?: IntentTags | null; } - Uniform supports helpers to ease working with CMS data. However, you can create your own customized variation data. For instance, if your CMS, compatible with Uniform, provides some post content items, you can map them as follows:
// replace `fetchPostsFromCMS` with something that fetches data from your CMS const allPosts = await fetchPostsFromCMS(); const mappedPosts = allPosts.map((post) => { return { ...post, // Assumes your CMS is capable of attaching Uniform Intent tags // to content items via `unfrmOptIntentTag` property. intentTag: post.unfrmOptIntentTag, }; }); - These posts can now be passed through the variation prop to the <personalize /> component as follows:
<Personalize variations={mappedPosts} /> - For <personalize /> to know which React component to use for rendering the required personalized variant, a React component should be passed directly into the <Personalize/> component's component prop as follows:
import { IntentTagStrength } from '@uniformdev/optimize-common'; import { Personalize } from '@uniformdev/optimize-tracker-react'; function RenderVariation({ title }) { return <p>Variation rendered: {title}</p>; } export default function OneComponentPersonalization() { // manually define some personalization variations. Normally these would come // from a content API (headless CMS, commerce, etc) const variations = [ { title: 'Default variation', intentTag: undefined }, { title: 'Variation for intent1 intent', intentTag: { intents: { intent1: { str: IntentTagStrength.Normal } } }, }, { title: 'Variation for intent2 intent', intentTag: { intents: { intent2: { str: IntentTagStrength.Normal } } }, }, ]; return <Personalize variations={variations} component={RenderVariation}/>; } - If you have more than one variation type, you can instruct <Personalize /> to use the required rendering component through conditional logic:
import { IntentTagStrength } from '@uniformdev/optimize-common';
import { Personalize } from '@uniformdev/optimize-tracker-react';
// this mapper component selects which implementation to use based on the `type` it is rendering
// (this can be a switch statement, map lookup, react.lazy, etc as needed)
const ComponentMapper = (variation) => {
    switch (variation.type) {
        case 'A':
            return <RenderVariationTypeA {...variation}/>;
        case 'B':
            return <RenderVariationTypeB {...variation}/>;
        default:
            return <p>Not sure how to render {variation.type}</p>;
    }
};
function RenderVariationTypeA({ title }) {
    return <p>Type A Variation rendered: {title}</p>;
}
function RenderVariationTypeB({ title }) {
    return <p>Type B Variation rendered: {title}</p>;
}
export default function ManyComponentPersonalization() {
    // manually define some personalization variations. Normally these would come
    // from a content API (headless CMS, commerce, etc)
    const variations = [
        { title: 'Default variation', intentTag: undefined, type: 'A' },
        {
            title: 'Variation for intent1 intent',
            intentTag: { intents: { intent1: { str: IntentTagStrength.Normal } } },
            type: 'B',
        },
        {
            title: 'Variation for intent2 intent',
            intentTag: { intents: { intent2: { str: IntentTagStrength.Normal } } },
            type: 'B',
        },
    ];
    return <Personalize variations={variations} component={ComponentMapper}/>;
}
Install the Contentstack Package
Follow the steps mentioned in the Enabling Optimize on an Existing Contentstack Stack guide and integrate with Contentstack.
Once the integration is ready, you need to fetch content from Contentstack into your application. The contentstackOptimizeListReader function will help your application to read Contentstack data and convert it to a Uniform-understandable format.
- Install the package using the following command:
npm install @uniformdev/optimize-tracker-contentstack
- Now fetch content from Contentstack assuming that Contentstack JavaScript SDK query fetches a single page entry:
// <a href="https://github.com/contentstack/contentstack-javascript">https://github.com/contentstac...</a> import contentstack from 'contentstack'; export const getPageBySlug = async (preview: boolean, slug: string) => { const config = { api_key: 'your_contentstack_api_key', delivery_token: 'your_contentstack_delivery_token', environment: 'your_contentstack_environment', }; const contentstackClient = contentstack.Stack(config); const query = contentstackClient .ContentType('page') .Query() .includeCount() .includeContentType() .includeReference(['components', 'components.unfrm_opt_p13n_list']) .toJSON(); const result = await query.where('url', slug).find(); // result is an array where - // result[0] == entry objects // result[result.length-1] == entry objects count included only when .includeCount() is queried. // result[1] == schema of the content type is included when .includeContentType() is queried. const [first] = result[0]; return { ...first, _content_type_uid: 'page' }; }; - Now to personalize Contentstack data use it with the Personalize component:
import { contentstackOptimizeListReader } from '@uniformdev/optimize-tracker-contentstack';
import { Personalize } from '@uniformdev/optimize-tracker-react';
import { Hero } from './Hero'; export const PersonalizedHero: React.FC<Entry<PersonalizedHeroFields>> = ({ unfrm_opt_p13n_list }) => {
  const variations = contentstackOptimizeListReader(unfrm_opt_p13n_list);
  return (
    <Personalize
      name="Personalized Hero"
      variations={variations}
      trackingEventName="heroPersonalized"
      loadingMode={<div>Loading component goes here</div>}
      component={Hero}
    />
  );
};
- Install the core tracker packages using the following command in your CLI:
-
References
The following articles for more information:
More articles
