

.svg?format=pjpg&auto=webp)
.svg?format=pjpg&auto=webp)
.png?format=pjpg&auto=webp)


.png?format=pjpg&auto=webp)
Create New Custom Field
Note: Experience Extensions use the legacy approach with extensions. We recommend using the Custom Field UI location for the Contentstack App Framework to extend the functionality of your apps.
In this guide, we will learn how to develop a new custom field from the ground up.
Note: When working within specific branches, extensions added or created will be available only within that particular branch. For example, you are working within the development branch, and you add new Custom Fields to this branch. These custom fields will be available only within the development branch. Refer to our Branch-specific Modules document for more information.
-
Create Field UI
The first step is creating the visual part of the field. It involves entering the code of your custom field in an HTML file in the format given below:
index.html
<html> <head> <meta name="viewport" content="width=device-width, initial-scale=1.0"/> </head> <body> <input type="color" id="html5colorpicker"> </body> </html> -
Plug field into Contentstack
Once you create your field’s UI, you need to integrate that field into Contentstack. This involves three steps:
- Merge field’s UI and functions with Contentstack
- Add Contentstack's design stylesheet
- Enable field data syncing with Contentstack
-
Merge field’s UI and functions with Contentstack
Contentstack provides Custom Field SDK that houses all the functions and methods that you will need to build powerful custom fields. This SDK is the bridge between your custom field and Contentstack. Your custom field code communicates with Contentstack through this SDK.
You need to include the JS SDK in the index.html file as follows:
<html> <head> <meta name="viewport" content="width=device-width, initial-scale=1.0"/> <script src="https://unpkg.com/@contentstack/ui-extensions-sdk@2.2.0/dist/ui-extension-sdk.js"></script> </head> <body> <input type="color" id="html5colorpicker"> </body> </html> -
Add Contentstack's design stylesheet
Contentstack also lets you include its design stylesheet within the custom field. Though using our style guide is optional, we recommend that you include it so that your custom field’s design blends smoothly with Contentstack’s default UI.Similar to the JS SDK, you need to include Contentstack’s CSS styleguide in the index.html file as well.
<html> <head> <meta name="viewport" content="width=device-width, initial-scale=1.0"/> <script src="https://unpkg.com/@contentstack/ui-extensions-sdk@2.2.0/dist/ui-extension-sdk.js"></script> <link rel="stylesheet" type="text/css" href="https://unpkg.com/@contentstack/ui-extensions-sdk@2.2.0/dist/ui-extension-sdk.css"> </head> <body> <input type="color" id="html5colorpicker"> </body> </html> -
Enable field data syncing with Contentstack
You will need to perform a couple of steps to ensure that the field data syncs with Contentstack automatically, whenever the field is used in a content type/entry. These steps are initializing the SDK and adding the logic of your custom field.<html> <head> <meta name="viewport" content="width=device-width, initial-scale=1.0"/> <script src="https://unpkg.com/@contentstack/ui-extensions-sdk@2.2.0/dist/ui-extension-sdk.js"></script> <link rel="stylesheet" type="text/css" href="https://unpkg.com/@contentstack/ui-extensions-sdk@2.2.0/dist/ui-extension-sdk.css"> </head> <body> <input type="color" id="html5colorpicker" onchange="colorChange()"> <script> // initialise Field Extension window.extensionField = {}; // find color input element var colorPickerElement = document.getElementById("html5colorpicker"); ContentstackUIExtension.init().then(function(extension) { // make extension object globally available extensionField = extension; // Get current color field value from Contentstack and update the color picker input element colorPickerElement.value = extensionField.field.getData(); }) // On color change event, pass new value to Contentstack function colorChange(){ extensionField.field.setData(colorPickerElement.value); } </script> </body> </html>Let’s break down the above code into small snippets and understand what they do:
onchange="colorChange()"Update the color input element and add the onchange event handler.
window.extensionField = {};Define the custom field extension object globally.
var colorPickerElement = document.getElementById("html5colorpicker");Find the input element and store it as a global variable. This will be used in the colorChange event handler.
ContentstackUIExtension.init().then(function(extension) {
    // make extension object globally available
    extensionField = extension;

    // update the field height
    extensionField.window.updateHeight();
The above snippet first initializes the Contentstack SDK. Then, it calculates the color picker palette’s height and sets the container height to this value.
    // Set default color in Contentstack
    var defaultColor = extension.field.schema.config.default_color || extension.config.default_color;

    if(!extensionField.field.getData()){
        extensionField.field.setData(defaultColor);
    }
Use the above snippet to set the default color. You need to inform the extension about which ‘config parameters’ to refer. Here, it will first consider the instance-level config parameter, if defined. Else, it will apply the default config parameter that you set while creating the custom field extension.
    // Get current color field value from Contentstack and update the color picker input element
    colorPickerElement.value = extensionField.field.getData();
})
Finally, fetch the current color value from Contentstack using the getData() function and assign this value to the color picker element. Once the custom field is initialized, a callback function is returned with the custom field object.
In the above code
- extension represents the instance of the Custom Field Extension
- extensionField returns the Field object that provides the function to get and set data in your custom fieldSee the Custom field extension API requests for more details.
function colorChange(){
   extensionField.field.setData(colorPickerElement.value);
}
Set new color value in Contentstack using the setData() function.
With this, the code for your custom field is ready. It’s now time to deploy it on Contentstack.
-
Set up the configuration
Pass the necessary configuration parameters for your Custom Field. These parameters will be applied globally to every instance of the Custom Field Extension within a stack.
Alternatively, you can also define different configuration parameters for specific instance of your Custom Field extension. These instance-level configuration parameters will be applied only to that instance of the Custom Field, and will not affect any other instances of that Custom Field. To know more about it, read the Config Parameters section.
-
Deploy field
There are two ways to deploy your custom field on Contentstack:
Let’s understand the two methods in detail.
Hosted externally
This method is suitable if you do not want to host the custom field extension code on Contentstack, but on an external server. In this case, you need to provide the URL of your externally-hosted extension.
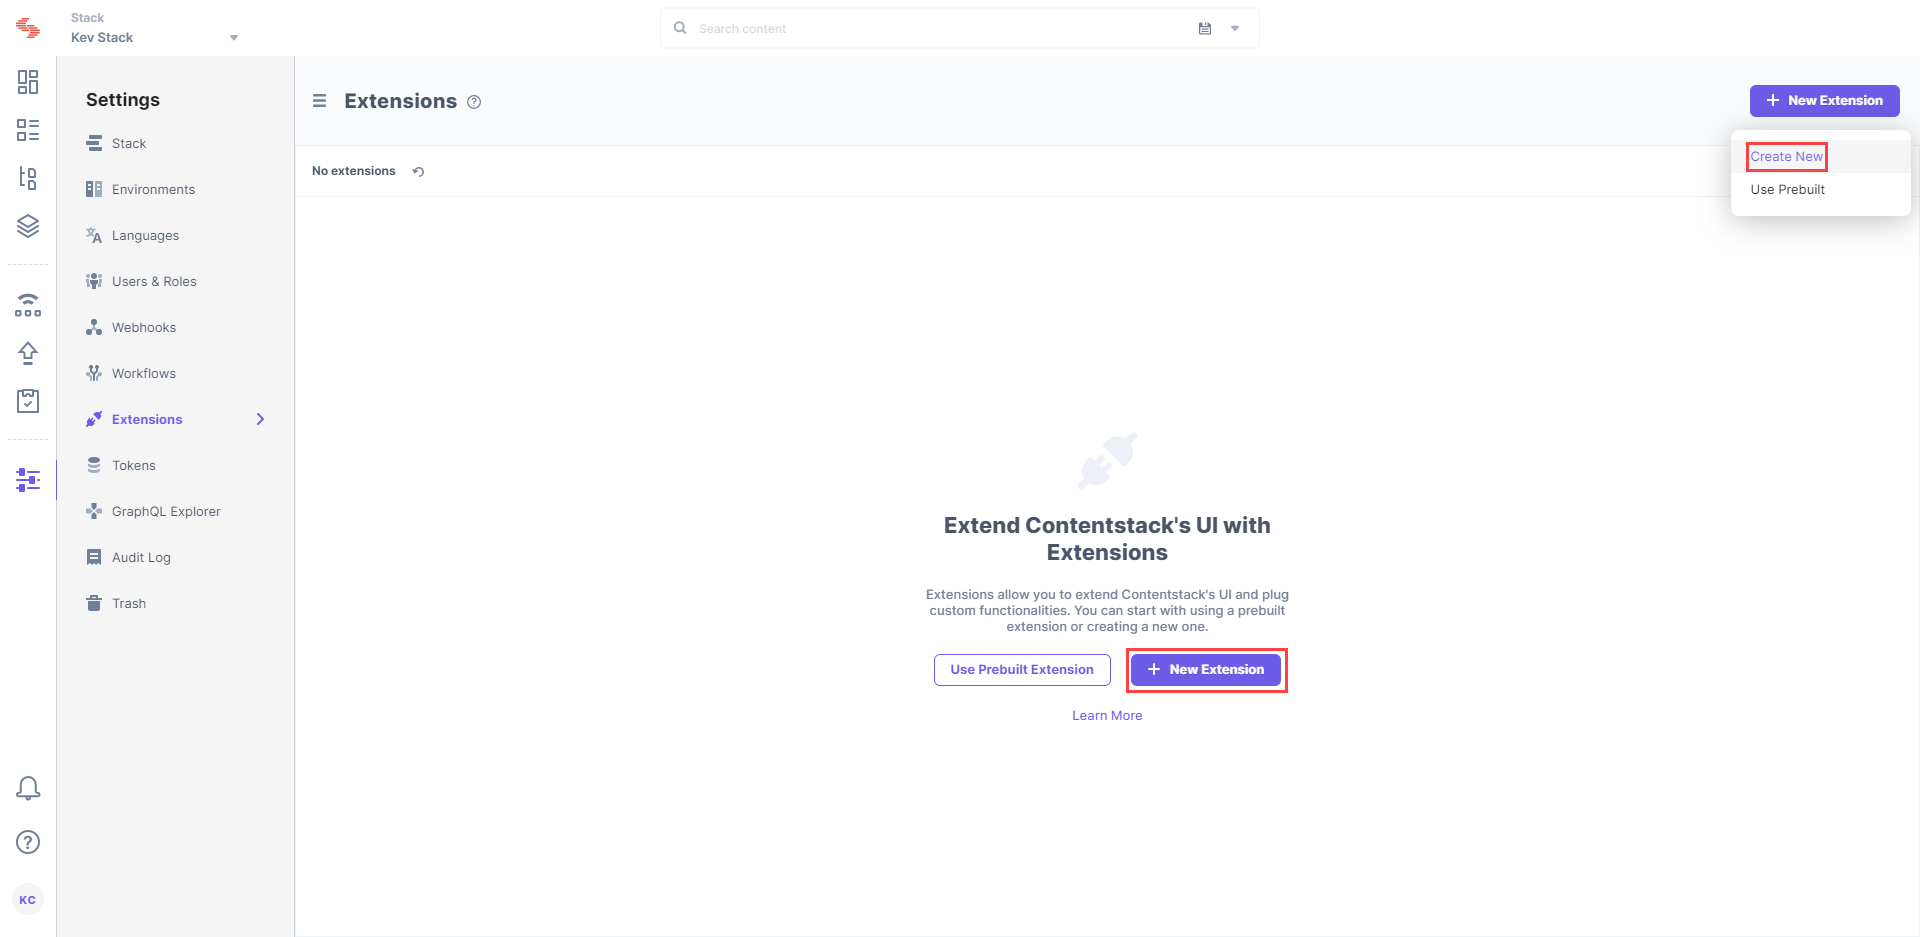
To deploy the custom field extension via this method, log in to your Contentstack account, and perform the following steps:- Go to your stack, navigate to the “Settings” gear icon, and select Extensions.
- On the Extensions page, click on the + Add Extension button, and select Create new. If you have not added any extensions in the stack yet, click on the create a new one link as shown below.
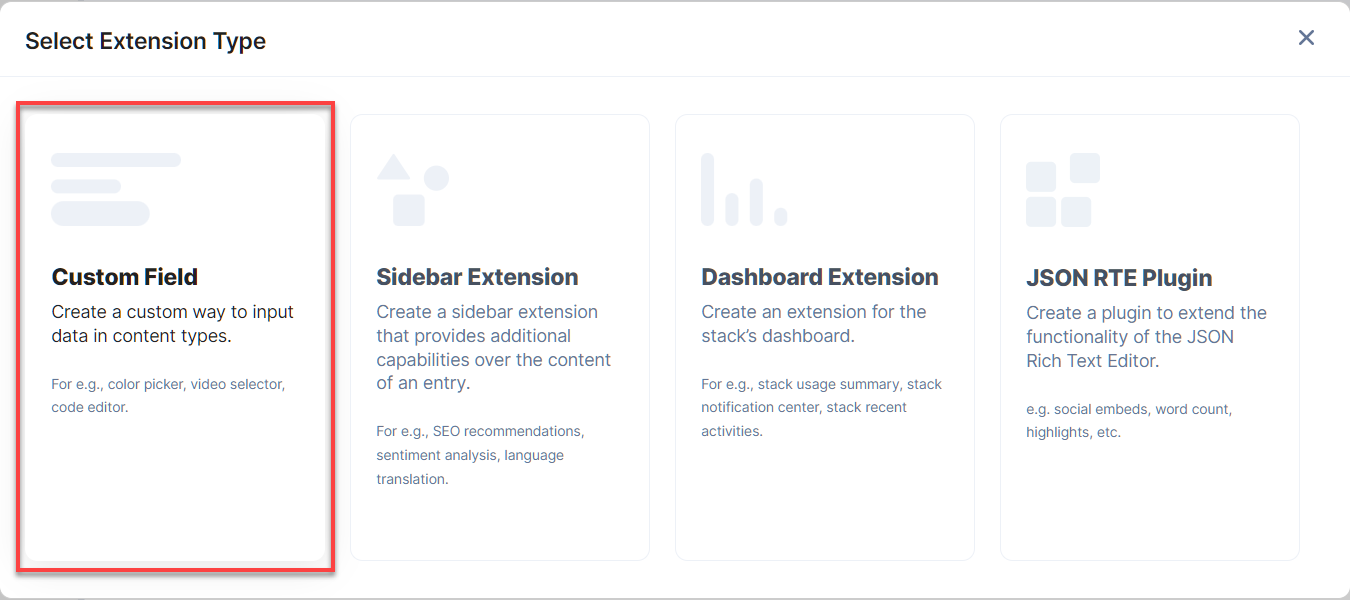
- In the Select Extension Type window, select Custom Field.
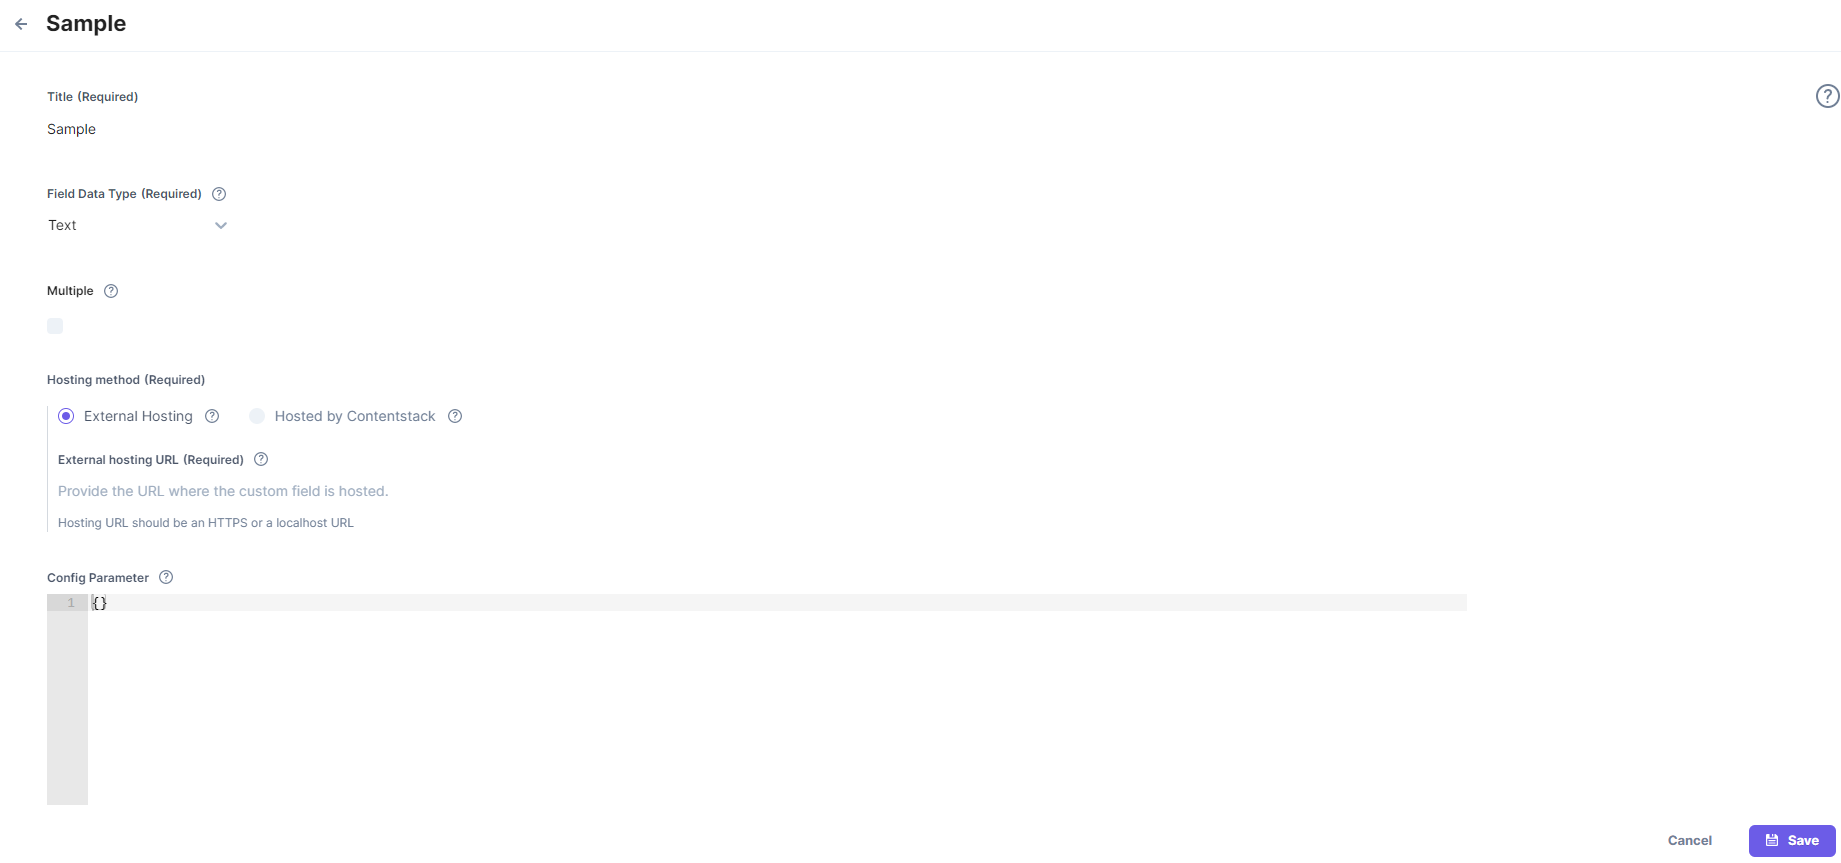
- On the Create New Extension page, enter values in the fields as given below:
- Title (required): Provide a suitable title for your custom field. This title will be visible when you select the extension in the custom field in your content type.
- Field data type (required): Select the data type in which the input data of the field should be saved in Contentstack.
Note: We only support these data types: Text, Number, Date, Boolean, Reference, File, and JSON.
- Multiple (optional): Select this if your custom field accepts multiple values, and the data type is not JSON.
- Hosting method (required): Select External Hosting as the hosting method for this content type.
- External hosting URL (required): Specify the URL of your externally-hosted custom field code.
- Config Parameter : If you want to provide any config parameters in the source code, specify the value of the parameters here.
Note: The settings provided in this field will act as the default configuration settings for all the instances of the custom field within the stack.
If you want to provide alternative configuration settings for specific instances of your custom field, you can provide them in the Properties section of the specific instance of the custom field, when setting up the content type.
However, for your instance-level configurations to be applicable, you need to mention in your custom field extension code to give precedence to and apply these parameters, if provided.
Additional Resource: To learn more about this option, refer to the Config Parameters section.
- Save your custom field.
Hosted on Contentstack
Through this method, you can host your custom field code on Contentstack.
To host a custom field on Contentstack, create a custom field by performing steps 1 to 3 of the aforementioned steps.
For step 4, on the Create New Extension page configure the following options:- Title (required): Provide a suitable title for your custom field. This title will be visible when you select the extension in the custom field in your content type.
- Field data type (required):Select the data type in which the input data of the field should be saved in Contentstack.
Note: We only support these data types: Text, Number, Date, Boolean, Reference, File, and JSON.
- Multiple (optional): Select this if your custom field accepts multiple values, and the data type is not JSON.
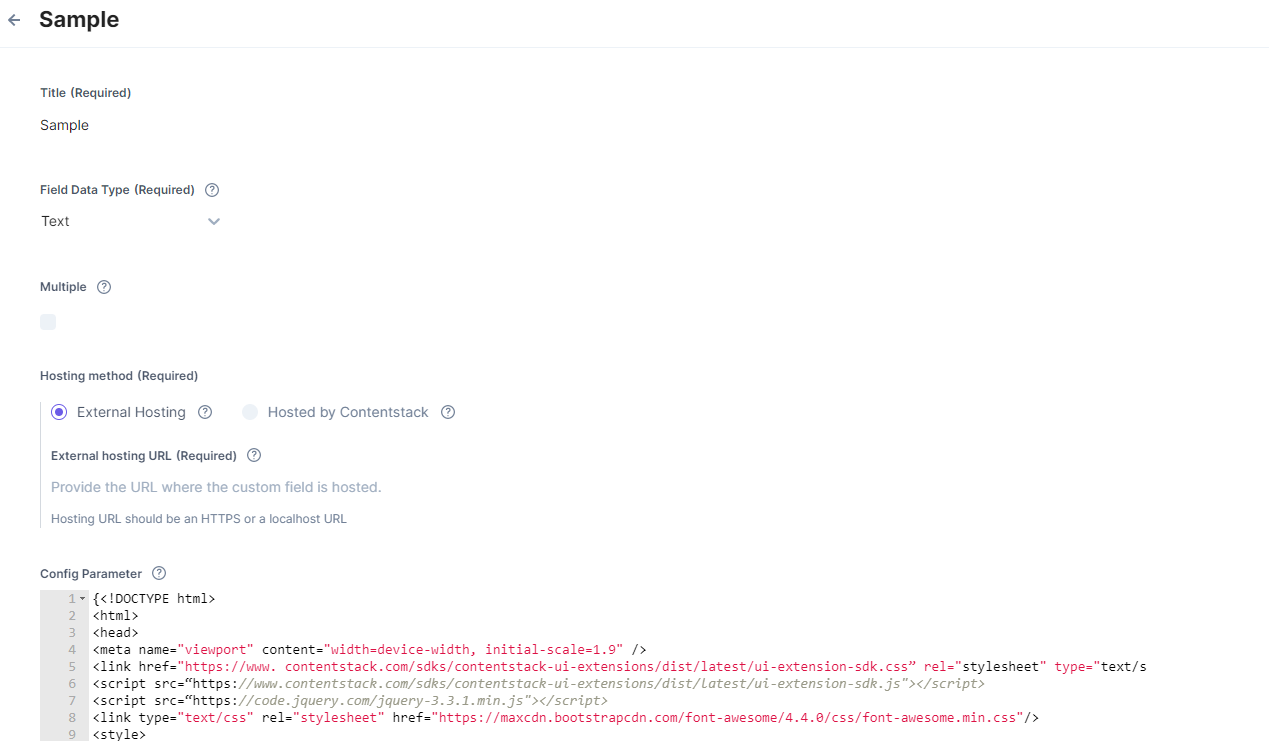
- Hosting method (required): Select Hosted on Contentstack as the hosting method for this content type.
- Extension source code (required): Enter your custom field code here. For this example, paste the code that we created in the previous steps.
- Config Parameter (optional): If you want to provide any config parameters in the source code, specify the value of the parameters here.
After filling in the details, Save the extension.
Note: Custom field extensions hosted internally on Contentstack are uploaded using the srcdoc attribute, which is not supported on Internet Explorer and Microsoft Edge. Also, the maximum size of a custom field source doc cannot exceed 500 KB. To know more limitations, check the Limitations section.
Once your custom field is created by any of the methods, you will be able to use the custom field in your content types.
-
Use Custom Field in Content Types
Once you have added a custom field, you can use it in your content type like any other field. To add a custom field in your content type, follow the steps mentioned in the Use Custom Field in Content Types article.
Note: You can add a maximum of 10 JSON type custom fields to a content type.
-
Testing Custom Field Extension
When you create your custom extension to integrate with Contentstack, you can follow the steps given below to test the extension and verify if the extension is working fine before releasing it.
To test the extension, first, clone the extension repo that you have built and install the dependencies. Then, edit the HTML, CSS, and JS files from the source folder.
To install the required dependencies, run the following command in the root folder.To create a new build for the extension, run the following command (index.html):npm install gulp-cli -g npm install
To update/test the extension while developing, run the following command:gulp build
Now, create a server using the Lite Server npm module. Before that, install the Lite Server module by using the following command:gulp watch
Then, run the lite-server — in the root folder — by using the following command:npm install -g lite-server
After running the above command, you will get the following screen:lite-server
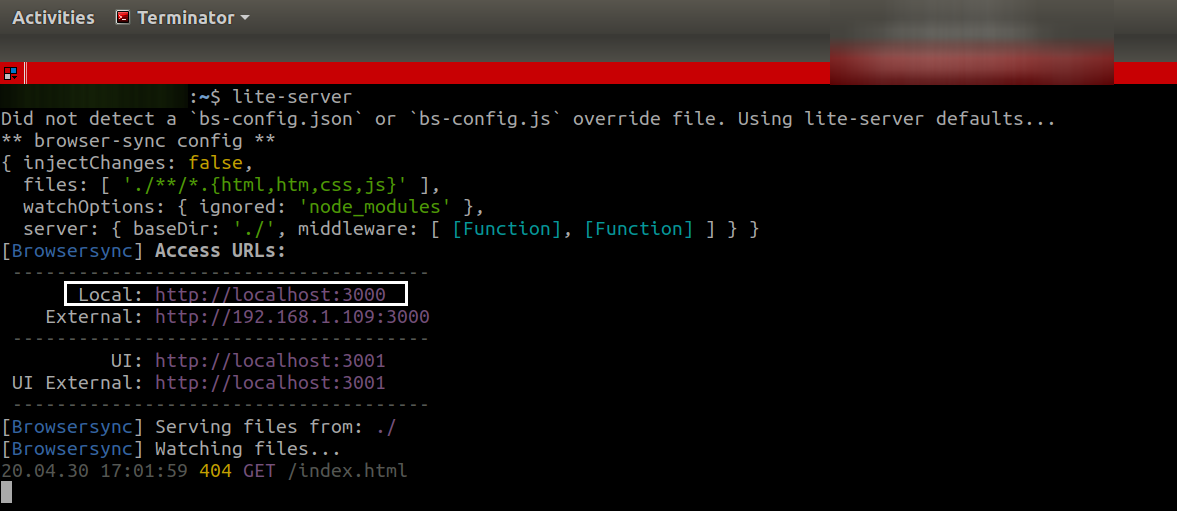
Make note of the port no in Access URLs (the localhost URL):
Next, we need to install ngrok to build secure tunnels from a public endpoint (that is the internet) to a locally running server. Issue the following command to install ngrok:npm install ngrok -g ngrok http <<port number>>
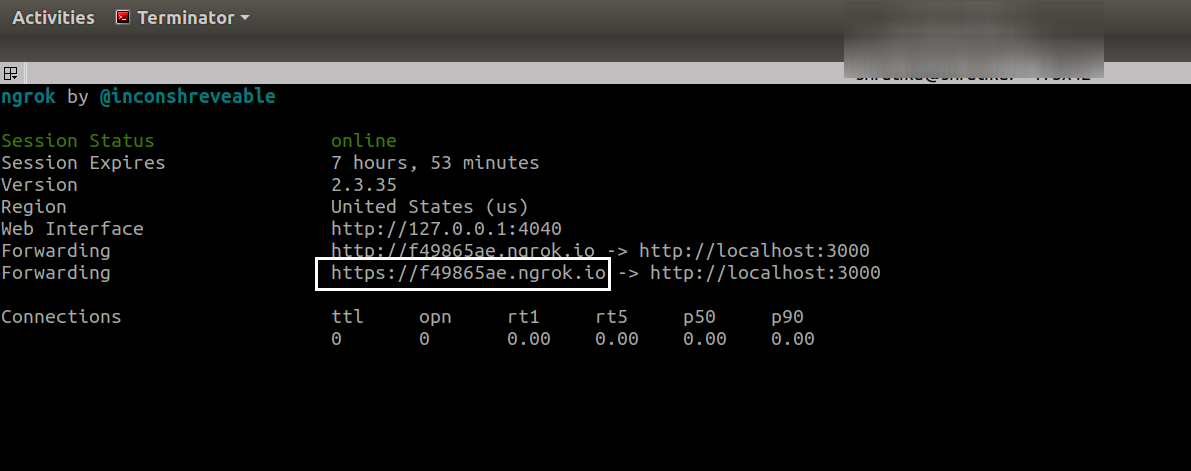
Once you run the above command, you will get a URL. Now create an extension by navigating to your stack and selecting Settings > + Add Extension > Create new.
On the Select Extensions Type screen, select Custom Field and then add the required details on the Create New Extension screen.
In the Hosting method field, select External hosting and paste the above URL in this field. Now save your extension and check the entry where you have added your extension.
You should see your updated changes.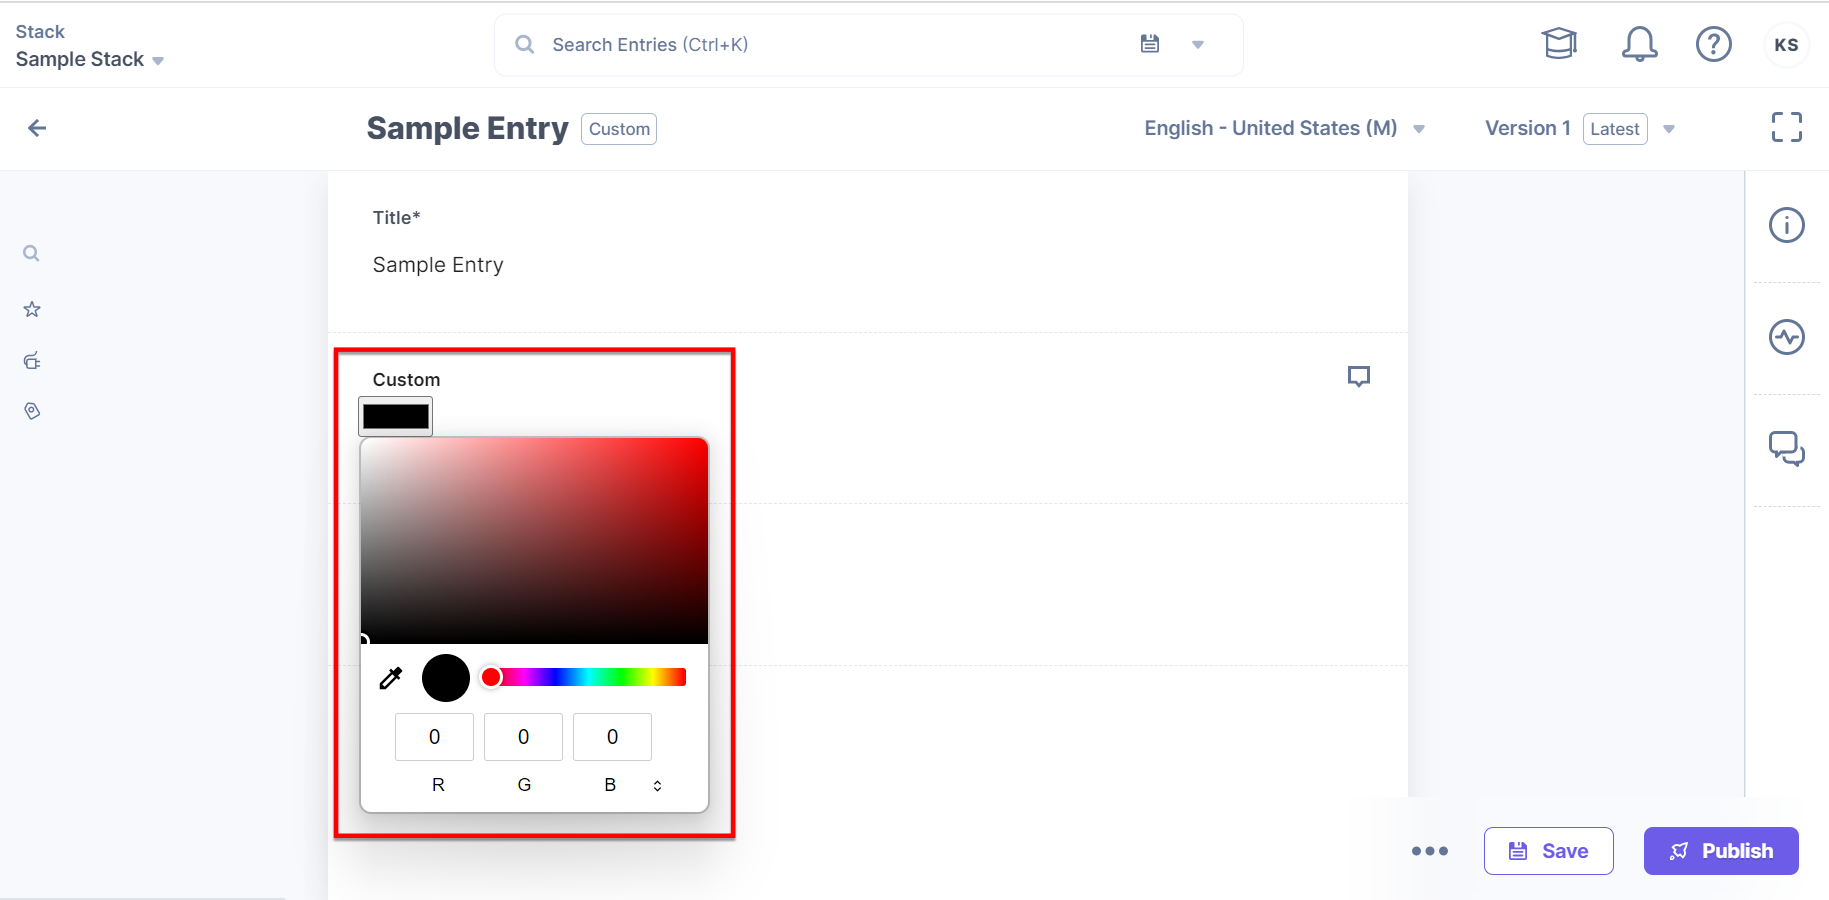
List of Custom Fields
Contentstack provides several prebuilt custom fields to use in your stack. Also, we support the implementation of custom fields using third-party services. Refer to the following links:
API Reference
To perform this create action via API, refer to the following API requests:
More articles in "Get started with Custom Fields"
