

.svg?format=pjpg&auto=webp)
.svg?format=pjpg&auto=webp)
.png?format=pjpg&auto=webp)


.png?format=pjpg&auto=webp)
Cancel Scheduled Publish/Unpublish Activity for Entries
You can cancel any scheduled publishing or unpublishing activity for a specific entry when you no longer wish to publish or unpublish the entry. Subsequently, you can also remove entries from a release that is scheduled for deployment.
Follow the below steps to cancel a scheduled publish or unpublish action for an entry:
- Go to your stack, and click on the “Publish Queue” icon on the left navigation panel. You can also use the shortcut key “alt + P” for Windows OS users, and “option + P” for Mac OS users to access Publish Queue.
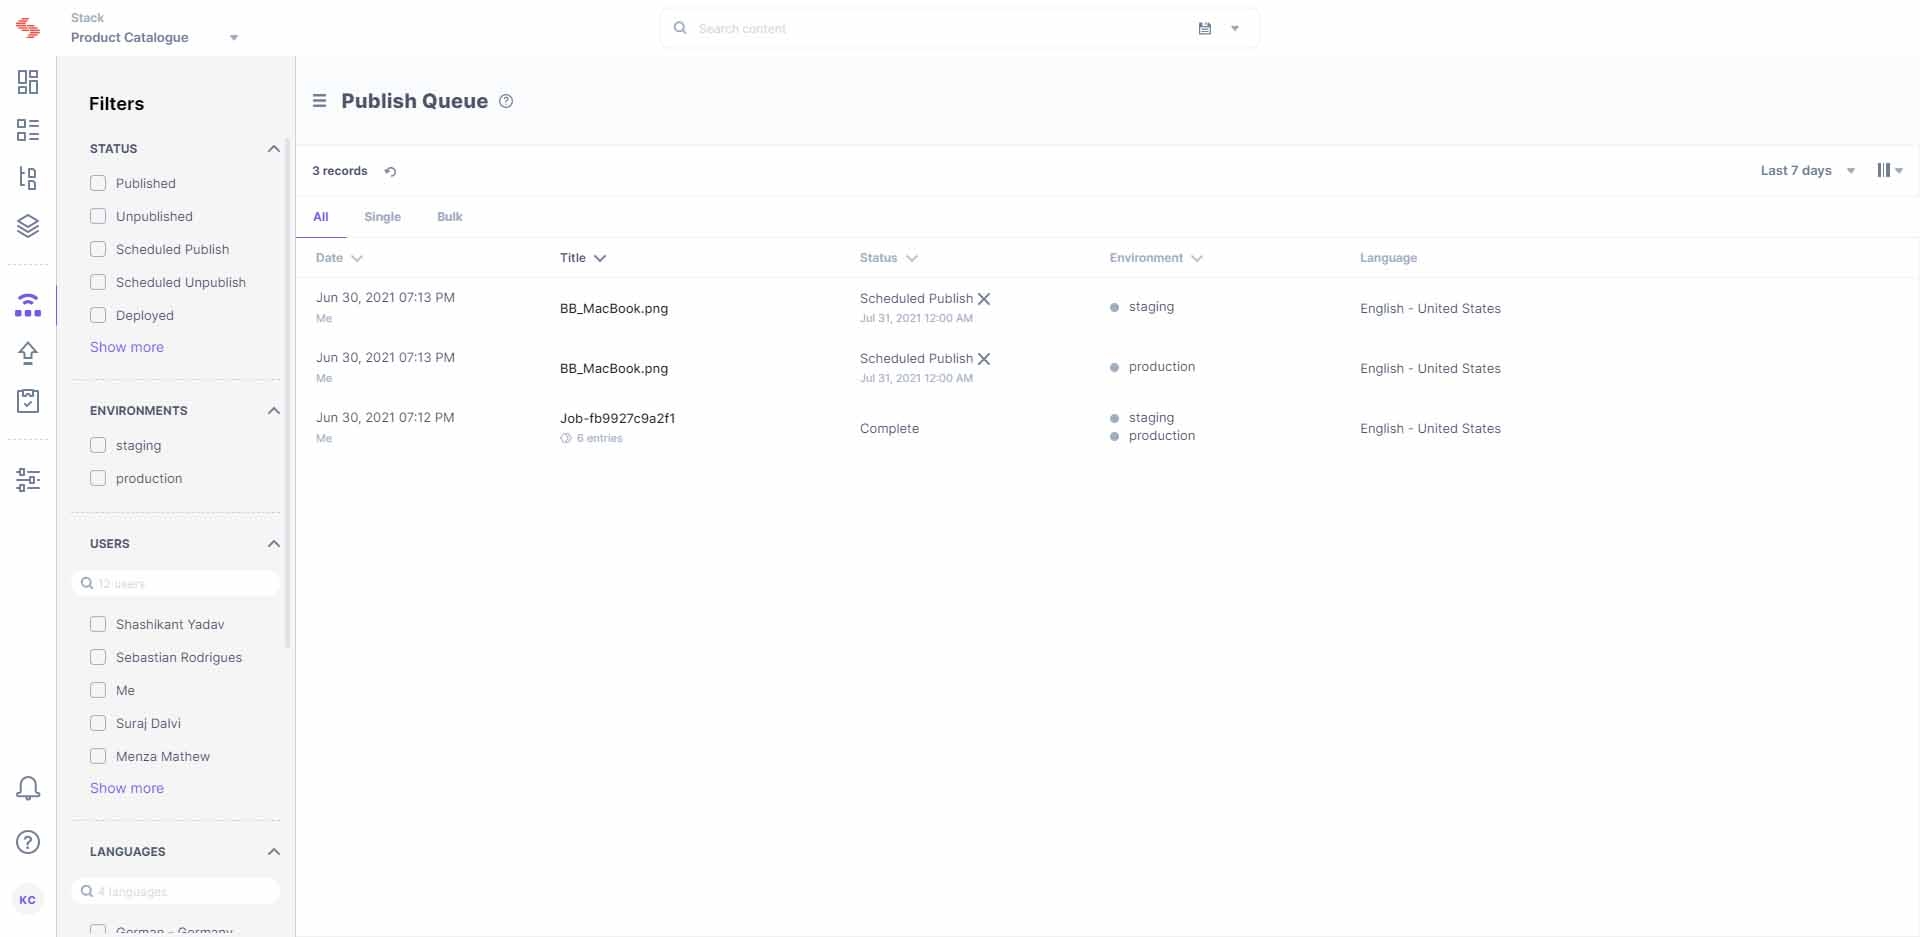
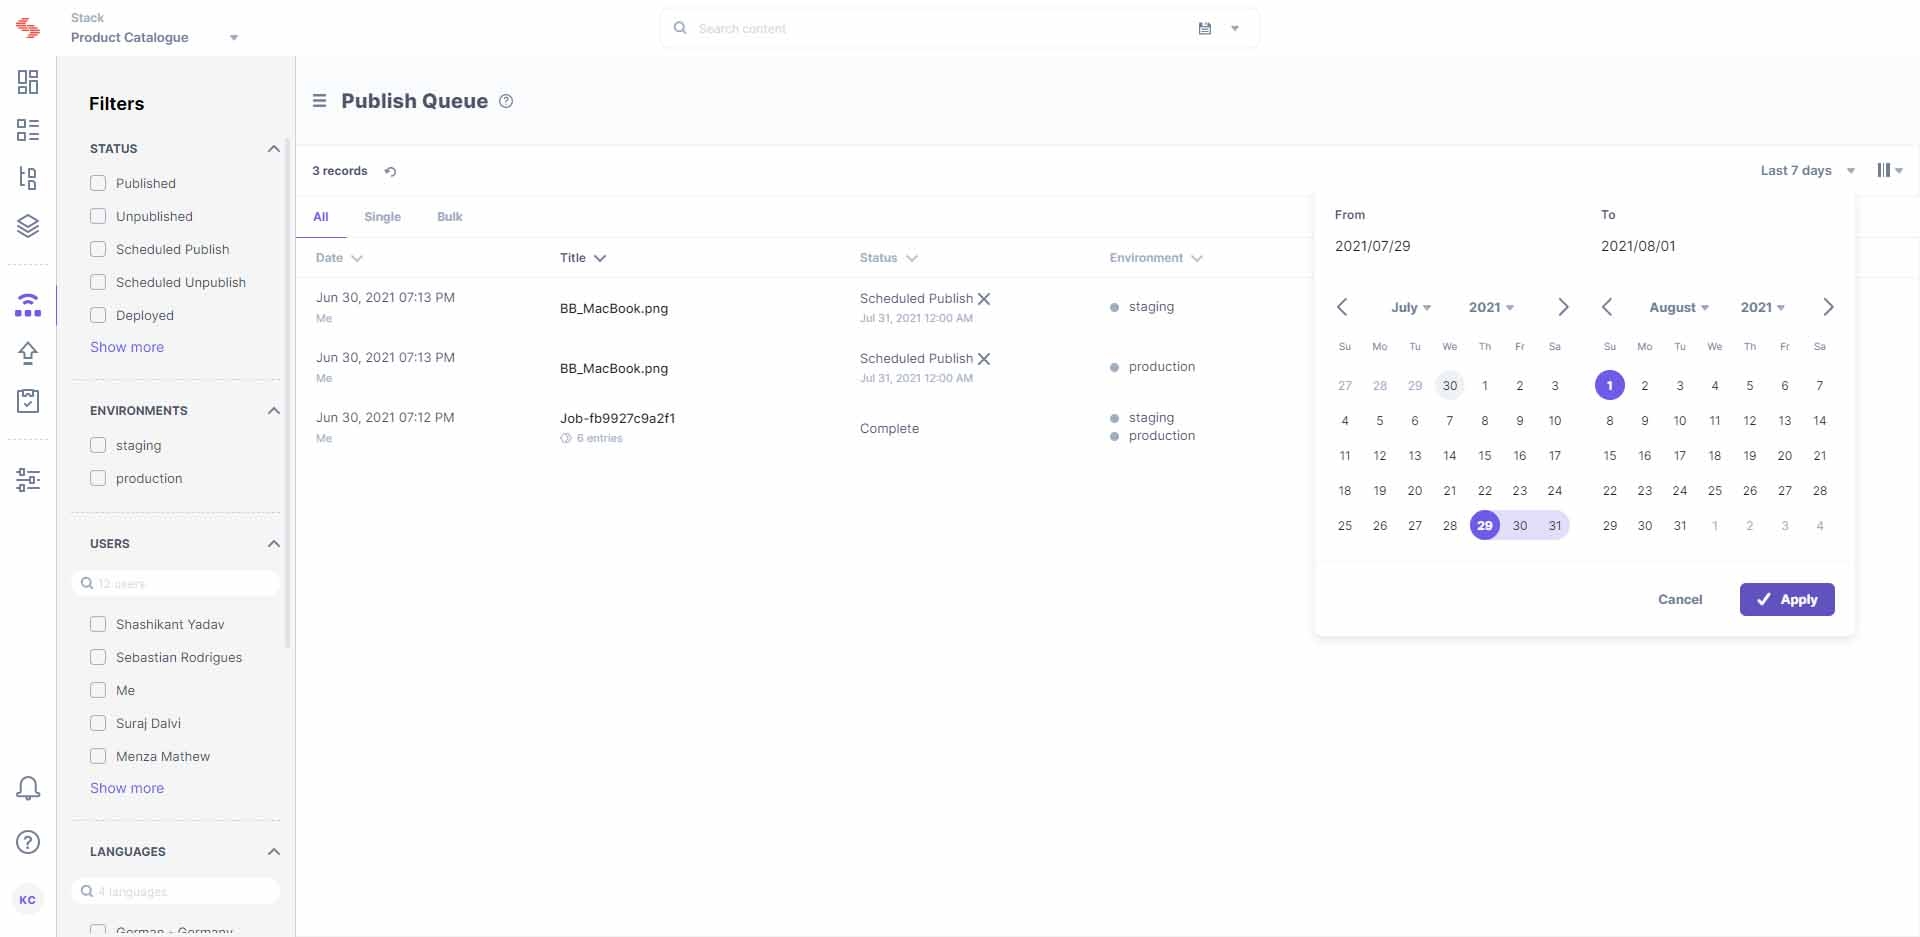
You can view the list of historical or current publishing or unpublishing activities on screen. - Under FILTERS, apply the date range filter to refine the publish queue results based on the specific date on which the entry is scheduled for publishing or unpublishing.
- From the refined activity list, click on the Cancel (x) icon beside each entry that needs to be removed from the publish queue.
Additional Resource: Learn how to cancel scheduled publishing or unpublishing activity for an entry using Contentstack's Content Management API.
Note: You need to cancel scheduled publishing activity by performing the above steps for each individual item in the publish queue.
Cancel Scheduled Publish/Unpublish Activity Using the Content Management API
To cancel the publishing or unpublishing action for entries or assets using Contentstack’s Content Management API, perform the following steps:
- Log in to Contentstack using the Authtoken or use the stack’s Management Token to authorize your API requests.
- Make a Content Management API request to retrieve details for publishing or unpublishing activities scheduled on or after a specific date. The API request will look as follows:
https://api.contentstack.io/v3/publish-queue?query={"scheduled_at": {"$gte": "scheduled_publishing_date"}}Note: You need to pass the scheduled publish/unpublish date and time in the ISO format.
- From the publish queue details retrieved in the response body of the previous API request, you can access the publish queue UIDs for each activity that you want to remove from the publishing queue.
- Make an API request to cancel the scheduled publishing or unpublishing action using each publish queue UID. The API request will look as follows:
https://api.contentstack.io/v3/publish-queue/{publish_queue_UID}/unschedule - If you need to cancel scheduled actions for multiple entries, you can write a script and fetch the publish queue details from the response body of the API request mentioned in Step 2.
API Reference
To cancel scheduled publishing or unpublishing activity of an entry via the API, refer the Cancel Scheduled Action API request.
More articles
