

.svg?format=pjpg&auto=webp)
.svg?format=pjpg&auto=webp)
.png?format=pjpg&auto=webp)


.png?format=pjpg&auto=webp)
Edge URL Rewrites
You can set URL rewrite rules in Contentstack Launch to rewrite specific URLs in your source code with the content in different URLs of your choice. Unlike the Edge URL redirects feature that sends you to a completely different URL, the Edge URL rewrites feature involves altering the URL path on the server side without necessarily changing the URL displayed in your browser. This means that it can also function as a proxy for external URLs.
URL rewriting has many use cases, such as migrating incrementally from a different hosting platform, proxying a part of the site from a different host, managing micro-sites separately while still hosting them as part of the same domain, and so on.
Edge URL Rewrites enable you to achieve high-performance rewrites and proxies since the rewritten origin calls are made from the CDN’s edge itself.
You can set your custom rewrites by adding them to the launch.json file and then check-in the file to your Git repository.
This step-by-step guide will help you create a project in Launch that configures Edge URL rewrites.
Prerequisites
- Contentstack account
- Access to Launch for your organization
Steps for Execution
Create the launch.json File
Follow the steps to create the launch.json file for URL rewrites:
- Open your source code folder.
- Create a JSON file named launch.json inside the folder, and paste the following code into it:
{ "rewrites": [ { "source": "/source", "destination": "/destination", "request": { "headers": { "x-api-key": "api-key" } }, "response": { "headers": { "x-powered-by": "launch" } } } ] } - Replace /source in the code with your source route.
- Replace /destination in the code with your destination route.
Note: The source and destination URLs must not exceed 512 characters each.
You can use the headers field in the request object to set custom headers before the call is made to the destination. The request field is optional, and you can skip it if setting custom headers is not required.
You can also use the headers field in the response object to set custom headers before the response is sent back to the client. The response from the destination is modified to add these headers, and any existing headers with the same key would be overridden. The response field is optional, and you can skip it if setting custom headers is not required.
- Save the launch.json file.
Note: The file size must be limited to 5MB. To optimize performance and minimize latency during processing, use regular expressions to keep the configuration compact and efficient.
Examples for the uses of Edge URL Rewrites
- Use path variables to rewrite hard-to-read URLs and turn them into human and search engine friendly URLs:
Example:{ "rewrites": [ { "source": "/blog/:slug/:postId", "destination": "/wp/pages/blogs?action=detail&page_id=:postId" } ] }In the above example, two path variables are declared in the source URL: slug and postId. In the destination, we re-use the postId variable to construct the URL while the slug is discarded. This allows us to rewrite a hard-to-read URL from a legacy system to a much more SEO-friendly URL like /blog/go-composable/2160.
- Path variables can also be captured with a regular expression. A regular expression allows you to pattern match on any given text, including URLs. The resulting path variable captures a part of the URL that matches the regular expression and can then be re-used to construct the destination URL.
Example:{ "rewrites": [ { "source": "/assets/:category(products|storefront)/:path(.*)", "destination": "https://example.com/assets/:path", "response": { "headers": { "x-robots-tag": "noindex" } } } ] }In the above example, we match two categories of asset requests coming to the website, namely, products and storefront, using a regular expression. If the categories match, we proxy the request to a completely different host, which manages assets for these categories. The asset path from the source URL is also used to construct the destination URL. Finally, we also set the x-robots-tag header on the response to prevent search engines from indexing assets.
- The Edge URL Rewrite feature is handy when migrating from a different host to Launch. It allows you to migrate incrementally, page by page, reducing the risk that comes with a big-bang migration.
Example:{ "rewrites": [ { "source": "/:path((?!blogs|docs|about-us).+)", "destination": "https://example.com/:path", "request": { "headers": { "x-api-key": "apikey" } } } ] }In the above example, we're allowing Launch to serve the homepage, /blogs, /docs, and /about-us while proxying traffic from all other pages to the legacy host.
Note how we've used the negative look-ahead regular expression to achieve this. At the same time, we've secured access to the legacy host by setting an API key header to the requests, ensuring that the legacy host URL only serves content from Launch.
- A convenient use case for Edge URL Rewrites is to set security headers for all requests to the website.
Example:{ "rewrites": [ { "source": "/:path(.*)", "destination": "/:path", "response": { "headers": { "X-Frame-Options": "DENY", "X-XSS-Protection": "0", "X-Content-Type-Options": "nosniff", "Referrer-Policy": "strict-origin-when-cross-origin", "Strict-Transport-Security": "max-age=63072000; includeSubDomains; preload", "Cross-Origin-Opener-Policy": "same-origin" } } } ] }Here, we have used the headers field in the response object to set security headers for all requests to the website. Since multiple rewrites could be added to the rewrites array, it is recommended to have this rewrite as the last one in the array.
This is because rewrites are evaluated in sequence, and this catch-all rewrite could match all requests and prevent other rewrites from executing.
Note: When you forward or rewrite a request to the origin server from the Launch Edge URL Rewrites or the Launch Edge Function, the same request will not re-invoke the Launch Edge Function. Instead, it will be directly forwarded to the origin server through a cache layer.
Deploy your Project in Launch
Deploy your project in Launch by importing the source code from GitHub or uploading the source code folder.
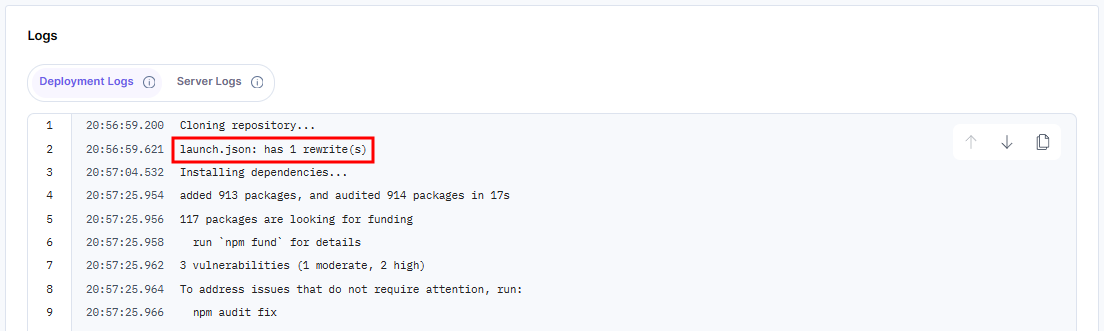
After successful deployment, the Logs section displays the count of rewrites as follows:
Limitations
- Adding a launch.json file to an app within a monorepo is currently not supported.
- Launch does not support complete URLs in the source. However, you can use Launch Edge Functions to rewrite traffic based on the hostname when multiple domains point to the same environment.
More articles in "Launch Features"
