

.svg?format=pjpg&auto=webp)
.svg?format=pjpg&auto=webp)
.png?format=pjpg&auto=webp)


.png?format=pjpg&auto=webp)
Set up SSO with Microsoft Azure AD B2C
This step-by-step guide explains how to set up Single Sign-On in Contentstack with Microsoft Azure Active Directory (AD) B2C as your SAML 2.0 Identity Provider (IdP).
In a nutshell, this integration requires following steps:
- Create SSO Name and ACS URL in Contentstack
- Configure Contentstack App in Microsoft Azure AD B2C
- Configure Microsoft Azure AD B2C Details in Contentstack
- Add Users to Your Microsoft Azure AD B2C Application
- Test and Enable SSO
Let us see each of the processes in detail.
- Create SSO Name and ACS URL in Contentstack
- Log in to your Contentstack account, go to the Organization Settings page, and click the Single Sign-On tab.
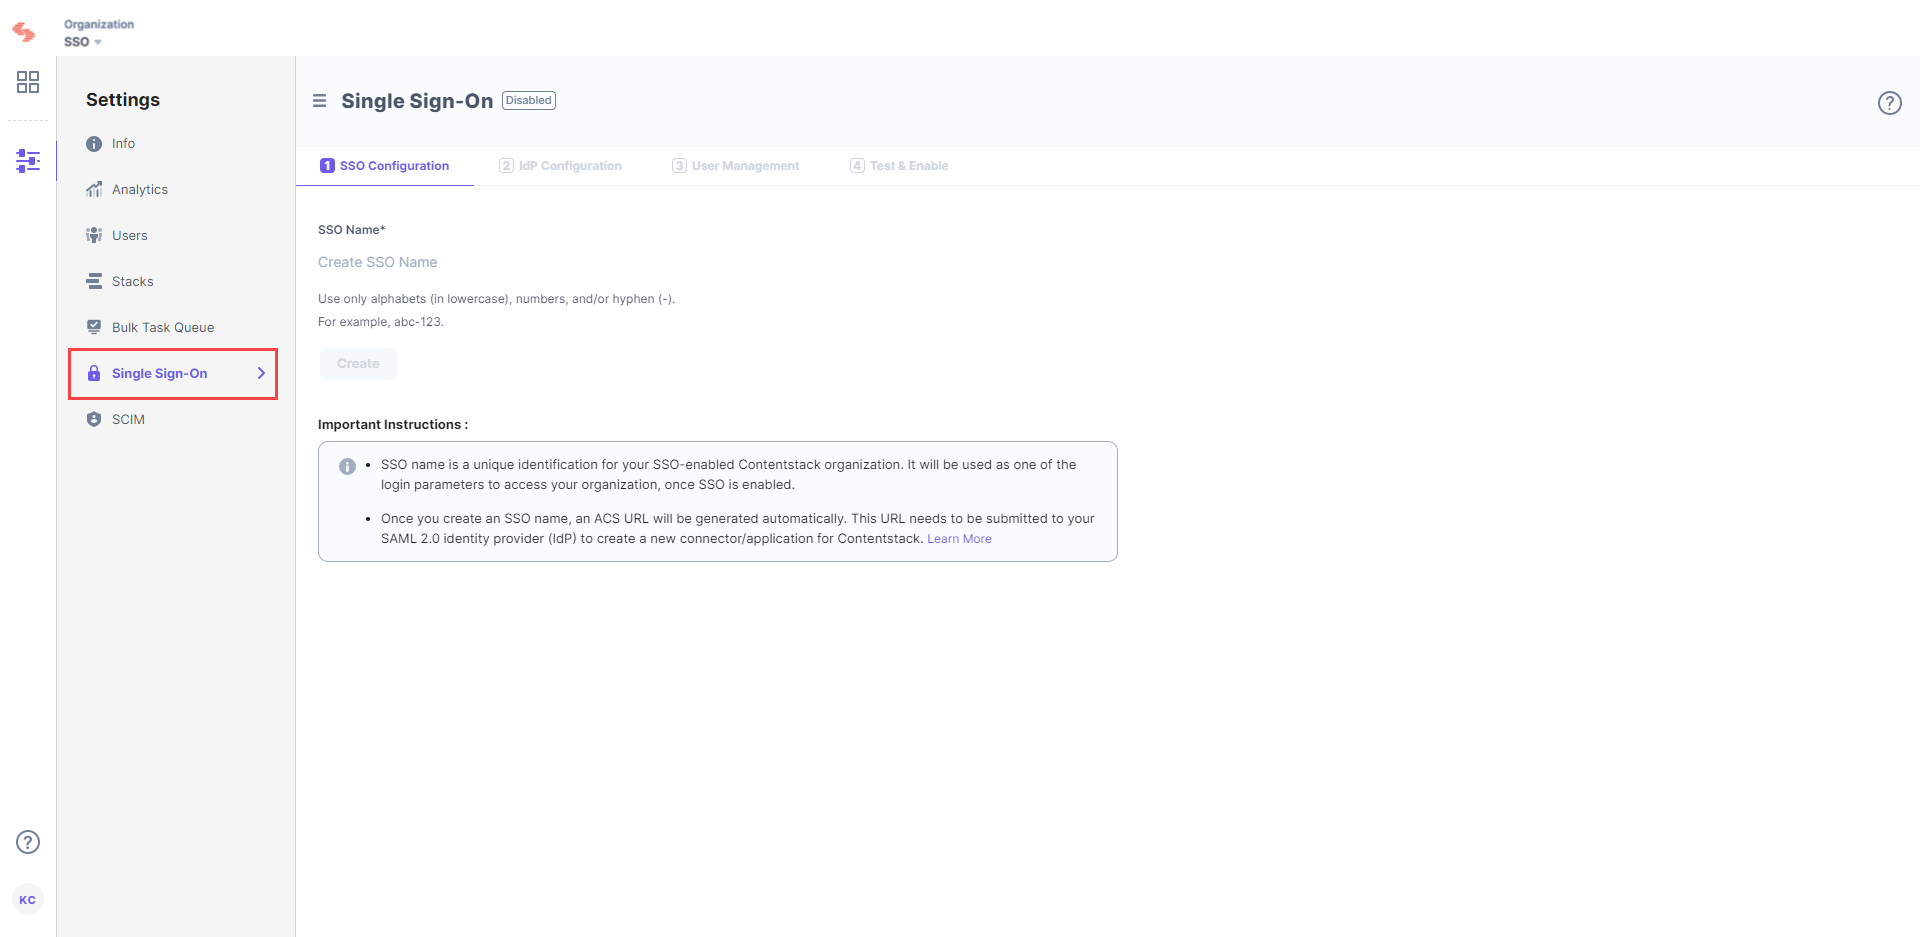
- Enter an SSO Name of your choice, and click Create. For example, if your company name is “Acme, Inc.” enter “acme” here. This name will be used as one of the login credentials by the organization users while signing in.
Note: The SSO Name can contain only alphabets (in lowercase), numbers (0-9), and/or hyphens (-).
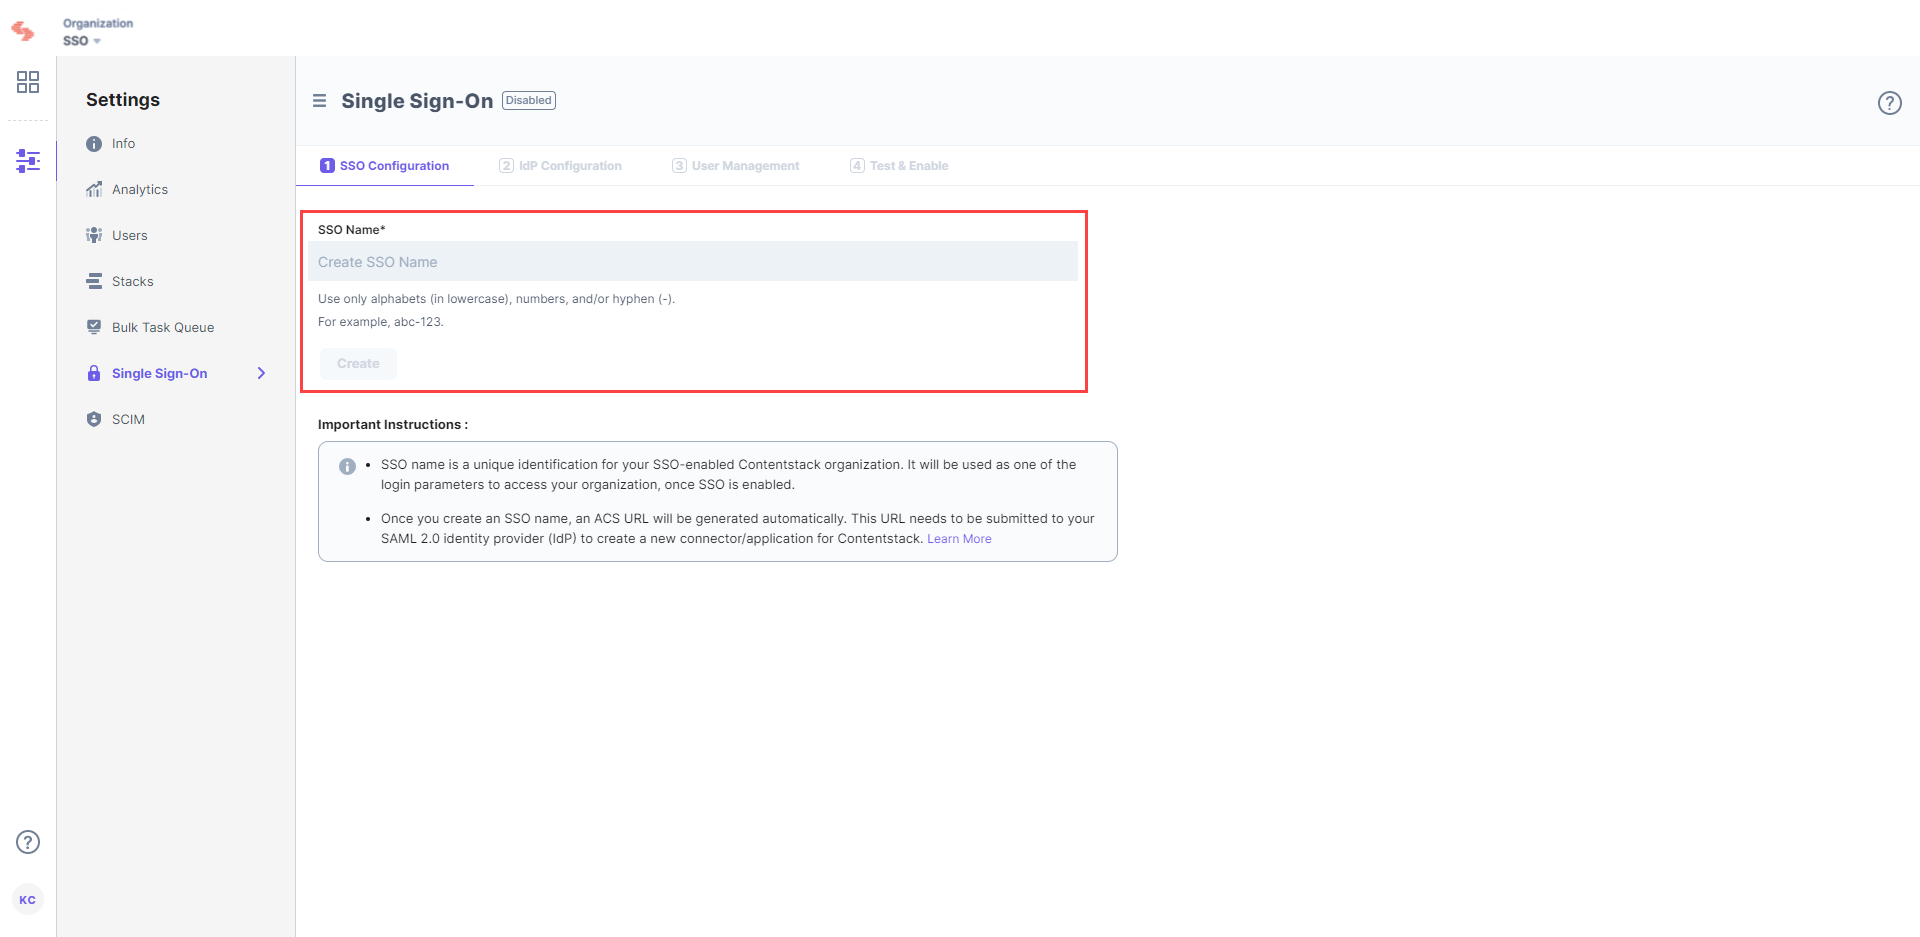
Let's use “sso-test” as the SSO Name.
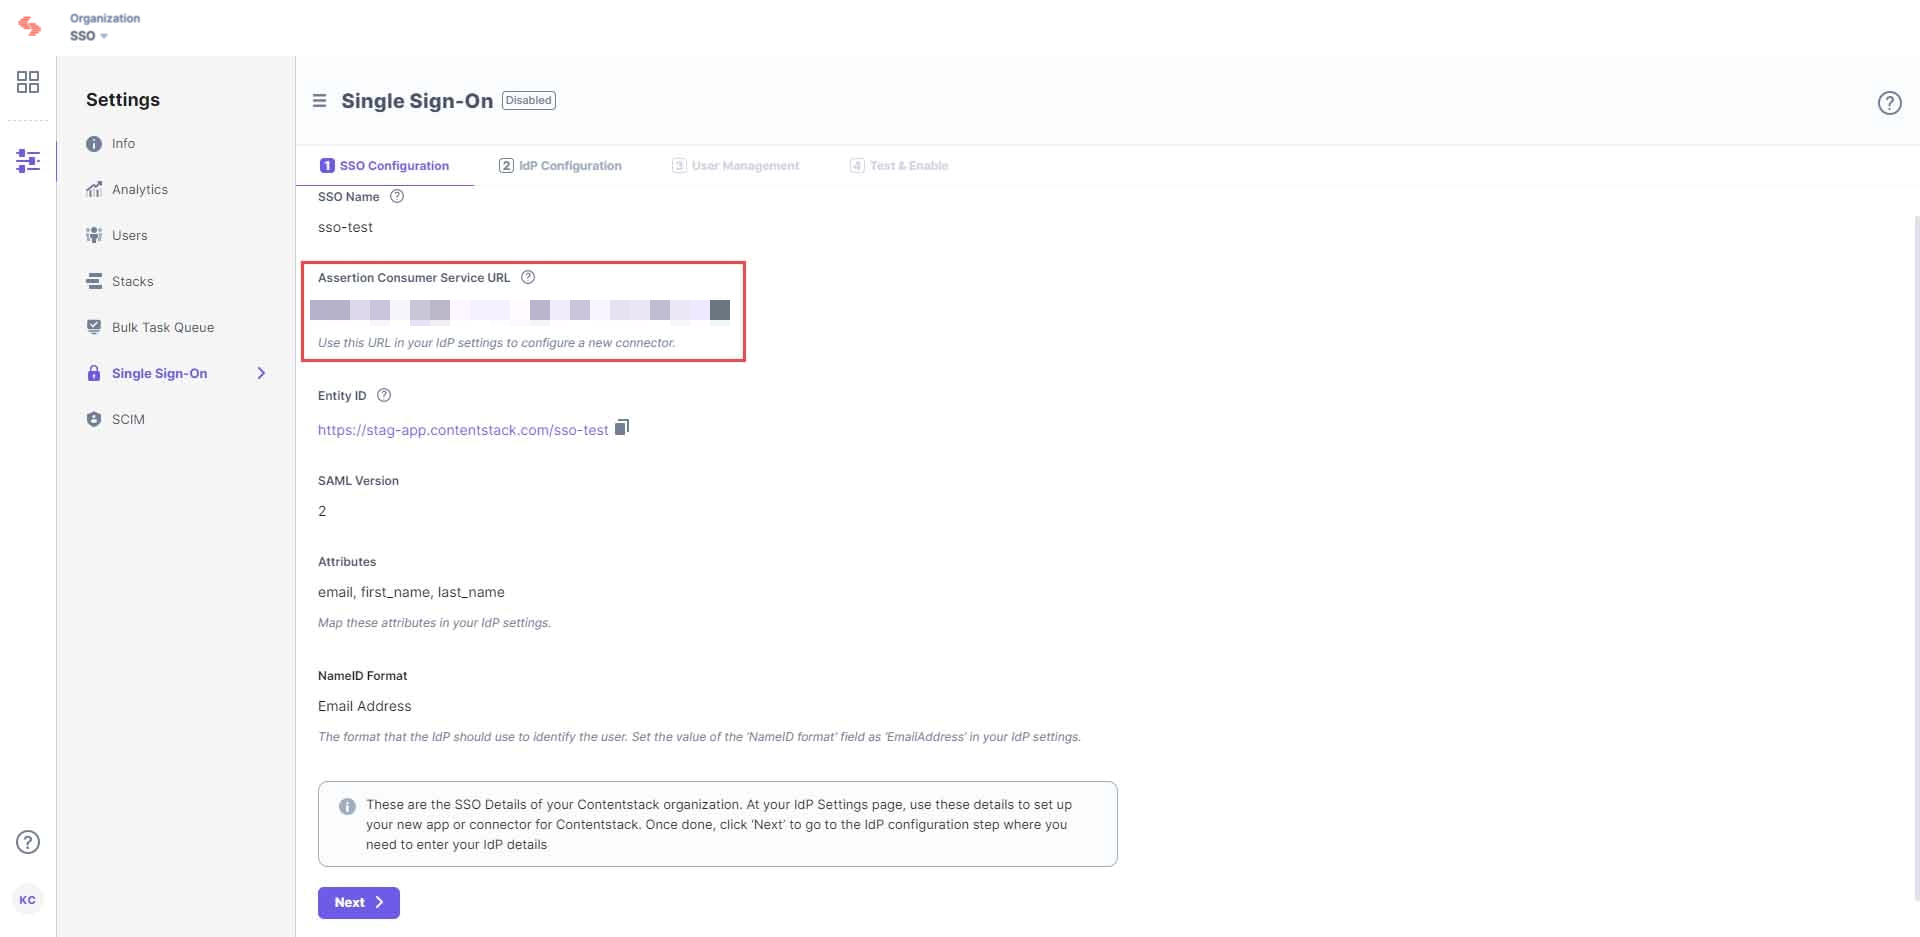
- When you click Create, this will generate the Assertion Consumer Service URL and other details such as Entity ID, Attributes, NameID Format, and SAML Version. These details will be used in Step 2 for configuring the Contentstack app in Microsoft Azure AD B2C.
- Configure Contentstack App in Microsoft Azure AD B2C
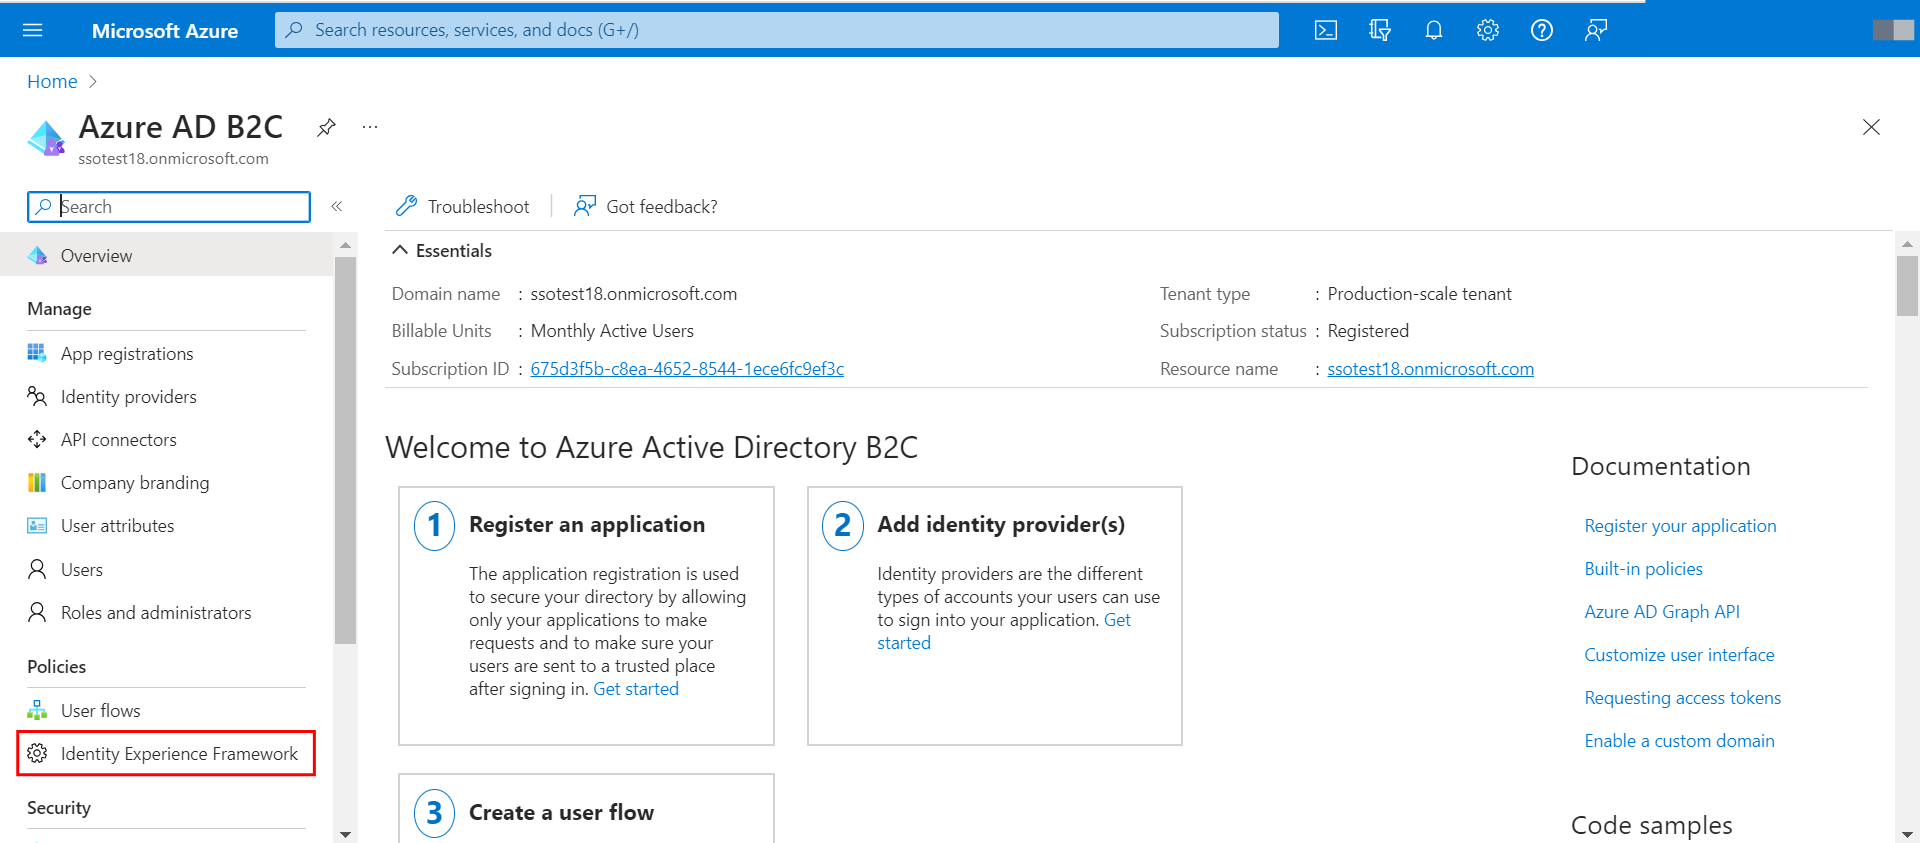
- Go to the Microsoft Azure Portal, and click on Azure AD B2C:
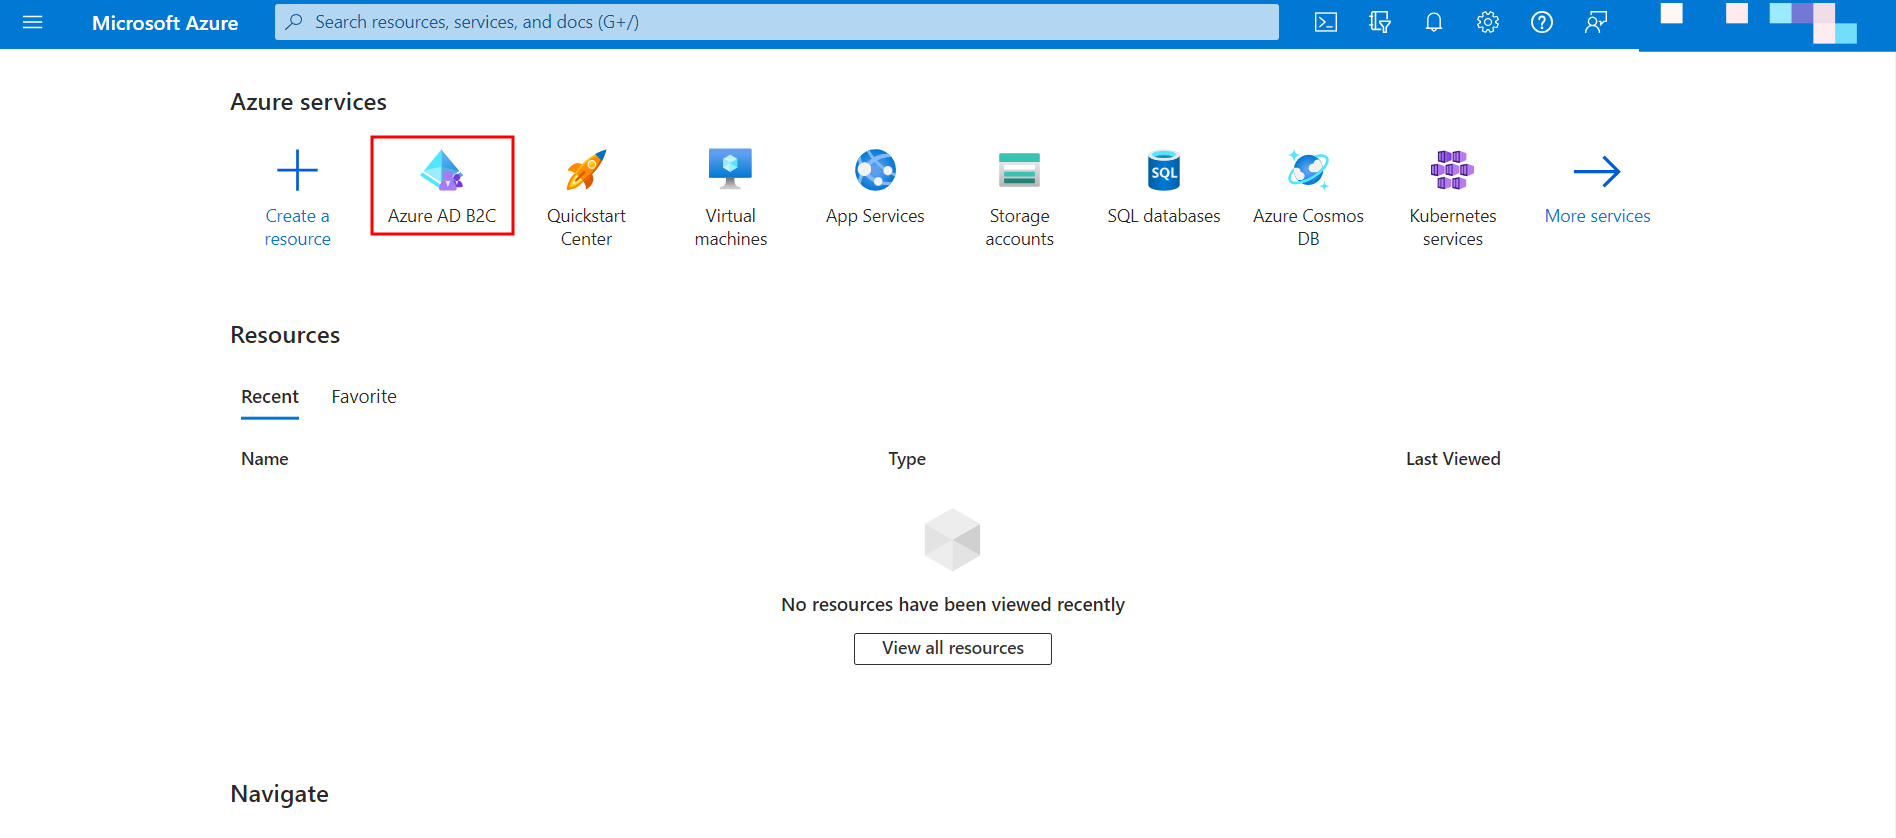
Note: Please make sure you have an active subscription of Azure AD B2C before we proceed to the next step.
- Within the Azure AD B2C portal, in the left navigation panel, scroll and click Identity Experience Framework.
- Next, generate the required security certificate that you will be needing in the next step.
Additional Resource: For detailed instructions on generating the certificate, refer to the Obtain a Certificate documentation.
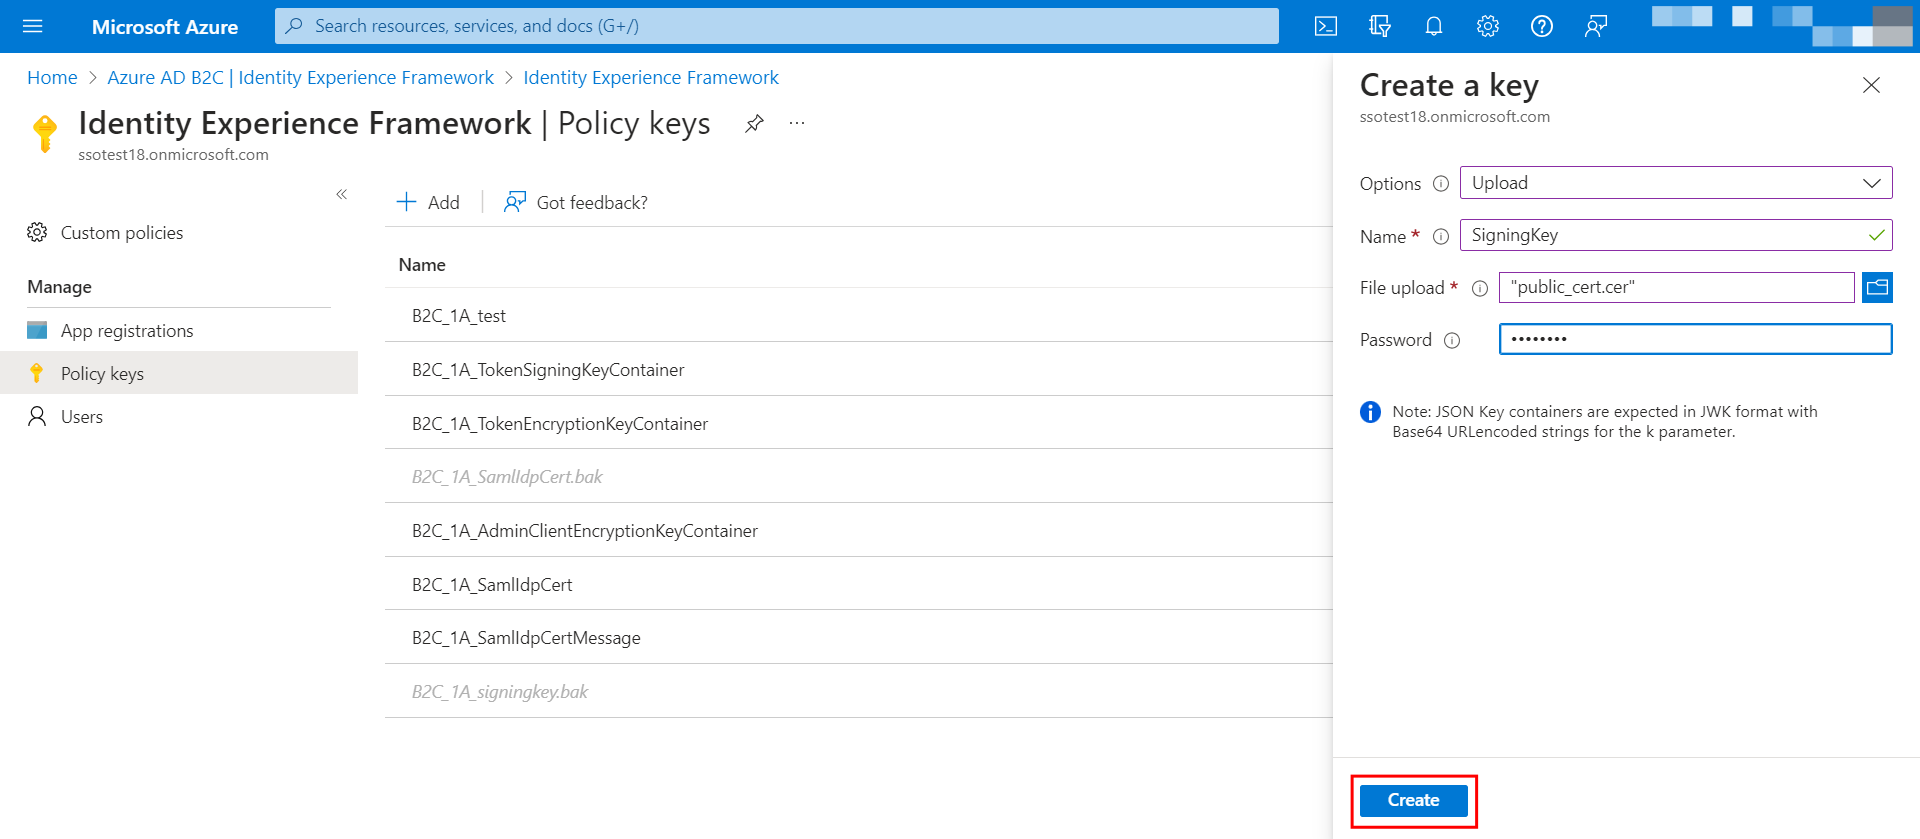
- Next, you need to create and upload the Policy keys for your application. To do so, follow the steps given below:
- Navigate to the Policy keys section in your Azure AD B2C portal and click the + Add button.

- Within the Create a key panel that appears, select Upload from the dropdown menu for the Options field.
- Enter the Name for the policy key.
- In the File upload field, browse through your local machine and select the security certificate created in the previous step.
- Enter a Password and click the Create button.
- Navigate to the Policy keys section in your Azure AD B2C portal and click the + Add button.
- Register the IdentityExperienceFramework and ProxyIdentityExperienceFramework applications in your portal.
Additional Resource: Refer to the Microsoft documentation on Register the IdentityExperienceFramework application and Register the ProxyIdentityExperienceFramework application documents for more information.
- Register the Contentstack Application in the Azure AD B2C Portal as follows:
- Navigate to App registrations and click the + New registration button.

- Enter the Name for your application.
- Select any one of the Supported account types from the given options.
- Within the Redirect URI section. Select Web as the platform from dropdown and add the URL that you obtained while setting up your stack in step 1.3.
- Select the Checkbox under Permissions and click the Register button.
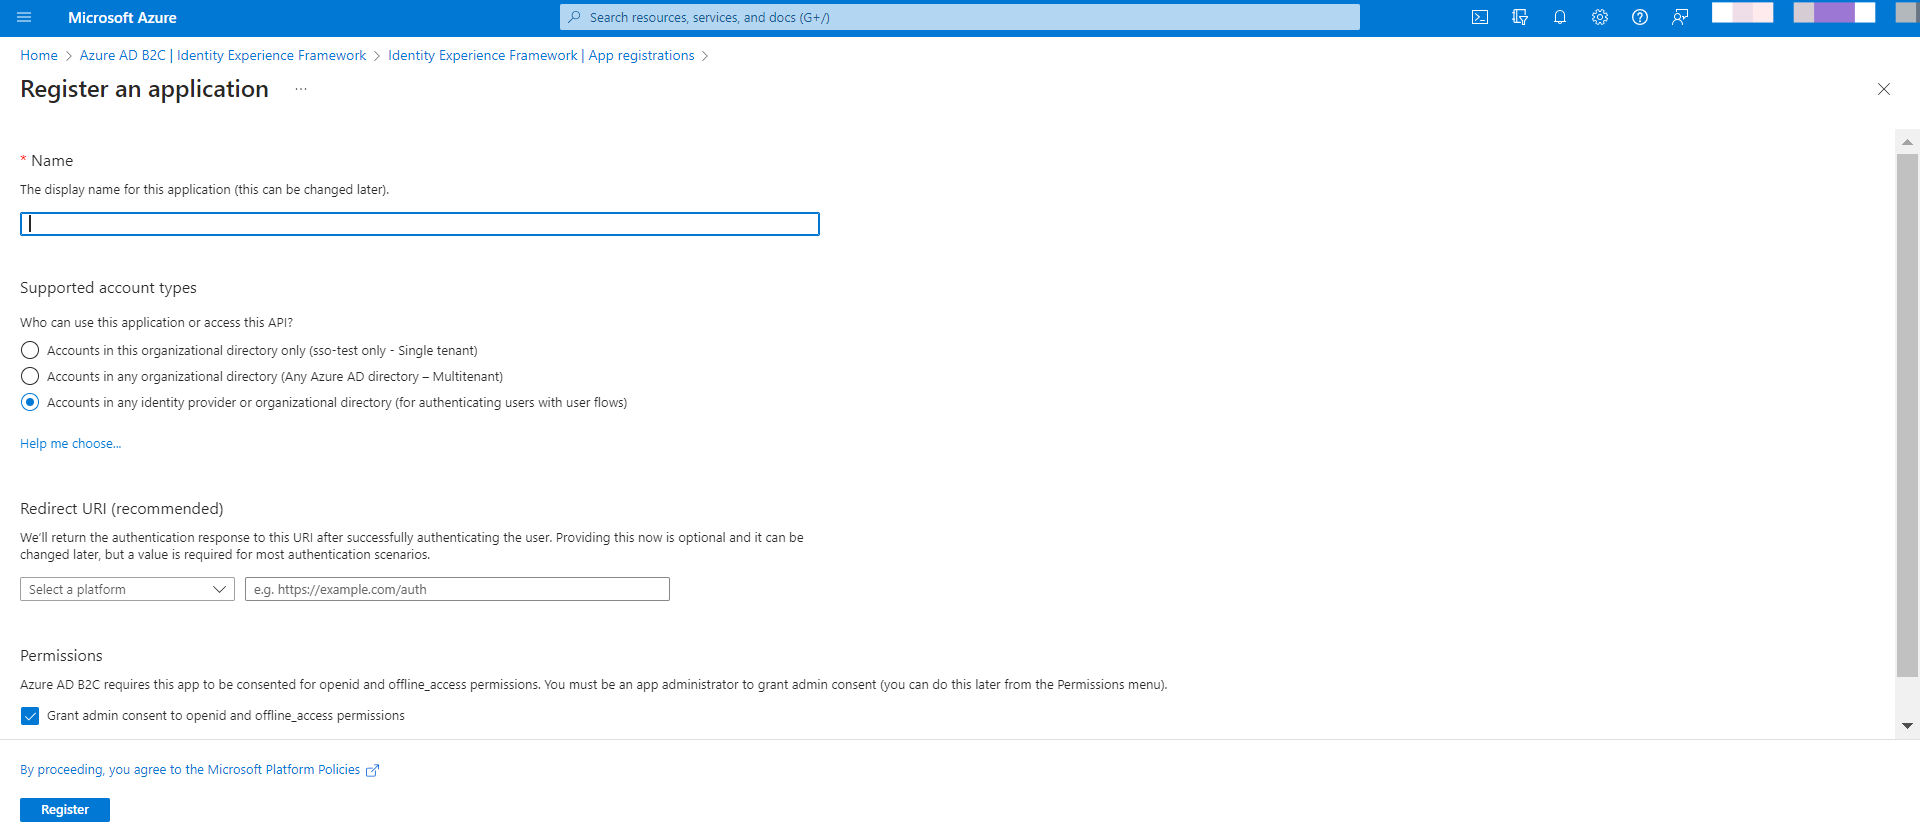
Note: Copy the Application ID for later use in the custom policies.
- Navigate to App registrations and click the + New registration button.
- To configure your application, go to the Manifest tab in the left navigation panel. In the IdentifierUris field, enter the EntityId that you received in step 1.3.
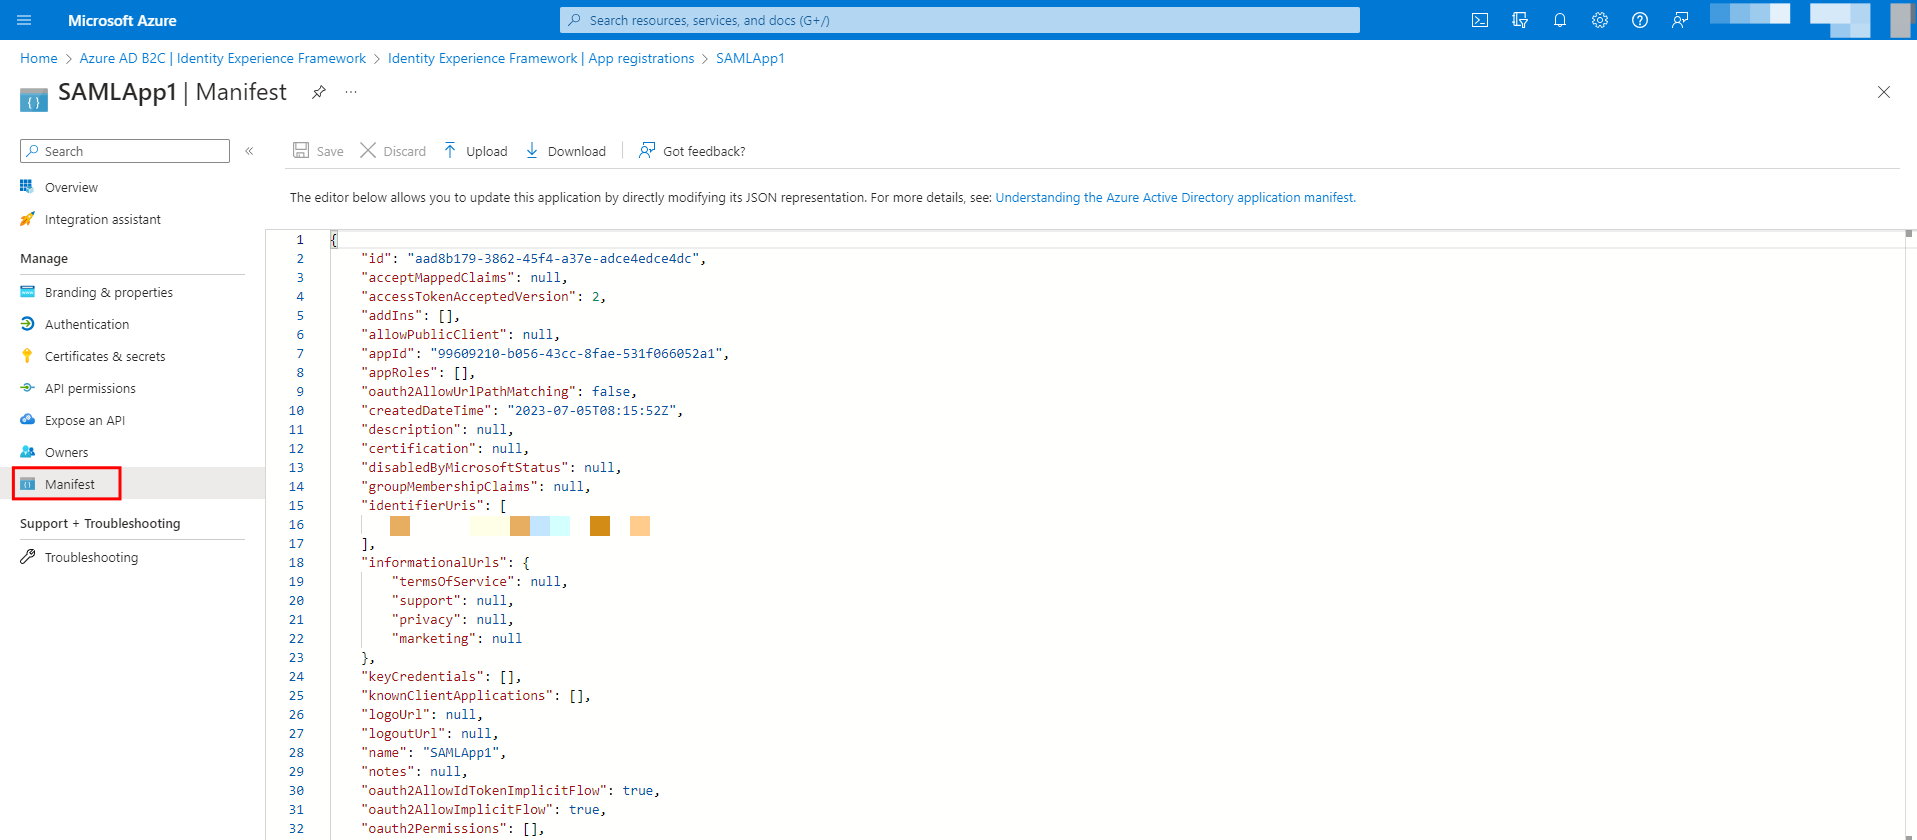
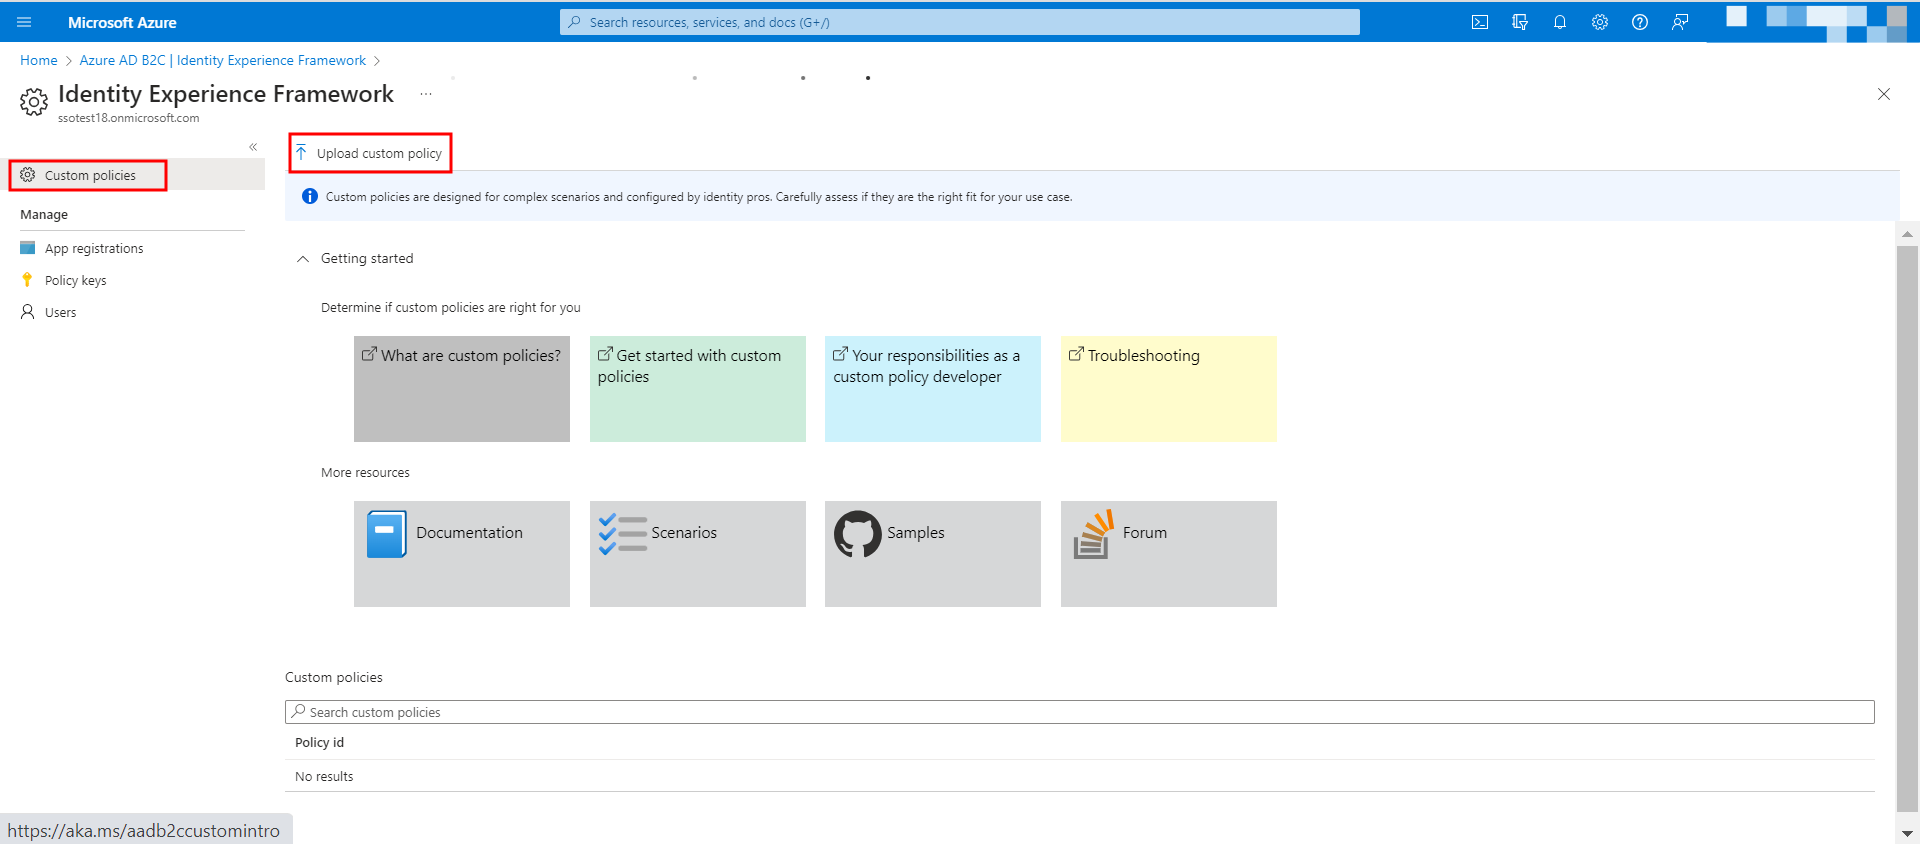
Click Save to secure your changes. - Within the Identity Experience Framework, navigate to the Custom policies tab and click the Upload custom policy button.
- If you already have custom policies defined for your B2C application, you can use the same ensure SAML2 Assertion is configured. If not you can use the custom policy starter pack and follow SAML assertion configurations.
- In the custom policy document, ensure the following output claims are added to the Technical profile section.
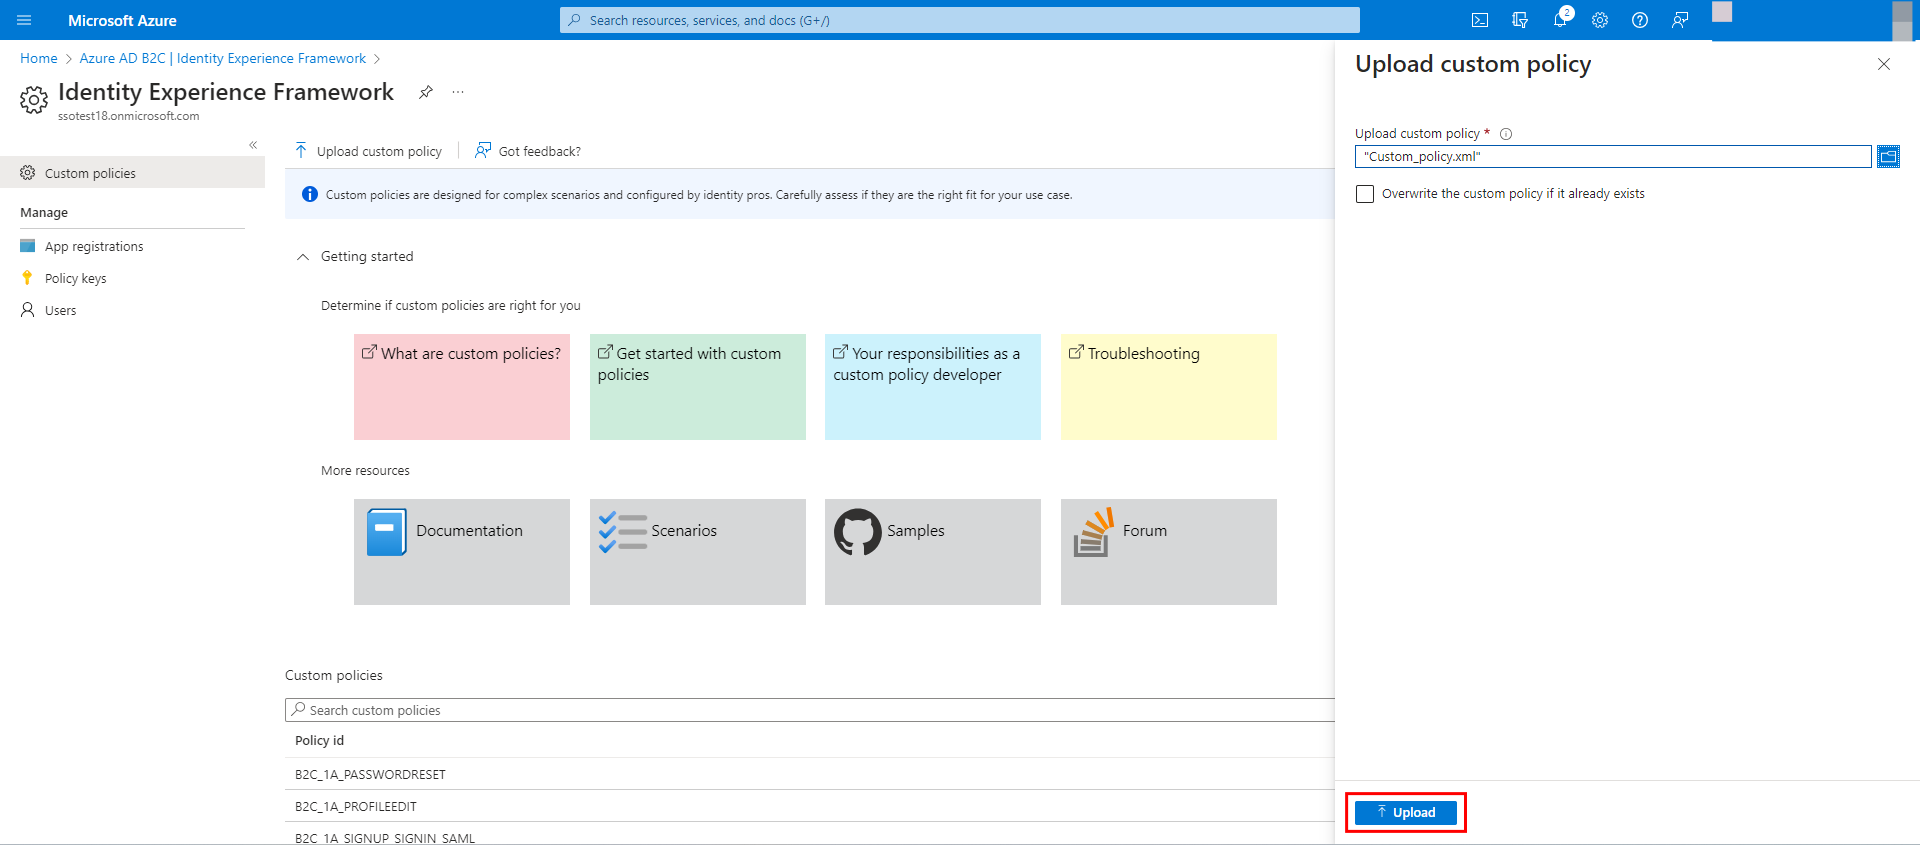
<OutputClaim ClaimTypeReferenceId="givenName" PartnerClaimType="first_name" /> <OutputClaim ClaimTypeReferenceId="surname" PartnerClaimType="last_name" /> <OutputClaim ClaimTypeReferenceId="signInNames.emailAddress" PartnerClaimType="email" /> - Browse through your local machine and select the file that includes the updated custom policy as per your configuration and click Upload.
- Once the setup is done, navigate to the below URL https://<tenant-name>.b2clogin.com/<tenant-name>.onmicrosoft.com/<policy-name>/Samlp/metadata where <tenant-name> is your Azure B2C tenant name.
This should give you a valid SAML response. - Search for SingleSignOnService in the page and note the URL mentioned under the Location parameter.
- Configure Microsoft Azure AD B2C Details in Contentstack
- Paste the URL from step 2.10 within the Single Sign-On Url field in your stack’s Single Sign-On settings.
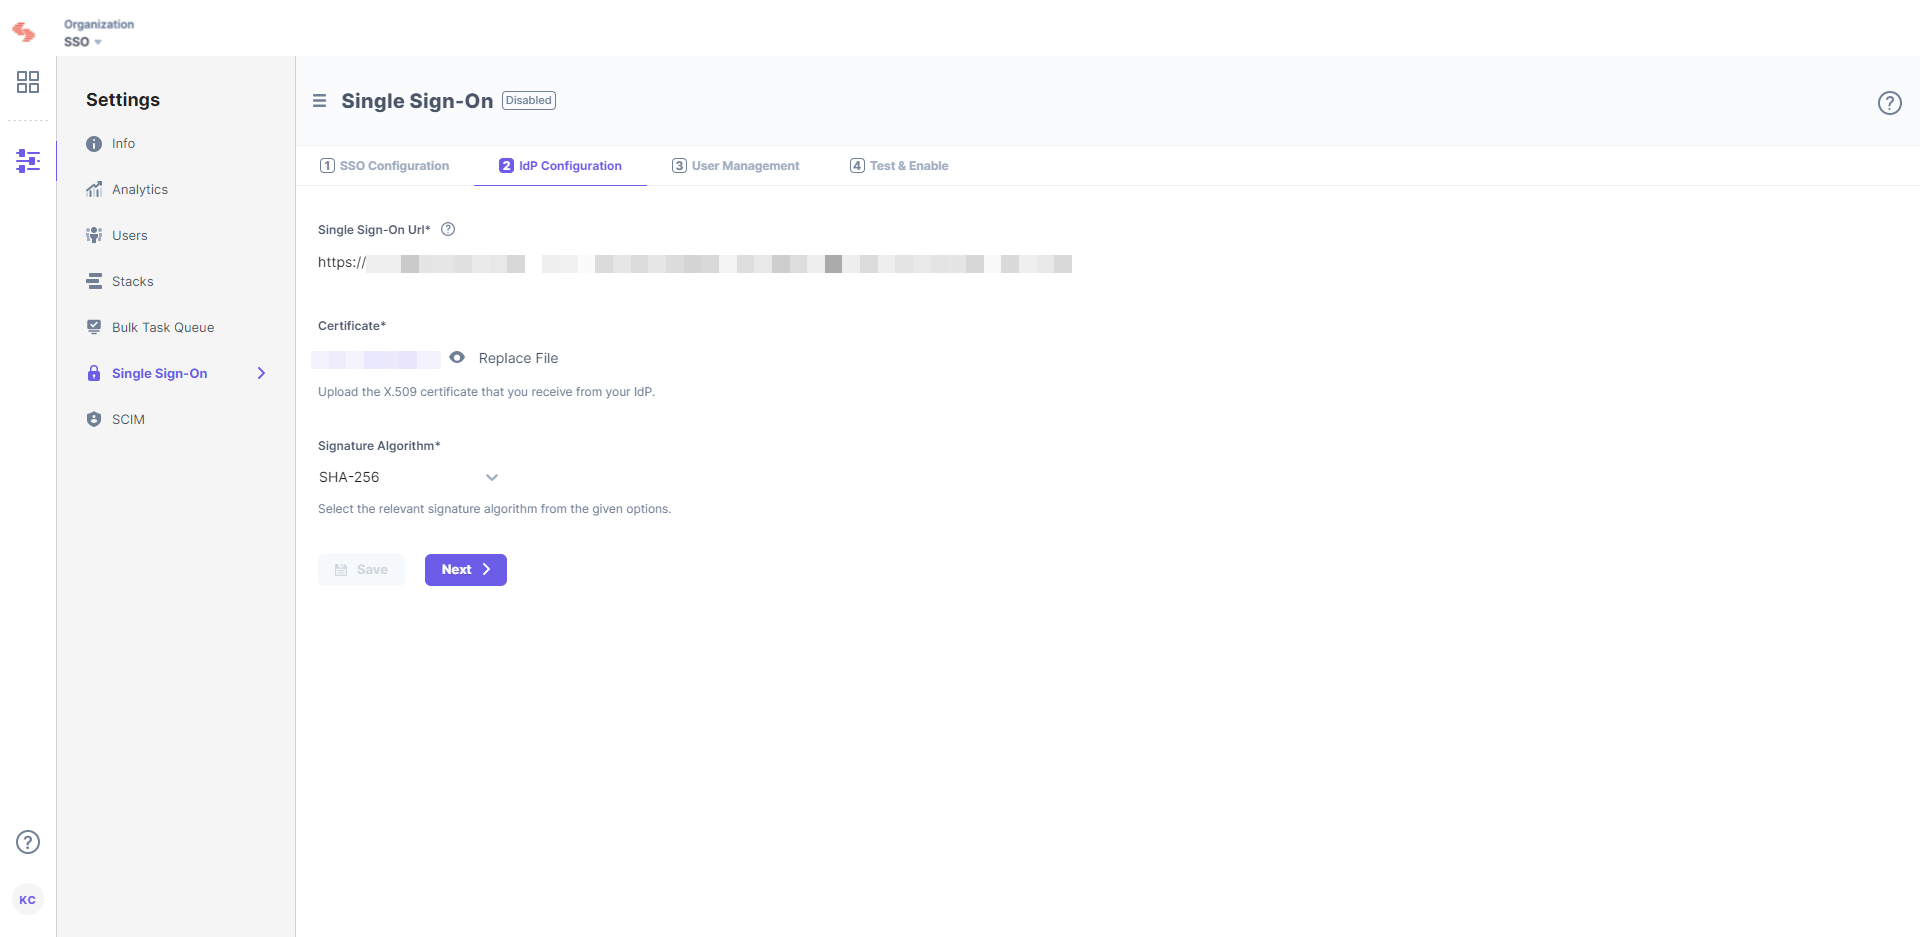
- In the Certificate field, upload the certificate generated in step 2.
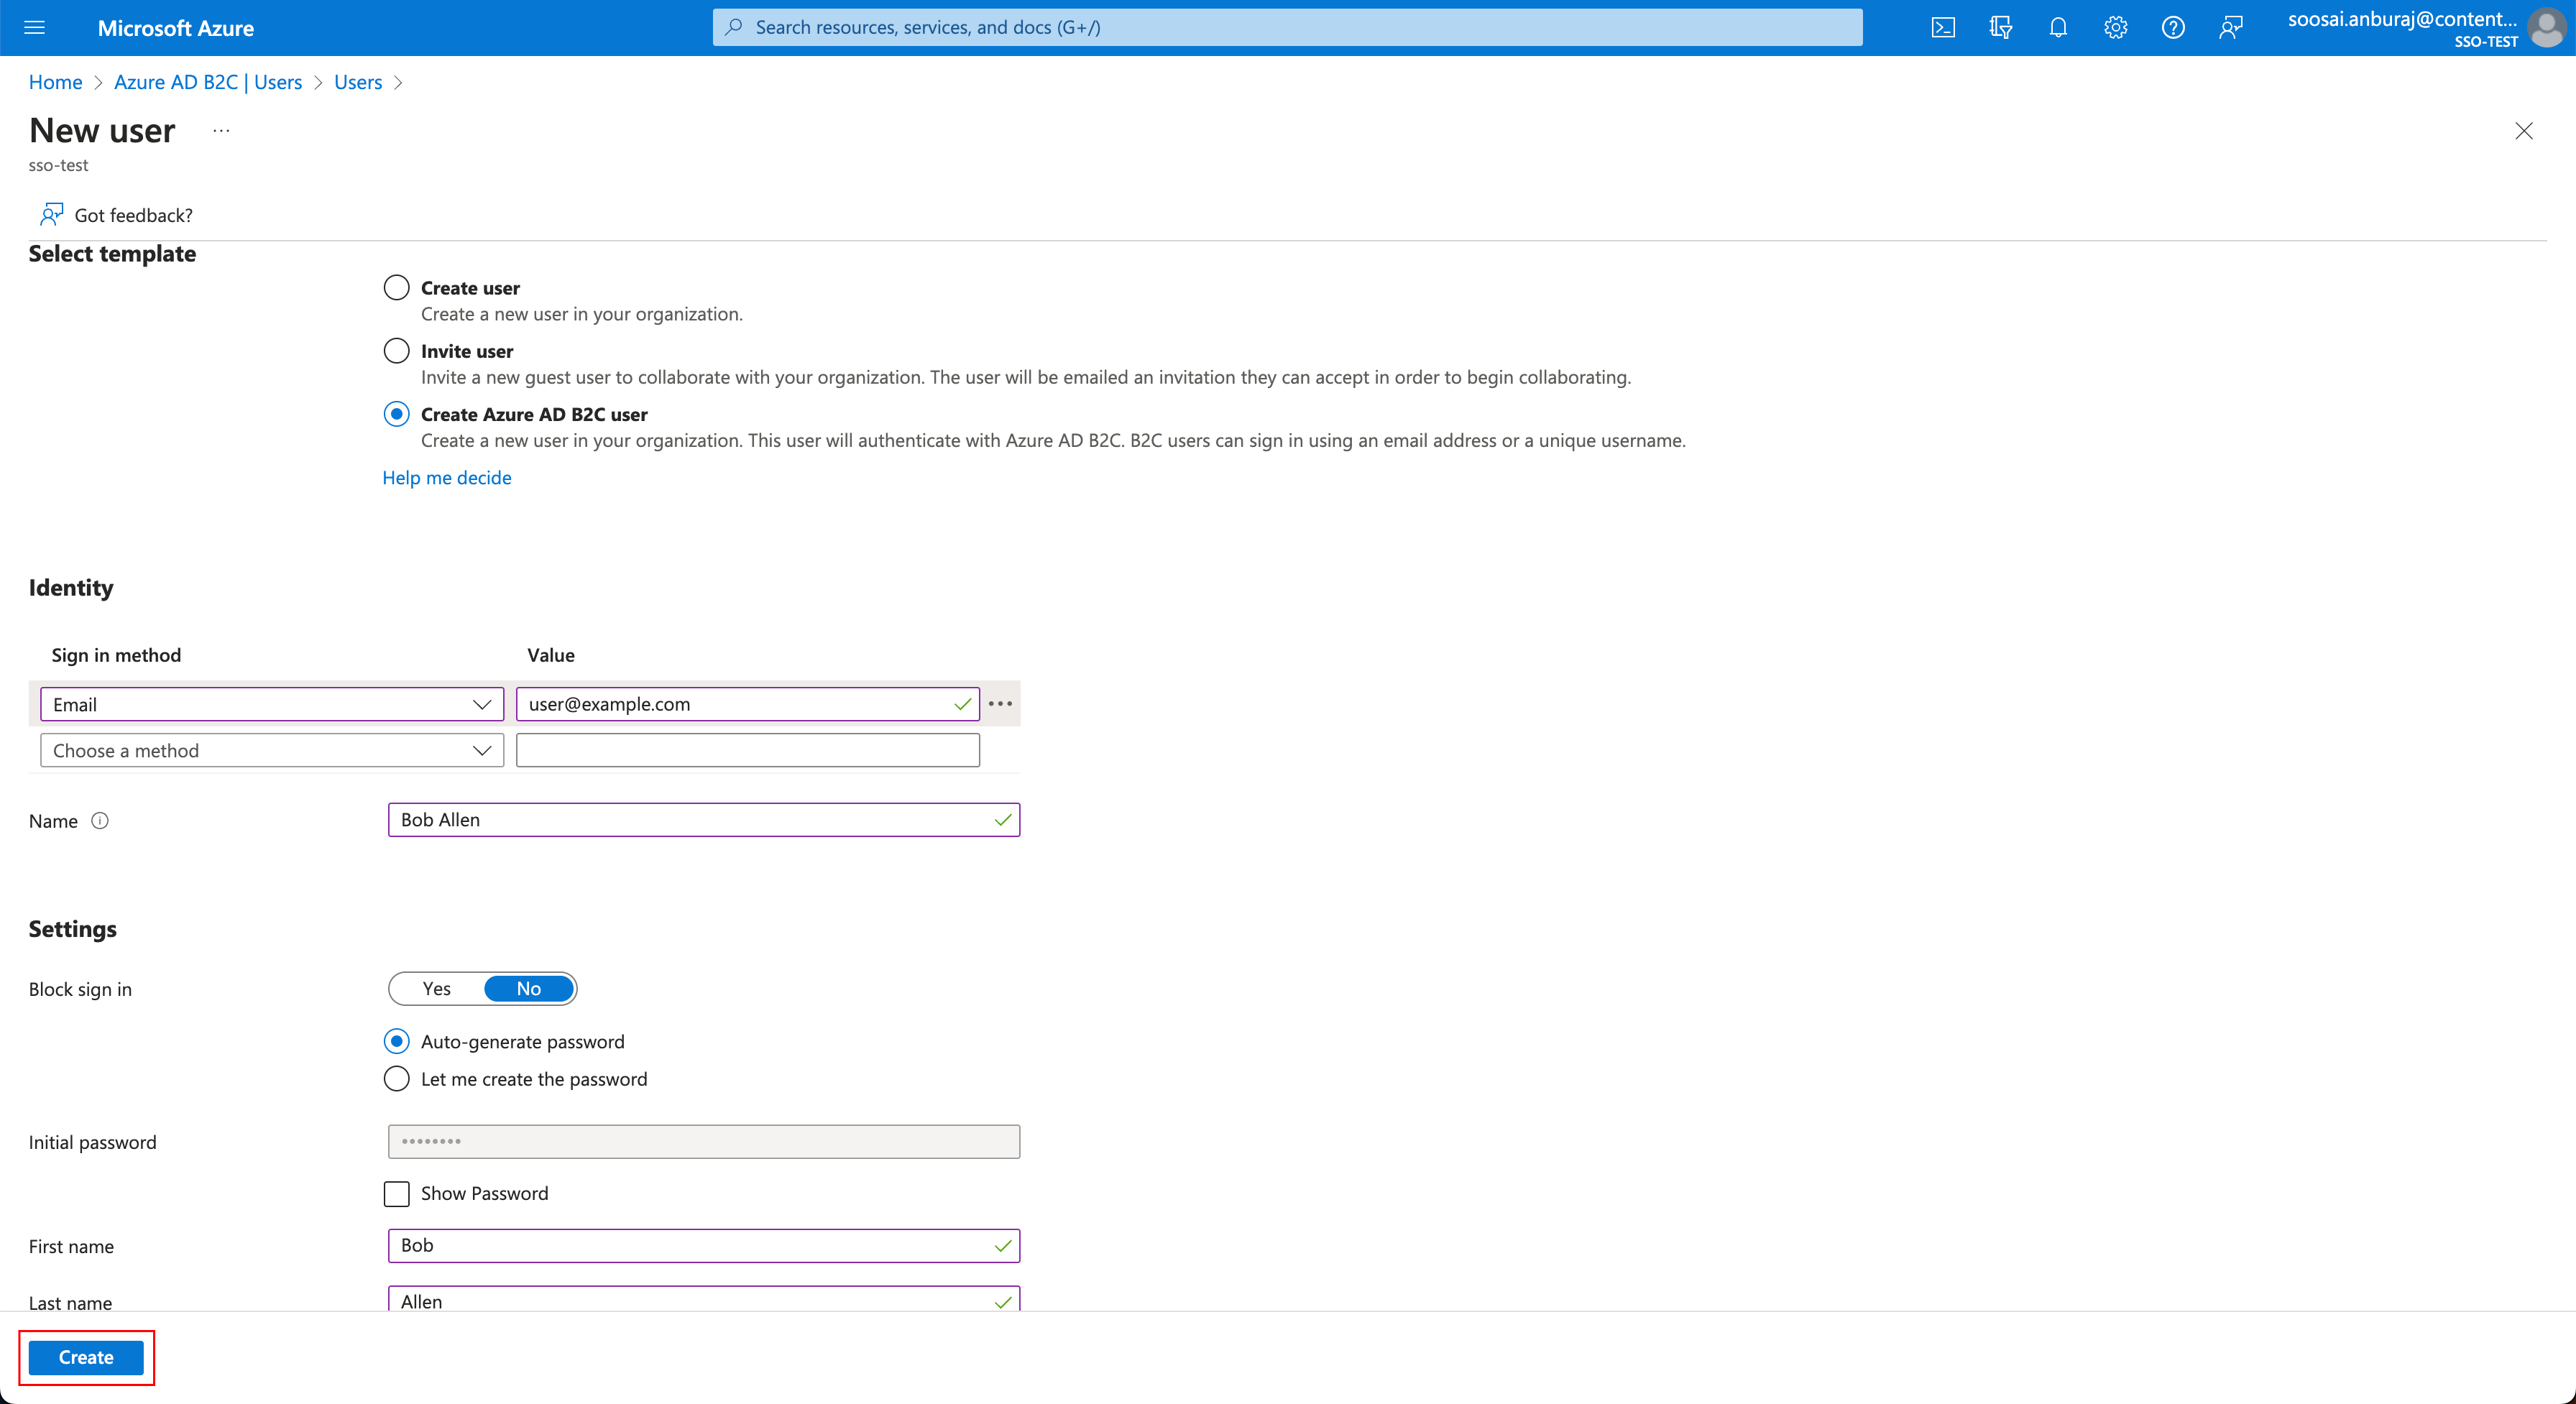
- Add Users to Your Microsoft Azure AD B2C Application
- Through SignUp page if configured
- Through Users list on the application
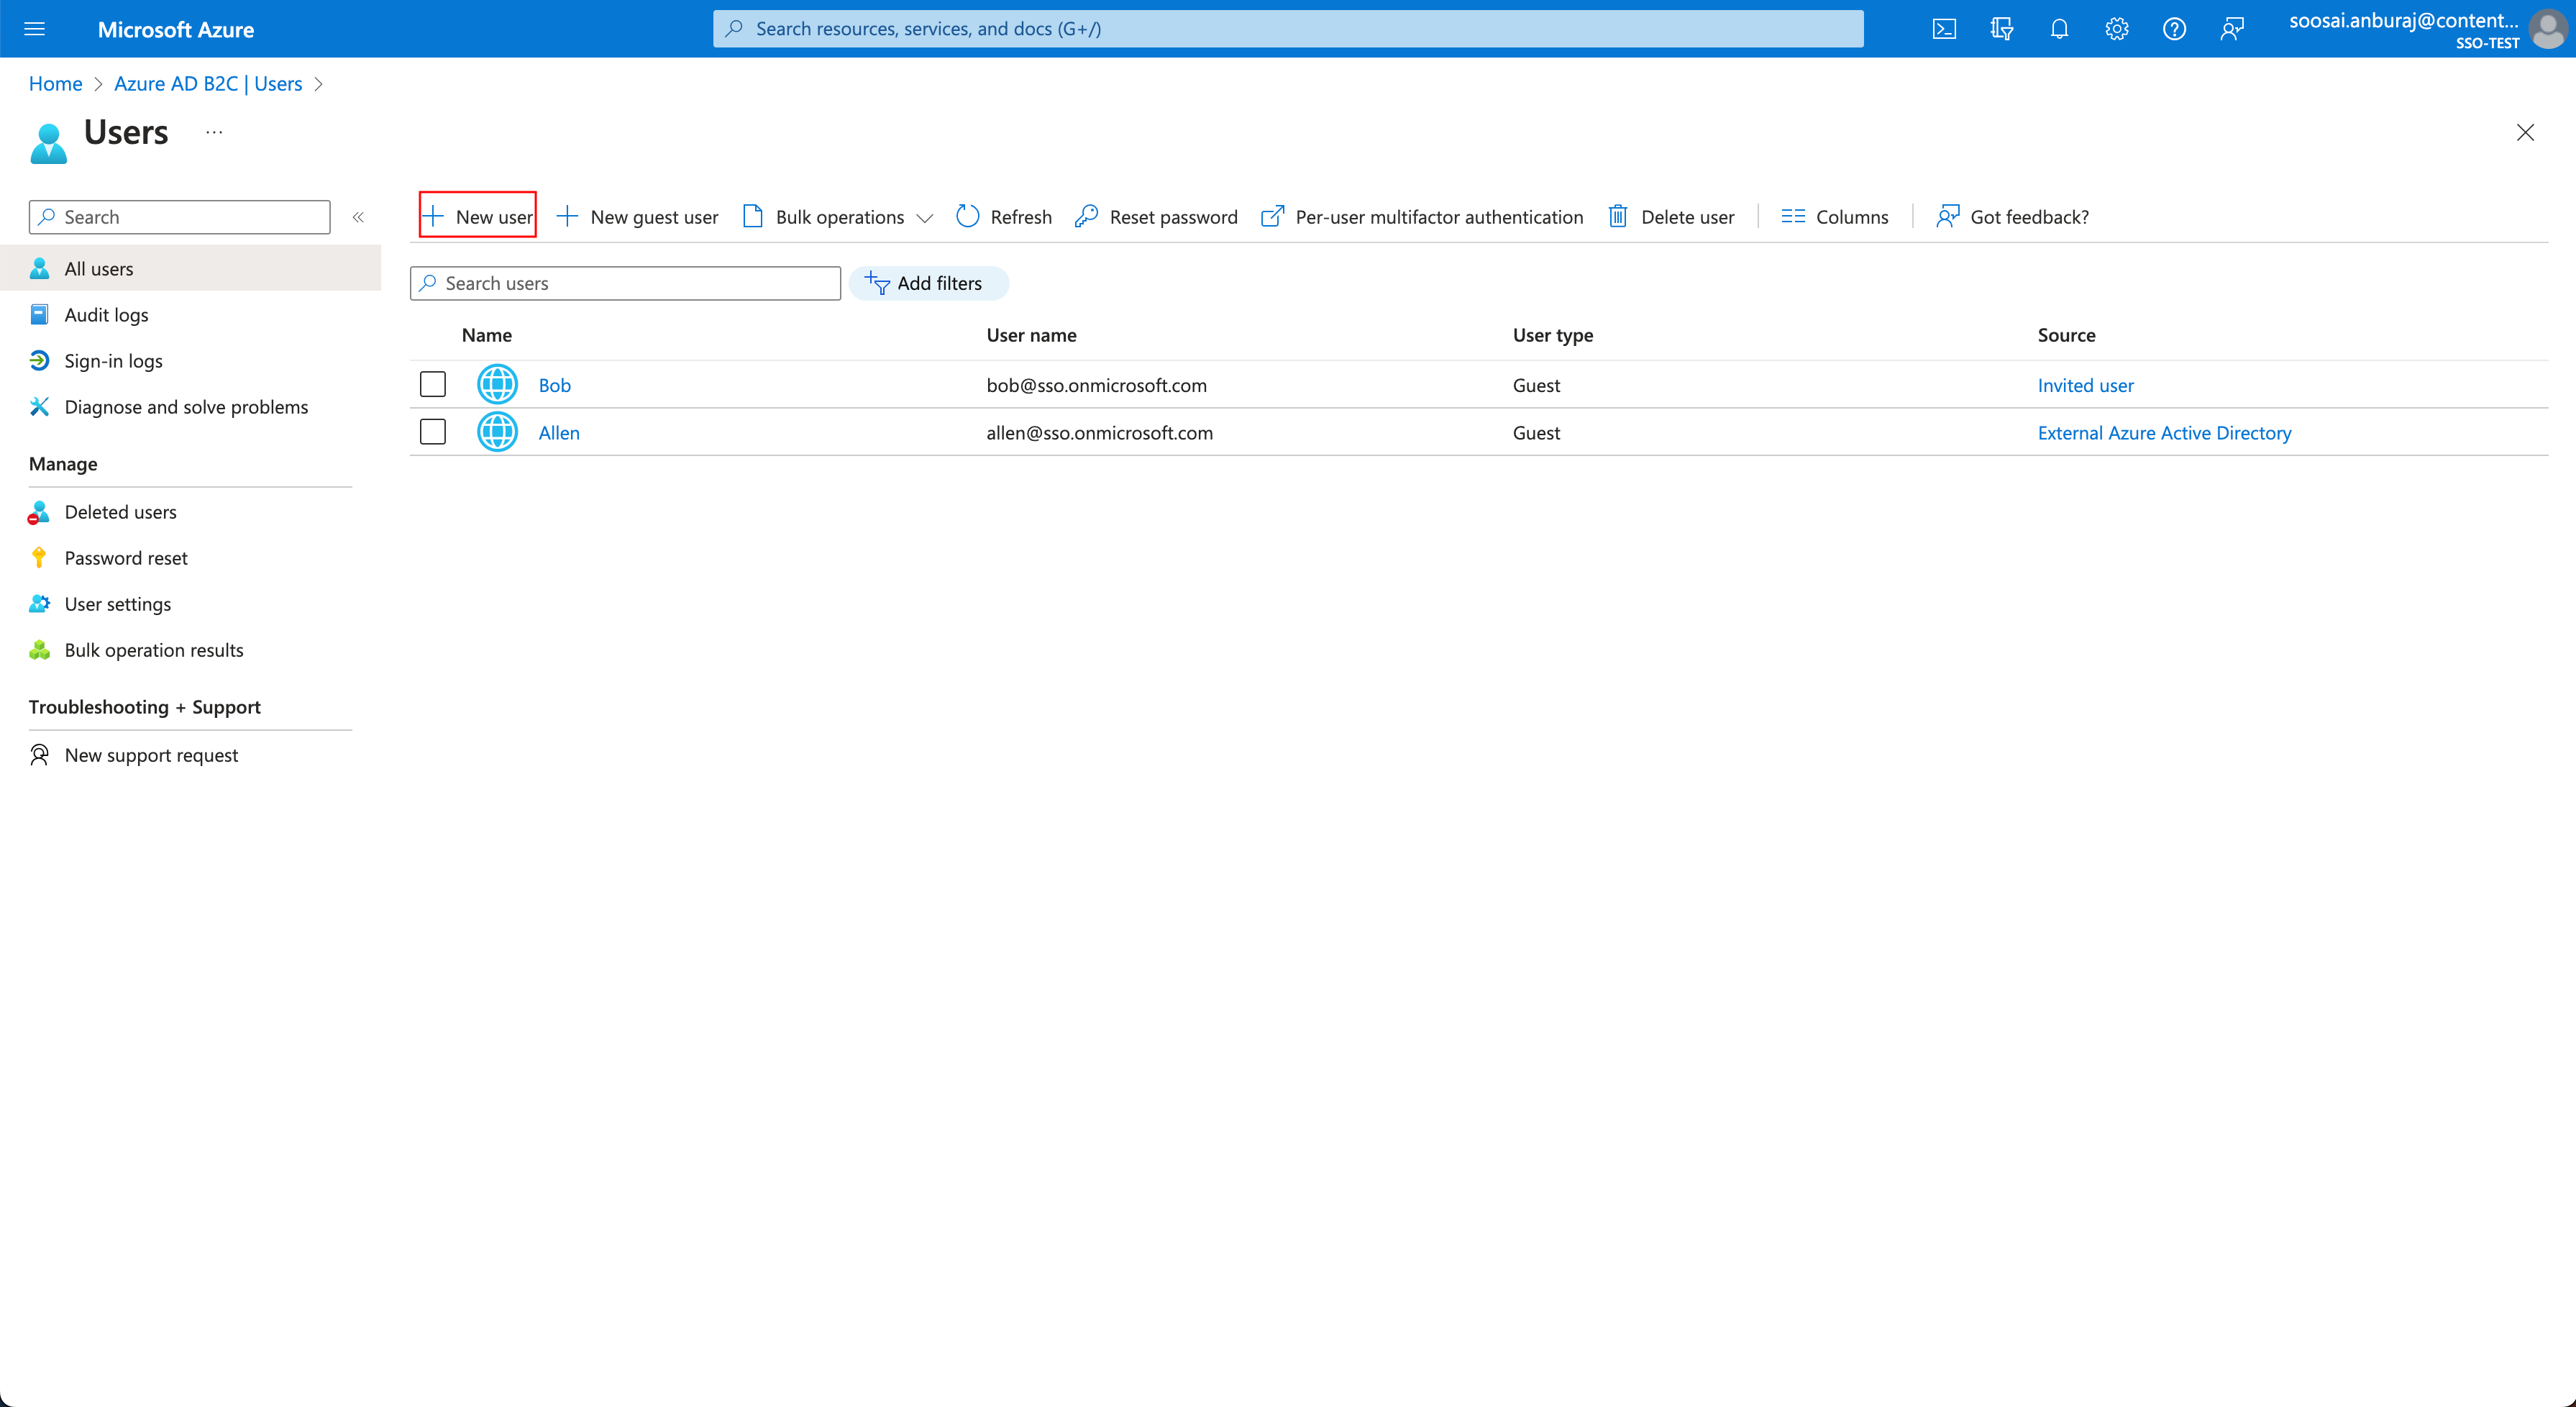
- Within the Microsoft Azure AD B2C portal, click Users in the left navigation panel.
- Click the +New Users button.
- In the Select template, choose any one from the options provided. You can either Invite user, Create user, or Create Azure AD B2C user.
- In the Identity field, provide the required data and select the Create button.
- Test and Enable SSO
- Click on the Test SSO button and it will take you to Contentstack’s Login Via SSO page where you need to specify your organization's SSO name.
- Then, click Continue to go to your IdP sign in page.
- Sign in to your account. If you are able to sign in to your IdP, your test is successful.
On successful connection, you will see a success message as follows: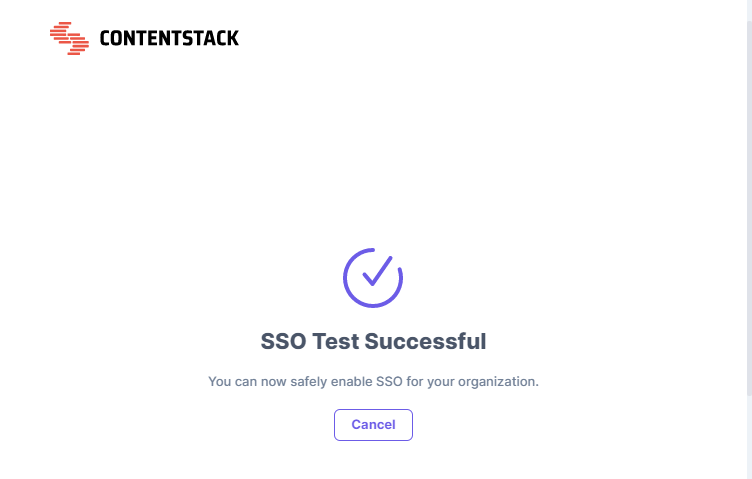
Note: Only the Organization Owner will be able to perform the steps discussed below.
Start by creating an SSO Name and generate the ACS URL in Contentstack
Keep this window open, as you may need these details for setting up the Contentstack app in Microsoft Azure AD B2C.
To configure the integration of Contentstack into Microsoft Azure AD B2C, you need to add the Contentstack app in Microsoft Azure AD B2C Portal.
To configure the Microsoft Azure AD B2C details in your stack, follow the steps below:
After setting the necessary configurations in Contentstack, you can add users to your newly added application. You can add users in two ways,
Here, we are using the second method to add users.
Next, you can try out the “Test SSO” and “Enable SSO” steps in Contentstack
Test SSO
Before enabling SSO, it is recommended that you test the SSO settings configured so far.
To do so, perform the following steps:
Enable SSO
Once you have tested your SSO settings, click Enable SSO to enable SSO for your Contentstack organization.
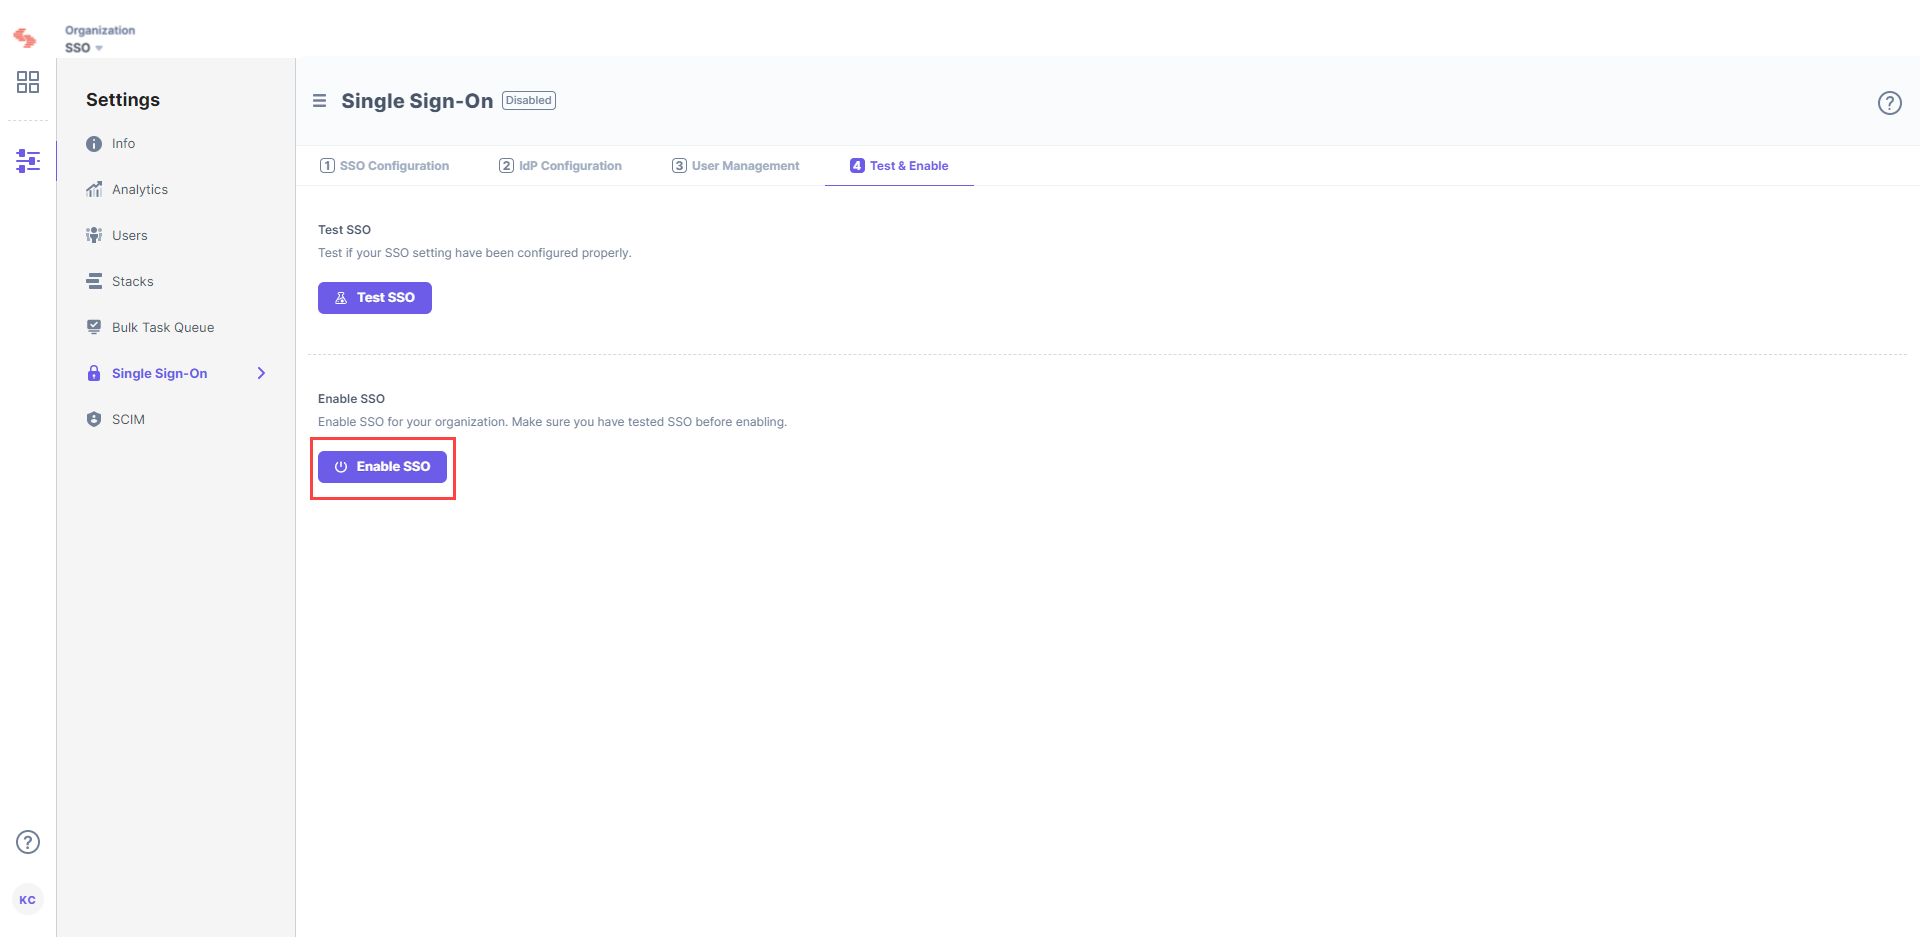
Confirm your action by clicking Yes.
Once this is enabled, users of this organization can access the organization through SSO. If needed, you can always disable SSO from this page as well.

More articles in "SSO Guides"
