

.svg?format=pjpg&auto=webp)
.svg?format=pjpg&auto=webp)
.png?format=pjpg&auto=webp)


.png?format=pjpg&auto=webp)
Set up SSO with Google G-Suite
This step-by-step guide explains how to set up Single Sign-On (SSO) in Contentstack with Google G Suite as your SAML 2.0 identity Provider (IdP).
The integration with Google G Suite can be done in two easy steps:
Let’s see each of the steps in detail.
Create SSO Name and ACS URL in Contentstack
- Log in to your Contentstack account, go to the Organization Settings page, and click on the Single Sign-On tab.
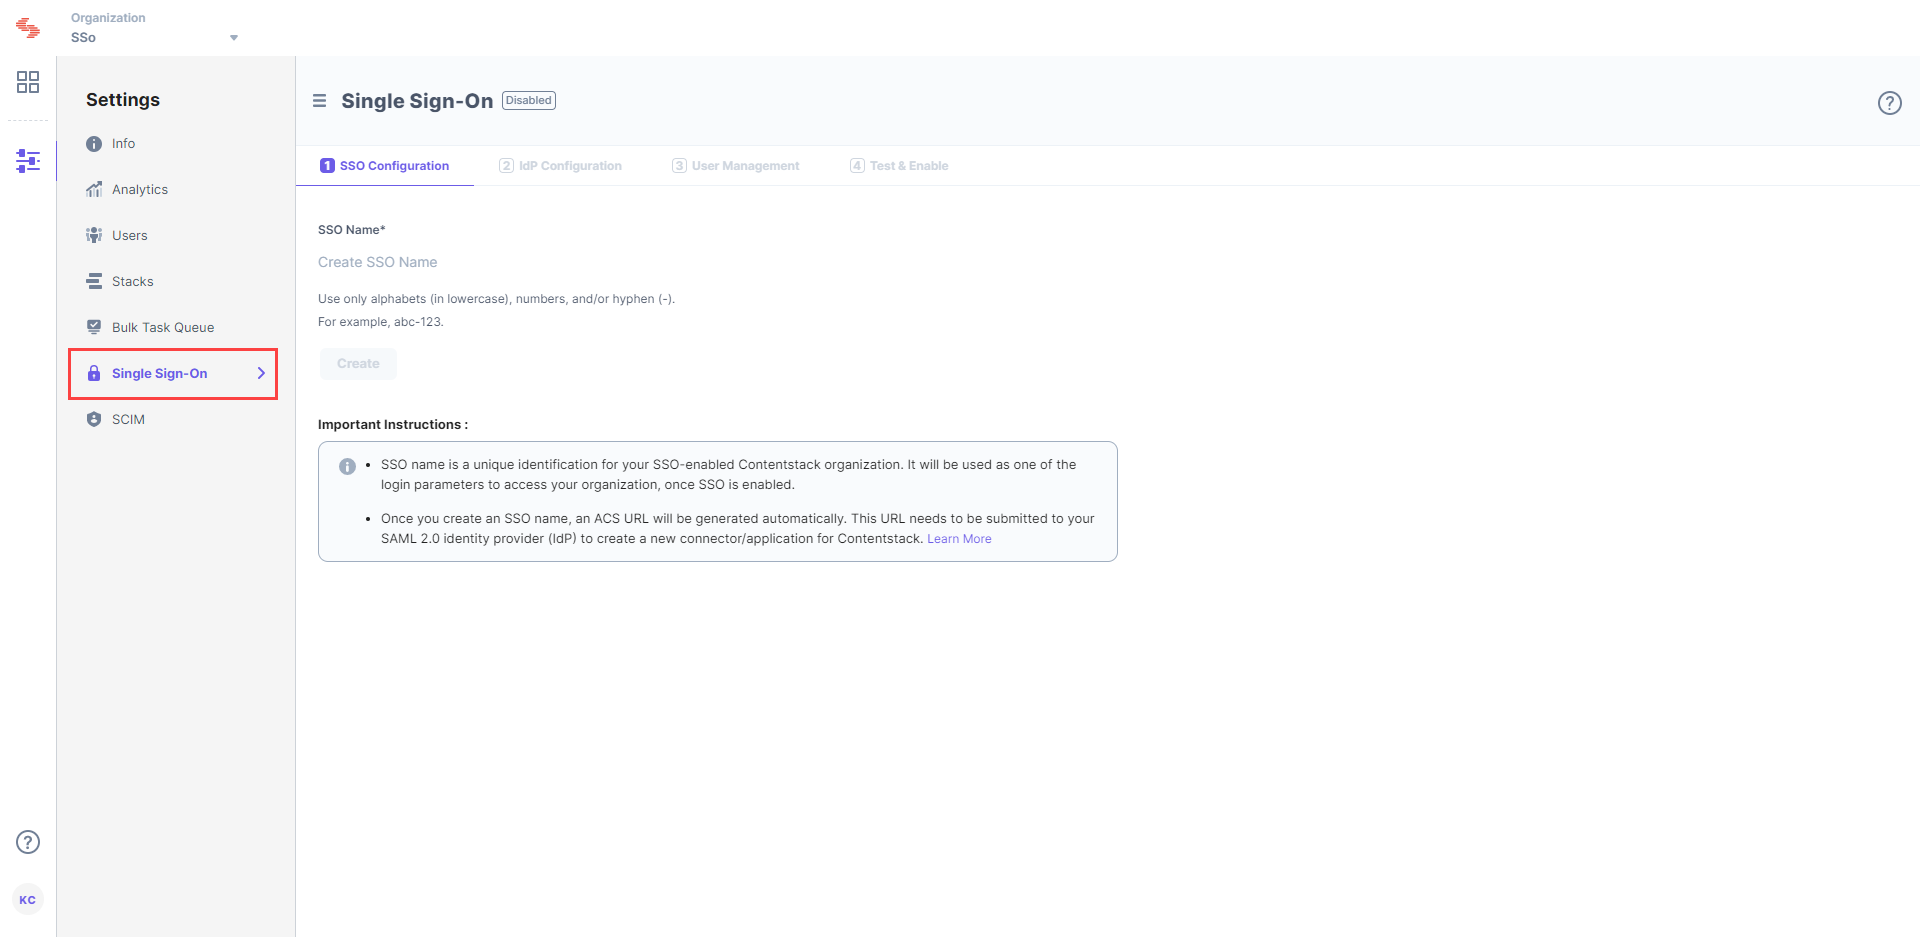
- Enter an SSO Name of your choice, and click Create. For example, if your company name is “Acme, Inc.” enter “acme” here. This name will be used as one of the login credentials by the organization users while signing in.
Note: The SSO Name can contain only alphabets (in lowercase), numbers (0-9), and/or hyphens (-).
 Let's use “sso-test” as the SSO Name.
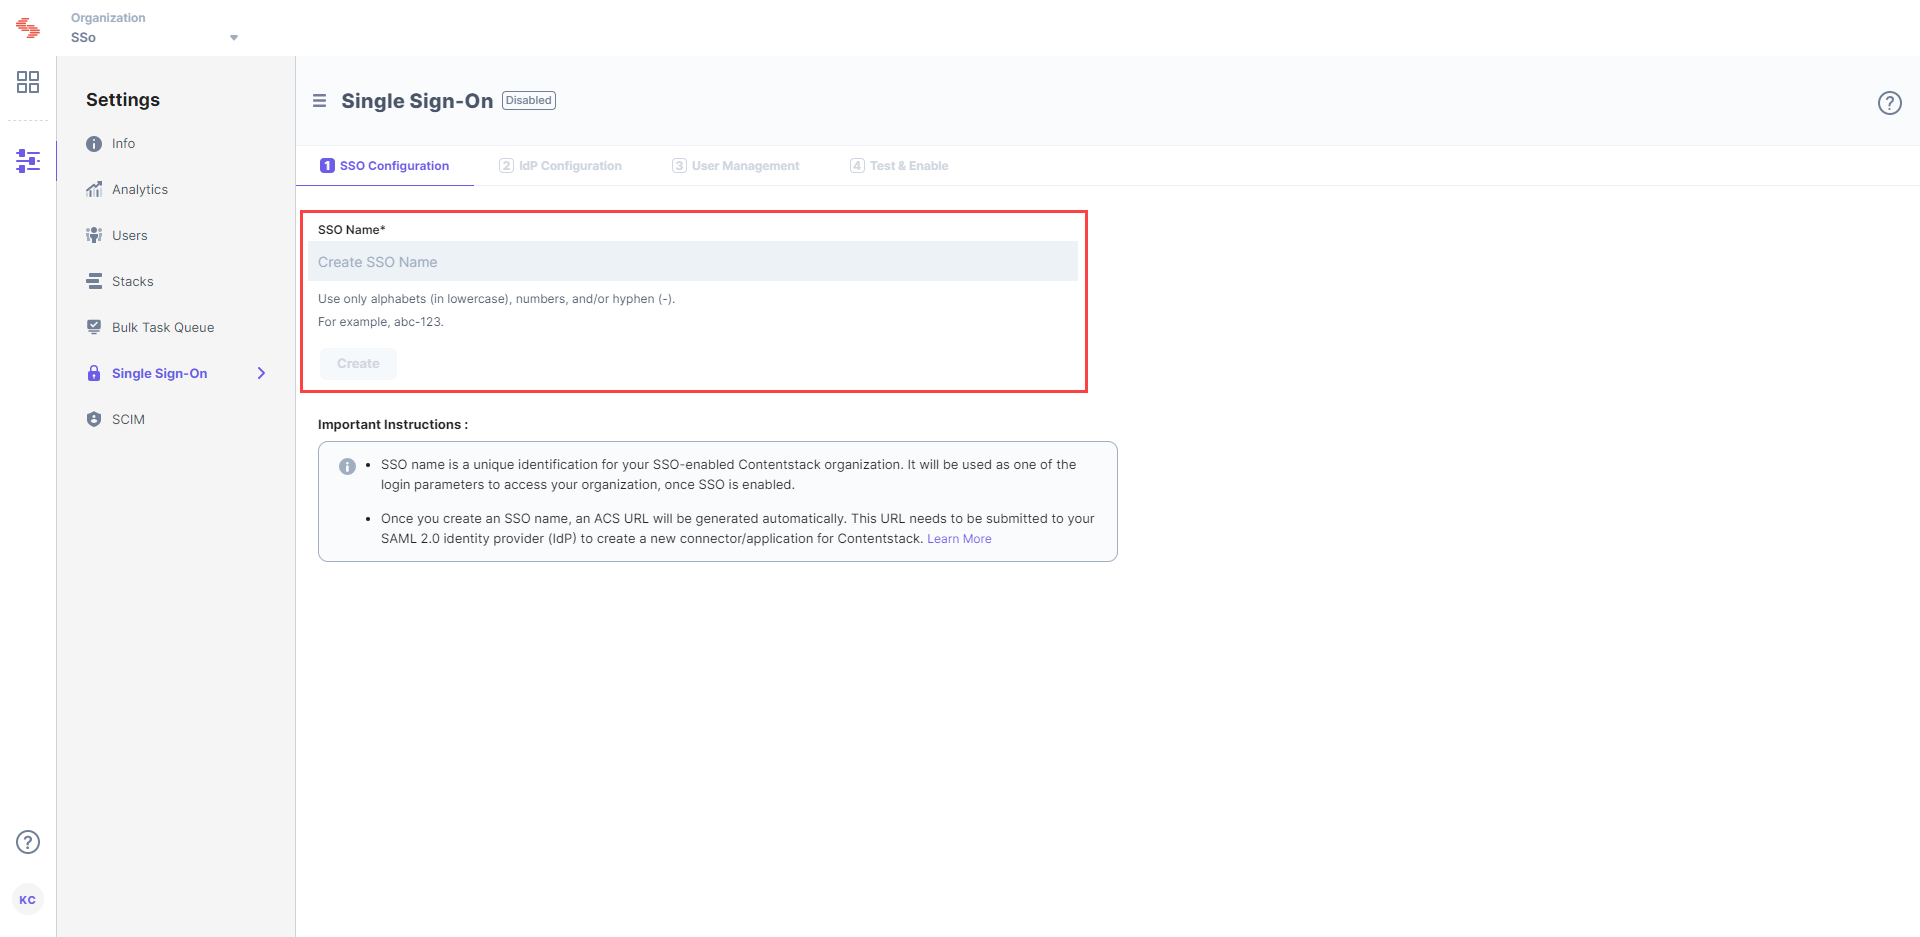
 - This will generate Assertion Consumer Service (ACS) URL and other details such as Entity ID, Attributes and NameID Format. These details will be used in Step 2 for configuring the Contentstack app in Google G Suite.
Keep this window open, as you may need these details for setting up the Contentstack app in Google G Suite.
- Log in to your Contentstack account, go to the Organization Settings page, and click on the Single Sign-On tab.
Configure Google G Suite for Contentstack
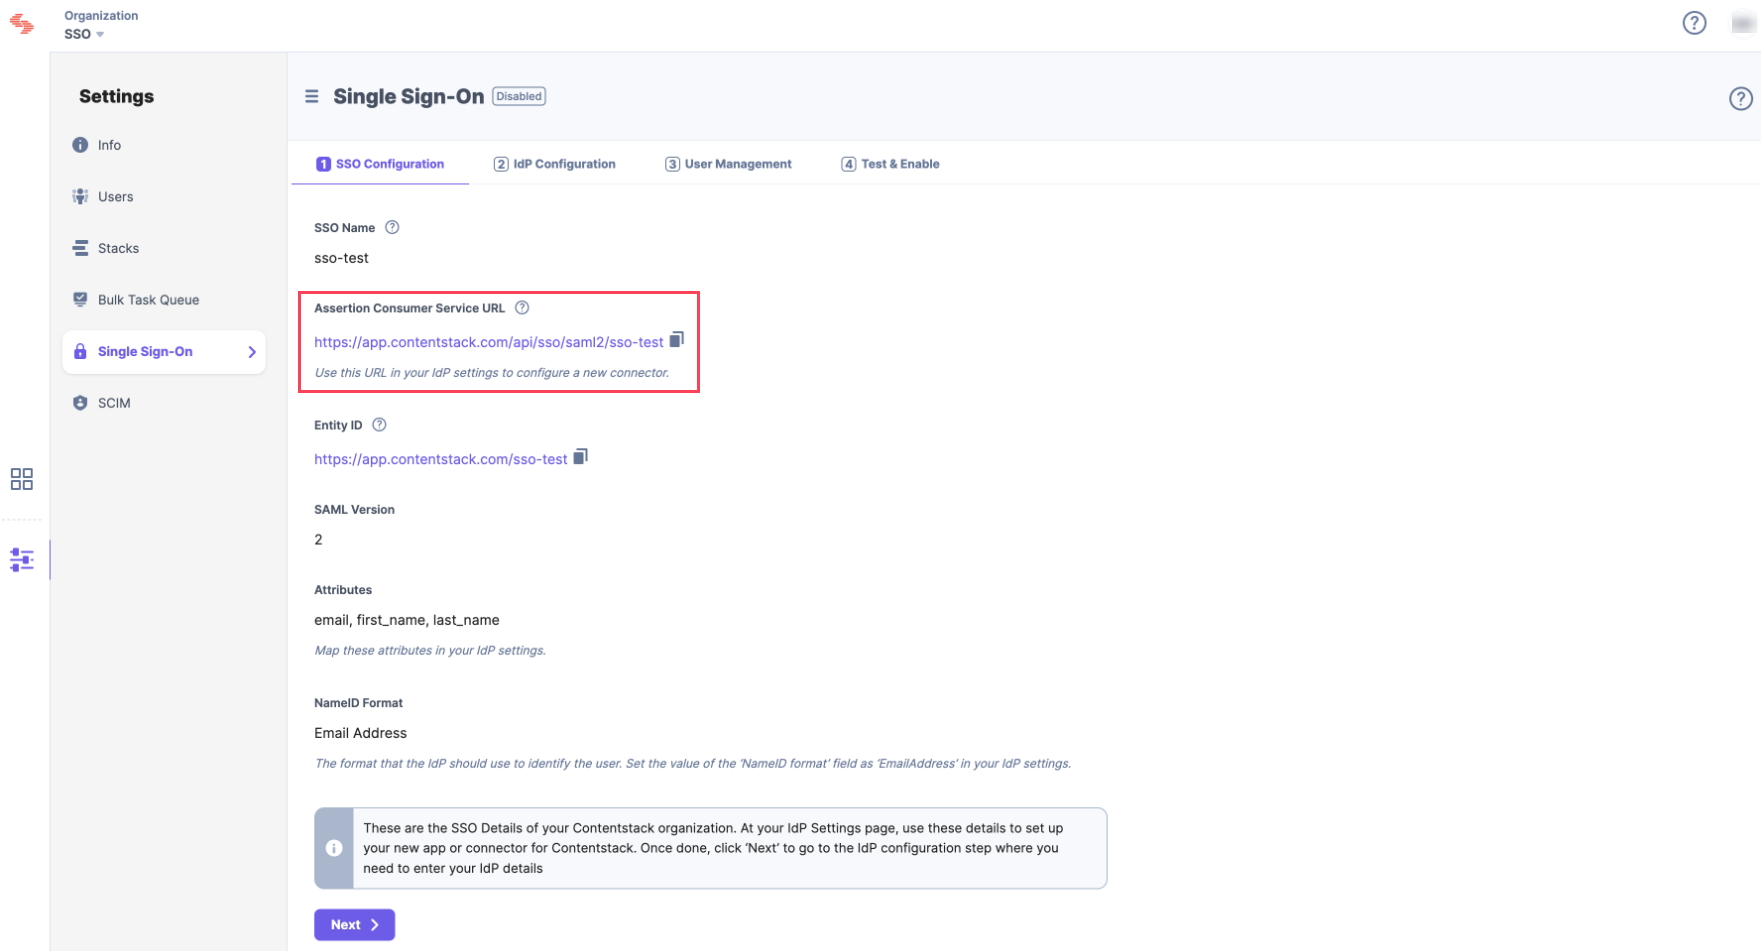
- Log in to your Google Admin account, click on to Apps, and select SAML apps.

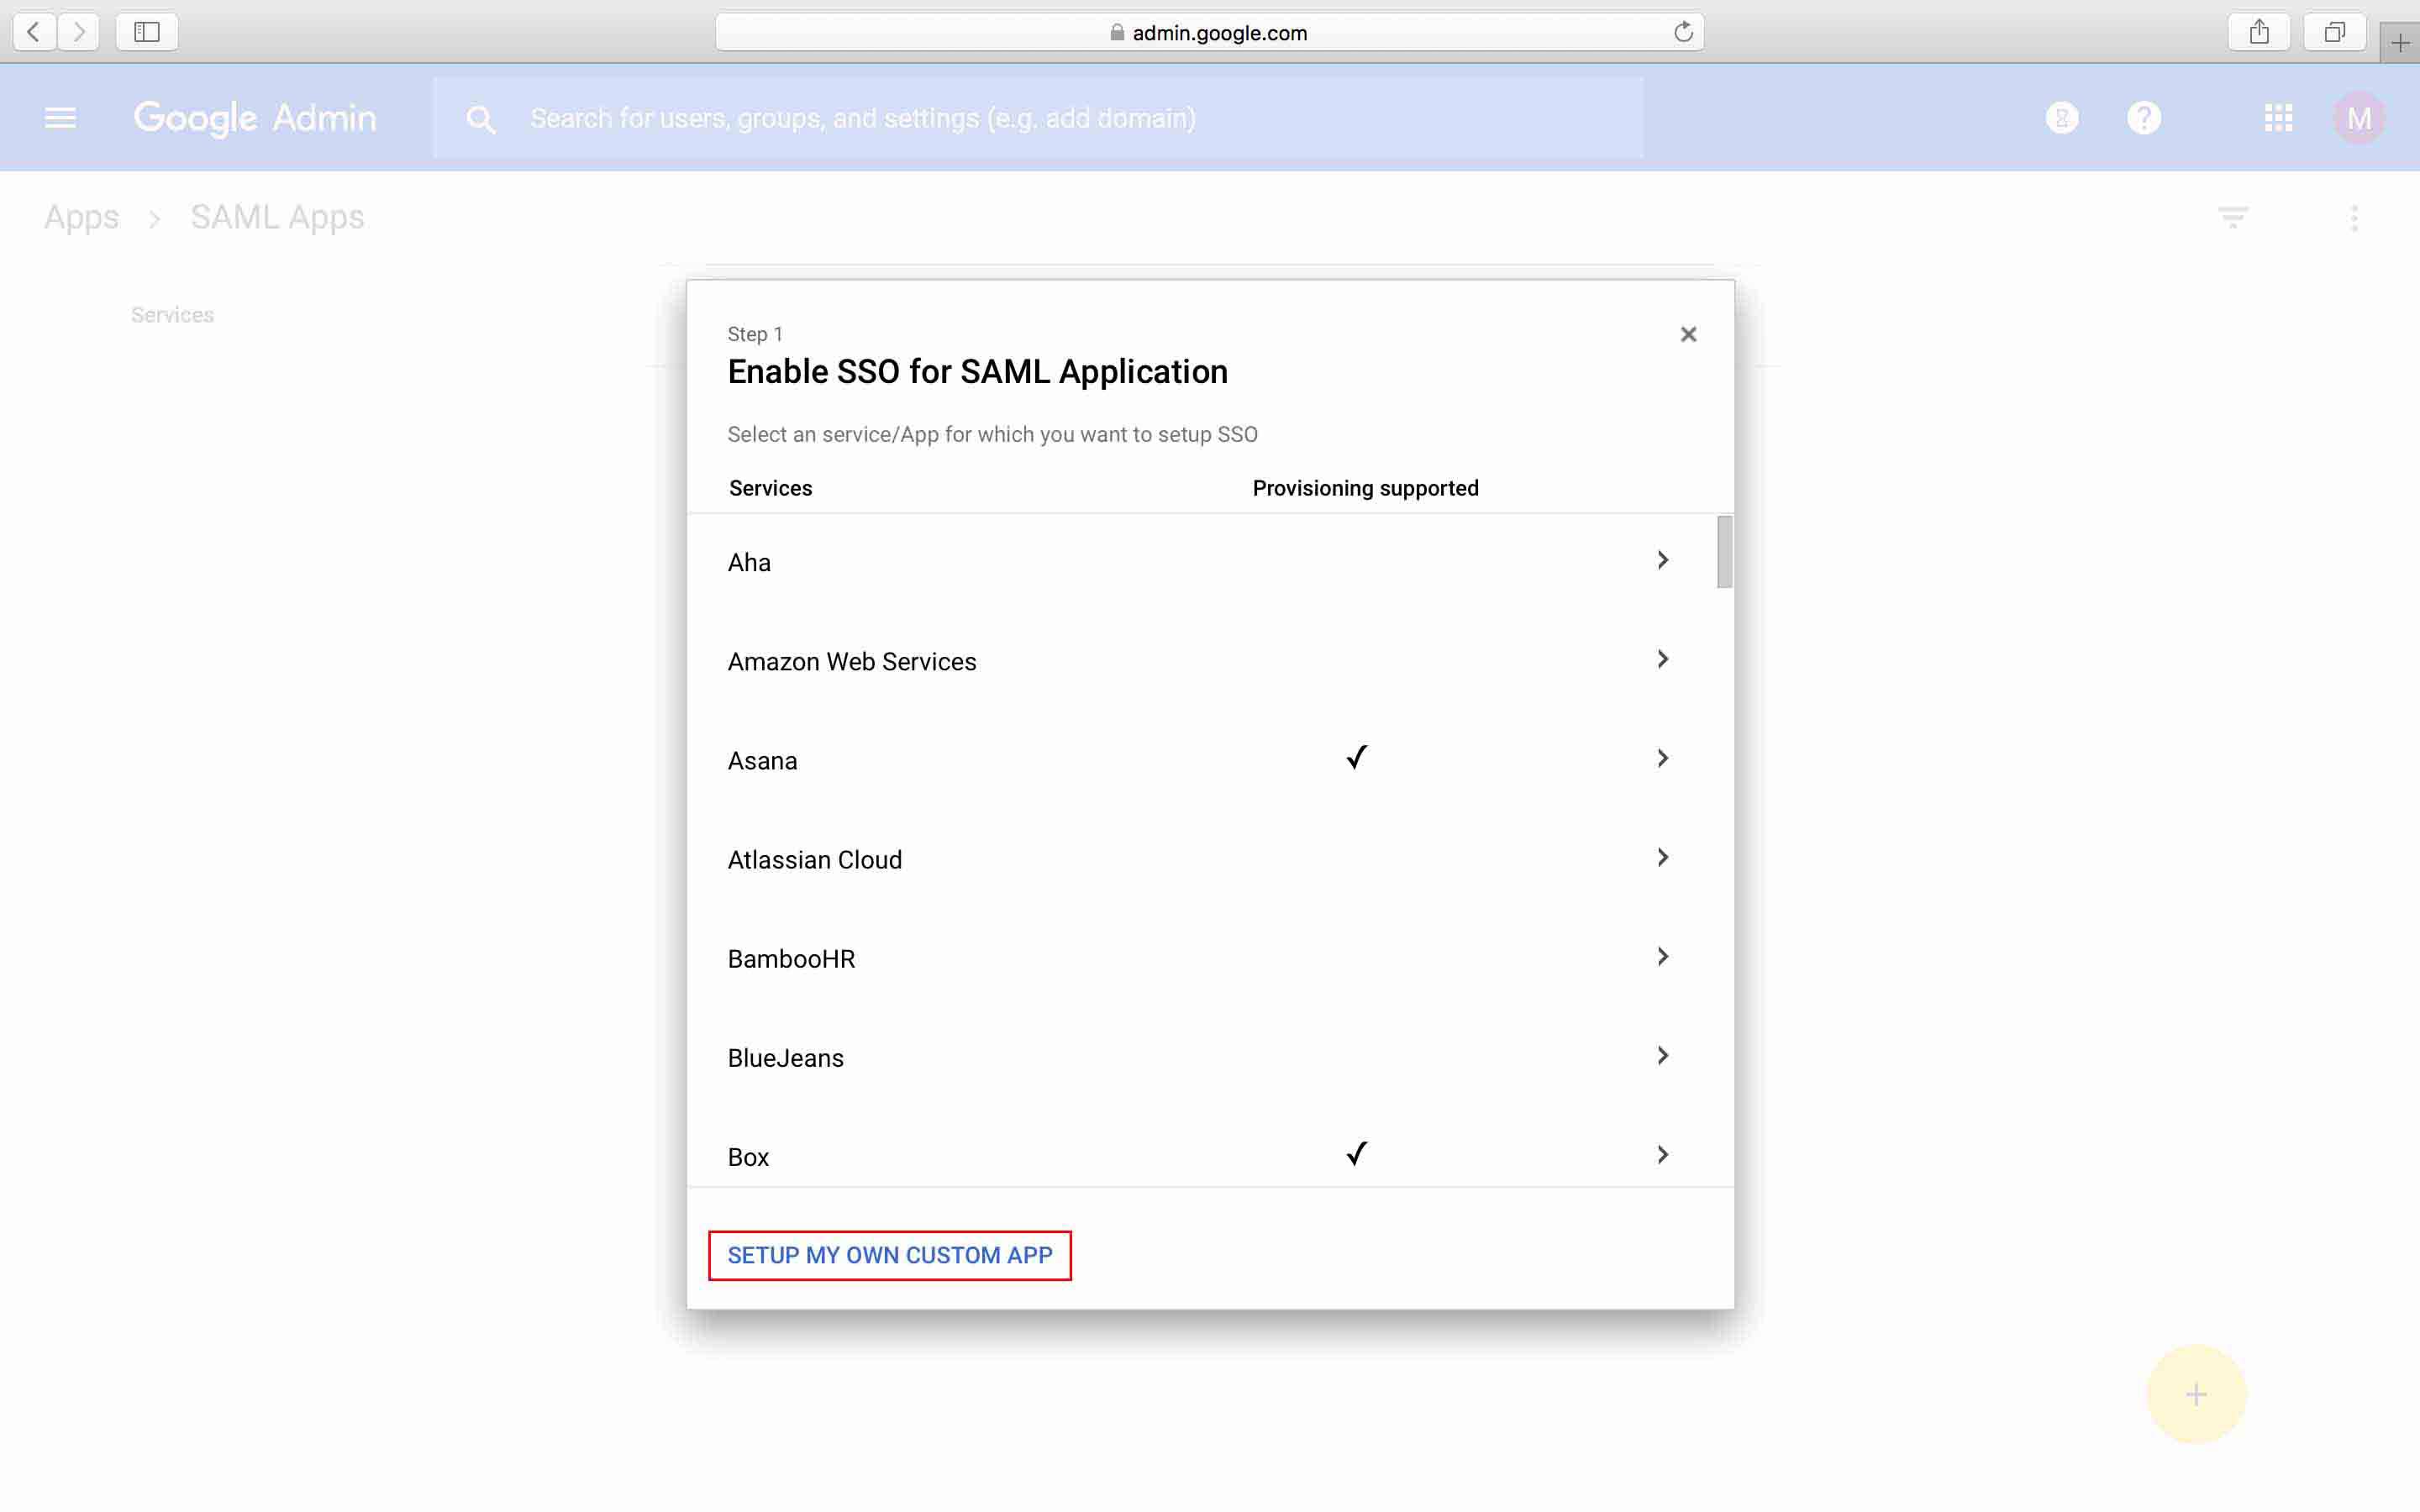
- Click on Add a service/App to your domain, or you can click on the yellow plus (+) icon in the right bottom corner.
- This will open the Enable SSO for SAML Application window. Click on SETUP MY OWN CUSTOM APP.
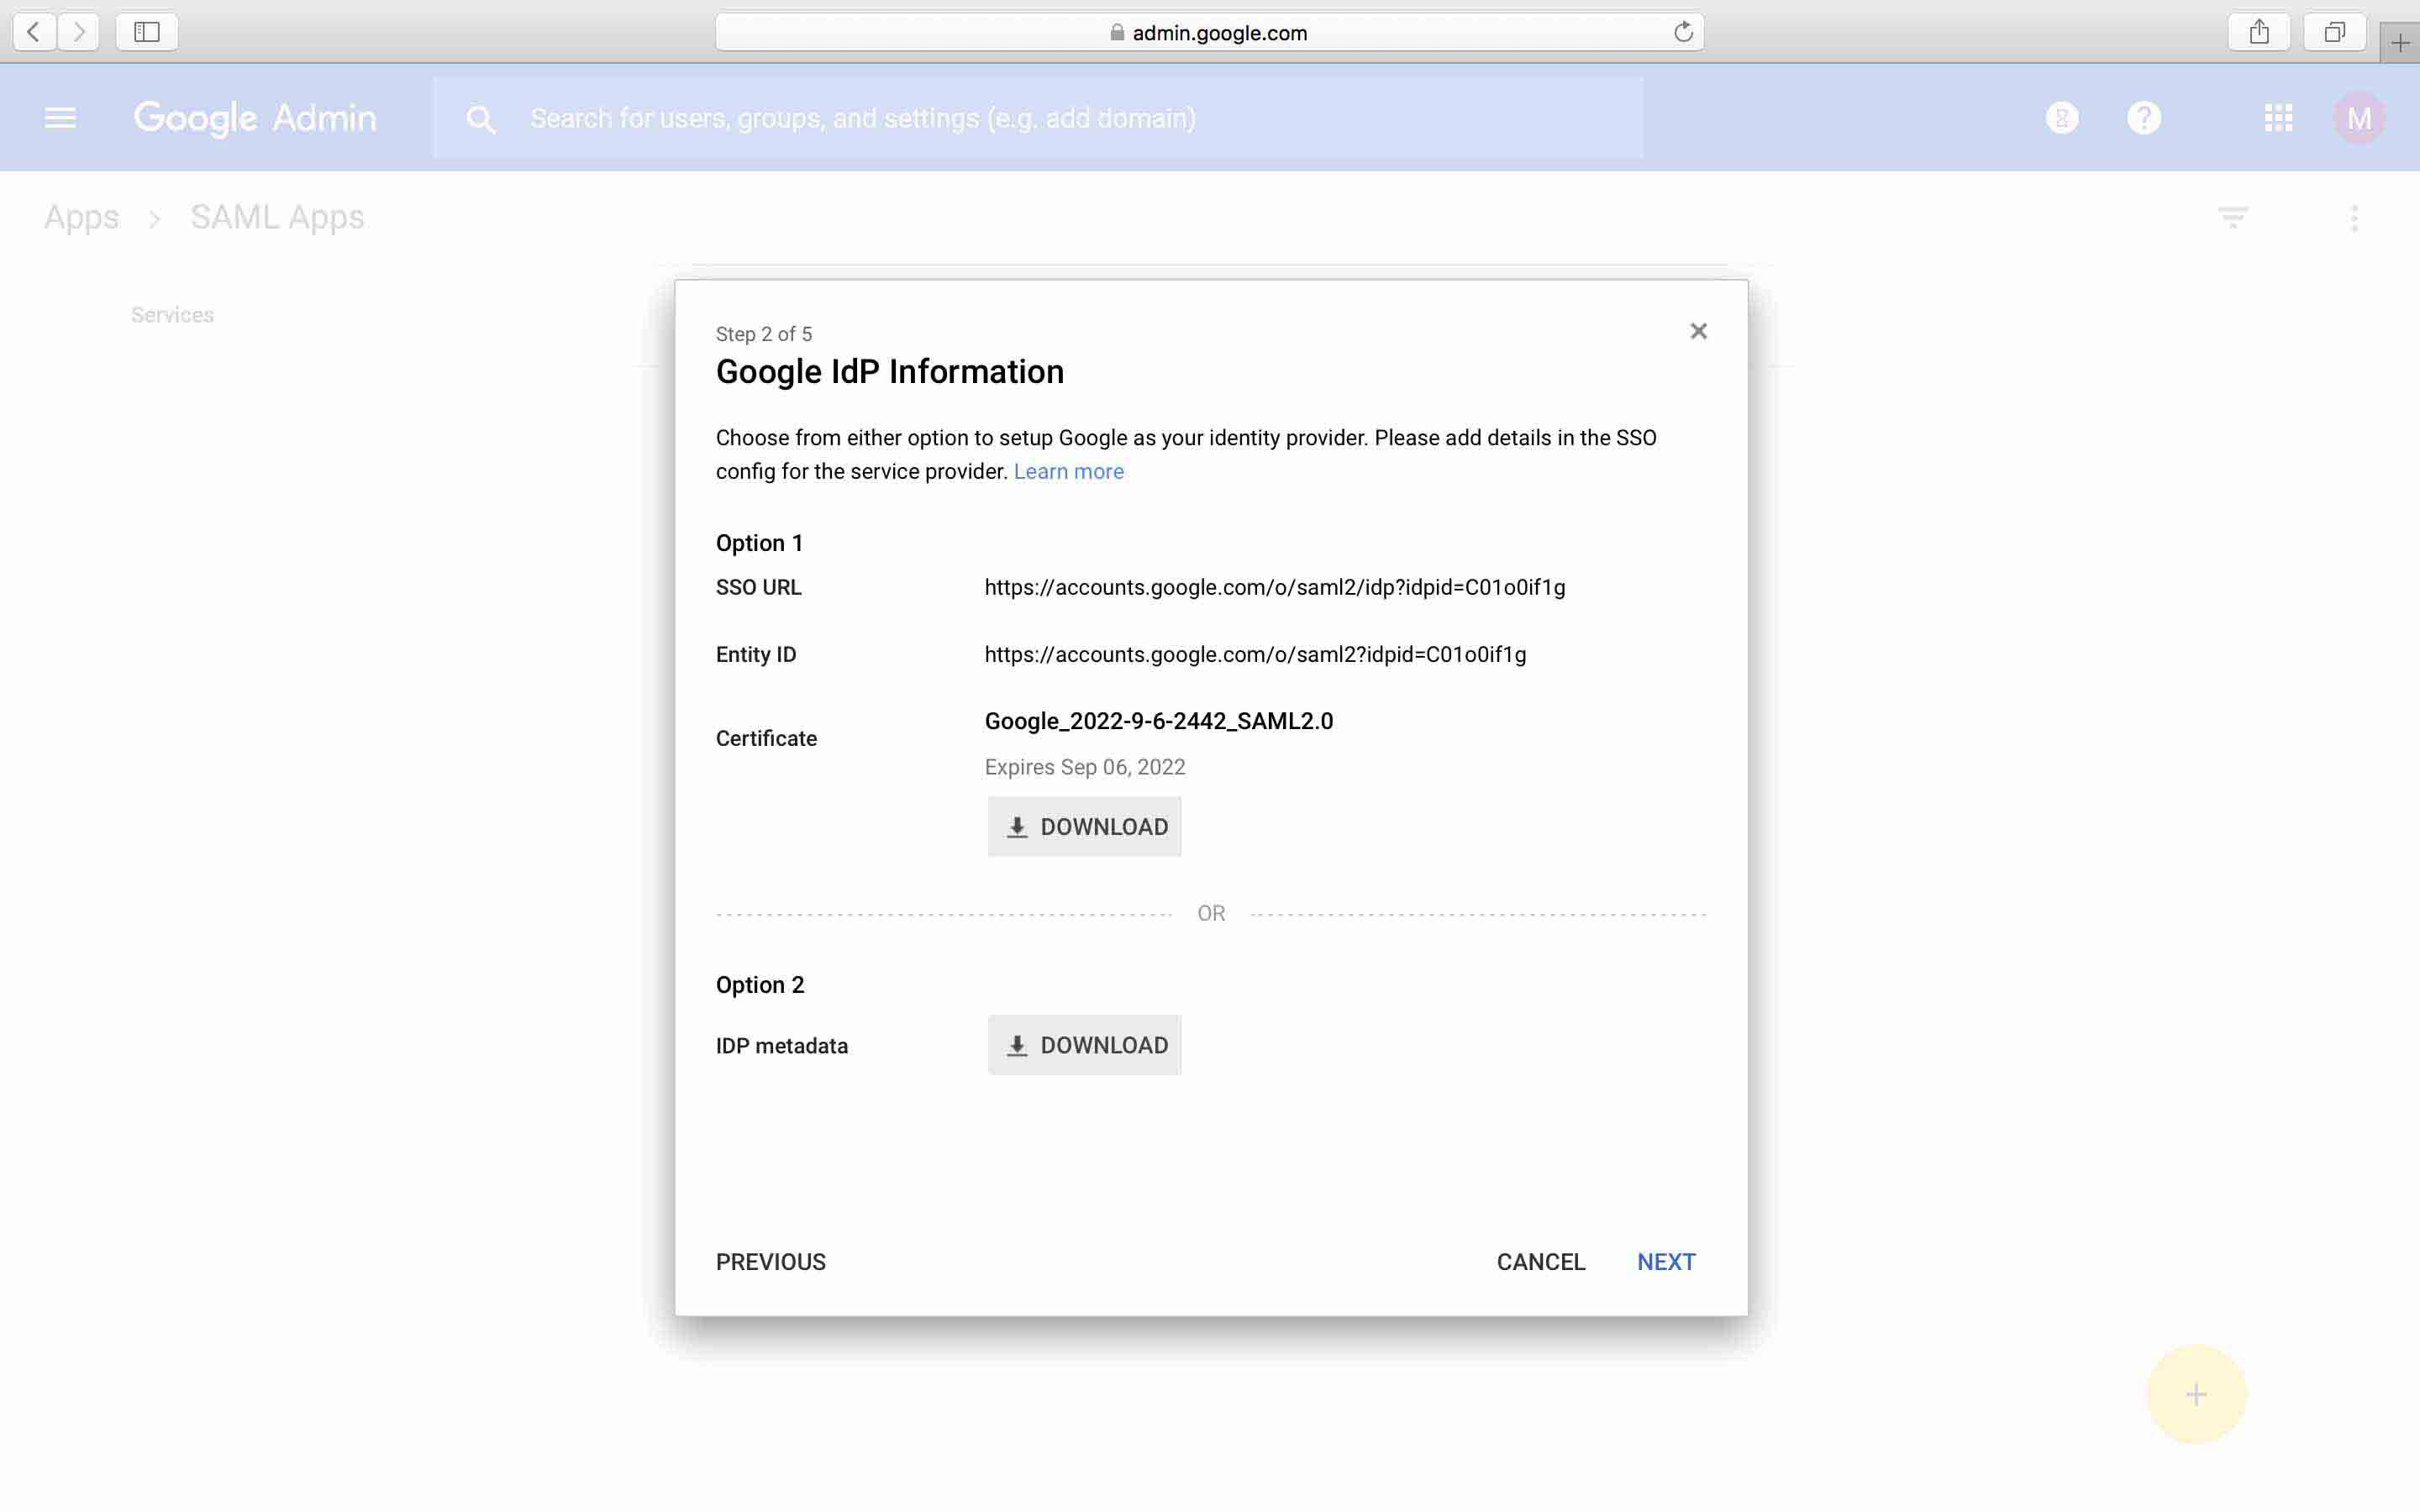
- Copy the link in the SSO URL field and paste it into the corresponding Sign-On URL field in Contentstack's Single Sign-On settings.
- Click on the Download button to download the Certificate and upload the downloaded certificate file in Contentstack’s SSO setting.
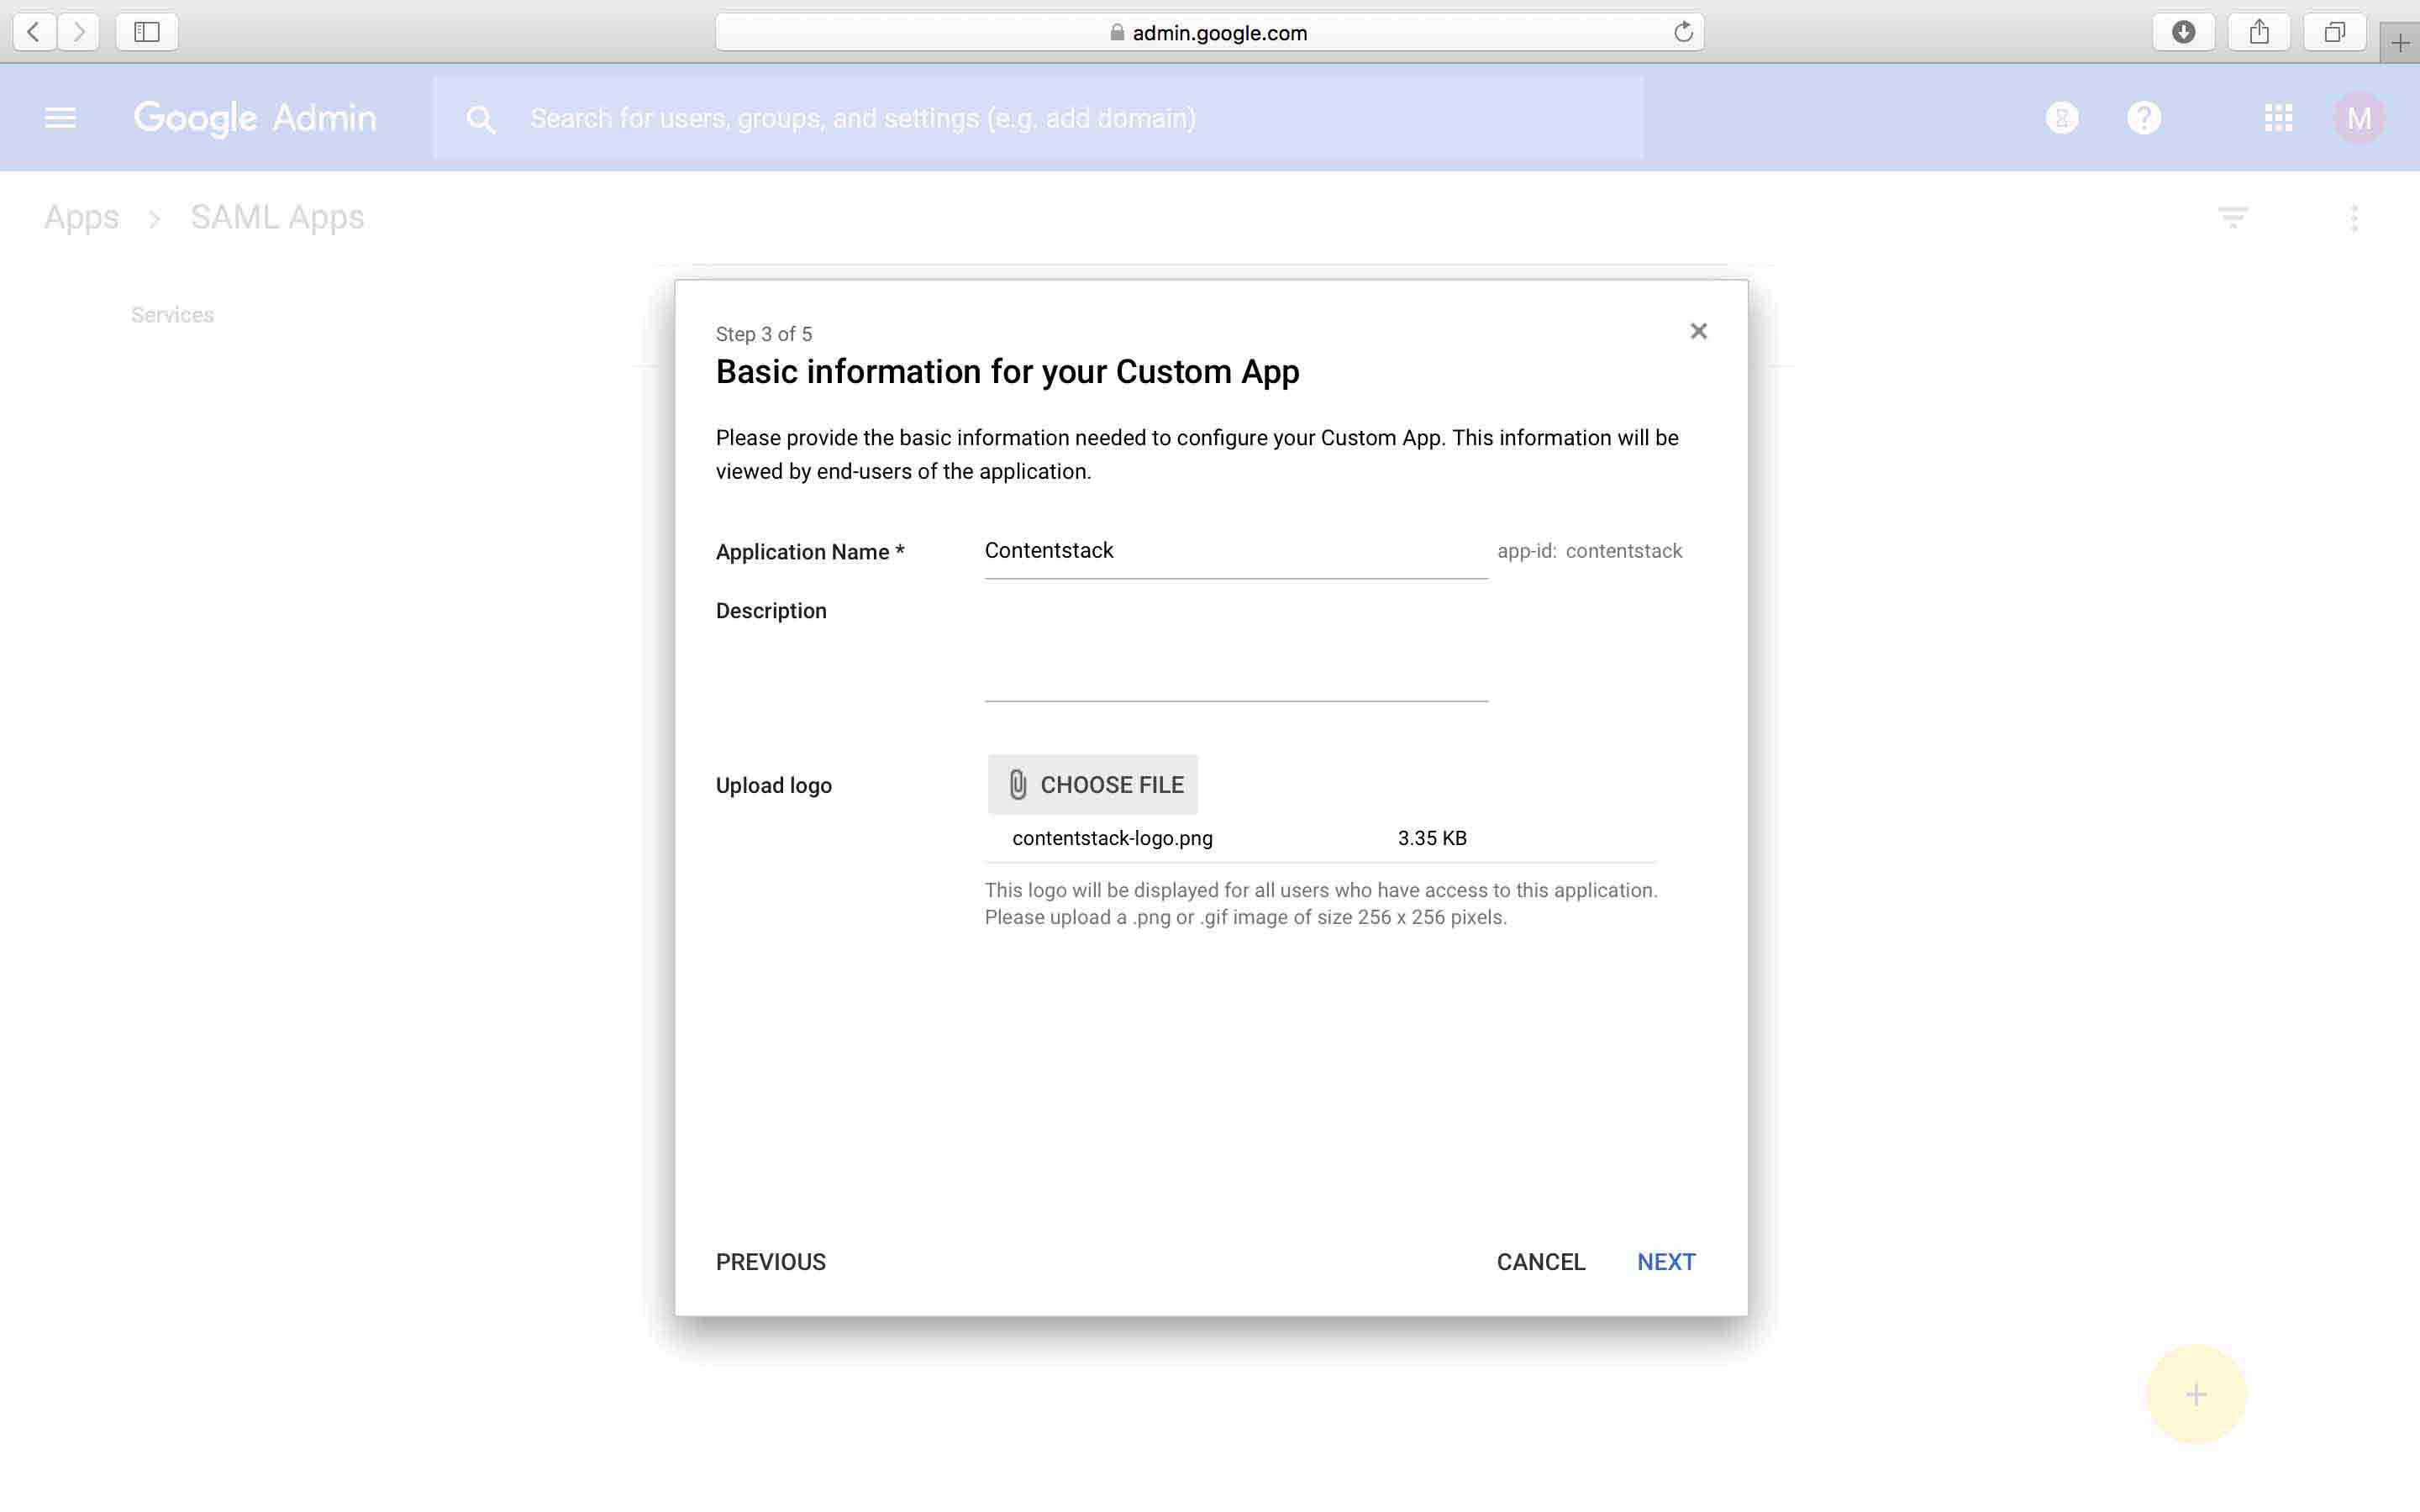
- Next, you will see the Basic information for your Custom App window where you can provide an application name and upload a logo. Then, click Next to proceed further to SAML settings.
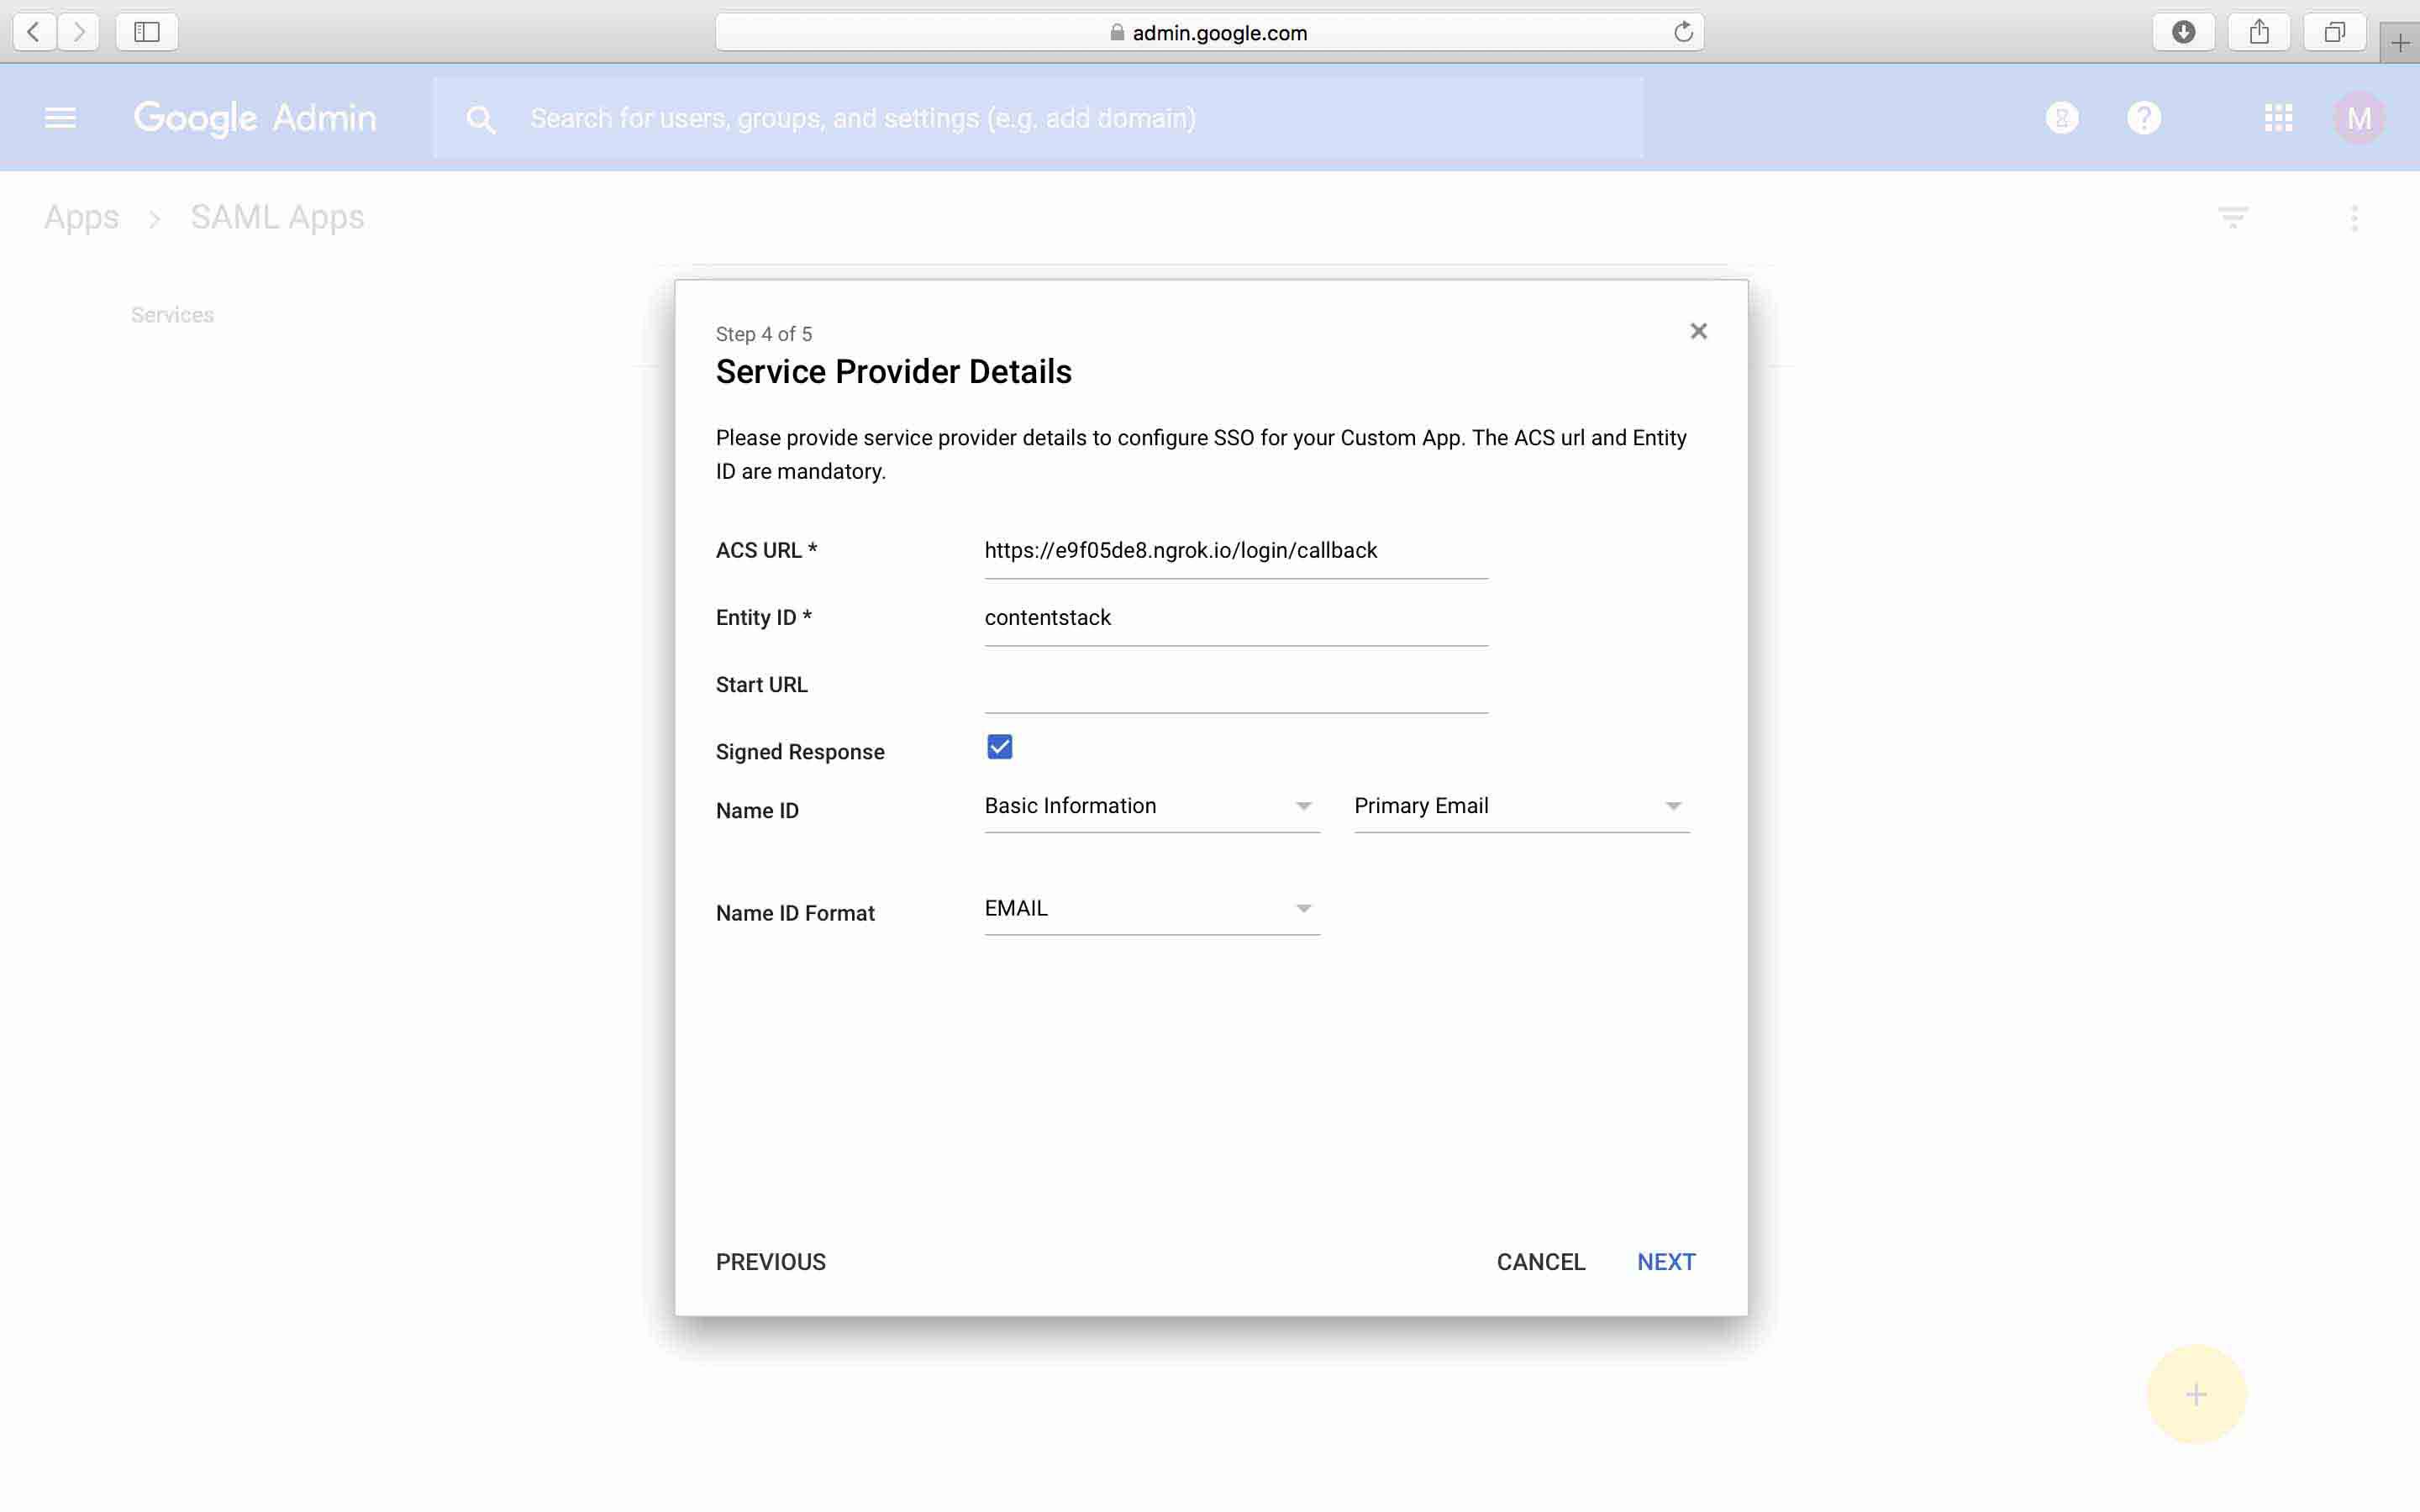
- Now you will come to the Service Provider Details window where you need to provide the ACS URL and the Entity ID of your Contentstack application.
- In the Name ID field, select Basic information and Primary Email. For the Name ID Format field, select EMAIL. Click on Next.

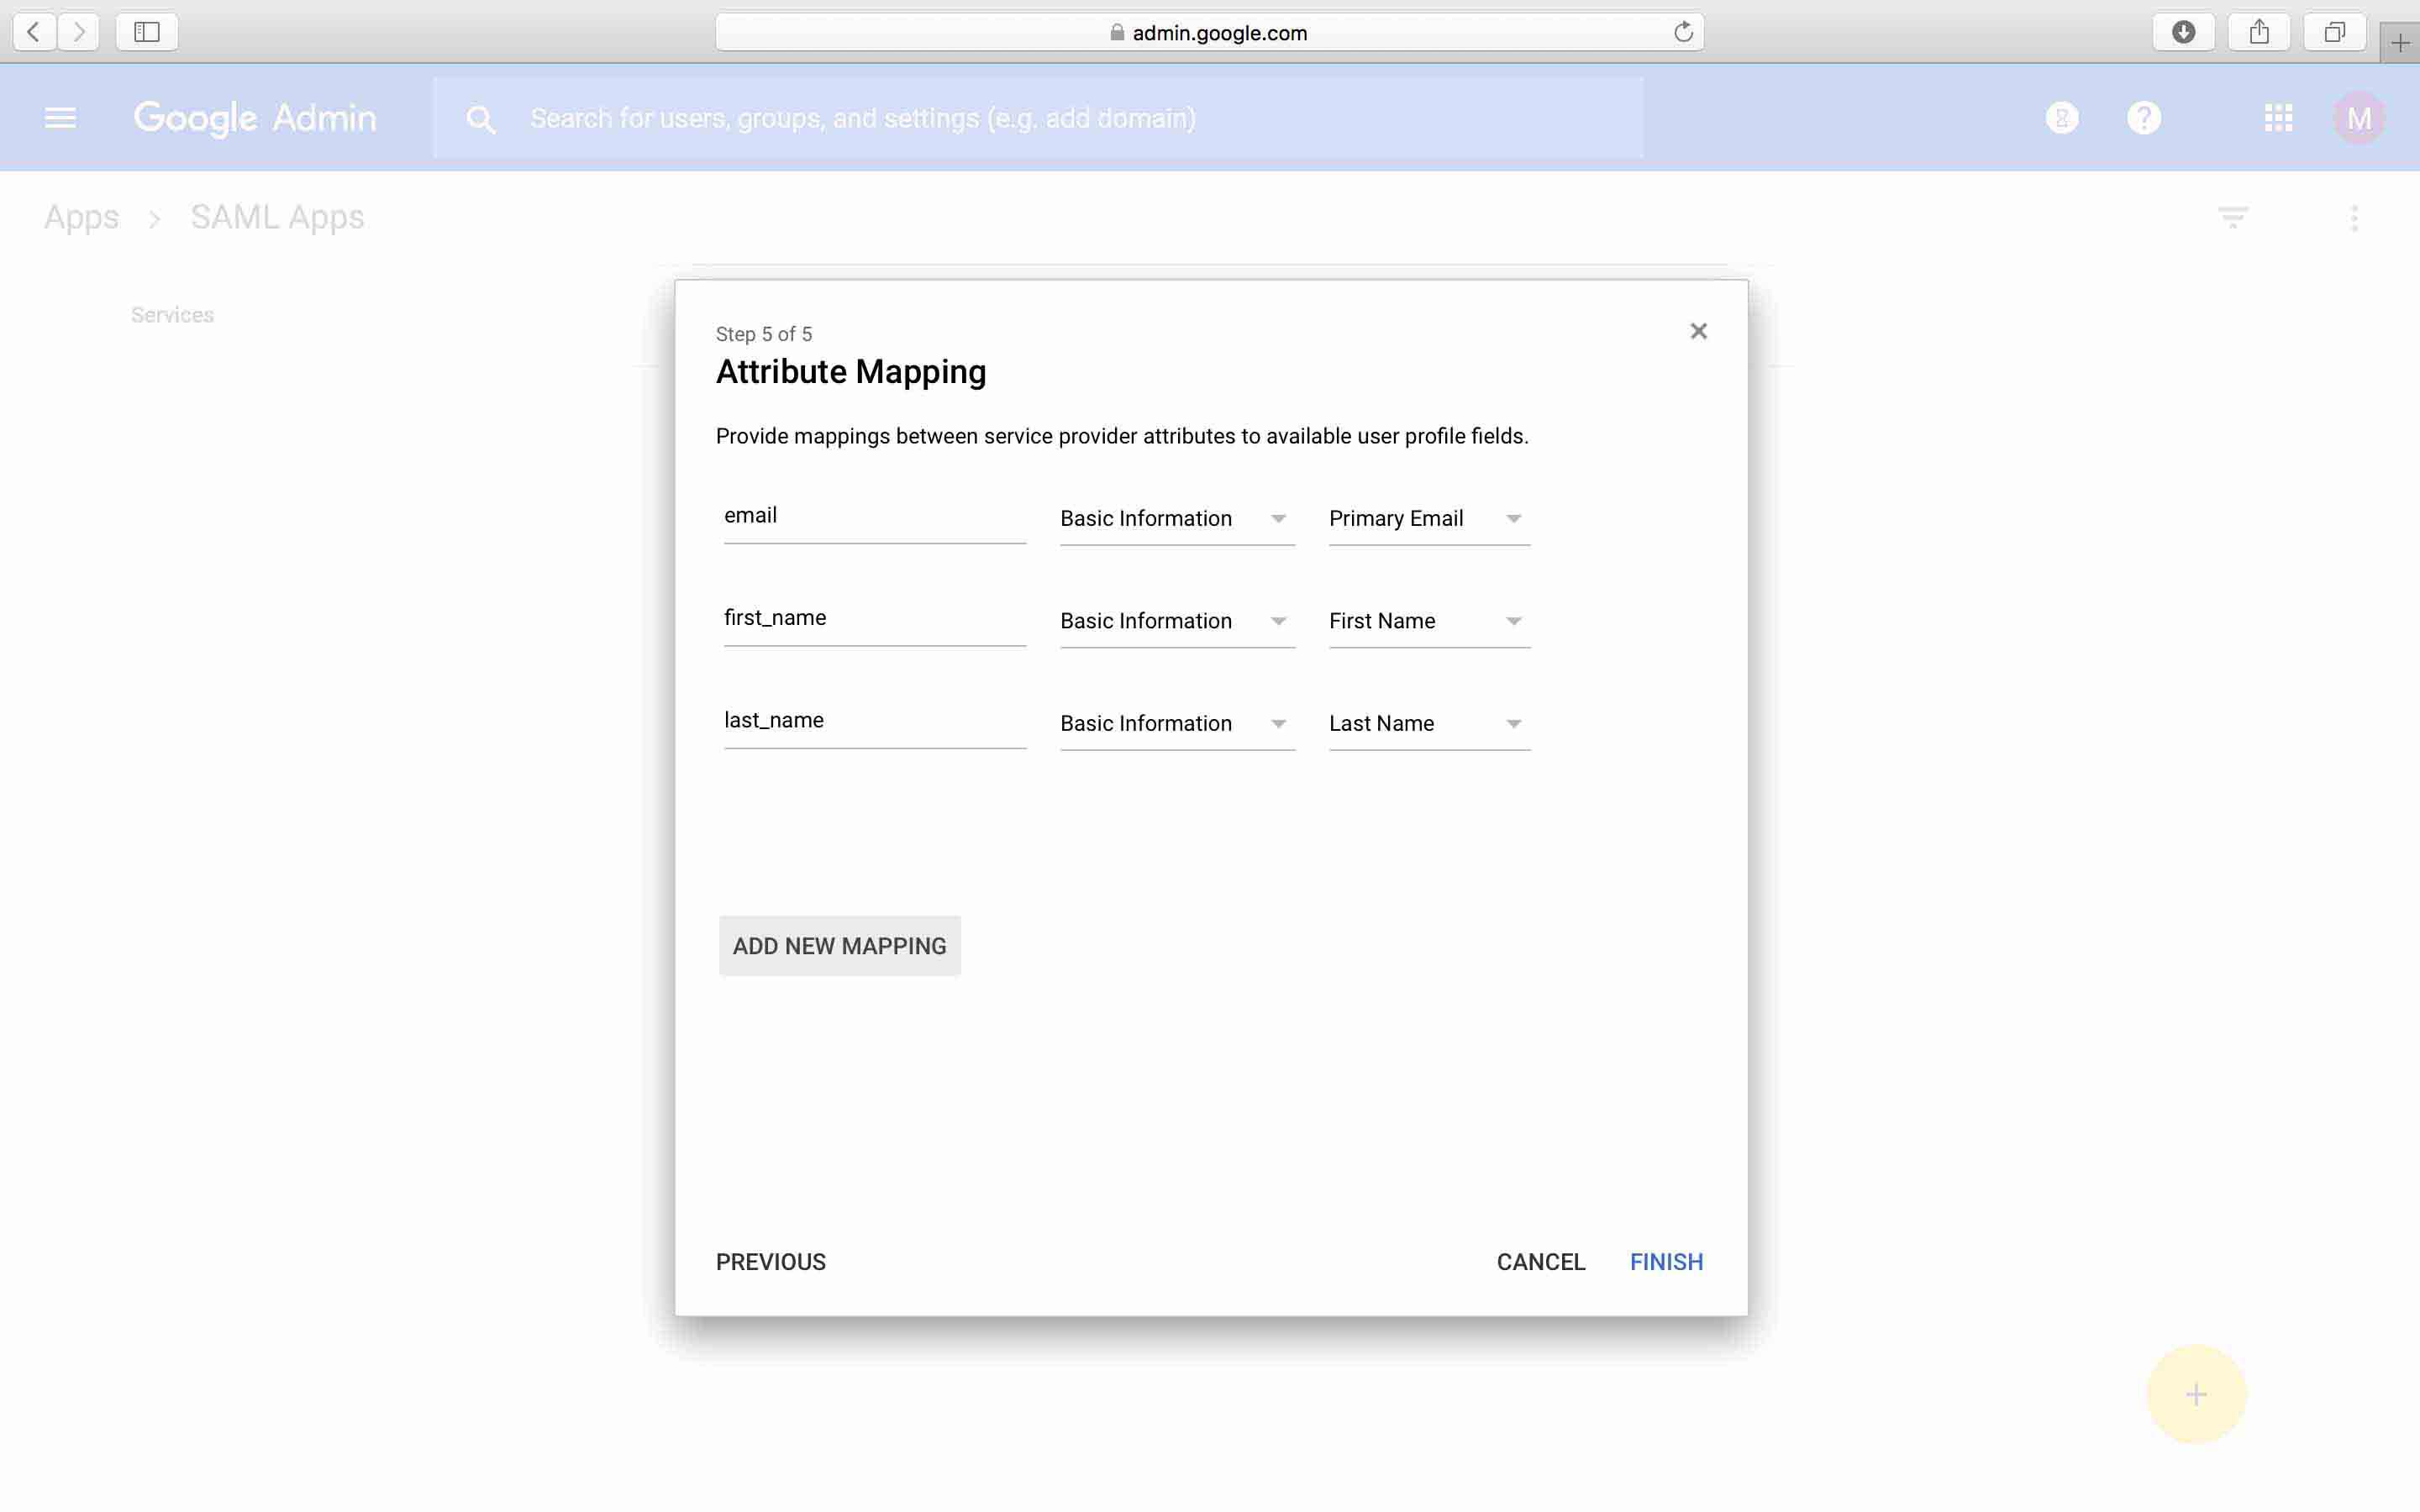
- In the Attribute Mapping window, click on ADD NEW MAPPING.
- Enter “email,” and select Basic information and Primary Email; enter “first_name,” and select Basic information and First Name; and enter “last_name,” and select Basic information and Last Name.

- On the following prompt, click on OK.
- Now, you will see your SAML app.
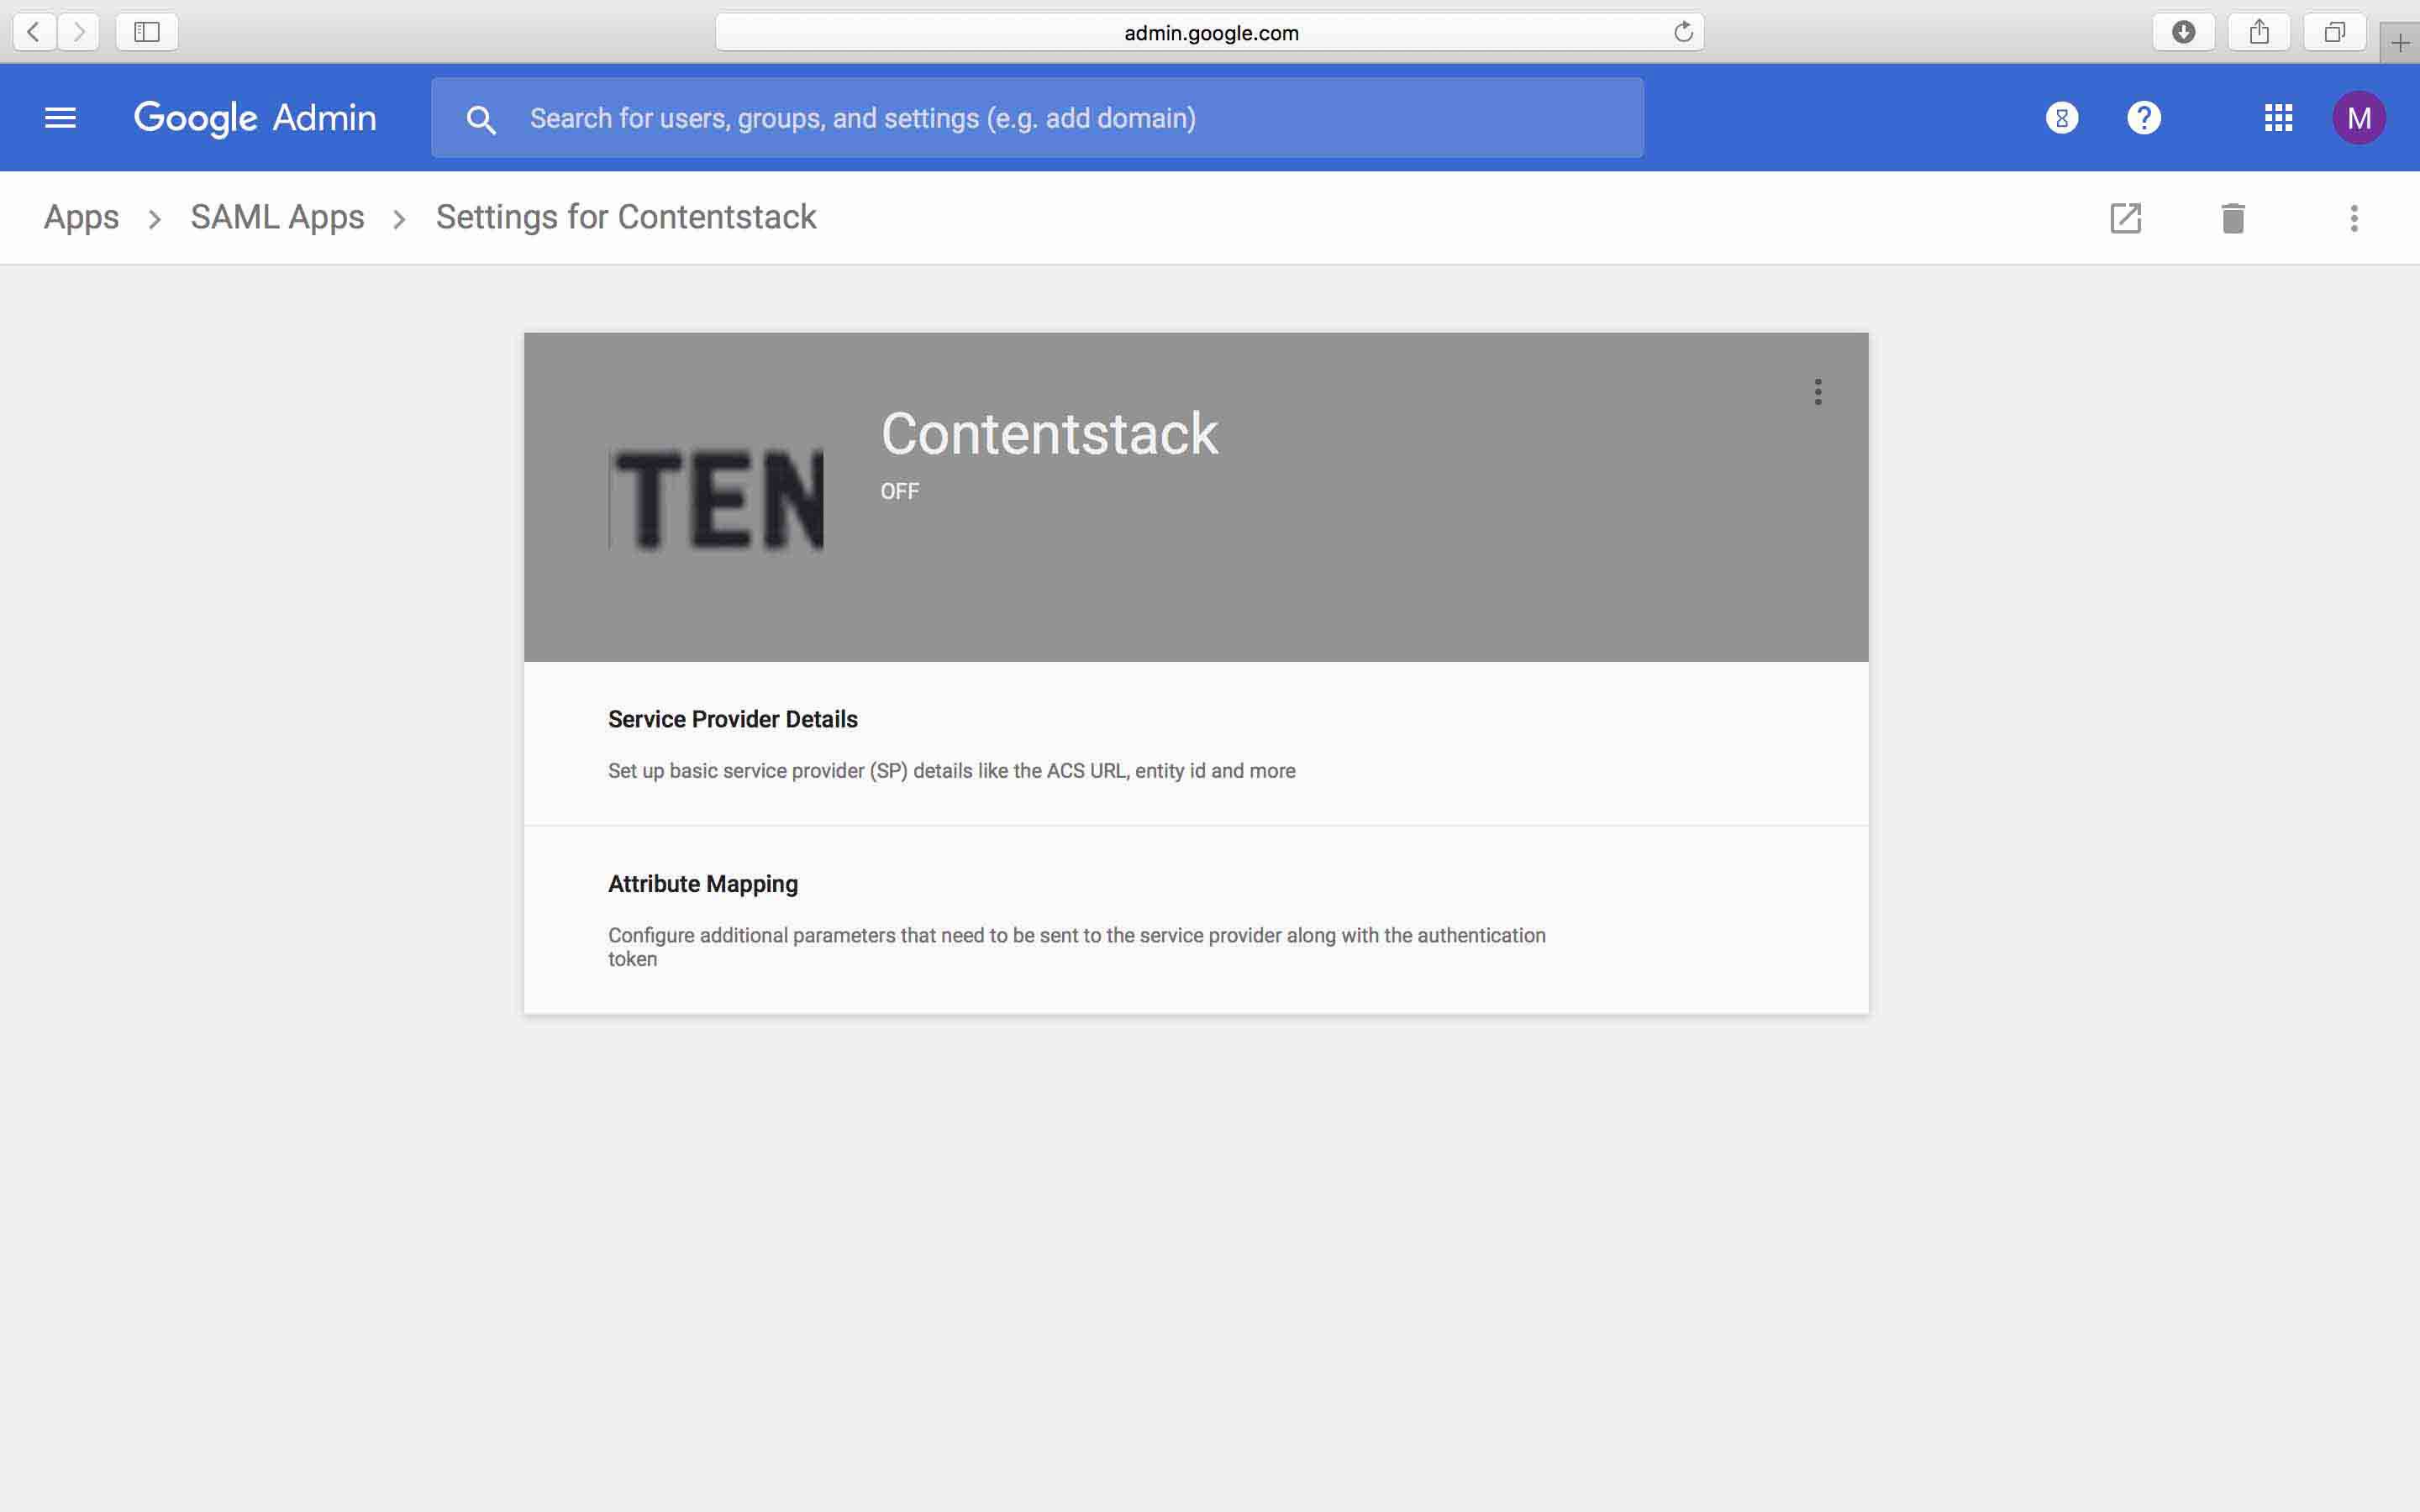
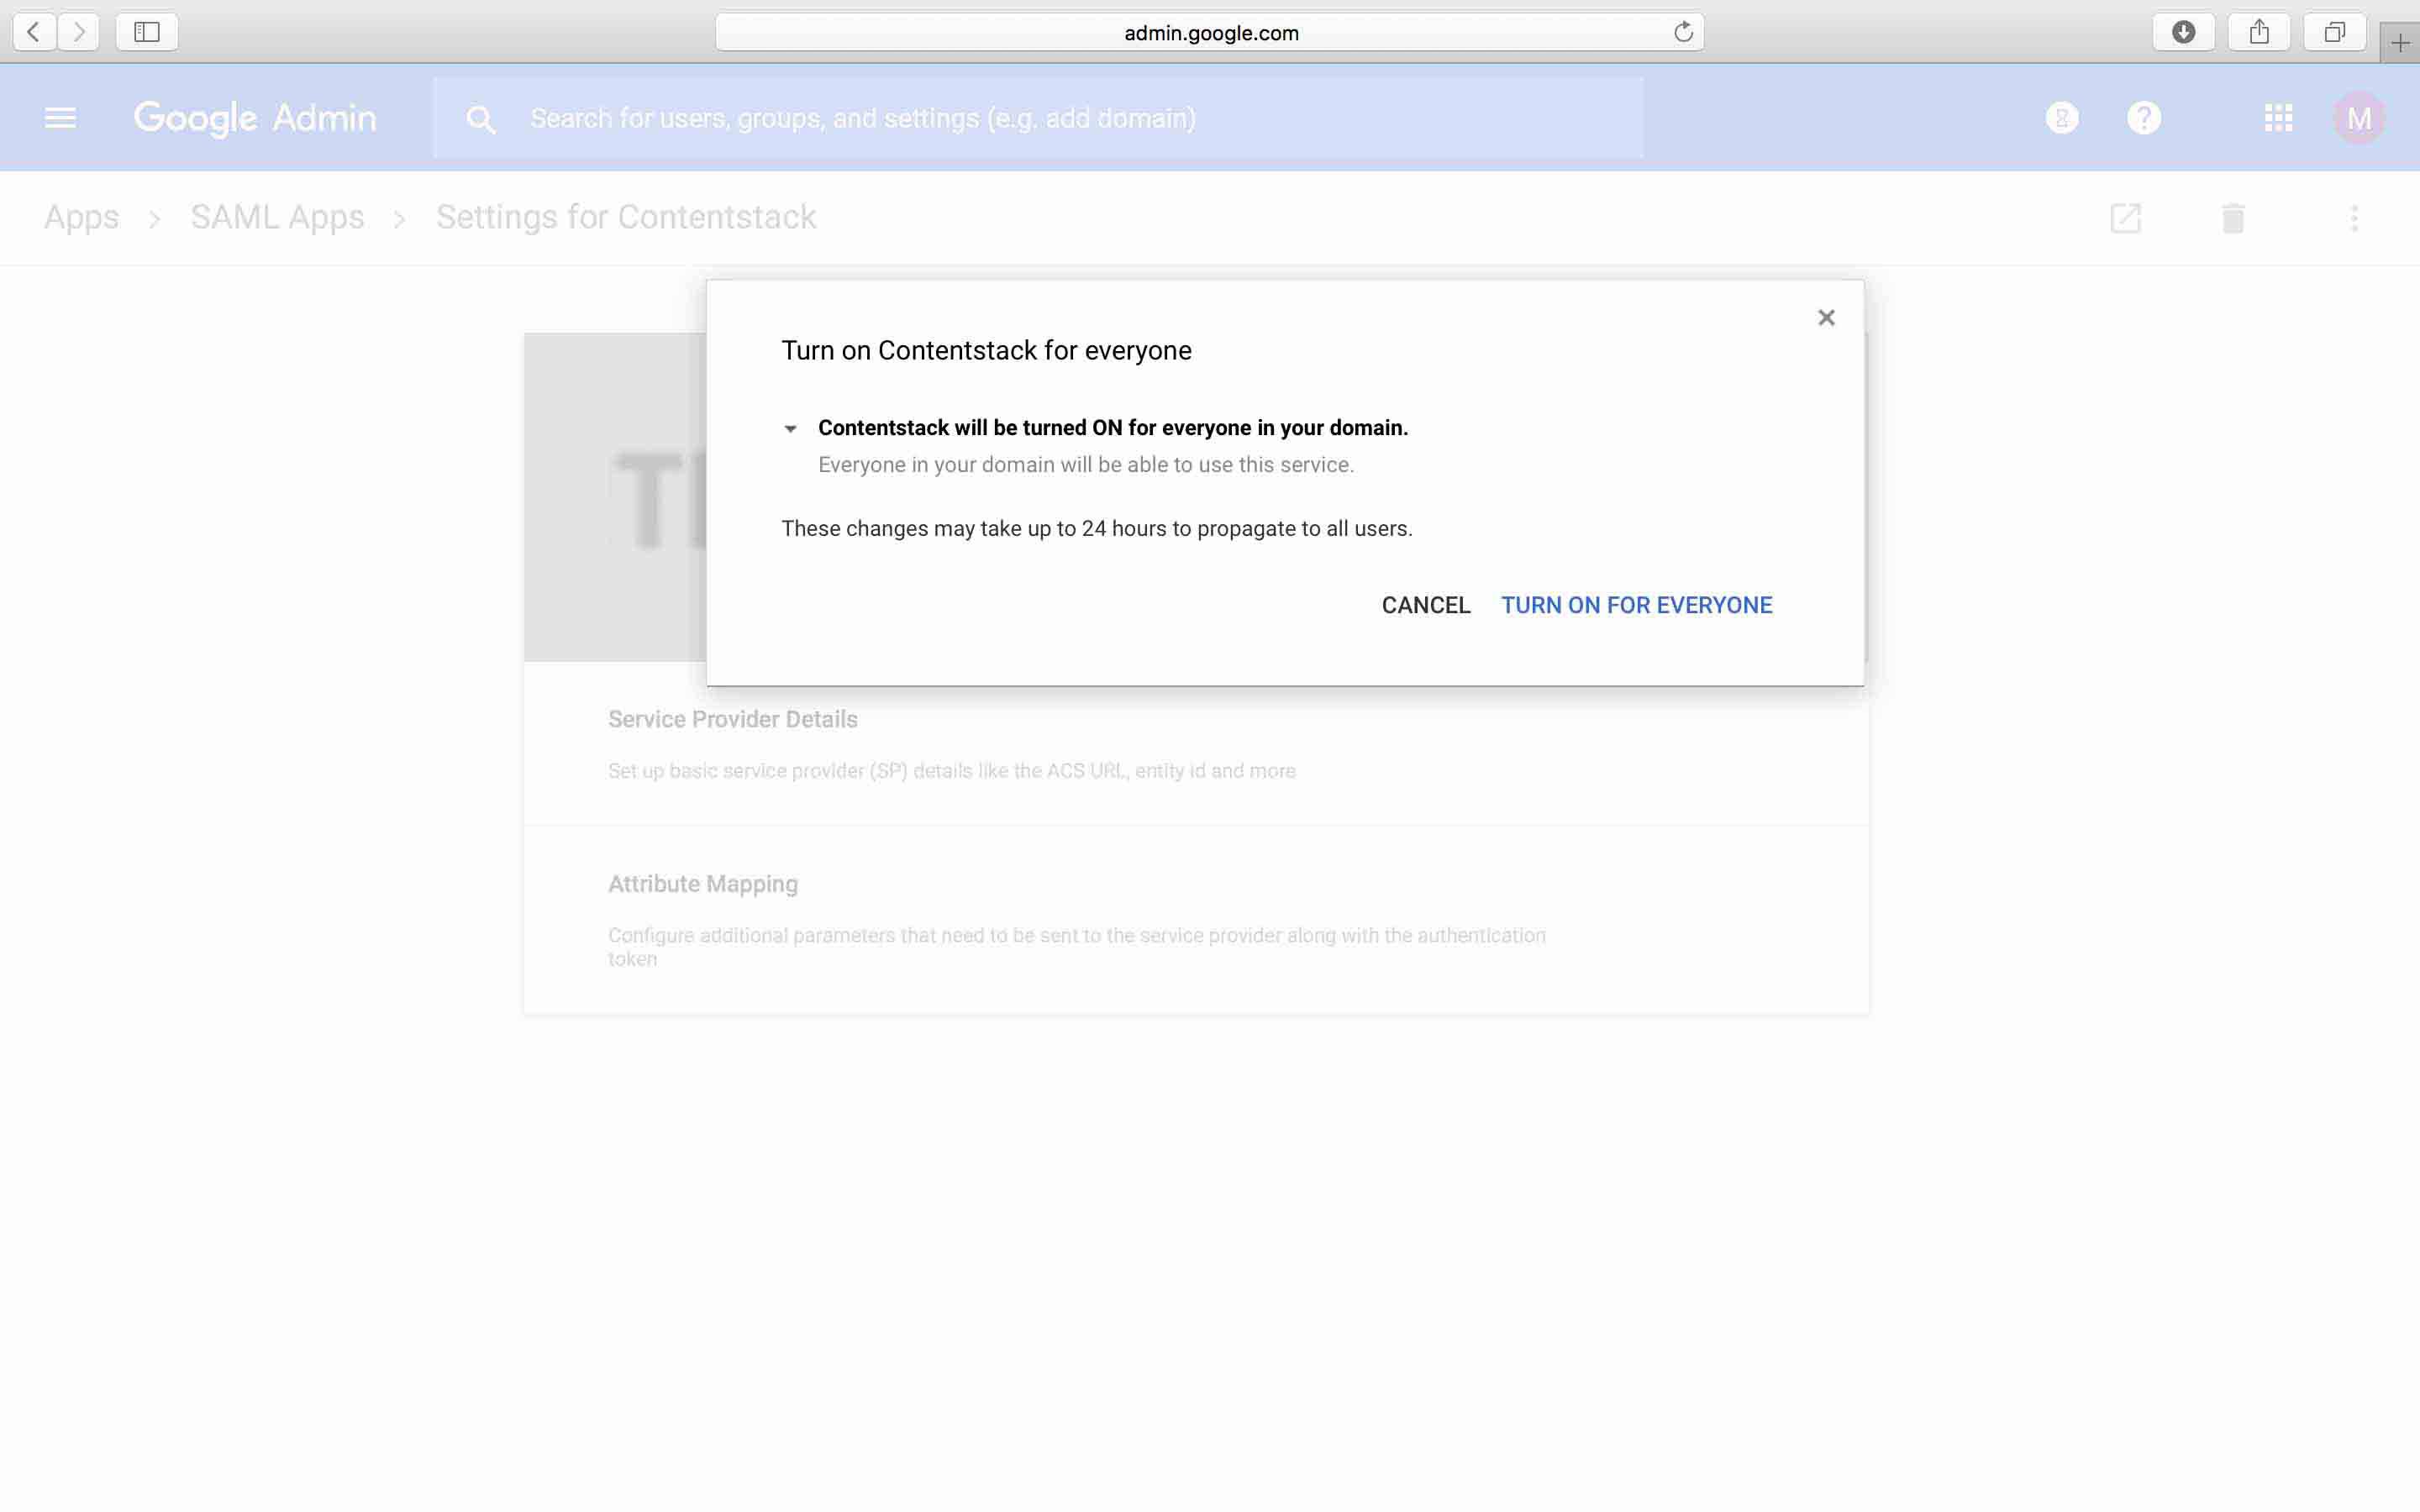
- Click the three dots at the top of the gray box. You will see three options: On for everyone, OFF, and On for some organizations.
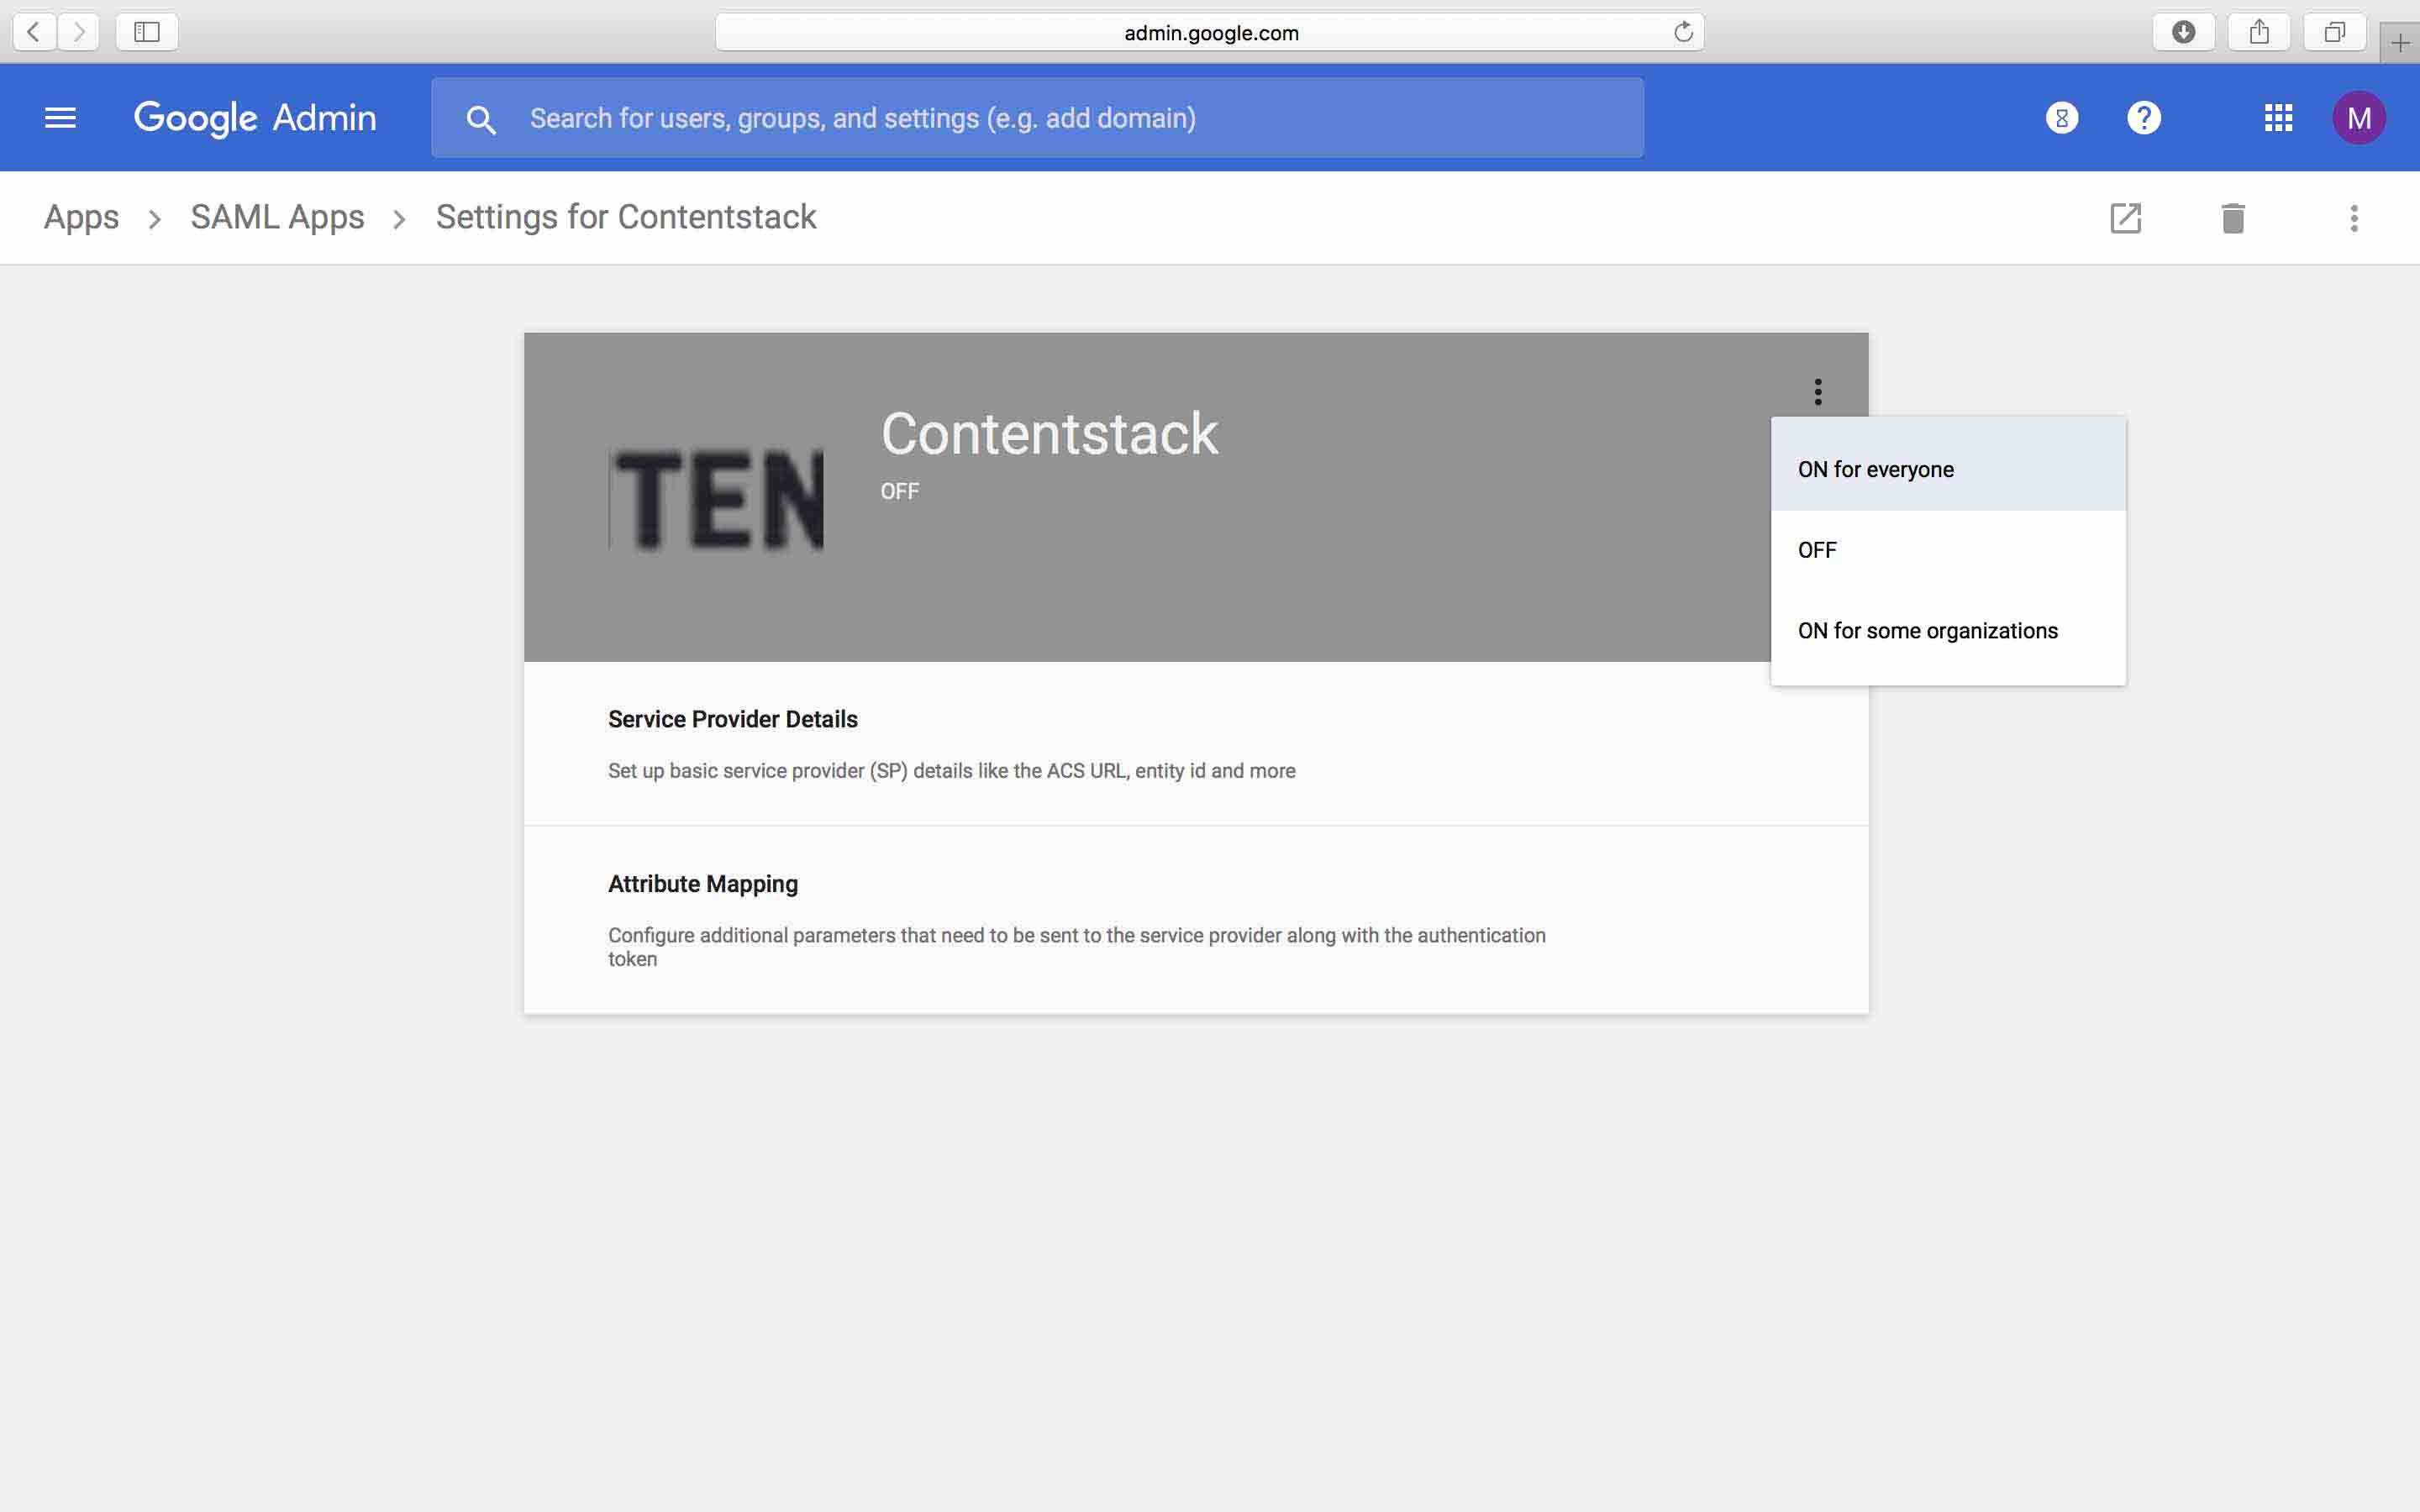
- Select On for some organizations and click on TURN ON FOR EVERYONE to confirm.
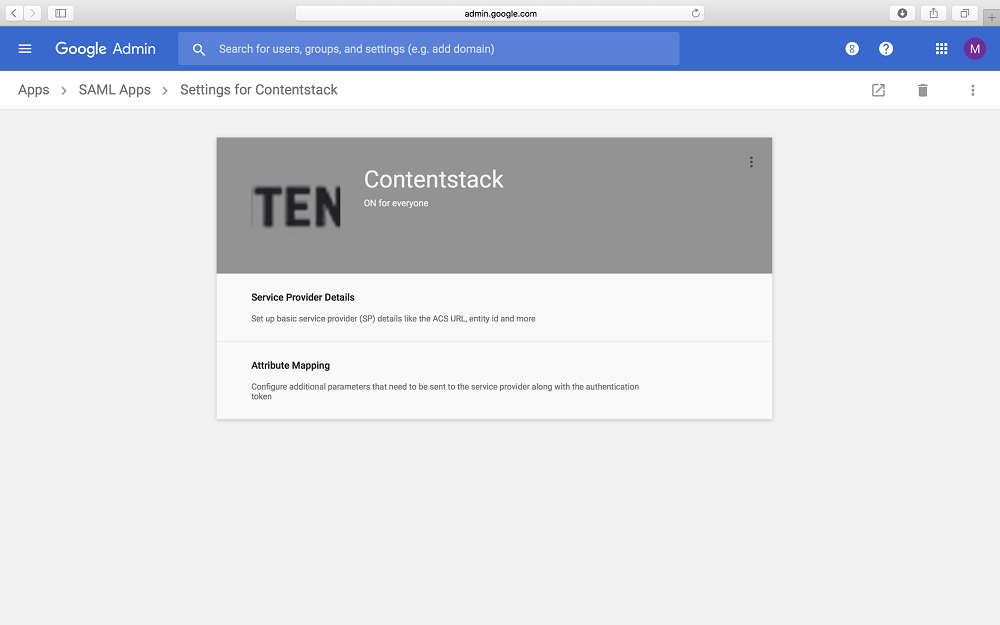
- Now you will see that your app has been turned on for everyone.
With this, you are done with setting up the Contentstack app in Google G Suite. You can now proceed to configuring the remaining steps in Contentstack.
- Log in to your Google Admin account, click on to Apps, and select SAML apps.
Further steps
User Management
In Contentstack, save your settings and go to 3. User Management.
Enable Strict Mode if you do not want any users to access the organization without SSO login.
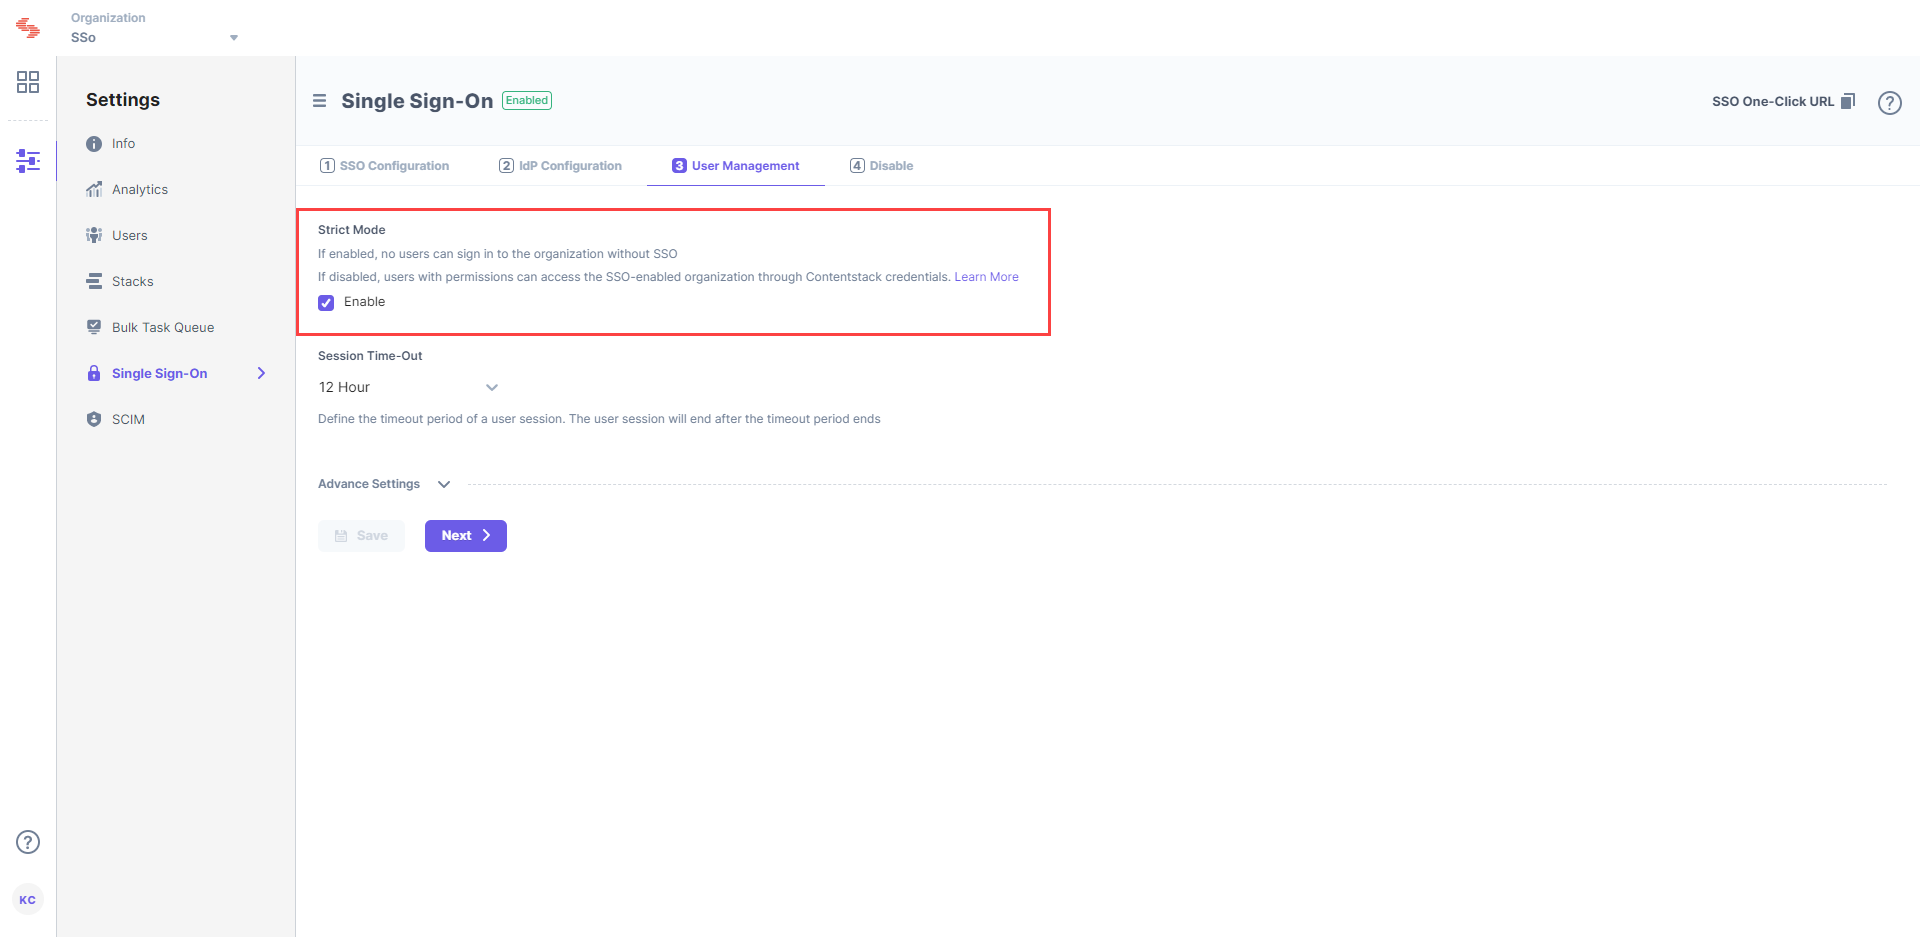
Session Timeout lets you define the session duration for a user signed in through SSO. While the default is set to 12 hours, you can modify it as per your requirement.
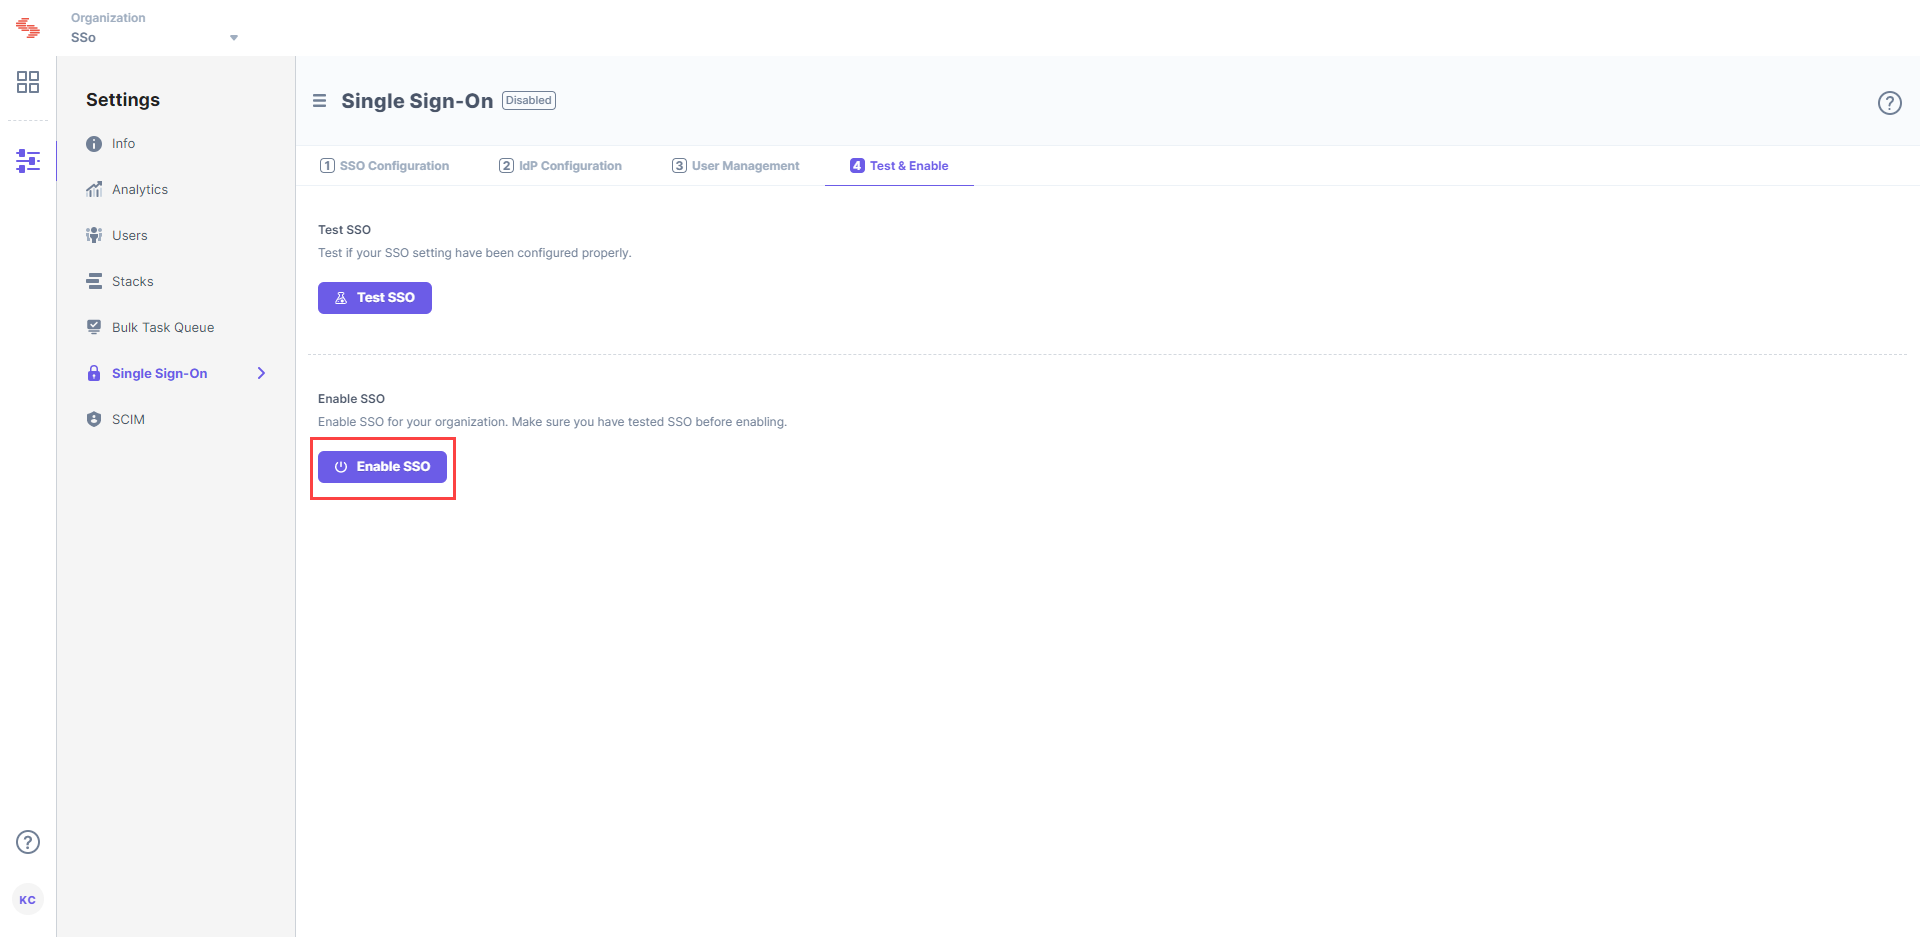
Test & Enable
Go to 4. Test & Enable in Contentstack.
Click the Test SSO button to check if your SSO settings have been configured properly. It is highly recommended that you test your settings before enabling SSO.
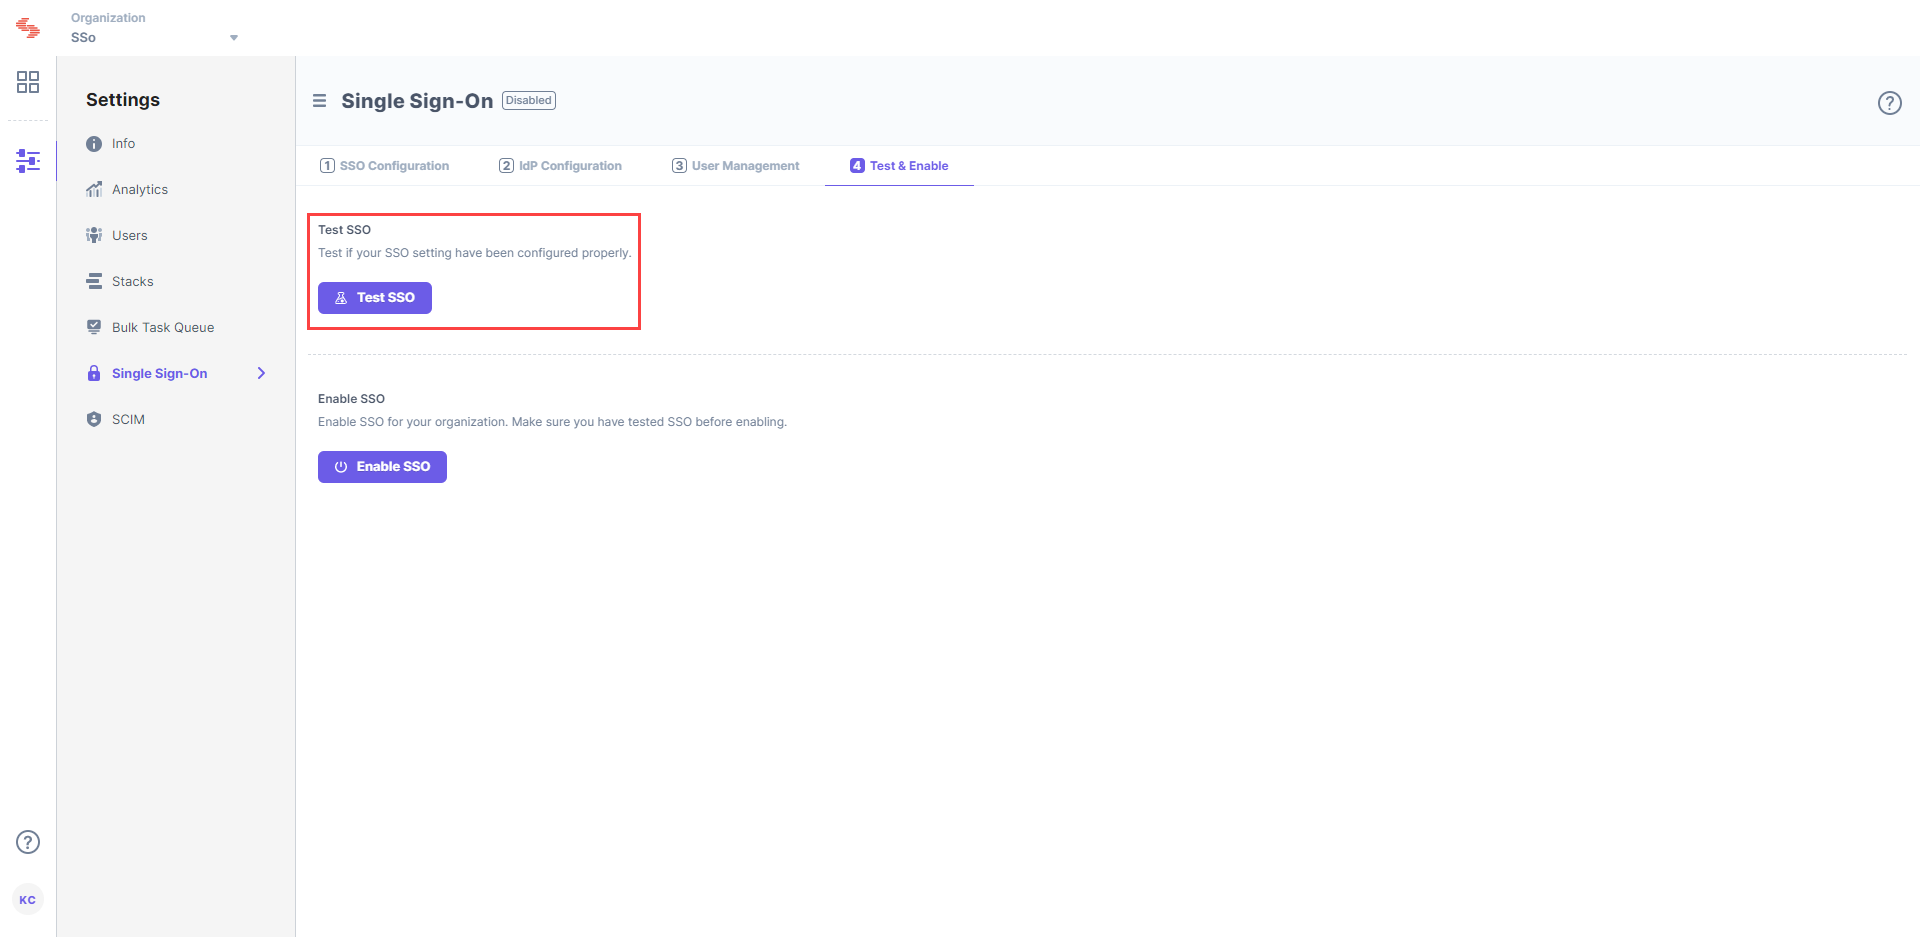
To enable SSO for your Contentstack organization, click on Enable SSO. Once this is enabled, users of this organization can access the organization through SSO.
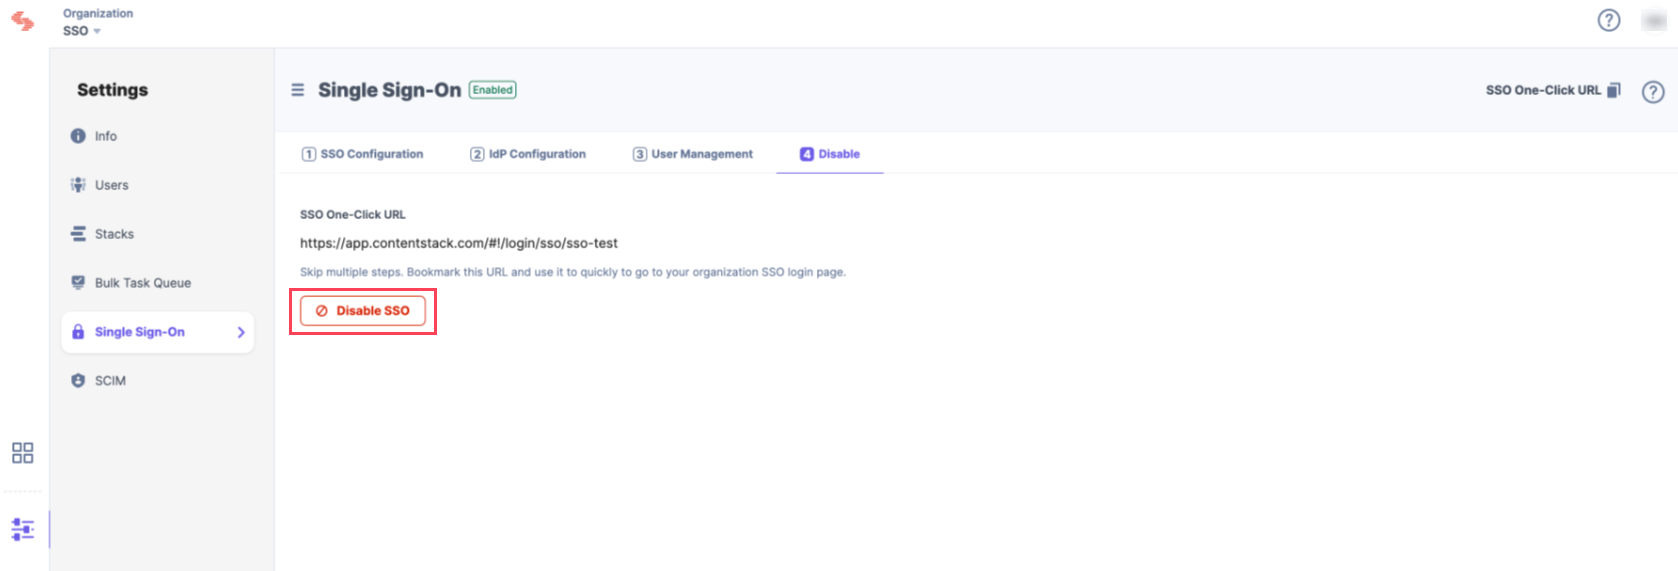
You can then disable SSO from the same page when required.
More articles
