Interstack Reference App Installation Guide
Interstack Reference Marketplace app allows you to easily use referenced entries within your content type across your Contentstack stacks. Using the Interstack Reference app, you can fetch the referenced entry in the custom field of your content type and use the entries’ data among multiple stacks without leaving your current stack.
Prerequisites
- Contentstack account
- Access to the Contentstack Organization/Stack as the Owner/Admin
This step-by-step guide explains how to install and configure the Interstack Reference app within your stack.
Steps for Execution
- Install and Configure the Interstack Reference app in Contentstack Marketplace
- Use the Interstack Reference app within your Stack
-
Install and Configure the Interstack Reference app in Contentstack Marketplace
Follow the steps to install the application in Contentstack.
- Log in to your Contentstack account.
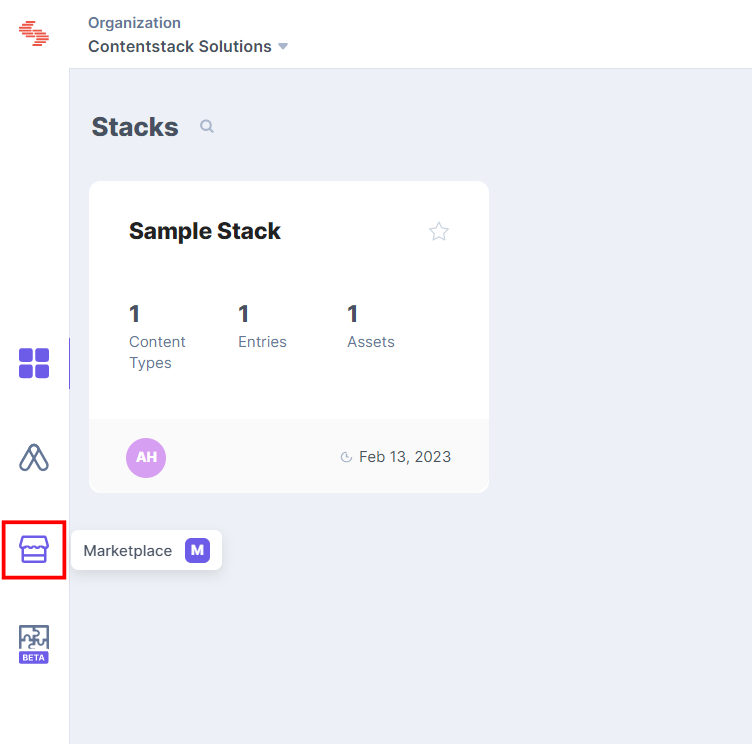
- In the left-hand side primary navigation, click the Marketplace icon to go to the Marketplace.
- Click Apps from the left panel.
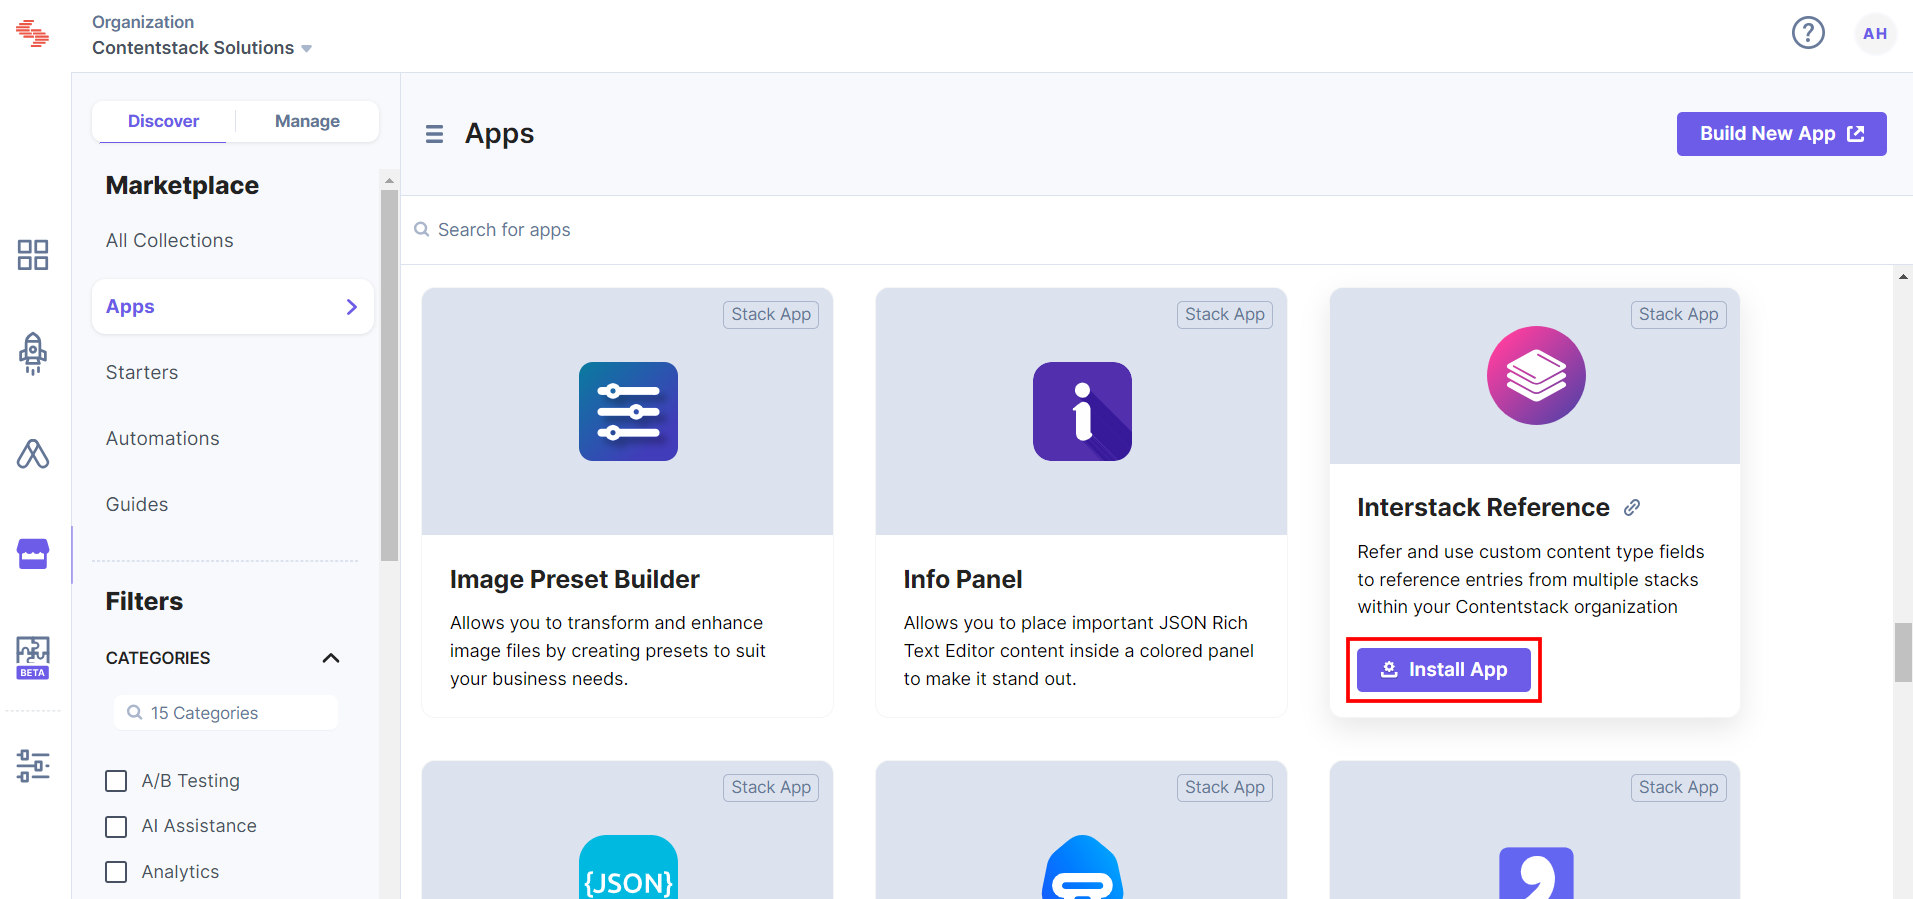
- Within the Marketplace, you can see all the available apps. Hover over the Interstack Reference app and click Install App.
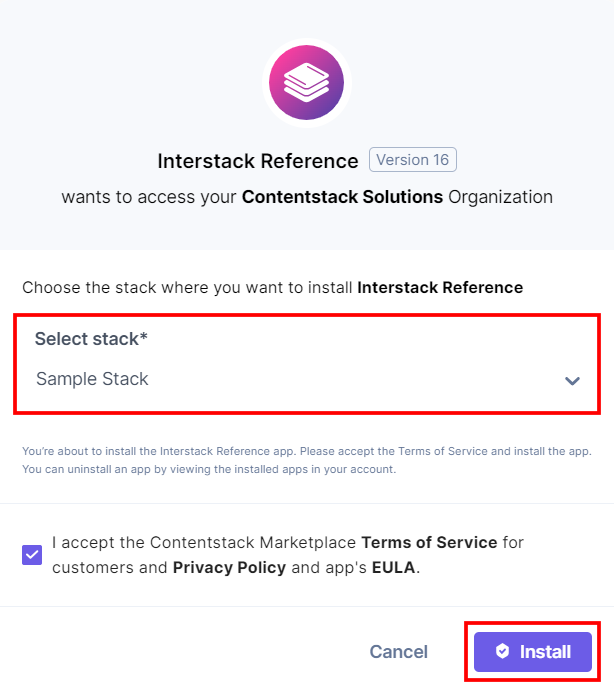
- In the popup window, select the stack where you want to install the Interstack Reference app and click the Install button.
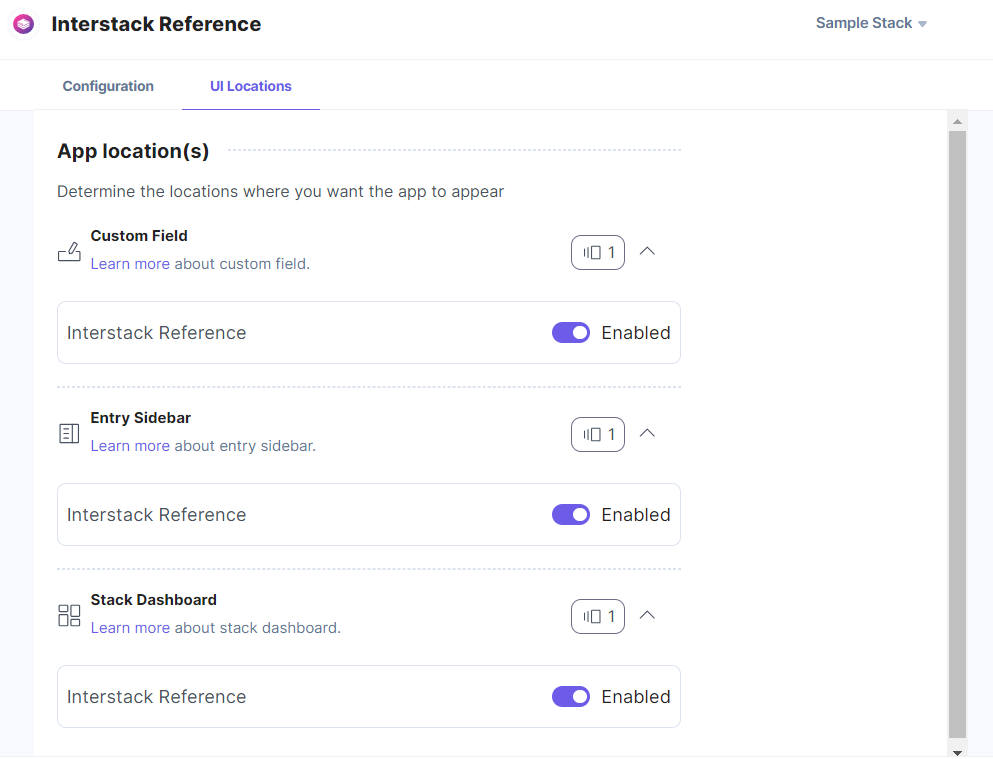
- A Configuration page appears with the configured settings.

- On the UI Locations tab, you can see the predefined app locations. You can use the toggle button corresponding to each UI location to enable or disable it based on your requirements.
- Click the Save button.
- Click Open Stack to start using the Interstack Reference application.
Note: The settings are configured automatically after installing the app. No additional settings are required to use the Interstack Reference app. If the app is not configured properly, you will get an error message.
Additional Resource: For more information on UI locations, please refer to the Installed Apps guide.
-
Use the Interstack Reference app within your Stack
To use the Interstack Reference application in an entry of your stack, you can use a Custom field.
Follow the steps given below to use the Interstack Reference application using a Custom field:
- Go to your stack and click the Content Models icon in the left navigation panel, and click the + New Content Type button.
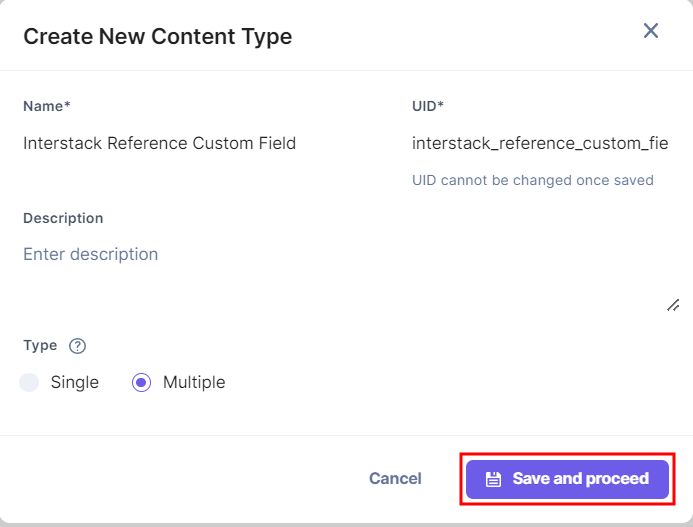
- Create a content type by adding relevant details and click Save and proceed.
- In the Content Type Builder page, add a Custom field in your content type by clicking the Insert a field link represented by a + sign.
- Under Select Extension/App, select Interstack Reference and then click Proceed.
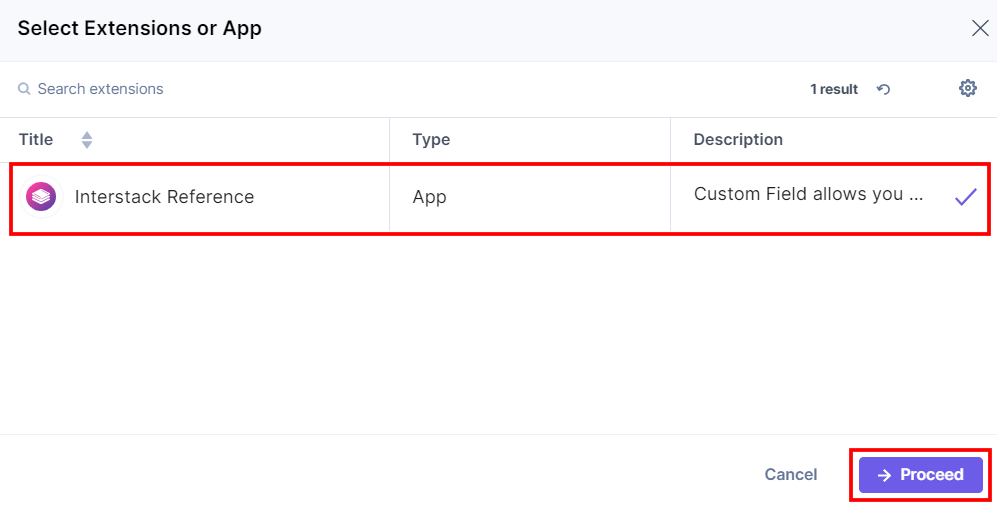
This adds Interstack Reference in the custom field.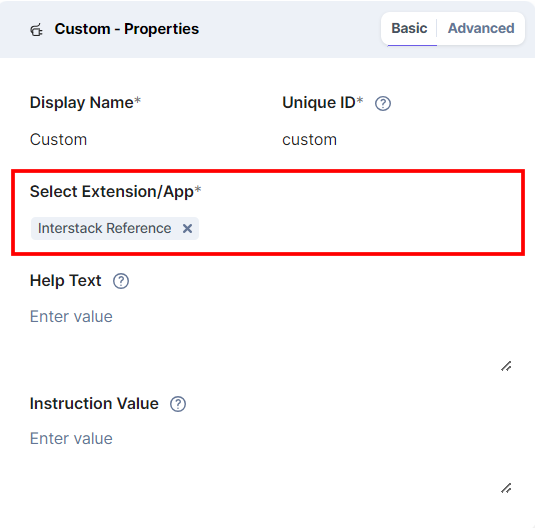
Add Configuration to Interstack Reference’s Custom Field (optional)
You can customize the configuration to select a particular stack and content type that you want to select through the custom field. Follow the steps given below to add configuration to the custom field:
- Click the Properties icon of the Custom field in your content type.
- Go to Advanced.
- Under Config Parameter, add the configuration to specify a stack and content type (in object format).
For example:
{
  "allowed": {
    "stack": {
      "bltbdb397c7cc18a214": {
        "content_type": [
          "$all"
        ]
      },
      "bltef3a570a470fd28c": {
        "content_type": [
          "ct_for_reference"
        ]
      }
    }
  }
}
Note: You will be able to fetch the entries only from the stacks and the content types mentioned in the configuration settings. You must mention the stack API key.
- After adding the app, click Save or Save and Close to save your changes.
- To use the Interstack Reference app, create an entry for the above content type, and you will see the Interstack Reference custom field in your entry page as shown below:
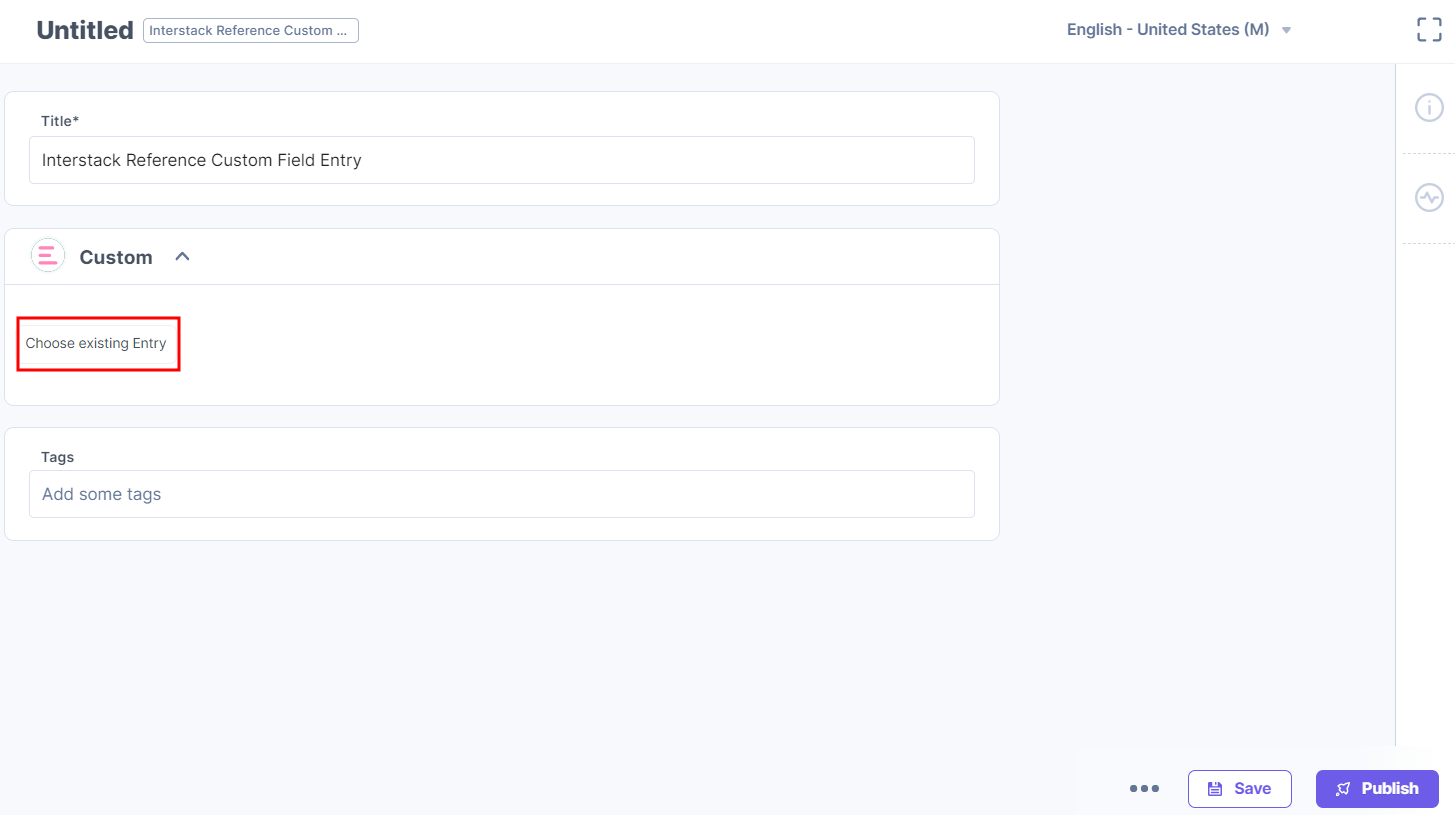
- Click the Choose existing Entry button. A modal box appears.
- In the Select Stack dropdown, select the stack from where you want to use the referenced entry.
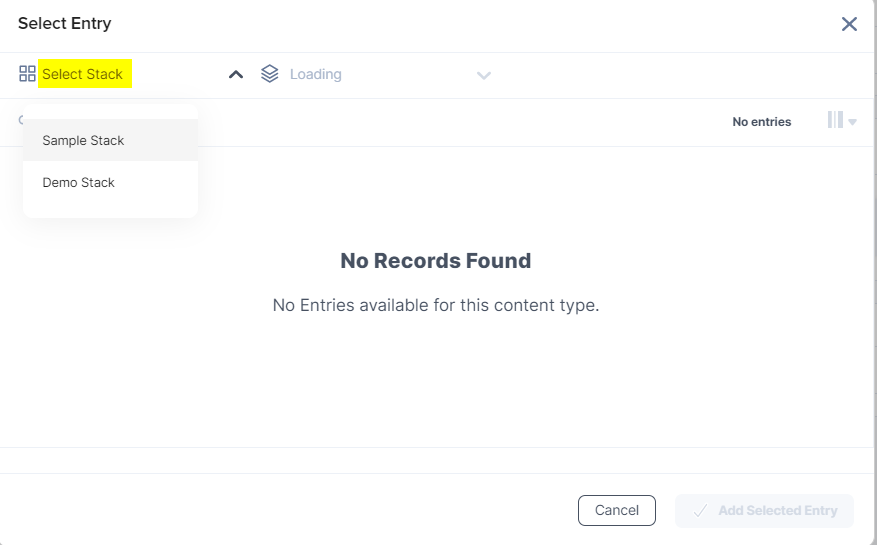
Note: You need at least read access for the stack that you want to select. Users with no access to a particular entry or stack will not be able to select the entries.
- In the Select Content Type dropdown, a list of all the content types appear present in the selected stack. Select the content type from where you want to fetch the entry.
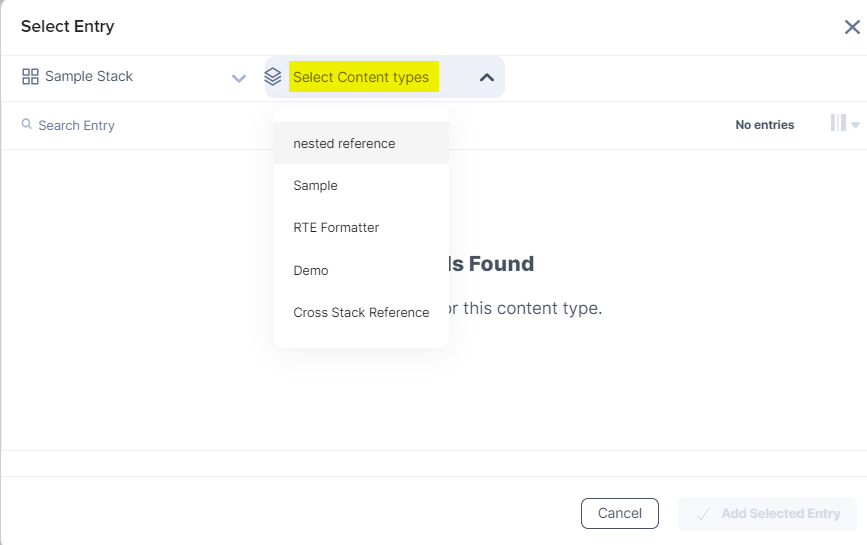
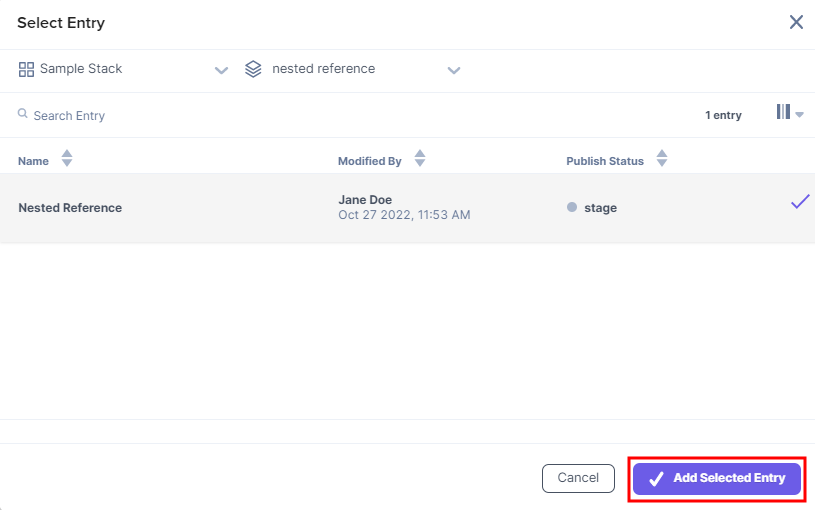
- Once you select the content type, a list of all the entries present in the content type appears. Select your preferred entry and then click the Add Selected Entry button to add the entry.
- Click Save.
Tip: The advantage of using the Interstack Reference app over the traditional referencing method is that you can select entries from different stacks in the Contentstack environment.
Note: Contentstack has its own JavaScript Delivery SDK that supports this plugin which can be used to fetch the content for your page from Contentstack for Interstack Reference app.
Follow the steps below to view the details of all the Referenced and Referencing entries.
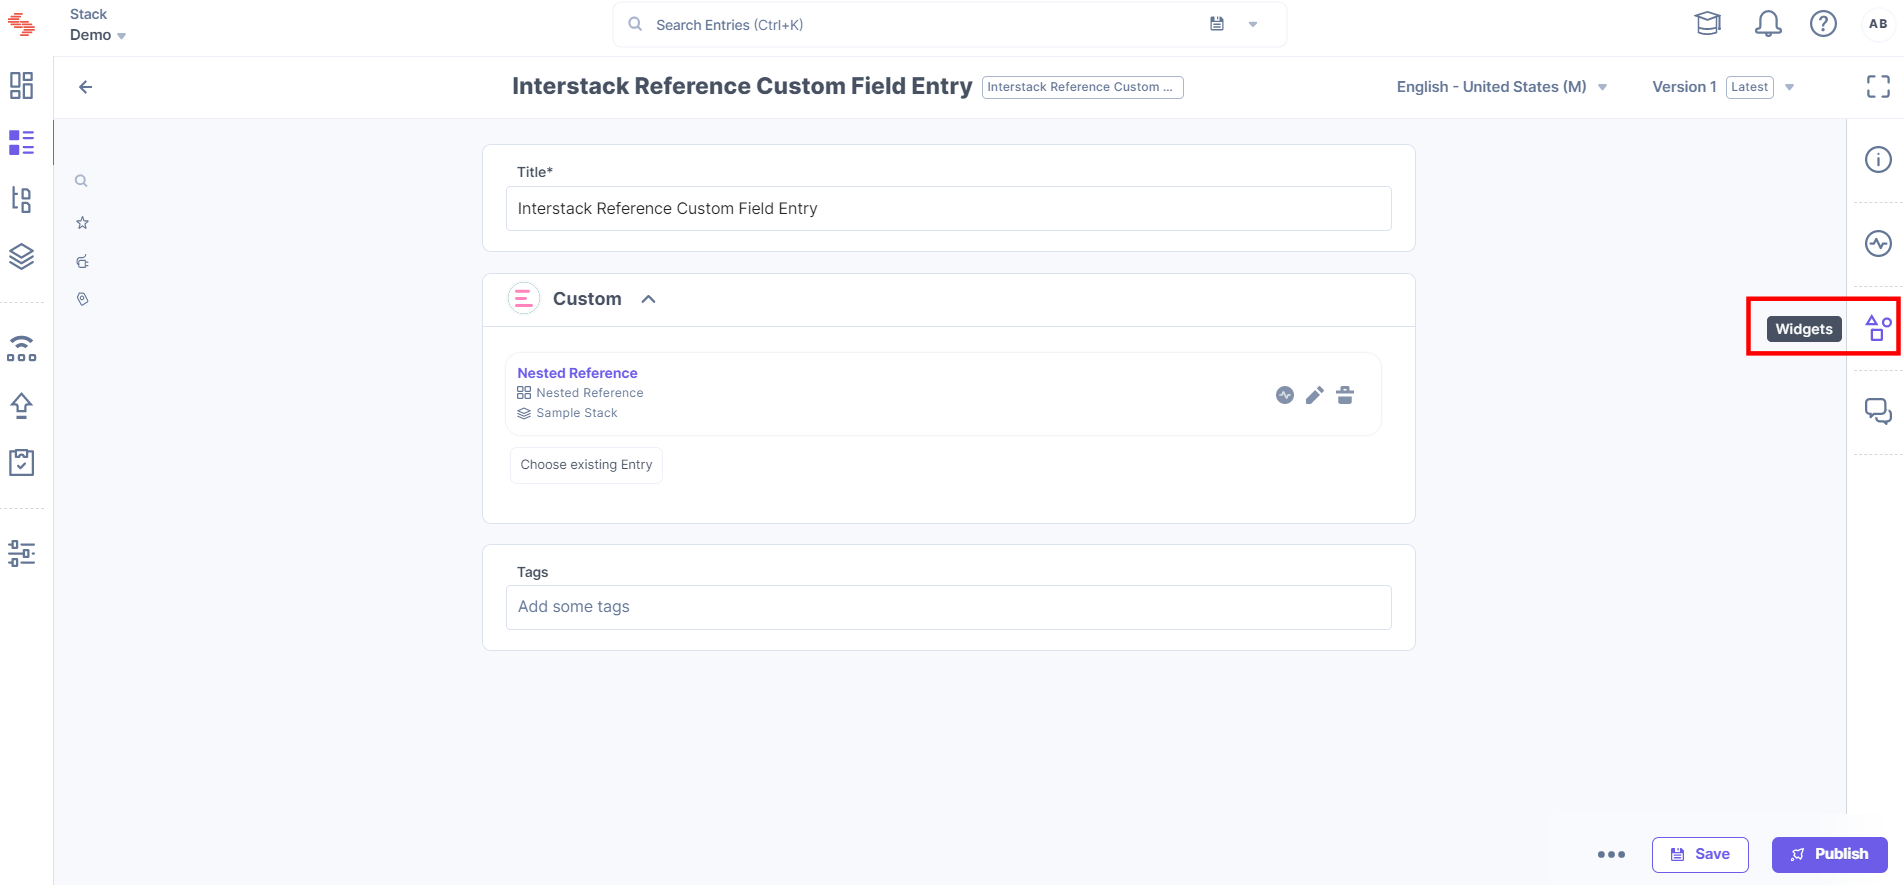
- Go to the Entries page, navigate to the Interstack Reference entry. Click the Widgets icon.
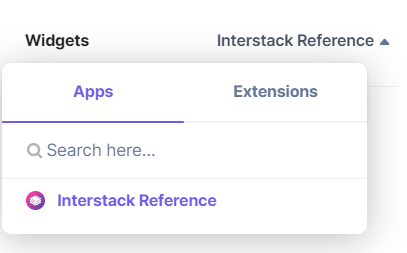
- In the Apps dropdown, select the Interstack Reference app.
- You will be able to see the details of all the Referencing entries and the entries to which the interstack entry is referenced to.
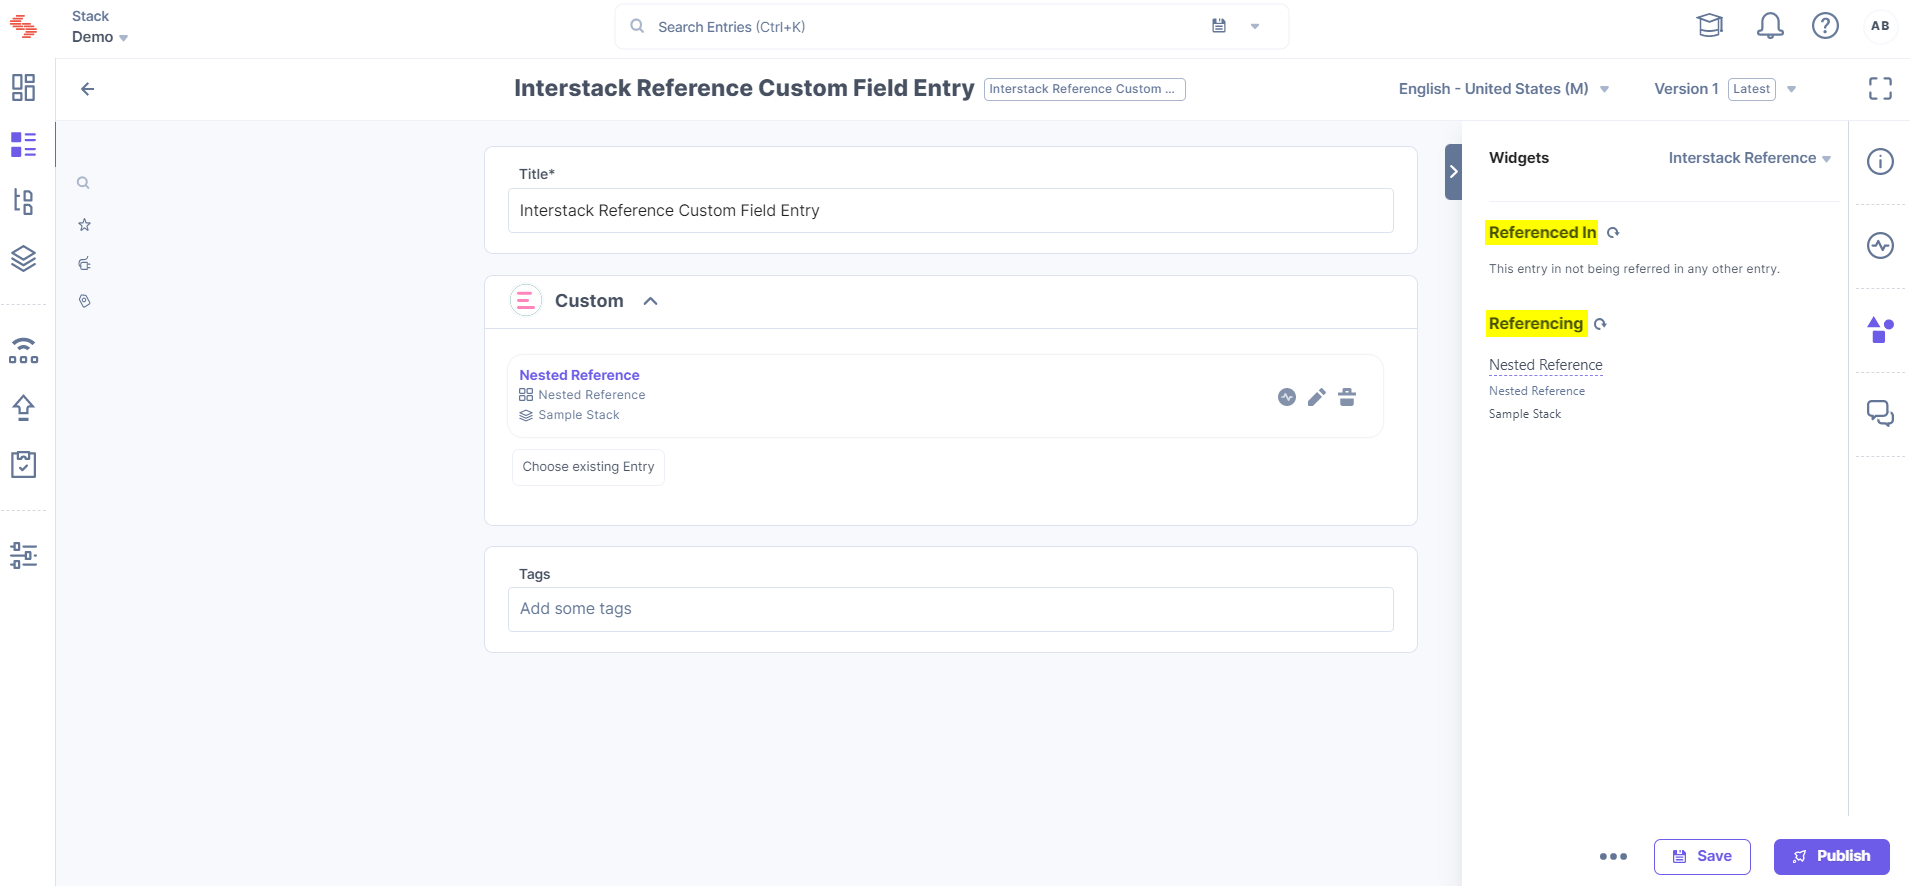
Note: You will see a refresh icon besides Referenced in and Referencing text fields. Click the refresh icon to check the latest updates.
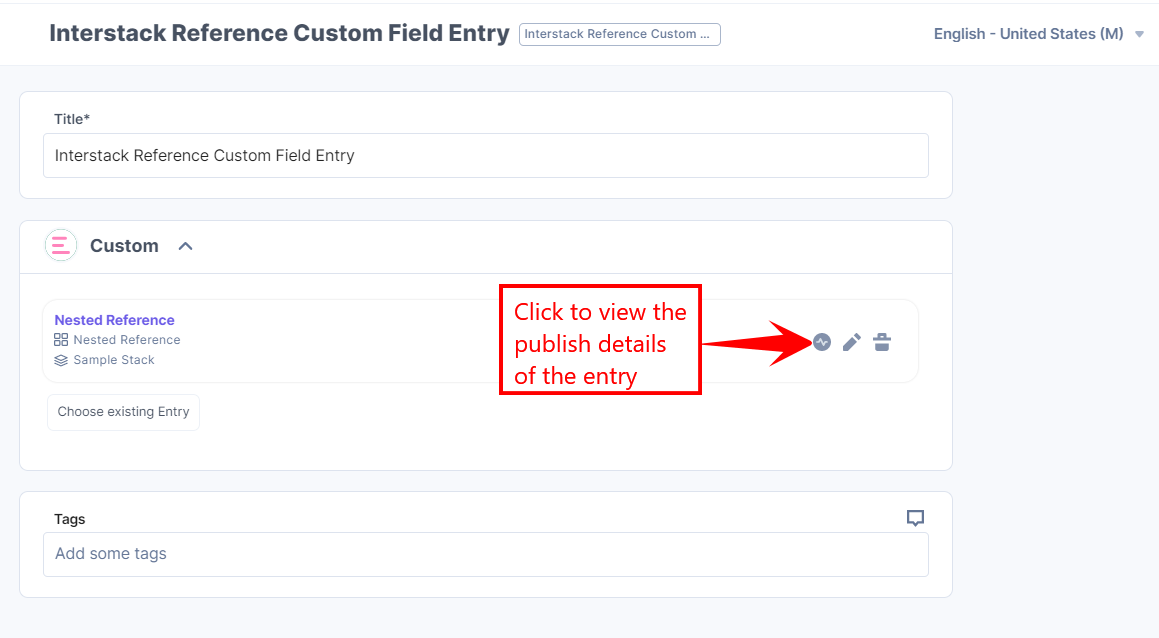
- You can view the status of the published entries by clicking on the publish status icon.
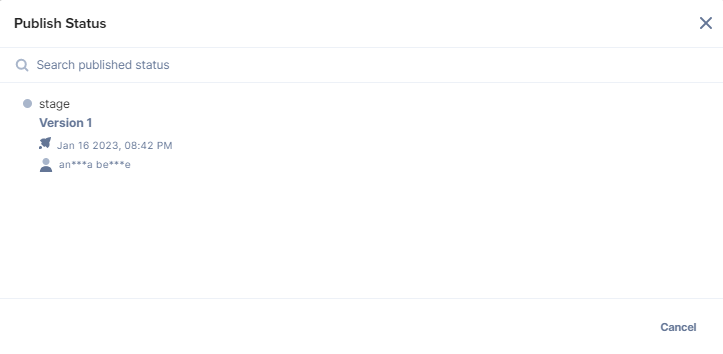
- A pop-up appears where you can see the publish status of all the entries referenced or referred to within the custom field entry.
- The dashboard widget lists down the entries from the current stack that are being referred to in other stacks.


.svg?format=pjpg&auto=webp)
.svg?format=pjpg&auto=webp)
.png?format=pjpg&auto=webp)


.png?format=pjpg&auto=webp)