

.svg?format=pjpg&auto=webp)
.svg?format=pjpg&auto=webp)
.png?format=pjpg&auto=webp)


.png?format=pjpg&auto=webp)
Google Analytics App Installation Guide
Google Analytics is a powerful web analytics tool which helps you gain meaningful insights of your website. Using Contentstack Marketplace you can easily install the Google Analytics app and use it within your stack.
This step-by-step guide explains how to install and configure the Google Analytics app in Contentstack Marketplace. With this, editors can see a graph of the page views for the URL corresponding to the current entry.
Note: When you install the Google Analytics app, by default, both the dashboard and sidebar widgets are configured.
Prerequisites
- Google Analytics account
- Contentstack account
- Access to the Contentstack Organization/ Stack as the Owner/ Admin
Steps for Execution
- Fetch View ID, Property ID and Service Account Details
- Install and Configure the Google Analytics App
- Use the Google Analytics Dashboard Widget
- Use the Google Analytics Sidebar Widget
-
Fetch View ID, Property ID and Service Account Details
To get your configuration details for Google Analytics, follow the steps given below:
Creating a Service Account JSON File for Google Analytics Integration
Follow the steps to generate and download a Service Account JSON file for integrating Google Analytics with your project:
- Create a Project: Go to the Google Cloud Console and click CREATE PROJECT to create a new project.
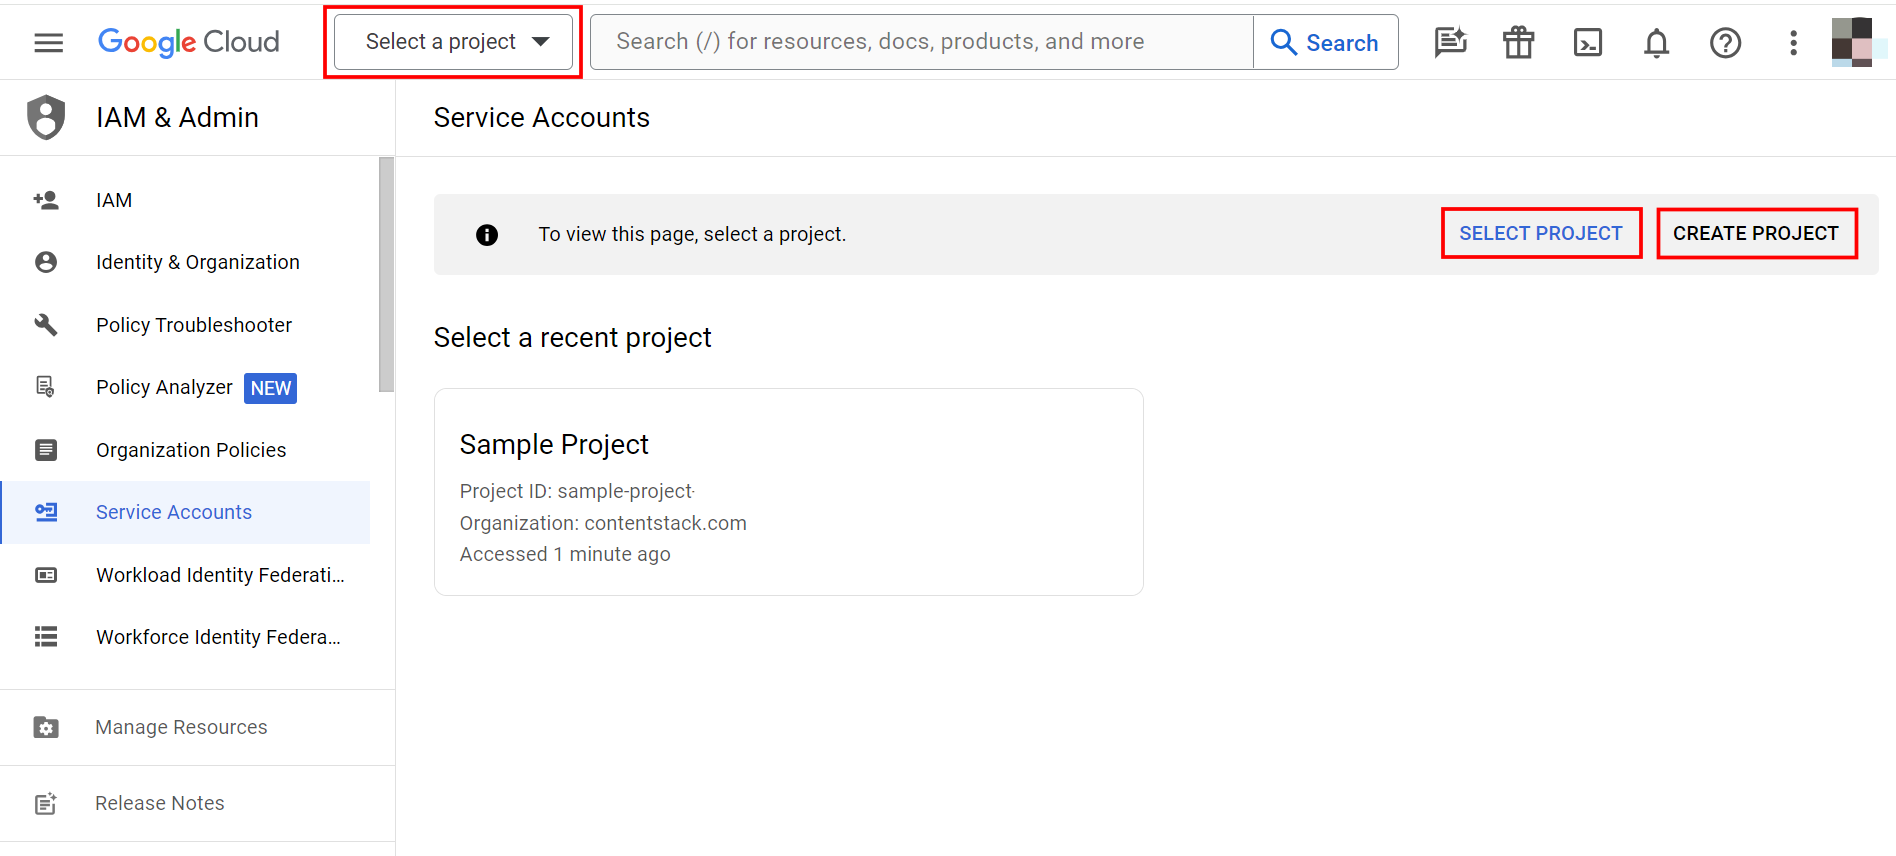 You can also select your existing project by clicking the SELECT PROJECT button or the Select a project drop-down or directly clicking the project.
 - Generate Service Account Key: Follow the steps to generate the service account JSON file:
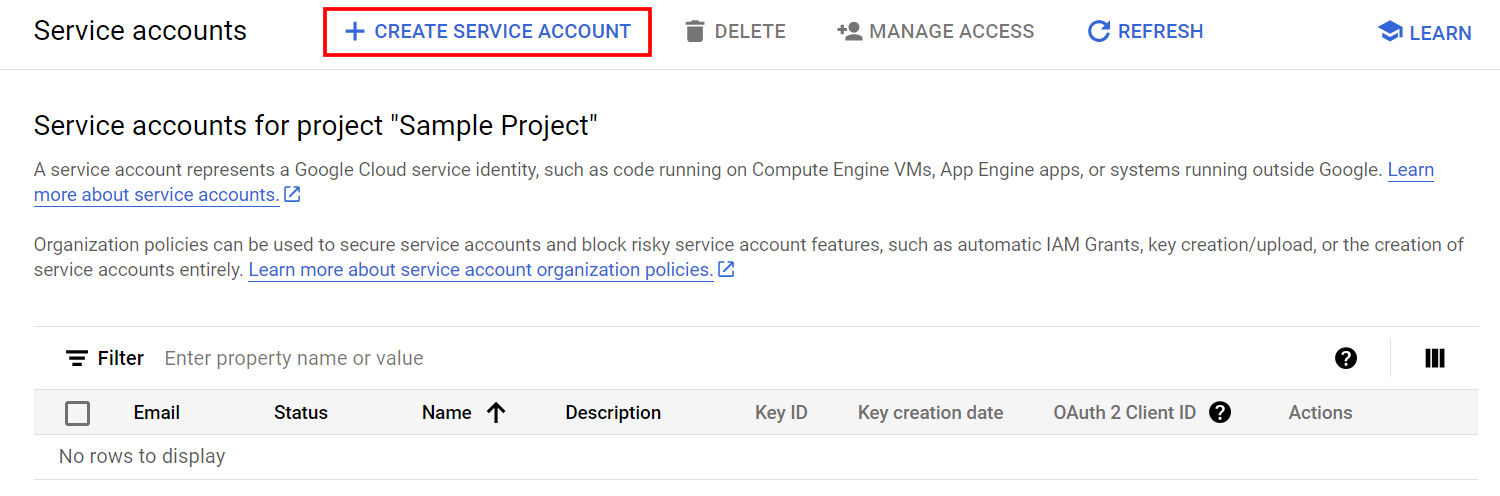
- Navigate to Service Accounts and select your project.
- To create a new service account, click the + CREATE SERVICE ACCOUNT button.
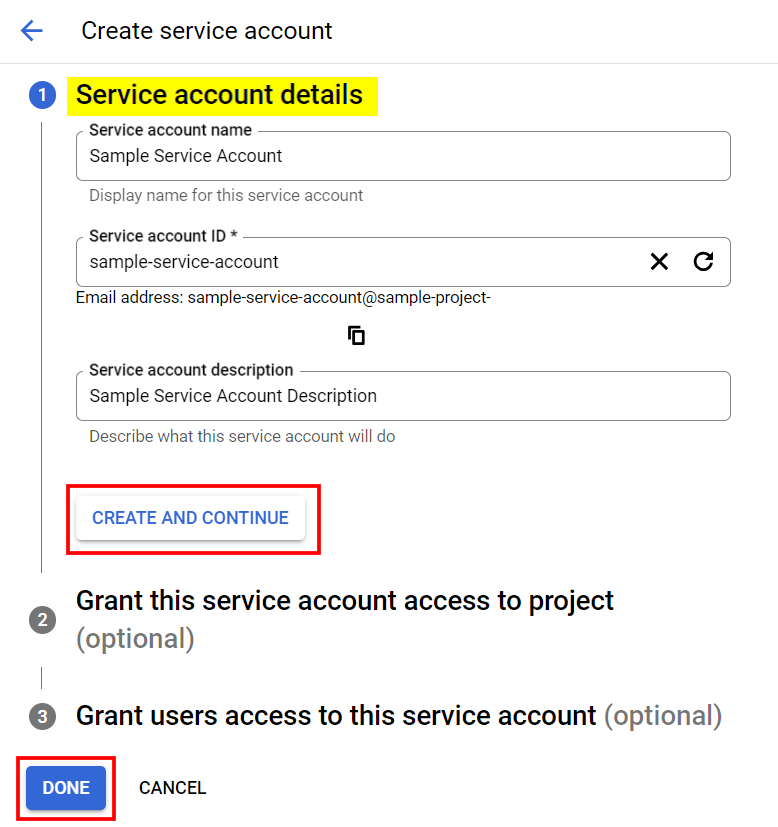
- Fill out the service account details, click the CREATE AND CONTINUE button, and then click DONE.
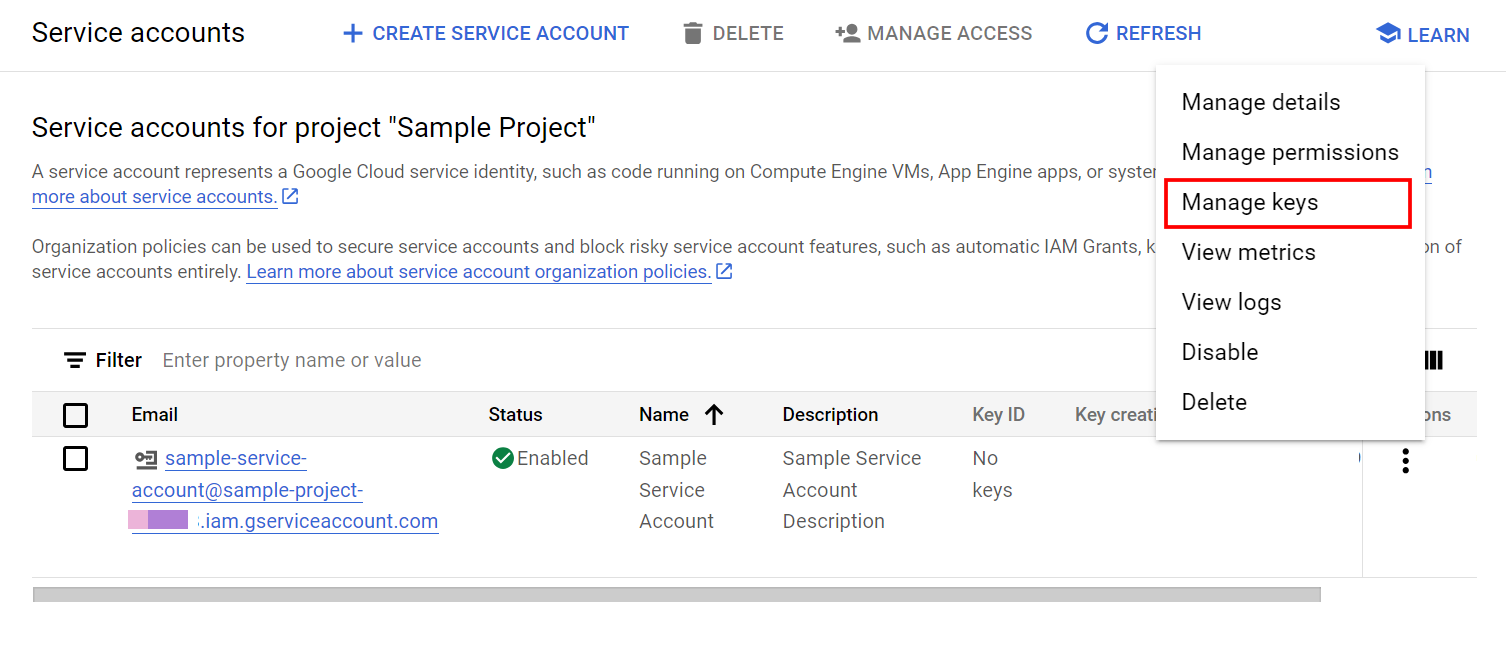
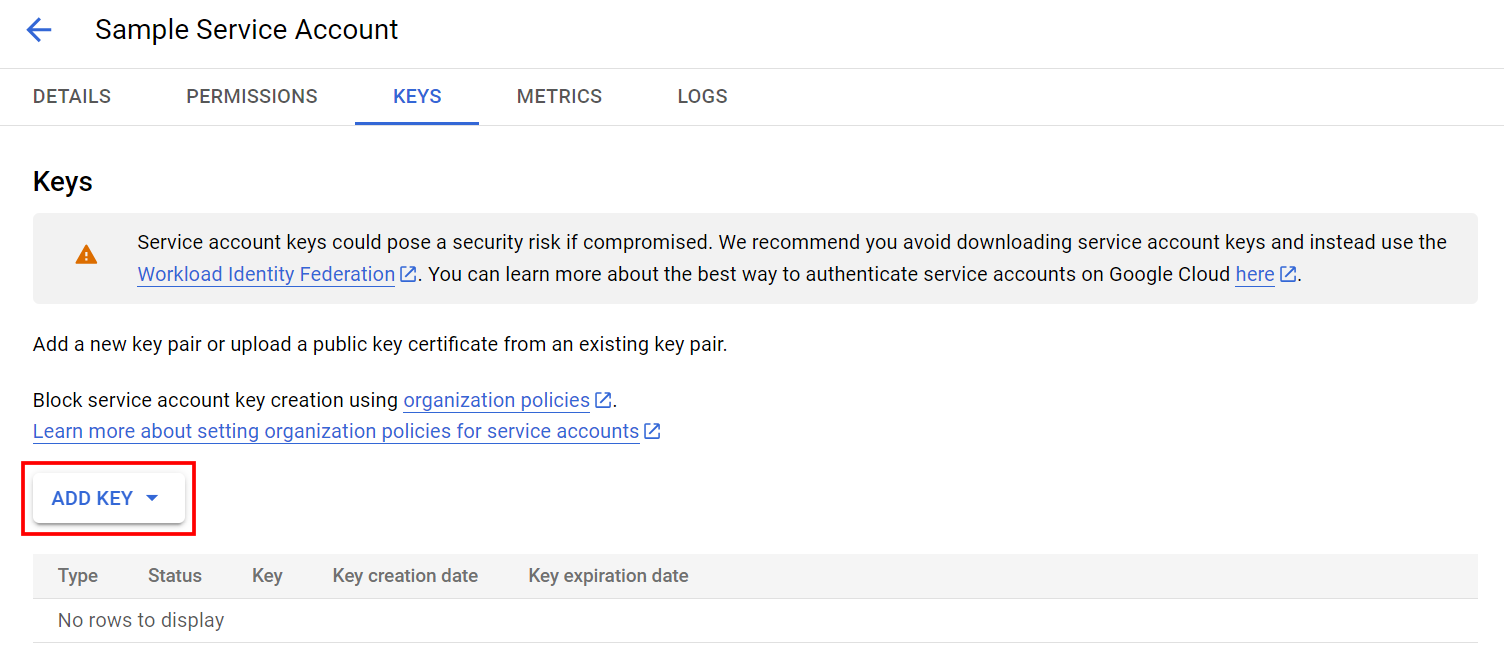
- Click the three dots corresponding to the service account details and select the Manage keys option.
- To add a new key, click the ADD KEY drop-down and select the Create new key option.
- Choose JSON as the Key type and click CREATE.
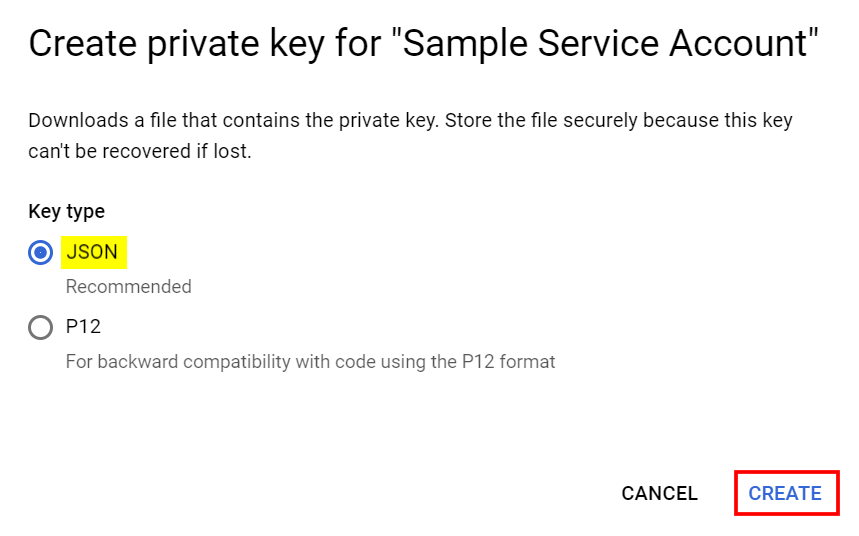
- A JSON file gets downloaded automatically. Save it properly to use in Step 2.
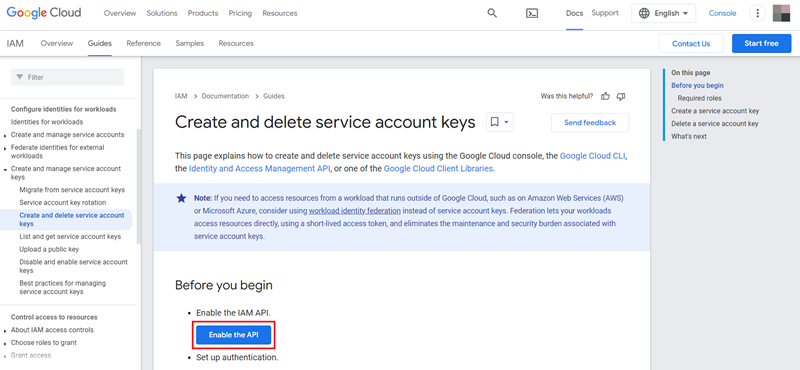
- Enable API Access: Follow the Create and delete service account keys documentation to enable the API access for your project.
Enable Google Analytics Reporting API
To enable the Google Analytics API, follow the steps:
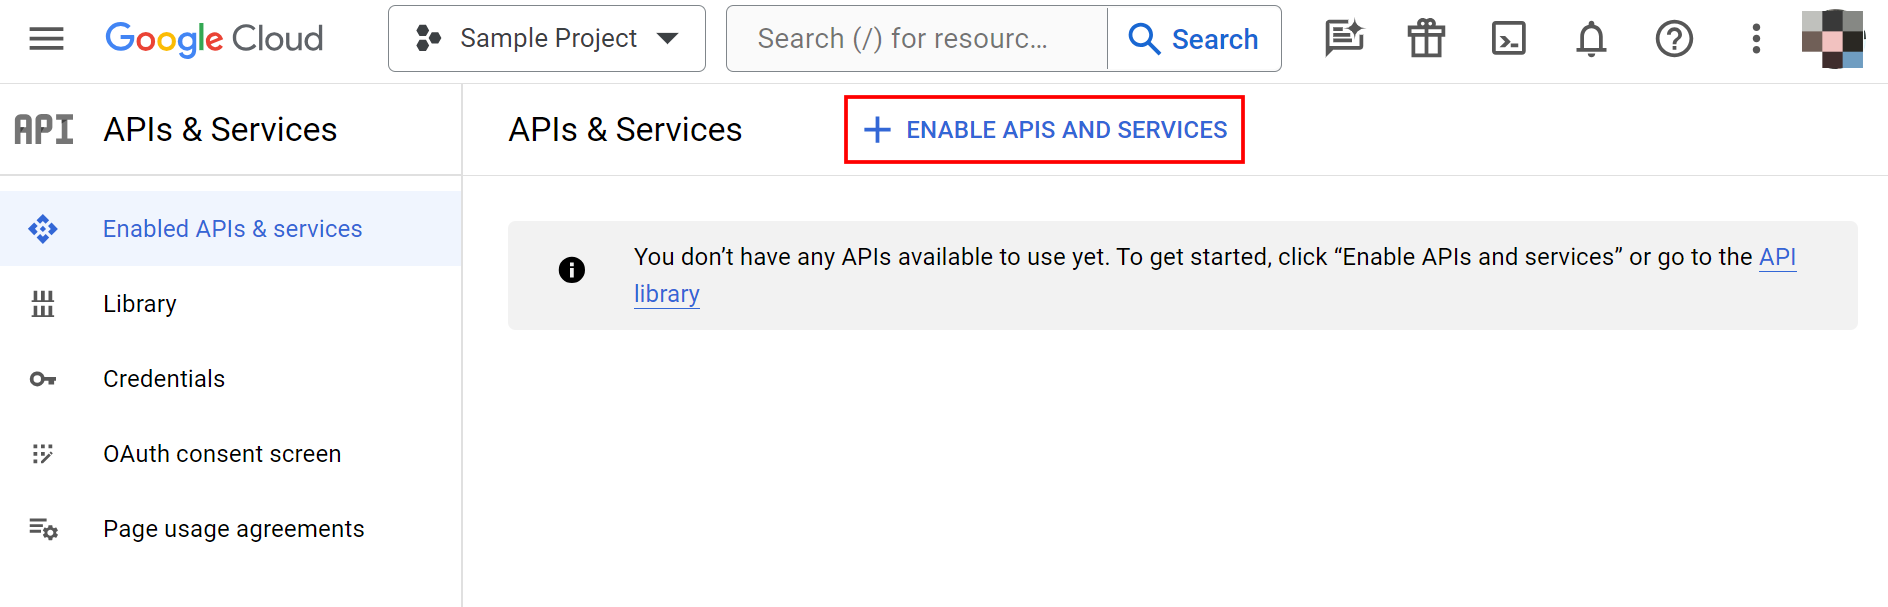
- Go to the APIs & Service dashboard in the Google Cloud Platform.
- Click the + ENABLE APIS AND SERVICES button on the top header.
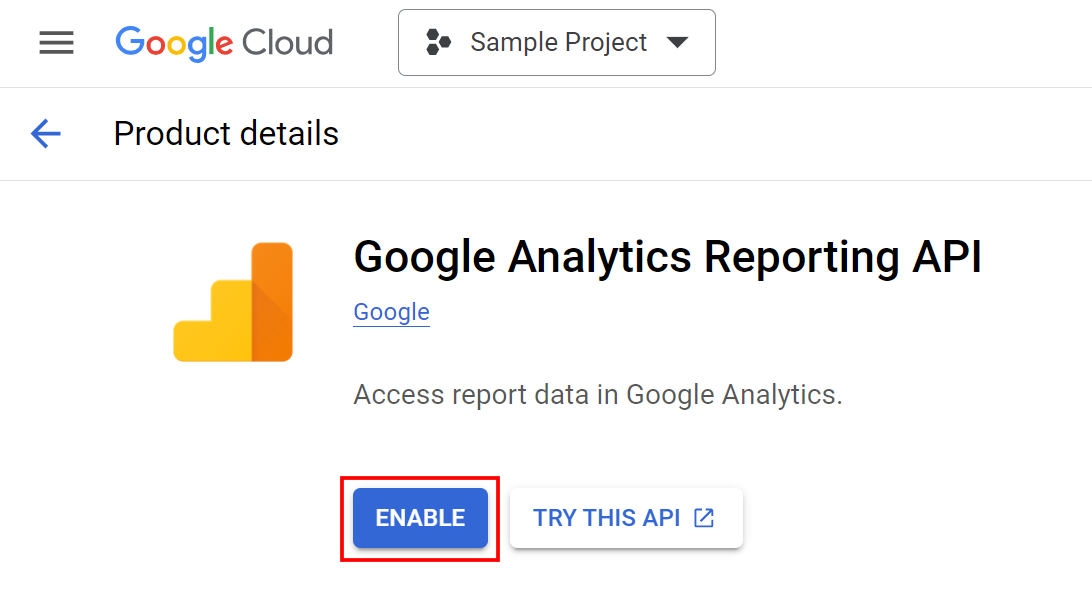
- In the search bar of the API Library page, type and select Google Analytics Reporting API.
- Click the ENABLE button to enable the Google Analytics Reporting API.
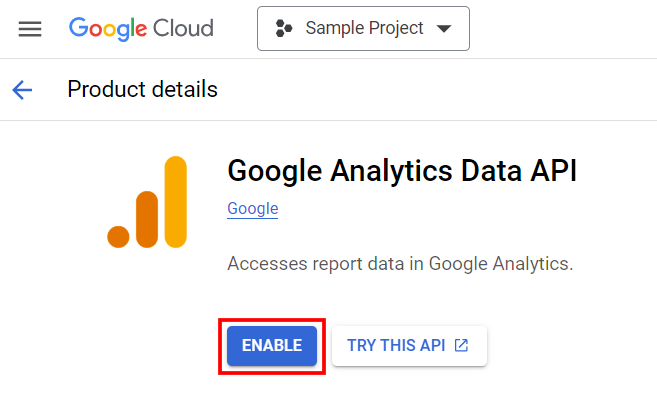
- Go back to the API Library page, type and search for Google Analytics Data API and select it.
- Click the ENABLE button to enable the Google Analytics Data API.
Add Service Account to Google Analytics
Follow the steps to add a service account to Google Analytics:
- Open the downloaded JSON file and copy the client_email value.
- Now, go to your Google Analytics account.
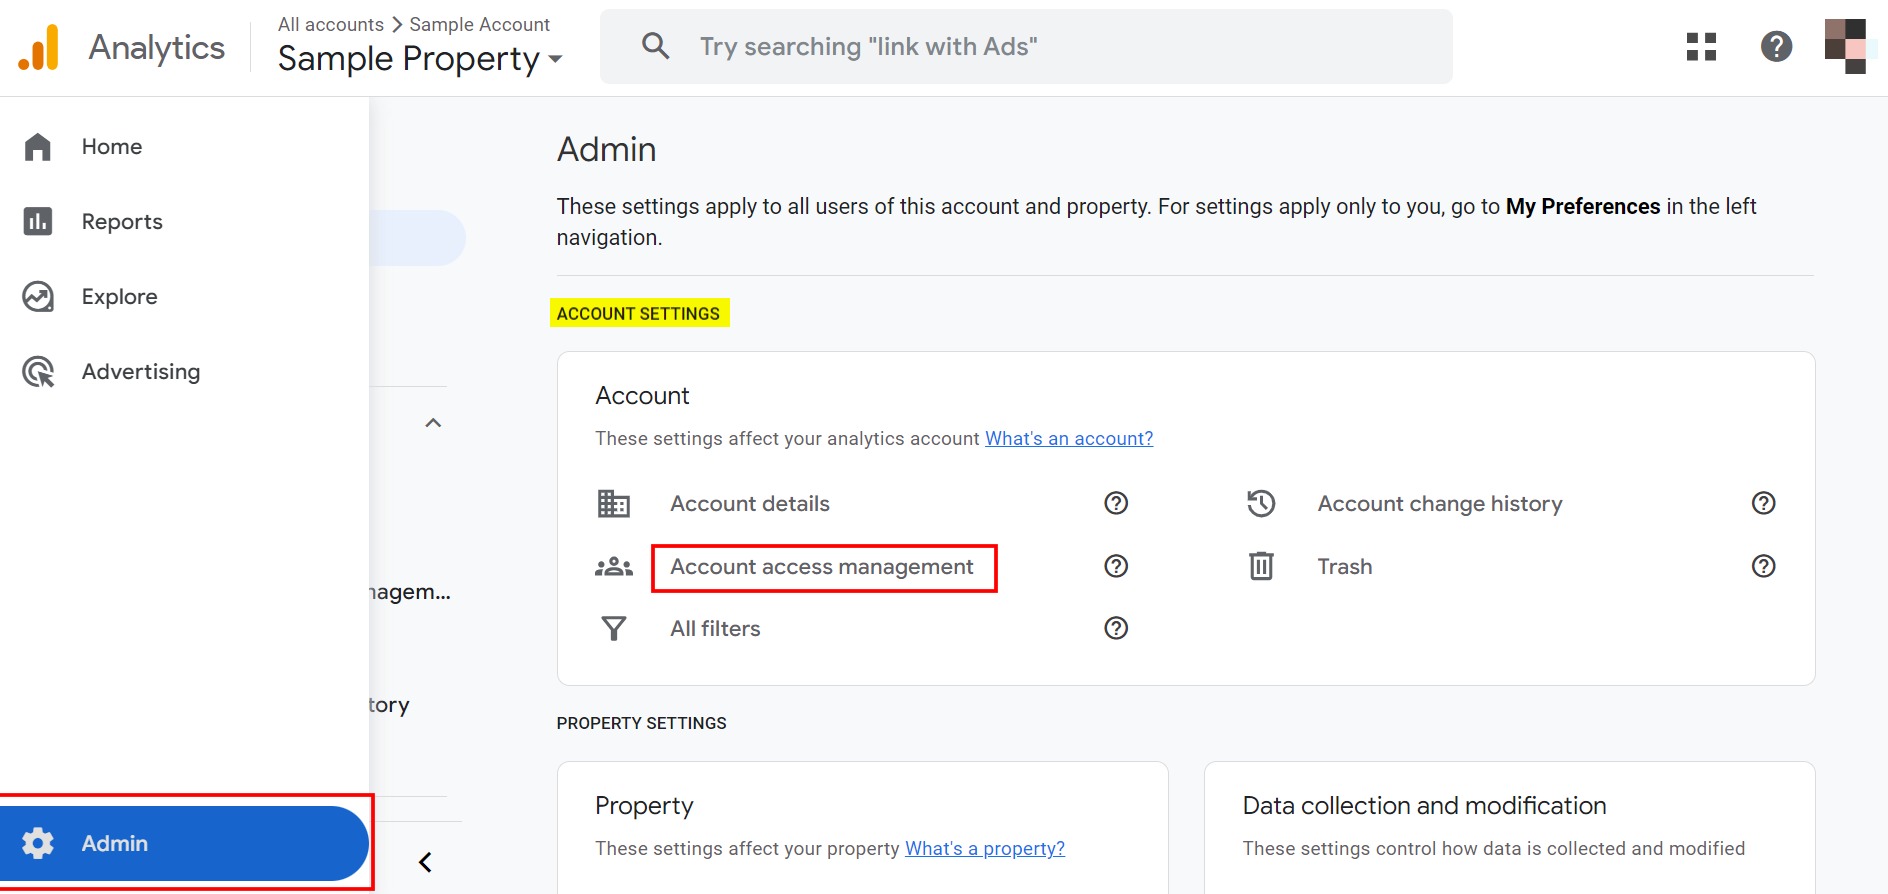
- In the left navigation panel, click Admin. Go to the Account Settings section and click Account access management to add users.
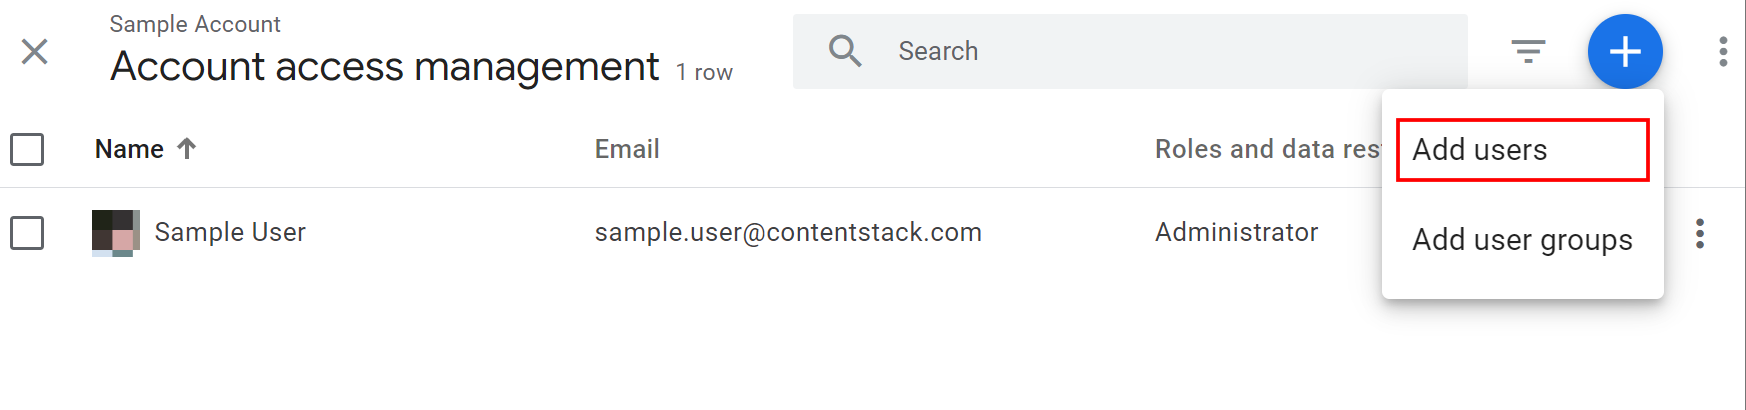
- Click the plus icon on the top-left corner of the screen and select the Add users option.
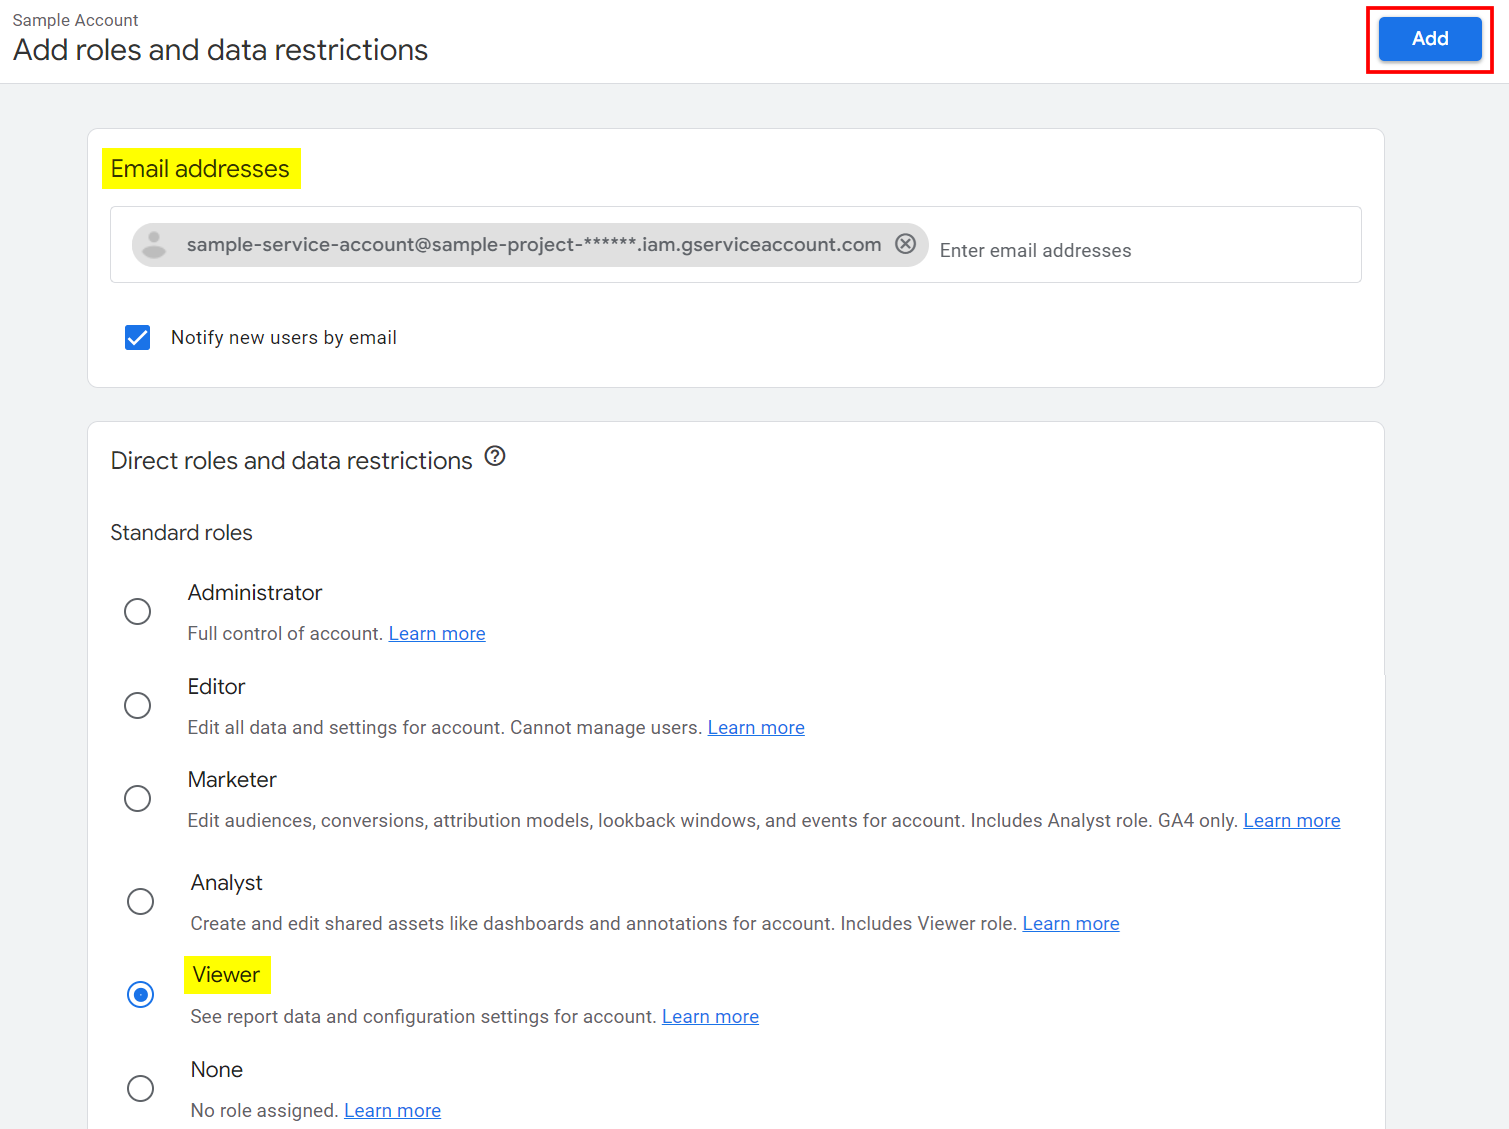
- In the Add roles and data restrictions modal, enter the client_email (retrieved from the JSON file) in the Email addresses text field, select Viewer under the Direct roles and data restrictions section, and click the Add button to add users to your analytics account.
Get the Property ID
To get the Property ID for the Google Analytics 4 version, follow the steps:
- Go to your Google Analytics account.
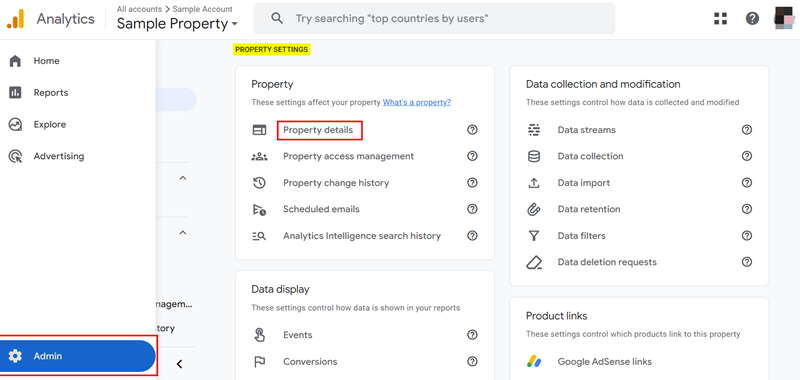
- In the left navigation panel, click Admin. Go to the Property Settings section and click Property details to get the property ID.
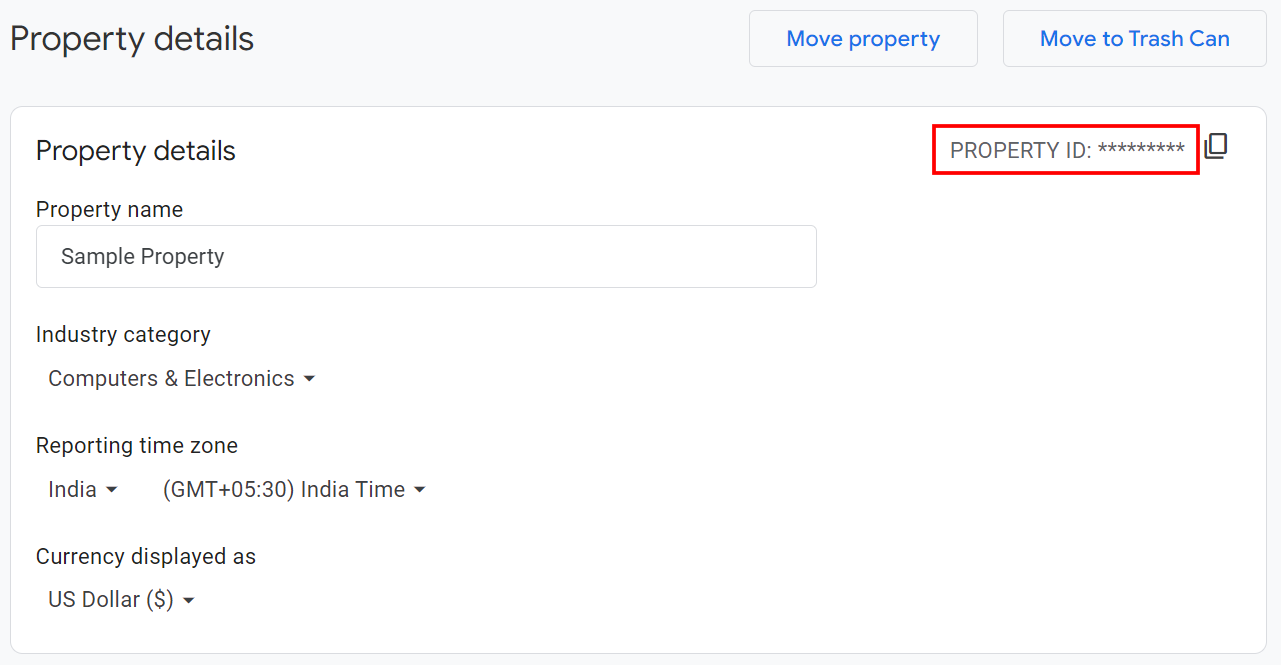
- In the top-right corner, you can view the PROPERTY ID. Copy it to the clipboard to use in Step 2.
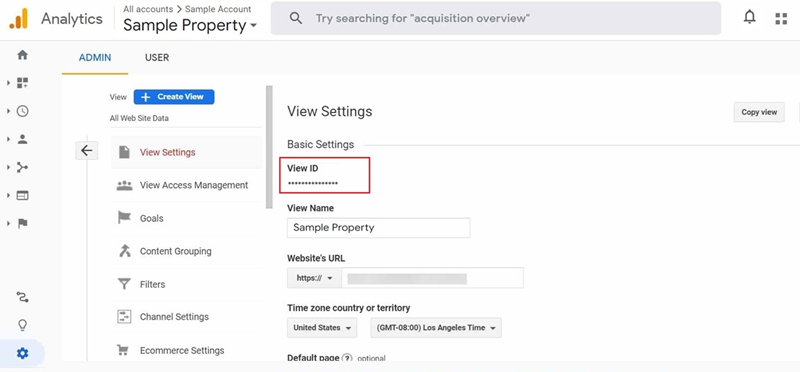
Get the View ID
To get the View ID for the Google Universal Analytics version, follow the steps:
- Go to your Google Analytics account.
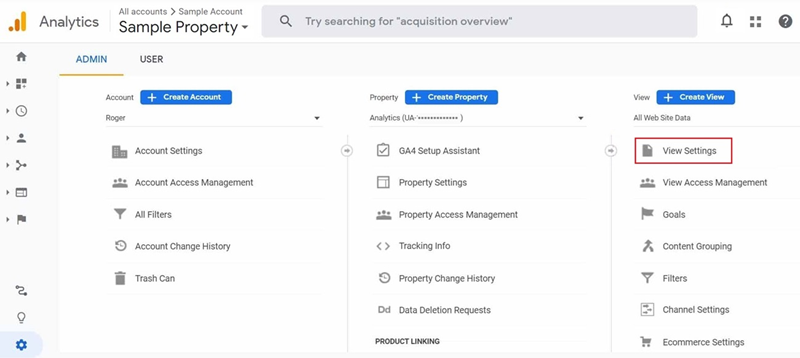
- Navigate to the Admin page. Under the View section, click View Settings.
- In the View Settings section, copy the View ID to the clipboard to use in Step 2.
- Create a Project: Go to the Google Cloud Console and click CREATE PROJECT to create a new project.
-
Install and Configure the Google Analytics App
Follow the steps below to install the application in Contentstack.
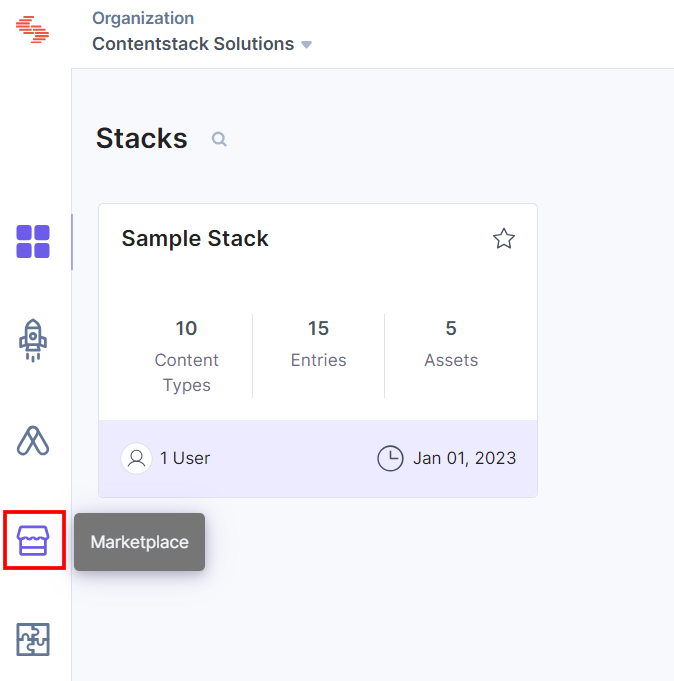
- Log in to your Contentstack account.
- In the left-hand side primary navigation, click the Marketplace icon to go to the Marketplace.
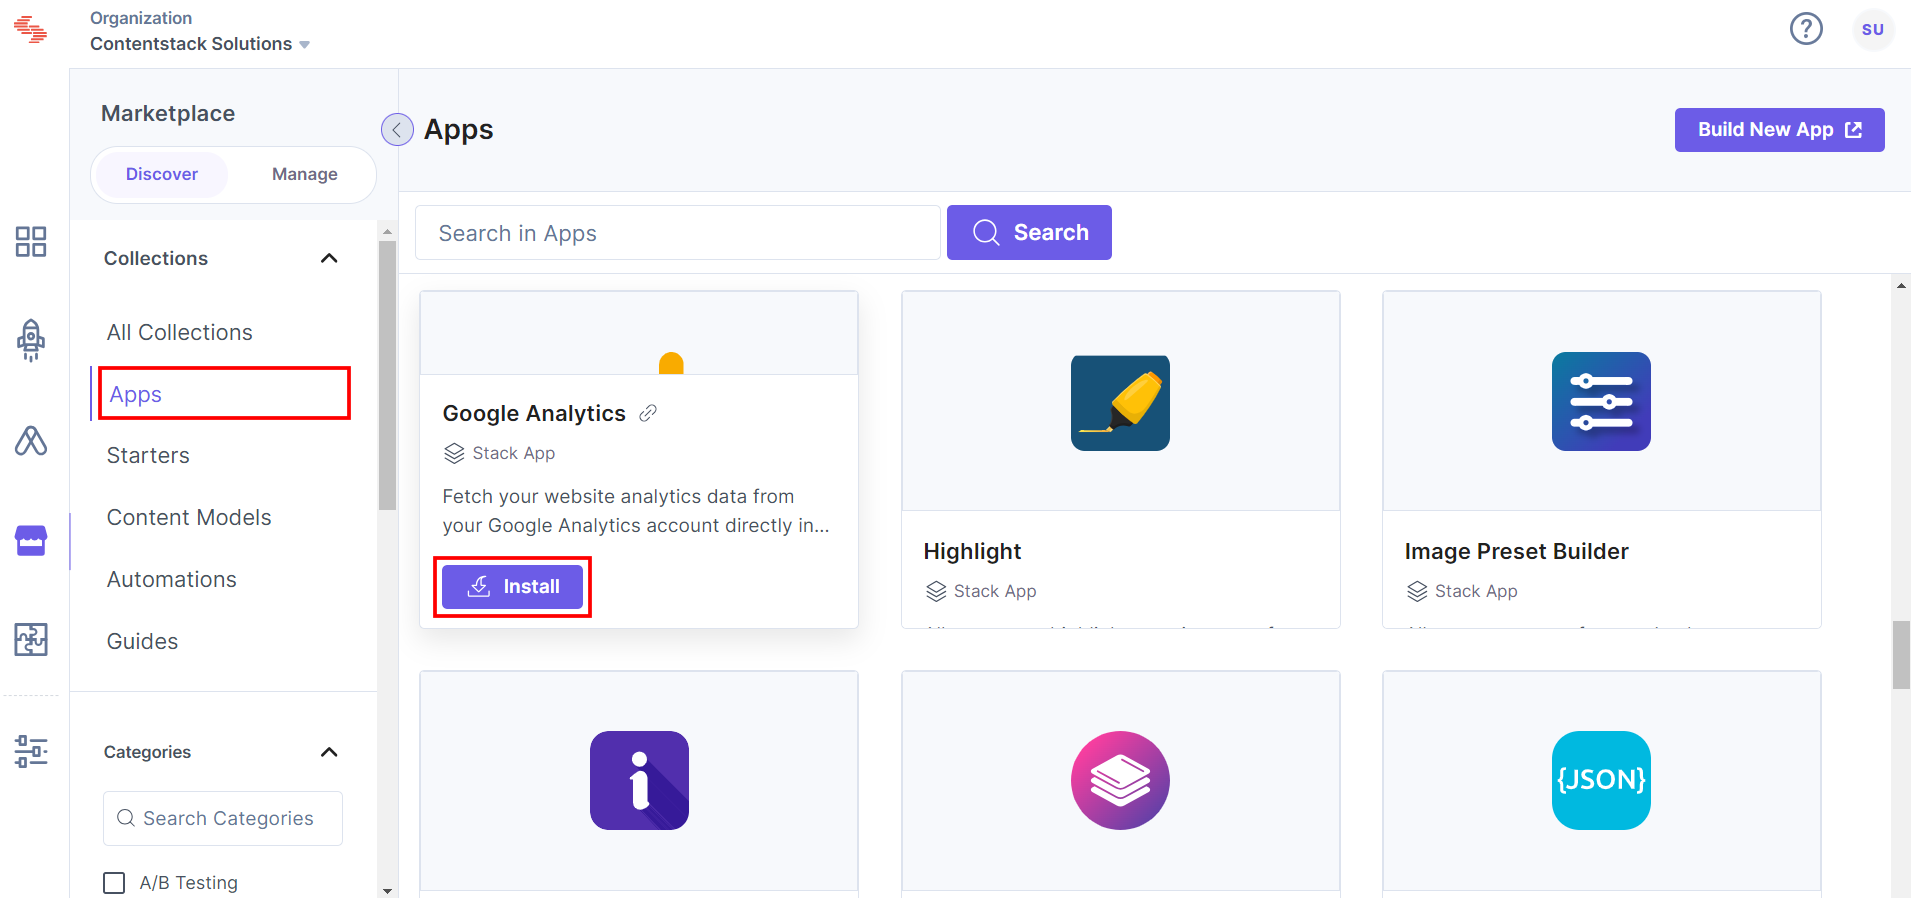
- Click Apps from the left panel.
- Within the Marketplace, you can see all the apps available. Hover over the Google Analytics app and click Install.
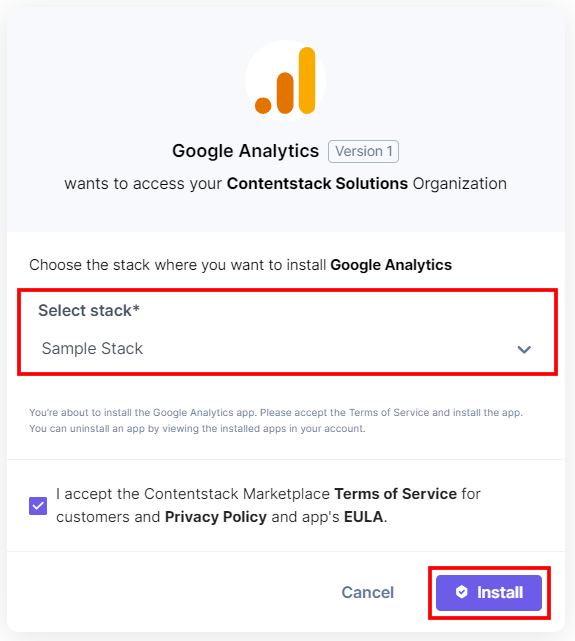
- In the popup window, select the stack where you want to install the Google Analytics app, accept the terms of service and click the Install button.
- You can choose to use Google Universal Analytics or Google Analytics 4 with the latest Marketplace app version.
- On the Configuration screen, choose the Google Analytics solution you prefer:
- Universal Analytics: To access the universal analytics, enter the following details:
View ID: Enter the View ID retrieved in Step 1.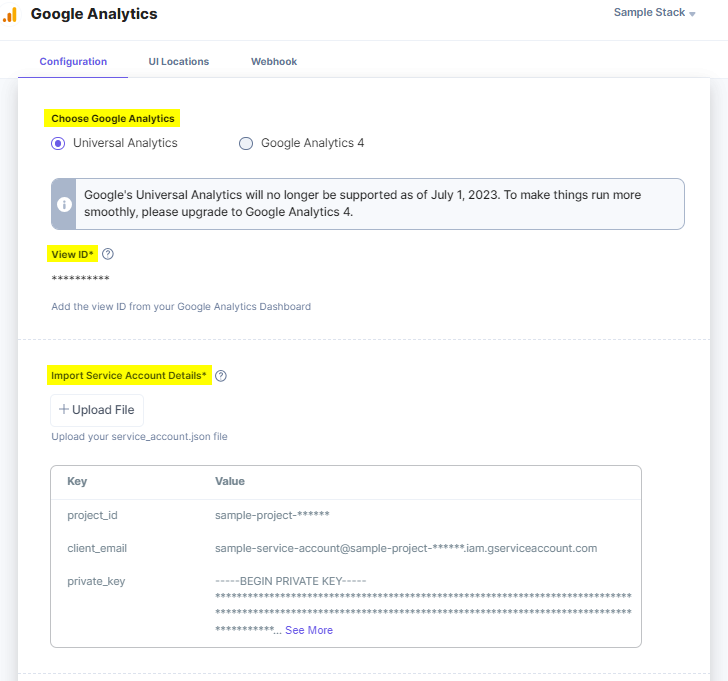
- Google Analytics 4: Contentstack now supports Google Analytics 4 in the latest app update as an advanced feature. To configure Google Analytics 4 into your stack, enter the following details:
Property ID: Enter the Property ID retrieved in Step 1.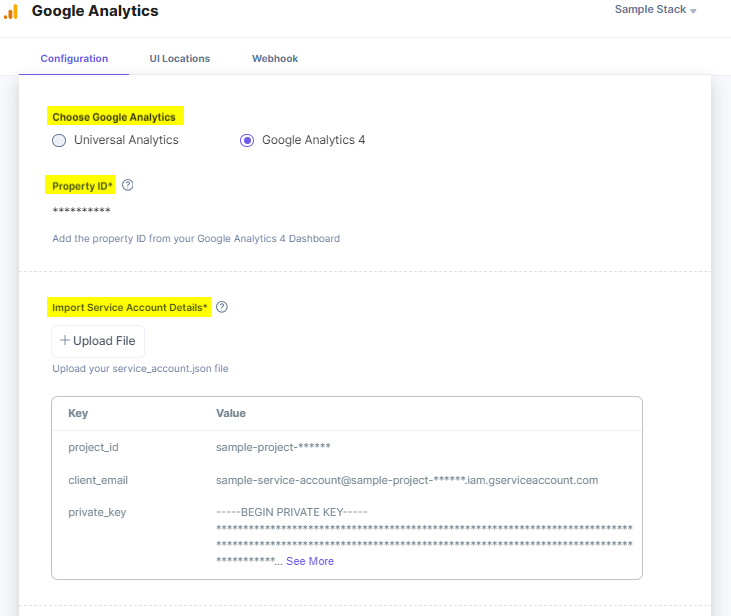
- Import Service Account Details: Upload the service account details (service_account.json file) retrieved in Step 1.
Note: The project_id, client_email, and private_key are mandatory fields in JSON file which cannot be edited.
- Universal Analytics: To access the universal analytics, enter the following details:
- After adding the configuration details, click the Save button.
- On the UI Locations tab, you can see the predefined app locations. You can use the toggle button corresponding to each UI location to enable or disable it based on your requirements.

- If the webhook is enabled for your app, you can view the webhook logs under the Webhook tab.
Additional Resource: For more information on UI location and webhooks, please refer to the Installed Apps guide.
- Click the Open Stack button to start using the Google Analytics application.
-
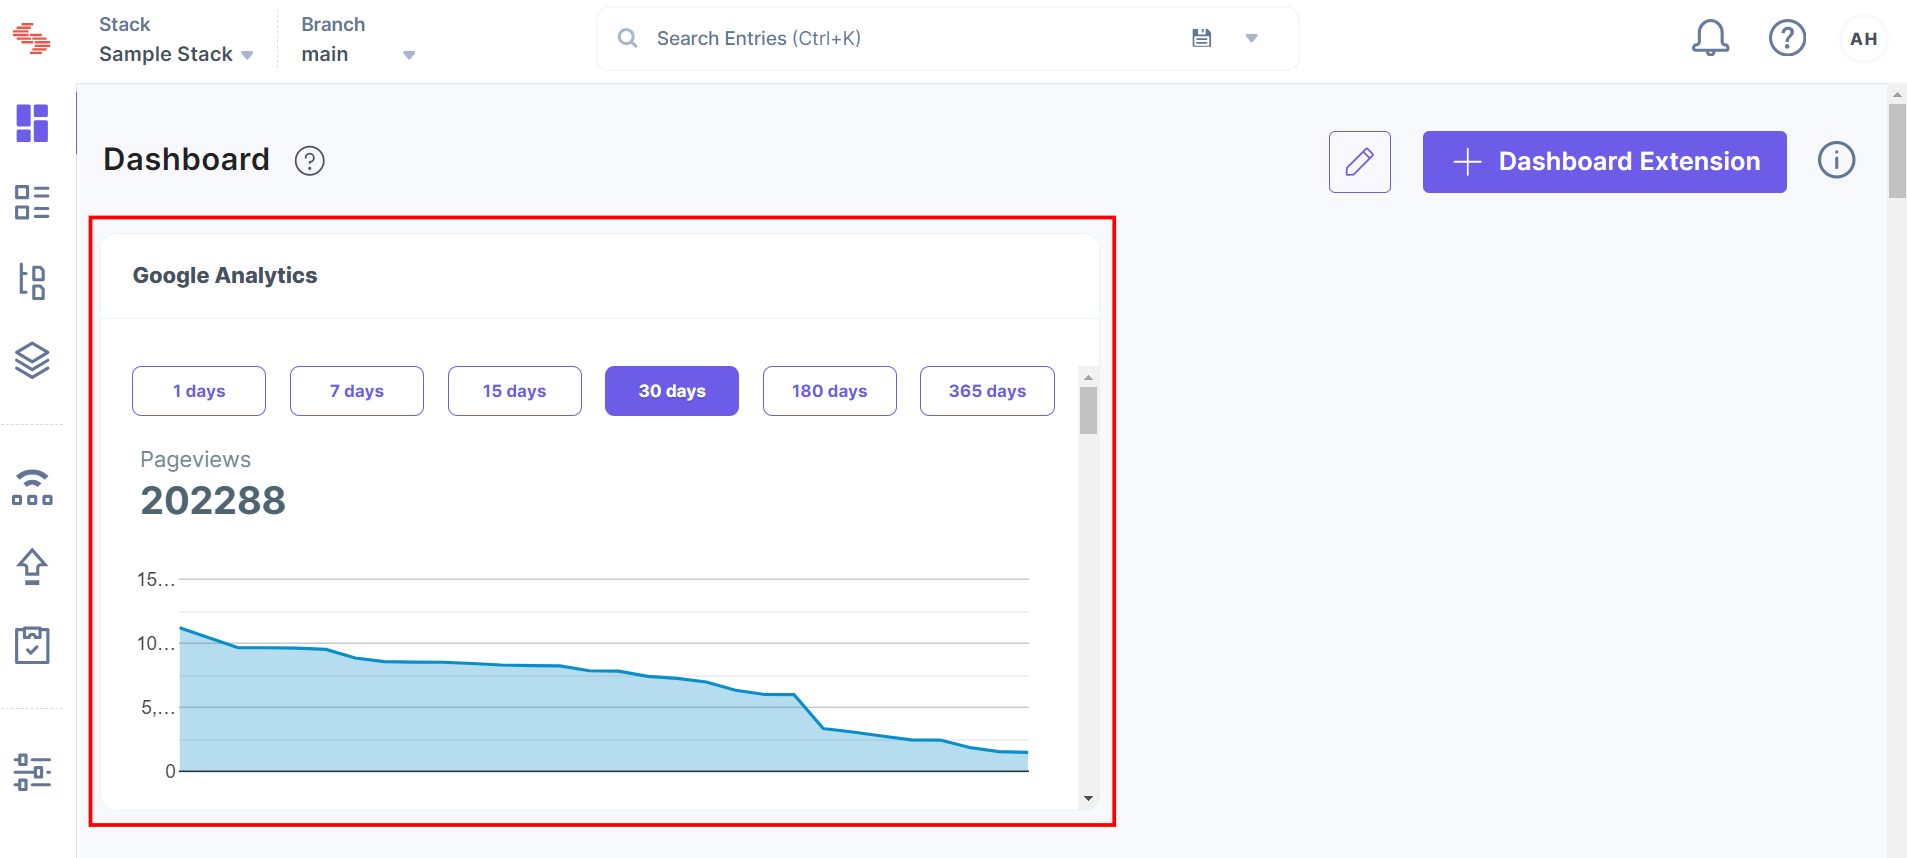
Use the Google Analytics Dashboard Widget
- Go to stack Dashboard to view the Google account analytics. By default, it displays the data for 30 days.
- You can select the number of days for which data should be displayed.
-
Use the Google Analytics Sidebar Widget
To use the Google Analytics app within an entry of your stack, follow the steps given below:
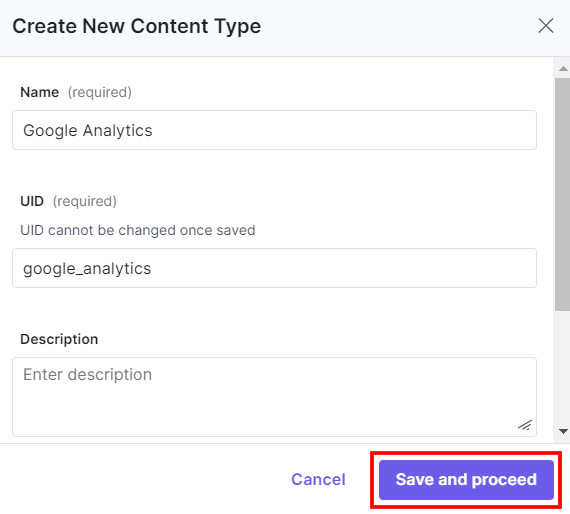
- Go to your stack, click the Content Models icon in the left navigation panel, and click the + New Content Type button.
- Create a content type by adding relevant details as displayed below:
- In the Content Type Builder page, add a URL field in your content type by clicking the Insert a field link represented by a + sign.
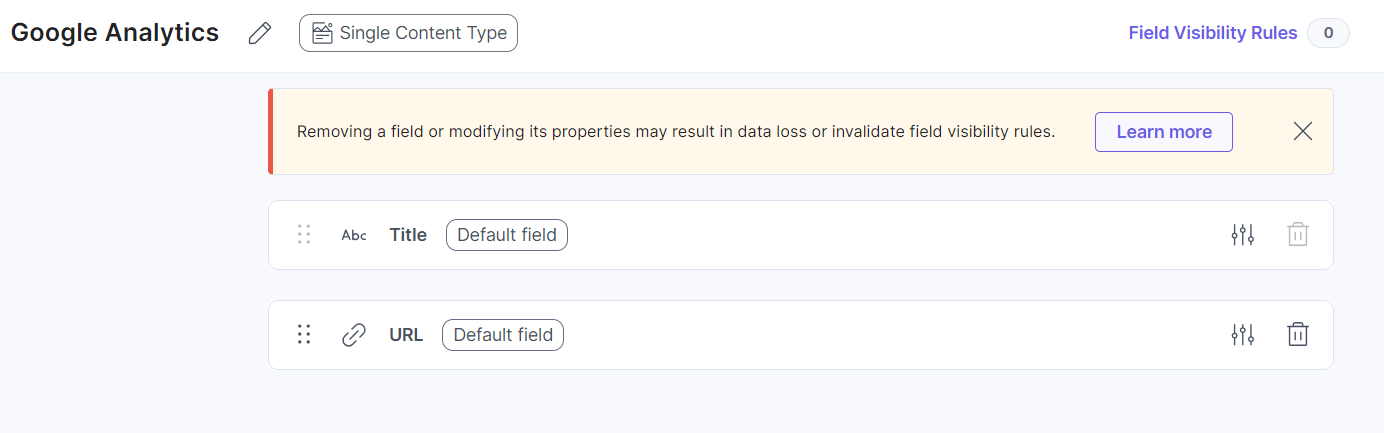
- After adding the fields, click Save or Save and Close to save your changes.
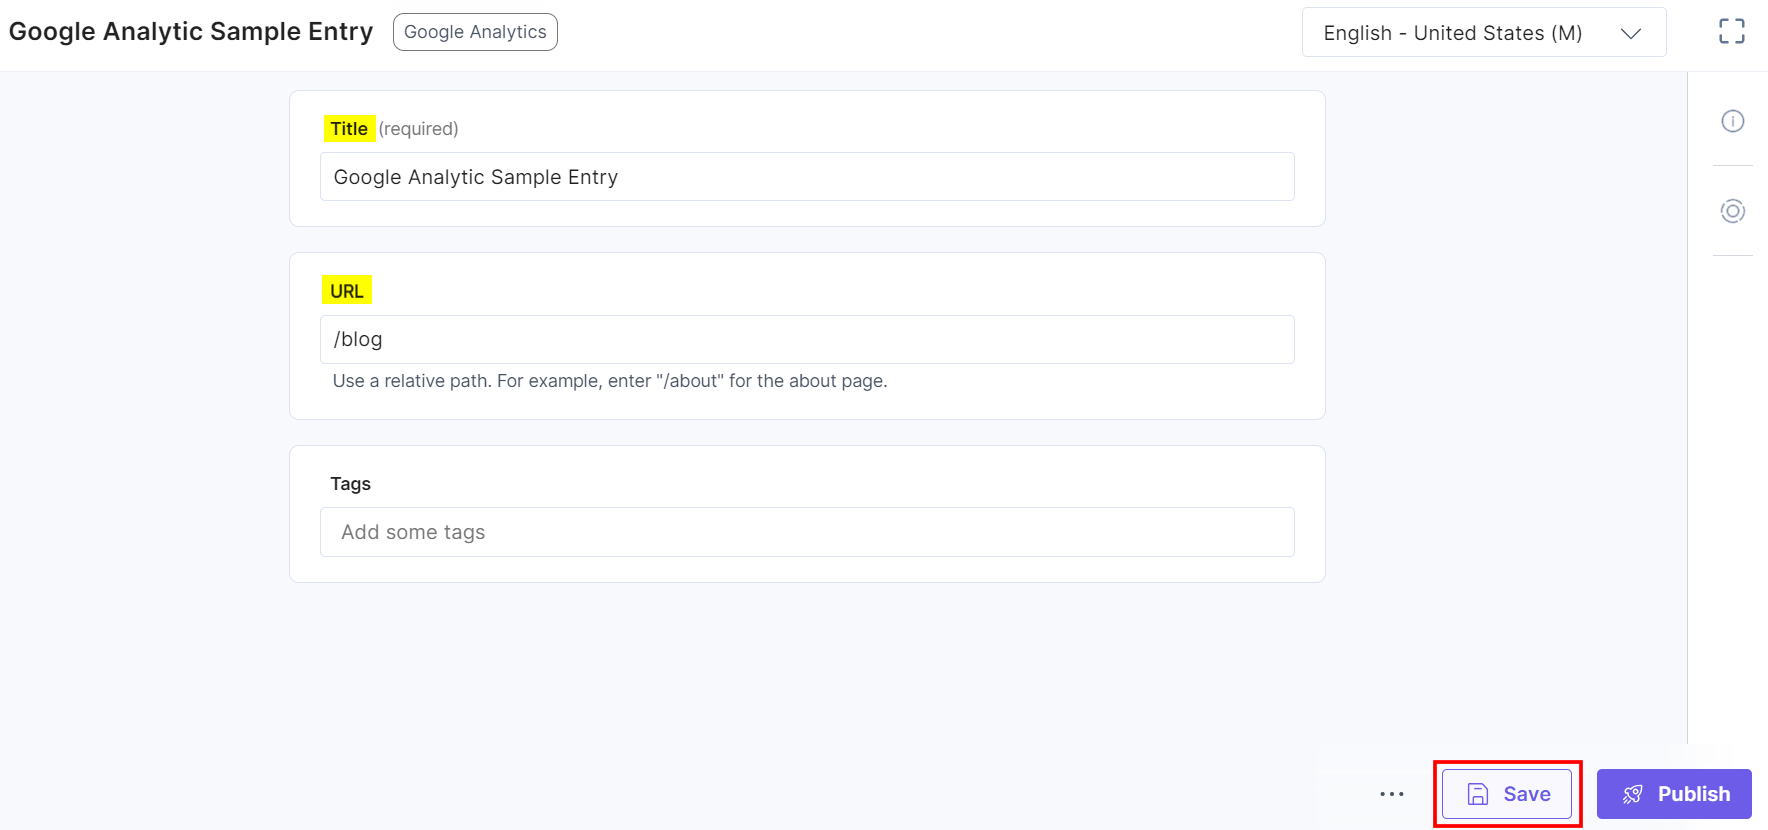
- To use the Google Analytics app in the sidebar widget, create an entry for this content type.
- In the Title field, enter a suitable title for your entry. In the URL field, enter the URL of the page for which you want to take the Google Analytics data, and then Save the entry.
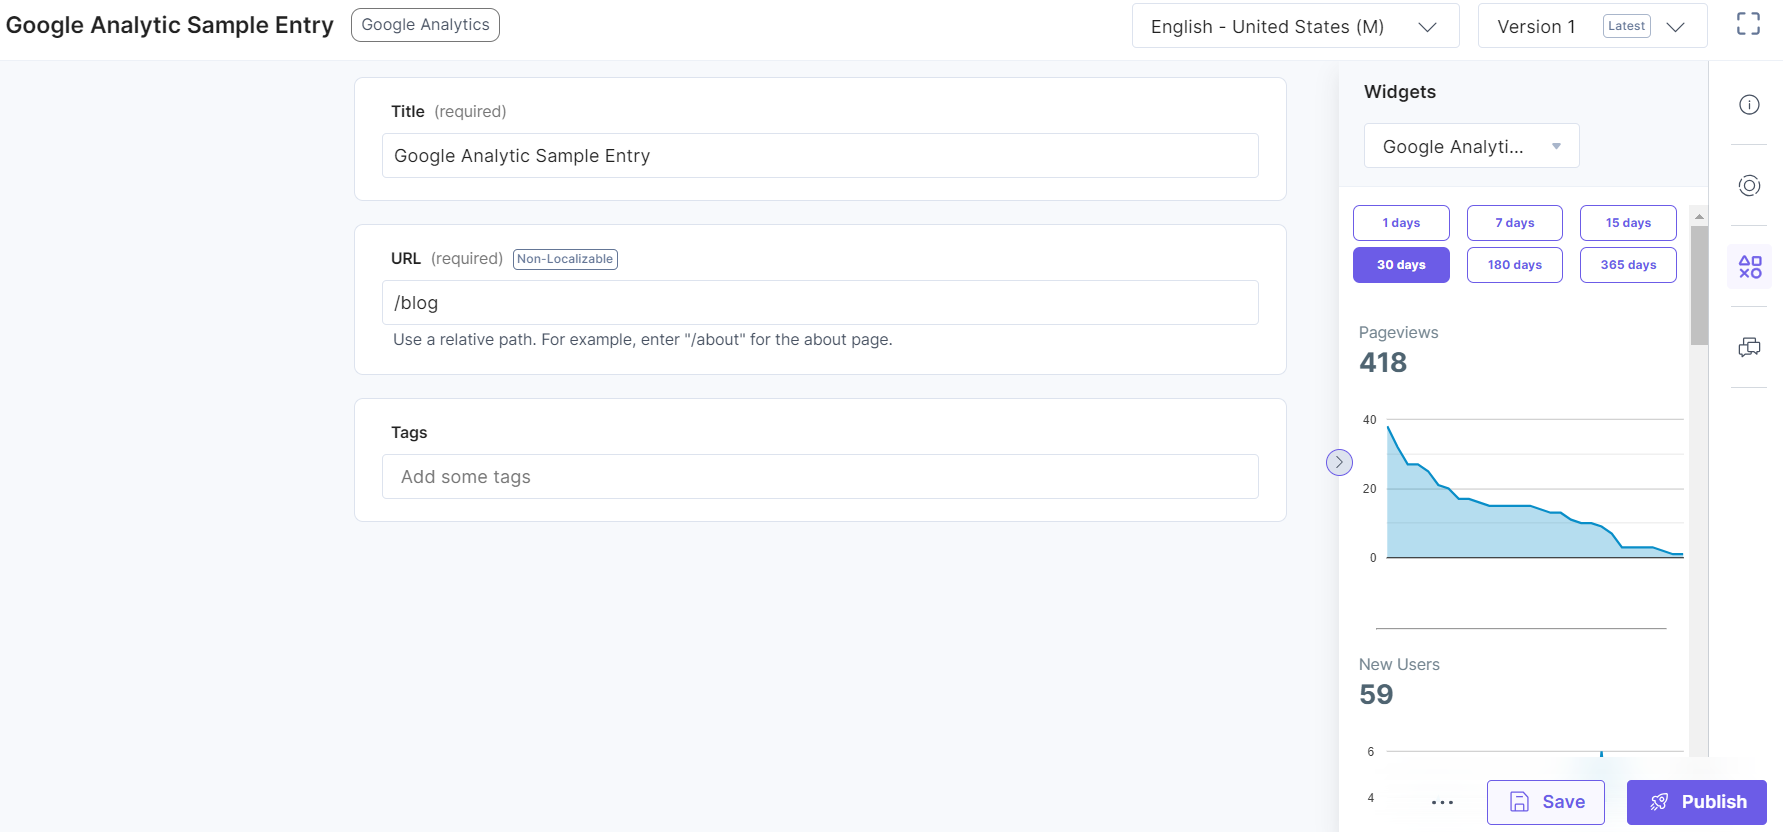
- In the right navigation panel, click Widgets and select the Google Analytics app to view the analytics.
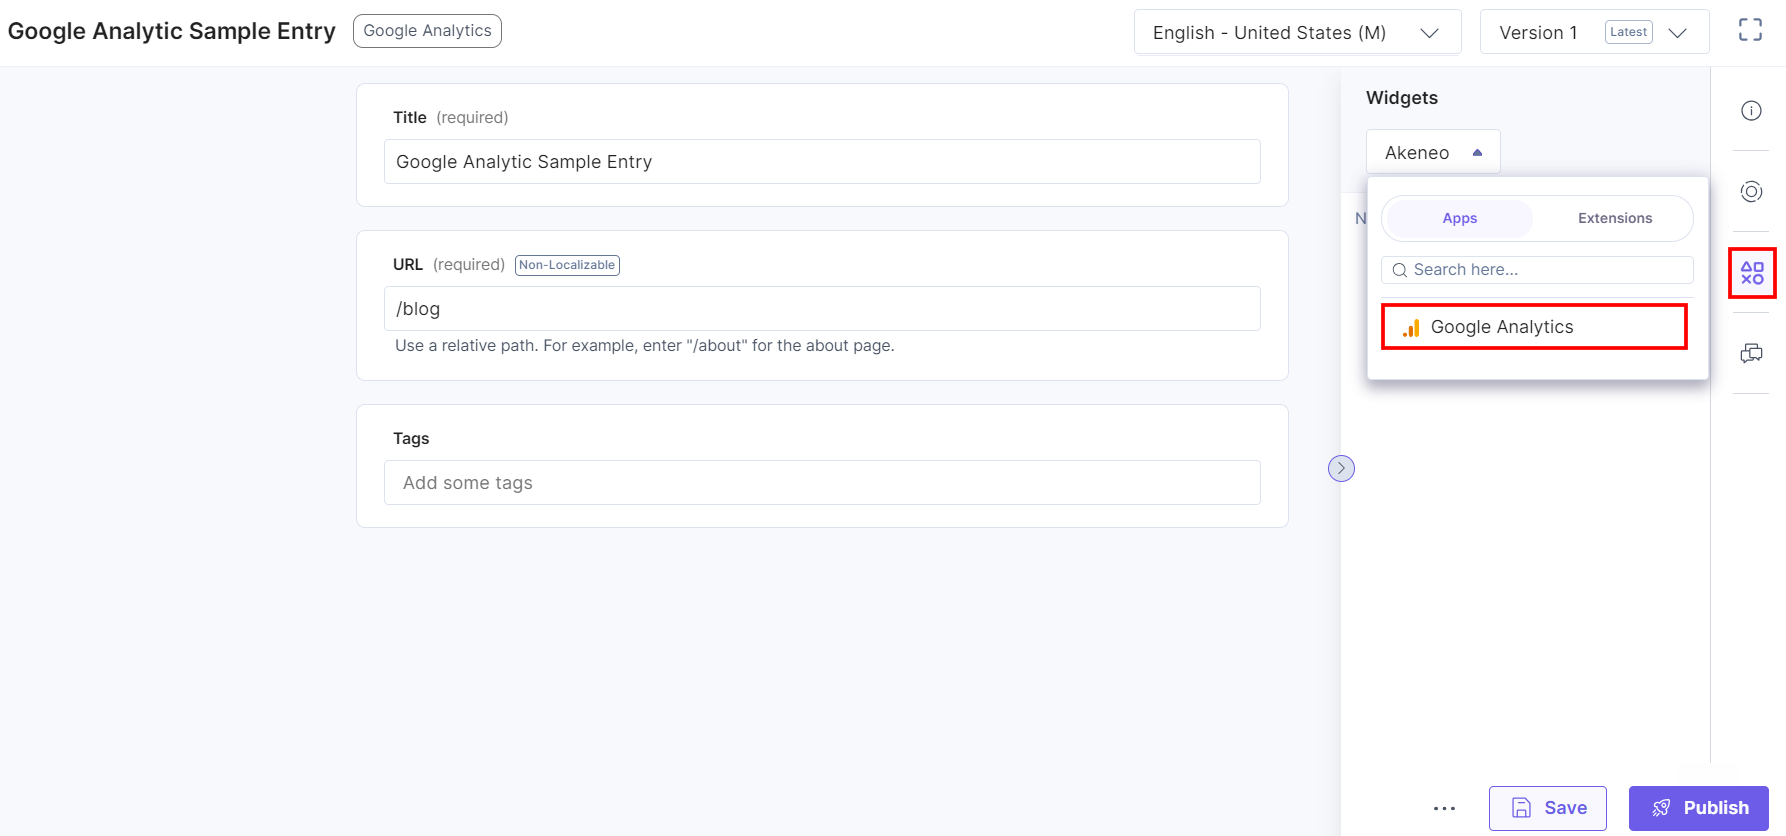
Note: This displays the Google Analytics data for the specific page.
- You can select the number of days for which data should be displayed for the specific page.
More articles in "Analytics"
