

.svg?format=pjpg&auto=webp)
.svg?format=pjpg&auto=webp)
.png?format=pjpg&auto=webp)


.png?format=pjpg&auto=webp)
Setting up Translation System with Contentstack Webhooks, Phrase, and AWS Lambda
Phrase is a powerful Computer-assisted Translation (CAT) tool for translating general documents. This cloud-based platform allows businesses to process and translate hundreds of languages in different formats.
Phrase can be integrated with other systems and in this document, we will create a translation system using Contentstack Webhooks, Phrase, and AWS Lambda.
Additional Resource: Translation systems can also be set up using Contentstack Workflows and AWS Translate, to know more, read our guide on how to Set up a Translation System with Contentstack Webhooks and Workflows, AWS Lambda, and AWS Translate.
A brief overview of the process: When the workflow stage of entry changes to Send to Translation a webhook is triggered. Phrase will translate the content of the entry and once the translation is done, AWS Lambda will change the workflow stage to Review.
Here are the steps required to set up this translation system:
- Set up the Essentials
- Set up Workflows for Translation
- Create a Phrase account
- Set up Lambda function for translation
- Trigger a webhook to initiate translation
Prerequisites
- Working knowledge of AWS API Gateways
- Access to the AWS environments such as AWS Lambda, AWS API Gateway, and AWS IAM
- Contentstack account
- Phrase account
-
Set up the Essentials
First, create a stack, and add a content type (in our example it is “Phrase”),and add entries to it.
Note: Ensure the field UID (body, multi_line, etc) in your code that you want to translate should match with the ones specified in the content type. In our example, it's title and body.
Next, create languages (locales) in your content type (Phrase). In our example, we have added two languages:
- English [en-us] which is the source language
- Japanese [ja] is another language which will be our target language
Note: Ensure that the languages you add are supported by Phrase. Also, ensure that you have localized the Japanese (ja) locale else the entry in your Japanese locale will not be translated.
Once you have these configured, then you're ready to begin the integration process for translation.
-
Set up Workflows for Translation
To set up workflows for the translation process, log in to your Contentstack account and perform the following steps:
- Click the “Settings” icon (press “S”) on the left navigation panel and click on Workflows (press “alt + F” for Windows OS, and “option + F” for Mac OS to access workflows).
- Click on + New Workflow.
- Add three stages (for example, Draft, Sent to Translation, and Review).
Read more on how to set up workflows.
Once the editor changes the workflow stage to Send to Translation, the webhook will be triggered and call the AWS Lambda function. The Lambda function will get the content translated from Phrase and will change the workflow stage to Review.
We will need the workflow stage UID which we will enter when we set up our Lambda Function. This UID will instruct Lambda to change the workflow stage when the content is translated to Review.
So proceed as follows to get the Review stage UID:
- Once you have created the workflow, it will show up like this:

-
Open Postman or any other API collaboration & development platform and make a GET request on any of the following URL. Enter the Workflow ID (highlighted above) at the end of the URL:
https://api.contentstack.io/v3/workflows/{YOUR WORKFLOW UID}
Note: For Europe region, the baseURL should be changed to https://eu-api.contentstack.com from https://api.contentstack.io. Similarly, for Azure NA region, change it to https://azure-na-api.contentstack.com, and for Azure EU region, change it to https://azure-eu-api.contentstack.com.
You will get the following response: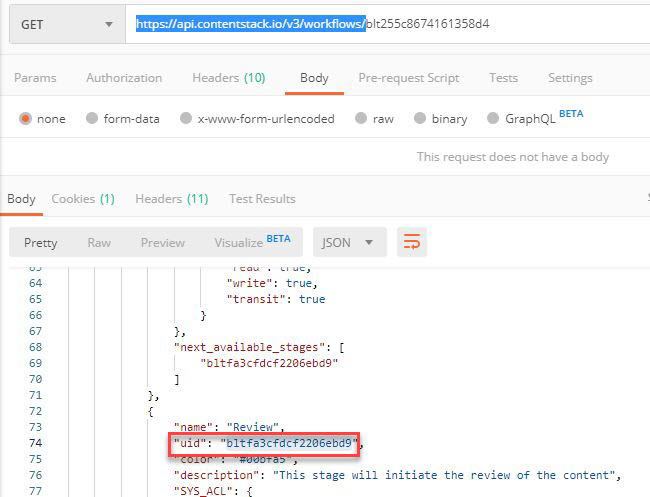
Tip: Make note of the UID highlighted in the above screenshot. We will need this in Step 4 when we set up our Environment Variable in the Lambda function.
-
Create a Phrase Account
Phrase will translate the content into the target language. So create an account in Phrase by following the below steps:
- Sign up with Phrase.
-
You can choose from the different plans they offer. For now, click on Free Trial at the top right side of the screen.
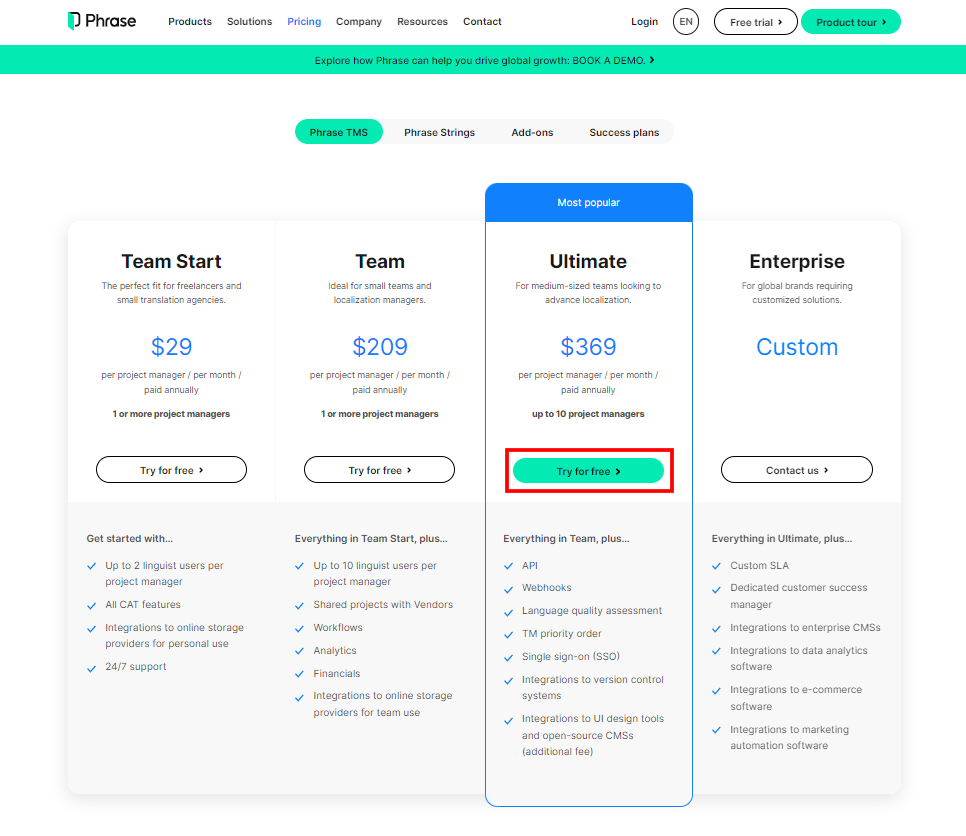
Note: Avoid selecting the personal plan as it doesn't provide any arrangement for making API calls.
- On the Sign Up page, keep the settings as shown in the screenshot below and click on Sign Up with Email:
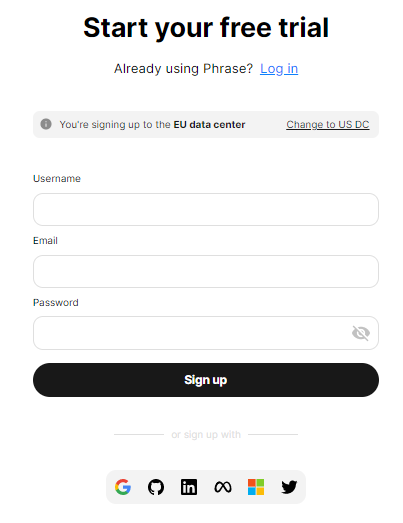
- On the next screen, enter your email, username, and password and click on Sign Up.
With this, we have created an account in Phrase. Let's move ahead and create the Lambda function
-
Set up Lambda Function for Translation
Perform the following steps to set up your AWS Lambda function:
- Login to your AWS Management Console, select AWS Lambda Service from the service list.
- Click on the Create Function button, and then the Author from Scratch option.
- Provide a name to your lambda function inside the Function name field, select Node.js 14.x as your Runtime language, and click on the Create function button.
- Now in the Code source section, click on the Upload from dropdown and select .zip file.
- In the Upload a .zip file modal, click on the Upload button, contact our support team at support@contentstack.com to get the sample code. Then, click on Save.
- In the Runtime settings option, keep Handler as index.handler.
- Scroll up and select the Configuration tab.
- Click on the Environment Variable option on the left and add the following variables inside it by clicking on Edit and then Add environment variable.
- Next, set up the Environment variables as follows:
.png)
CT_User: {Enter your Contentstack user ID}
CT_Pass: {Enter your Contentstack password}
memUser: {Enter your Phrase user name}
memPass: {Enter your Phrase password}
WorkFlowStage: {Enter the UID of the Review stage that we generated in step 2}
Content_Type_Uid: {Enter the UID of your content type}
source_Locale_Lang: {Enter the source local language, for example “en-us”}
targetLocale: {Enter the target locale you created in step 1, in our example it is "ja"}
targetTranslateLang: {Enter the target language of Phrase, in our example, it is "ja"} - Once you have done these settings, click on Save.
We have now set up our Lambda Function, we will now proceed with creating the API gateway to get the URL where our webhook will issue notifications.
- Log in to AWS Management Console and select API Gateways from the services list.
- Click on the Getting started or Create API button (depending on whether you have already an API configured or not).
- On the Choose an API type page, go to the REST API option (the public one) and click on Build.
- On the next page, ensure that Create new API section has New API checked. Under the Settings section, enter the API name and click on Create API.
- On the next page, from the Actions dropdown in Resources, select Create Method.
- From the resultant dropdown, Select POST and click on the checkmark.
- Select your Lambda function in the Lambda Function field and click on Save.
- You'll get the Add Permission to Lambda Function pop-up, click on OK.
Next, we need to deploy our API. Follow the steps given below:
- Again, from the Actions drop-down in Resources, select the Deploy API option.
- Select [New Stage] in the Deployment stage and enter prod (or anything you want to identify this stage as) in the Stage name.
- Click on Deploy.
On the next screen, you'll get your deployed API under Invoke URL. We'll use this URL in the next step when we create a webhook to initiate notifications to our Lambda function.
-
Trigger a Webhook to Initiate Translation
To create and set up a webhook in Contentstack, log in to your Contentstack account and perform the following steps:
- Click the “Settings” icon (press “S”) on the left navigation panel and click on Webhooks (press “alt + W” for Windows OS, and “option + W” for Mac OS).
- Click on + New Webhook.
- On the Create Webhook page, fill up the Name field (for example, “Translation”). In the URL to notify field, enter the URL that you generated when you deployed your APIs, in the previous step.
- Scroll down to the Conditional View section for creating a trigger for the webhook as shown below:

- Once done, click Save to save your settings.
With this, we have set up the webhooks for triggering notifications.
-
Try Out the Set-Up
We are now ready to test the setup.
- Go to your English (en-us) entry and change the workflow stage by selecting Send to Translation from the WORKFLOW DETAILS section on the right.
- Now select Japanese from the locale drop-down and you should see your entry translated in the target language, Japanese, and the workflow stage changed to Review.
Tip: If you still cannot see your entry translated in Japanese, just hard refresh the page (Ctrl+Shift+R).
More articles
