

.svg?format=pjpg&auto=webp)
.svg?format=pjpg&auto=webp)
.png?format=pjpg&auto=webp)


.png?format=pjpg&auto=webp)
Creating Consistent Website Layouts using Express and Contentstack
Many websites have a standard layout that provides a consistent user interface for users when they navigate from one page to another. This layout usually includes elements such as the site header, navigation, and footer.
This leads to a common notion, especially with those who have worked with traditional content management systems, that everything appearing on a page should be fetched from an entry, with references to common UI elements.
In this document, we'll discuss how we can create a consistent website layout using Express and Contentstack.
Prerequisites
- Contentstack account
- Working knowledge of Express.js
- Node.js 8+ installed on your machine.
Set up the Essentials
First, create a stack. For this example, we have created sample content types. You just need to download them from our GitHub page.
After downloading the content types, add entries to it, add a publishing environment and publish the entries.
Once you have these configured, you're ready to move on to download the code.
Download Sample Code
We have created an example app to help you understand this exercise. You can download it from our GitHub page. Once you have the code, open it in any code development editor, it should look similar to the following:
Below we list some of the important files and their respective explanations.
- App.js: It is one of the most crucial files in the code as it is the server file where we add all our website routes (pages), such as Home, About, and so on.
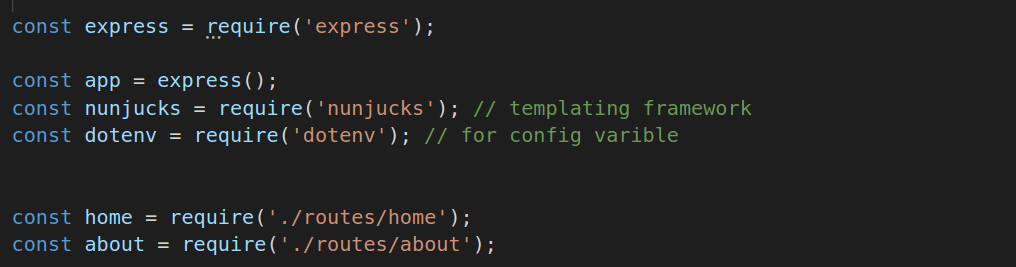
- partials.js: This file is inside the middleware folder. It has a function that loads our header & footer data used in the routes (res.render) as a variable to render the header and footer with those variables (as used in nunjucks templating).
- Index.html: In the index.html file, we have included our header and footer. It is the default file that is loaded when we load our pages/routes.
- Views: The views folder holds the templates for different pages, in our case Home, About, Header, and Footer.
So, whenever the Home page route is hit, the header and footer will be rendered. The data will be fetched every time the route is hit. You can add more routes such as Products, Blogs, etc and the header and footer will be shown on each page.
Make Configuration Changes
Now that we have a gist of what files the code contains, let's go ahead and make some configuration changes in it.
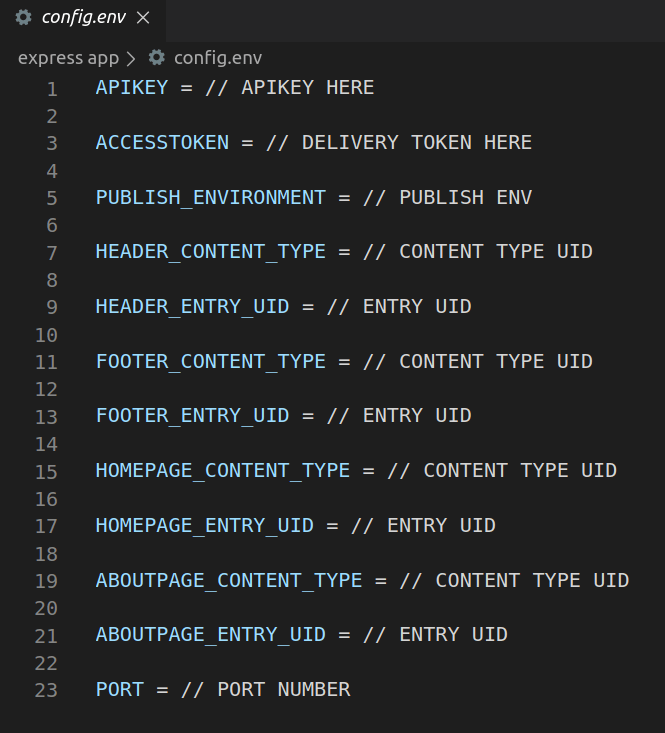
Open the config.env file and add your stack details to it. You'll also need to enter the content type and entry UIDs respectively as shown below:
Start the App
- Open the command prompt and move inside your project's root folder. Then, install the node modules by running the following commands:
npm install
- Start the app by running the following command:
node app.js
By default the app will start on the port number you mentioned in config.env.
As shown in the example below, the Home page of the website contains the header and the footer section.

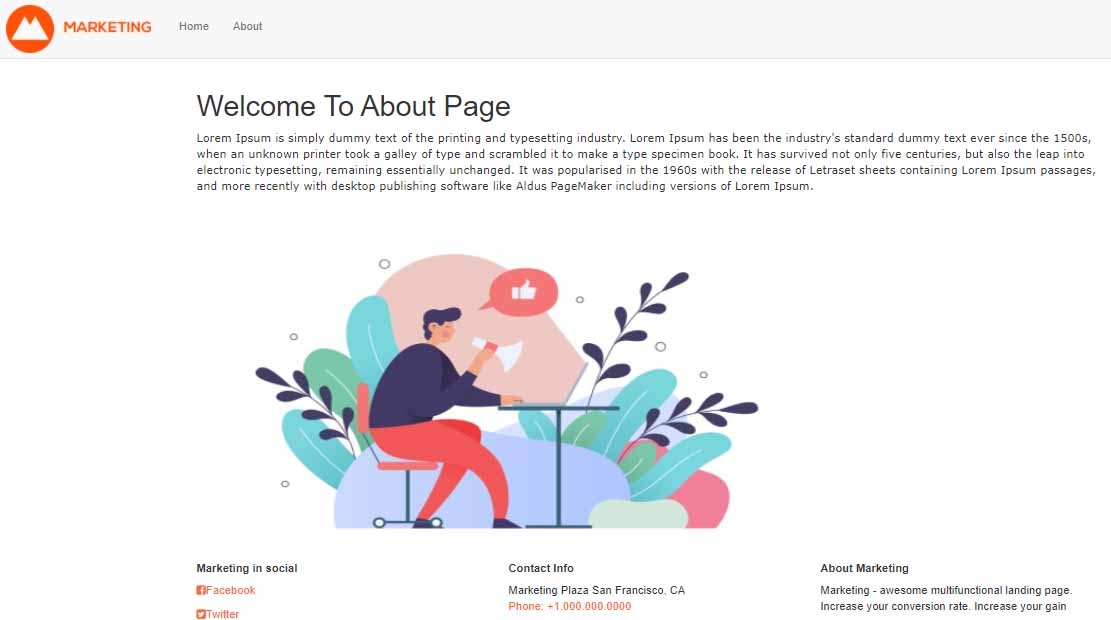
When you navigate to the About page, the header and the footer section remains the same; only the content changes as shown below.
Additional Resource: Learn how to Add Elasticsearch to Contentstack-powered websites.
More articles
