

.svg?format=pjpg&auto=webp)
.svg?format=pjpg&auto=webp)
.png?format=pjpg&auto=webp)


.png?format=pjpg&auto=webp)
Creating an Automated Webhook Listener Using Webhooks and AWS Lambda
The combination of AWS Lambda and Contentstack Webhook can be used to simplify working with the entries. You can use them to automatically update a particular field of an entry when any changes are made to it.
In this guide, we will discuss the steps for creating an automated system that will do just that.
Process overview: We will create a content type and add an entry to it. When the entry is updated (Date and Priority fields), a webhook will trigger and invoke the Lambda Function. The Lambda Function will then auto-update a specific field (Sort order, in our example) in the entry.
Prerequisites
- Basic knowledge of AWS Lambda
- Working knowledge of AWS API Gateways
- Access to the AWS environment
- Contentstack account
Steps for Execution
- Create a content type and add an entry
- Create an AWS Lambda Function
- Create an API Gateway
- Deploy your API
- Create a Webhook in Contentstack
- Try it out
Let's get started!
Create a Content Type and Add an Entry
The first step is to create a content type and add an entry to it. For this exercise, we will create a content type with specific fields as listed below:
- Title
- URL
- Date
- Select field with name Priority (display type as Radio)
- Single Line Textbox with name Sort order
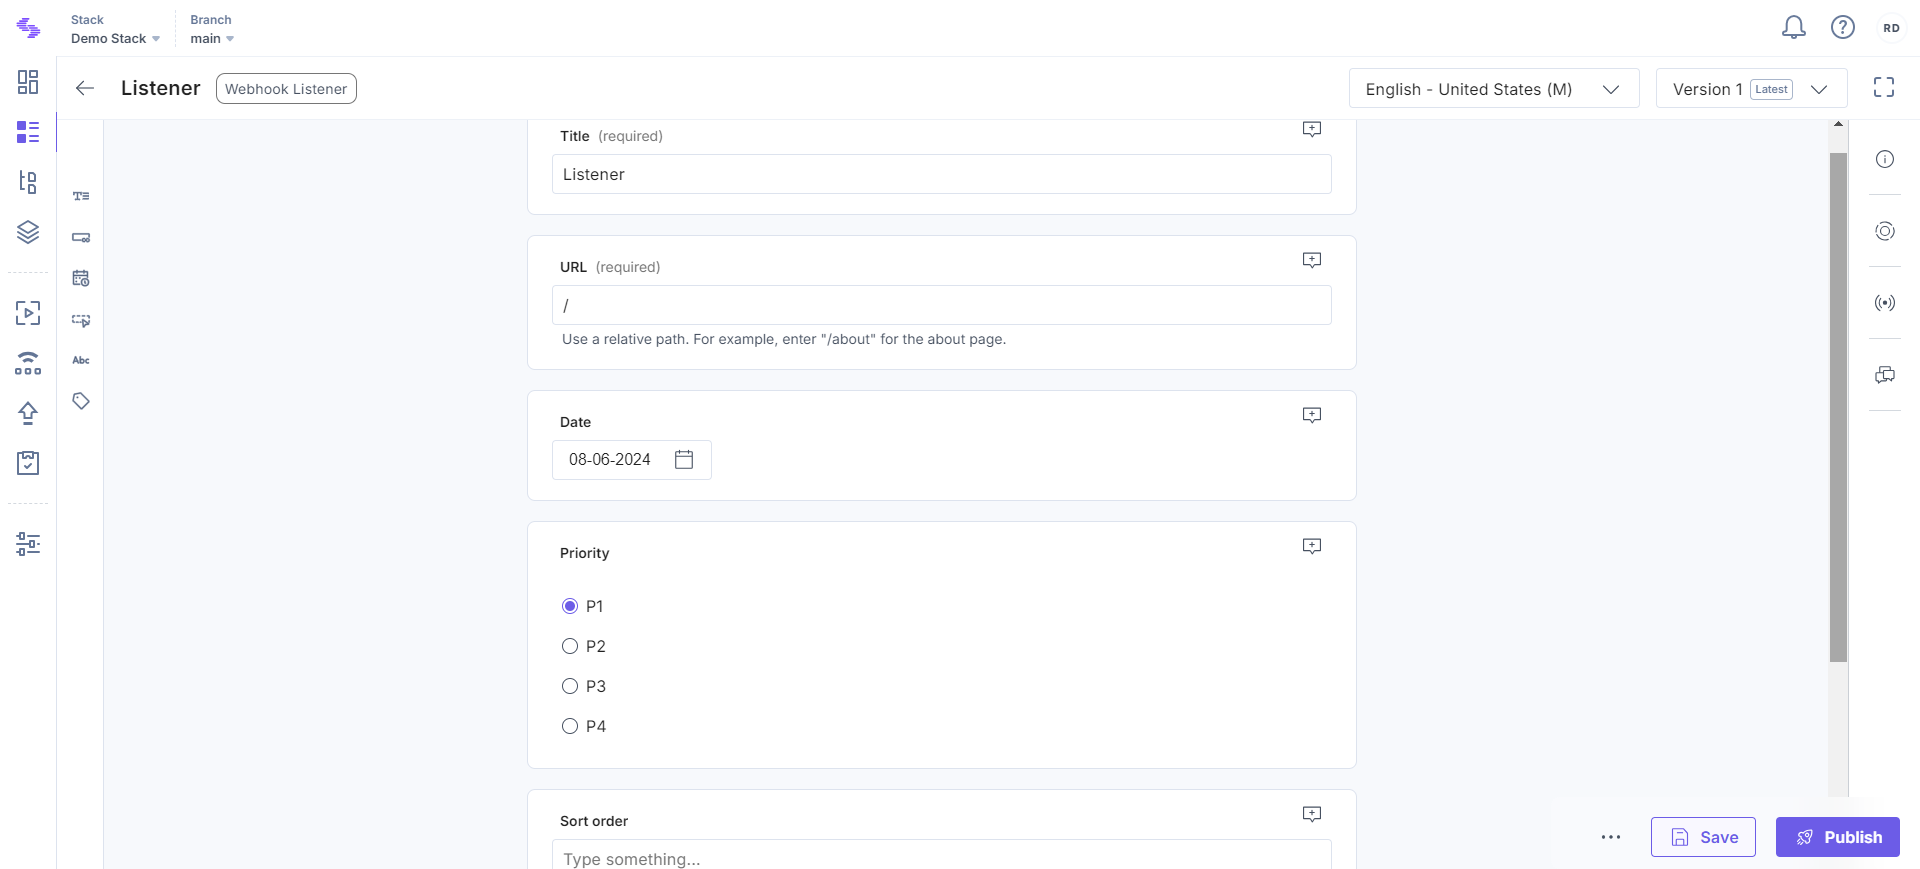
Note: Do not add anything in the Sort order field yet, keep it blank for now. It will get auto-updated when we make changes in the Date and Priority fields.
With this, we have the essentials ready, let's move on to creating a Lambda Function.
Create an AWS Lambda Function
Perform the following steps to set up your AWS Lambda function:
- Login to your AWS Management Console and select Lambda from the Service list.
- Click on the Create Function button and then the Author from Scratch option.
- Configure the lambda based on your requirements. Choose Node.js 12.x as your run-time language and click on the Create function button.
- AWS Lambda offers an inline code editor. You can write your lambda code here or alternatively upload the code. For our example, we have created a sample code. Download the code from our GitHub repo.
- Once you get the code, install the required dependency as mentioned in package.json and then upload it on Lambda by selecting the Upload a .zip file option from the Code entry type drop-down. Keep Handler as index/index.handler and click on Save.
This is how it will look when you upload the code in the editor: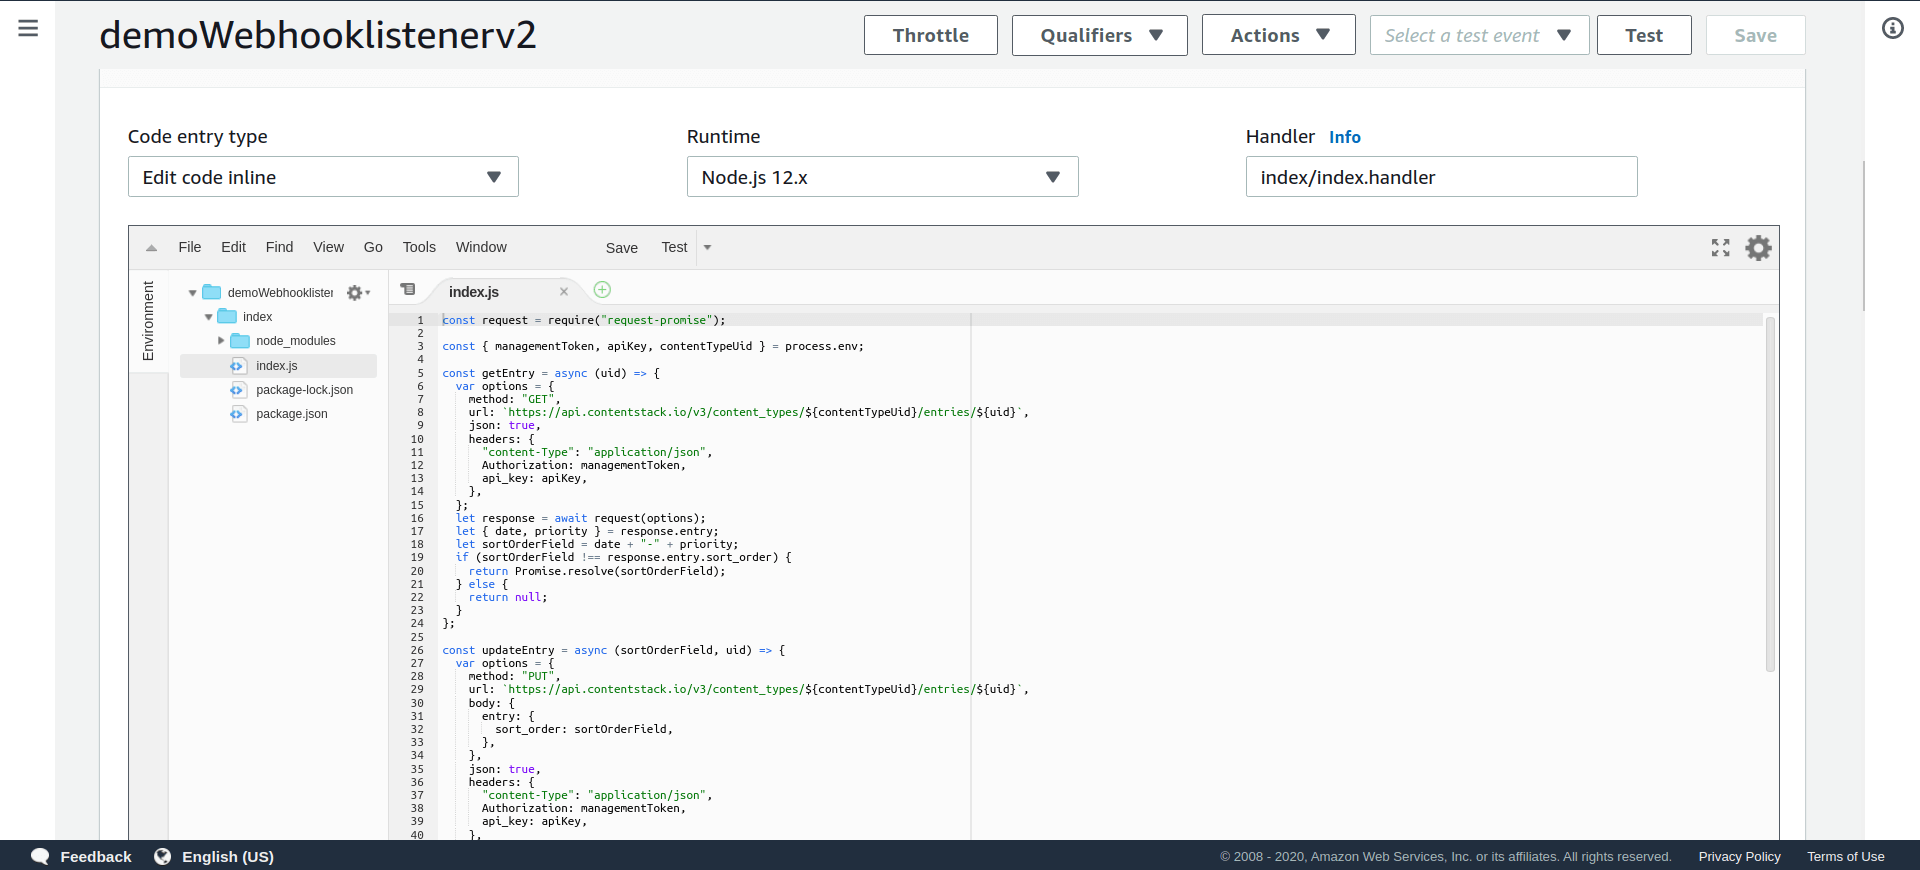
- Once we have uploaded the code in the editor, let's now set up the Environment variables by adding the Stack API key, your Contentstack region (US, EU, Azure NA, or Azure EU), and Stack Management Token as follows:
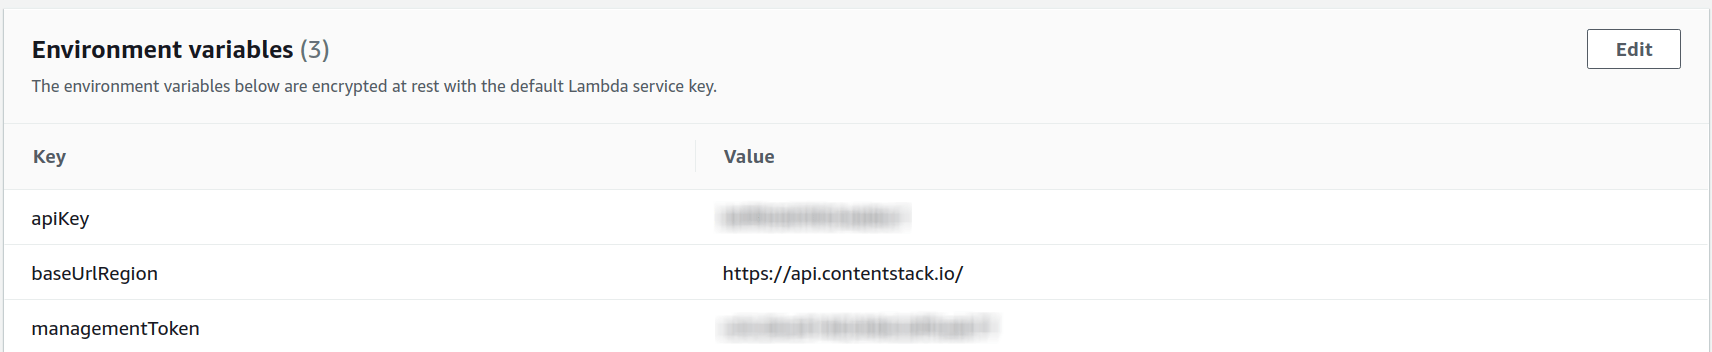
- Once you add the environment variables, click Save.
We now have set up our Lambda Function. Let's move ahead and create the API Gateway through which our Lambda Function will be invoked.
Create an API Gateway
Execute the following steps to create the API Gateway:
- Login to AWS Management Console (if you have logged out) and select API Gateway from the Services list. You can also type “API” in the search box to locate it quickly as shown:

- Click on the Getting started or the Create API button (depending on whether you have an API already configured or not).
- On the Choose an API type page, go to the REST API option (the public one) and click on Build.
- On the next screen, ensure that Choose the protocol section has REST selected and the Create new API section has New API selected. Enter the API name and a description (optional) in the Settings section and click on Create API.
- On the next page, from the Actions drop down in Resources, select Create Method.
- From the resultant drop-down, select POST and click on the checkmark.
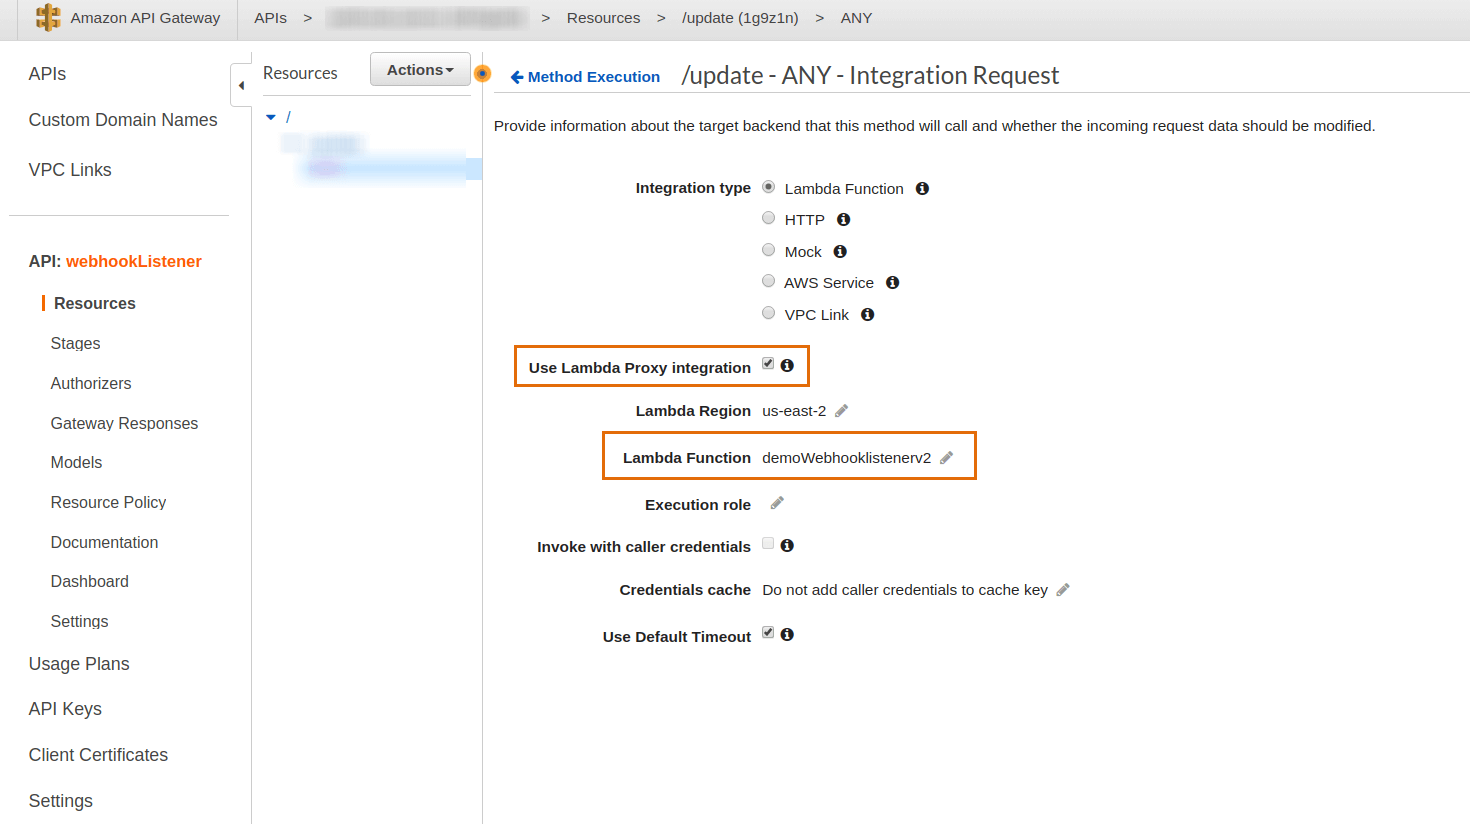
- Select your Lambda function by typing the name of your function (it auto-populates) in the Lambda Function field. Ensure the Use Lambda Proxy integration option is checked as shown below and click on Save:
- You'll get the Add Permission to Lambda Function pop-up, click on OK.
With these steps, we have created the required API Gateway.
- Login to AWS Management Console (if you have logged out) and select API Gateway from the Services list. You can also type “API” in the search box to locate it quickly as shown:
Deploy your API
Next, we need to deploy our API. Follow the steps given below:
- From the Actions drop-down in Resources, select the Deploy API option.
- Select [New Stage] in the Deployment stage and enter “prod” (or anything you like to identify this stage with) in the Stage name.
- Click on the Deploy button.
- On the next screen, you'll get your deployed API under Invoke URL. We'll use this URL in the next step when we create a webhook to initiate notifications to our Lambda function.
Once you have deployed your API, your Lambda Function will look similar to this:
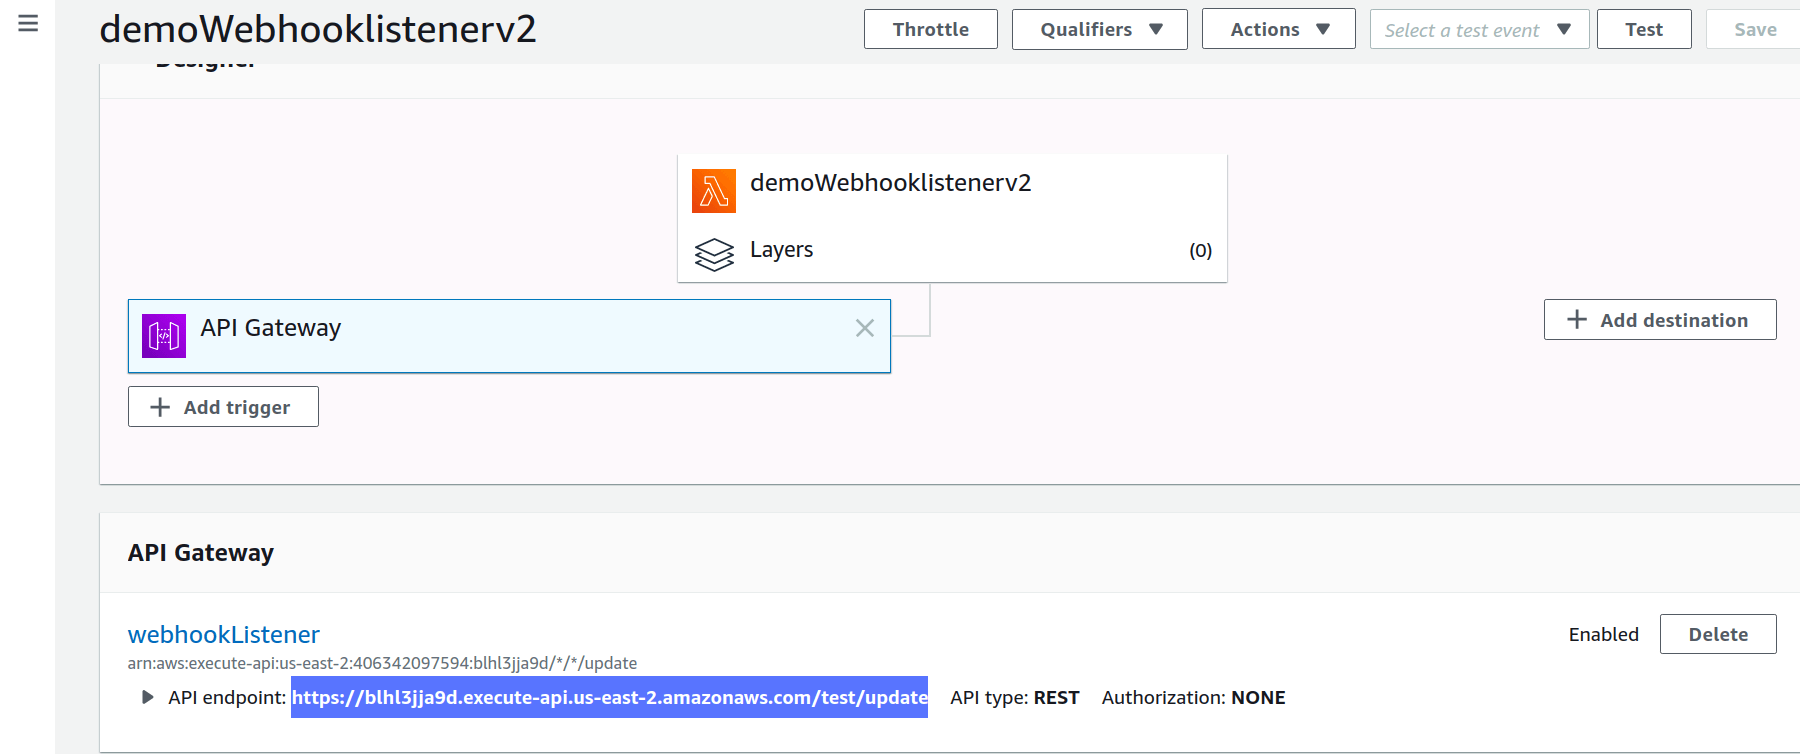
That's it! We have created the Lambda Function and have deployed the API to invoke it.
Create a Webhook in Contentstack
Let's now create a webhook in Contentstack to invoke the Lambda Function through the API that we just created. To do this, log in to your Contentstack account and follow the steps given below:
- Navigate to your stack, click on the “Settings” icon on the left navigation panel, and click on Webhooks. You can also use the shortcut keys “alt + W” for Windows OS users, and “option + W” for Mac OS users to access webhooks.
- On the Webhook page, click on + New Webhook.
- On the Create Webhook page, fill up the Name field (for example, WebhookListener). In the URL To Notify field, enter the URL that you generated when you deployed your APIs, in the previous step.
- Scroll down to the Conditional View section for creating a trigger for the webhook as shown below:
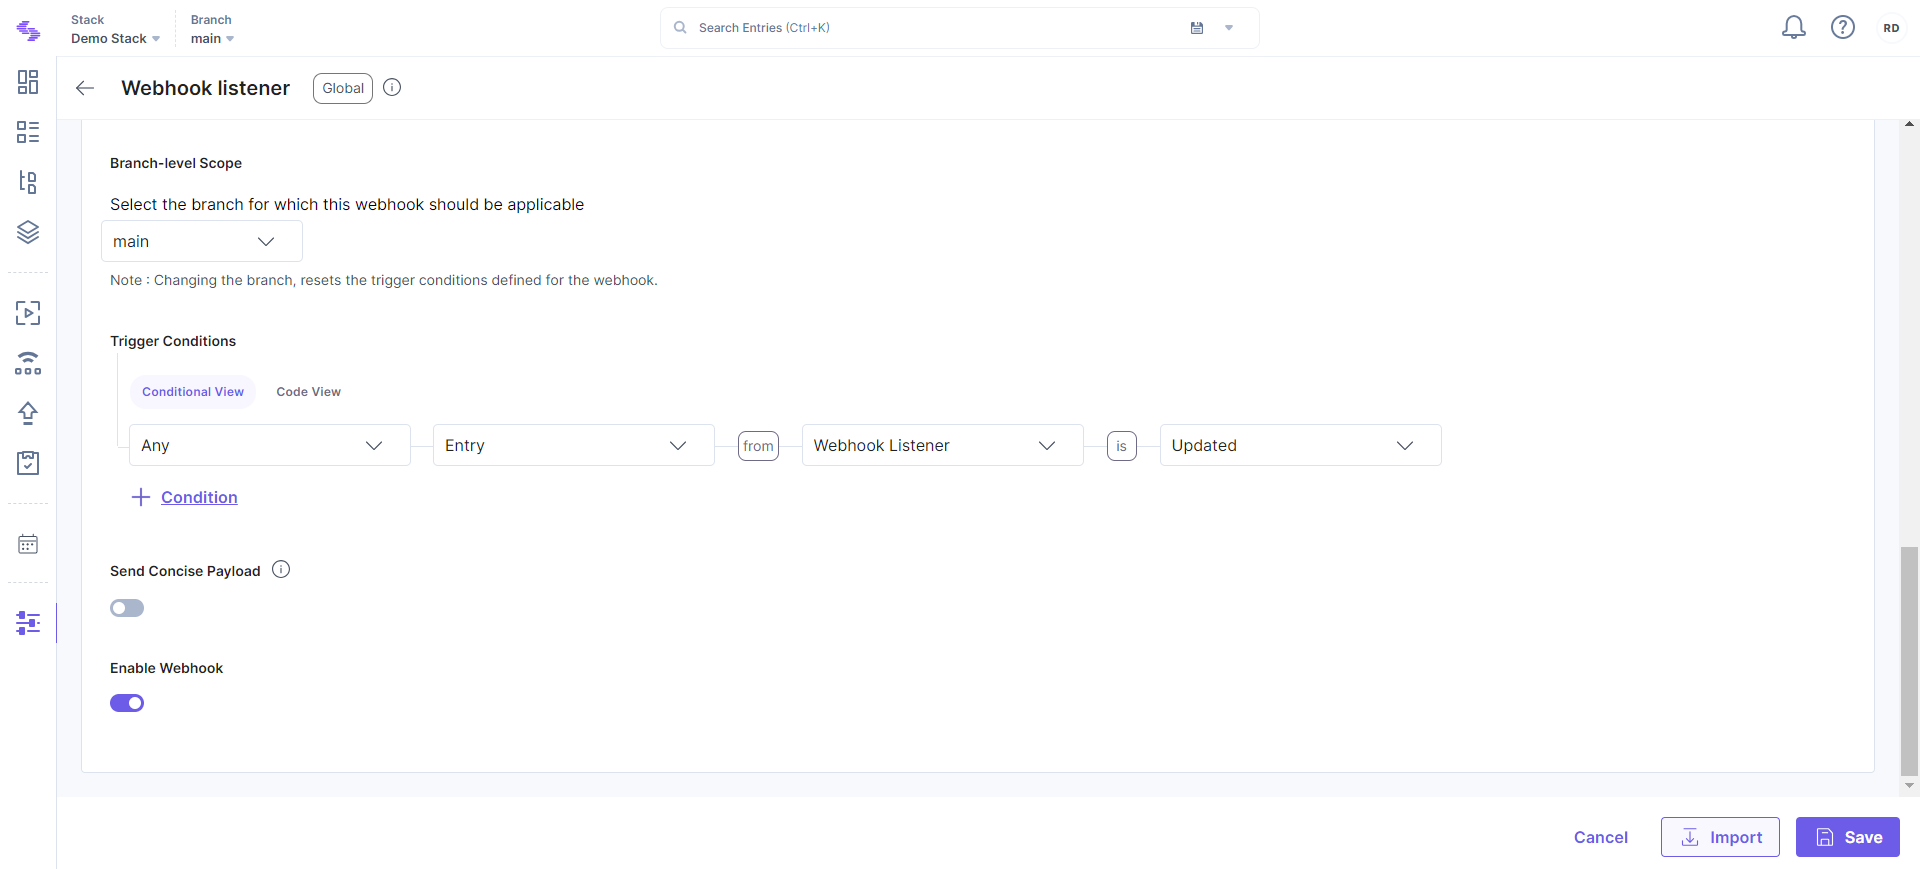
- Select the Enable Webhook checkbox option and Save your webhook settings.
Your webhook is now ready to invoke the Lambda Function when an entry in the Webhook listener content type is updated.
Try it Out
The entire set up is done and you are ready to try this out.
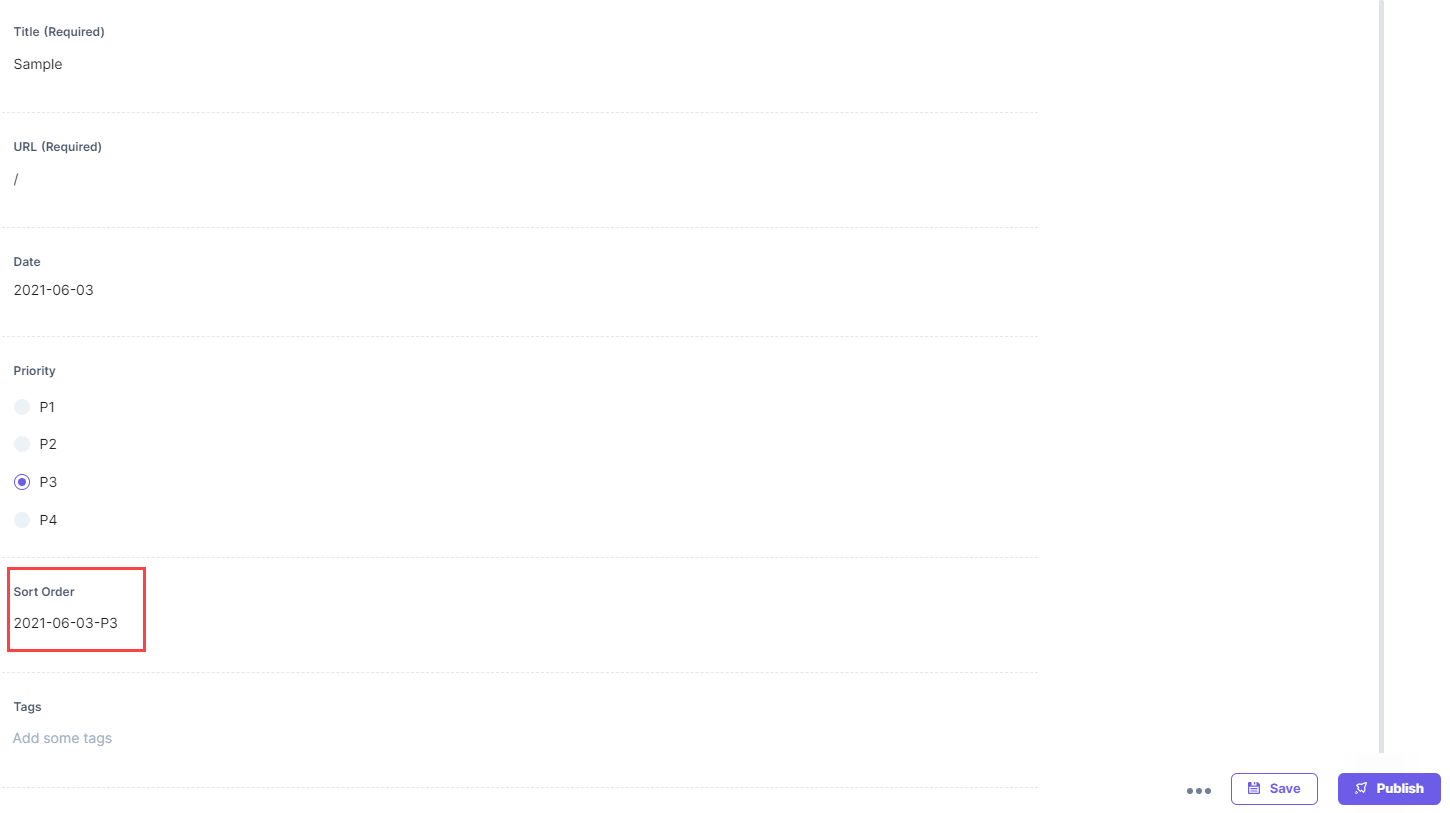
- Navigate to your entry and try changing the Date and Priority fields.
- Save your entry. Upon saving, the webhook triggers. It then invokes the Lambda Function through the APIs and the Sort order field gets updated automatically.
- Hard refresh (Ctrl + Shift + R) the entry page and you should see the changes as shown below:
Additional Resource: You can also refer to our guides on how you can use Contentstack Webhooks with AWS Lambda to automate several content management tasks.
More articles
