

.svg?format=pjpg&auto=webp)
.svg?format=pjpg&auto=webp)
.png?format=pjpg&auto=webp)


.png?format=pjpg&auto=webp)
CSV/XLSX
The CSV/XLSX custom field extension allows you to fetch content from a CSV or an XLSX file and displays it into a field in your content type of your stack. Thus, while creating entries, you can have a CSV or an XLSX file imported as the input value for the field.
This step-by-step guide explains how to create a CSV/XLSX custom field extension for your content types in Contentstack. The steps performed are as follows:
Prerequisites
- Contentstack account
- A CSV file with data in it
Add the CSV/XLSX Custom Field Extension to your Stack
Log in to your Contentstack account and perform the following steps:
- Go to your stack and click on the “Settings” icon on the left navigation panel.
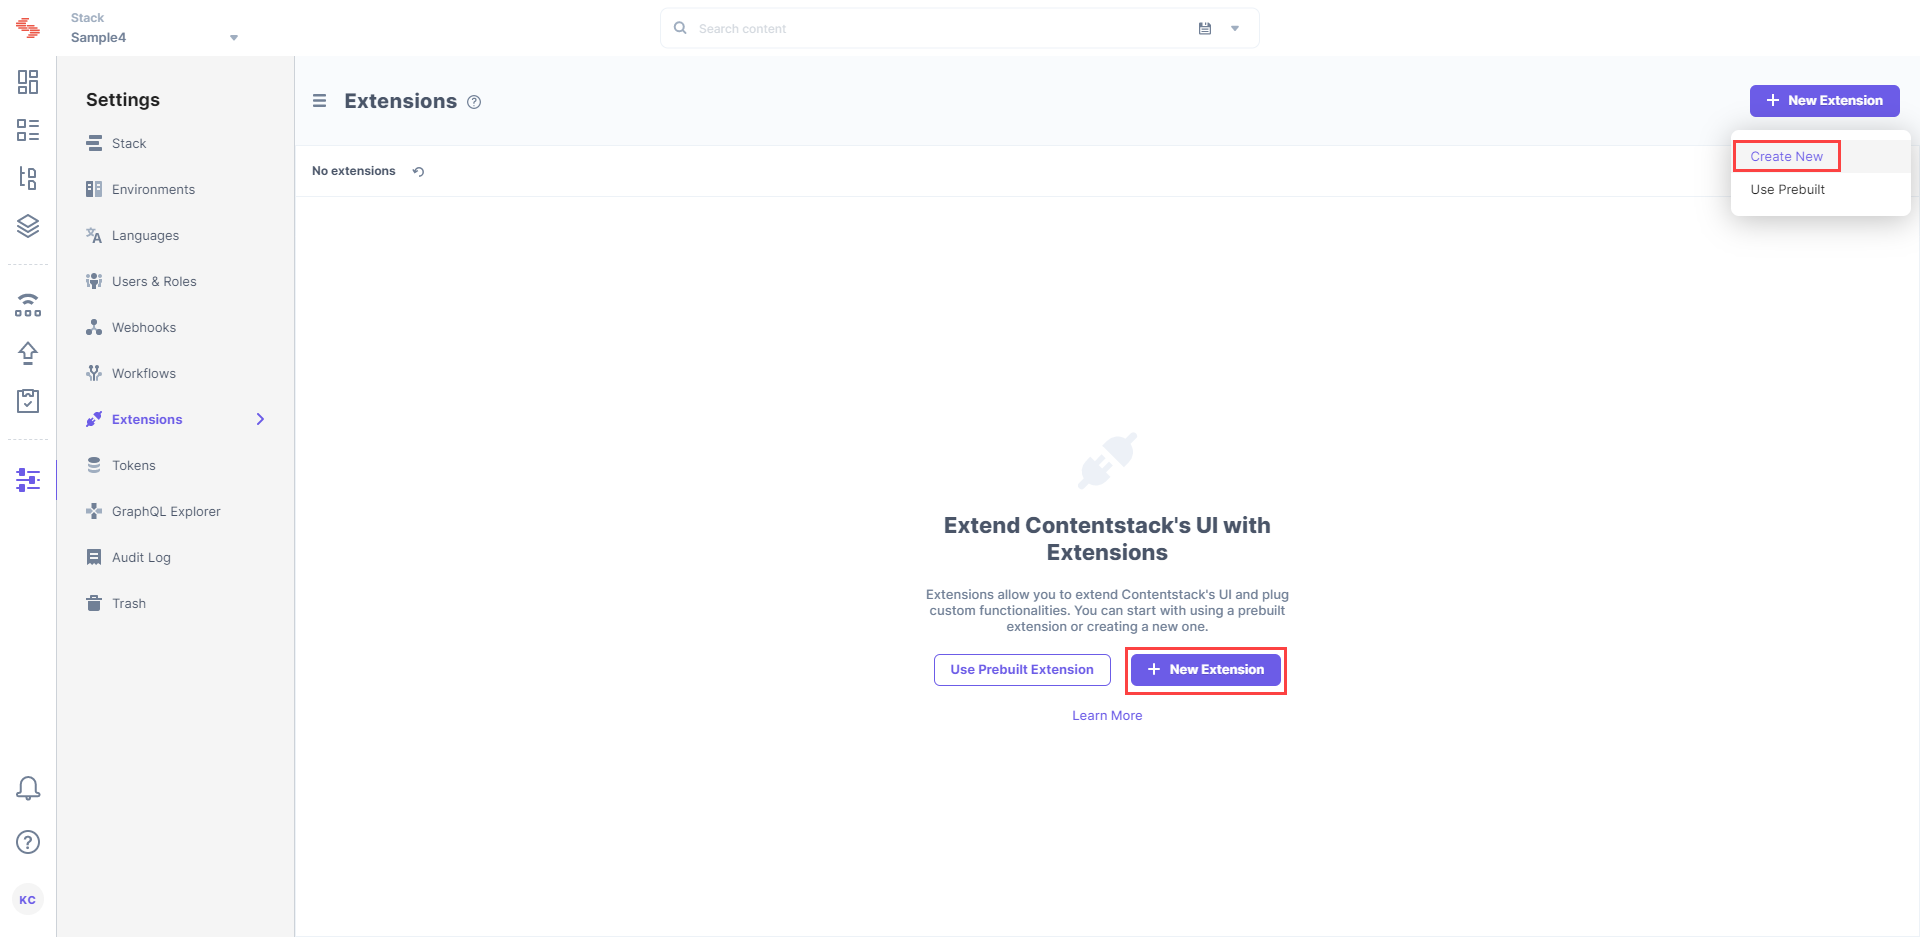
- Click on Extensions.
- On the Extensions page, click on the + New Extension button and then on Create new as shown below:
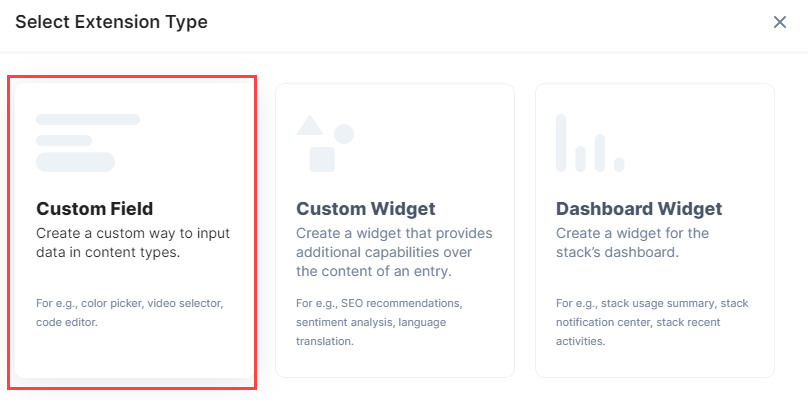
- On the Select Extension Type screen, select Custom Field.
- On the Create New Extension page, enter details in the fields as given below:
- Title: Provide a suitable title. For example, “CSV.”
- Field data type: Select the data type in which the input data of the field should be saved in Contentstack. Select JSON in this case.
- Multiple: Keep this unchecked.
- Hosting method: The hosting method will be set to Hosted By Contentstack.
- Extension Source Code: In this field, you need to enter the extension code. To get the code, contact our Support team.
Once it is downloaded, copy the code from the index.html file located in the root folder and paste it in the Extension source code field. - Config Parameter: Enter the following configuration details as the extension's config parameter:The integer value that you enter in the above config will put a limit to the number of rows and columns that the imported file will display.
{
    "columns_limit": ,
    "rows_limit":
}
- Click on Save. This creates your custom field.
Now, let's understand how you can start using this custom field in your content type.
Use Your Custom Field
Once you have added a custom field, you can use it in your content type like any other field. To add a custom field in your content type, perform the following steps:
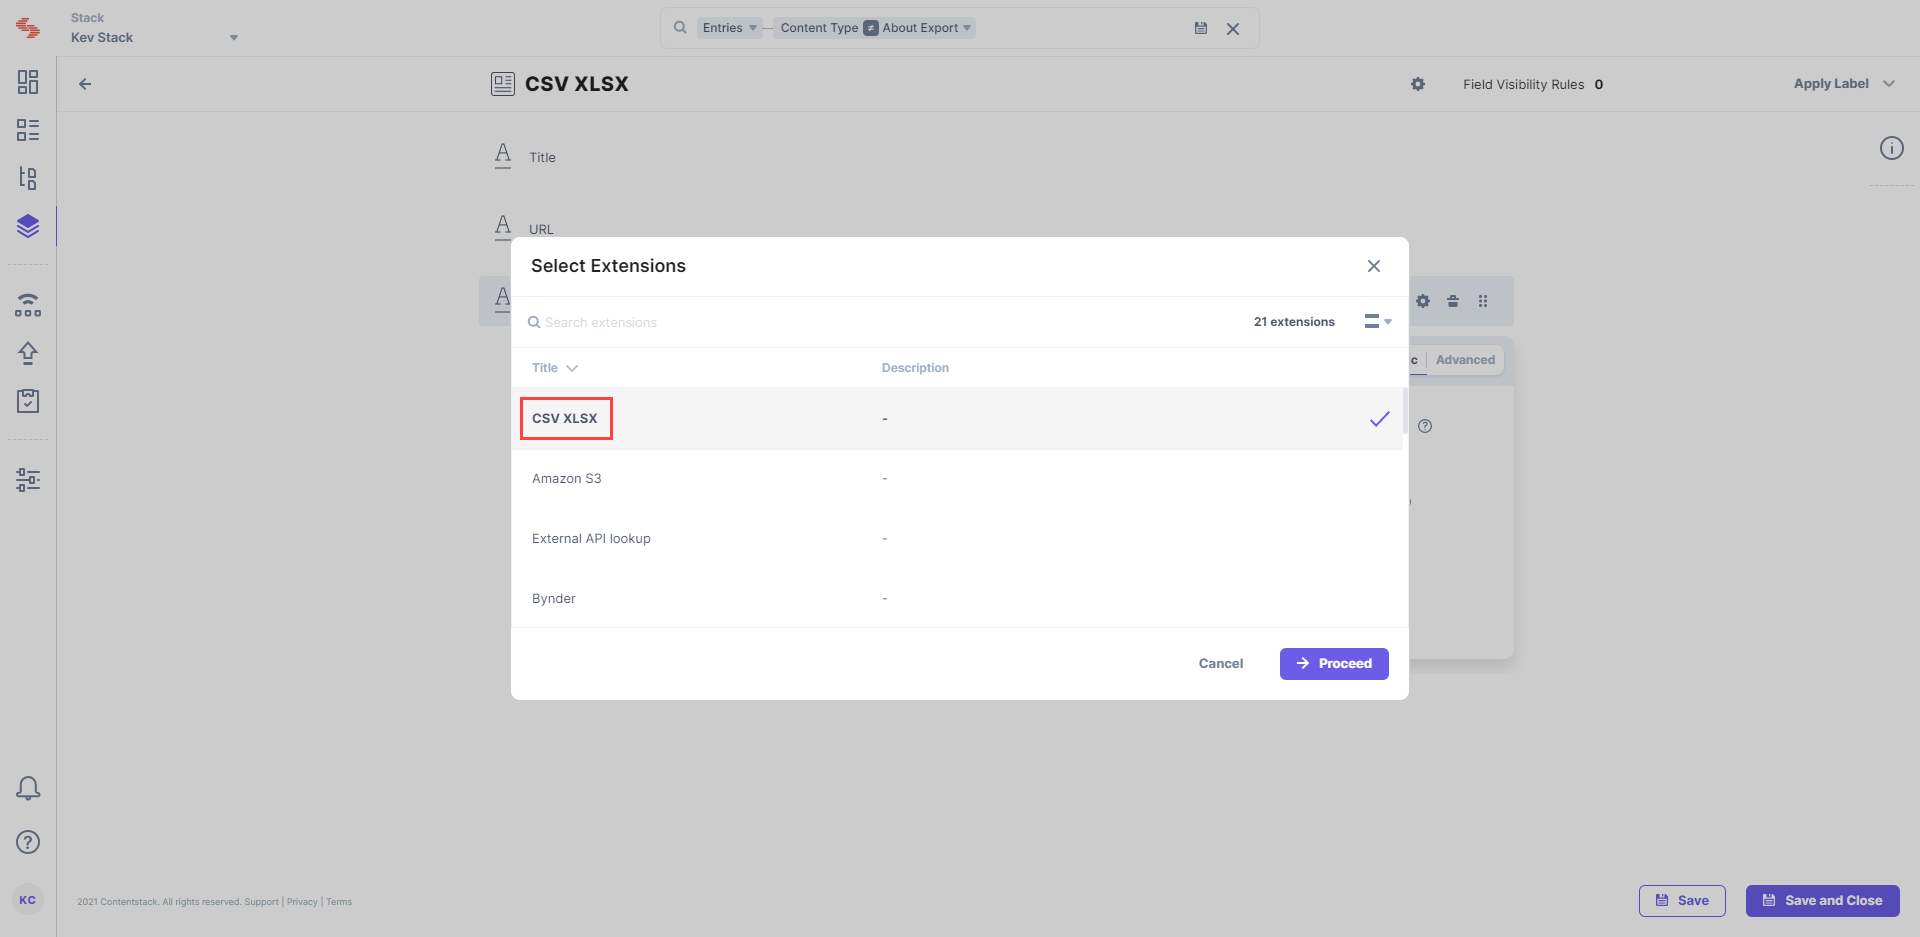
Create a content type and add the Custom field to it.
Under Select Extension, select the “CSV” field that you created and set the other properties. You can add other fields as per requirements.
- Finally, click on either Save or Save and Close to save your changes.
- Next, create an entry for this content type, and click on the Select CSV/XLSX File To Import button.
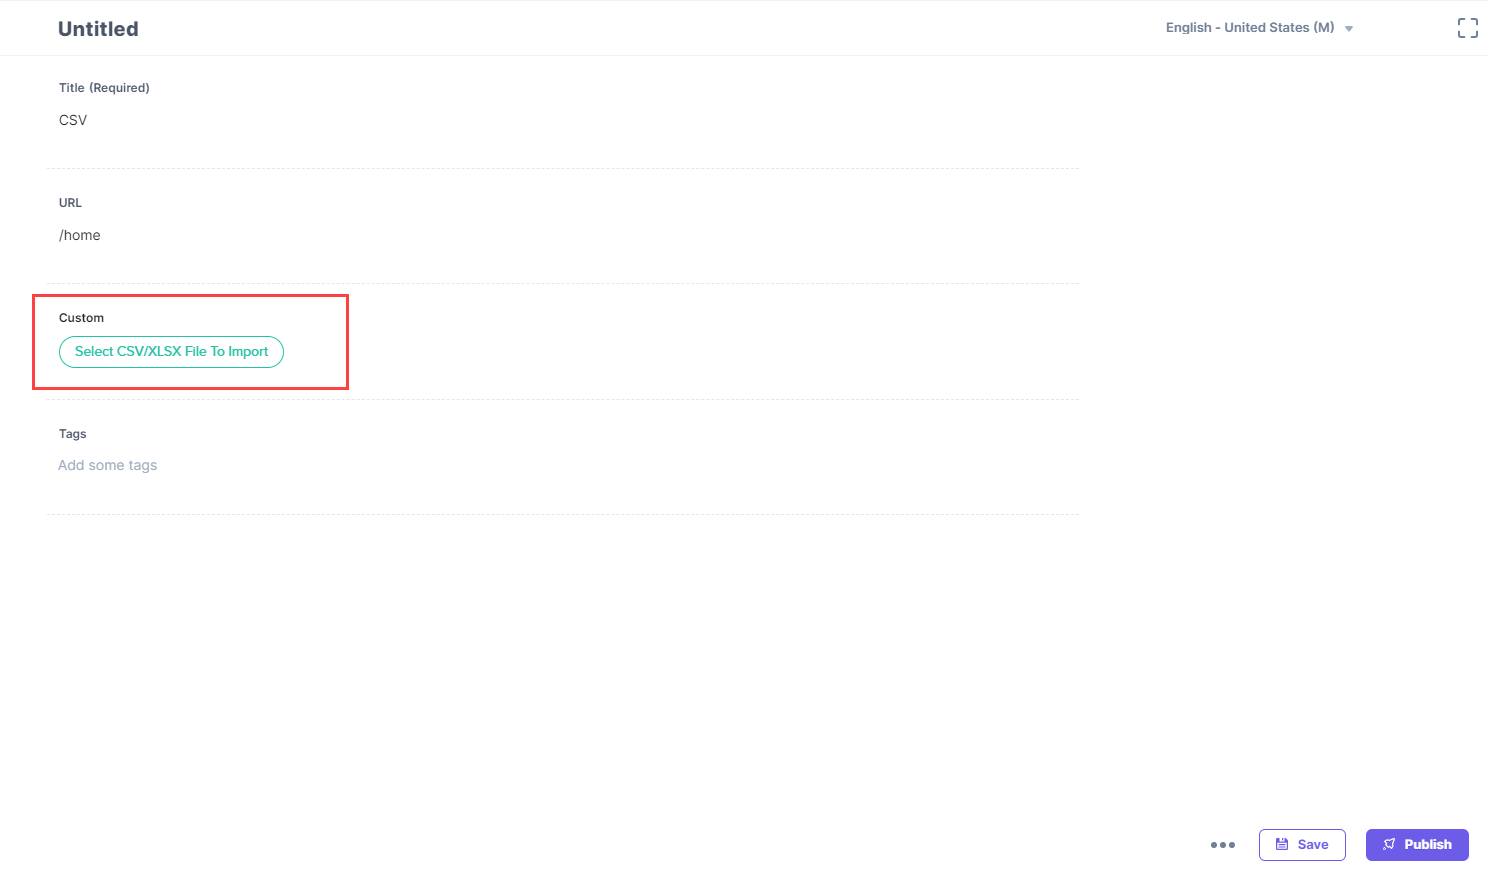
- It will then prompt you to choose the CSV or the XLSX file and import it to your field. Once you add your file, this is how it appears in your entry:
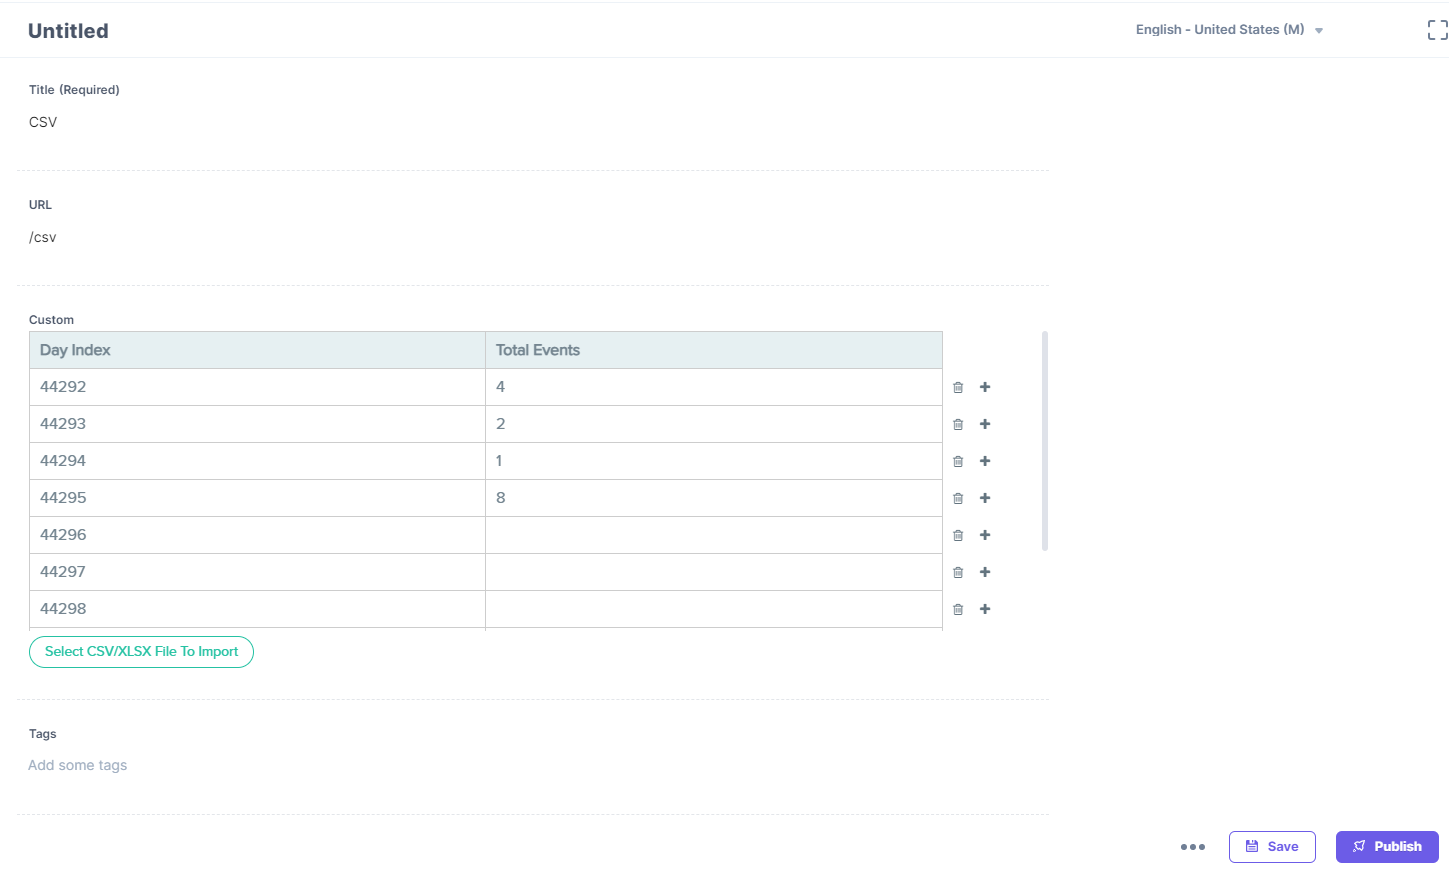
- You can add or delete rows by clicking on the + or the "trash" icon respectively.
Note: The max file size that can be imported in the field extension is 10 KB. Refer to our Extension Limitation doc for more details.
More articles in "General Custom Field guides"
