

.svg?format=pjpg&auto=webp)
.svg?format=pjpg&auto=webp)
.png?format=pjpg&auto=webp)


.png?format=pjpg&auto=webp)
Image Cropper
The Image Cropper custom extension allows you to fetch and crop the images in your stack into a field of your content type. By using this extension, you can crop and add multiple images in the custom field of your entry.
Additionally, the image cropper extension also lets you set a focal point for the images you want to crop. The editor can choose a point in an image to focus on by using the focal point. Regardless of the image cropping, the focal point remains constant.
This step-by-step guide explains how to create an Image Cropper custom field extension for your content types.
Steps for Execution:
Create Custom field Extension
To set up the Image Cropper extension in Contentstack, log in to your Contentstack account.
We have created the sample code for the extension. If Extensions are part of your plan, contact our Support team to get the code for the extension. Our team will provide the source code which contains the following two files:
- image-cropper: Navigate to image-cropper/build/index.html file. The code inside this file will be uploaded in the extension source code field of our extension in the next step.
- image-cropper-popup: Navigate to image-cropper-popup/build/index.html. Upload this file as an asset in your stack by referring to the Create/Upload Assets guide. After uploading this file, make a note of the asset URL. To view the asset URL, open the asset and copy the File URL.
Once you have logged in to your account, follow the steps given below:
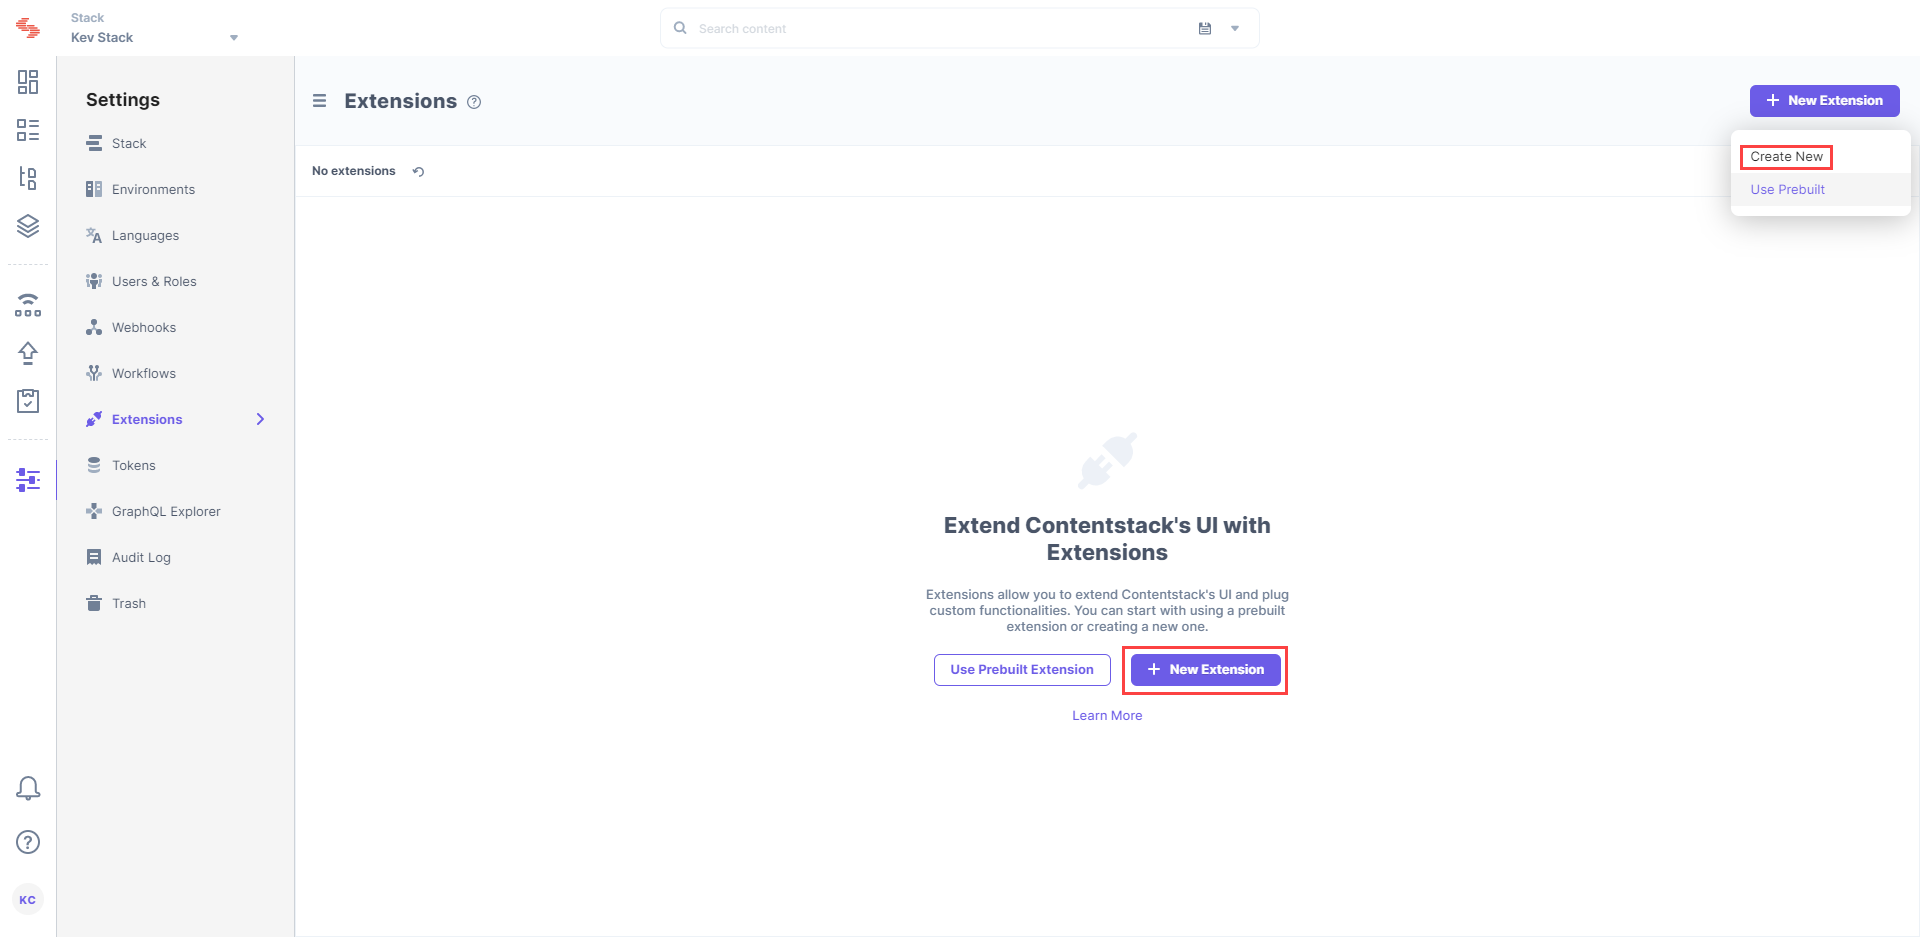
- Go to your stack, navigate to the “Settings” icon on the left navigation panel and select Extensions. You can also use the shortcut keys “alt + X” for Windows OS users, and “option + X” for Mac OS users to access the extensions menu.
- On the Extensions page, click on the + New Extension button, and select Create New.
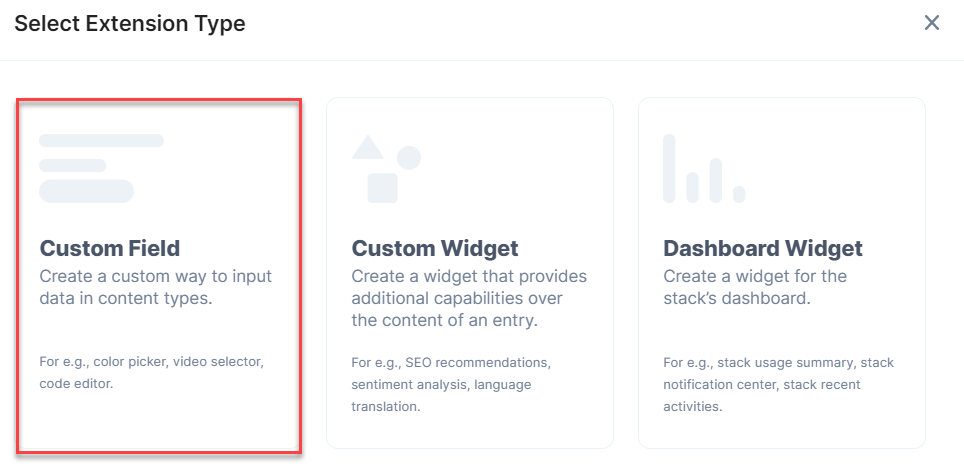
- Click on the Custom Field option in the Select Extension Type window as shown below:
- On the Create New Extension page, enter values in the fields as given below:
- Title (required): Provide a suitable title, for example “Image Cropper” for your custom field. This title will be visible when you select the extension in the custom field in your content type.
- Field data type (required): Select the data type in which the input data of the field should be saved in Contentstack. In this case, select JSON.
- Multiple : Leave this field unchecked.
- Hosting method (required): Select Hosted by Contentstack as the hosting method for this content type.
- Extension Source Code (required): Enter the downloaded extension source code here. Navigate to image-cropper/build/path from the downloaded folder, copy and add the code of the index.html file here.
- Config Parameter (required): Enter the following configuration details as the extension's config parameter:The redirectURL is the URL of the file that you uploaded as an asset in above.
{ "redirectUrl": <URL of the asset file> } - Confirm your settings by clicking on the Save and Close button.
Your extension is now ready, let's move ahead and use this extension in your content type.
Use your Custom Field
To use the extension, we will have to create a content type and add a custom field in it. Follow the steps given below to add one:
- Create a content type and add the Custom field to it.
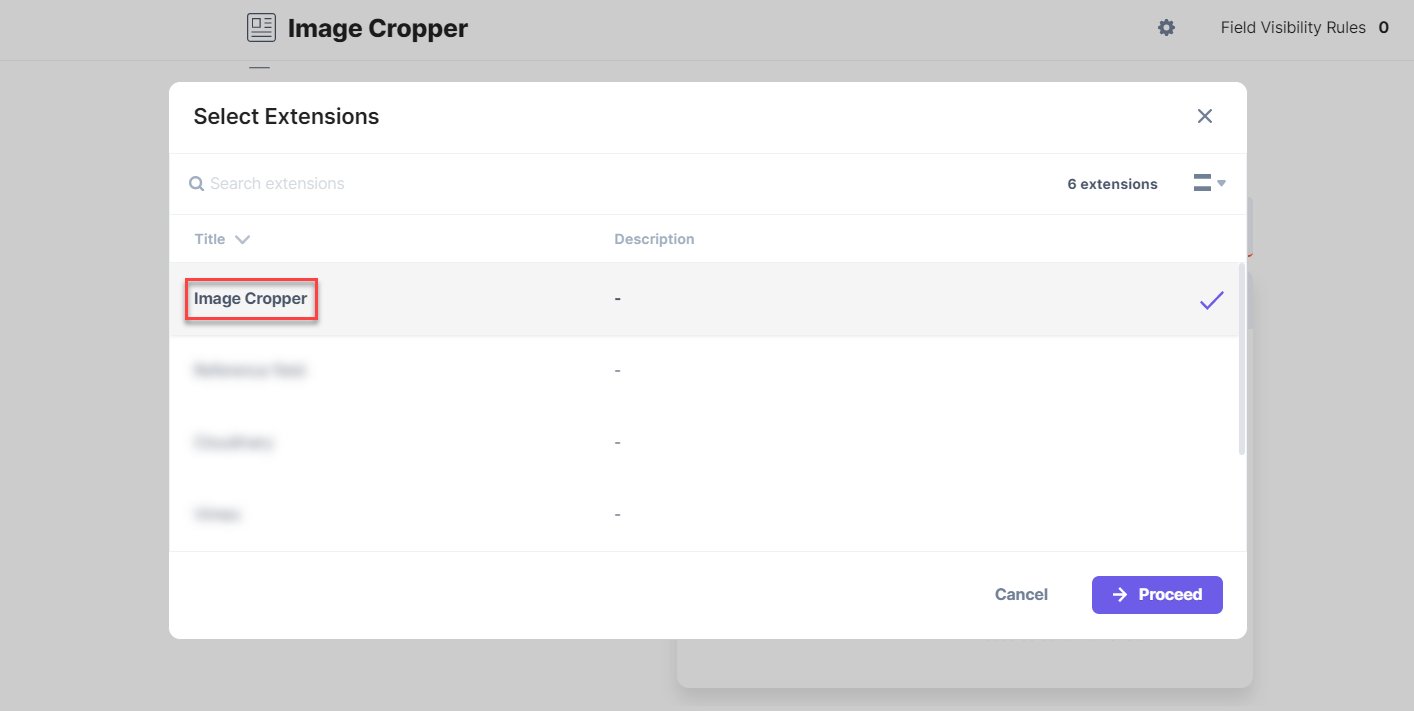
- Under Select Extension, select the “Image Cropper” extension that you created and set other properties accordingly. You can add other fields if required.
- Finally, click on Save and Close to save your changes.
- Now create an entry for this content type, and you will see the Image Cropper custom field in action.
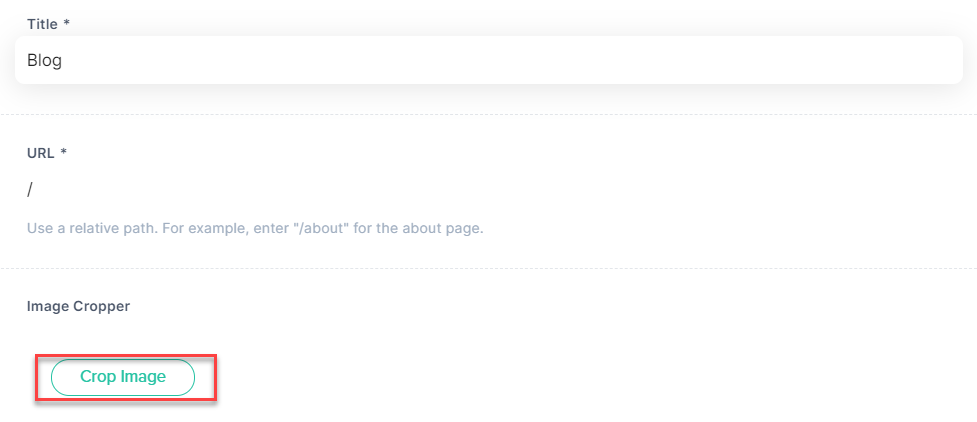
- Click on the Crop Image button and you will see the images stored in your stack.
- Select and crop the image you want to add to this field. Set the focal point for the image you want to crop.
Editors can also view the Preview of some preset crops, shown next to the image. This will allow you to understand how the cropped images look from the end-users perspective. - Finally click on the Save button to successfully add the cropper image to the field.
The cropped image's height, width and focal point coordinates are returned as JSON entry response.
More articles in "General Custom Field guides"
