
Executing an Automation
In this use case, we will cover a scenario where, if a user publishes an entry in Contentstack, Automations should be able to deploy the selected GitHub repository on Netlify immediately. And, every time you update an entry, the Automation will redeploy the repository on Netlify.
Let's break this scenario to see what must be the trigger event and the consequent action required to execute the Automation:
- Set up the Contentstack Entry Publish Trigger Event: This trigger event is activated whenever a Contentstack entry of a particular stack is published, and in turn it activates the Automation.
- Set up the Netlify Deploy Site Action: Once the above event triggers the Automation, it will deploy your set GitHub repository (for e.g., a starter app website) to Netlify. Further, any updates to the entry content will invoke the Entry Publish trigger event and automatically redeploy your website on Netlify.
The steps to set up the Automation are as follows:
- Create an Automation
- Set up the Contentstack Trigger Event
- Set up your Netlify Action Connector
- Test out the Automation
Lets look at the setup in detail.
- Log in to your Contentstack account and click the Automate icon.
- Click+ New Project and provide the required details to create a new project.
- Click+ New Automation to add the steps required to configure automations.
- Click Configure Trigger from the left navigation panel.
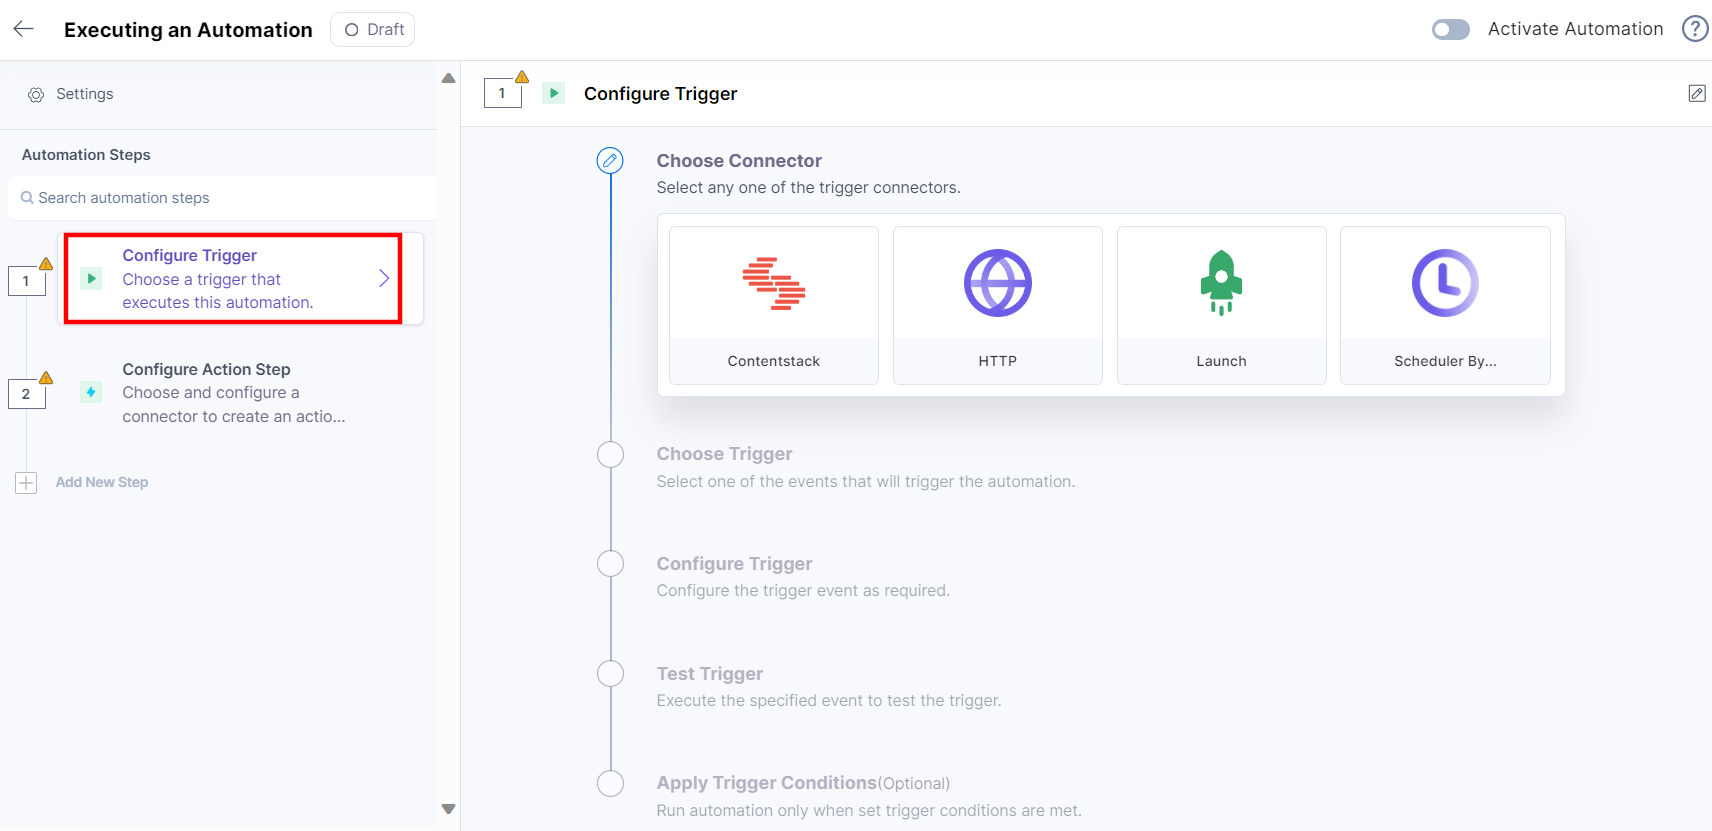
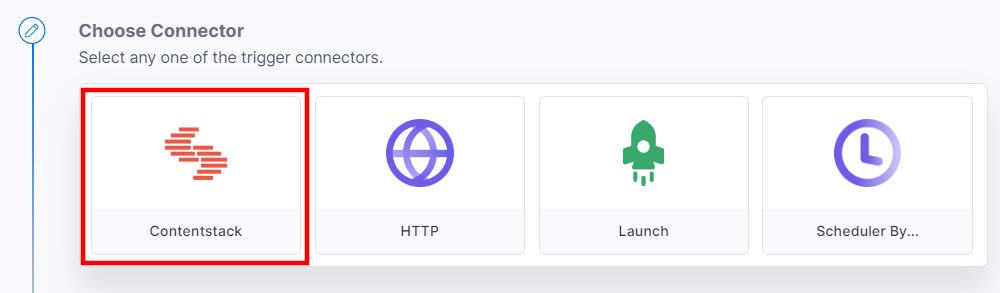
- Within the Configure Trigger step, click the Contentstack connector.
- Add your Contentstack account. For more information, refer to the Contentstack Trigger documentation.
- Once done, select Entry Published from the list of trigger events and define the rest of the steps needed to set up the trigger (refer steps 2 to 11 in Entry Trigger) under the Contentstack Trigger section.
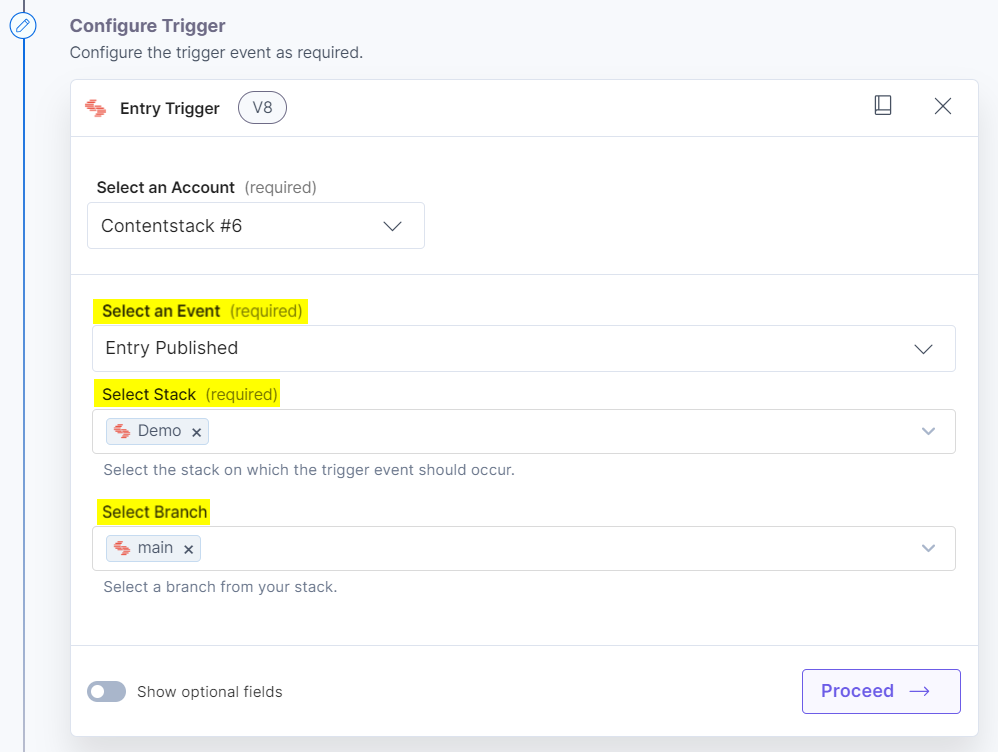
- Once done, click Proceed.
- Click Test Trigger to execute and test the trigger that you configured.
- Click Configure Action Step from the left navigation panel.Click to enlarge
- Within the Configure Action Step, click the Netlify connector.
Note You can sort and search the connector(s) based on the filter.
Click to enlarge - Select the Deploy Site action.Click to enlarge
- In the Configure Action tab, click+ Add New Account to add your Netlify account.Click to enlarge
- To add your Netlify account, refer to the Netlify Connector document.
- Click the Site ID text box and select an ID from the Lookup drop-down.
The Site ID is a unique identifier given to a project configured in Netlify. You can choose the desired project for which you want to configure the Netlify connector.Click to enlarge - Once done, click Proceed.
- Click the Test Action button to test the configured action connector.Click to enlarge
- Once the execution is successful, you will get the final output as seen in the screenshot in step 11.
This should initiate the build in your Netlify console. Navigate to your Netlify console and verify it. If you see the build initiated, that means the automation works successfully. - Navigate back to your automation set up page, and click Save and Exit to finish setting up the action.Click to enlarge
- Go to Contentstack and create an entry for the content type that you selected in your trigger event in Step 2.
- Once done, publish the entry. This should trigger your Automation.
- Now, navigate to Netlify and log in to your Netlify console.
- Check the Deploy log window to see whether Automation has initiated the build. You should see the following output:Click to enlarge
Create an Automation
To create an Automation, perform the steps given below:
Note You can now throttle the execution for your automations to avoid rate limit. For more information, refer to the Throttle Execution document.
Next, lets look at the steps to set up the trigger event.
Set up the Contentstack Trigger Event
Set up your Netlify Action Connector
Lets configure the Netlify Action connector.
This sets up the Netlify action connector.
Also, you can now automate performing different actions based on certain set conditions using the Conditional Path feature. Configure your condition and set up an action step based on this condition. For more information, refer to the What is Conditional Path document.
Additional Resource For a real world use case, refer to the Using Conditional Paths to Customize Automations document.
Test out the Automation
Now, its time to test out your automation. To do so, perform the steps given below: