

.svg?format=pjpg&auto=webp)
.svg?format=pjpg&auto=webp)
.png?format=pjpg&auto=webp)


.png?format=pjpg&auto=webp)
Set Up SCIM Provisioning With OneLogin
You can configure Contentstack as a provisioning app in OneLogin. This will allow you to use OneLogin to provision or deprovision users automatically with Contentstack.
Note: Before proceeding with this guide, ensure that SCIM is a part of your Contentstack plan.
Here’s a step-by-step guide that explains how you can do this.
- Enable SCIM in Contentstack
- Create and authorize Contentstack app in OneLogin
- Enable Provisioning in Your OneLogin App
- Enable Provisioning for Groups in OneLogin
- Provision and Deprovision Users via OneLogin
- Set up groups in OneLogin
- Create group mapping in Contentstack
Prerequisite
- OneLogin Developer account
- Contentstack account
Let's check the process of setting up SCIM in Contentstack.
Enable SCIM in Contentstack
Note: Only the Owner or Admin users of an organization in Contentstack can perform this step.
To allow provisioning and deprovisioning of users in Contentstack’s organization through OneLogin, you need to enable SCIM in Contentstack by performing the following steps:
- Log in to your Contentstack account and go to the Organization Settings page.
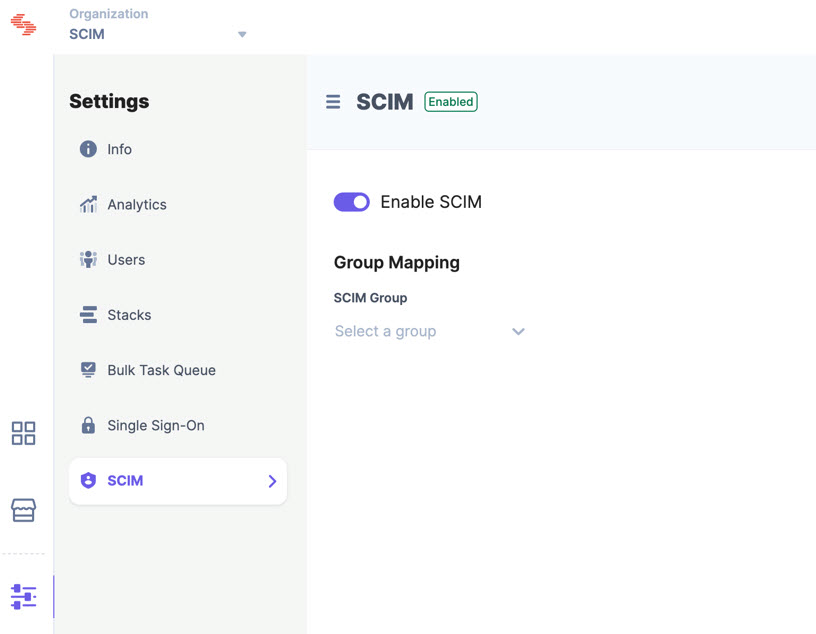
- Go to the SCIM tab and select the Enable SCIM option.
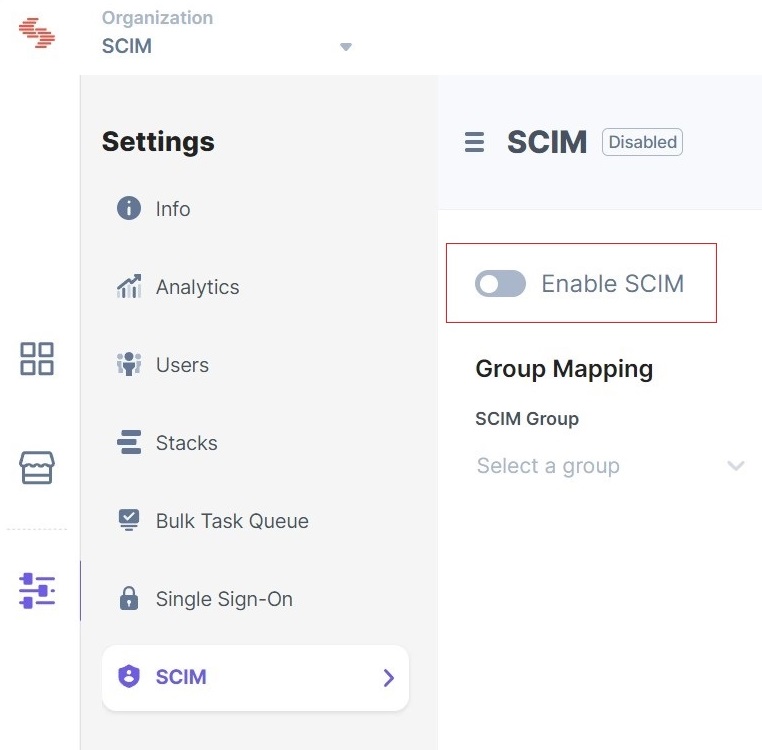
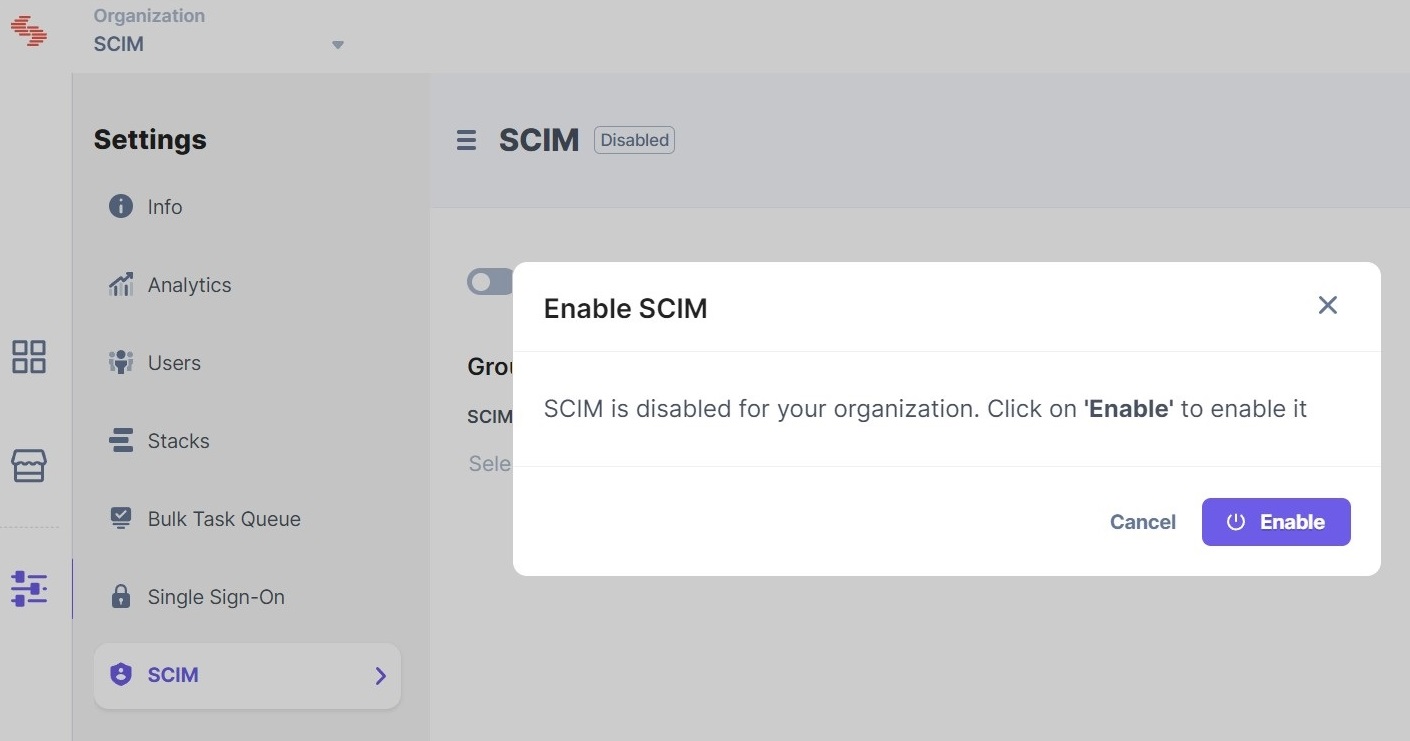
- On the Enable SCIM modal, click Enable.
After enabling SCIM, you’ll see the Group Mapping section. This section will enable you to set permissions for a group of users provisioned via the OneLogin app. We’ll cover the steps to create groups and set up group mappings later in this guide.
Create and Authorize Contentstack App in OneLogin
Note: You will need administrator rights in OneLogin to complete the steps given below.
- Log in to your OneLogin account, click Administration on the header, and then click the Applications link on the header.
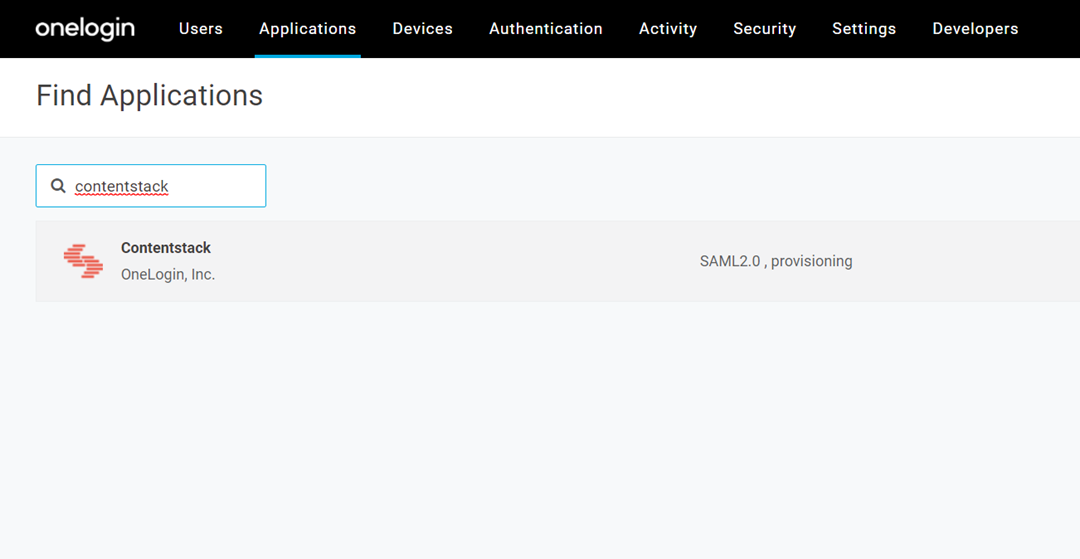
- Next, on the Applications screen, click the Add App button.
- Search for “Contentstack” in the search menu, as shown below, and click the Contentstack application.
- You will see the app’s Info screen with default content. Click on Save.
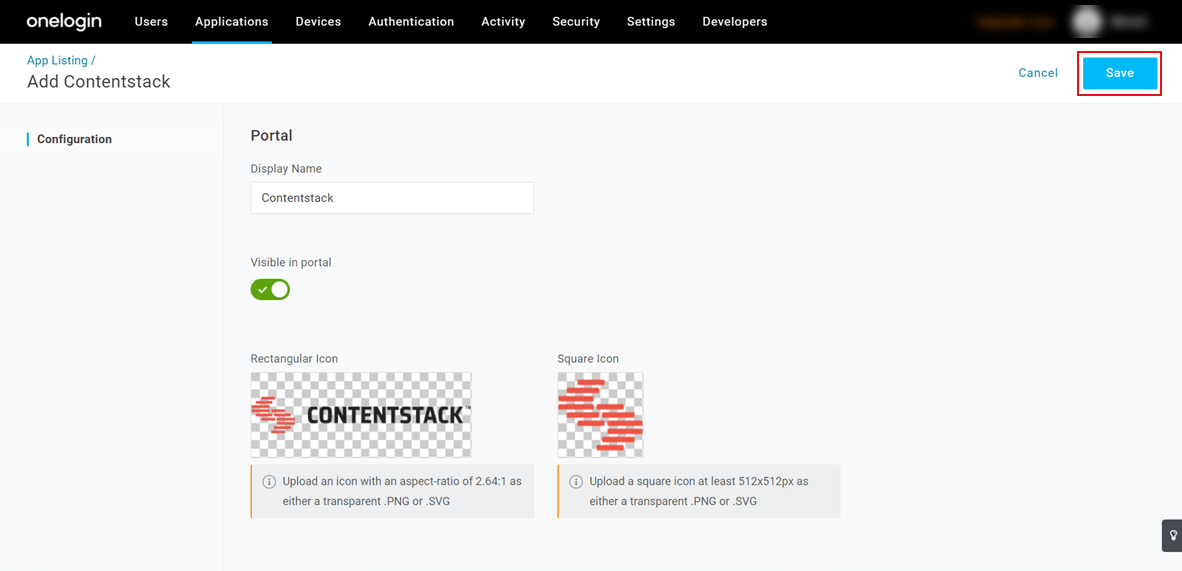
The Contentstack app is now added to your OneLogin account.
- On the left navigation panel, go to Configuration.
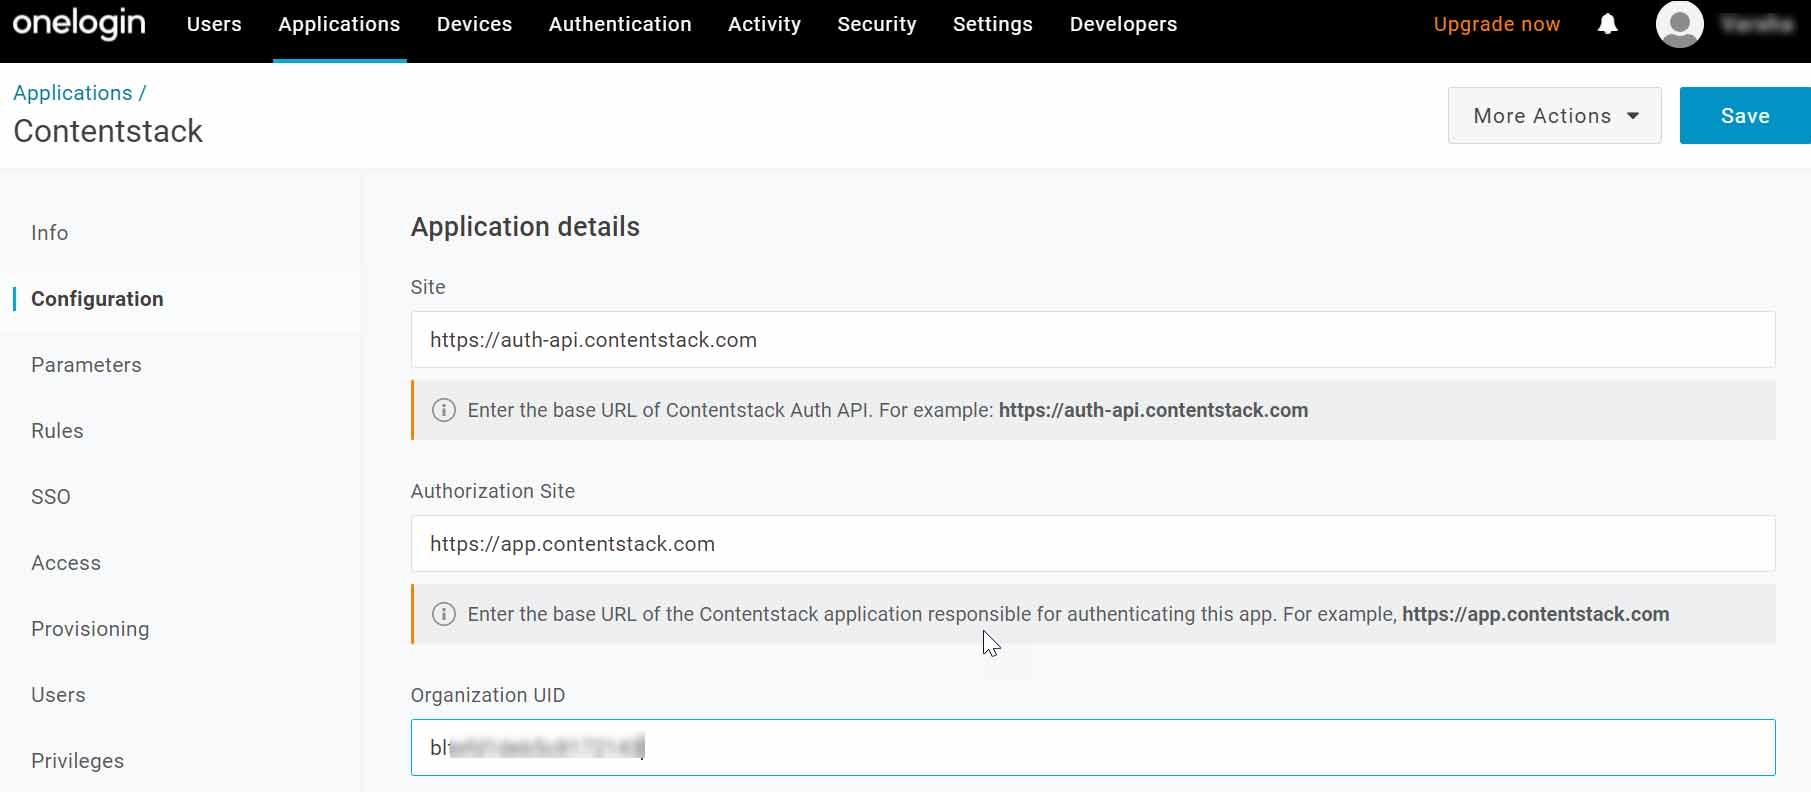
- Then, in the Application details section, provide the following details:
- Site: Provide the base URL of Contentstack Auth API.
- For North American region, use https://auth-api.contentstack.com
- For Europe region, use https://eu-auth-api.contentstack.com
- For Azure NA region, use https://azure-na-auth-api.contentstack.com
- For Azure EU region, use https://azure-eu-auth-api.contentstack.com
- For GCP North America region, use https://gcp-na-auth-api.contentstack.com
- For GCP Europe region, use https://gcp-eu-auth-api.contentstack.com
- Authorization URL: Enter the base URL of the Contentstack app to authorize OneLogin with SCIM in Contentstack.
- For North American region, use https://app.contentstack.com
- For Europe region, use https://eu-app.contentstack.com
- For Azure NA region, use https://azure-na-app.contentstack.com
- For Azure EU region, use https://azure-eu-app.contentstack.com
- For GCP North America region, use https://gcp-na-app.contentstack.com
- For GCP Europe region, use https://gcp-eu-app.contentstack.com
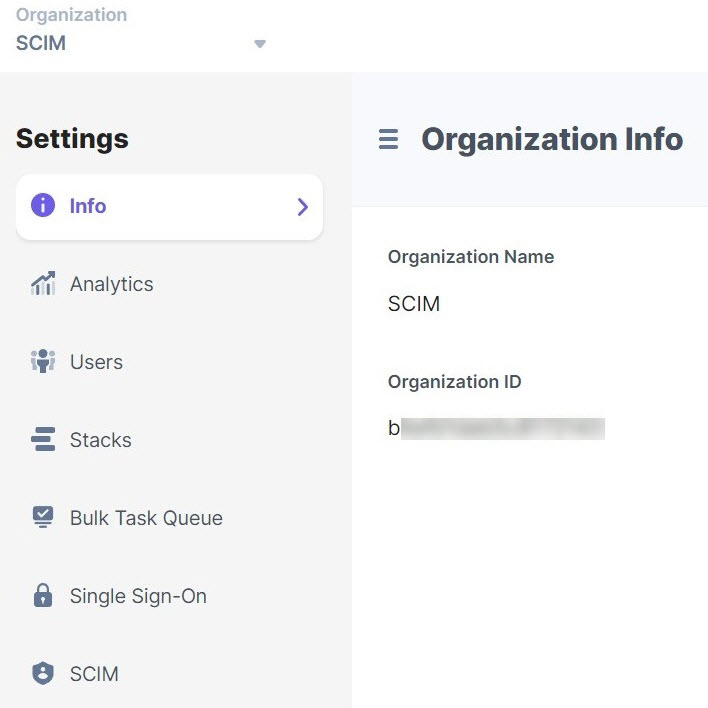
- Organization UID: Enter the UID of your Contentstack organization. To get the UID, log in to your Contentstack account and go to the Organization Settings page. Then, go to the INFO tab and you’ll see Organization ID on the Organization Info page as shown below:
- Site: Provide the base URL of Contentstack Auth API.
- Click on Save on the top-right corner.
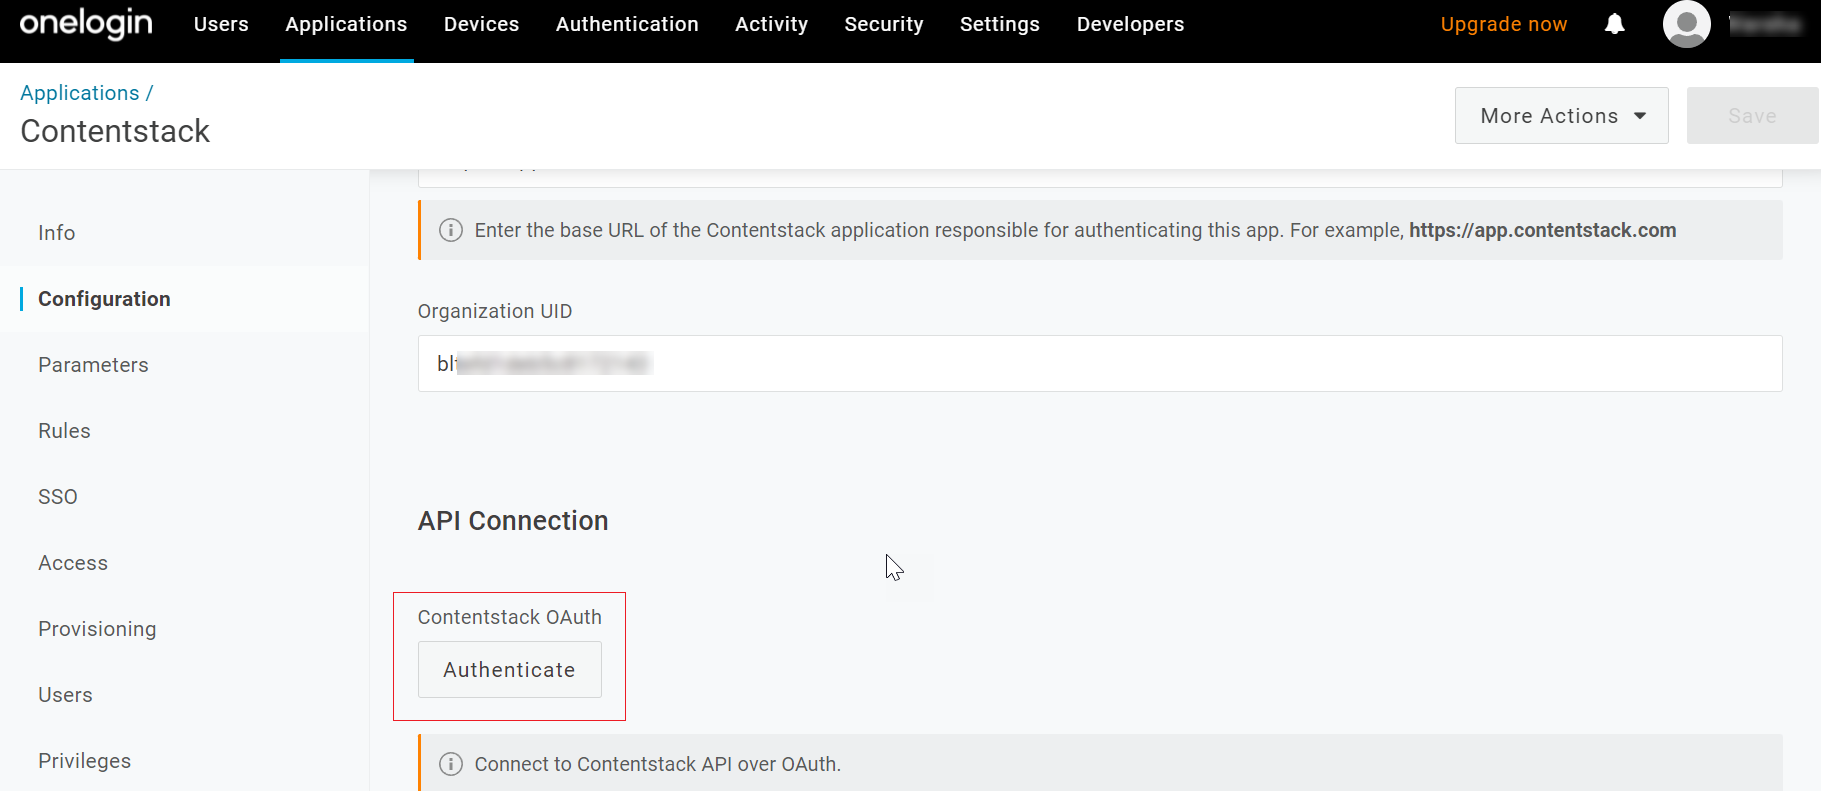
- Go back to the Configuration section, navigate to the API Connection section, at the end of the Configuration page, and click on Authenticate.
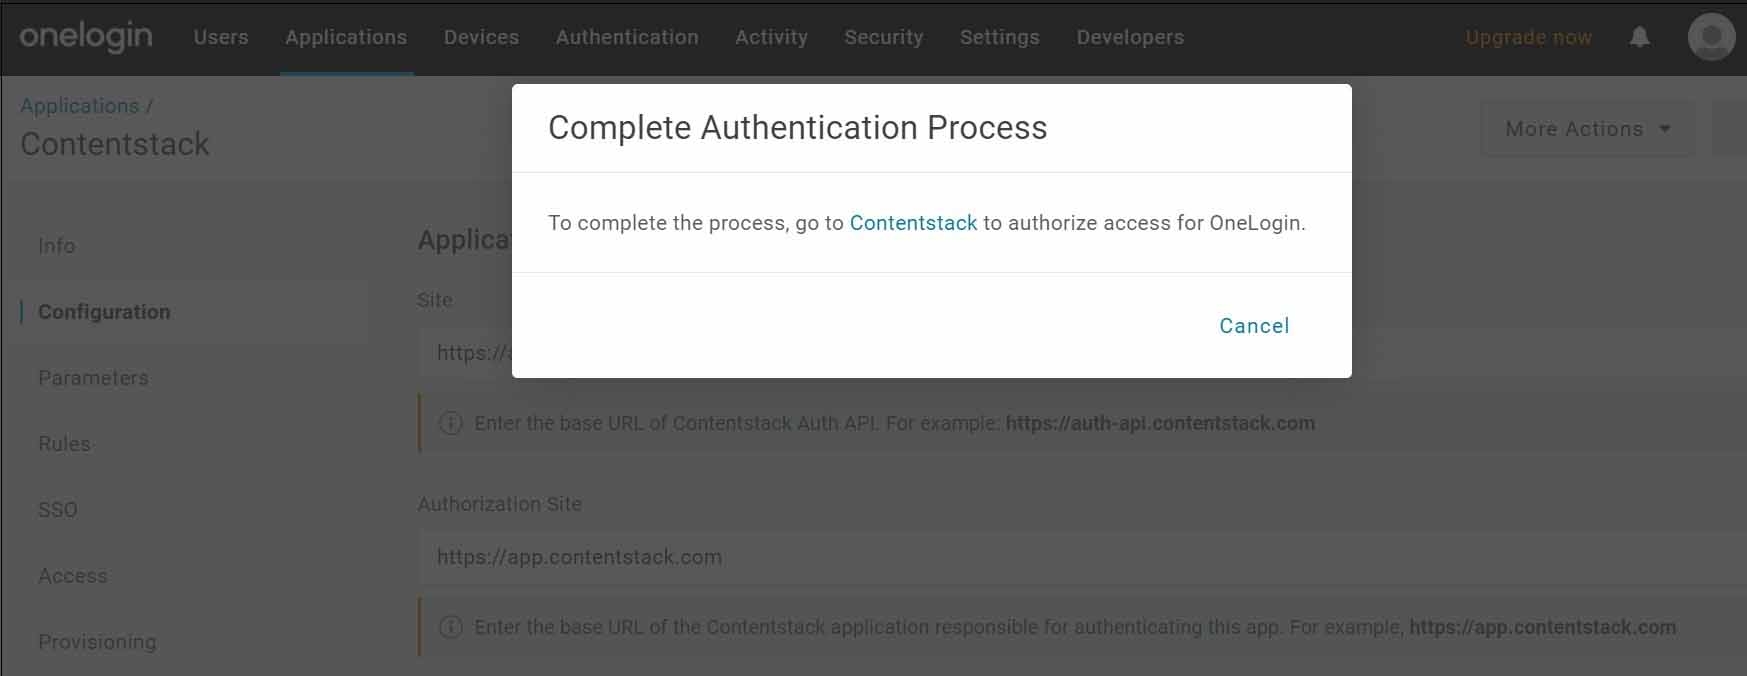
- On the Complete Authentication Process modal, click on the Contentstack link.
This will redirect you to the Contentstack app where you need to authorize OneLogin.Note: If you haven’t logged in to your Contentstack account, it will ask you to first log in to your Contentstack account, and then allow access.
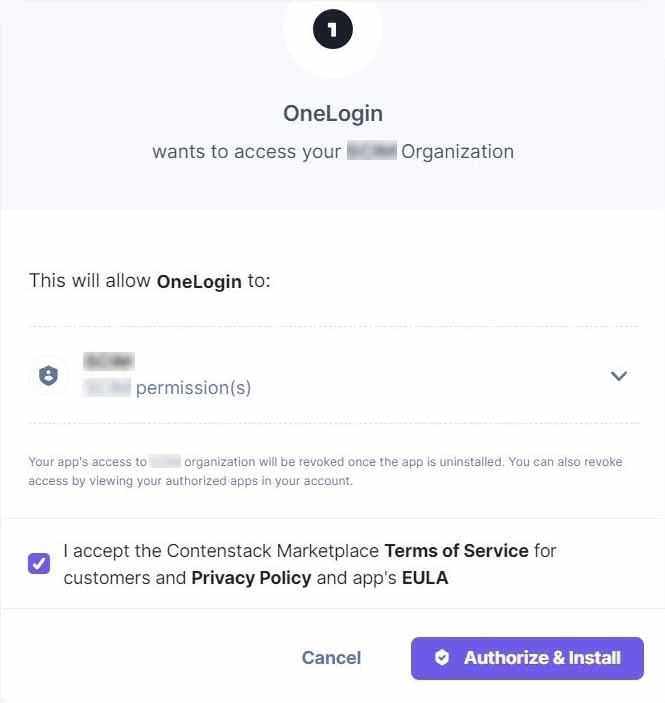
- Then, on the “Authorization” modal that appears, select the checkbox to accept terms and conditions and then click on the Authorize & Install button to allow OneLogin to access your Contentstack account.
Note: Ensure OneLogin has access to the provided organization.
Finally, you will get the “OAuth authorization performed successfully” message denoting that the authorization steps are successfully completed.
Enable Provisioning in Your OneLogin App
To enable your app to use the provisioning feature, before adding or removing a user from the Contentstack organization, you need to perform the following steps:
- Staying inside the Contentstack app in OneLogin, click on Provisioning on the left navigation panel.
- Under the Workflow section, check the Enable provisioning option, select Delete (to enable deprovisioning) from the first dropdown, and Save it.

This will enable user provisioning as well as deprovisioning in your OneLogin app.
Note: By default, admin approval for the create, delete, and update user options is enabled. You can uncheck any of these if required. For this tutorial, we have kept the default configuration unchanged.
Now let’s proceed to enable the provision of groups in OneLogin.
Enable Provisioning for Groups in OneLogin
To use groups in the OneLogin’s Contentstack app, you should enable it by performing the following steps:
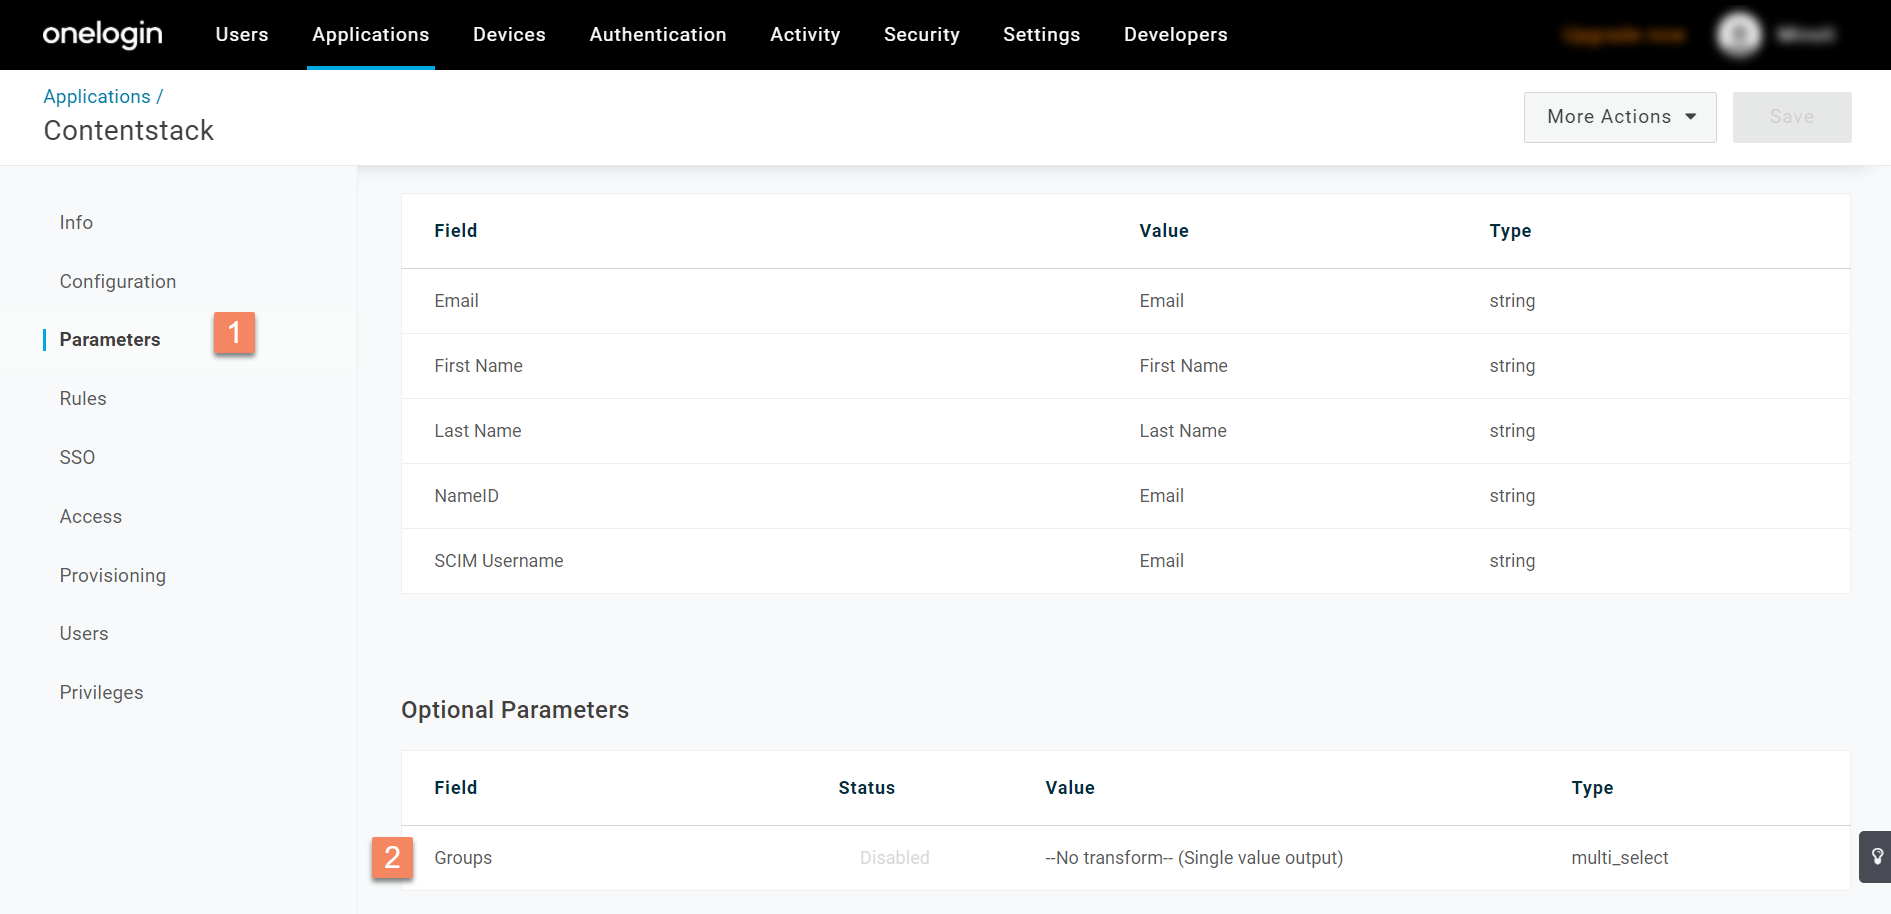
- Go to the Parameters tab on the left navigation menu, and click Groups from the Optional Parameters section.
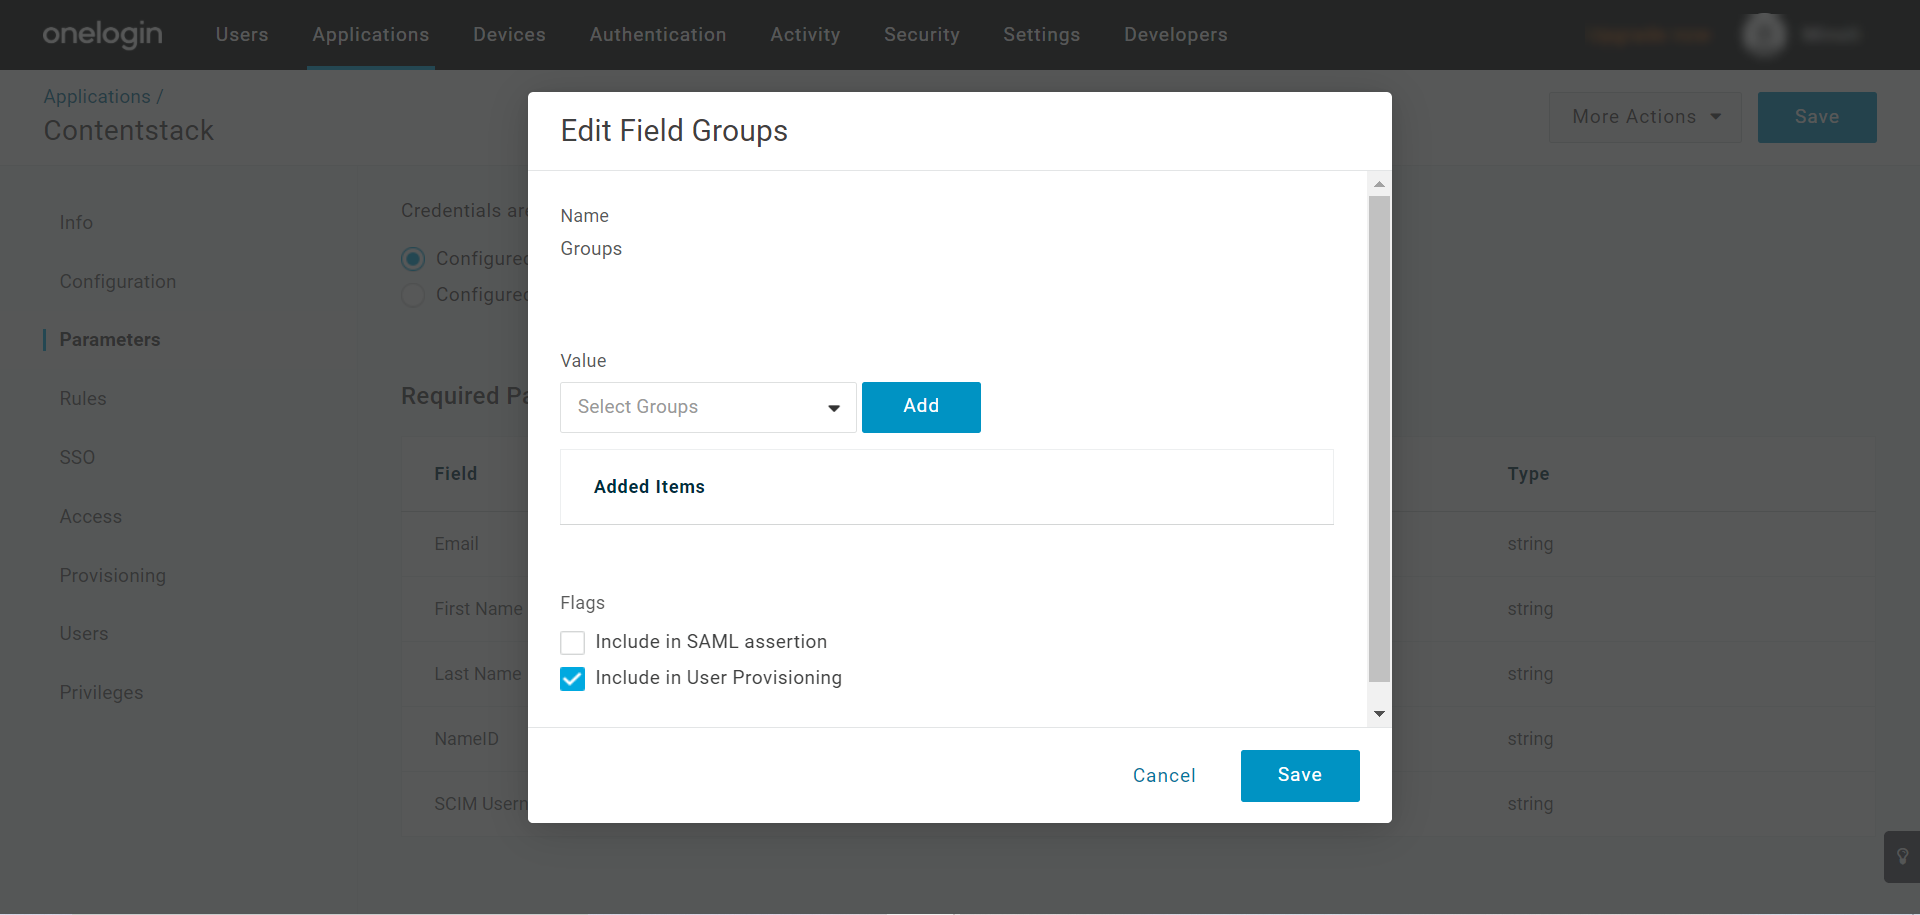
- Then, in the Edit Field Groups modal, select Include in User Provisioning option, and click Save.
- Go to the Parameters tab on the left navigation menu, and click Groups from the Optional Parameters section.
Provision and Deprovision Users via OneLogin
Using SCIM, you can provision and deprovision users in your Contentstack organization via OneLogin.
Provision Users via OneLogin
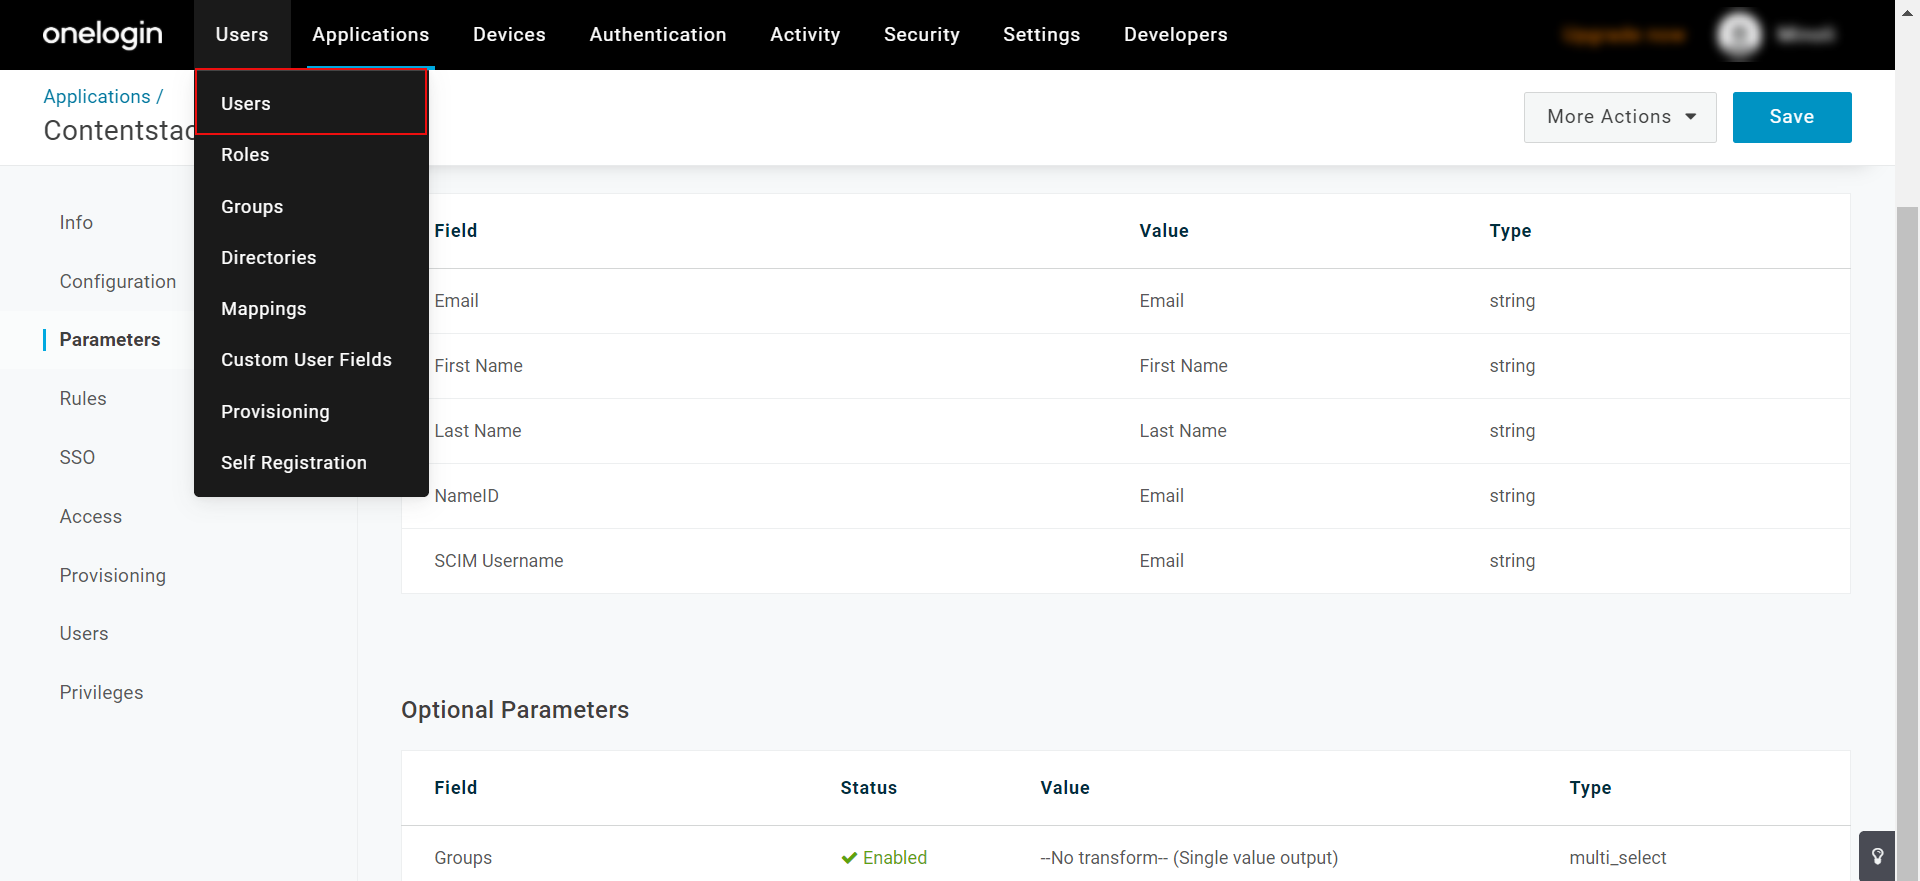
To do so, perform the following steps:- In the OneLogin’s Contentstack app, after configuring the application, go to the Users tab on the header, and then select Users.
- To add a user, click on the New User button.
- On the New User page that appears, provide the following details about the user:
- First and last name
- Email address
- Username
Note: The email address and username should not be different.

- Click on the Save User button. With this step, you’ve added a user to your OneLogin app. Now let’s provision this user to your organization in Contentstack.
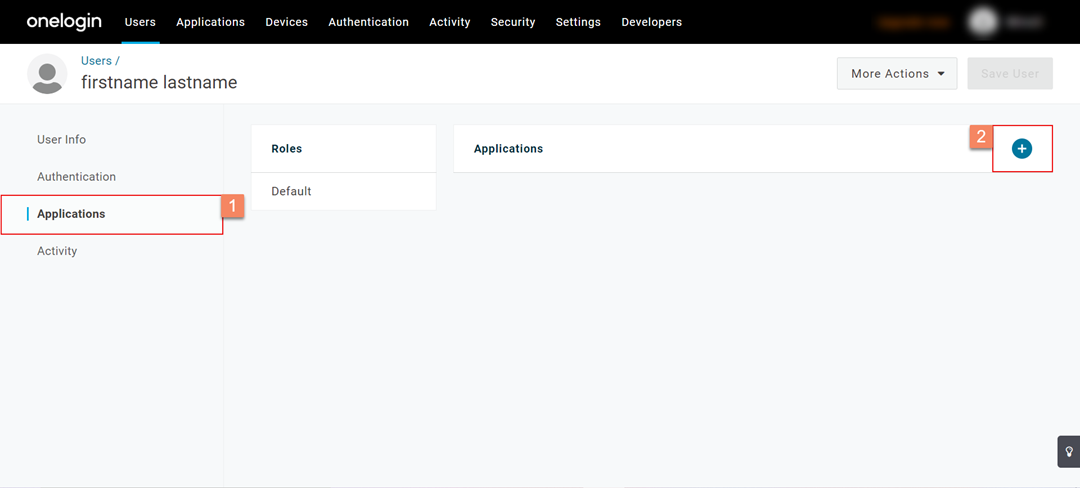
- Once the user is added, you’ll see an Applications tab on the left navigation panel. Go to the Applications tab and click the ‘+’ button.
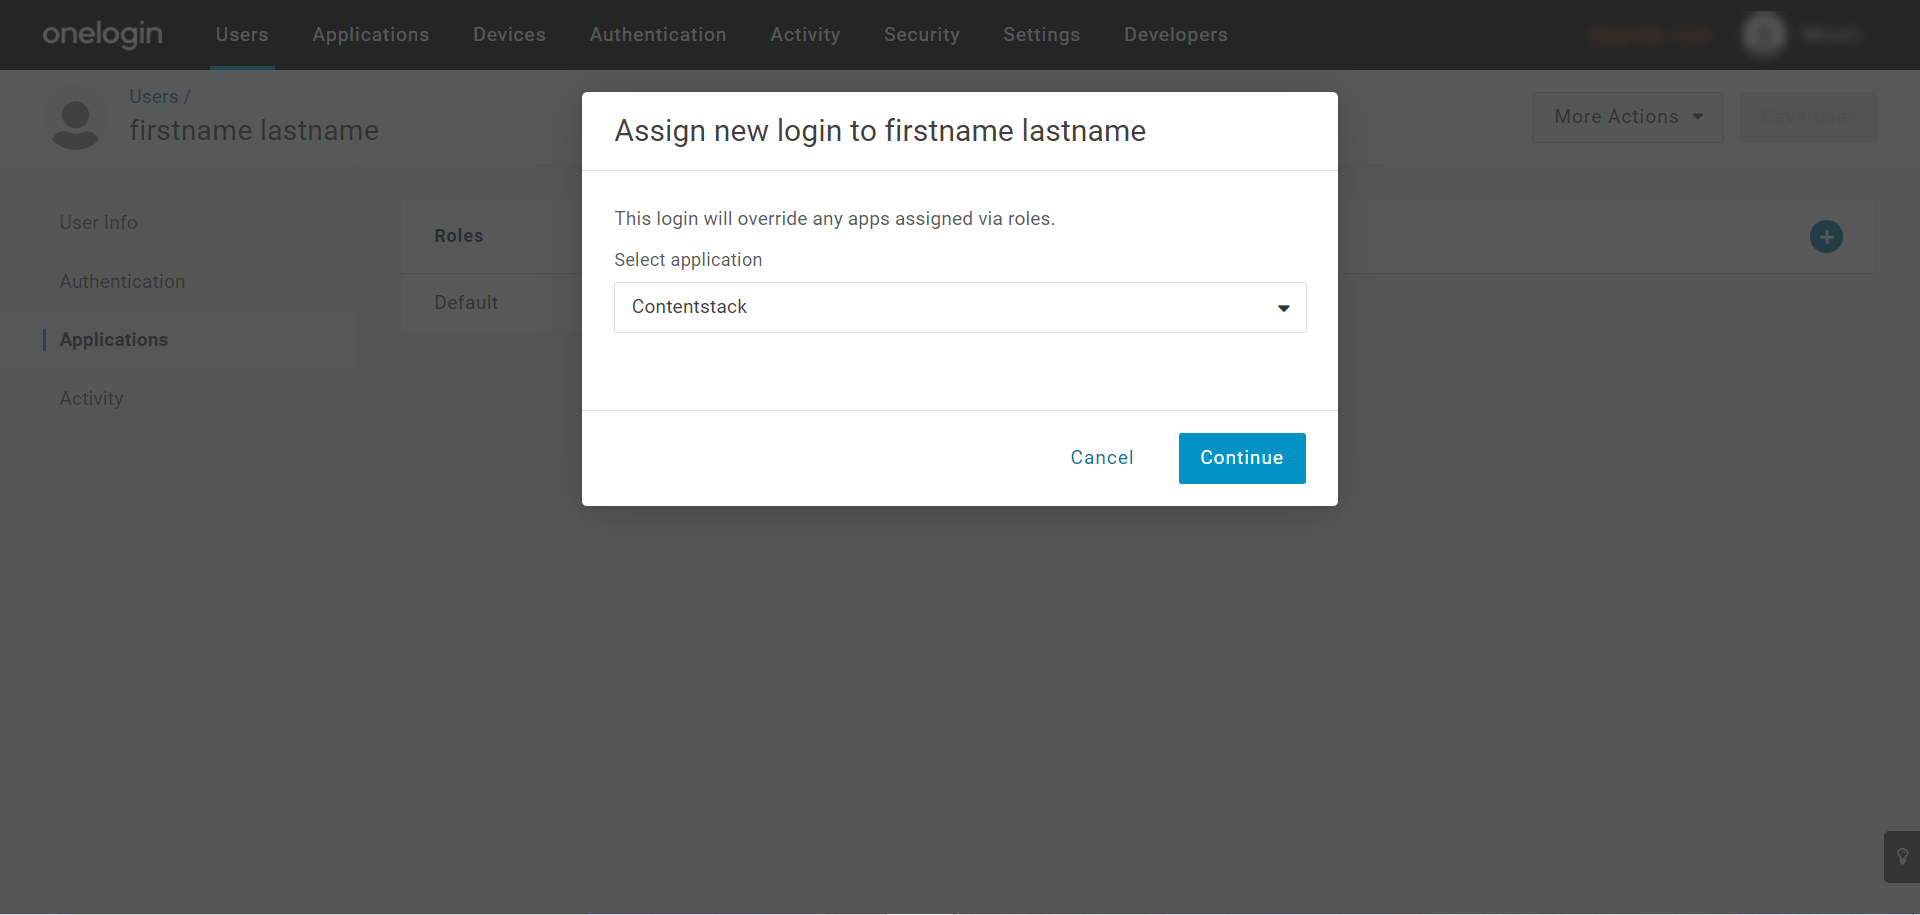
- On the “Assign new login to {name of user}” modal that appears, select the application to which you want to provision the user from the Select application dropdown menu, and click Continue.
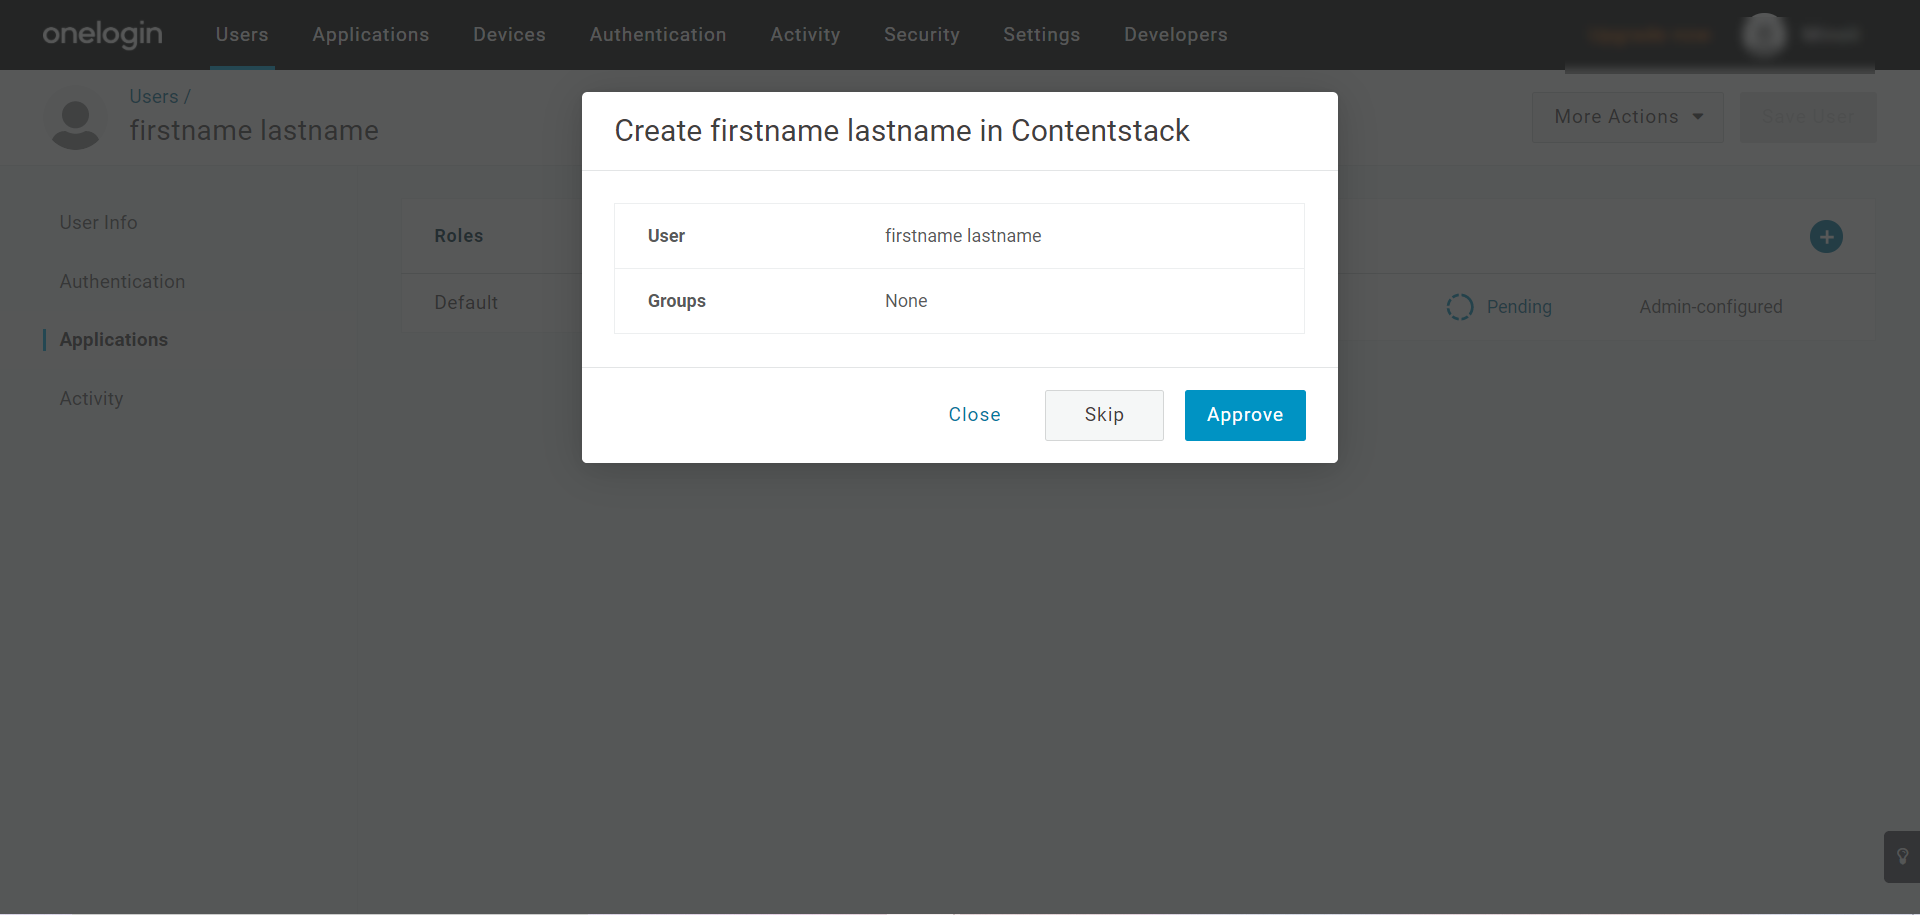
- On the next screen, review or edit the user’s details and click on Save to confirm.
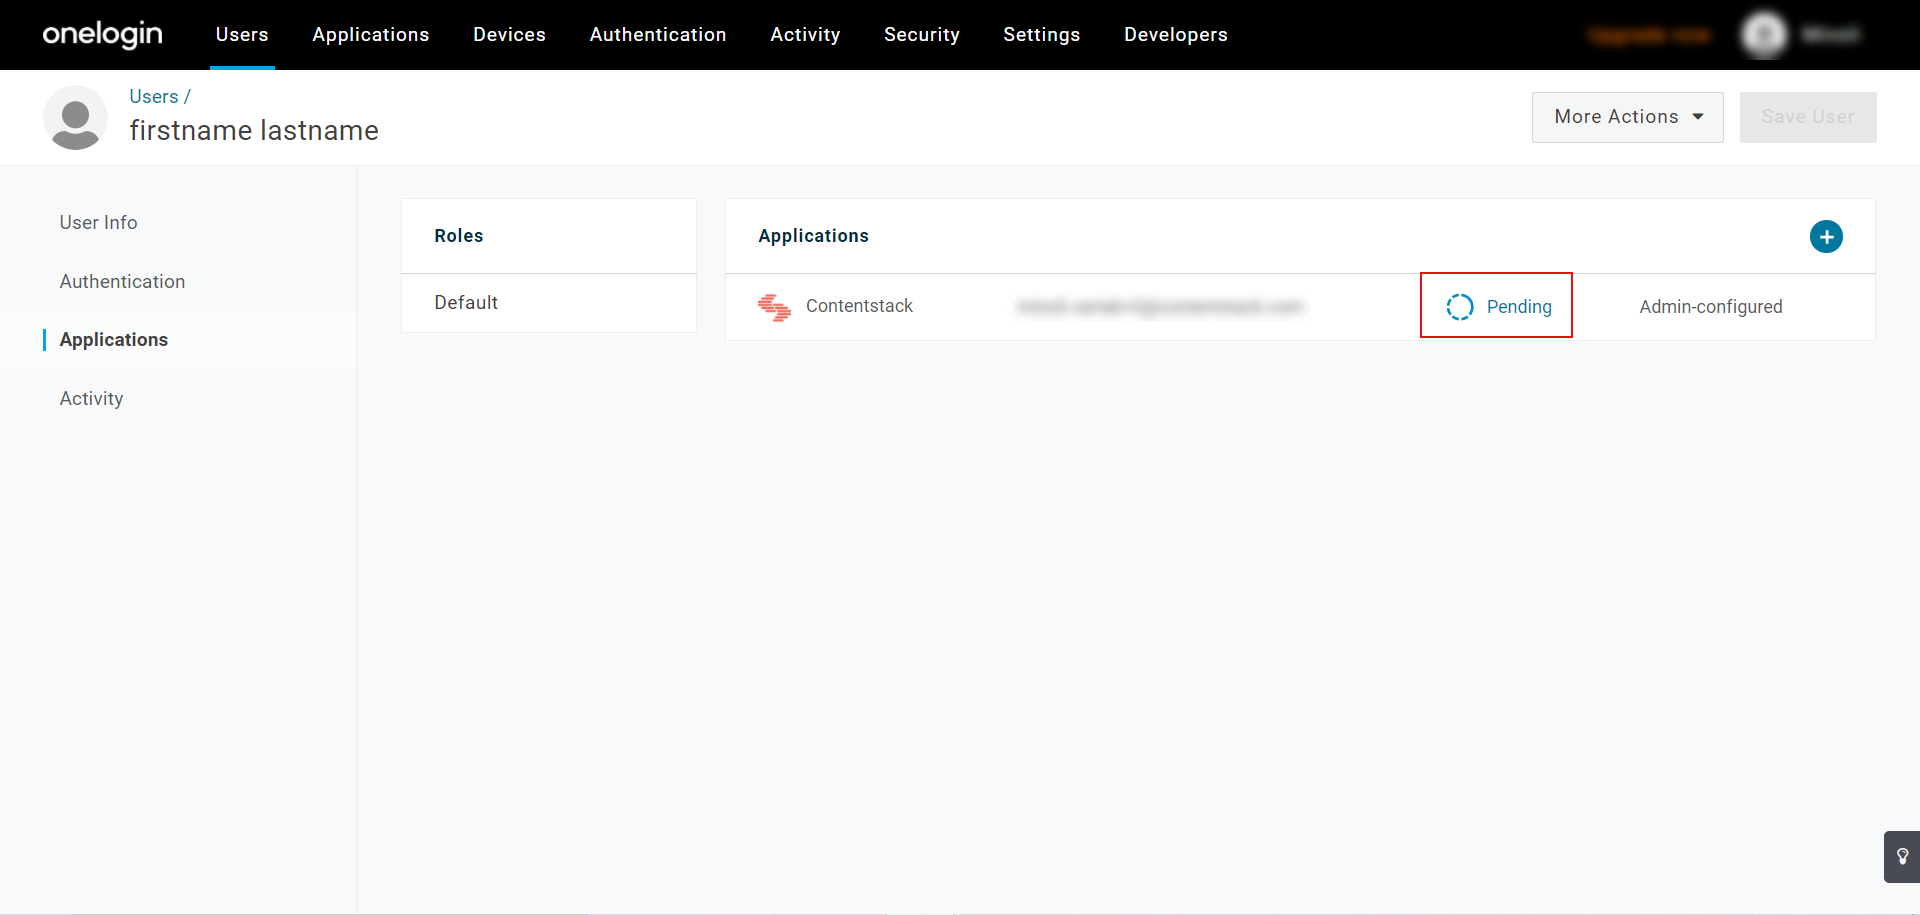
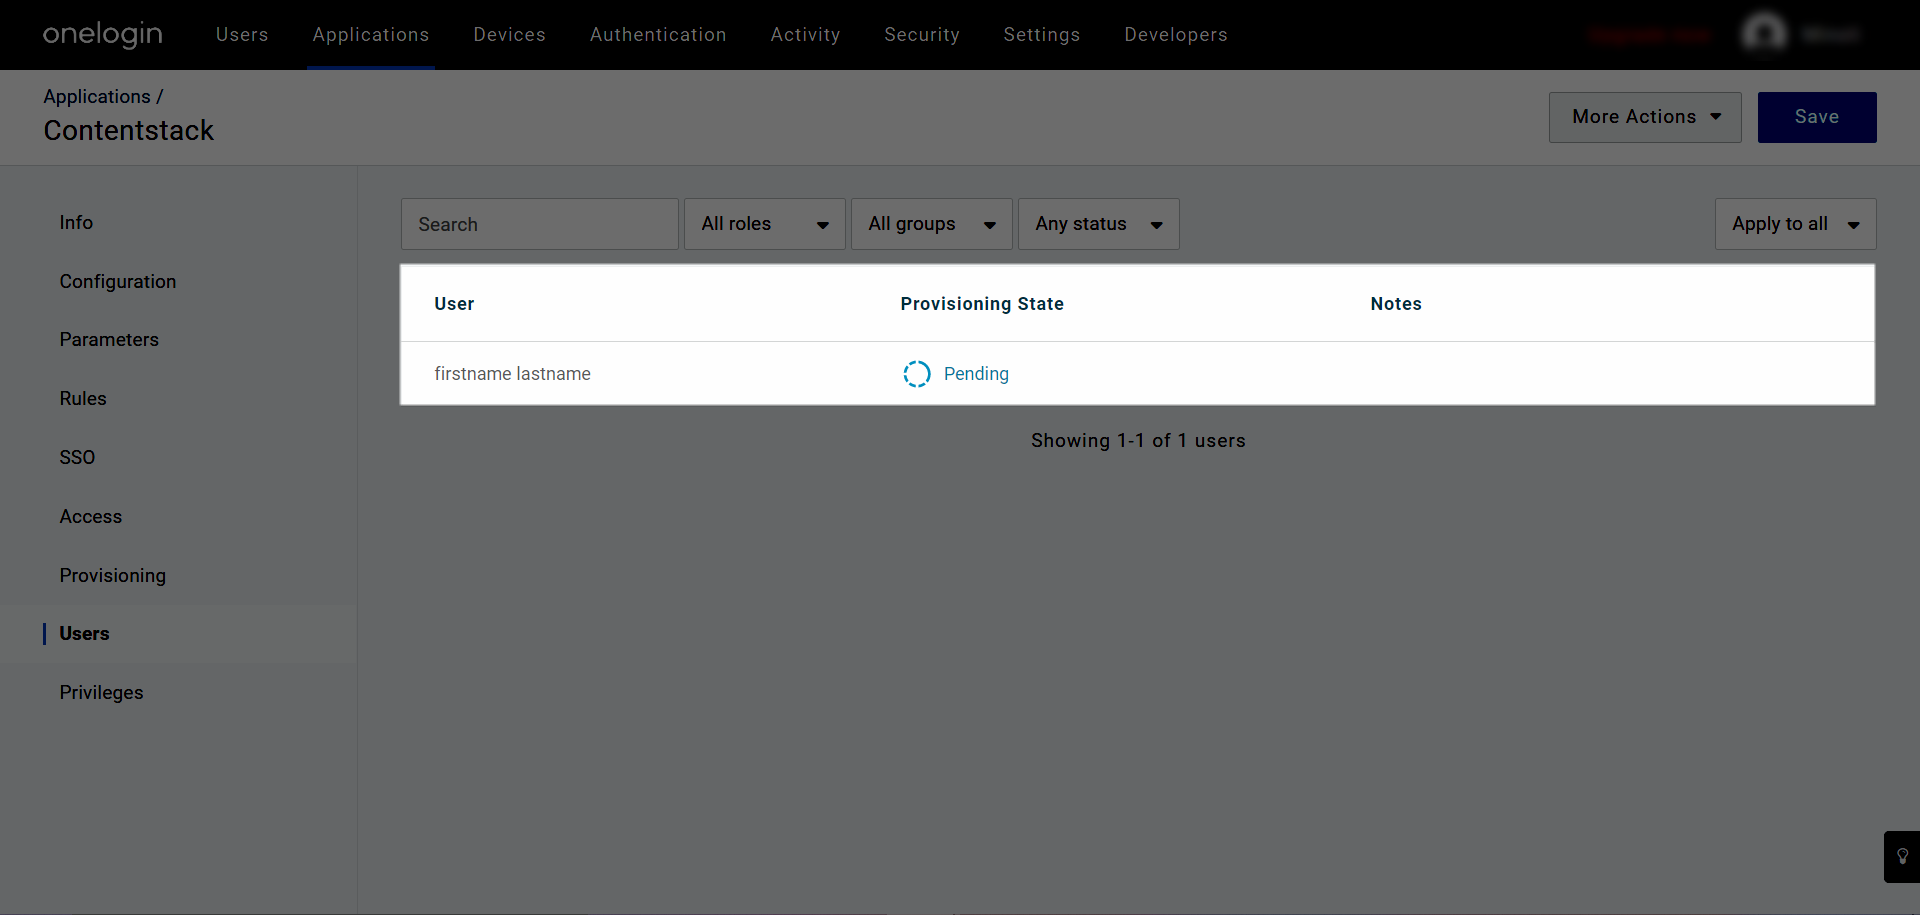
- As the provisioning option is enabled, initially the status of the request will be in the “Pending” state denoting that admin's approval is required to provision this user. Click on Pending.
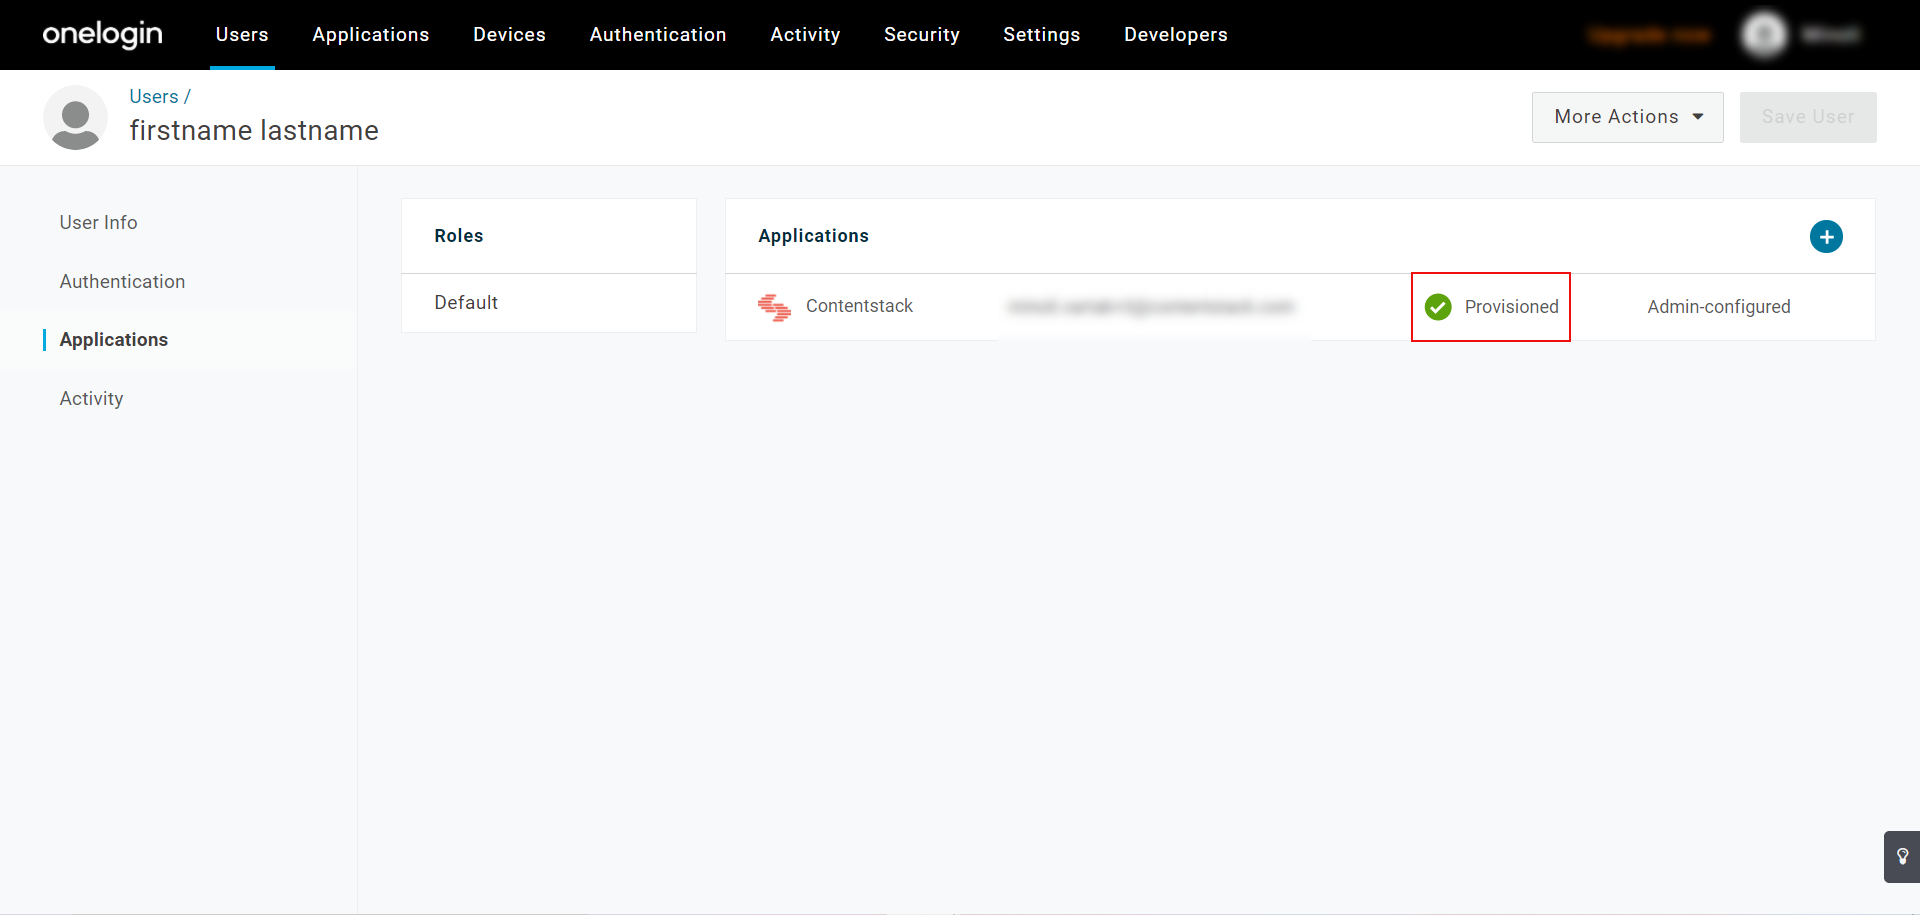
- Then click on Approve to approve the request.
- Once the request is approved, the status changes to Provisioned as shown in the screenshot below.
Once the user is added to your Contentstack organization, you can proceed with Step 6 to create groups in the Onelogin app.Deprovision Users via OneLogin
To deprovision/remove a user from your Contentstack organization using OneLogin, perform the following steps:
- Go to the Contentstack app in OneLogin created in Step 2 and click Users on the left navigation panel.
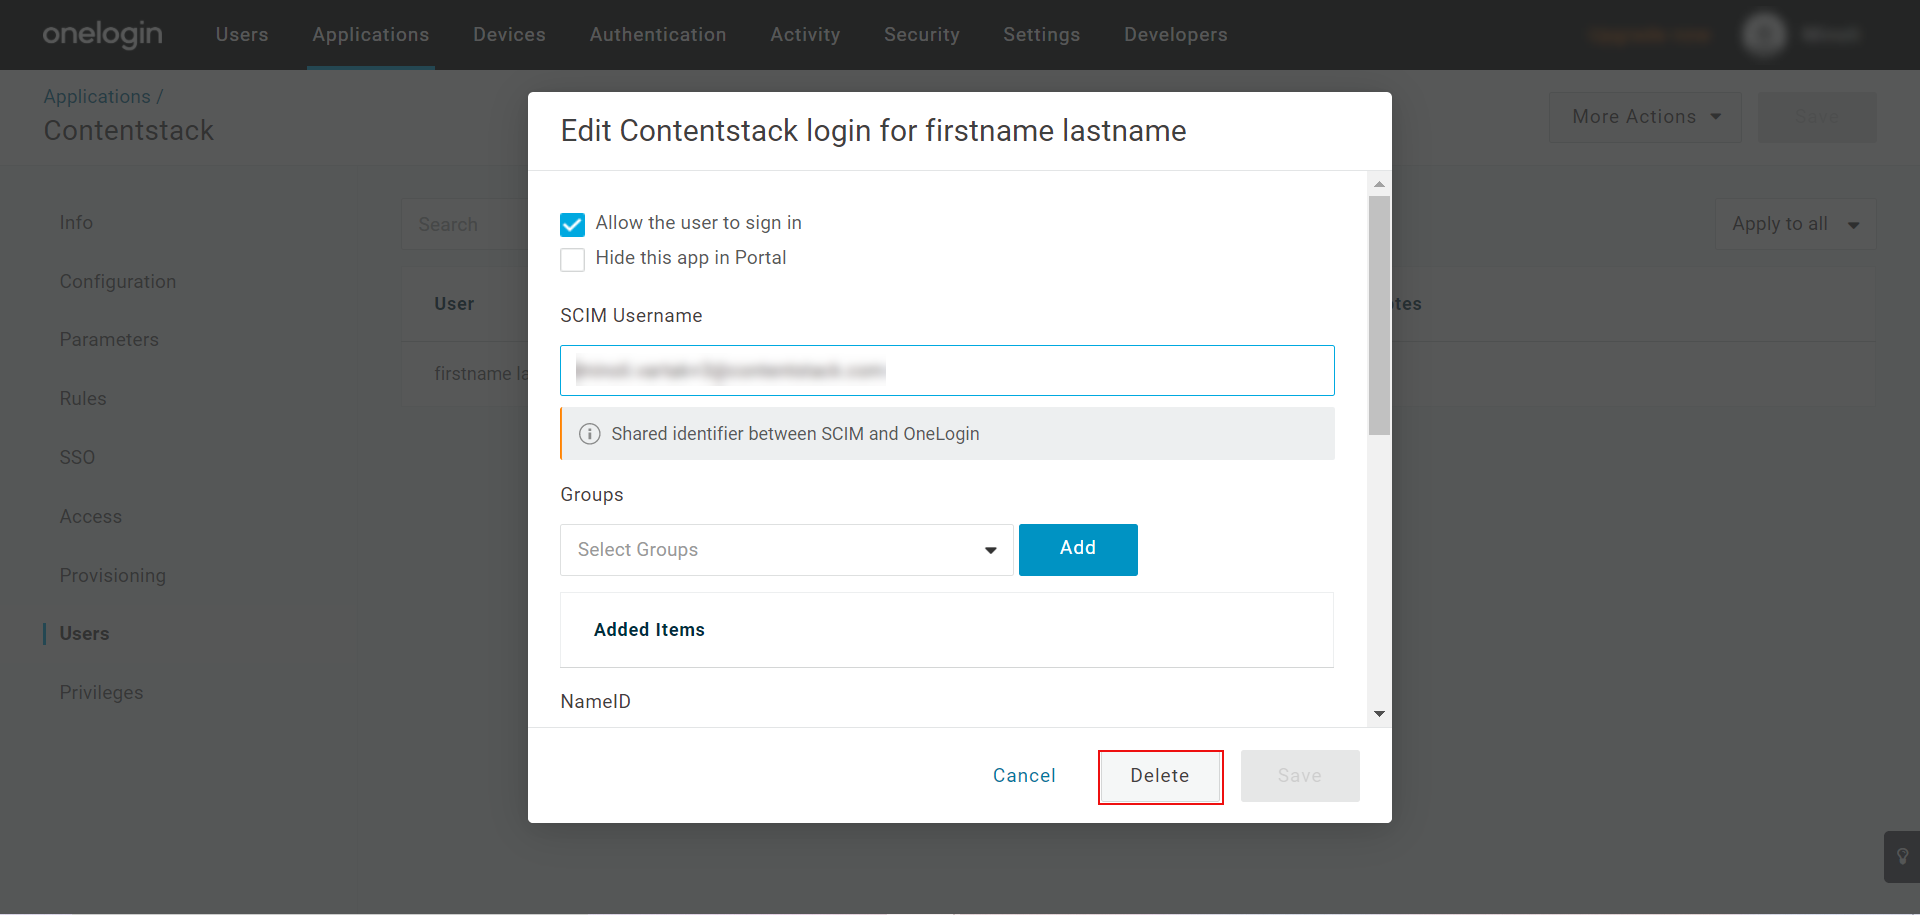
- You’ll see a list of users added to the application. Click the user you want to deprovision.
- On the prompt that appears, click Delete.
- To approve this delete request, click on the Pending link.
- Approve the request for deprovisioning.

The user is now removed from the assigned organization in Contentstack. Note that the user will still have a Contentstack account, but with no access to your organization.
- In the OneLogin’s Contentstack app, after configuring the application, go to the Users tab on the header, and then select Users.
Set up Groups in OneLogin
A group refers to a collection of users who are designated to share common permissions. Through the OneLogin account, you can create a group using several ways such as through roles or departments.
After creating a group, you can use the “group mapping” functionality in your Contentstack organization for setting permissions.
To set up groups in OneLogin according to the role, perform the following steps:
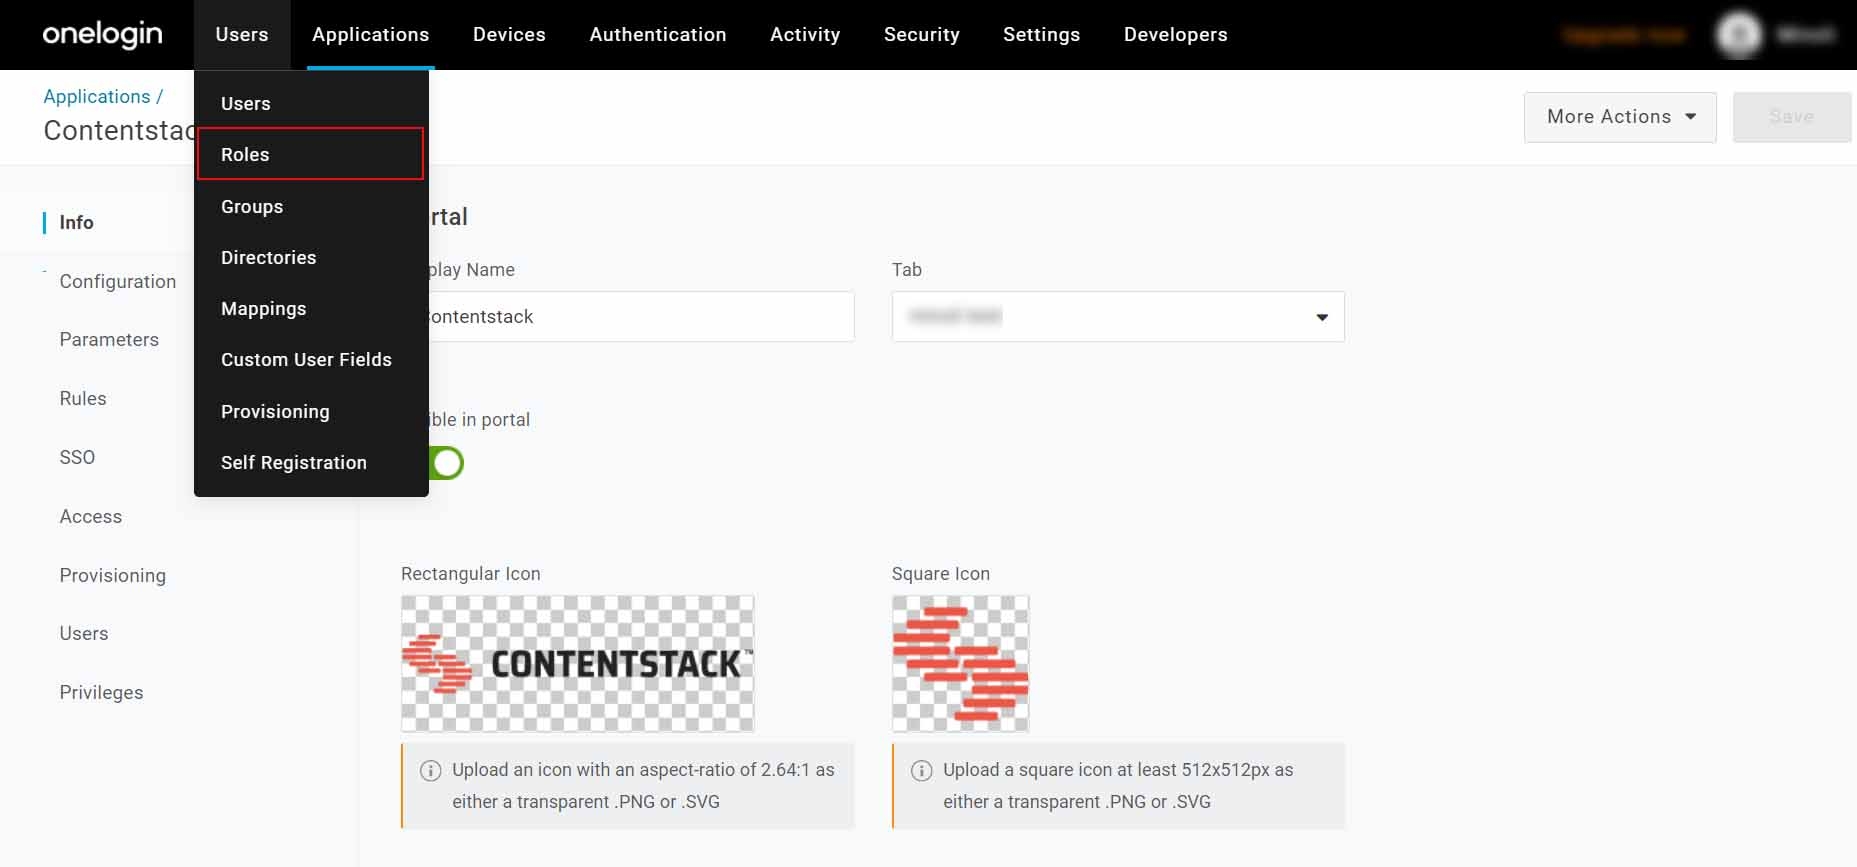
- Click on the Users tab and select Roles.
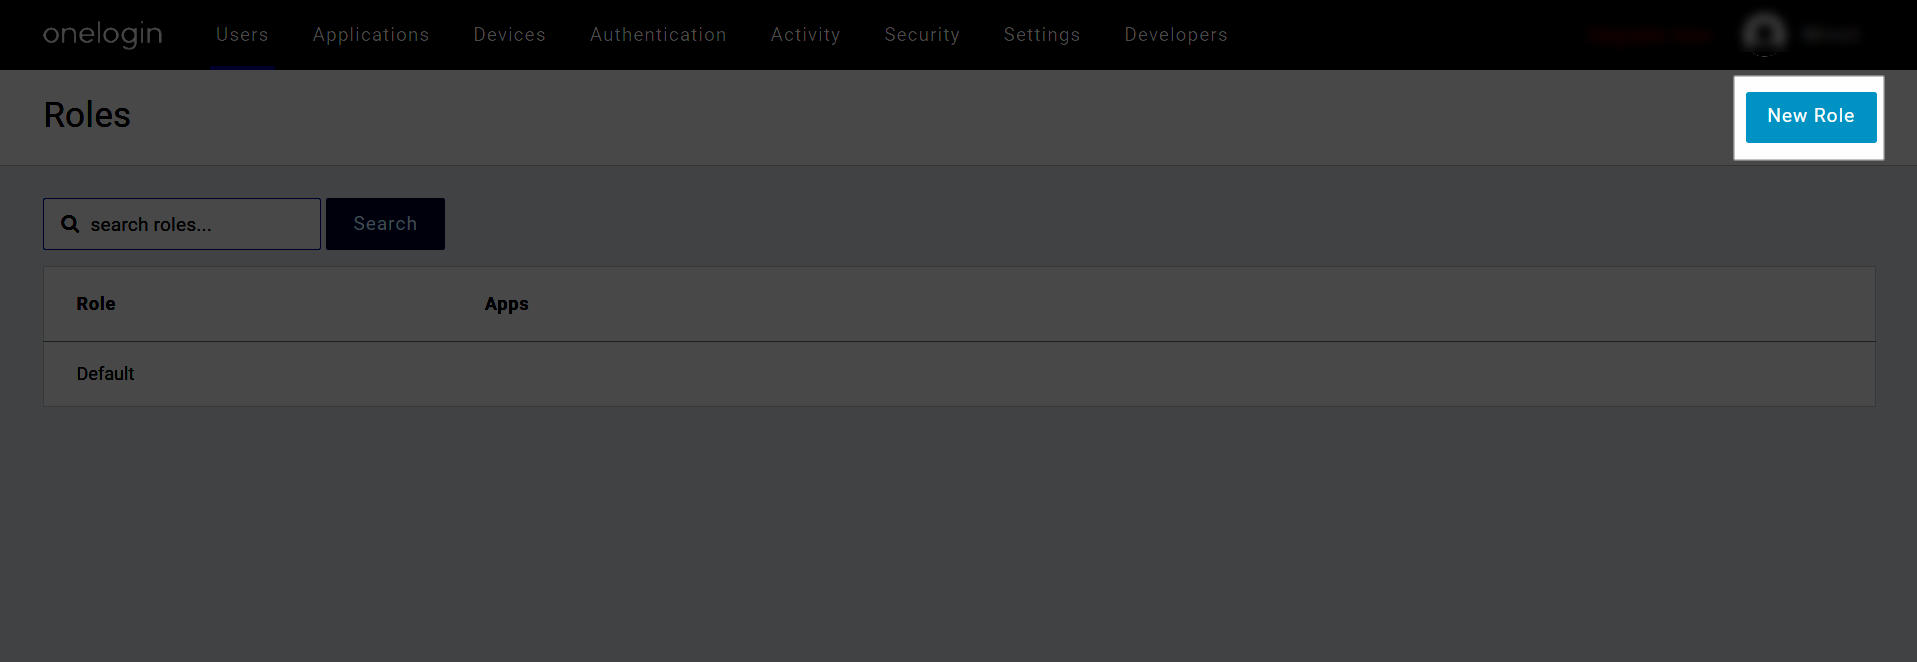
- On the Roles page, you will see a default role. Click on the New Role button.
- On the next screen, provide a role name, for example, “Developer Role,” then select the applications to which this role is applicable, and Save it.
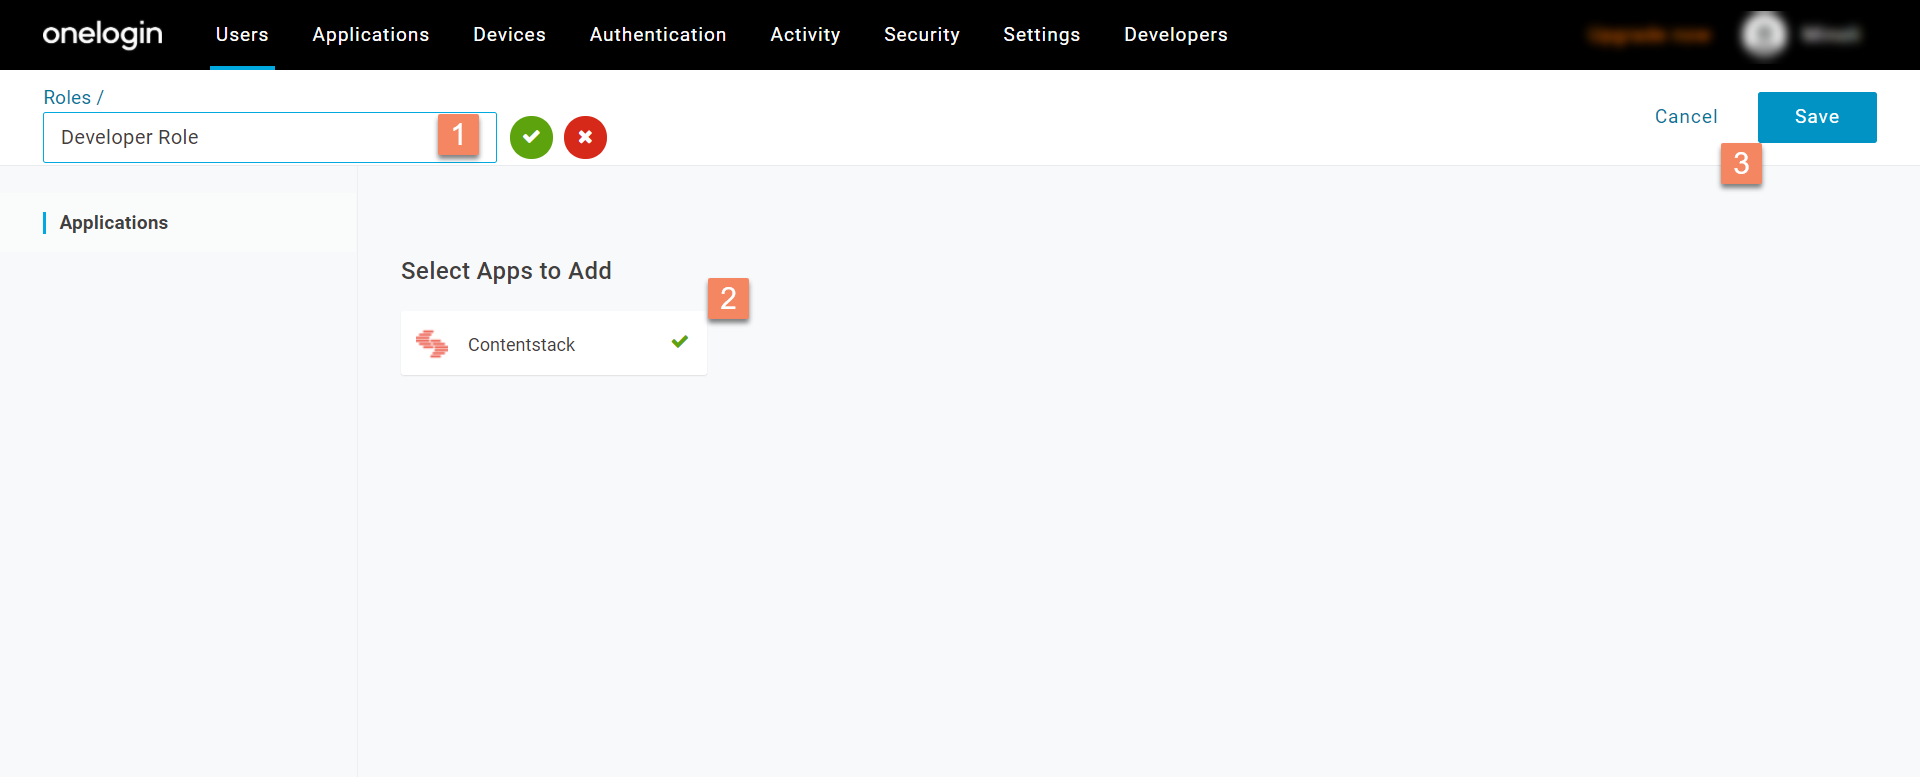
- A new role will be created and you will be redirected to the Roles page. Click on the newly created role.
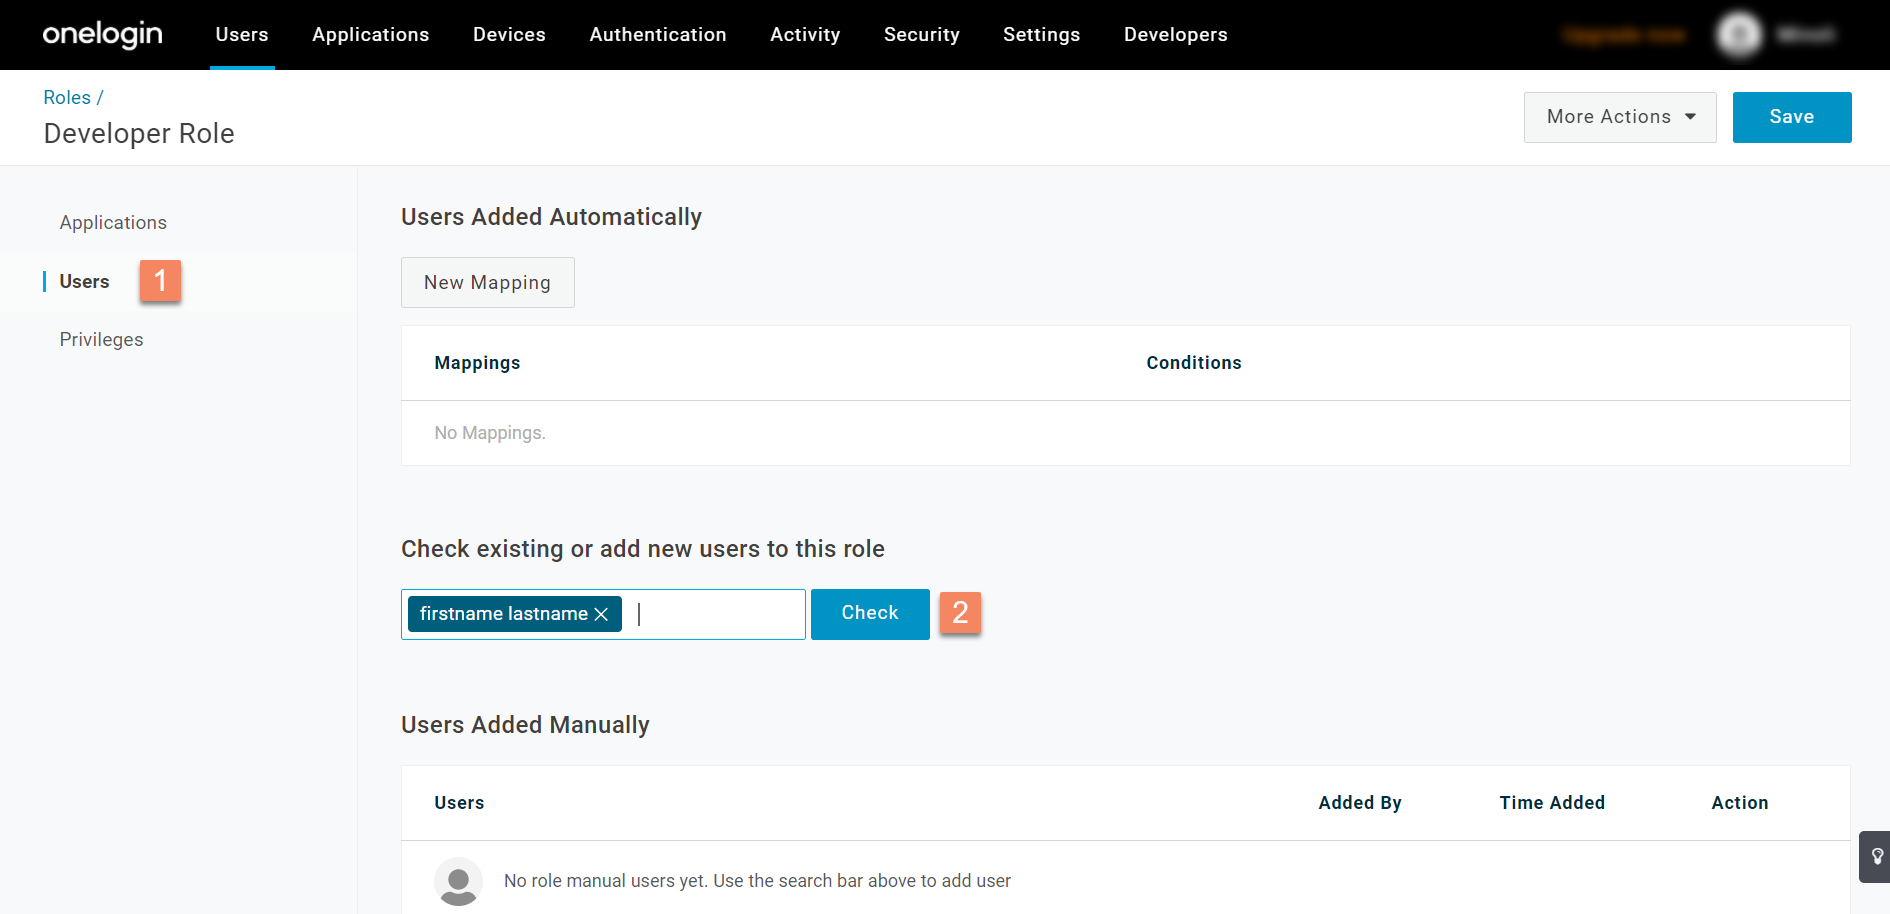
- Then, go to the Users section from the left navigation panel, then under the Check existing or add new users to this role section, enter the name of the user, and click Check.
- Add this user to the role by clicking on the Add To Role option and then the Save button.
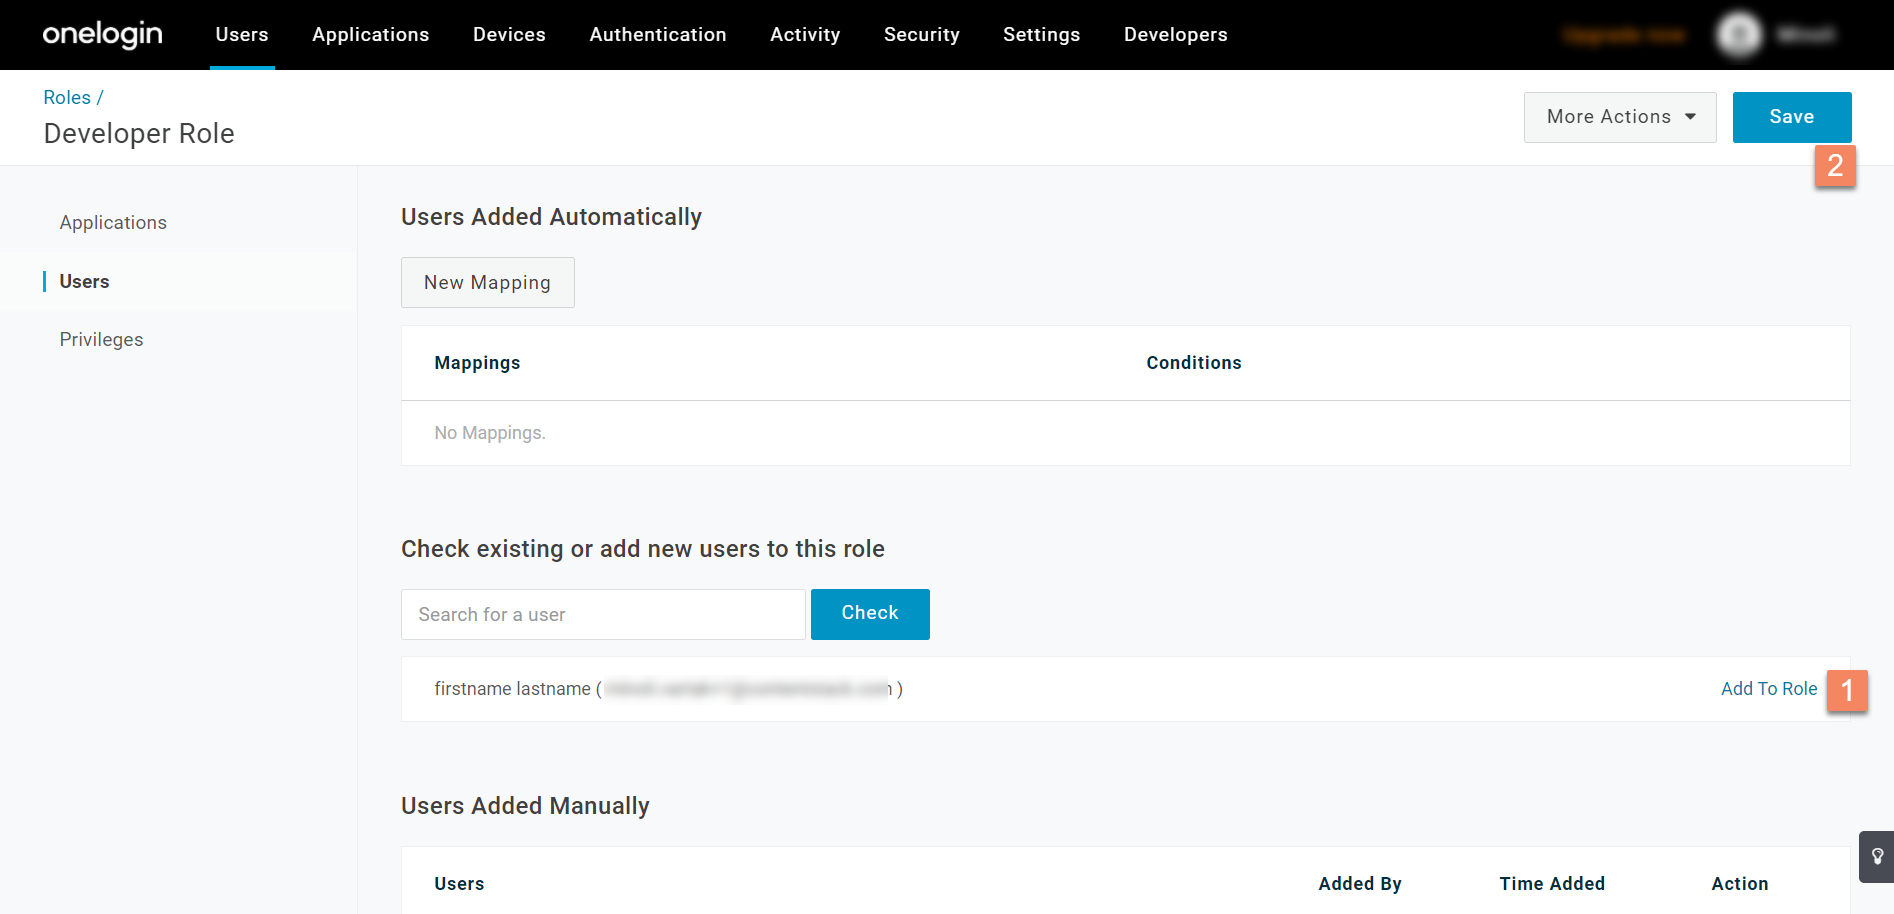
- Confirm to add a user to the role by clicking Save.
- Next, click on the Applications tab at the top.
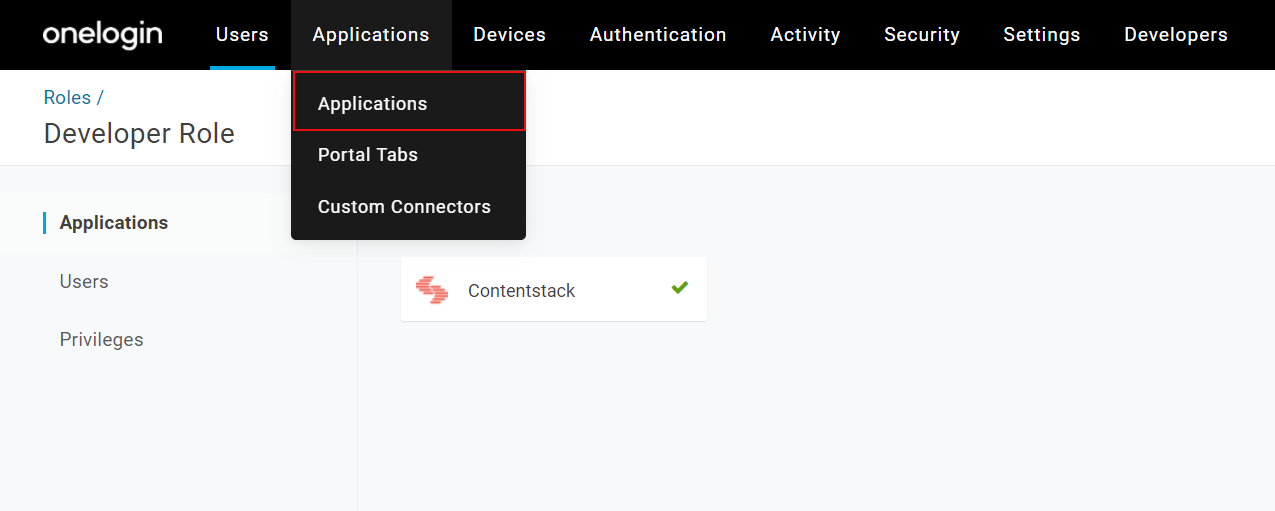
- From the Applications page, go to the Contentstack application we created in Step 2.
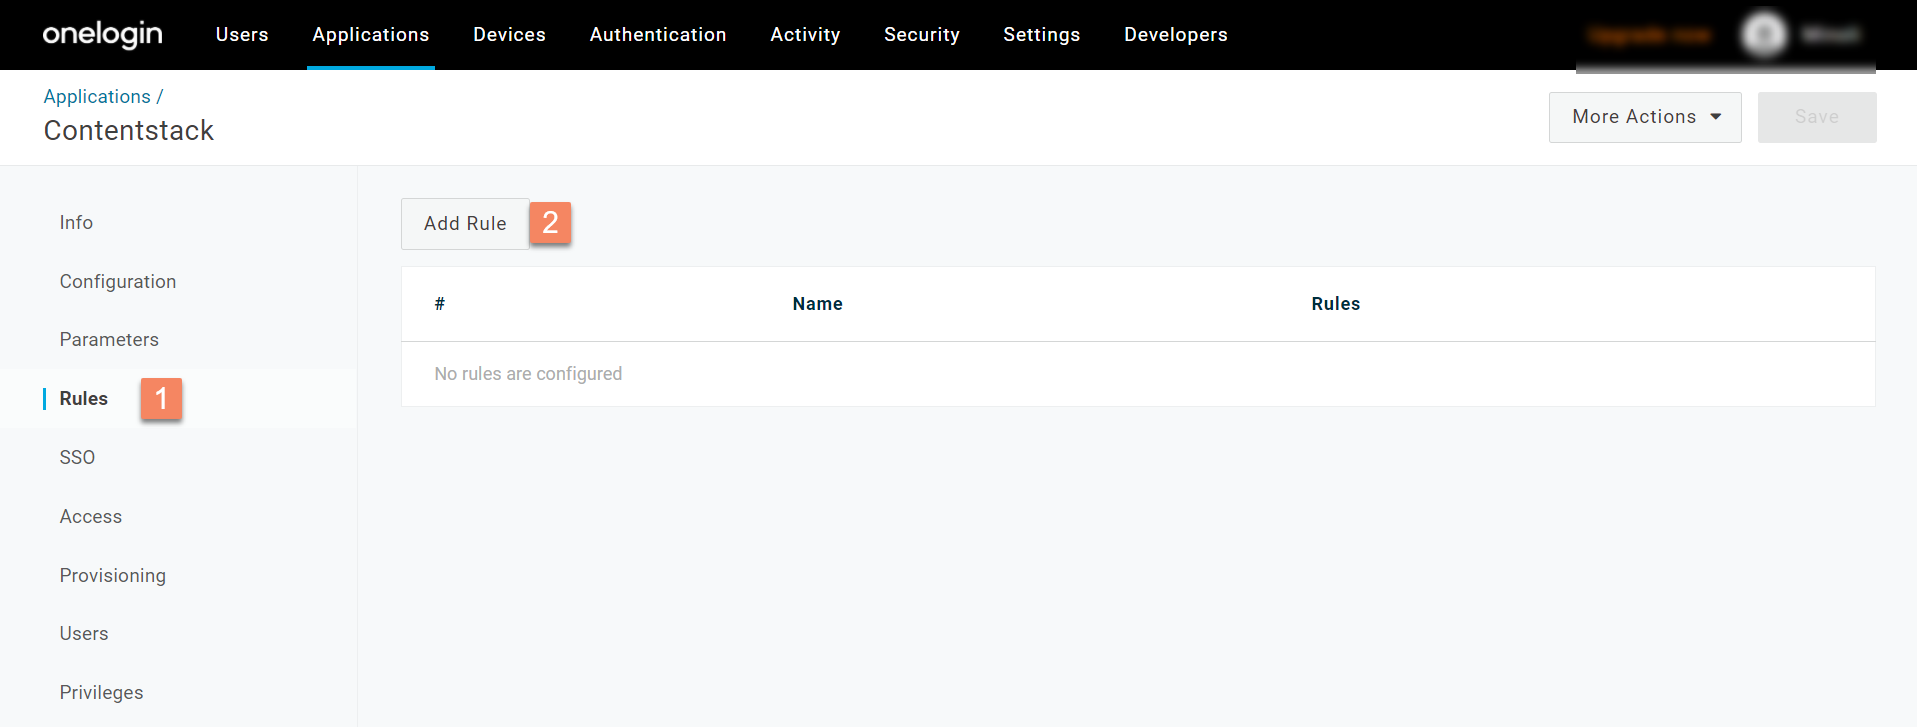
- Go to the Rules tab and click the Add Rule button.
- In the New mapping modal that appears, provide the following:
- Name of the rule, for example, “Developer Role rule”.
- Conditions: Skip it for now.
- Actions: Select Set Groups in Contentstack from the dropdown menu. From the For each dropdown, select role, and in the with value that matches field, provide the name of the role that you created, for example, “Developer Role.”
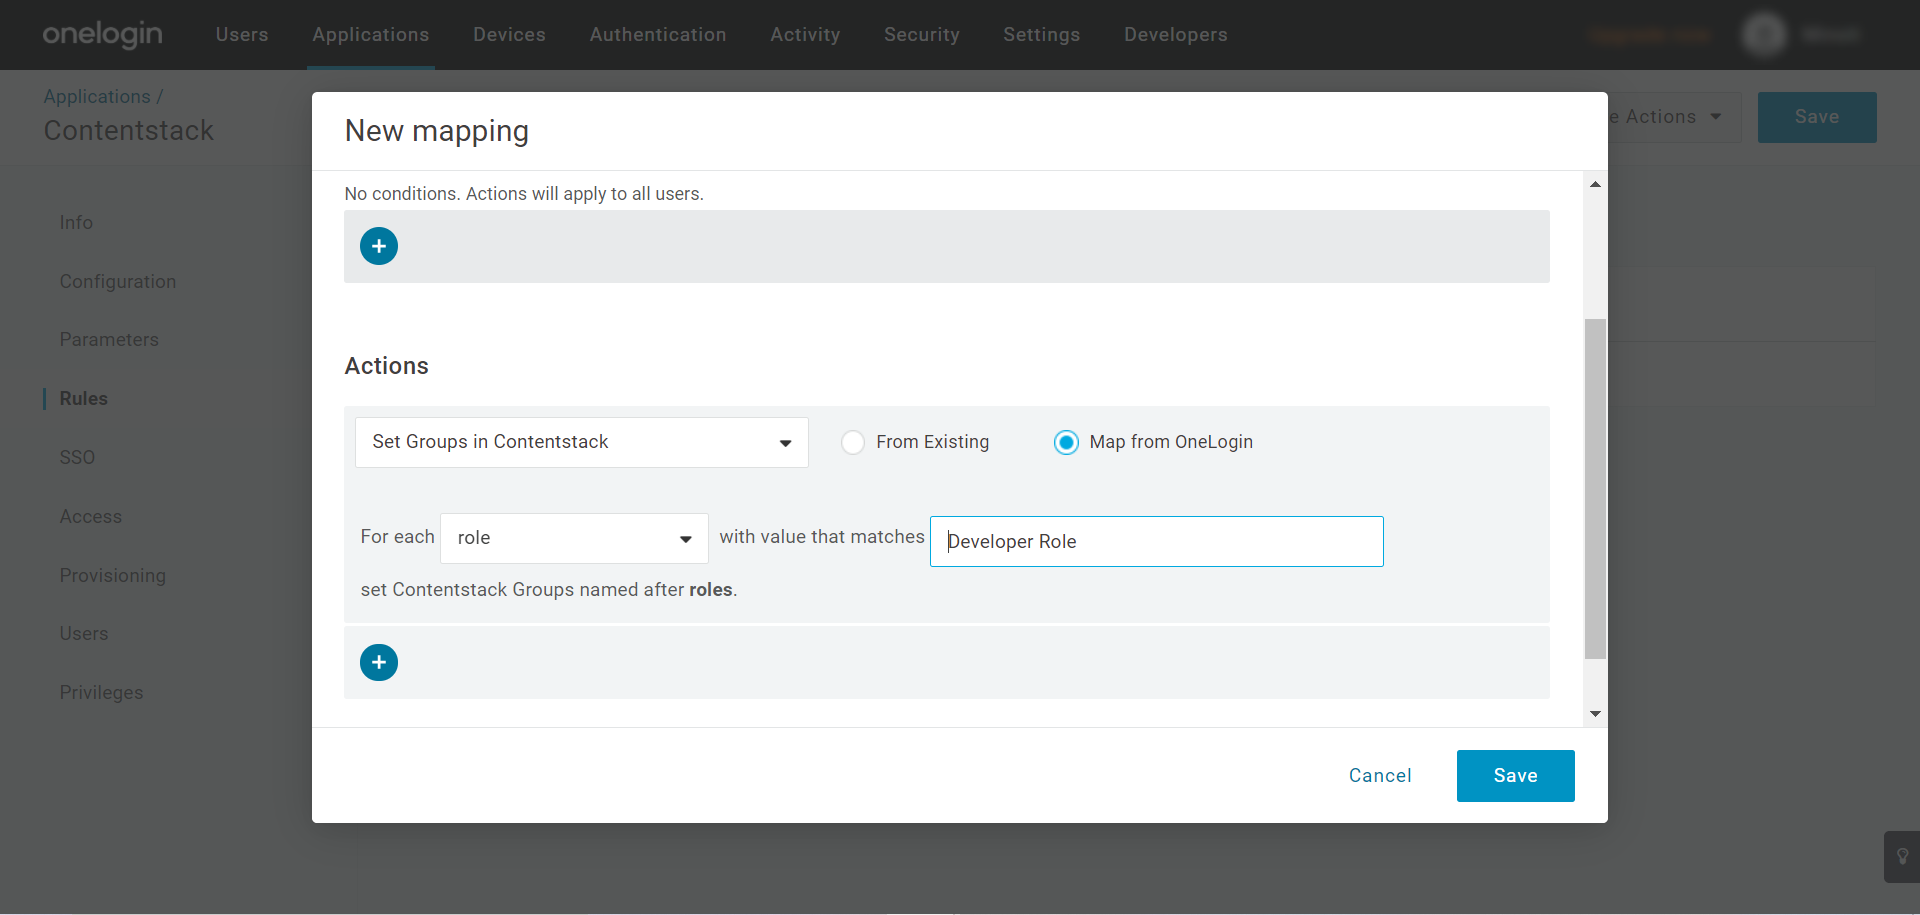
Note: Ensure that the Map from OneLogin option is selected as shown above.
- Click on Save.
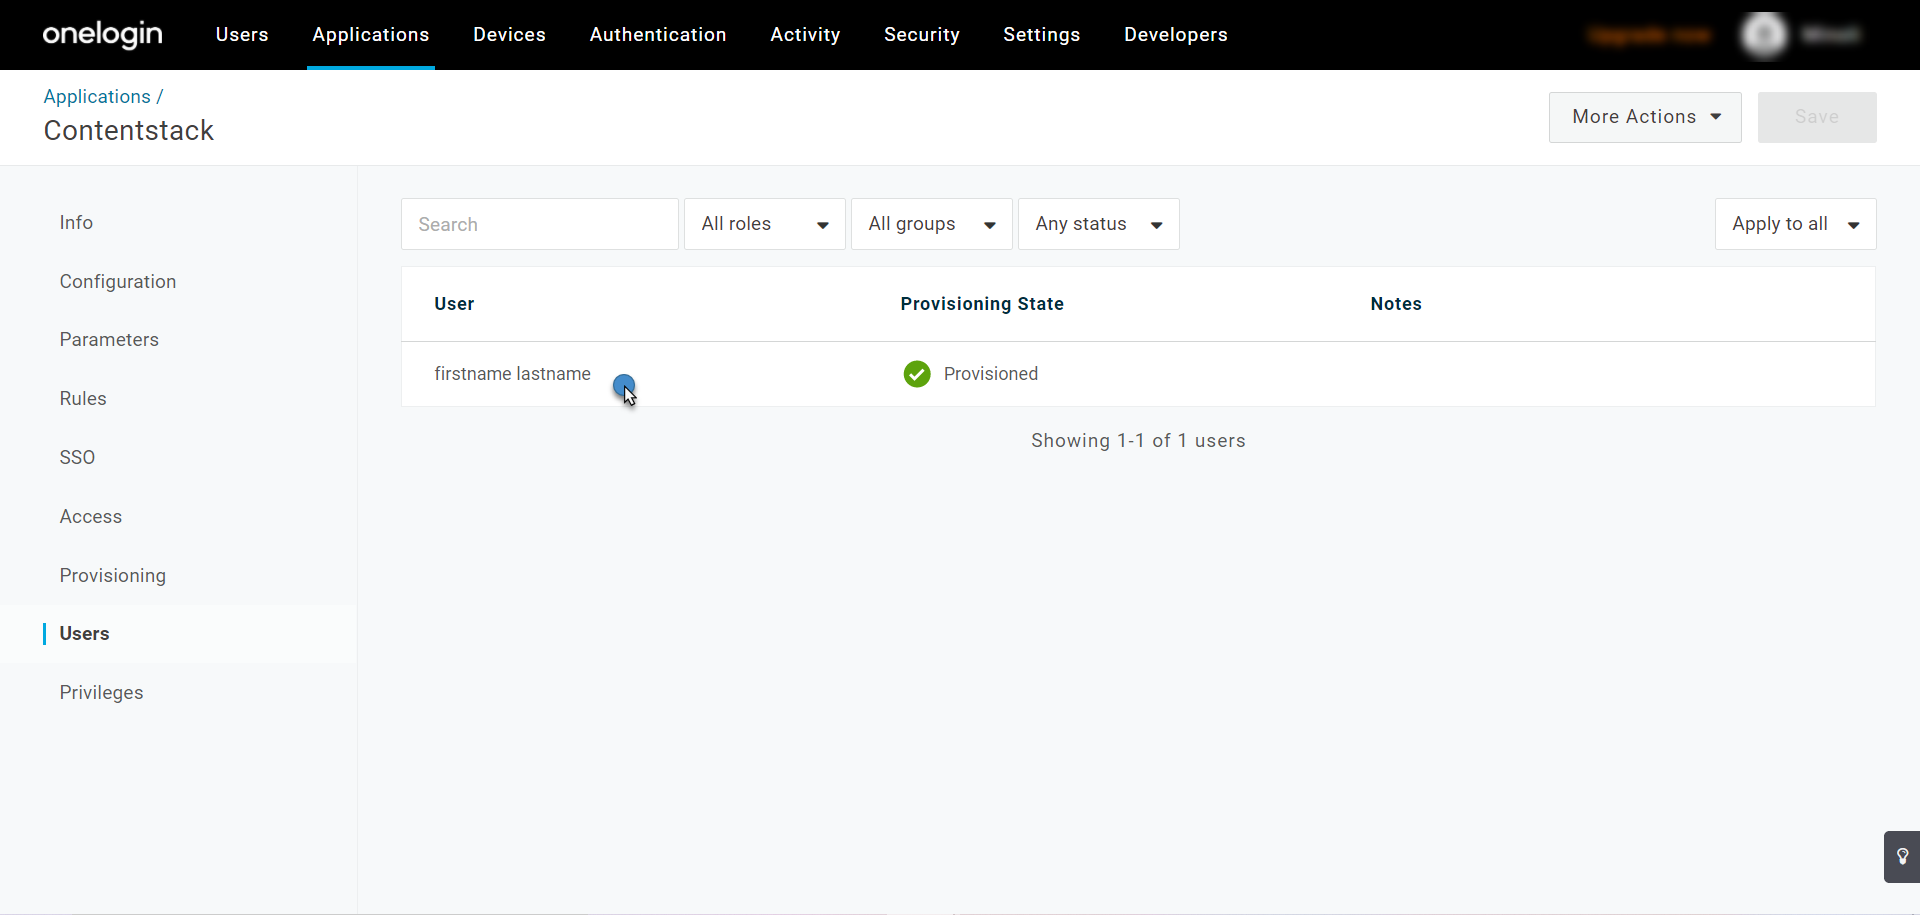
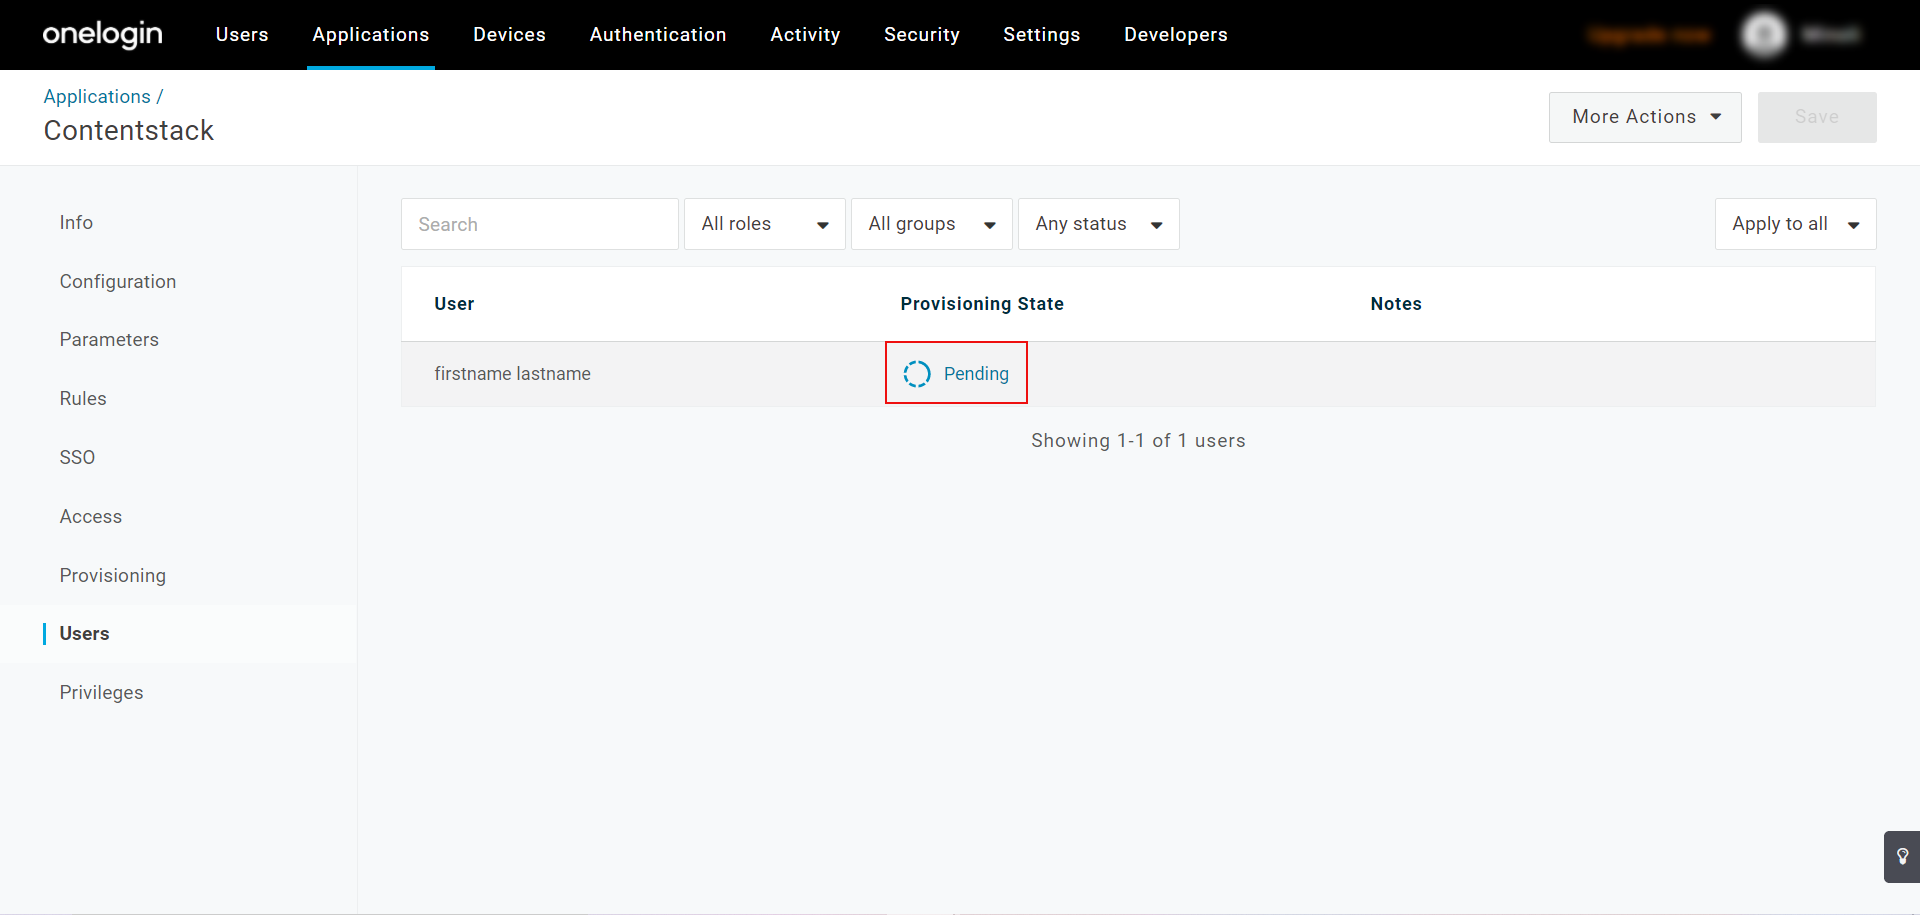
- Now navigate to the Users tab from the left navigation panel. You'll see the Provisioning State of the user you have associated with a role, as Pending.
- Click on Pending and then Approve.
You have now successfully added the group. To verify if a group has been added, go to your Contentstack’s Organization Settings page, click the SCIM tab, and search for the group (you just created) in the dropdown list under the Group Mapping section.

Now let’s proceed to map groups to permissions in the Contentstack organization.
Create Group Mapping in Contentstack
Group mapping refers to the process of assigning permissions to the SCIM groups at the organization level and the stack level in Contentstack. The permissions you set for a particular group will be applicable to all the users added to that group.
To perform group mapping, perform the following steps:
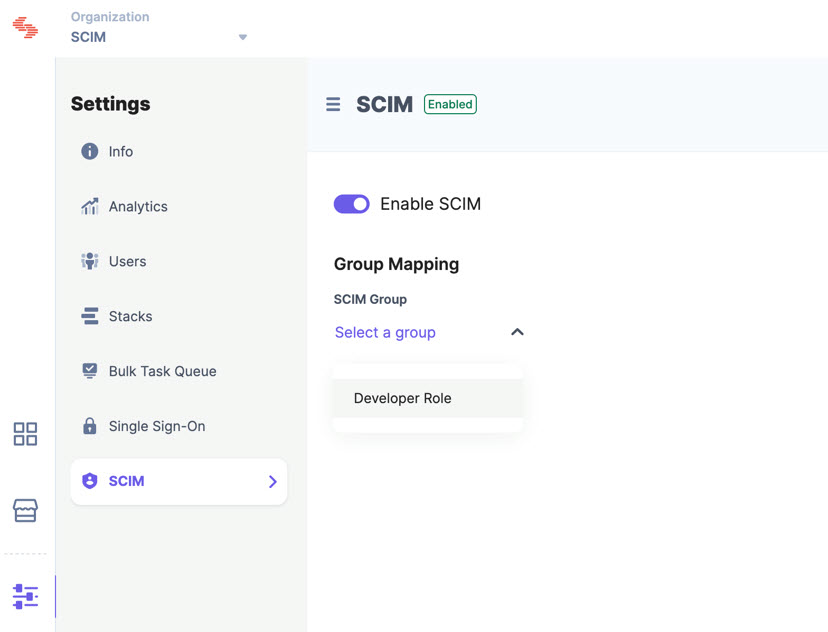
- Go to the Organization Settings page in Contentstack and then to the SCIM tab.
- From the SCIM Group dropdown, select the group for which you want to set permissions.
- Select the Organization Role for the group.
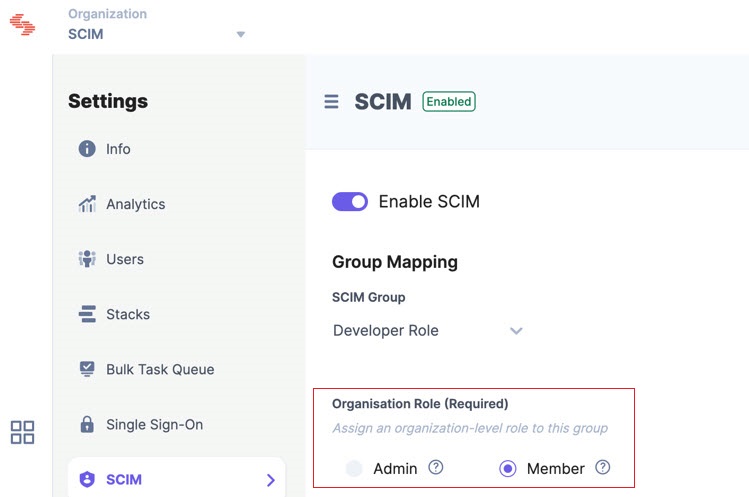
- Set Stack Role for the group. For example, if you set the “Developer” role for the “Developer stack” stack, users within the selected group will have a “Developer” role on that stack.
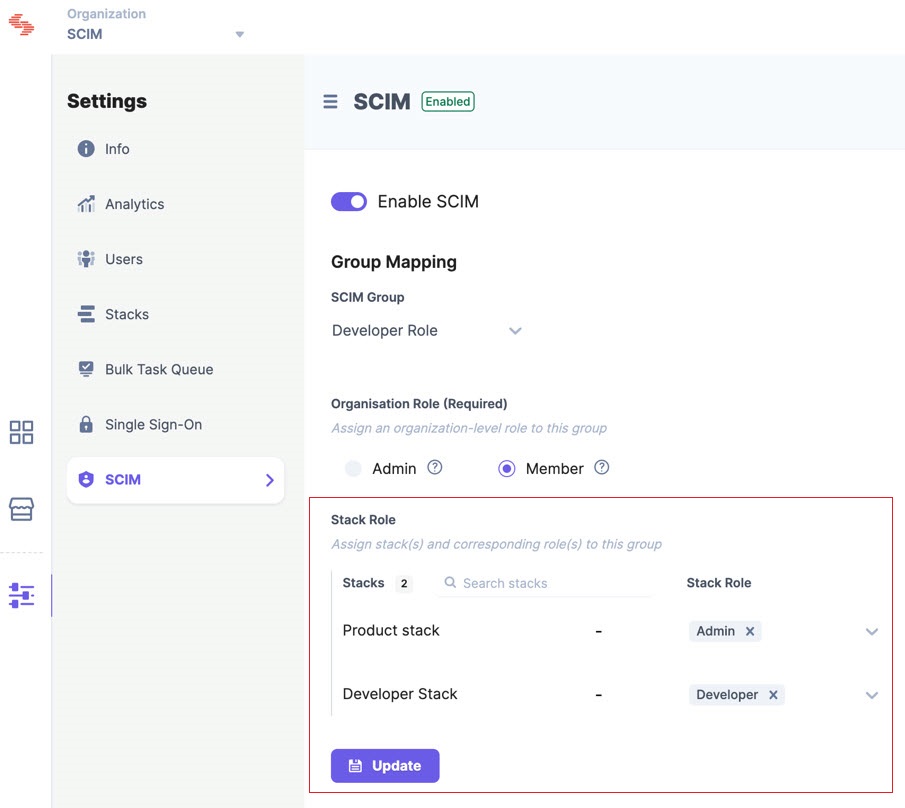
- Finally, Save the group mappings.
- Go to the Organization Settings page in Contentstack and then to the SCIM tab.
More articles in "SCIM Guides"
