

.svg?format=pjpg&auto=webp)
.svg?format=pjpg&auto=webp)
.png?format=pjpg&auto=webp)


.png?format=pjpg&auto=webp)
JSON Editor App Installation Guide
To further enhance the business user experience, Contentstack provides prebuilt custom field applications that let you extend the functionality of your custom fields to serve your unique business needs while providing a native Contentstack look and feel.
Using Contentstack Custom Field, you can now input a JSON text into an entry field. With the JSON Editor custom field, you can edit and format JSON text, and view it in modes like code, trees, etc. within your Contentstack entry.
Prerequisites
- Contentstack account
- Access to the Contentstack Organization/ Stack as the Owner/Admin
This step-by-step guide explains how to install and configure JSON Editor within your stack.
Steps for Execution
-
Install and Configure JSON Editor in Contentstack Marketplace
Follow the steps below to install the JSON Editor app in Contentstack.
- Log in to your Contentstack account.
- In the left-hand side primary navigation, click the Marketplace icon to go to the Marketplace.
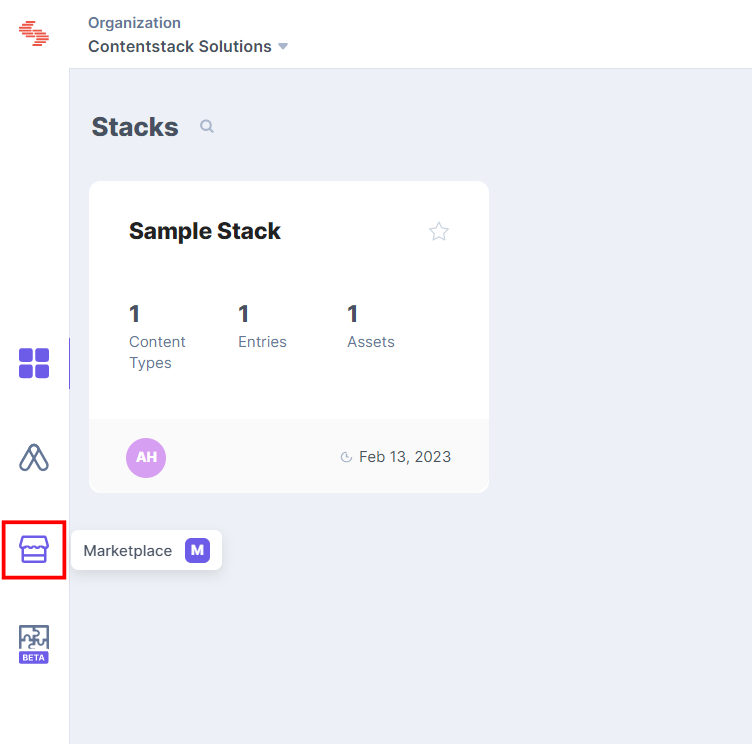
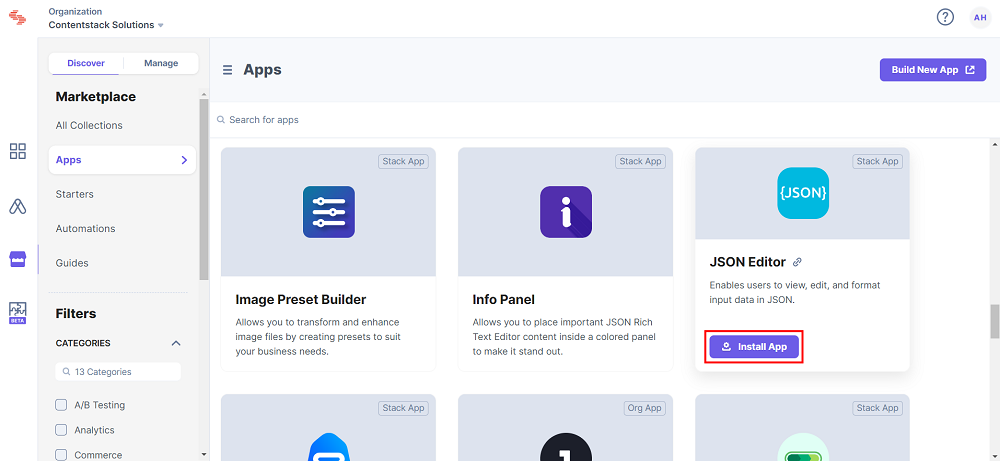
- Click Apps from the left panel.
- Within the Marketplace, you can see all the available apps. Hover over the JSON Editor app and click Install App.
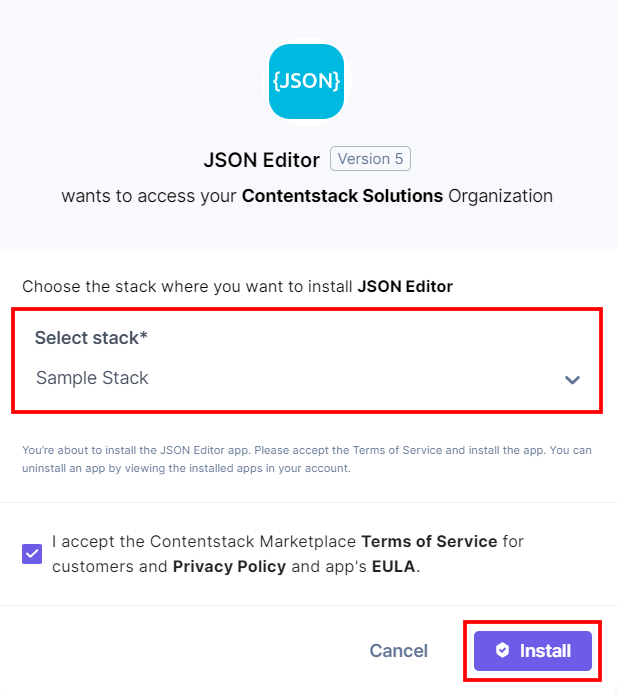
- In the popup window, select the stack where you want the JSON Editor app to be installed and click the Install button.
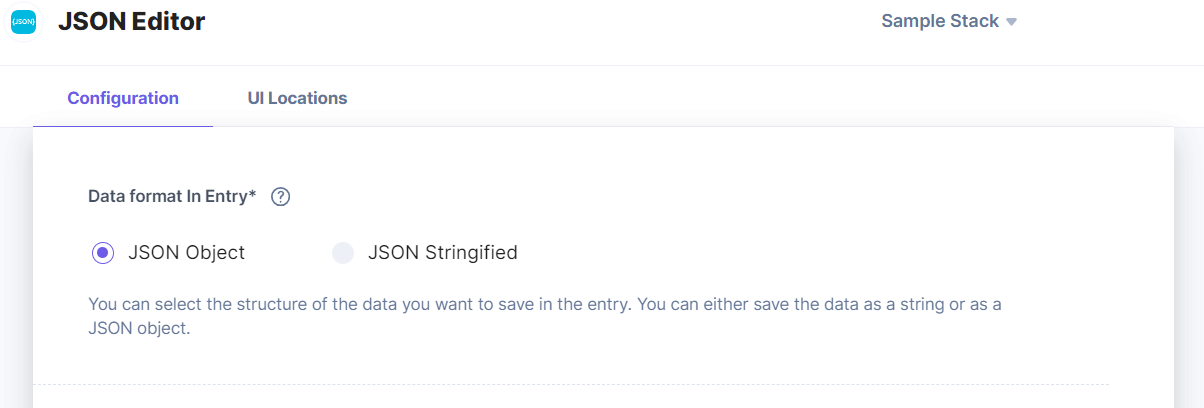
- Now on the Configuration screen, choose the global format in which you want to store the JSON. Select JSON Object to store the JSON in JSON format or select JSON Stringified to store the JSON as a String.
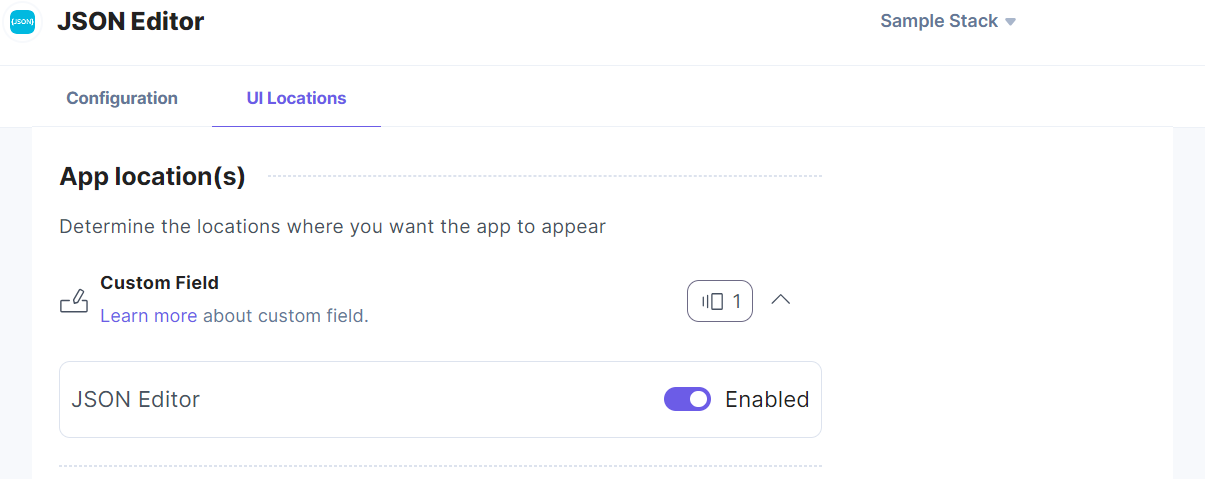
- On the UI Locations tab, you can see the predefined app locations. You can use the toggle button corresponding to each UI location to enable or disable it based on your requirements.
- After selecting the configuration details, click the Save button.
- Click Open Stack to start using the JSON Editor application.
Additional Resource: For more information on UI locations, please refer to the Installed Apps guide.
-
Use JSON Editor within your Stack
To use the JSON Editor application within an entry of your stack, follow the steps given below:
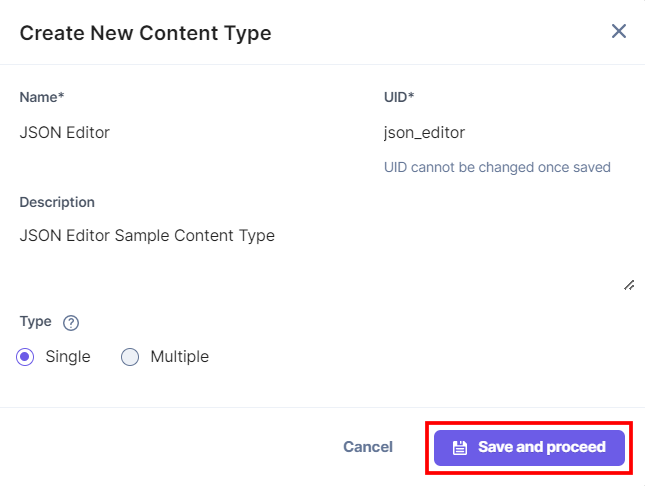
- Go to your stack and click the Content Models icon in the left navigation panel, and click the + New Content Type button.
- Create a content type by adding relevant details as displayed below:
- In the Content Type Builder page, add a Custom field in your content type by clicking the Insert a field link represented by a + sign.
- Under Select Extension/App, select JSON Editor and then click Proceed.
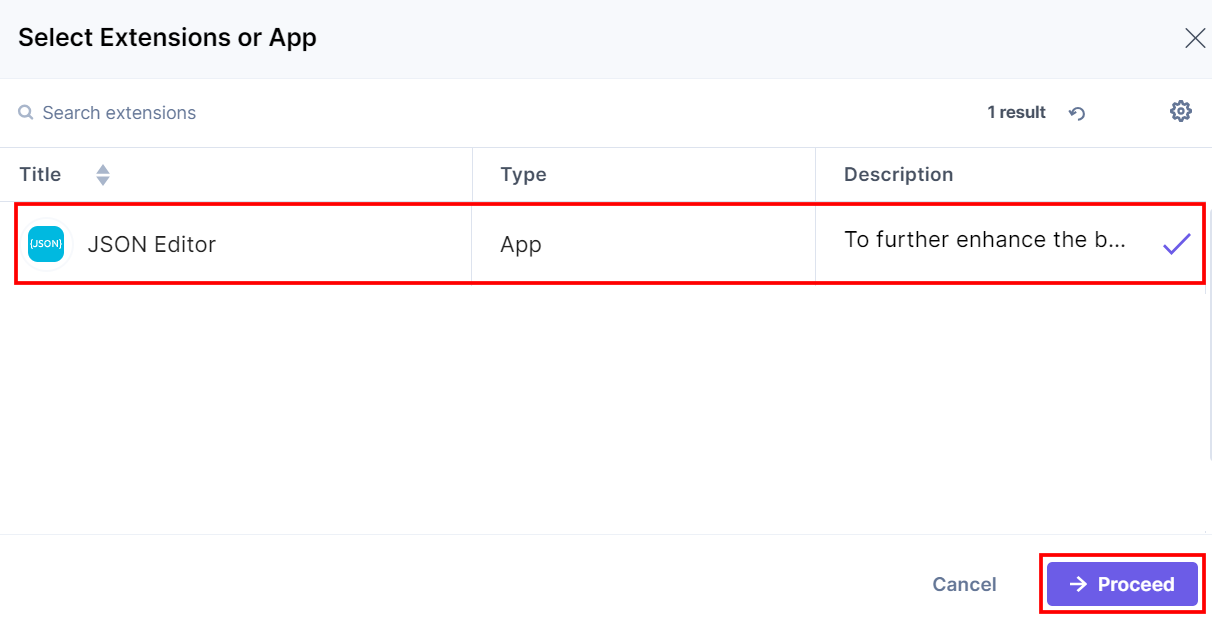
This adds JSON Editor in the custom field.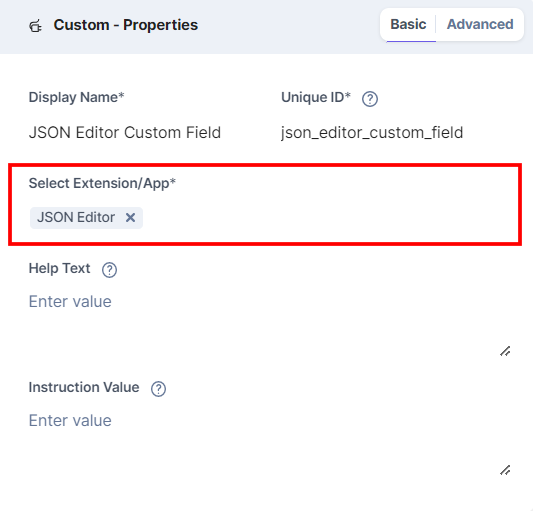
-
Under Advanced Properties, you also have an option to set the Config Parameter for all the entries of a particular content type. This will override the global format which was configured at the time of installation in the Configuration page.
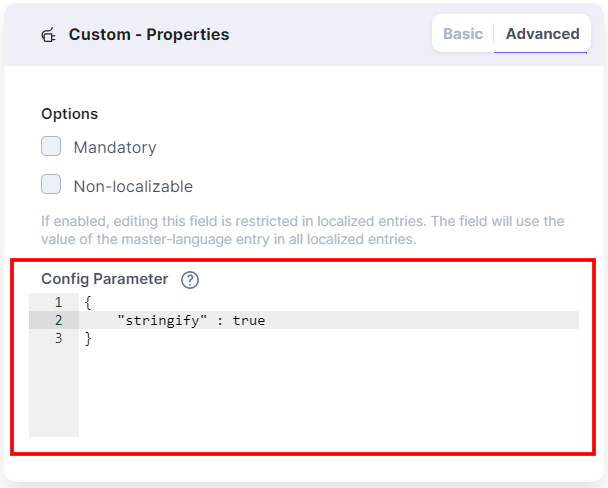
Add a key as stringify and its value as true (or false) in the following format:
After adding this config parameter "stringify" and setting it to true, the JSON data will be stored as a string for all the entries of this content type even if the global configuration is set to JSON Object, and vice-versa.{ "stringify": true } - After adding the app in a custom field, click either Save or Save and Close to save your changes.
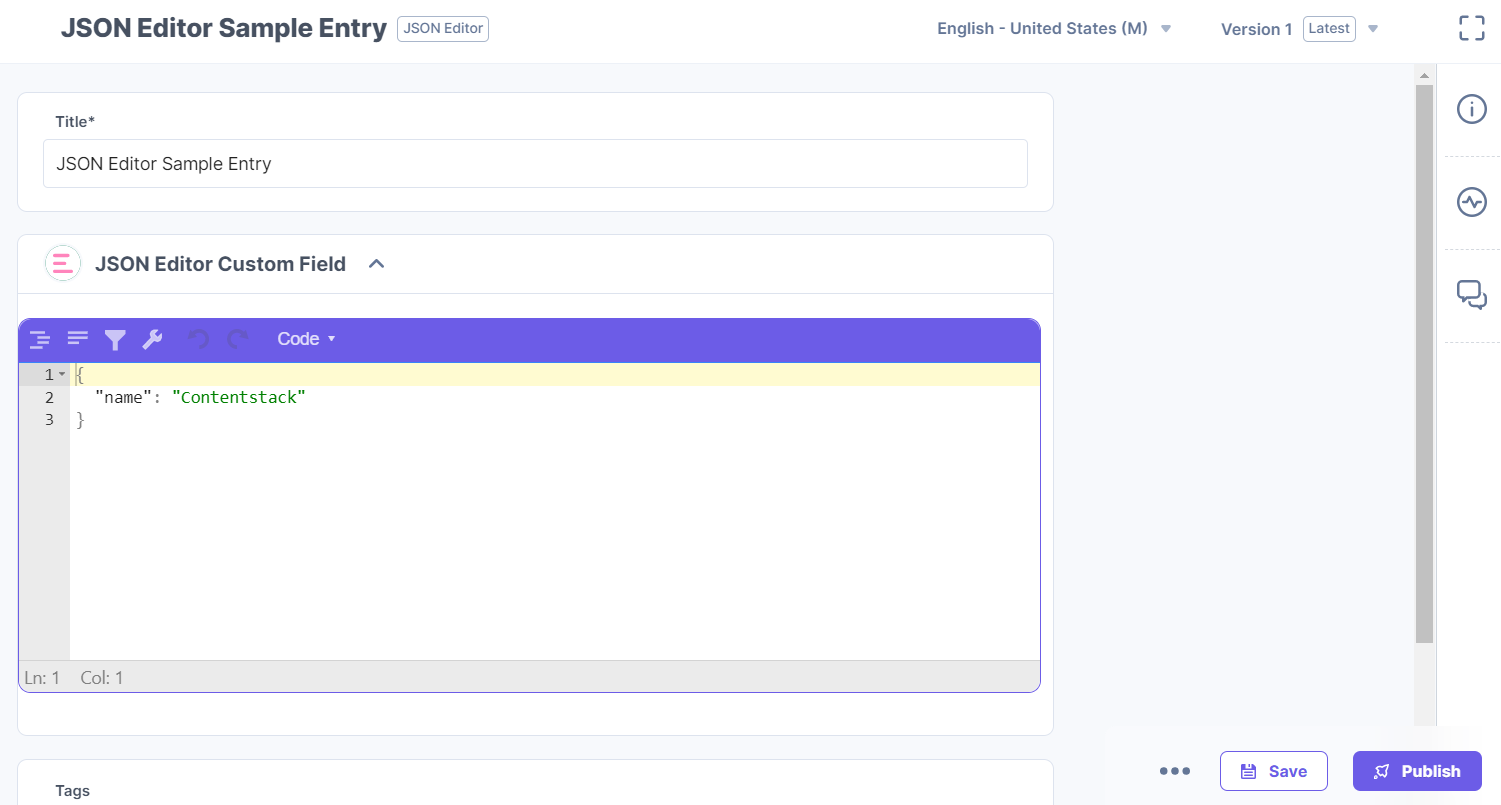
- To use the JSON Editor app, create an entry for this content type, and you will see this JSON Editor custom field on your entry page as shown below:
-
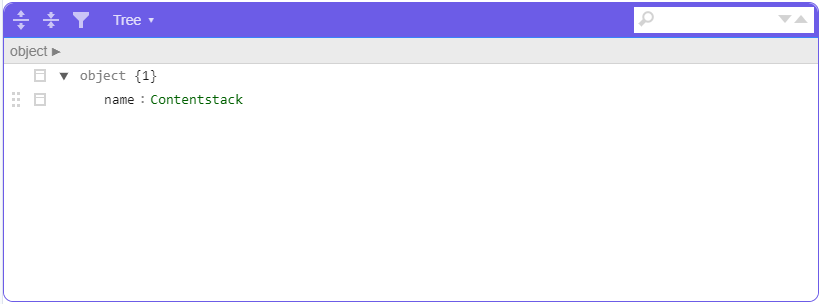
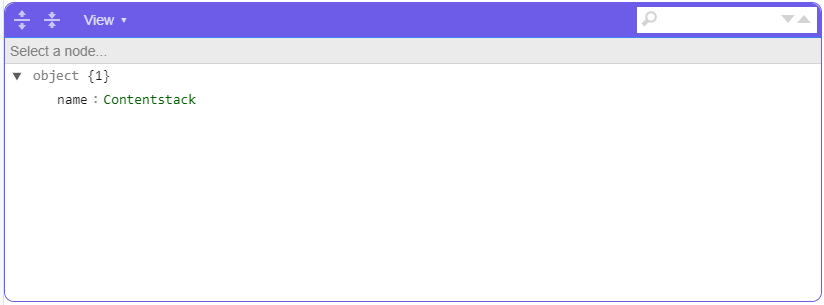
You can input, edit, format, compact, and repair the JSON data, and perform undo and redo operations in the JSON editor. The content can be filtered, sorted, or transformed by JMESPath query language and can be viewed in different visual representations. There are five editor modes for writing:
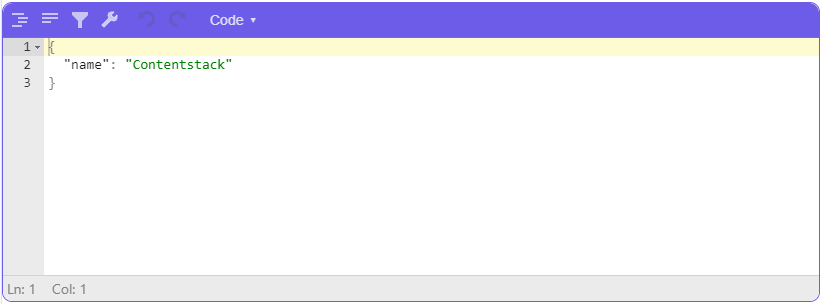
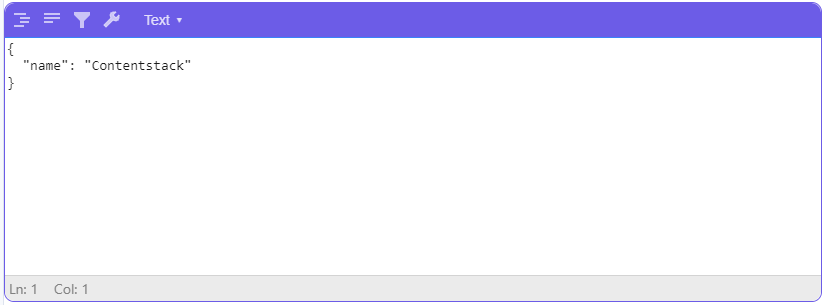
- Code Editor mode:
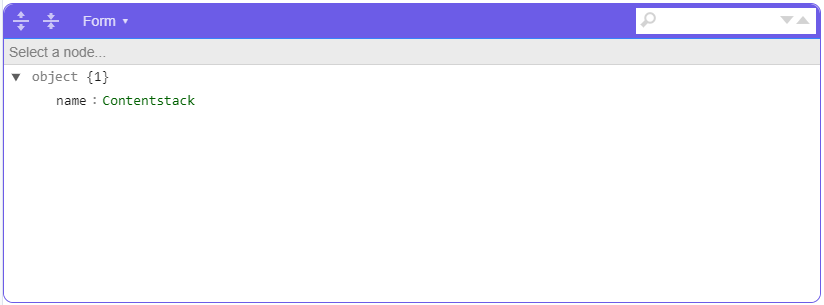
- Form Editor mode:
- Text Editor mode:
- Tree Editor mode:
- View Editor mode:
- Code Editor mode:
- After adding your JSON content, Save and Publish your entry.
More articles in "Development"
