

.svg?format=pjpg&auto=webp)
.svg?format=pjpg&auto=webp)
.png?format=pjpg&auto=webp)


.png?format=pjpg&auto=webp)
Audience Variable App Installation Guide
The Audience Variable app enables content teams to create targeted and personalized experiences for their audience. The app helps improve content relevance and drive better user engagement.
Consider a scenario where you have to display different content on your university website for faculty members, students, and staff. Creating multiple entries with additional content for various audiences can be time-consuming.
In this case, the Audience Variable app allows you to define your audiences once and then reference them in your entries. This approach makes your content audience-centric and improves its reach.
Prerequisites
- Contentstack account
- Access to the Contentstack Organization/Stack as the Owner/Admin
Let's follow this step-by-step guide to install and configure the Audience Variable app in your stack.
Steps for Execution
- Define your target audience
- Install the Audience Variable app and configure it with your audience
- Use the Audience Variable app within your entry
-
Define your Target Audience
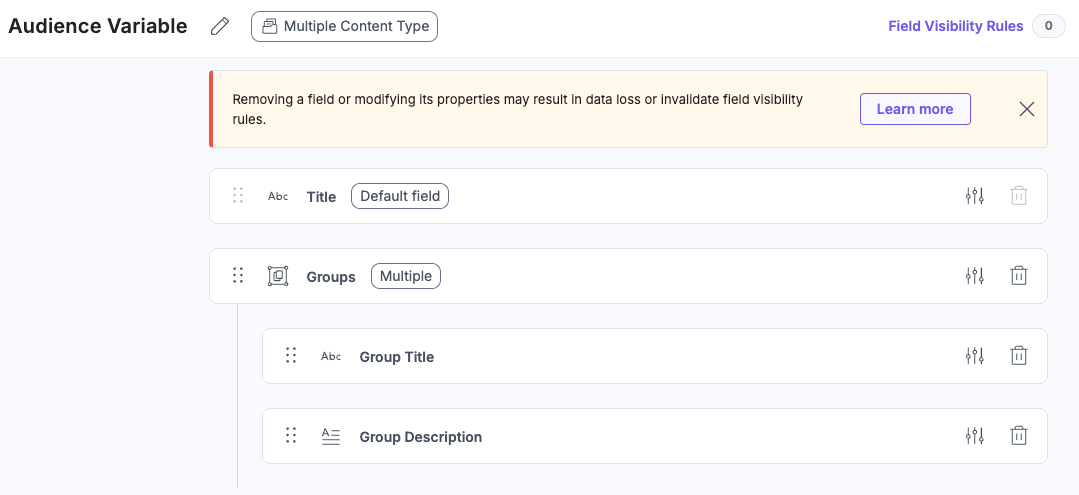
- First, you must define the target audience. For this, you need to create a content type with following fields:
- Title: A Title field represents the audience group, such as University in our example.
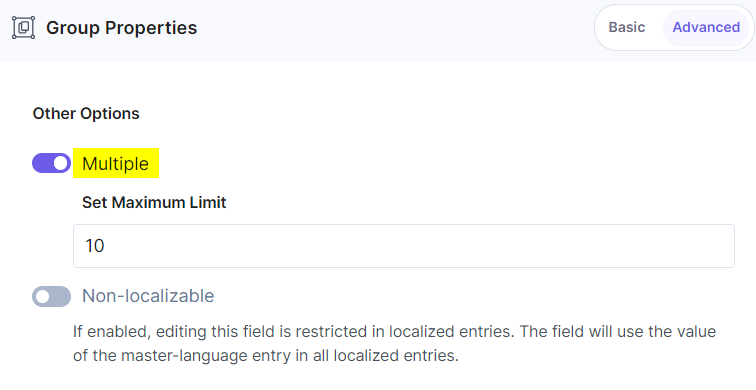
- Group: A Group lists all audiences. While adding the group field, go to the Advanced properties option and set it to Multiple. If required, you can also set the maximum number of instances that you can have inside the group field.
Then, you will need to add the following two fields inside the Group field:
- Group Title: A Single-Line Textbox field for the audience title.
- Group Description: A Multi-Line Textbox field for describing the audience.
Once you have added these details to your content type, click Save and Close.
Note: Copy the Content Type UID of the Audience content type, UID of the Group field, and Group Title Field UID. We will need these UIDs in the Audience Variable app configuration settings in step 2.
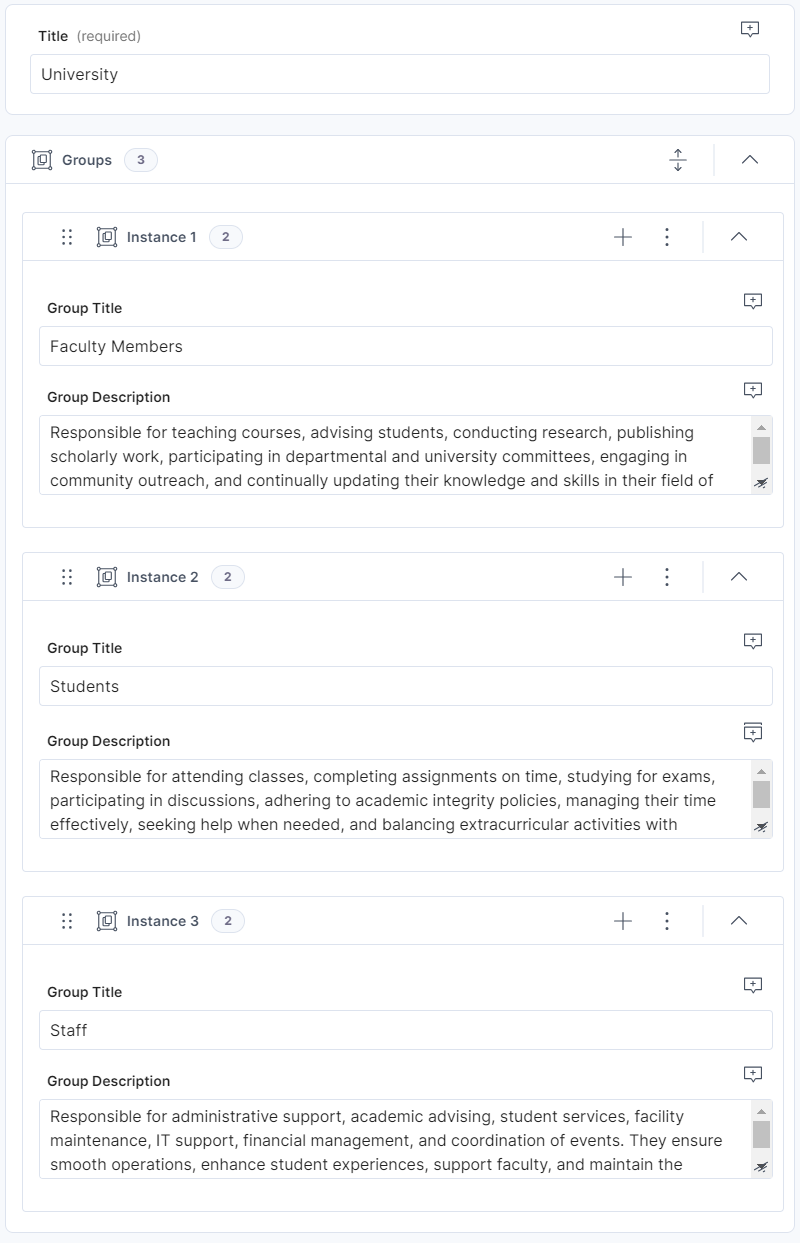
- Now, you can create an entry in the Audience content type. To do this, from the left navigation panel, click Entries and then click + New Entry. In the Select Content Type modal, select Audience (content type created above) and click Proceed.
For the University example, we will name (Title) this entry as University which will contain information about Faculty Members, Students, and Staff (refer to the following screenshot where we have added details about Faculty Members, Students, and Staff).
Note: You will refer to this entry in step 3 when rendering the target audience.
- First, you must define the target audience. For this, you need to create a content type with following fields:
-
Install the Audience Variable app and Configure it with your Audience
To install the app, log in to your Contentstack account and follow the steps below:
- From the left-hand side primary navigation, click the Marketplace icon.
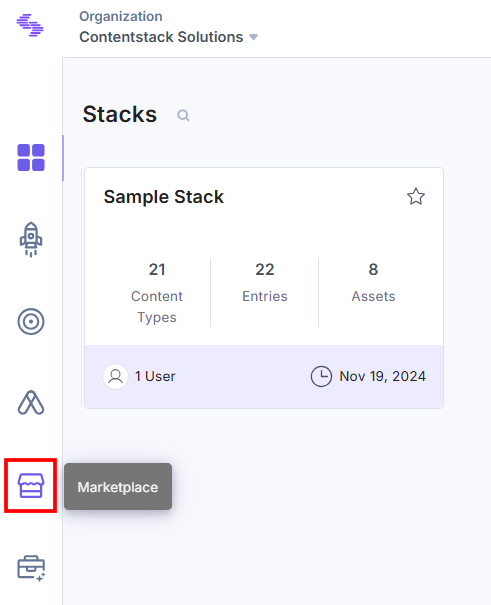
- Click Apps from the left panel.
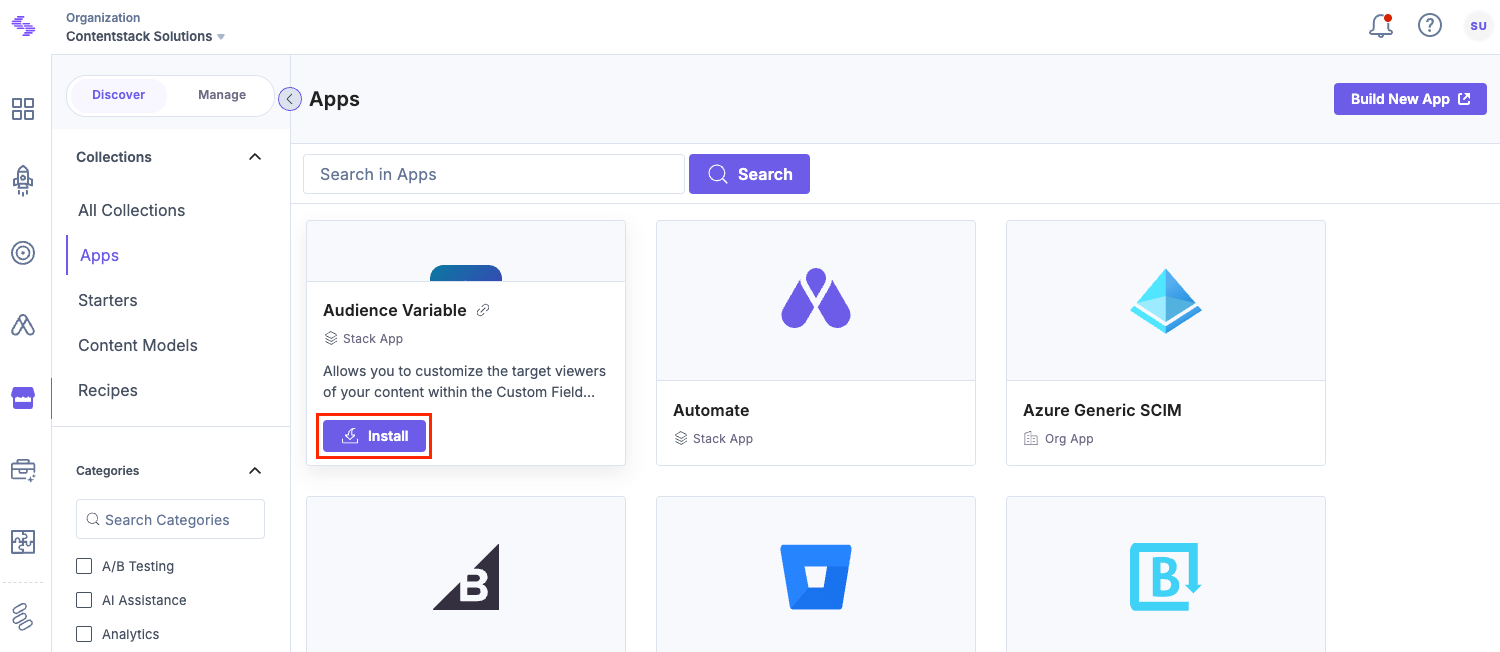
- Within the Marketplace, you can see all the available apps. Hover over the Audience Variable app and click Install.
- In the pop-up window, select the stack where you want to install the Audience Variable app and click the Install button.

- On the Configuration screen, enter the Audience Content Type UID, UID of the Group field, and Group Title Field UID that you retrieved and copied in step 1.
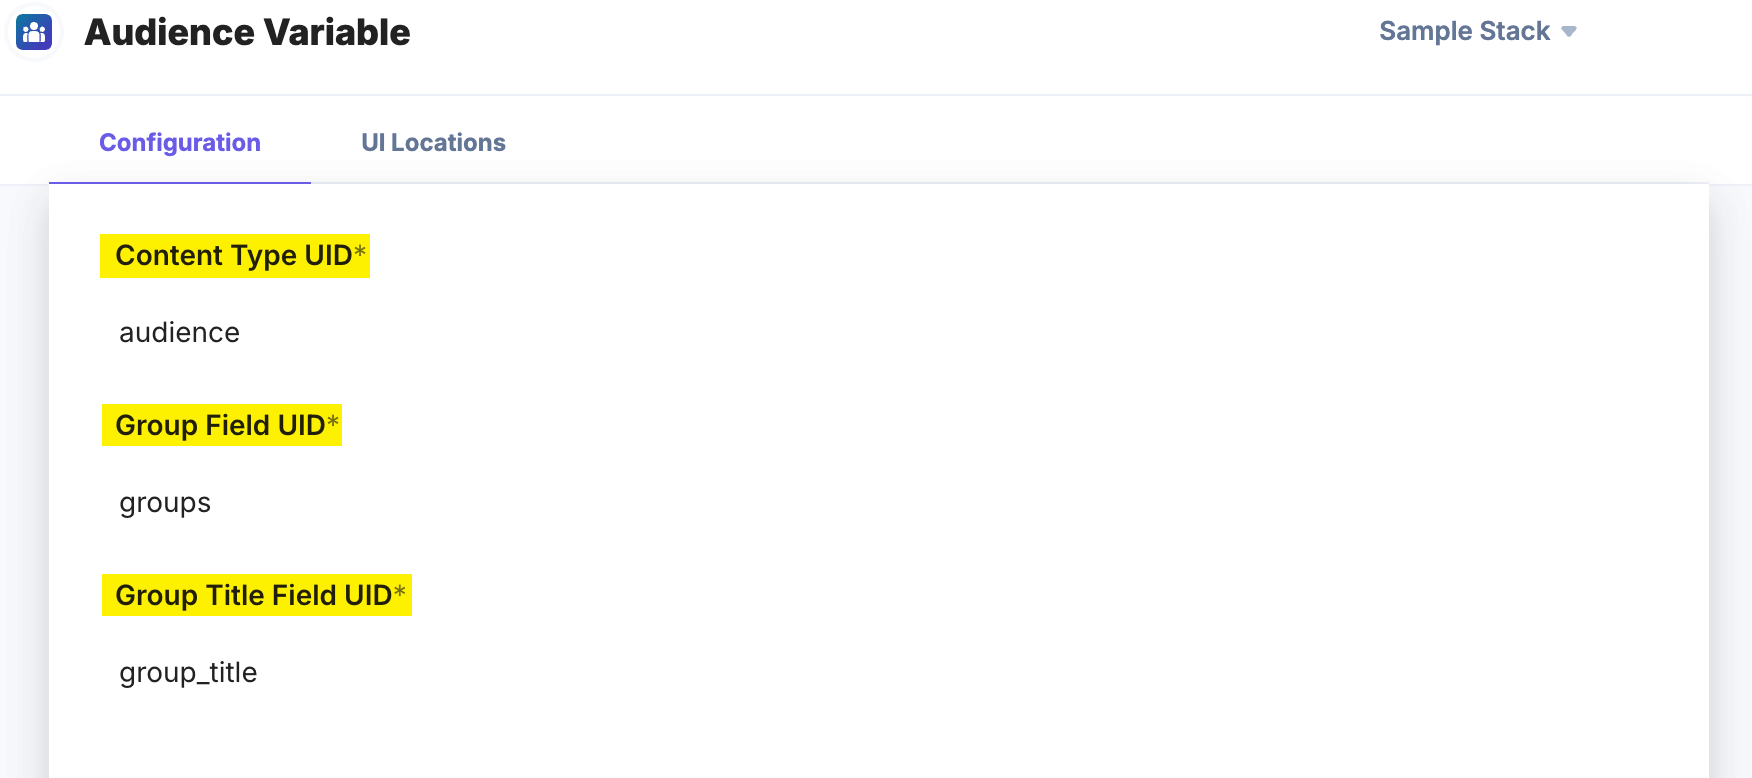
- Click the Save button.
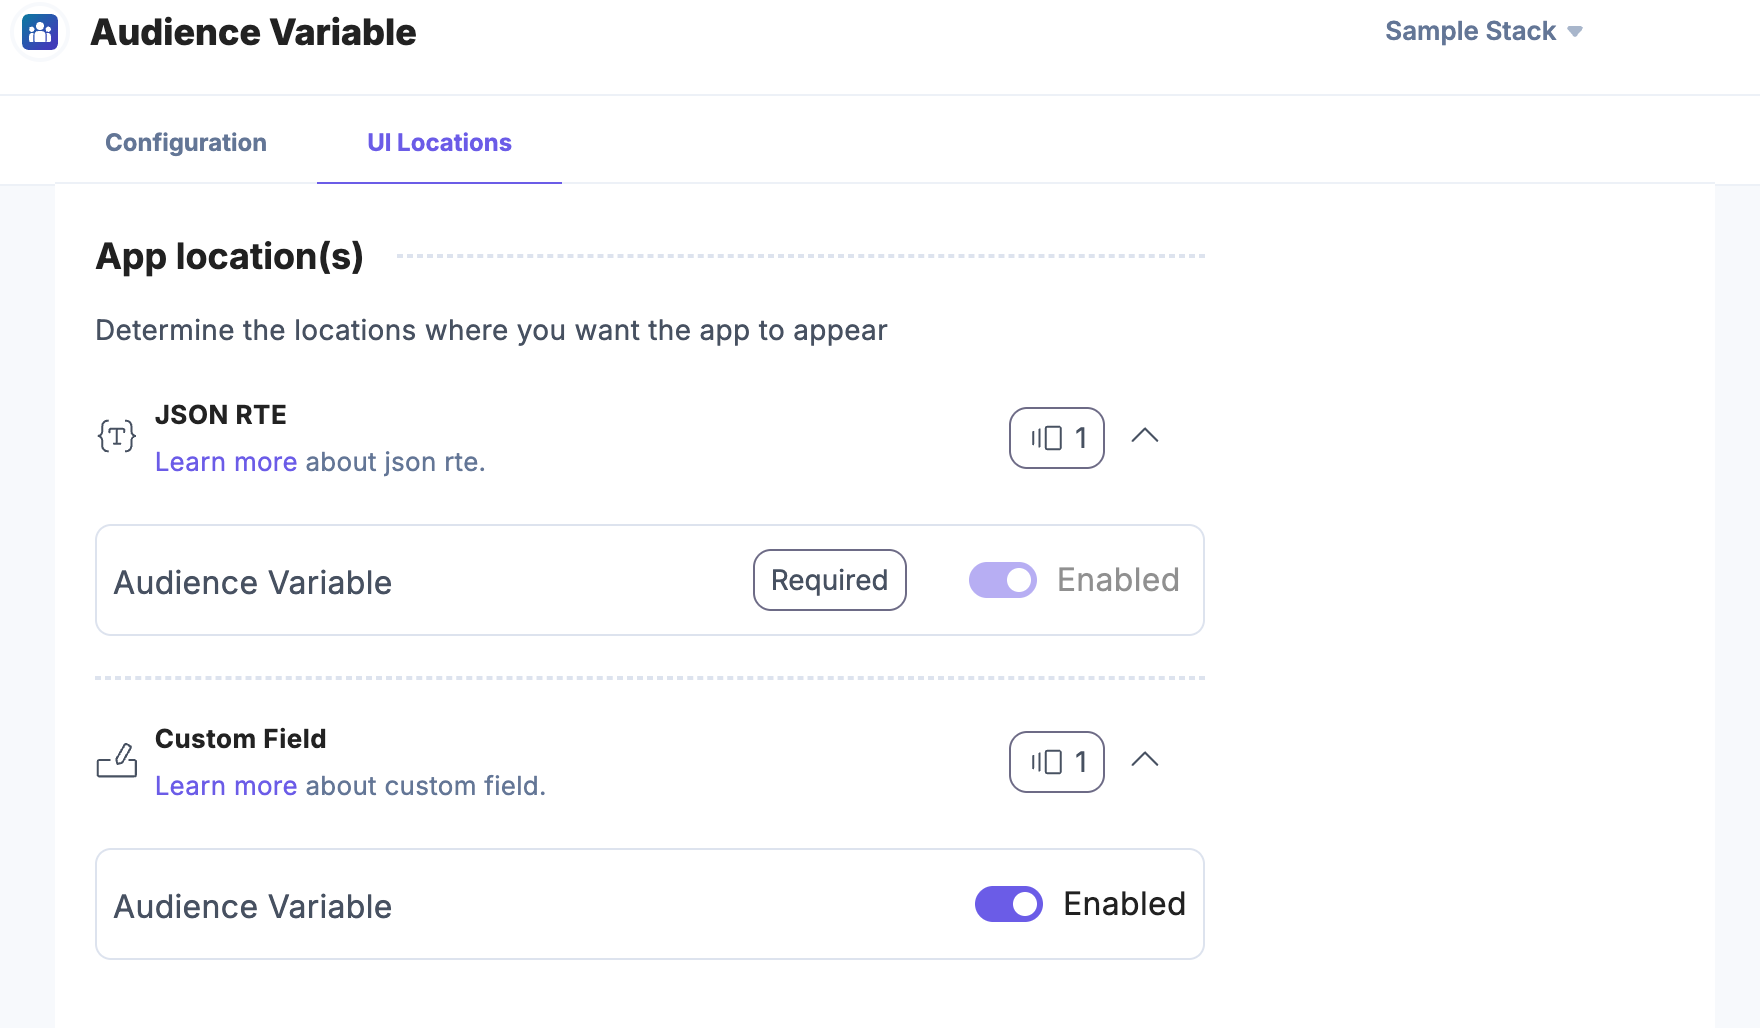
- On the UI Locations tab, you can see the predefined app locations. You can use the toggle button corresponding to each UI location to enable or disable it based on your requirements.
For the Audience Variable app, JSON RTE and Custom Field are the two UI locations. You can only enable or disable the Custom Field UI location.
Additional Resource: For more information on UI locations, please refer to the Installed Apps guide.
- Click Open Stack to start using the plugin within your stack.
- From the left-hand side primary navigation, click the Marketplace icon.
-
Use the Audience Variable App within your Entry
To render the University data that we created in step 1 for Faculty Members, Students, and Staff, you now need to create another content type, for example, Institution. In this content type, we can select the audience and render the respective data.
To use the Audience Variable app within an entry of your stack, follow the steps given below:
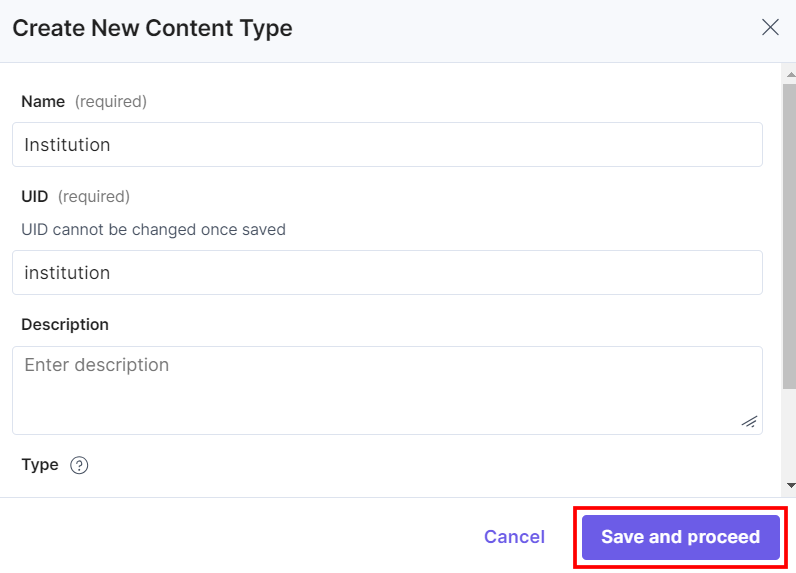
- Go to your stack and click the Content Models icon in the left navigation panel, and click the + New Content Type button.
- Create a content type (consider an example Institution) by adding relevant details as displayed below:
There are two ways to use the Audience Variable app in your entry:
Steps to use the Audience Variable App as a Custom field
- On the Content Type Builder page, add a Custom field in your content type by clicking the Insert a field link represented by a + sign.
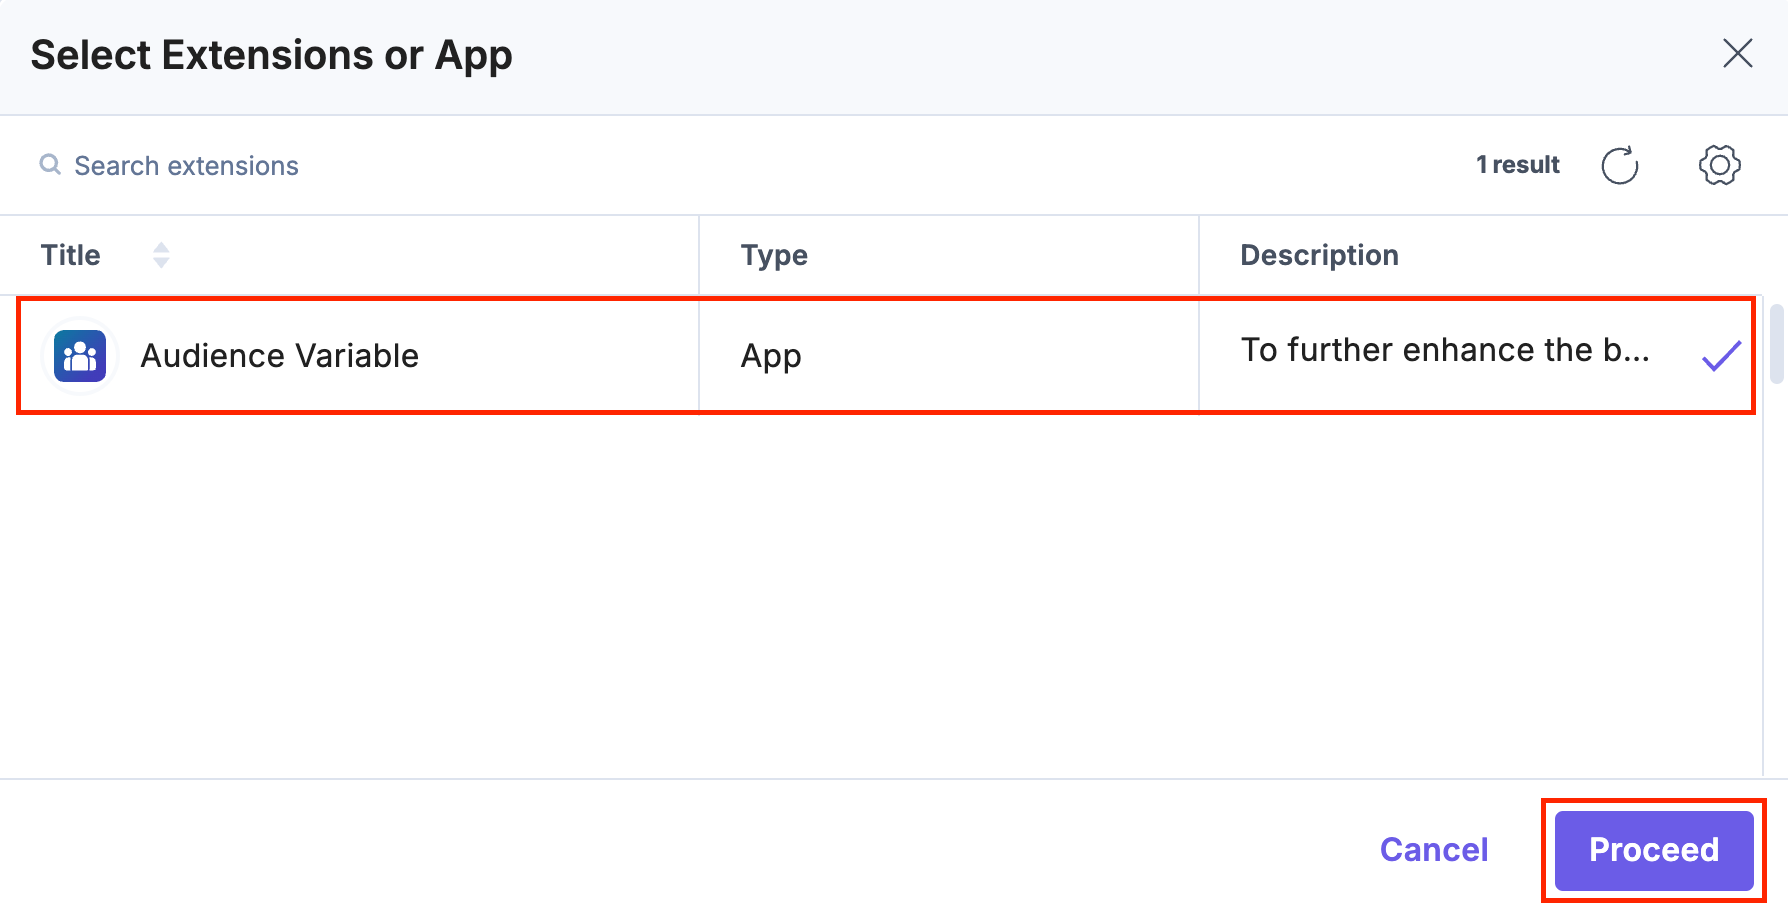
- Under Select Extension/App, select Audience Variable, and click the Proceed button.
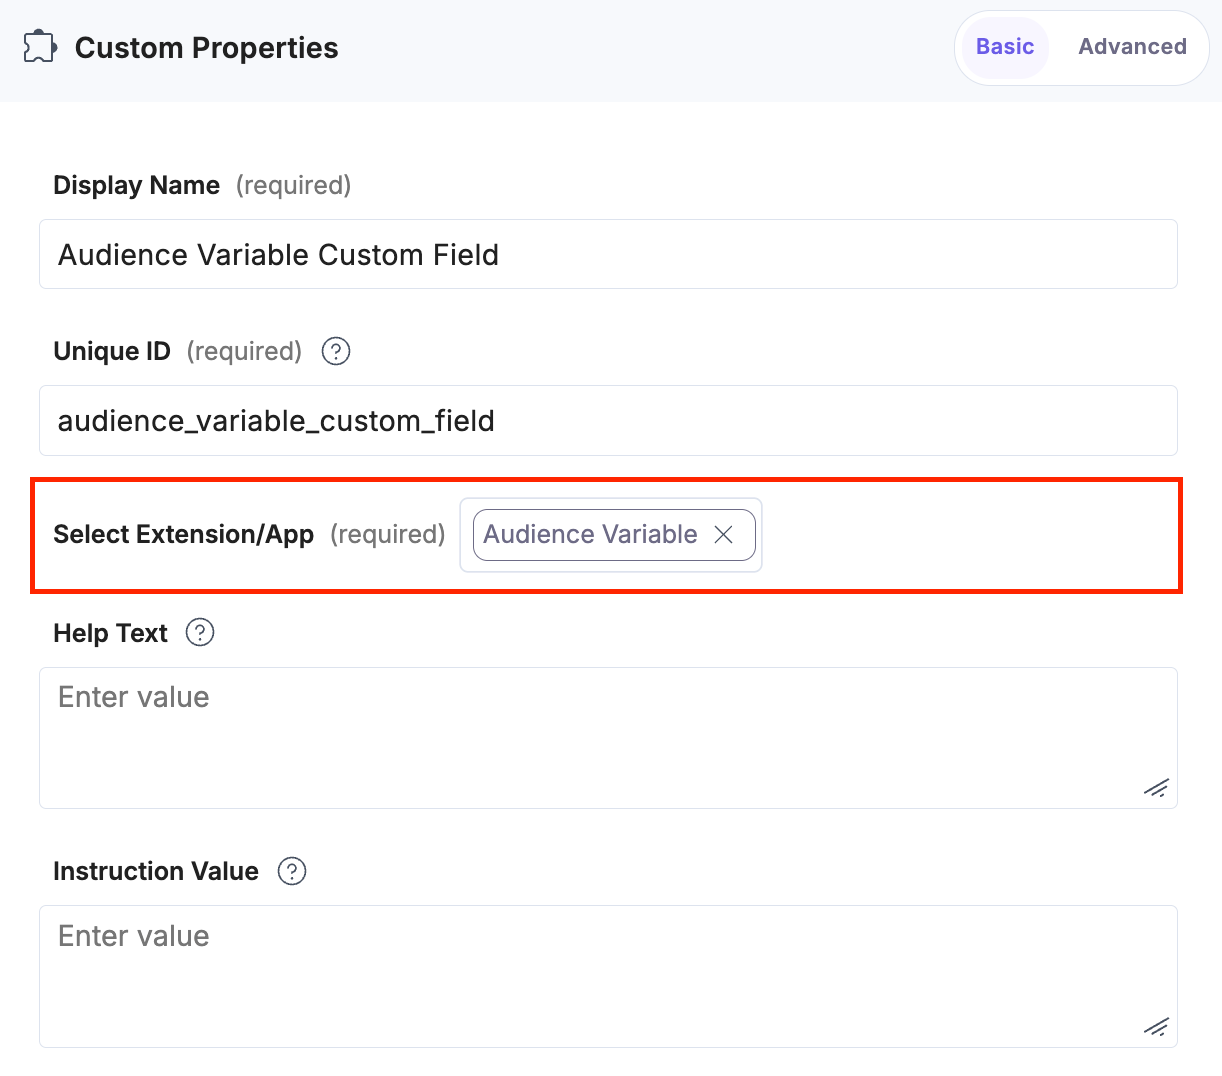
Change the Display Name of the custom field to your choice, for example, Audience Variable Custom Field. Optionally, you can add Help Text and Instruction Value for your custom field.
This adds the Audience Variable app in the custom field.
- After adding the app in a custom field, click Save or Save and Close to save your changes.
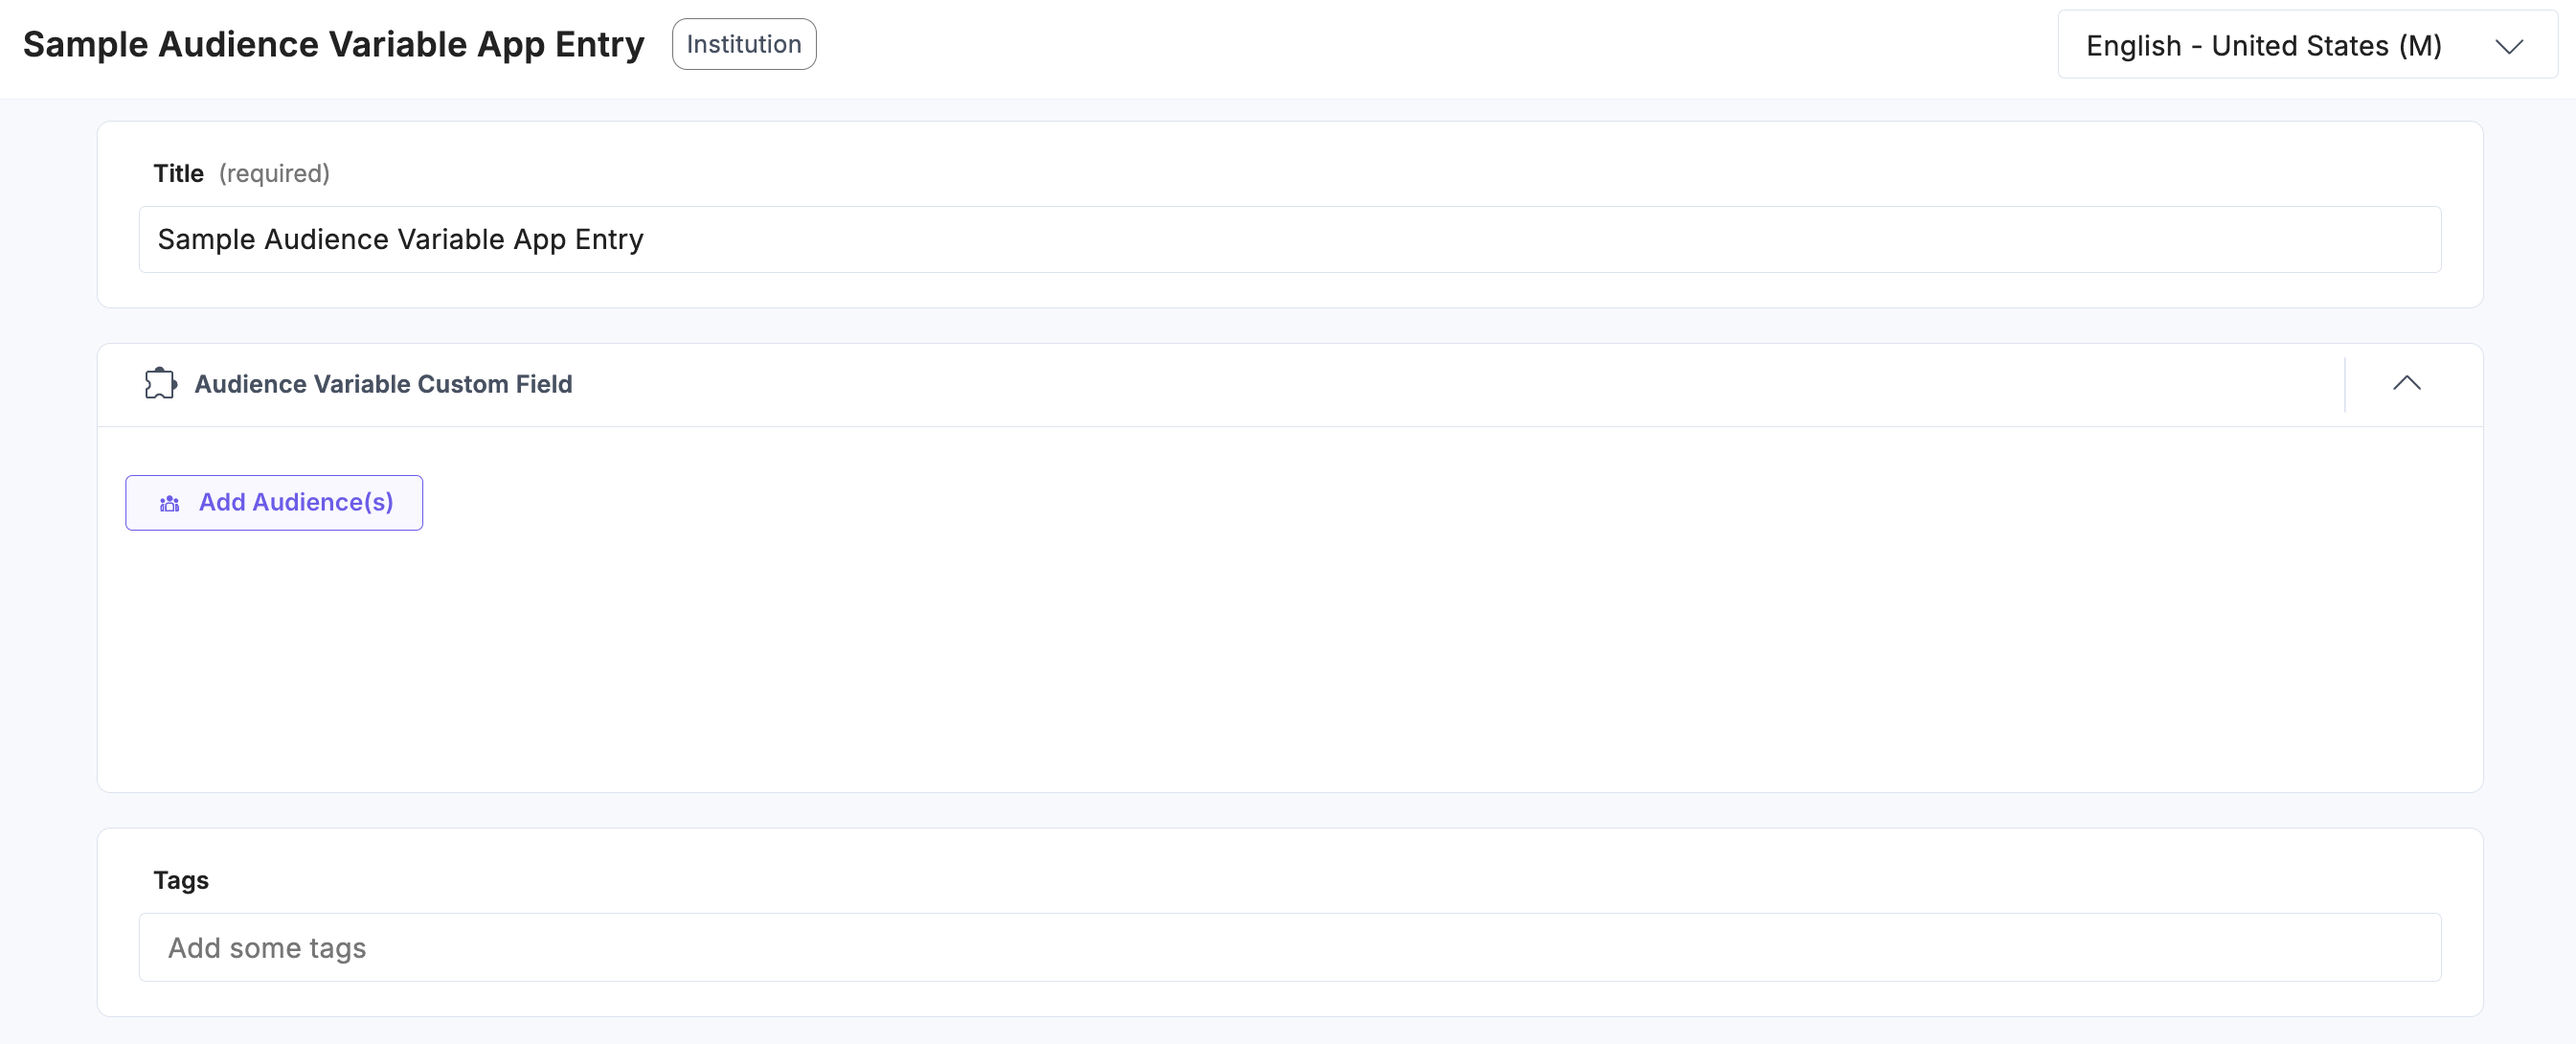
- To use the Audience Variable app, create an entry for this newly created content type. To do this, on the left navigation panel, click Entries and then click + New Entry. In the Select Content Type modal, select Institution (our example content type) and click Proceed.
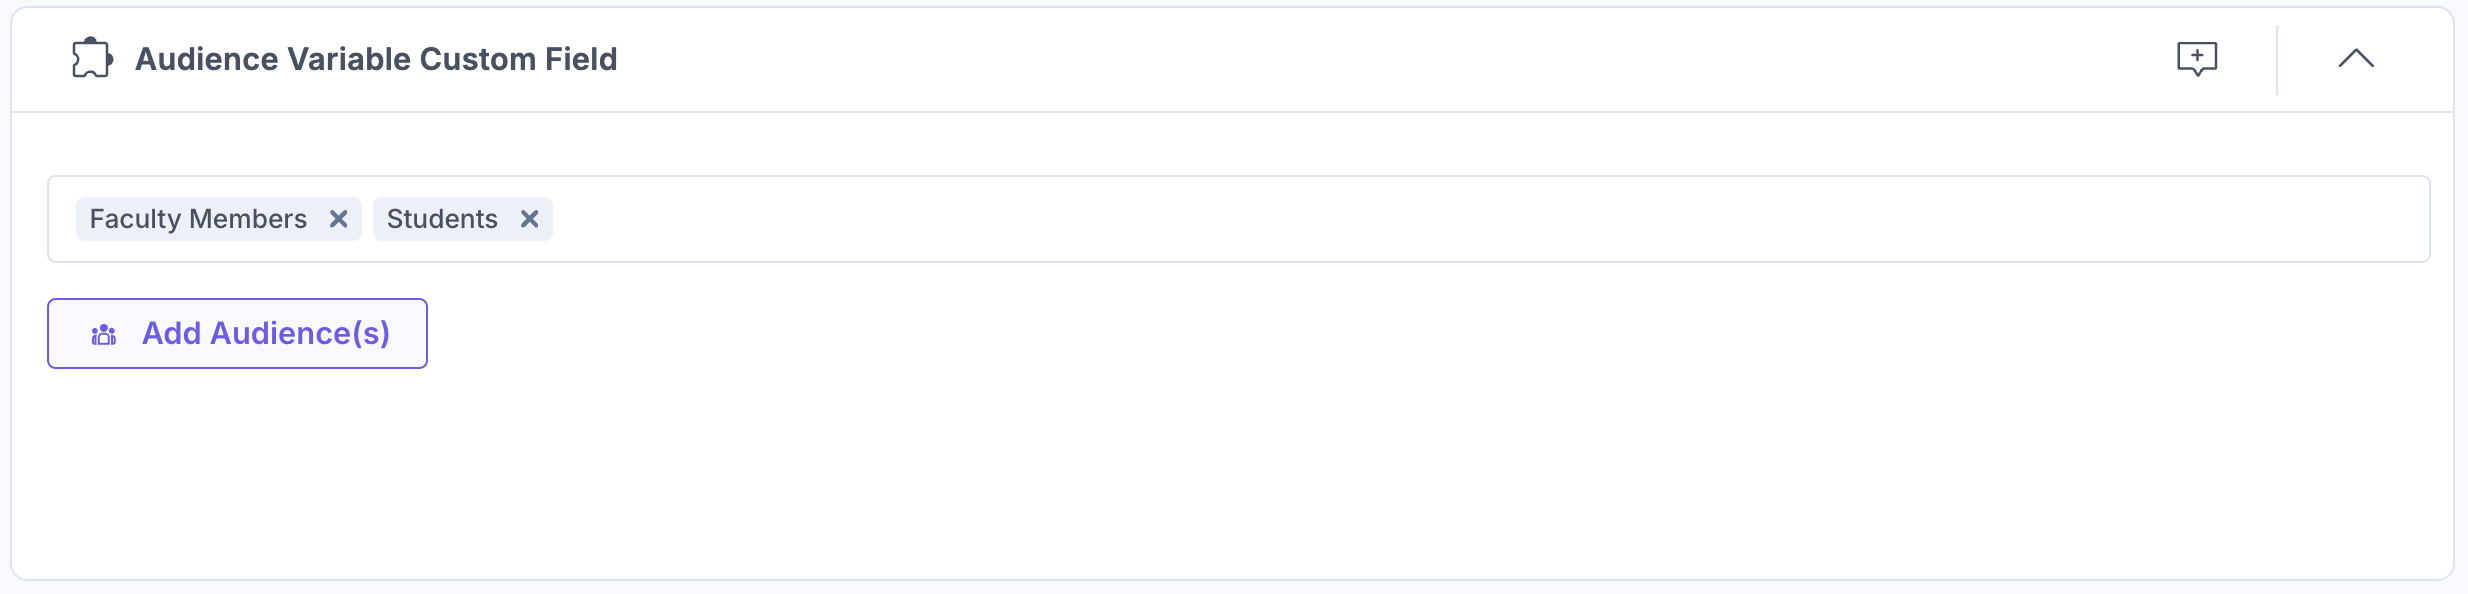
You can see the Audience Variable app’s custom field on your entry page as shown below:
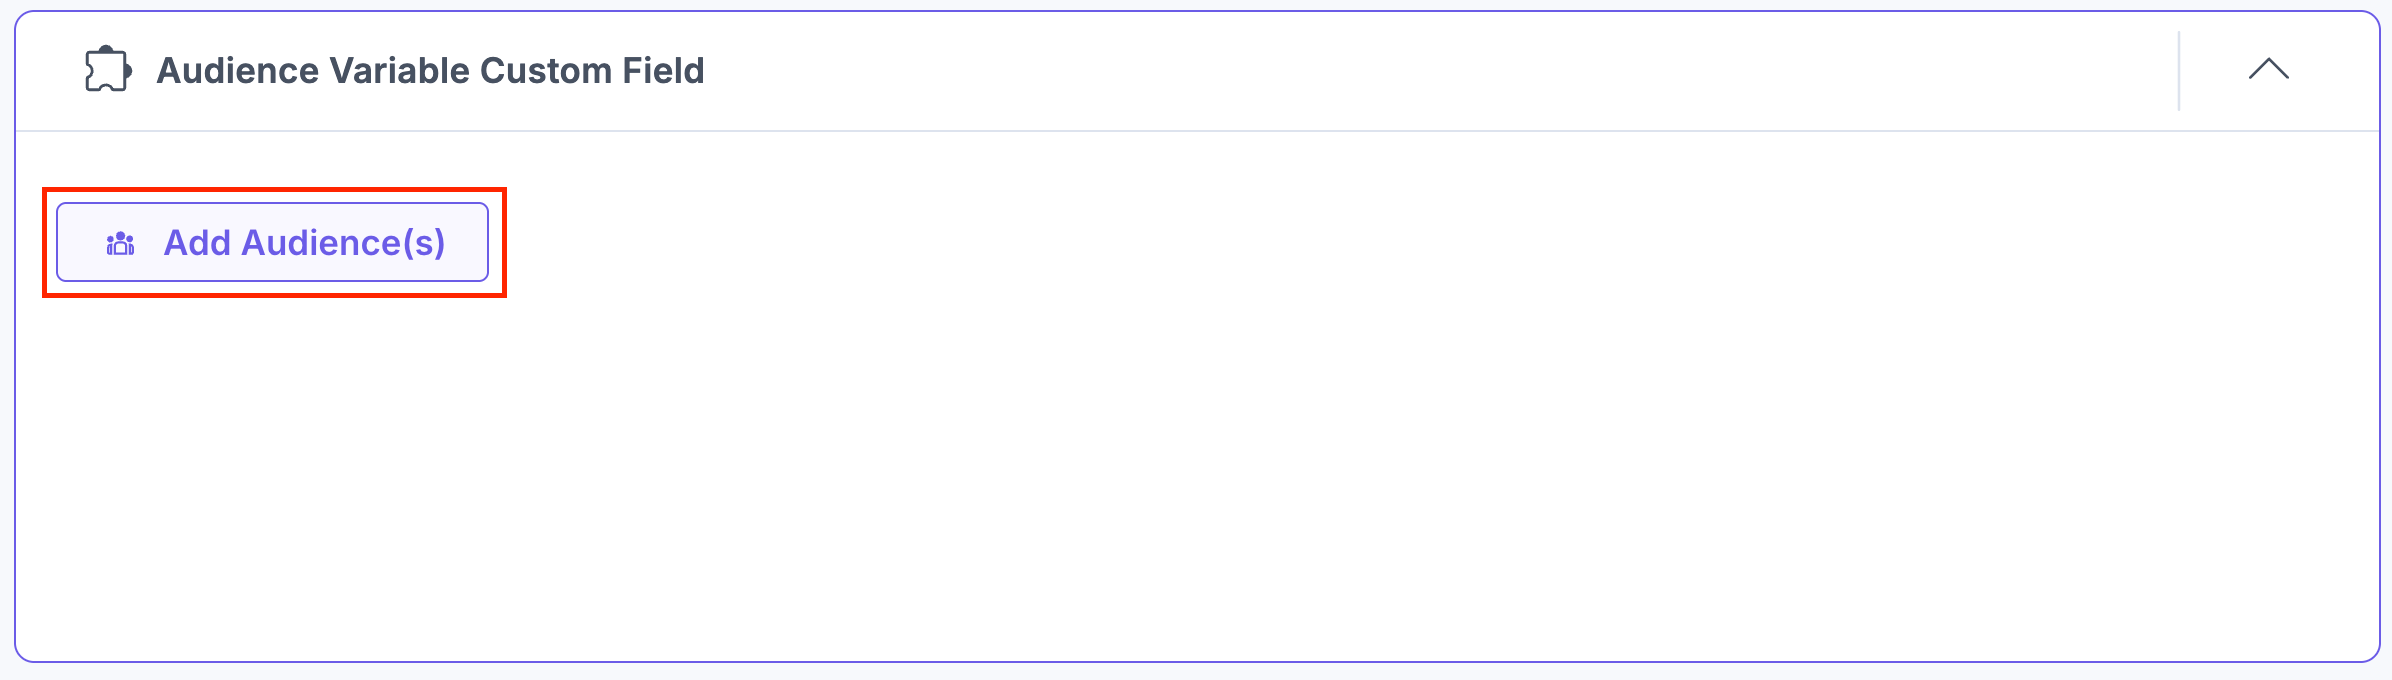
- Click the Add Audience(s) button.
- In the Select Audience modal, select the target audience for your content (Faculty Members/Students/Staff) and click Add Selected.
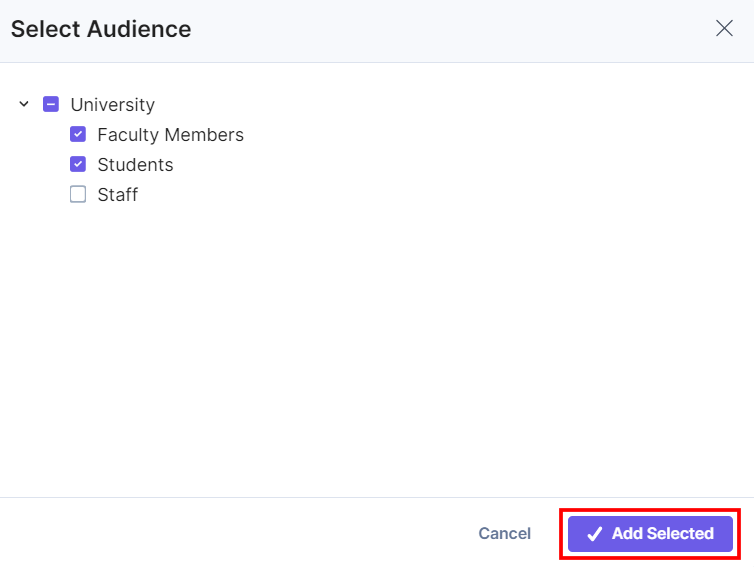
- The audiences you added get referenced within your entry.
- After adding the audience, Save and Publish your entry.
Steps to use the Audience Variable App as a JSON RTE Plugin
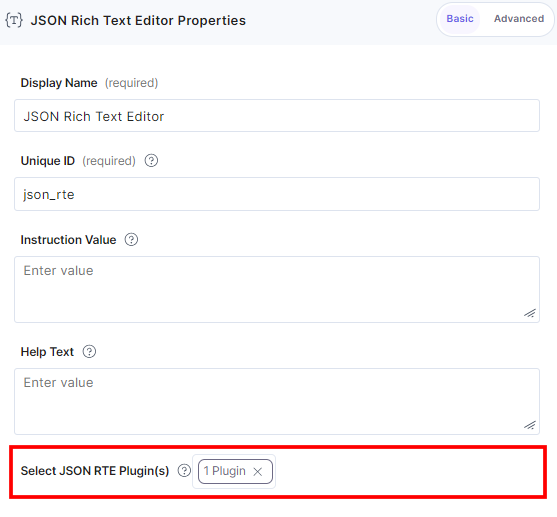
- On the Content Type Builder page, add a JSON Rich Text Editor field in your content type by clicking the Insert a field link represented by a + sign.
- Under Select JSON RTE Plugin(s), select Audience Variable, and then click Add Plugin(s).

This adds the Audience Variable app in the JSON Rich Text Editor field.
- After adding the app in a JSON Rich Text Editor field, click Save or Save and Close to save your changes.
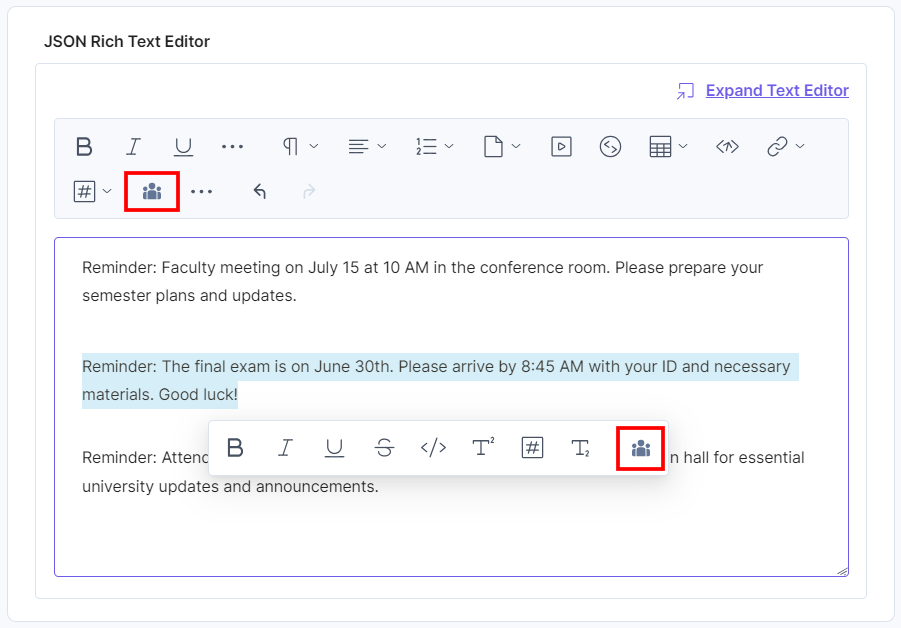
- To use the Audience Variable app as a JSON RTE plugin, create an entry for the content type. Within the JSON Rich Text Editor, add your content and click the Audience Variable app icon to customize which target audience can view the specific content. You can also select the text and click the Audience Variable app icon from the toolbar.
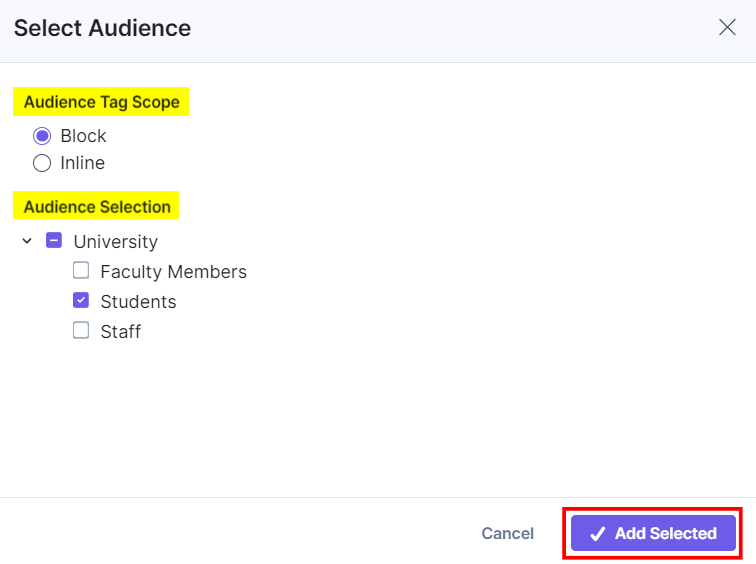
- In the Select Audience modal, choose the following:
- Audience Tag Scope: Select the scope for the Audience tag. There are two scopes: Block (supports elements such as lists, tables, and images) and Inline (supports text).
- Audience Selection: Select the target audience for your content (Faculty Members/Students/Staff).
- Once done, click Add Selected.
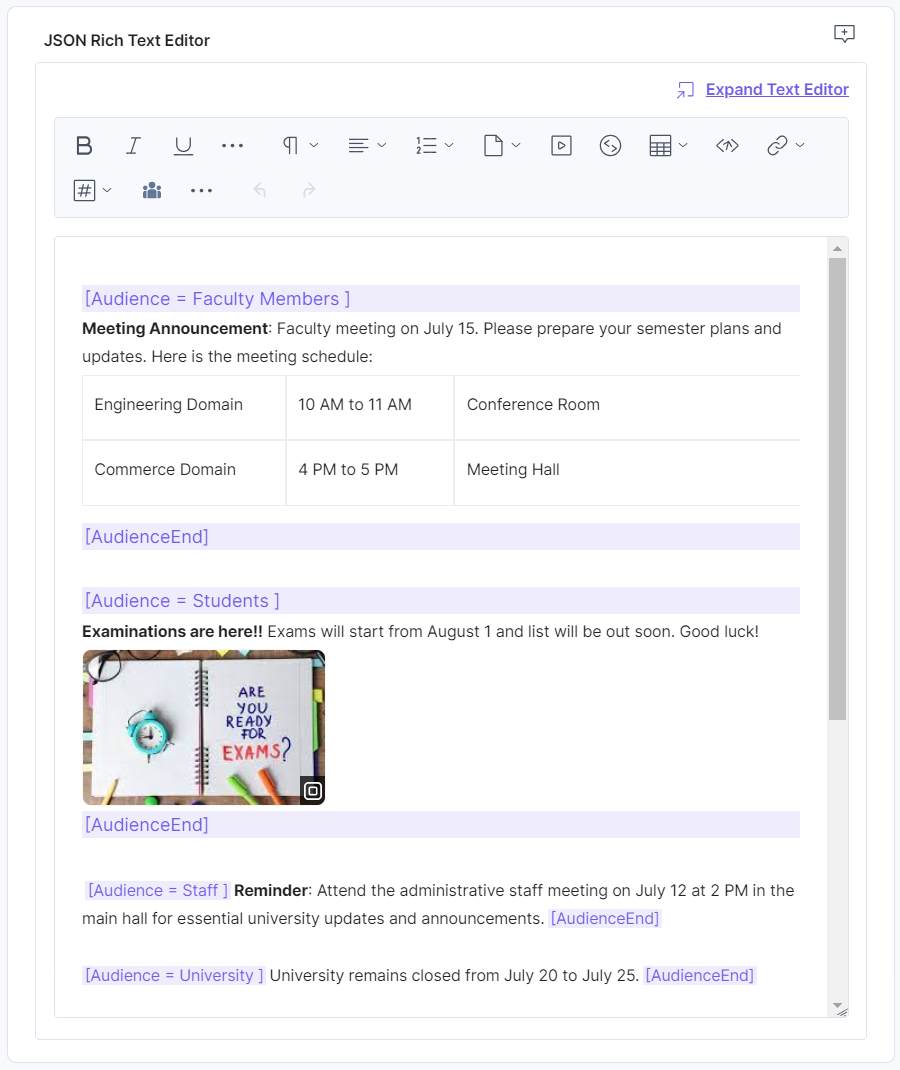
Now, the content you add would be visible to the Faculty Members, Students, Staff, or all. You need not to create separate entries to add different content. You can use the Audience Variable app and customize your content as per your target audience.
In the following example, Faculty Members and Students data are in the Block scope, while Staff and University (All) data in the Inline mode.
- After adding the audiences, Save and Publish your entry.
More articles in "Personalization"
