

.svg?format=pjpg&auto=webp)
.svg?format=pjpg&auto=webp)
.png?format=pjpg&auto=webp)


.png?format=pjpg&auto=webp)
Create a New Dashboard Extension
Note: Experience Extensions use the legacy approach with extensions. We recommend using the Dashboard UI Location for the Contentstack App Framework to extend the functionality of your apps.
Contentstack allows you to create dashboard extensions for your stack’s dashboard.
Note: When working within specific branches, extensions added or created will be available only within that particular branch. For example, you are working within the development branch, and you add new Dashboard Extensions to this branch. These dashboard extension will be available only within the development branch. Refer to our Branch-specific Modules document for more information.
To create a dashboard extension, log in to your Contentstack account, and perform the following steps:
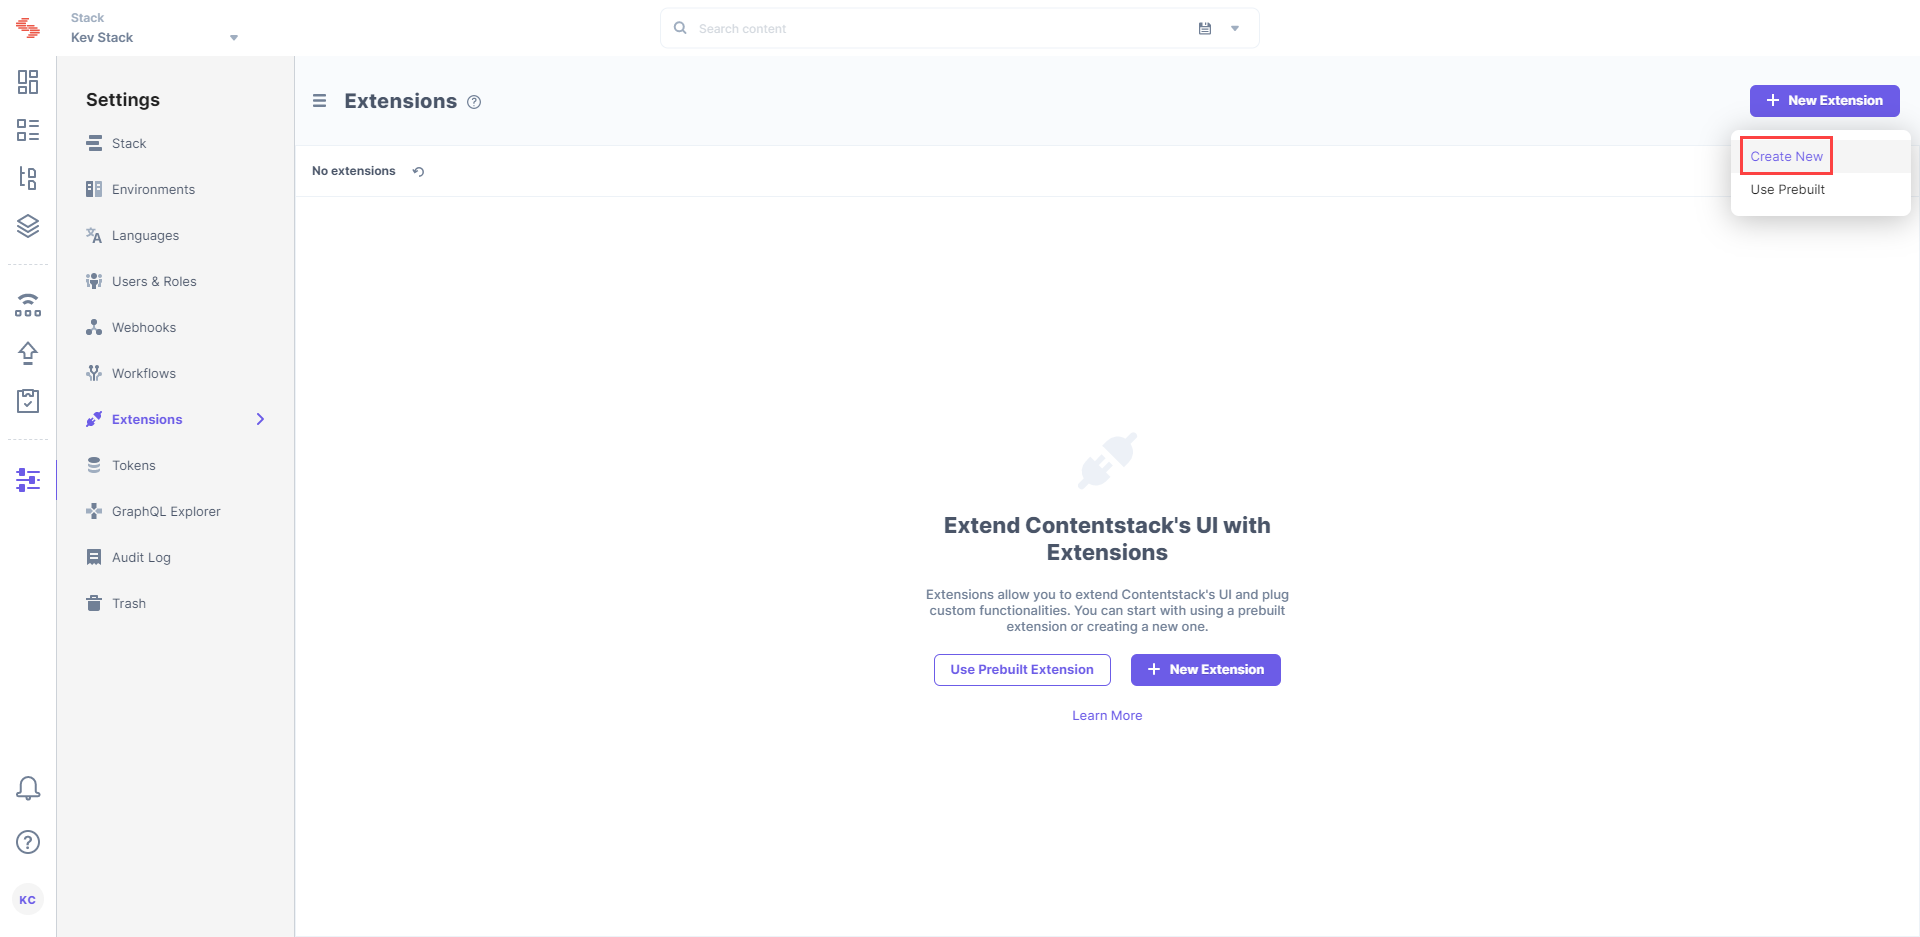
- Go to your stack and click on the “Settings” icon on the left navigation panel.
- Click on Extensions.
- On the Extensions page, click on the + New Extension button, and select Create new.
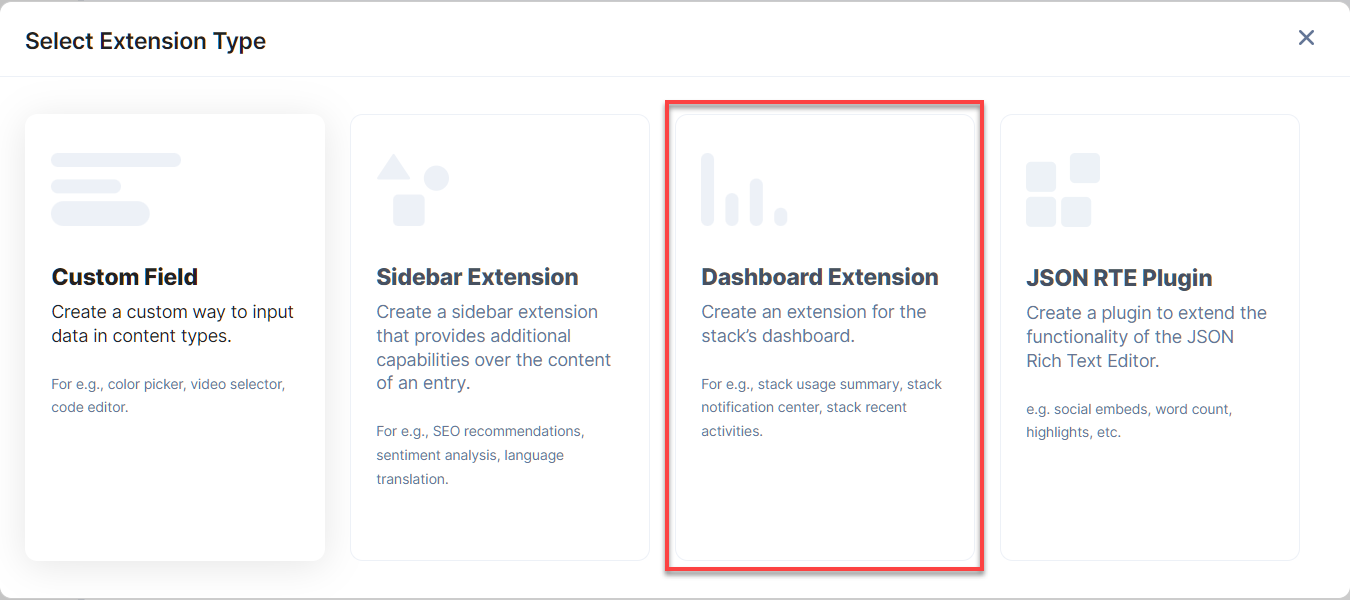
- In the Select Extension Type window, select Dashboard Extension.
- In the Create New Extension page, enter values in the fields as given below:
- Title: Provide a suitable title for your dashboard extension. This title will be visible as the extension name on the main dashboard page.
- Default width: Choose the width of the custom dashboard extension. Select either Half Width or Full Width as per your requirement.
Tip: The height is configurable through the Extensions SDK. You can also define if the user can toggle between Half Width and Full Width in the SDK.
- Hosting method: Select how you want to host the extension:
- External Hosting: Select this option for externally hosted extensions. You need to provide the URL in the External hosting URL field that appears below.
- Hosted on Contentstack: Select this option if you can write the code in the Extension source code field that appears below.
- Config Parameter: If you have used any config parameters (such as access token) in the source code, specify the value of the parameters in this field.
- Enable dashboard extension: Check this option to make the Dashboard Extension enabled for all users of the stack on the main Dashboard page.
Tip: Using the “Settings” gear icon on the Dashboard page, the users can show or hide the extension on their Dashboard.
- Finally, click on Save.
Testing Dashboard Extension
When you create your dashboard extension to integrate with Contentstack, you can follow the steps given below to test the extension and verify if the extension is working fine before releasing it.
To test the extension, first, clone the extension repo that you have built and install the dependencies. Then, edit the HTML, CSS, and JS files from the source folder.
To install the required dependencies, run the following command in the root folder.
npm install gulp-cli -g
npm install
To create a new build for the extension, run the following command (index.html):
gulp build
To update/test the extension while developing, run the following command:
gulp watch
Now, create a server using the Lite Server npm module. Before that, install the Lite Server module by using the following command:
npm install -g lite-server
Then, run the lite-server — in the root folder — by using the following command:
lite-server
After running the above command, you will get the following screen:
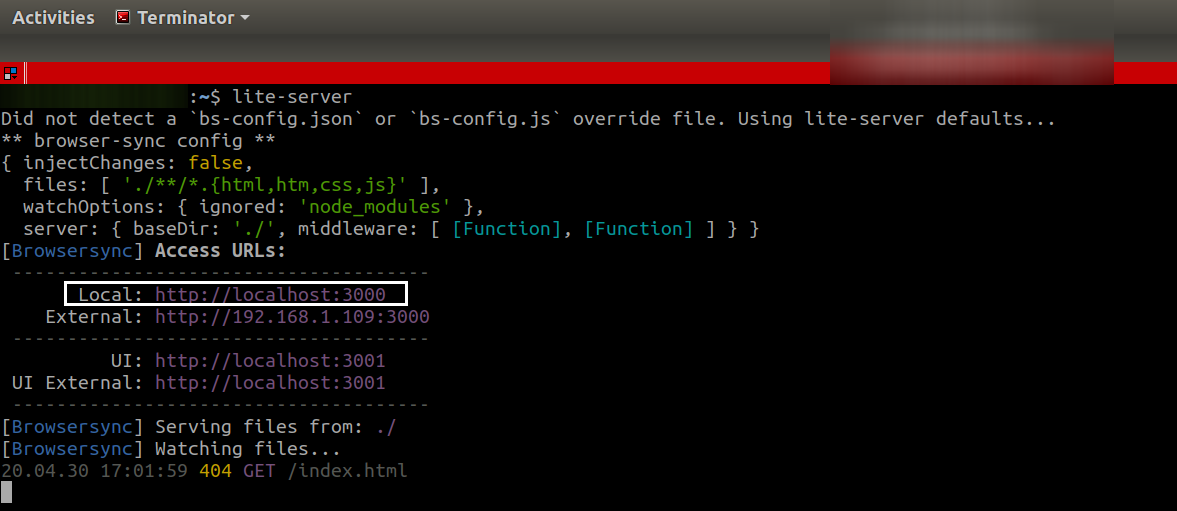
Make note of the port no in Access URLs (the localhost URL).
Next, we need to install ngrok to build secure tunnels from a public endpoint (that is the internet) to a locally running server. Issue the following command to install ngrok:
npm install ngrok -g
ngrok http <<port number>>
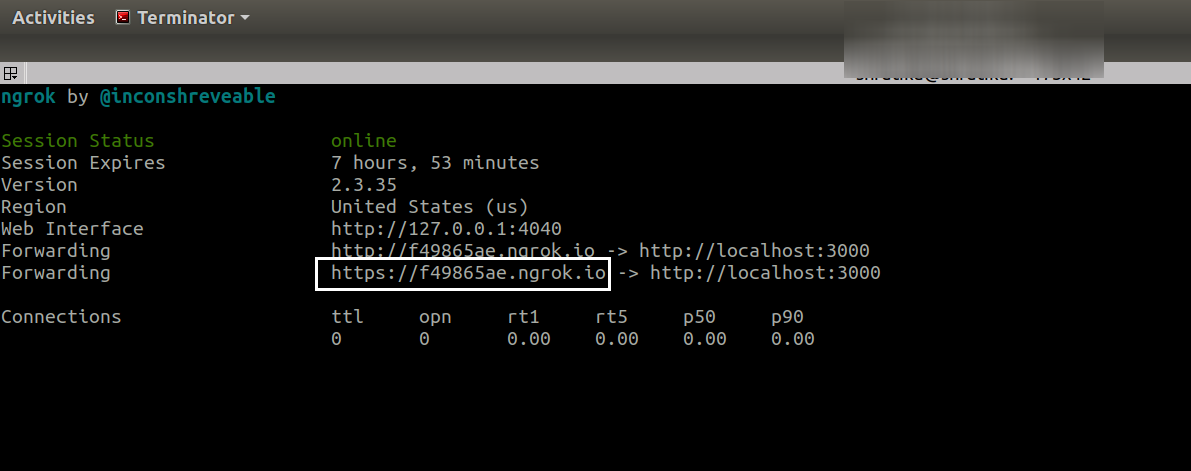
Once you run the above command, you will get a URL. Now create an extension by navigating to your stack and selecting Settings > + Add Extension > Create new.
On the Select Extensions Type screen, select Dashboard Extension and then add the required details on the Create New Dashboard screen.
In the Hosting method field, select External hosting and paste the above URL in this field. Now save your extension and check the dashboard where you have added your extension.
You should see your updated changes.
API Reference
Here are the links to the API requests related to this action:
More articles in "Get Started With Dashboard Extensions"
