

.svg?format=pjpg&auto=webp)
.svg?format=pjpg&auto=webp)
.png?format=pjpg&auto=webp)


.png?format=pjpg&auto=webp)
Optimizely
Note: This documentation uses the legacy approach with extensions. We have launched Optimizely as a Marketplace App. For more information on Optimizely, please refer to the Optimizely App Installation Guide.
The Optimizely extension lets you serve personalized content by allowing you to select the audience for each entry. This extension fetches and displays your Optimizely audiences into a field in your content type. Thus, while creating entries, you can select audience(s) for each entry. Based on the selection, the entry will be visible only to the targeted audience when published.
This step-by-step guide explains how to create an Optimizely extension in Contentstack. The steps to be performed are as follows:
- Retrieve your project ID
- Add audiences
- Generate access token
- Add “Optimizely” extension to your stack
- Use the extension in Contentstack
- Use the extension on the presentation layer to serve personalized content
Retrieve your project ID
In order to use this extension, you will need the ID of your Optimizely project. If you haven’t created any projects, refer to this guide to create one.
On successful creation of your project, you will see your project ID in the URL. The project ID is the part after "projects/" in the URL. For example, in “https://app.optimizely.com/v2/projects/11111111111,” the number "11111111111" is the project ID.
Save this ID as you will need it in Step 4 when configuring your Optimizely extension.Add audiences
If you haven’t added any audiences in your project, create some in your Optimizely account by referring to the Set up audiences in Optimizely guide.
The audiences you add to your project will be visible as possible values for your extension field in Contentstack.Generate access token
In order to use Optimizely resources within Contentstack, you will need to authenticate by providing your personal access token. You can create new tokens by following the steps given in this guide.
Note down this token, since you will need it while configuring the extension in Step 4.
Add “Optimizely” extension to your stack
To add this extension to your stack, log in to your Contentstack account and perform the following steps:
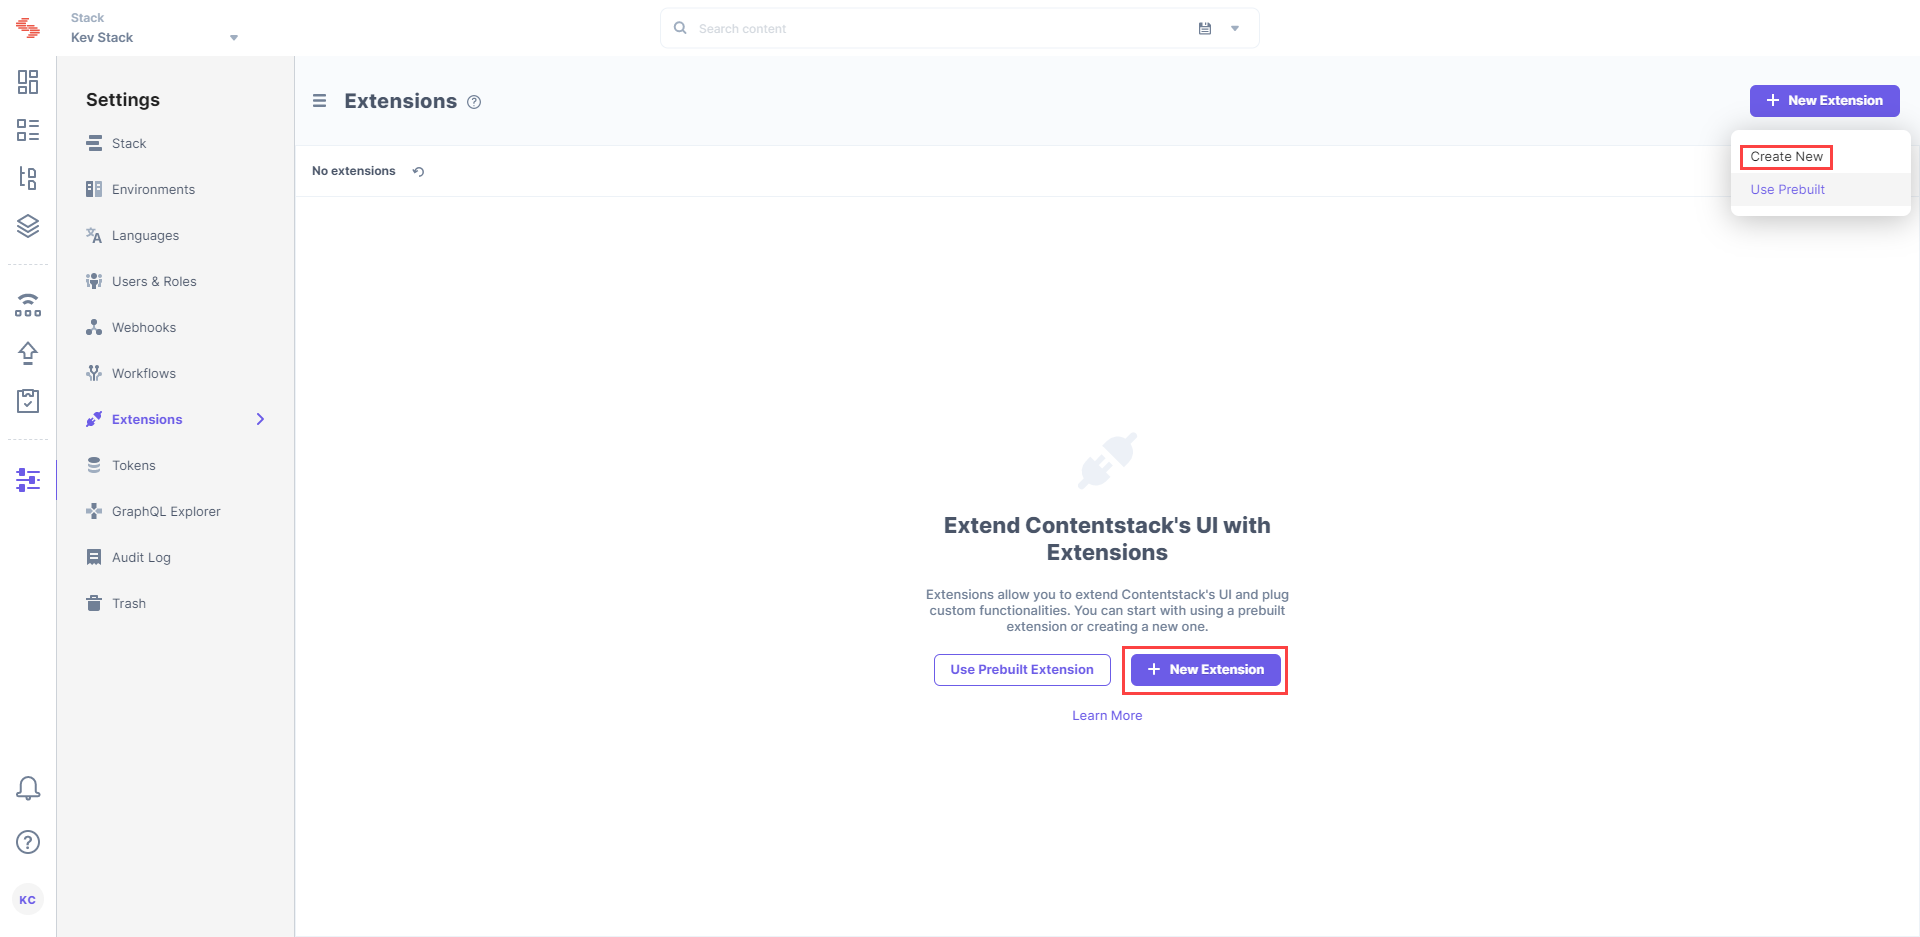
- Go to your stack, click on the “Settings” icon on the left navigation panel.
- Click on Extensions.
On the Extensions page, click on the + New Extension button, and select Create new.
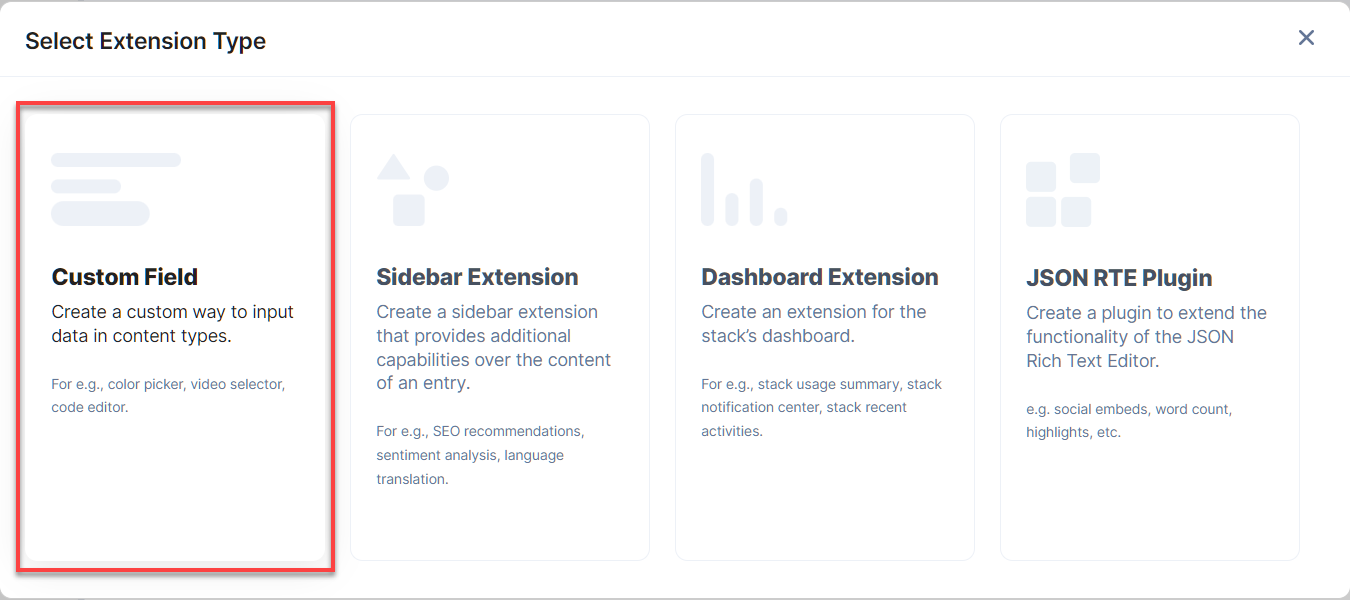
In the Select Extension Type window, select Custom Field.
- On the Create New Extension page, enter values in the fields as given below:
- Title (required): Provide a suitable title, for example “Optimizely,” for your custom field. This title will be visible when you select the extension in the custom field in your content type.
- Field Data Type (required): Select the data type in which the input data of the field should be saved in Contentstack. In this case, select JSON.
- Multiple (optional): Leave this field unchecked.
- Hosting method (required): Select Hosted by Contentstack as the hosting method for this content type.
- Extension Source Code (required): Specify the extension code here. To get the code, download it, and paste the contents of the index.html file in this field.
Config Parameters (required): Enter the configuration details for the extension. Here, you need to mention the project ID created in Step 1 and the Optimizely API access token generated in
Step 3.
{
    "access_token": "1:pl1abaBAbabaBabAb_aBa1BaBAb11ab4AbA1AB_A1Bab-ABabaBA",
    "project_id": "11111111111"
}
Save the custom field.
Now, let’s understand how you can start using your custom field extension in your content type.
Use your custom field extension in Contentstack
Once you have added a custom field, you can use it in your content type like any other field. To add a custom field in your content type, perform the following steps:
- Create a content type and add the Custom field to it.
Under Select Extension, select the “Optimizely” field that you created and set the other properties. You can add other fields as per requirements.

- Finally, click on either Save or Save and Close to save your changes.
Next, create an entry for this content type, and you will see the Optimizely field in action.

Use the extension on the presentation layer to serve personalized content
In order to display personalized content to your site visitors, you will need to query entries based on the audience type of your site visitor. You can use Contentstack queries as follows to fetch the content based on the audience ID provided:
SDK
let Query = Stack.ContentType('content_type_uid').Query().where('audience_field_uid.id', '11718912337')API
https://cdn.contentstack.io/v3/content_types/product/entries?api_key=blt20962a819b57e233&access_token=blt01638c90cc28fb6f&environment=production&locale=en-us&query={ "audience_field_uid.id": { "$in": [ array_of_auidences ] } }
Additional Resource: You can check out our documents that show how you can use Optimizely with Contentstack: Optimizely Experiments, A/B Testing Using Contentstack and Optimizely, and Implementing Personalization Using Optimizely on Your Website.
