

.svg?format=pjpg&auto=webp)
.svg?format=pjpg&auto=webp)
.png?format=pjpg&auto=webp)


.png?format=pjpg&auto=webp)
Edit an Alias
Once created, you can edit an alias to make changes, such as edit the name, description, or change the target branch.
To edit an alias, log in to your Contentstack account, go to your stack, and perform the following steps:
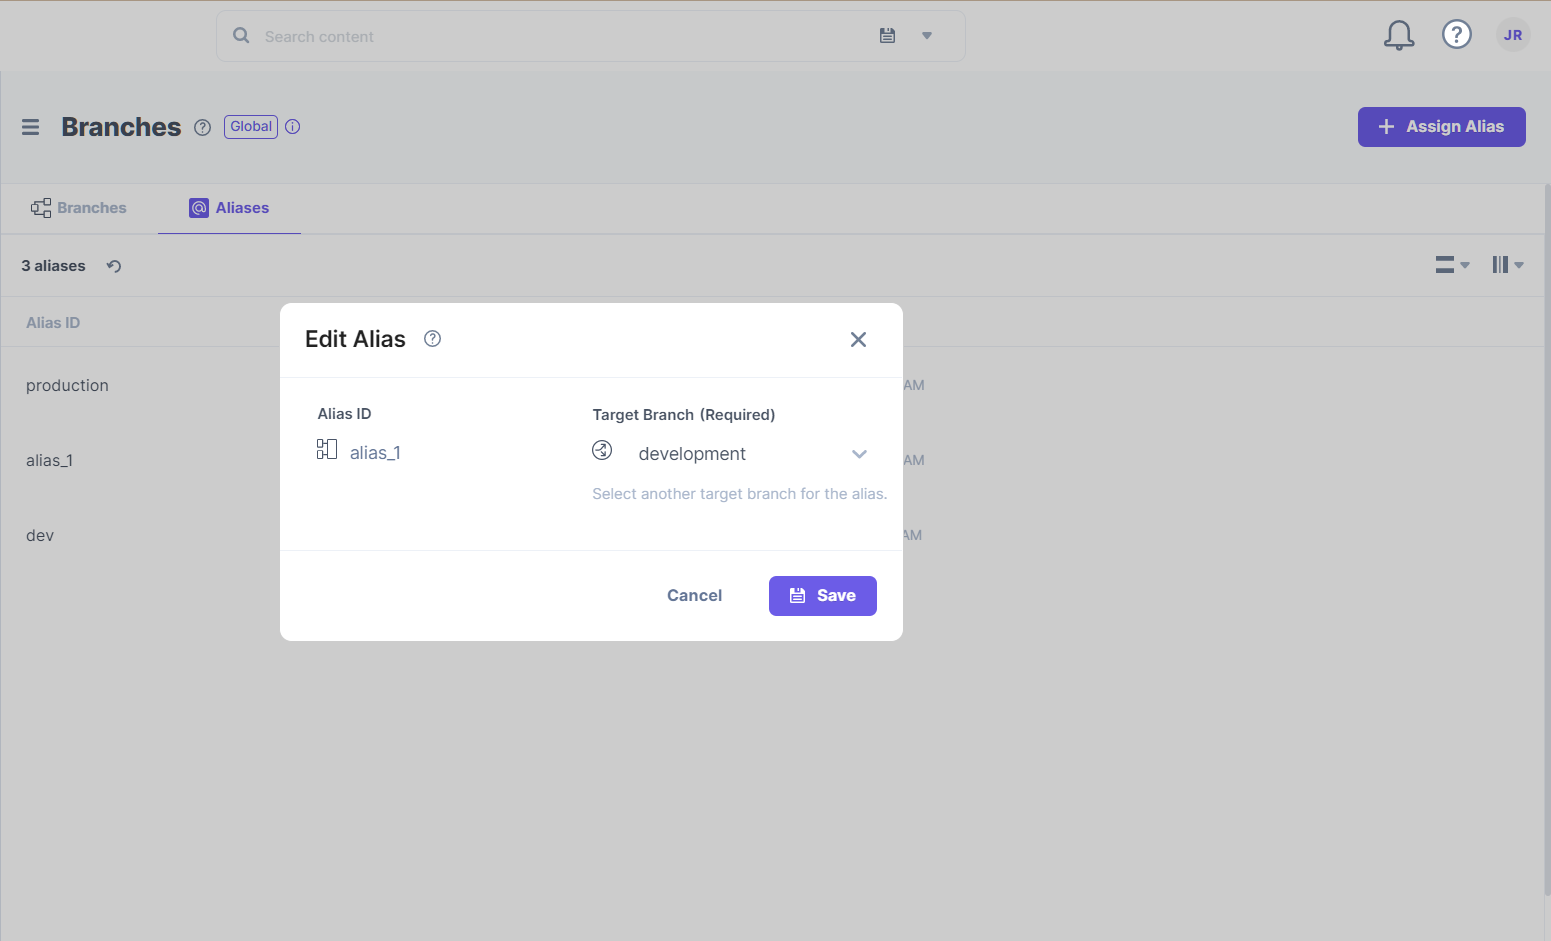
- Click the “Settings” icon on the left navigation panel, select Branches, and click on the Aliases tab.
- Hover over the alias you want to edit, and click on the “Edit” icon (pencil) that appears at the extreme right.

- The Edit Alias form opens up where you can see the current target branch as well. Change the target branch as per your needs.
Note: Once you edit and assign the alias to another branch, it will stop pointing to the existing target branch and instead point to the newly selected target branch.
- After making the necessary changes, click Save to save your changes.
Note: An Alias can point only to a single branch at a time.
Note: The content from the new target branch can now be displayed on your website.
Was this article helpful?
More articles in "Work with Aliases"
