

.svg?format=pjpg&auto=webp)
.svg?format=pjpg&auto=webp)
.png?format=pjpg&auto=webp)


.png?format=pjpg&auto=webp)
Egnyte
Note: This documentation uses the legacy approach with extensions. We have launched Egnyte as a Marketplace App. For more information on Egnyte, please refer to the Egnyte App Installation Guide.
Egnyte extension allows you to fetch the files stored in your Egnyte account and display them into a field in your content type. Thus, while creating entries, you can select one or more files as input value for the field.
This step-by-step guide explains how to create an Egnyte custom field extension for your content types in Contentstack. The steps performed are as follows:
- Create an account in Egnyte
- Register with the Egnyte developer portal
- Add the “Egnyte” custom field extension to your stack
- Use the extension
Prerequisites
- Contentstack account
- Egnyte account
- Client ID
- Egnyte domain
-
Create an Account in Egnyte
To get started with using this extension, you're required to create an account in Egnyte. Follow the steps given below to create one:
- Visit the Egnyte official page. To ensure the extension works as expected, it is recommended to purchase one of the plans Egnyte offers.
- So, click on the PRICING option at the top and select one of the plans. You will get an official email after the purchase. Follow the instruction to set up your account and Egnyte domain.
Note: Make sure to note the domain as we'll need it while setting up the extension in Contentstack.
- Log in to your Egnyte account and you'll be redirected to your dashboard.
- Start uploading your files on Egnyte and then you'll be asked to share the files. So select the files that you want to share, click Share, and then Share Link.
- Choose from the available options Get Link or Email Link. Similarly,Now that you can perform other operations such as making a folder shareable etc.
-
Register with the Egnyte Developer Portal
Once you have done this setup and added your files in your account, perform the following steps to register yourself:
- Go to the Egnyte for Developers portal. Fill in the required details such as your name, email address, company name, Egnyte domain, etc., and complete the registration process.
- Keep the Registered OAuth Redirect URI field empty.
- Inside the SELECT WHICH WEB APIS YOU WILL USE section, use the “Egnyte Connect API” and not the “Egnyte Protect: Egnyte Protect API.” To do this, just uncheck the Issue a new key for Egnyte Protect option.
- After completion of the registration, you will get a “Key” (client ID) to use as a config parameter while setting up the extension in Contentstack.
Note: Make sure to note this client ID. Plus, ensure to use the “Key” as your client ID and not the secret key.
Now that we have set up the account in Egnyte and got yourself registered, let's proceed to create an Egnyte extension in Contentstack.
-
Add the “Egnyte” Custom Field Extension to your Stack
To add this custom field to your stack, log in to your Contentstack account and perform the following steps:
- Go to your stack and click on the “Settings” icon on the left navigation panel.
- Click on Extensions. You can also use the shortcut keys “alt + X” for Windows OS users, and “option + X” for Mac OS users to access the extensions menu.
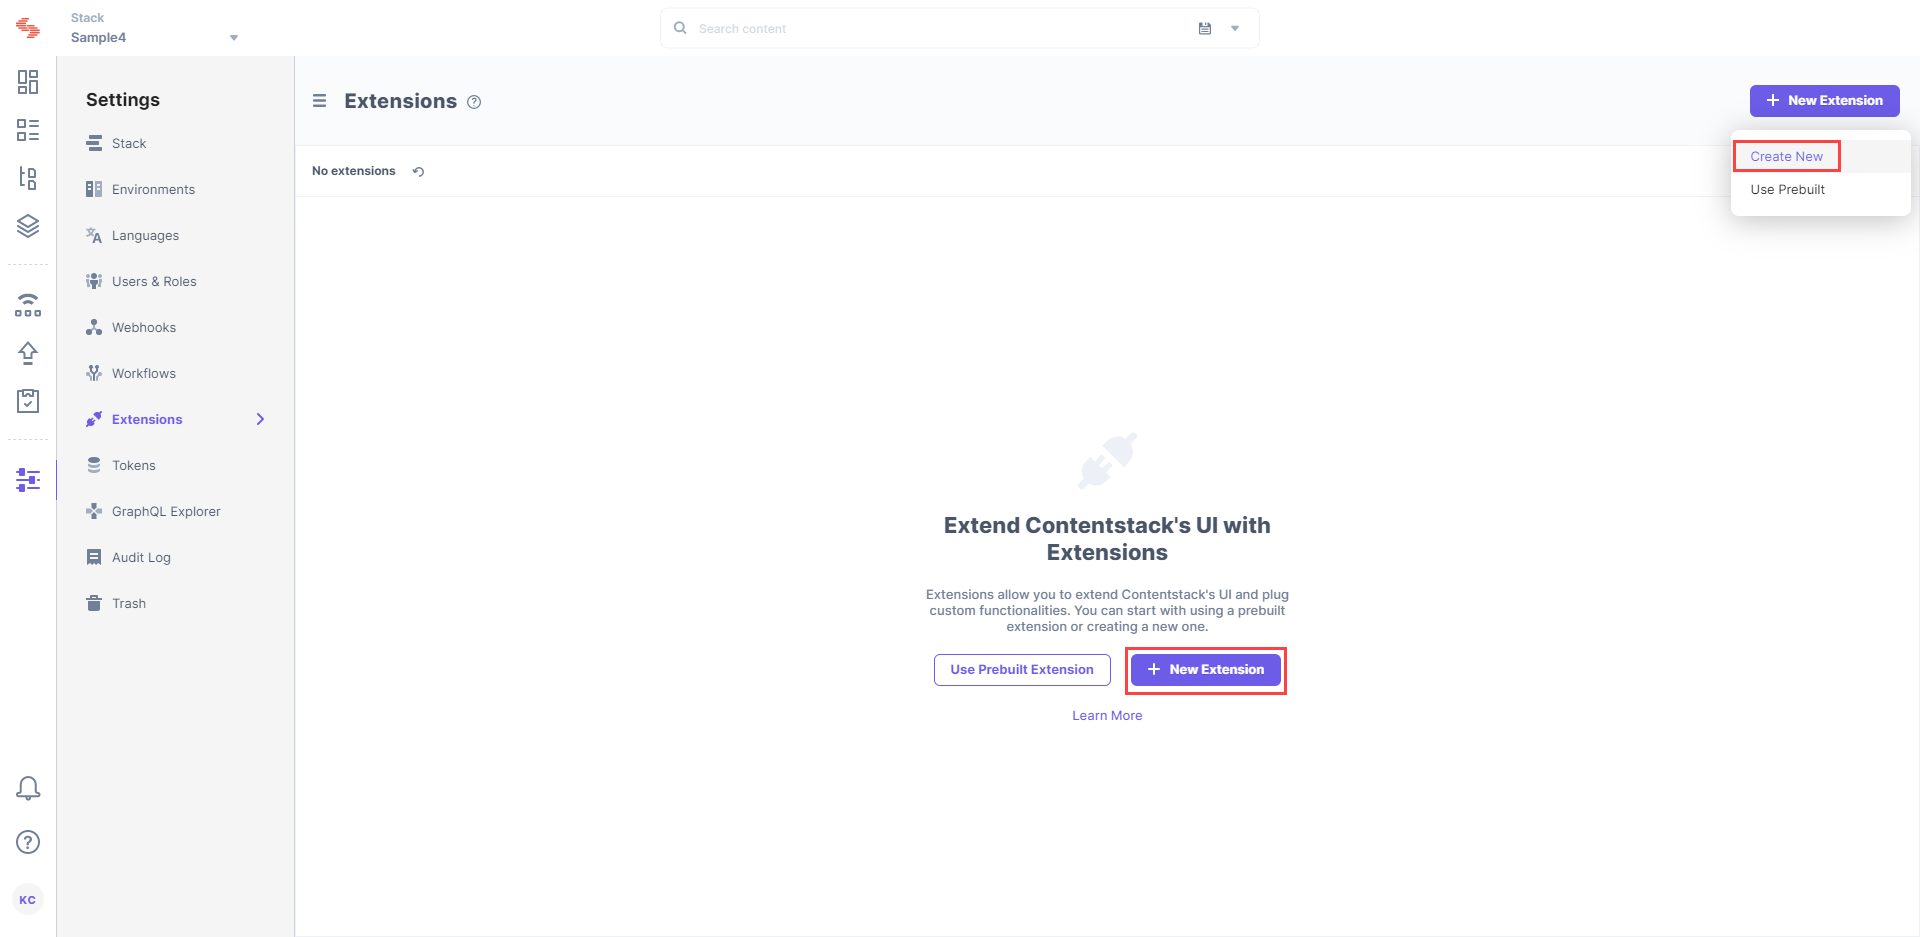
- On the Extensions page, click on the + New Extension button, and select Create new
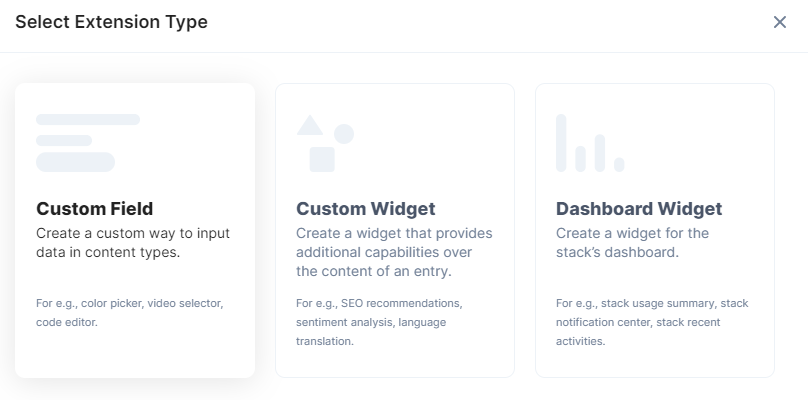
- Select the Extension type as Custom Field.
- On the configuration page, enter details in the fields as given below:
- Title (required): Provide a suitable title. For example, “Egnyte.”
- Field Data Type (required): Select the data type in which the input data of the field should be saved in Contentstack. Select JSON in this case.
- Multiple (optional): Leave this checkbox unchecked.
- Hosting Method (required): Select Hosted By Contentstack.
- Extension Source Code (required): In this field, you need to enter the extension code. If Extensions are part of your plan, contact our Support team to get the code for the extension.
Note: In the code, locate the redirect.html file inside the source folder, and upload this file as an asset in Contentstack by following the steps mentioned in the Create/Upload asset article. After uploading the file, you'll get a URL in the asset details section, make note of this URL.
- Config Parameter (required): Enter the following details as your config parameters:
{
    "domain": "<egnyte-domain>",
    "clientId": "<egnyte-clientID>",
    "redirectUrl": "<redirect-url>"
}
Provide the details in the following parameters:
- domain: Provide the URL that you created while signing up with Egnyte in the aforementioned step.
- clientID: Provide the ID that you created when you registered with the Egnyte developer portal
-
redirectUrl: Provide the URL of the file that you uploaded as an asset in Contentstack.
- Click on Save. This will create your custom field.
Now, let’s understand how you can start using this custom field in your content type.
-
Use the Extension
Once you have added a custom field, you can use it in your content type like any other field. To add a custom field in your content type, perform the following steps:
-
Create a content type and add the Custom field to it.
- In the Edit Properties section, under Select Extension, select Egnyte from the drop-down and set the other properties of your custom field.
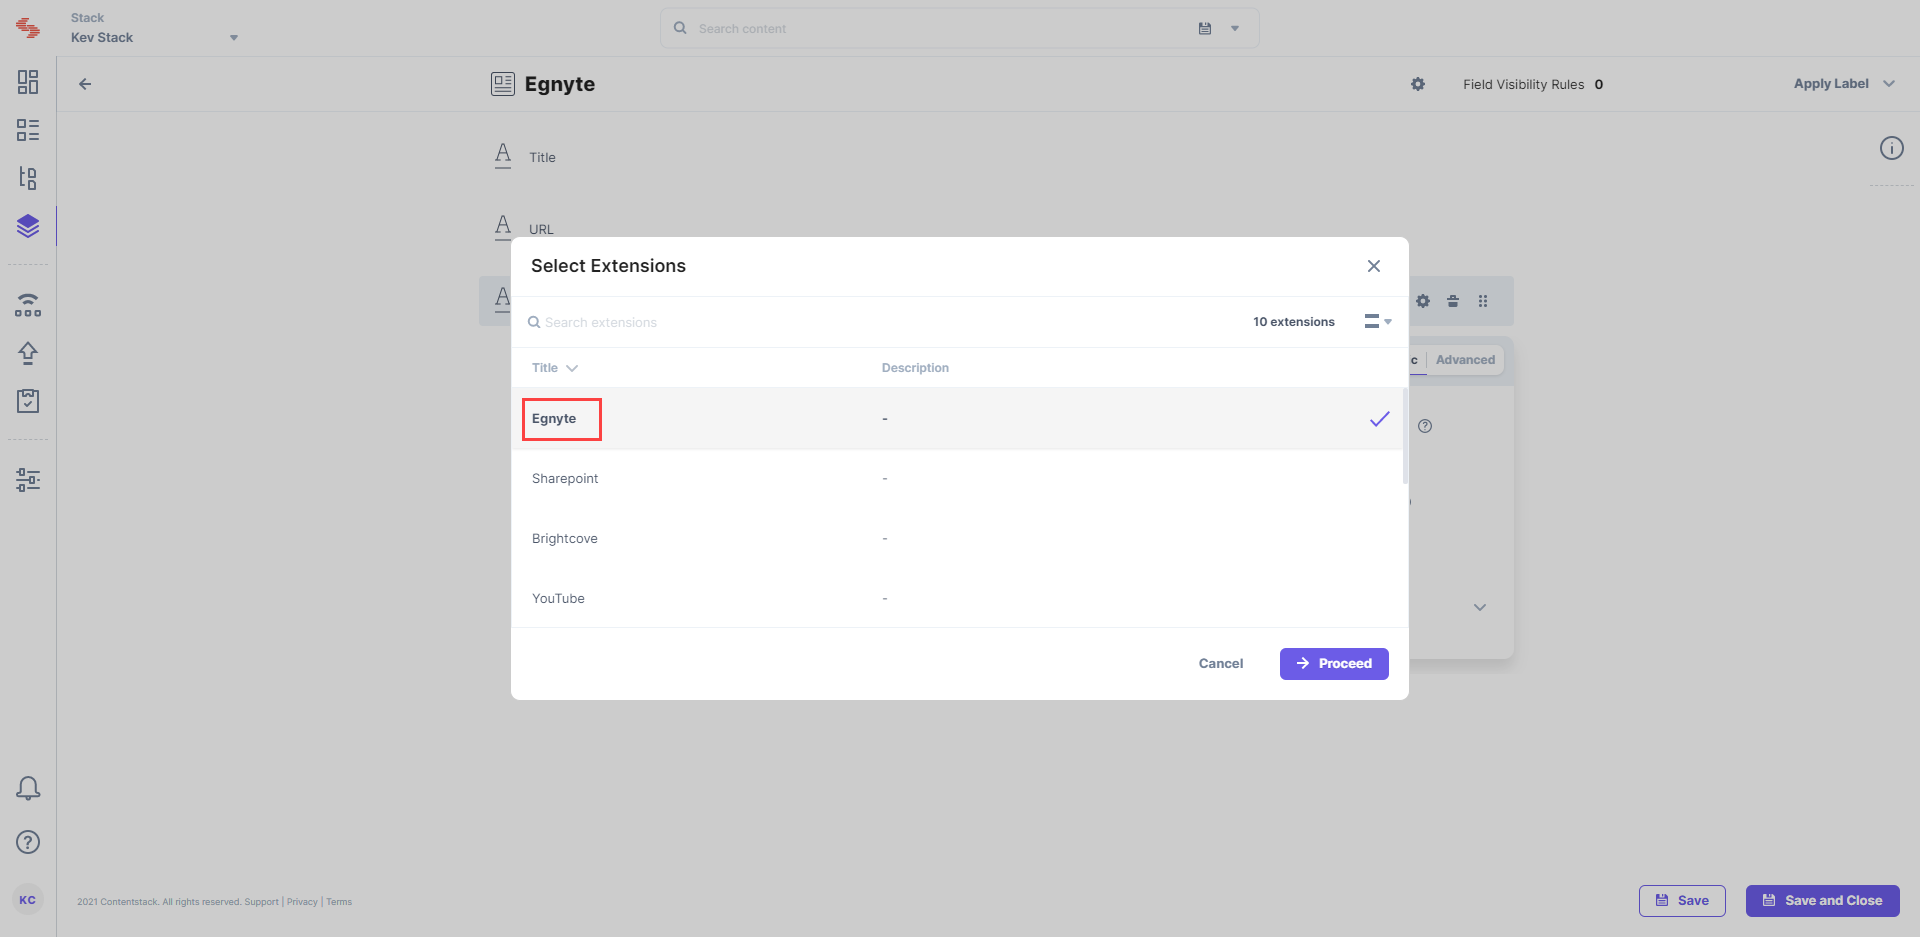
- After adding other relevant fields in your content type, click on either Save or Save and Close to save your changes.
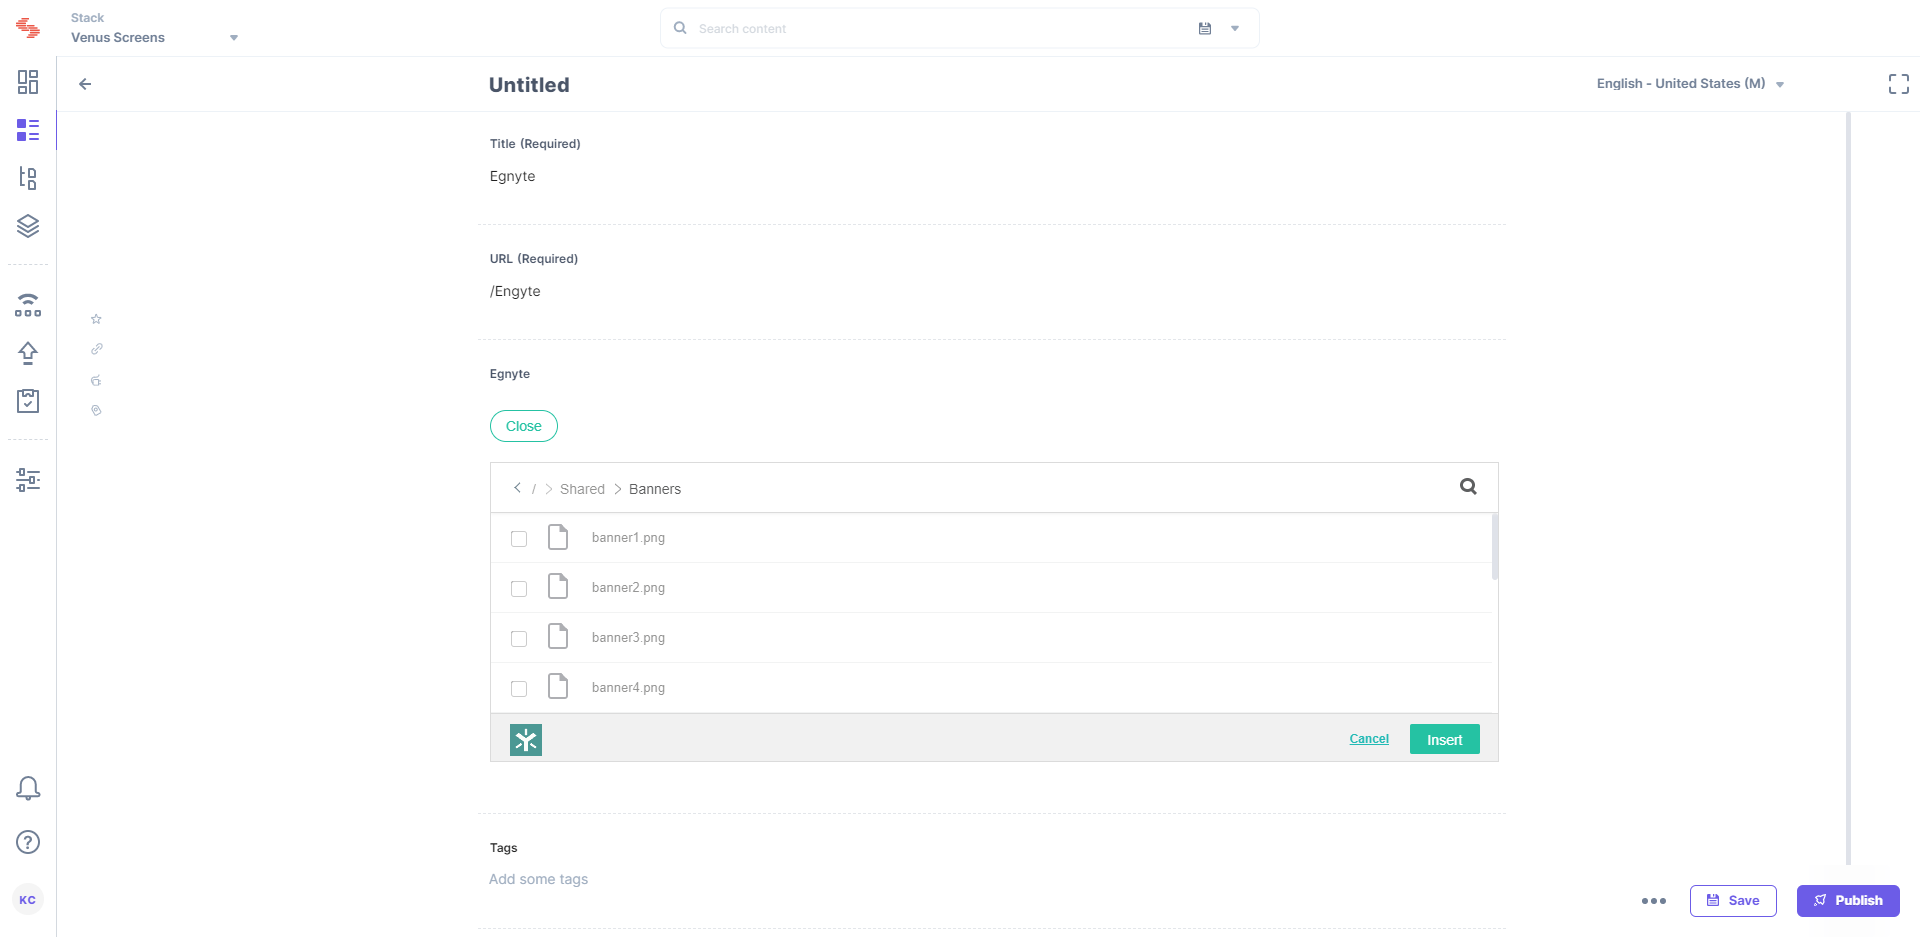
- Next, create an entry for this content type, and you will see the Egnyte field in action.
-
Note: The number of items that can be selected depends on the size of the JSON that is to be stored, and currently, only 10 KB of data can be stored. This is due to the limitation of the JSON data stored via Custom Field. Refer to our Custom Field Limitation doc for more detail.
More Articles
You can also visit our collection of similar other articles:
