

.svg?format=pjpg&auto=webp)
.svg?format=pjpg&auto=webp)
.png?format=pjpg&auto=webp)


.png?format=pjpg&auto=webp)
Bynder
Note: This documentation uses the legacy approach with extensions. We have launched Bynder as a Marketplace App. For more information on Bynder, please refer to the Bynder App Installation Guide.
The Bynder custom field extension allows you to fetch images from Bynder and display them into a field in your content type. Subsequently, while creating entries, you can select one or more images as the input value for the field.
This step-by-step guide explains how to create a Bynder custom field extension for your content types in Contentstack. The steps performed are as follows:
Prerequisites
- Bynder account and a domain
- Contentstack account
-
Create a Bynder Account
To use this extension, you need to create an account in Bynder. To do that, follow the steps given below:
- Go to https://www.bynder.com/en/ and create a new account. It is recommended to use the partnership account by purchasing the license. The free trial account won't work as expected.
- You will receive a confirmation email, click on the provided link and change your password.
You'll then get a URL. Make a note of it as you will need it when you set up the extension in Contentstack.
Additional Resource: If you want a detailed explanation to get started with your Bynder account, refer to the Getting Started with Bynder documentation.
Now, let's move ahead and set up our extension.
-
Add the Bynder Custom Field Extension to your Stack
To add the Bynder custom field to your stack, log in to your Contentstack account and perform the following steps:
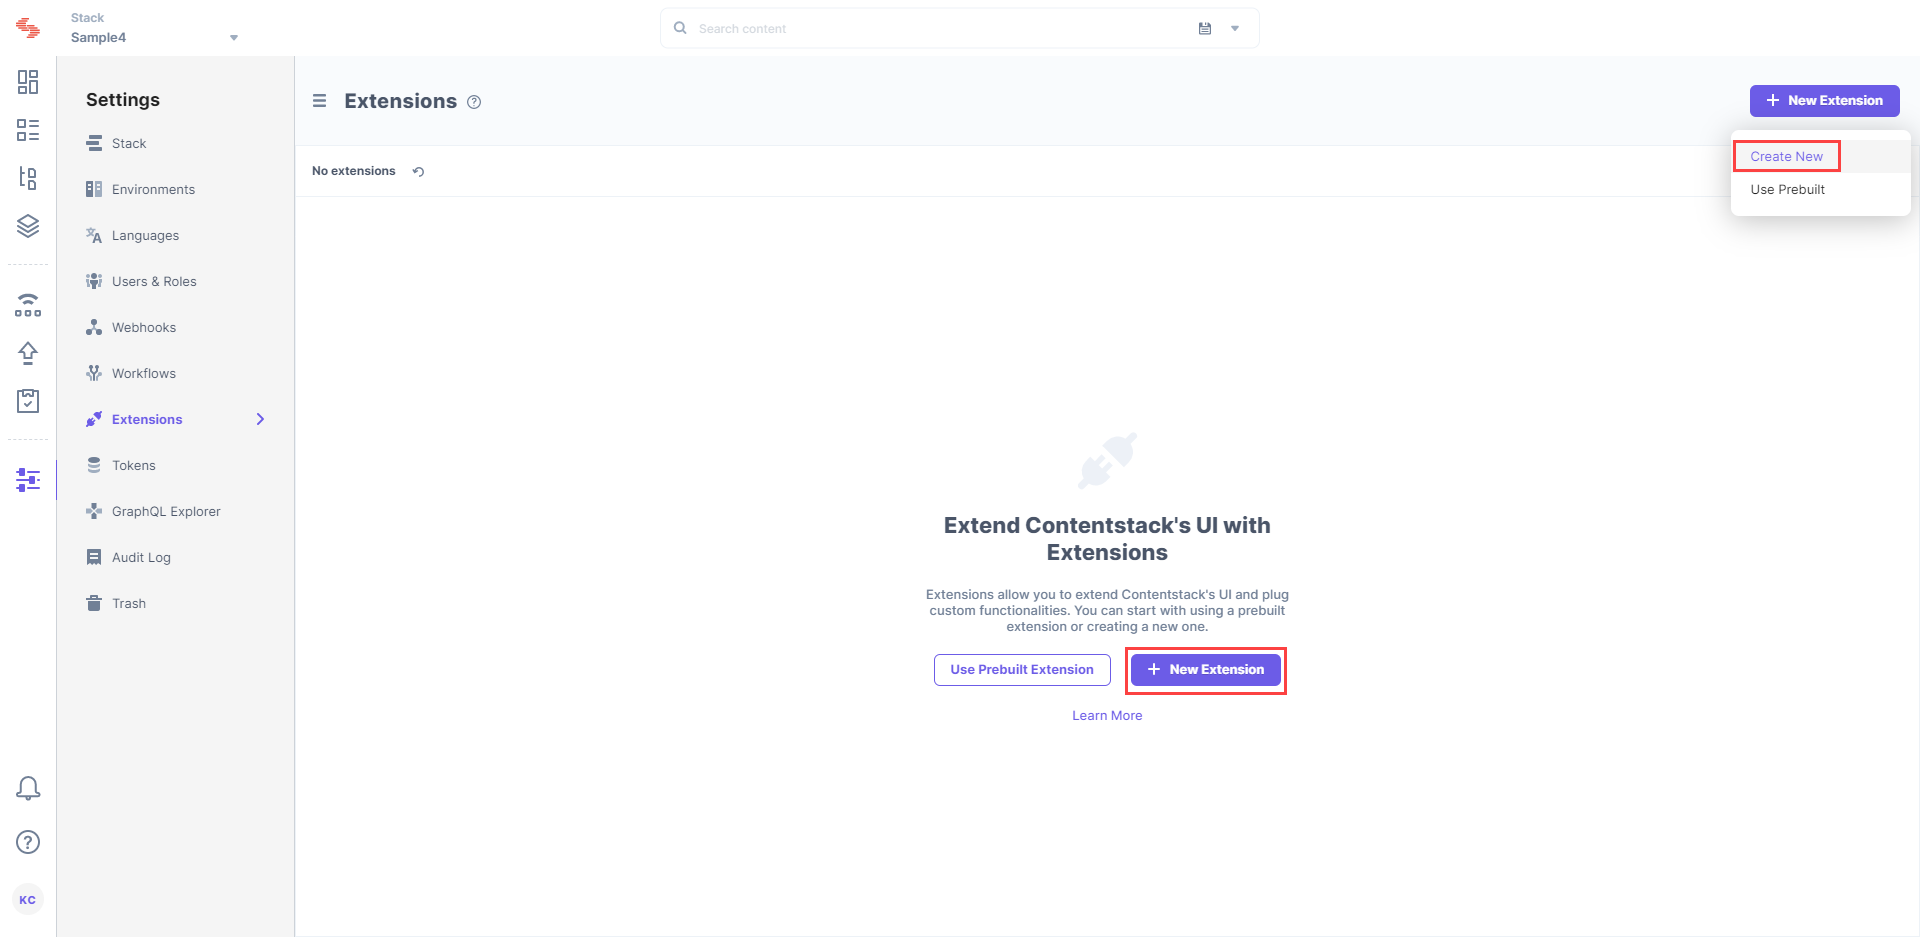
- Go to your stack, and click on the “Settings” icon on the left navigation panel
- Click on Extensions. You can also use the shortcut keys “alt + X” for Windows OS users, and “option + X” for Mac OS users to access the extensions menu.
- On the Extensions page, click on the + New Extension button and then on Create new:
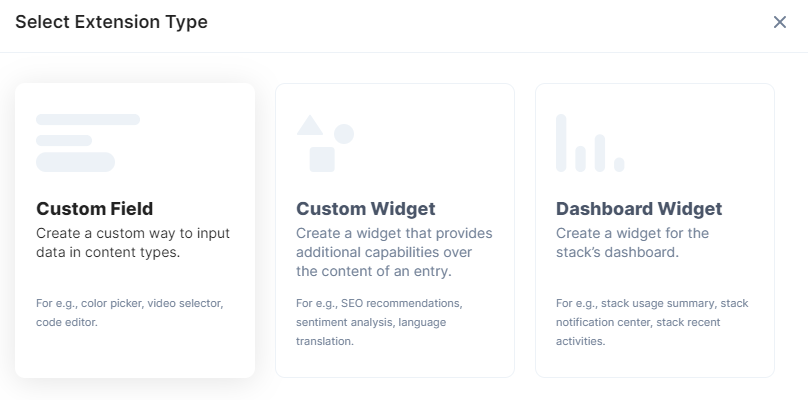
- In the Select Extension Type window, select Custom Field.
- On the Create New Extension page, enter values in the fields as given below
- Title (required): Provide a suitable title, for example “Bynder,” for your custom field. This title will be visible when you select the extension in the custom field in your content type.
- Field data type (required): Select the data type in which the input data of the field should be saved in Contentstack. In this case, select JSON.
- Multiple (optional): Leave this field unchecked.
- Hosting method (required): Select Hosted by Contentstack as the hosting method for this content type.
- Extension Source Code: (required): Specify the extension code here. If Extensions are part of your plan, contact our Support team to get the code for the extension.
The support team will provide you with the source code (src file). Copy the code from the index.html file located in the root folder and paste it in the Extension source code field.Note: In the downloaded code, inside the source folder, there's a bynder-widget HTML file. Upload this file as an asset in Contentstack by following the steps mentioned in the Create/Upload asset article. After uploading the file, you'll get a URL in the asset details section, make note of this URL.
- Config Parameter (required): Enter the following configuration details as the extension's config parameter:The value for widgetUrl is the URL of the bynder-widget HTML file which you just uploaded as an asset. The value for defaultDomain is the same URL that you generated after the creation of your account in Bynder.
{
    "widgetUrl": "<<widgetUrl>>",
    "defaultDomain": "<<defaultDomain>>"
}
-
Save the custom field.
Now, let’s understand how you can start using this custom field in your content type. -
Use Your Custom Field Once you have added a custom field, you can use it in your content type like any other field. To add a custom field in your content type, perform the following steps:
- Create a content type and add the Custom field to it.
- Under Select Extension, select the “Bynder” field that you created and set the other properties. You can add other fields as per requirements.
- Finally, click on either Save or Save and Close to save your changes.
- Next, create an entry for this content type, and you will see the Bynder field in action.
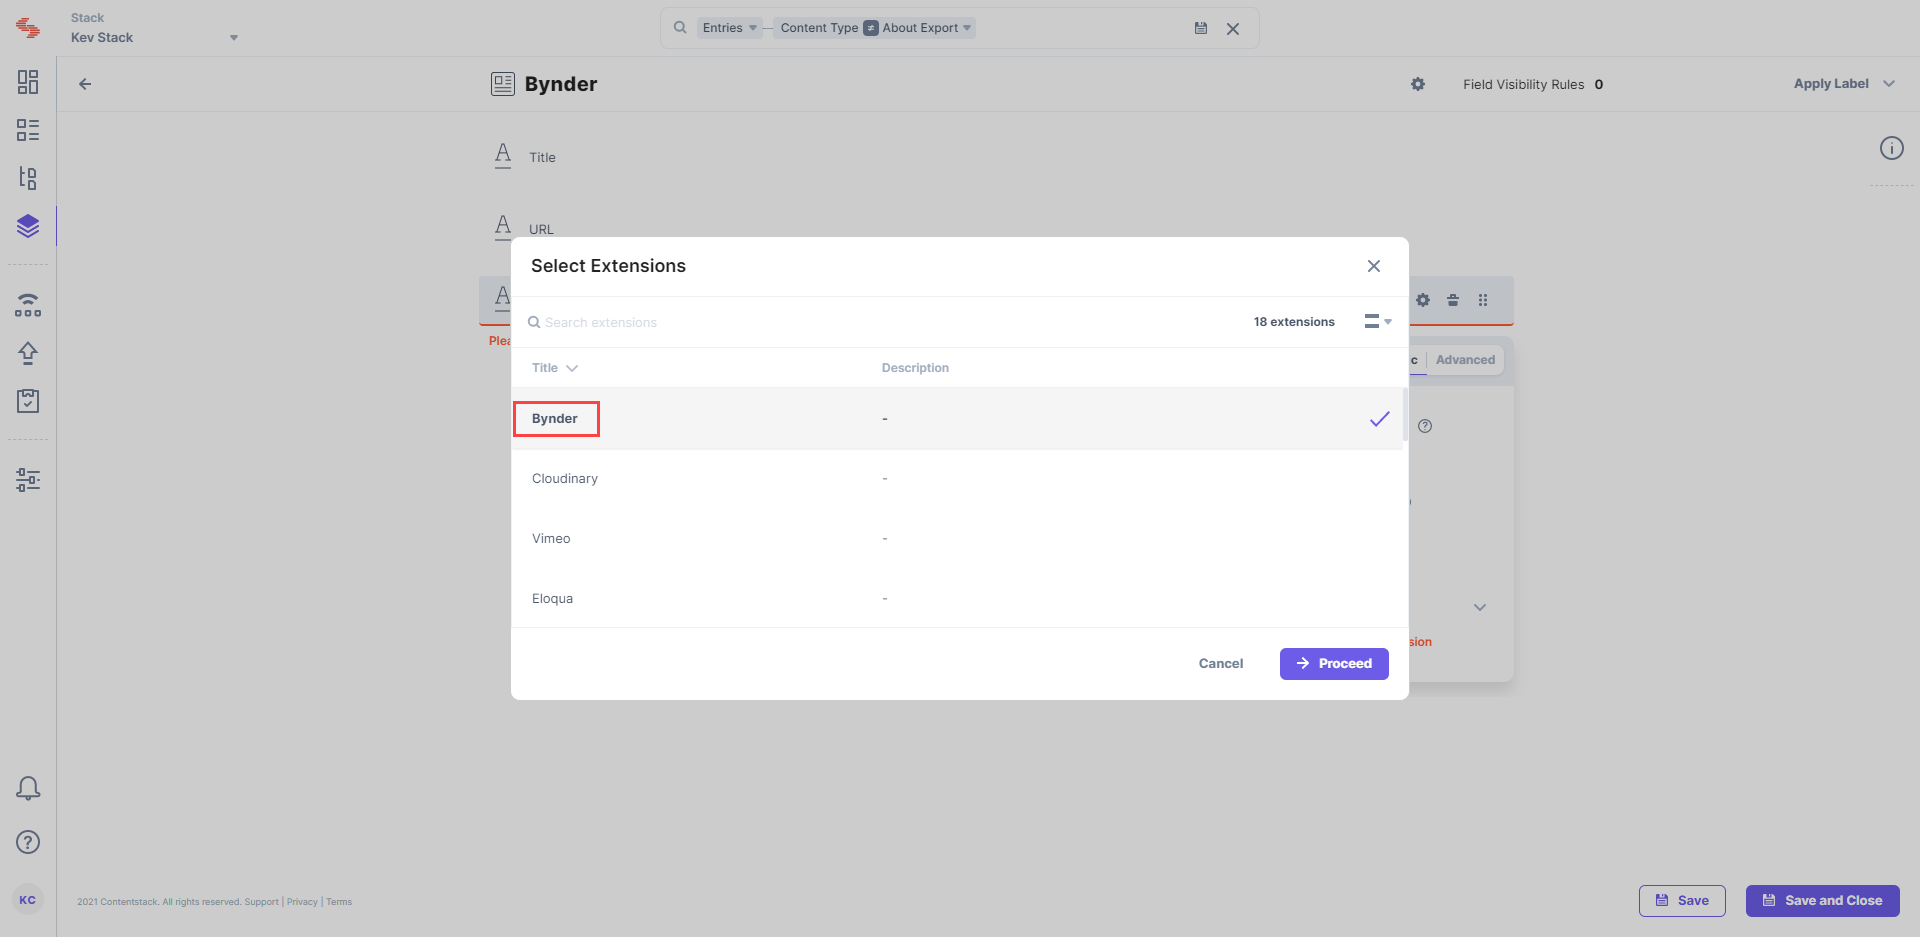
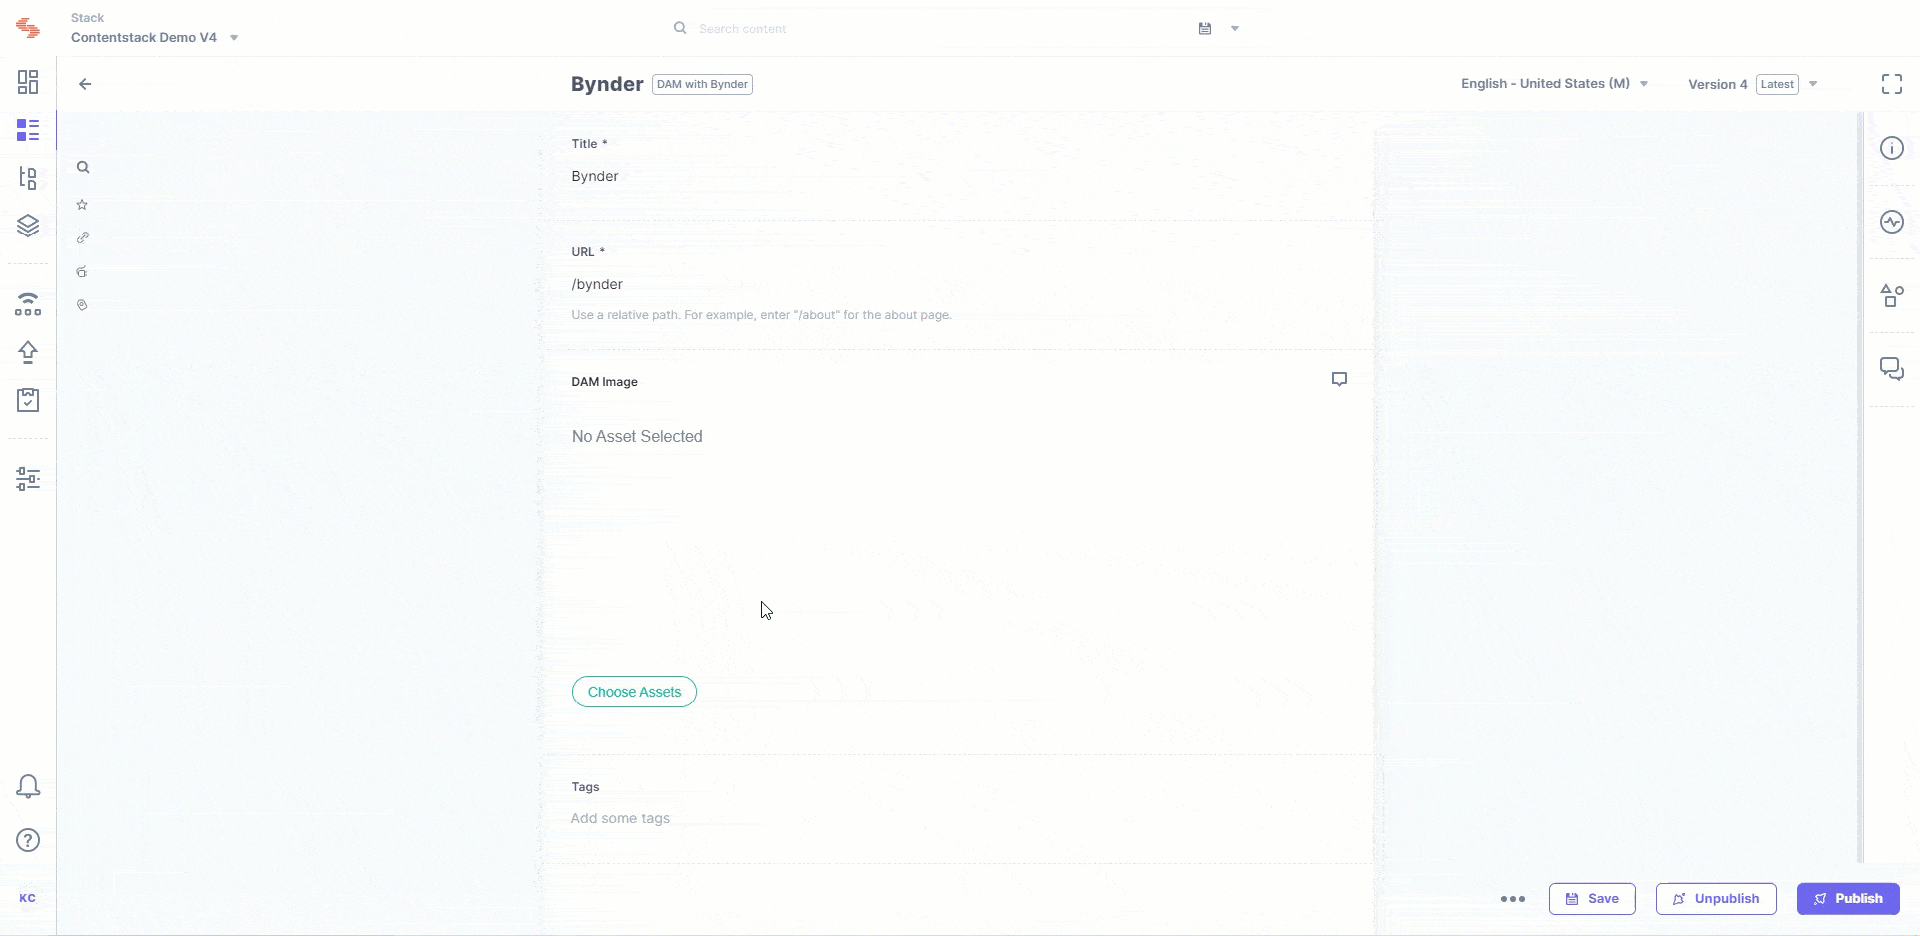
- Click on Choose Assets. If you are still logged into Bynder, it will open inside your entry page, from where you can select multiple images and insert them in your entry as shown below:
Note: The number of items that can be selected depends on the size of the JSON that is to be stored, and currently, only 10 KB of data can be stored. This is due to limitation of the JSON data stored via Custom Field. Refer to our Custom Field Limitation doc for more detail.
