

.svg?format=pjpg&auto=webp)
.svg?format=pjpg&auto=webp)
.png?format=pjpg&auto=webp)


.png?format=pjpg&auto=webp)
Using Repeat Paths to Automate Repetitive Tasks
This use case covers a scenario where you can dynamically create multiple entries in Contentstack using the Repeat Path feature.
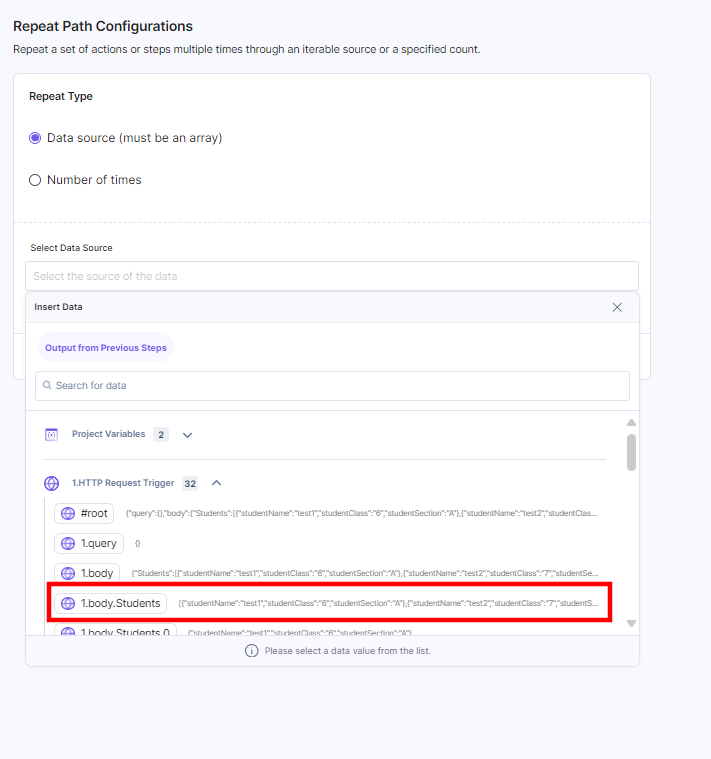
In this use case, we send bulk data via Postman and fetch the data in the HTTP trigger. Once the data is fetched, you need to configure the Repeat Path. Select the HTTP trigger data via the Data source field in the Repeat Path configuration.
Note: You can use any trigger or action to fetch the data from any source.
Configure the Contentstack action and select the Create an Entry action inside the repeat path. In the Create an Entry action, fetch the current-item value from the Repeat Path step. The current_item will iterate through each item in the data array and create the entries in Contentstack.
Let's break this scenario to see what must be the trigger event and the consequent action required to execute the Automation:
- Set up the “HTTP'' Trigger Event: This trigger event is activated whenever a user makes a HTTP GET/POST request to the configured URL. In this case, the data is collected from Postman to the HTTP trigger.
- Set up the Contentstack “Repeat Path”: Once the above event triggers the automation, it checks for the configuration provided within the repeat path.
- Set up the Contentstack “Create an Entry” action: When the Repeat Path configurations are set, the create an entry action will create different entries in Contentstack.
Note: Once you configure any action inside the Repeat Path, it will execute the action step repeatedly until the condition is met.
The steps to set up the Automation are as follows:
- Configure HTTP Trigger
- Configure Repeat Path
- Configure Contentstack Connector within the Repeat Path Step
Let’s look at the setup in detail.
Configure HTTP Trigger
- Log in to your Contentstack account and click the “Automate” icon.
- Click + New Project to add a new project.
- Click + New Automation.
- Enter the Automation Name and Description.
- Click Create.
- Select Configure Trigger from the left navigation panel.
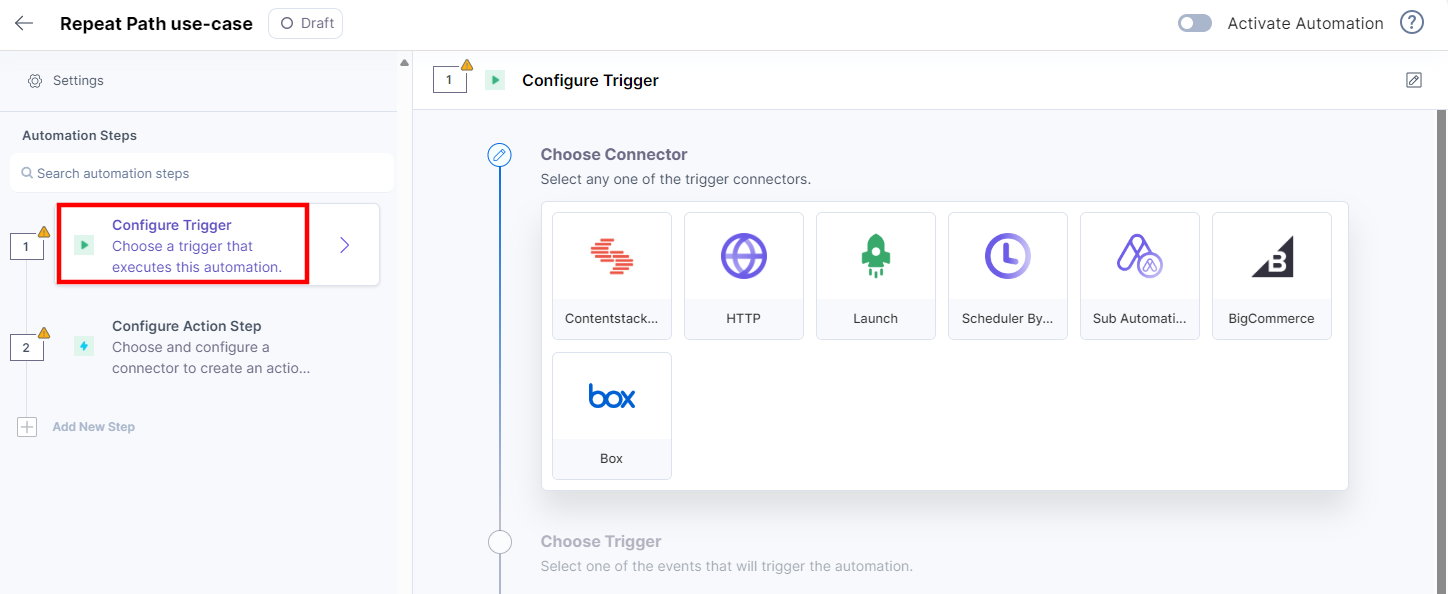
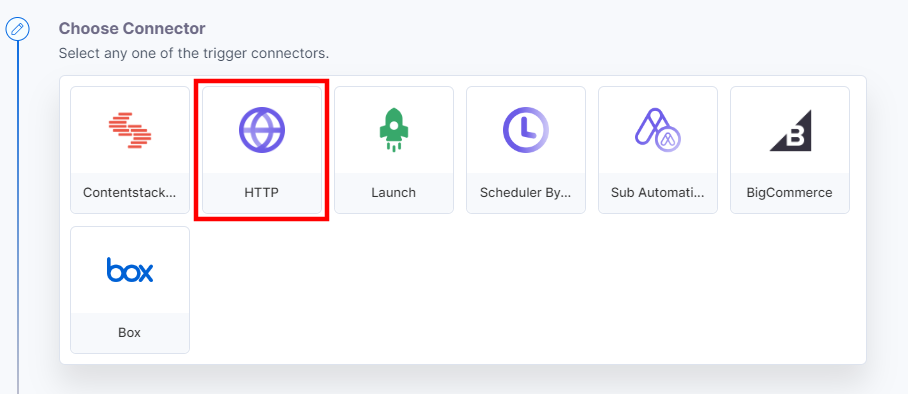
- Within the Configure Trigger step, click the HTTP trigger connector.
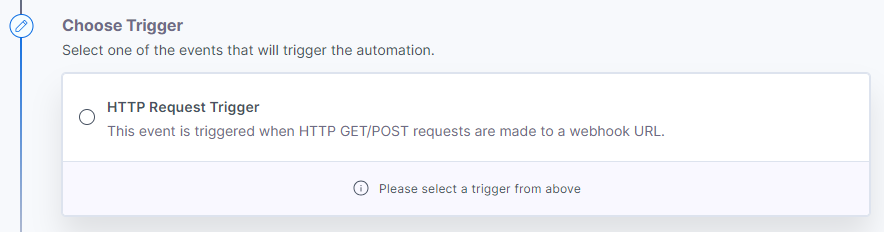
- Select HTTP Request Trigger. This trigger will be activated whenever you make an HTTP GET/POST request to a specific webhook URL.
- Select a Method, i.e., GET/POST.
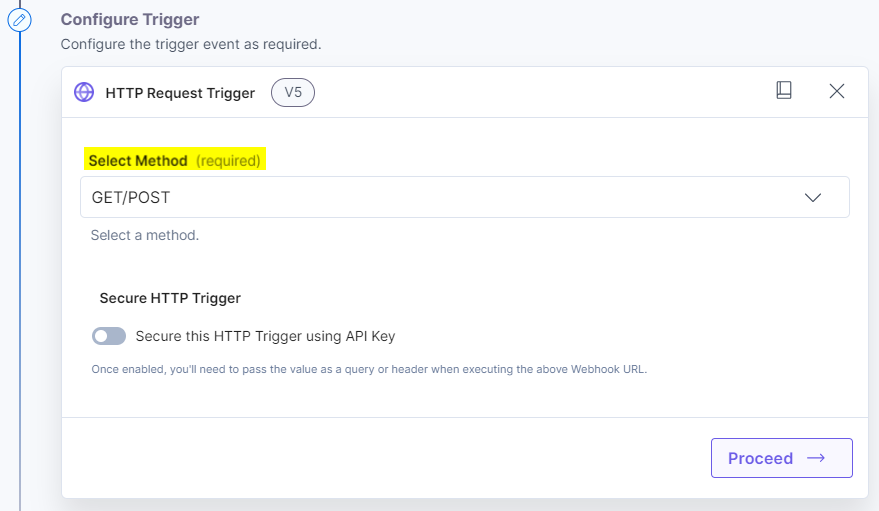
- Click the Proceed button.
- You will find the applicable input “URL.” This URL will be the webhook URL to see the rule working. To send the data, hit the URL with a POST call in Postman.
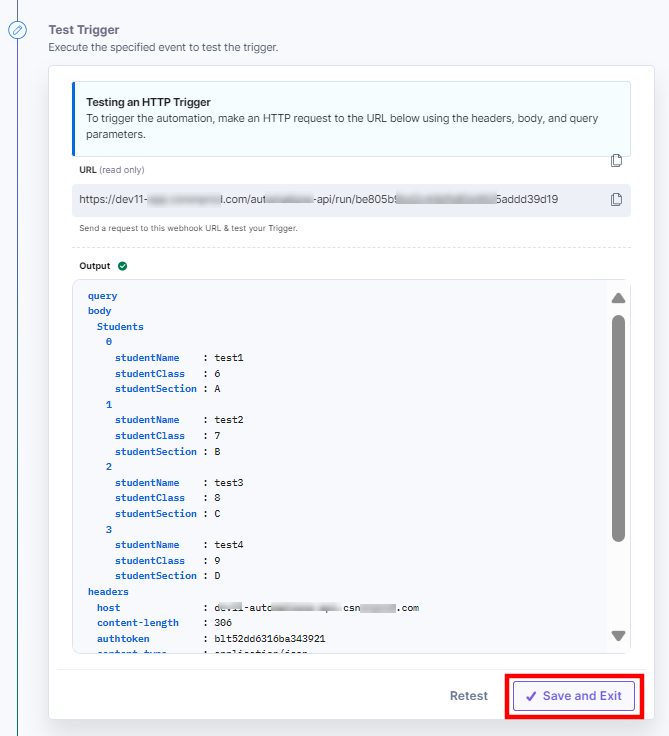
Note: Let’s consider the following dummy data from Postman.
{ "Students": [ {"studentName":"test1","studentClass":"6","studentSection":"A"}, {"studentName":"test2","studentClass":"7","studentSection":"B"}, {"studentName":"test3","studentClass":"8","studentSection":"C"}, {"studentName":"test4","studentClass":"9","studentSection":"D"} ]} - Click the Test Trigger button to test the configured trigger.
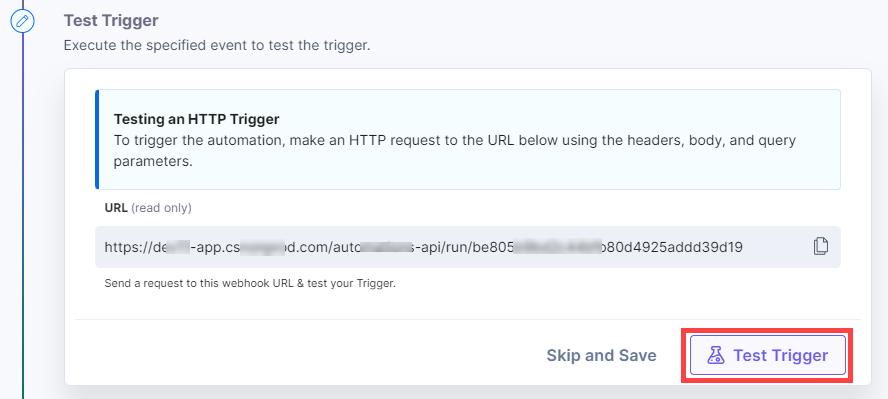
- On successful configuration, you can see the below output. Click the Save and Exit button.
Configure Repeat Path
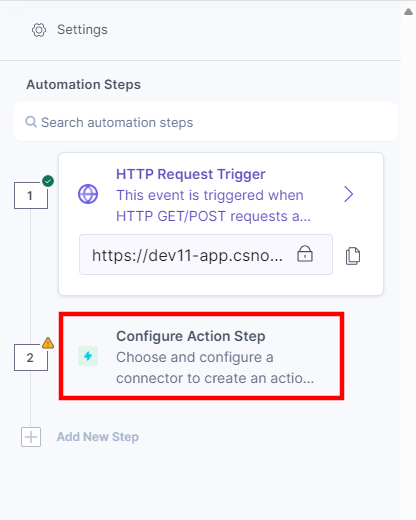
- Click Configure Action Step from the left navigation panel.
Click Repeat Path to configure and select the Repeat type.
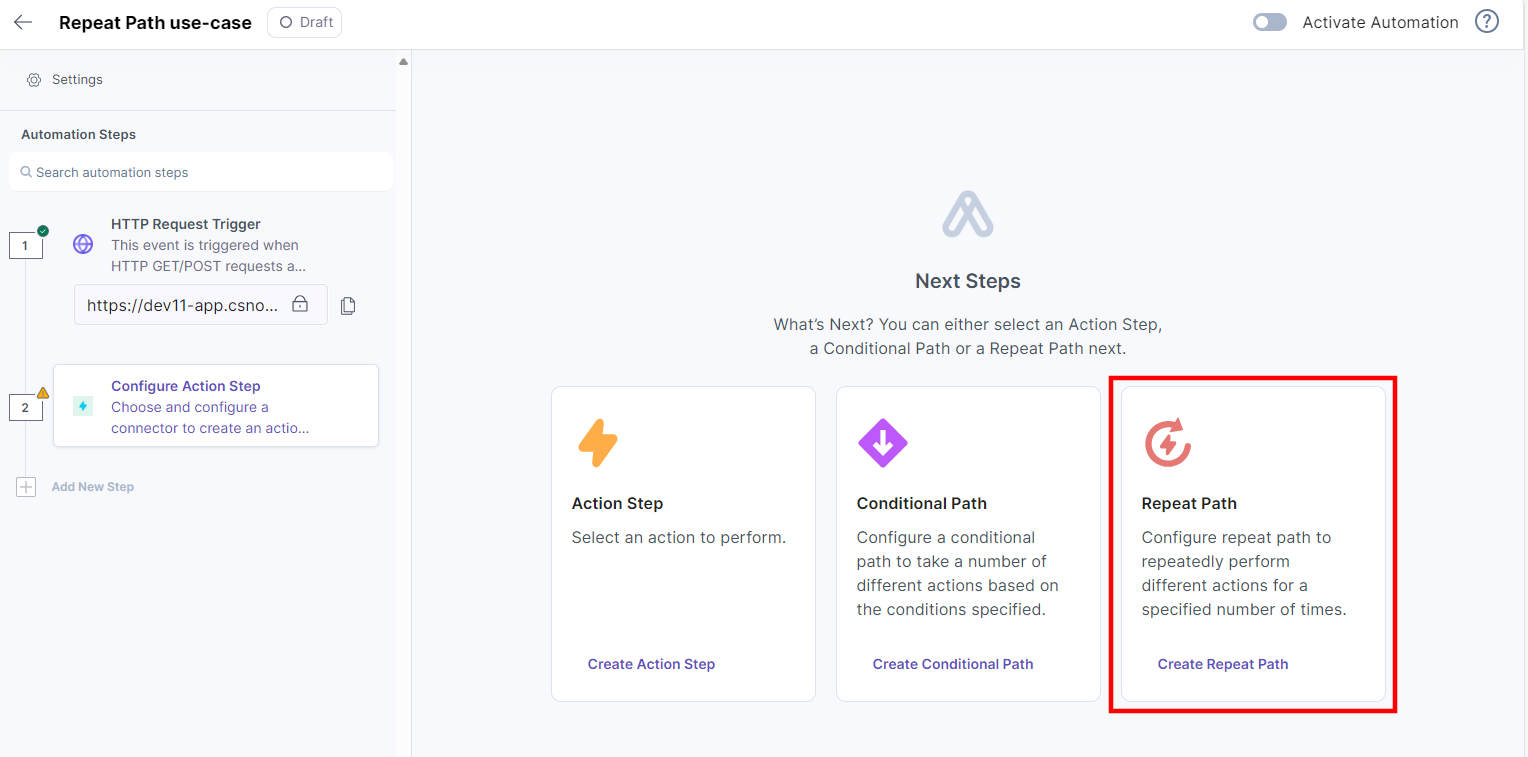
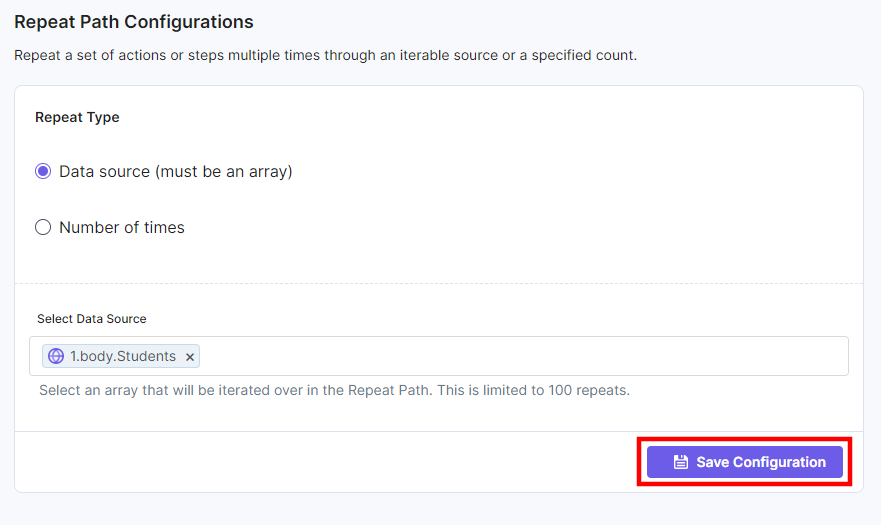
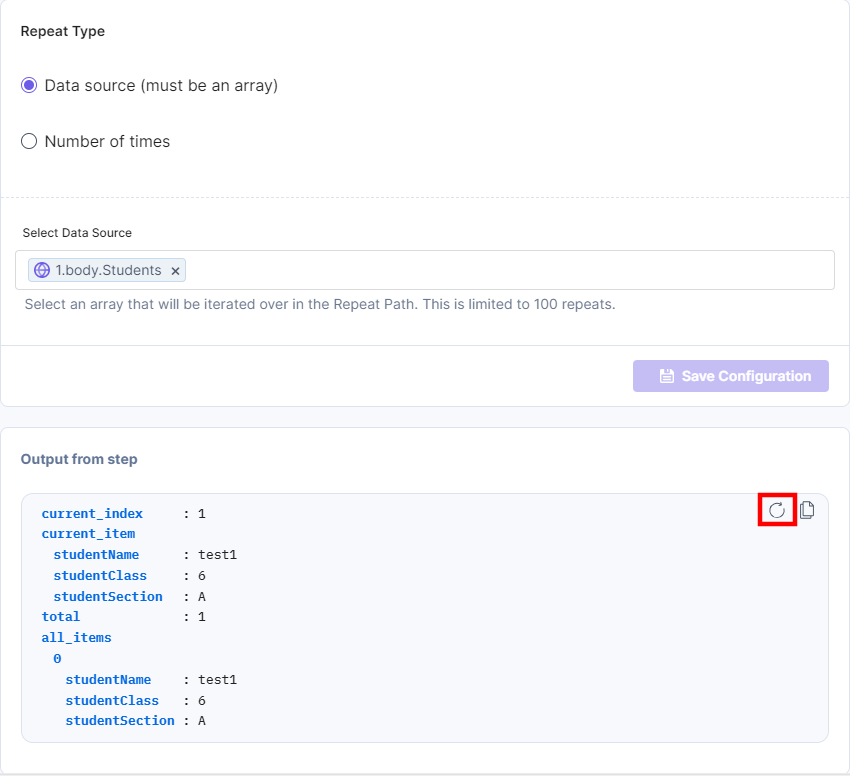
- In the Repeat Path Configurations, select the Data source to iterate the array received in the trigger.
- Click Save Configuration.
- You can click the Reload icon to access the most recent data fetched from the Data Source field for the Repeat Path output without affecting the configuration.
- Click Configure Action Step from the left navigation panel.
Configure Contentstack Connector within the Repeat Path Step
Configuring an action step inside the Repeat Path will iterate and run the action until the end of the data source is reached.
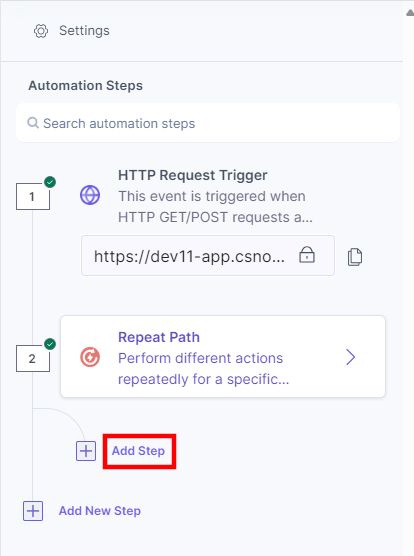
- Click + Add Step under the Repeat Path from the left navigation panel.
- Within the Configure Action Step, click the Contentstack connector.
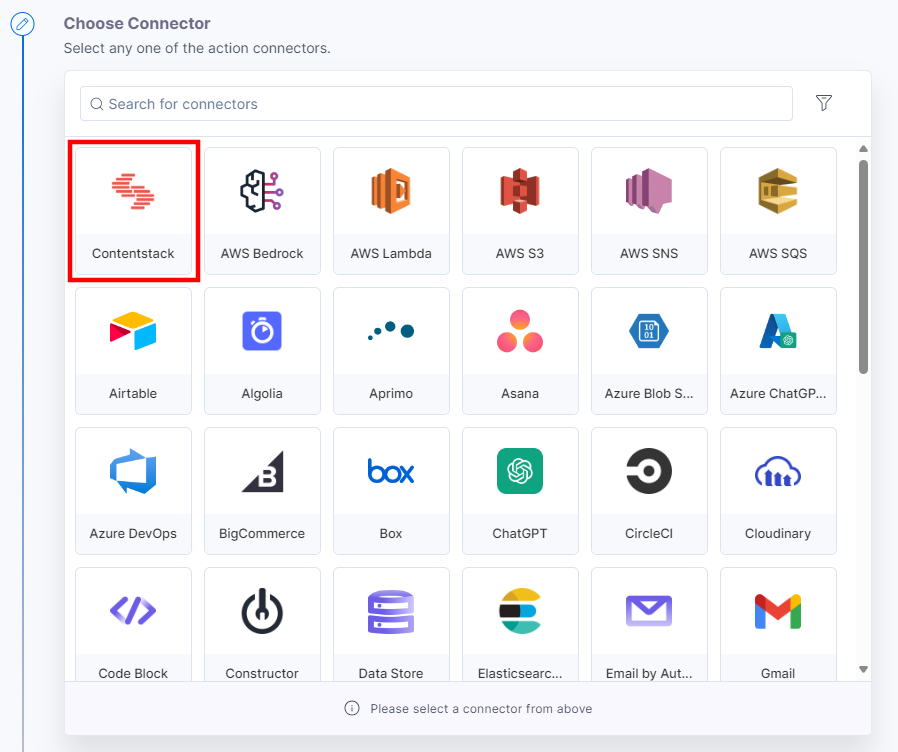
- Select the Contentstack Management connector to perform CMS tasks.
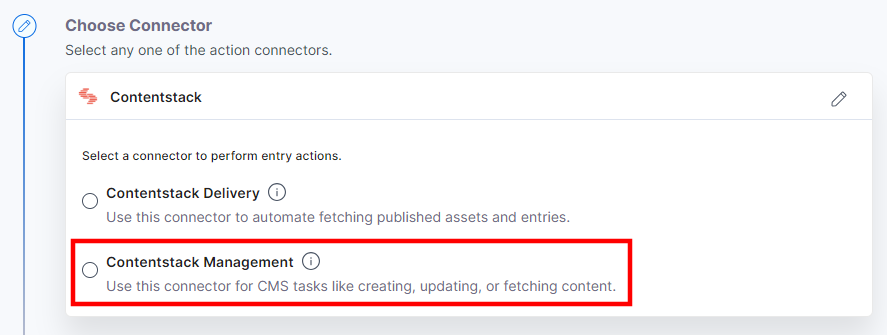
- Under Choose an Action tab, select the Create an Entry action.

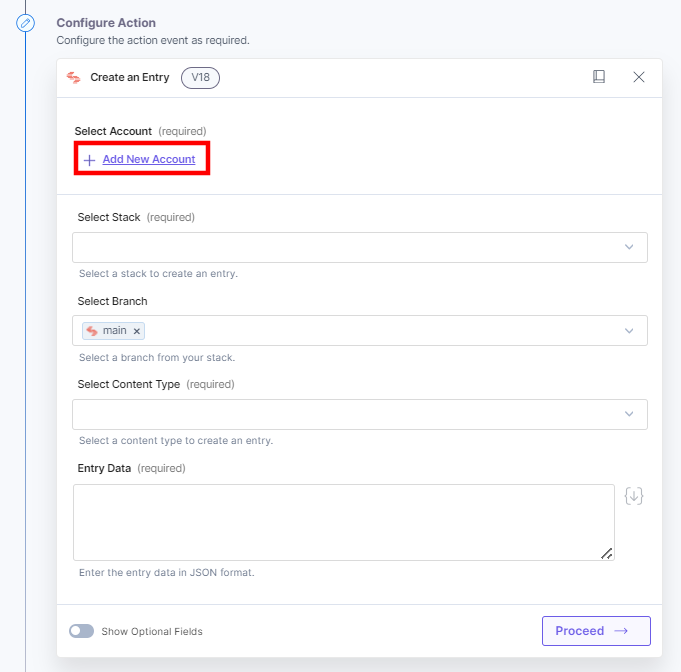
- In the Configure Action tab, click + Add New Account to add your Contentstack account.
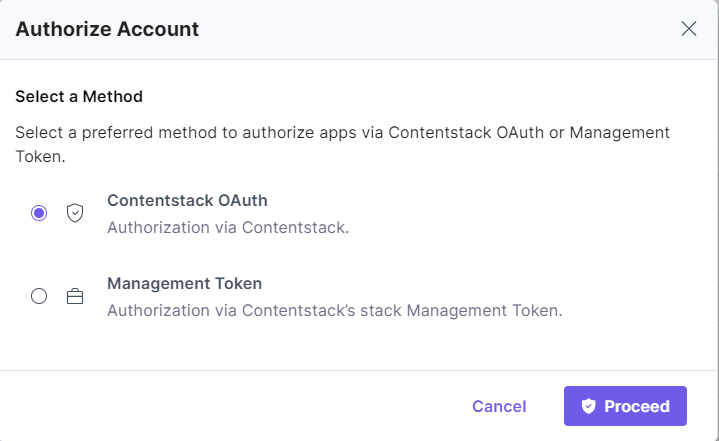
- Select a way to add a new account. You can authenticate your account in two ways: Contentstack OAuth or Management Token.
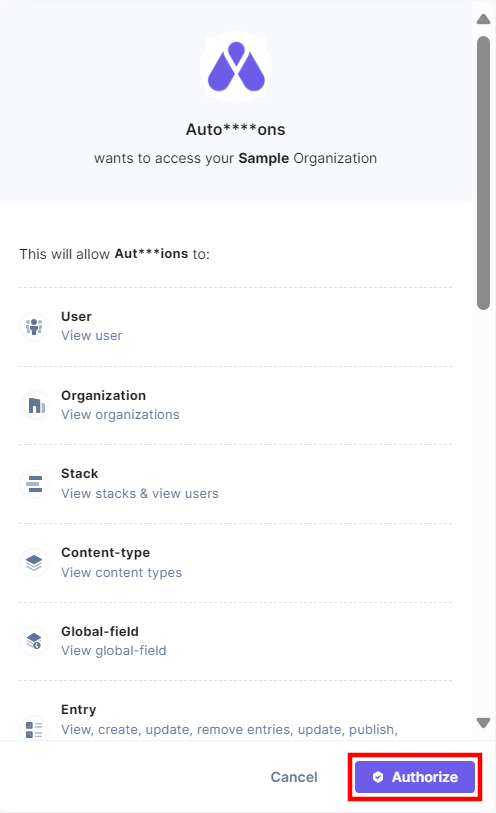
- If you select Contentstack OAuth and click Proceed, the Manage Permissions modal will open, as shown below. Provide the OAuth permissions for all the values by checking the boxes and click Authorize.

- In the pop-up that appears, select your organization to complete the authorization.
- In the pop-up that appears, view the module-specific access rights provided to the app. Click Authorize to complete authorization.
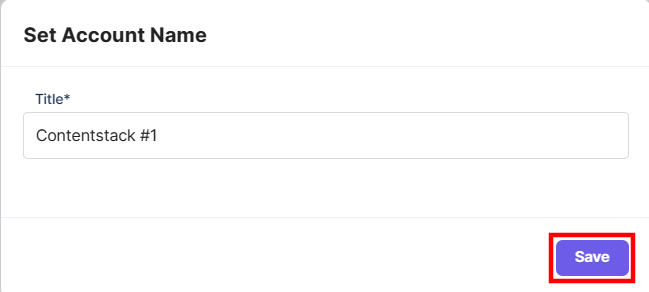
- Provide an Account Name and click the Save button.
- If you select Contentstack OAuth and click Proceed, the Manage Permissions modal will open, as shown below. Provide the OAuth permissions for all the values by checking the boxes and click Authorize.
- Select a Stack, Branch, and a Content Type from the Lookup list.
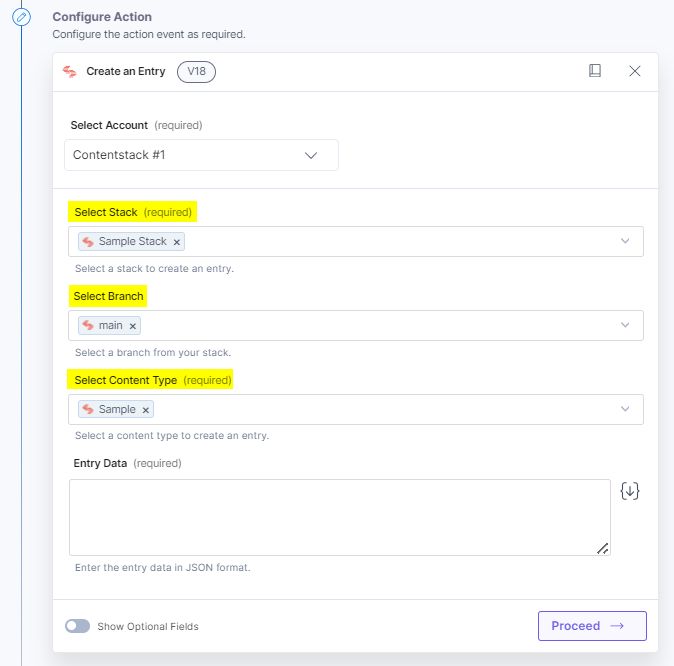
- Provide your entry data in the Entry Data field. Fetch the data from the Repeat Path step.
Note: Provide your entry data as per your content type schema in JSON format only.
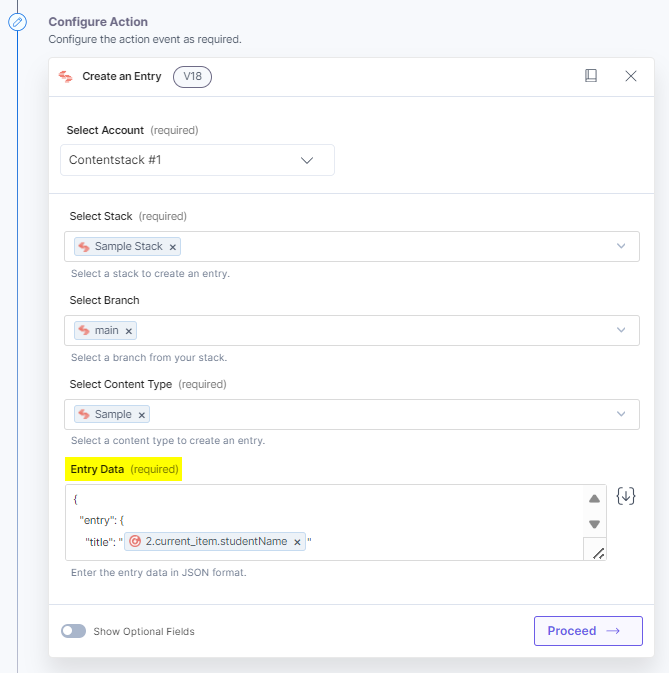
- Click the Proceed button.
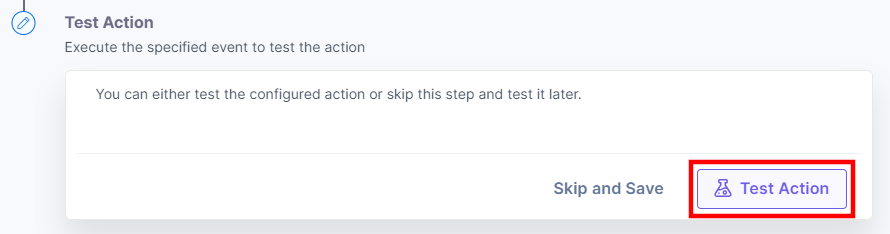
- Click the Test Action button to test the configured action.
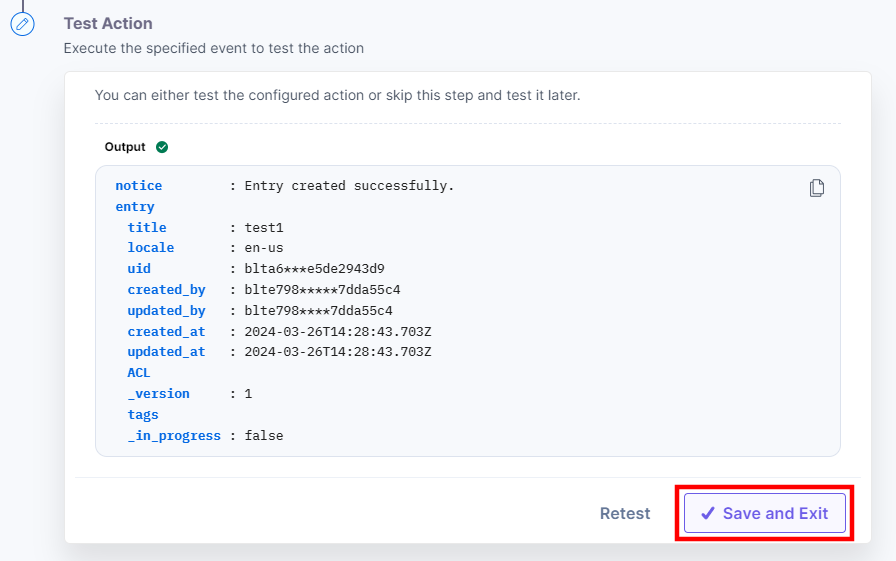
- Click the Save and Exit button.
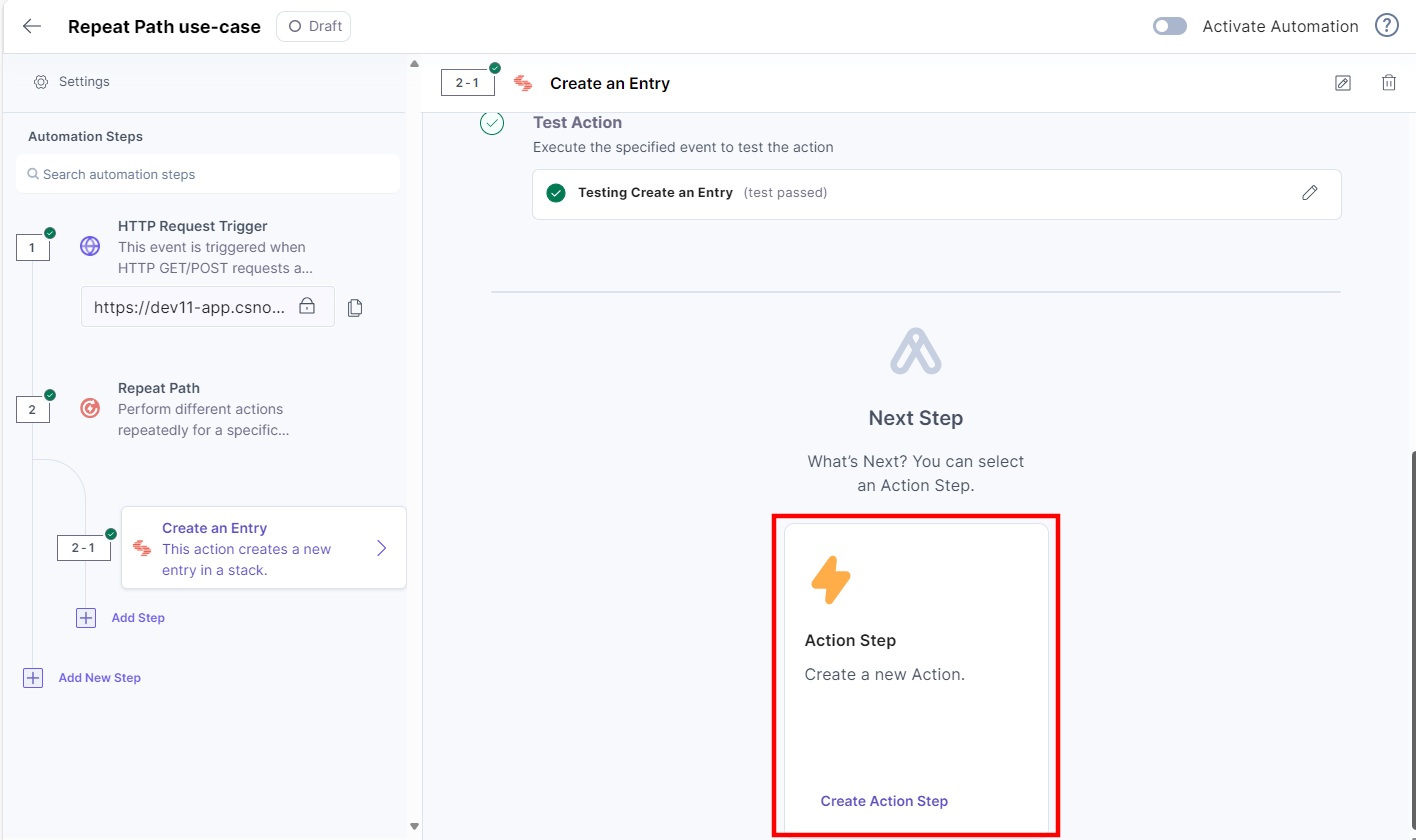
You can also add another action step using the Quick Select screen after you have configured the Contentstack connector.
In the output, you will see one entry. To view all the entries created, you must activate the automation.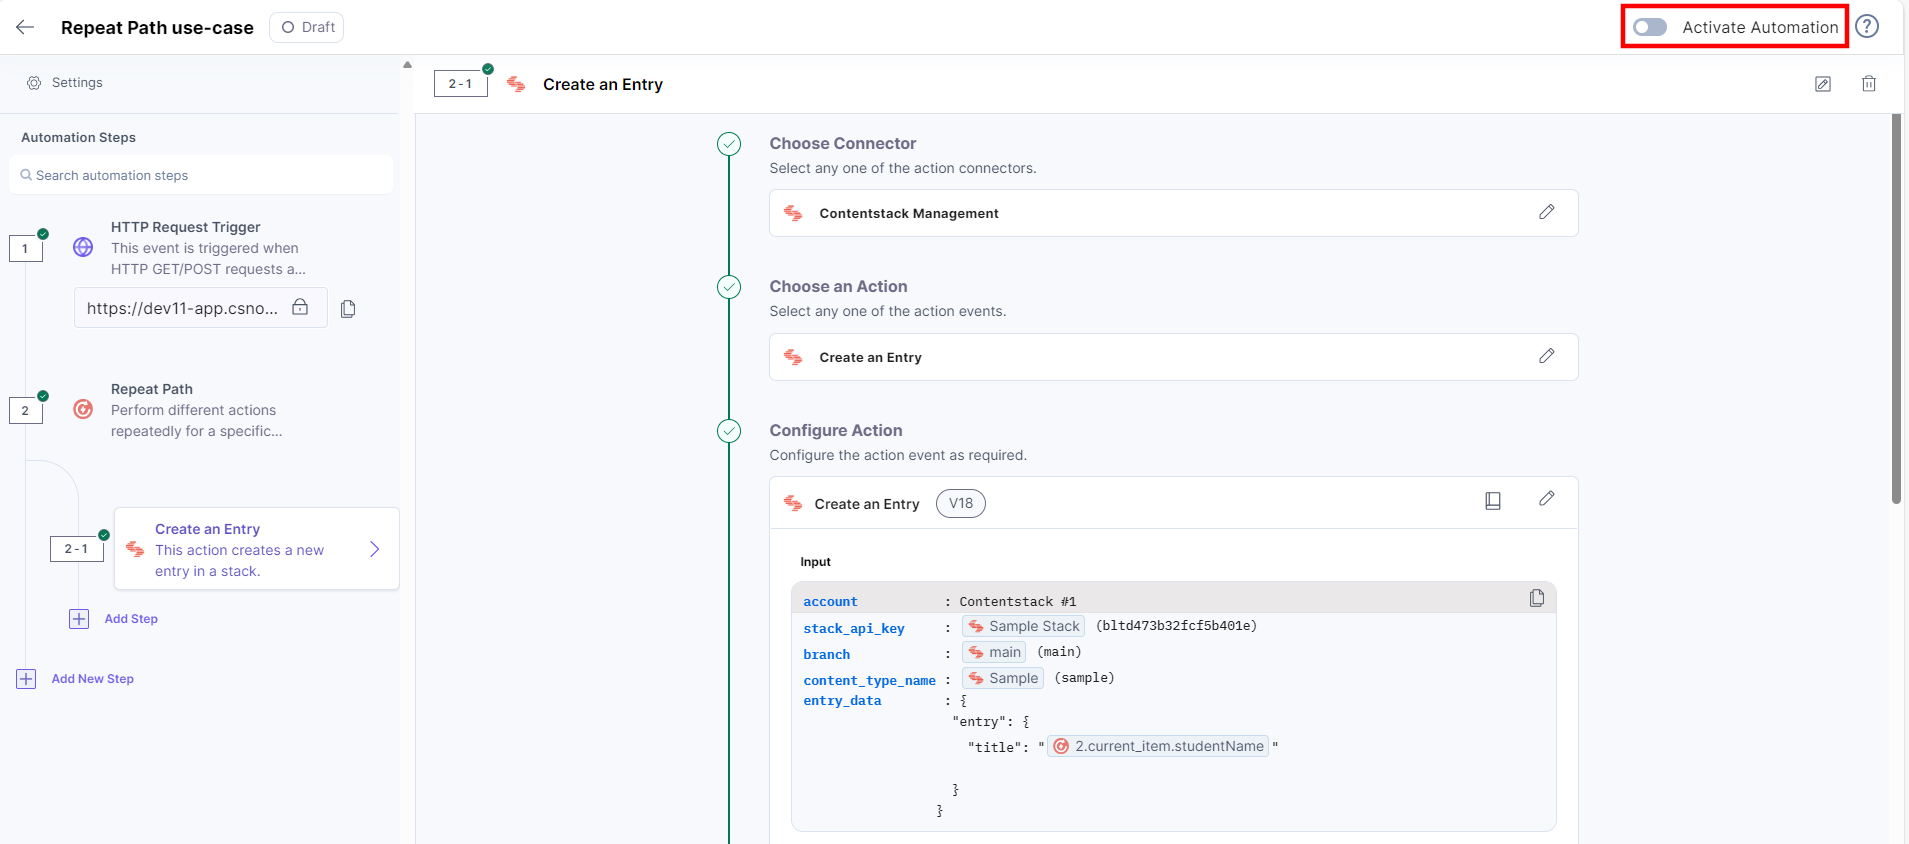
After activating the automation, you must send the data via Postman to the HTTP trigger URL. Navigate to Contentstack to view the entries in the selected content type.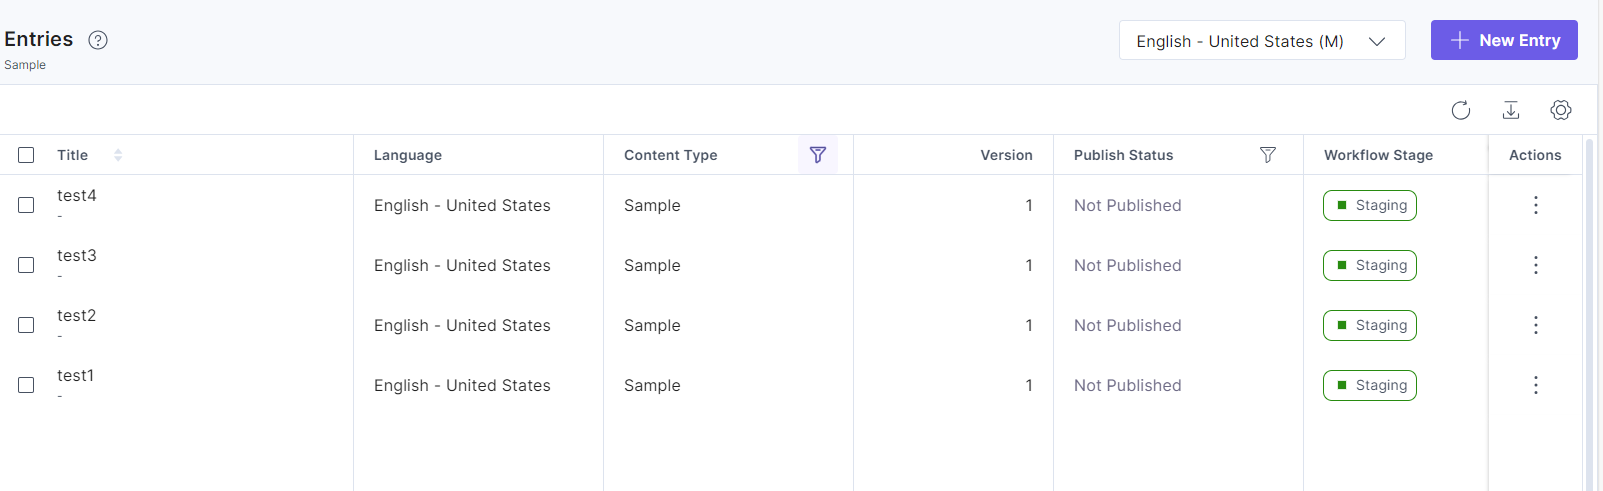
You can view the details of the entry as shown below: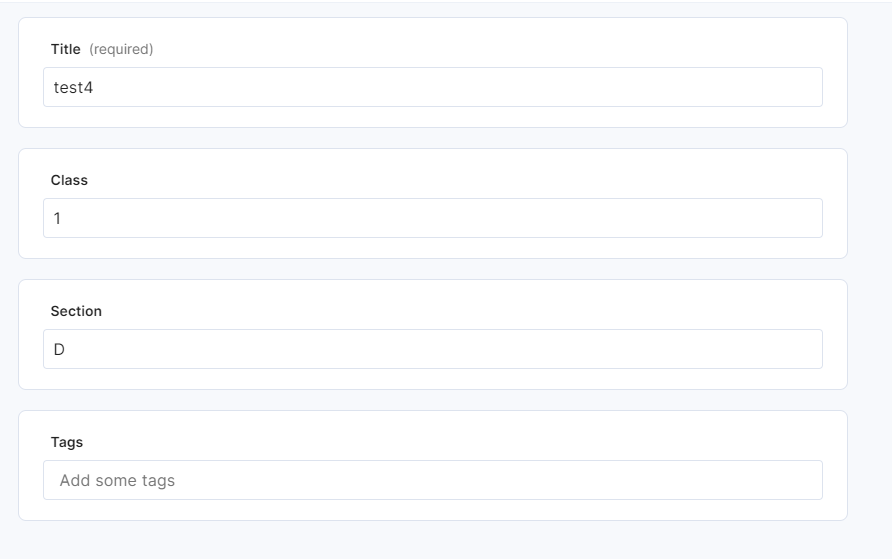
- Click + Add Step under the Repeat Path from the left navigation panel.
More Articles "Repeat Paths within Automate"
