

.svg?format=pjpg&auto=webp)
.svg?format=pjpg&auto=webp)
.png?format=pjpg&auto=webp)


.png?format=pjpg&auto=webp)
Cloudinary
Cloudinary is an image and video management tool for websites and mobile applications covering everything from uploading, storage, optimization, and delivery.
With Automate, you can now easily automate the process of updating the metadata of all the assets present in a cloudinary account.
Set up Cloudinary
Perform the following steps to set up the Cloudinary action connector:
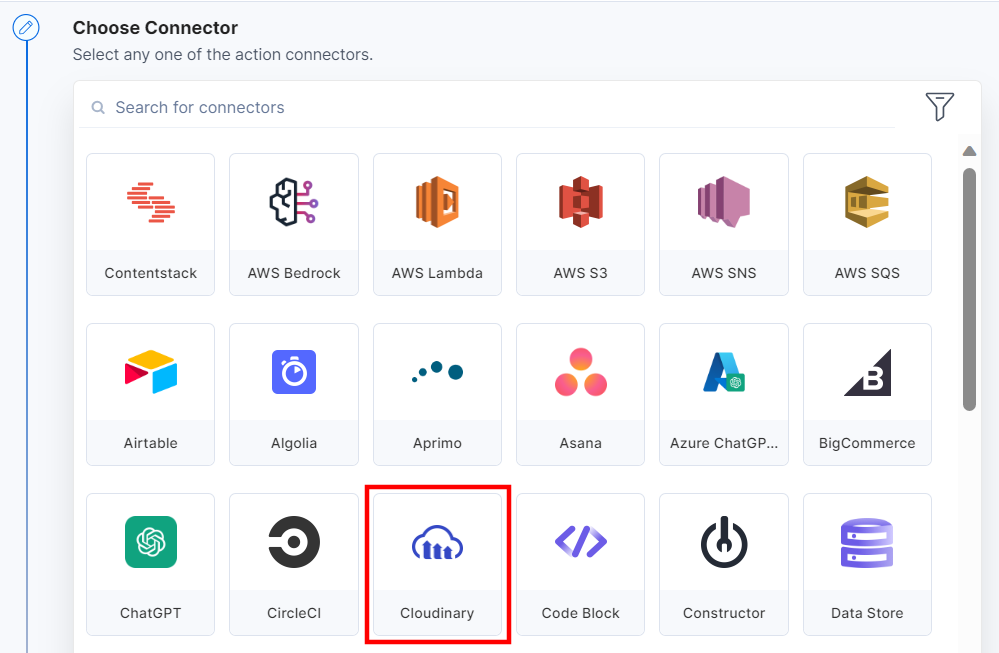
- Click Configure Action Step from the left navigation panel.
- Click Action Step to configure third-party services.
- Within the Configure Action Step, click the Cloudinary connector.
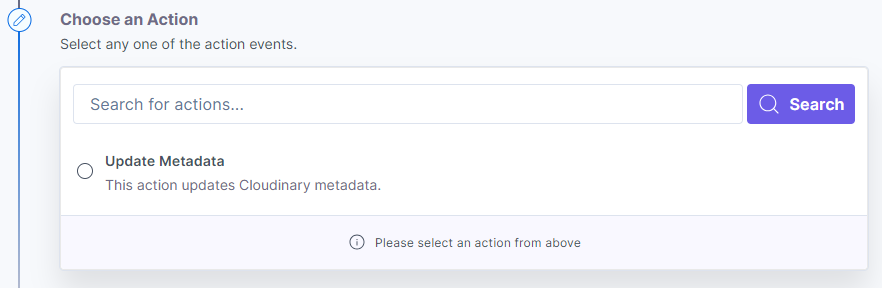
- Under Choose an Action tab, select the Update Metadata action.
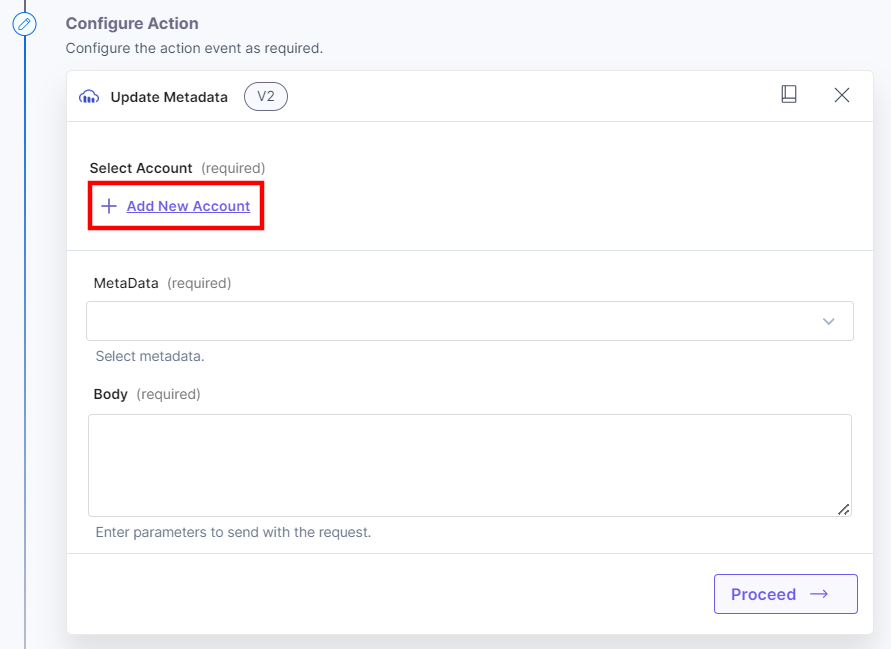
- In the Configure Action tab, click + Add New Account to add your Cloudinary account.
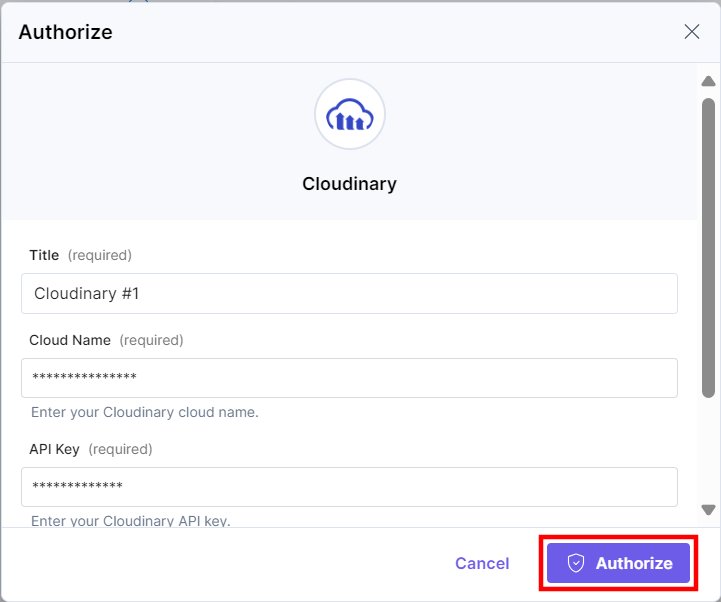
- In the Authorize pop-up window, provide details such as Cloud Name, API Key, and API Secret.
To generate Cloud Name, API Key, and API Secret, log in to the Cloudinary dashboard and perform the following steps:
- Click the Dashboard tab in the left navigation.

- Under the “Product Environment” section, you will see the Cloud Name. Click Go to API Keys, and click the + Generate New API Key button to create a new API key.
You will see the API Secret. Click the Eye icon and provide the login password. Click Approve to view the API Secret.
For more information, refer to the Admin API reference document.
- Click the Dashboard tab in the left navigation.
- Once done, click Authorize.
- Select the MetaData from the Lookup list. Cloudinary structured metadata allows you to define asset fields, populate them with values programmatically or via the Media Library, and perform searches on them. You can also add validation rules, set default values, and define fields as mandatory.
- In the Body field, enter the metadata field that you want to update. It should be in JSON format.
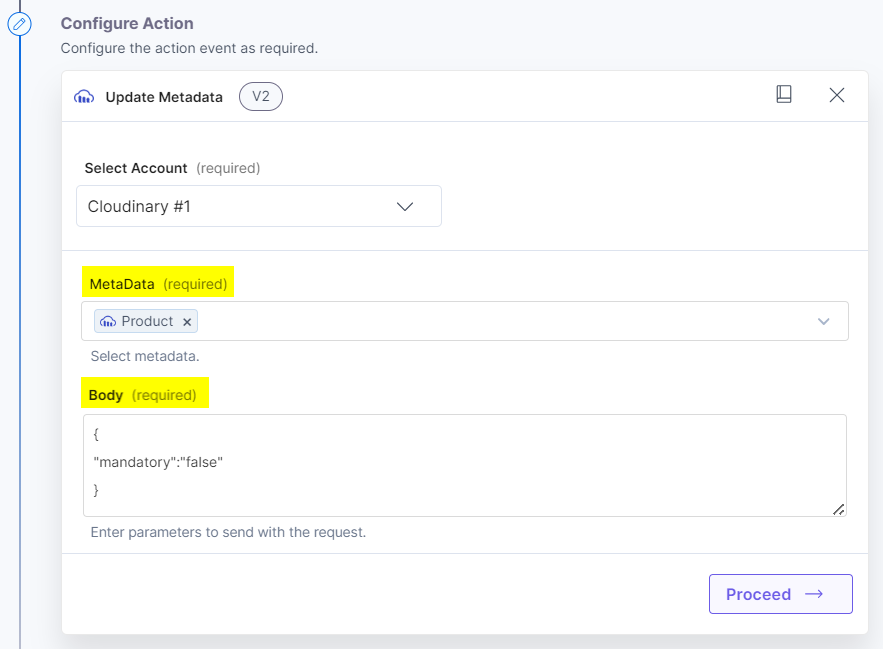
- Click Proceed.
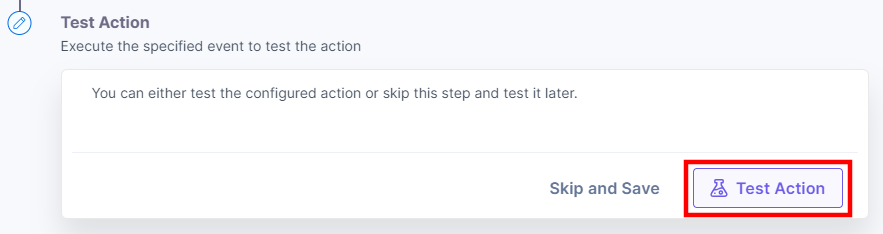
- To execute and test the configured action, click Test Action.
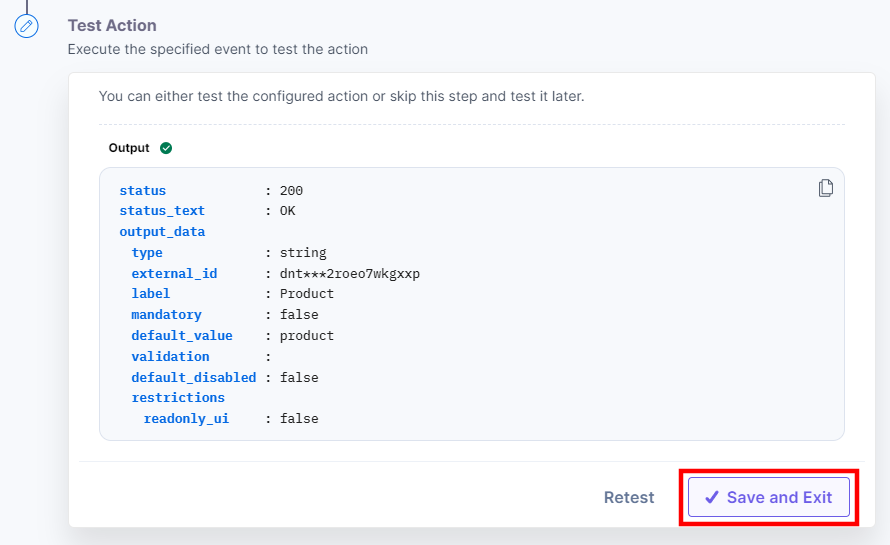
- On successful configuration, you can see the below output. Click Save and Exit.
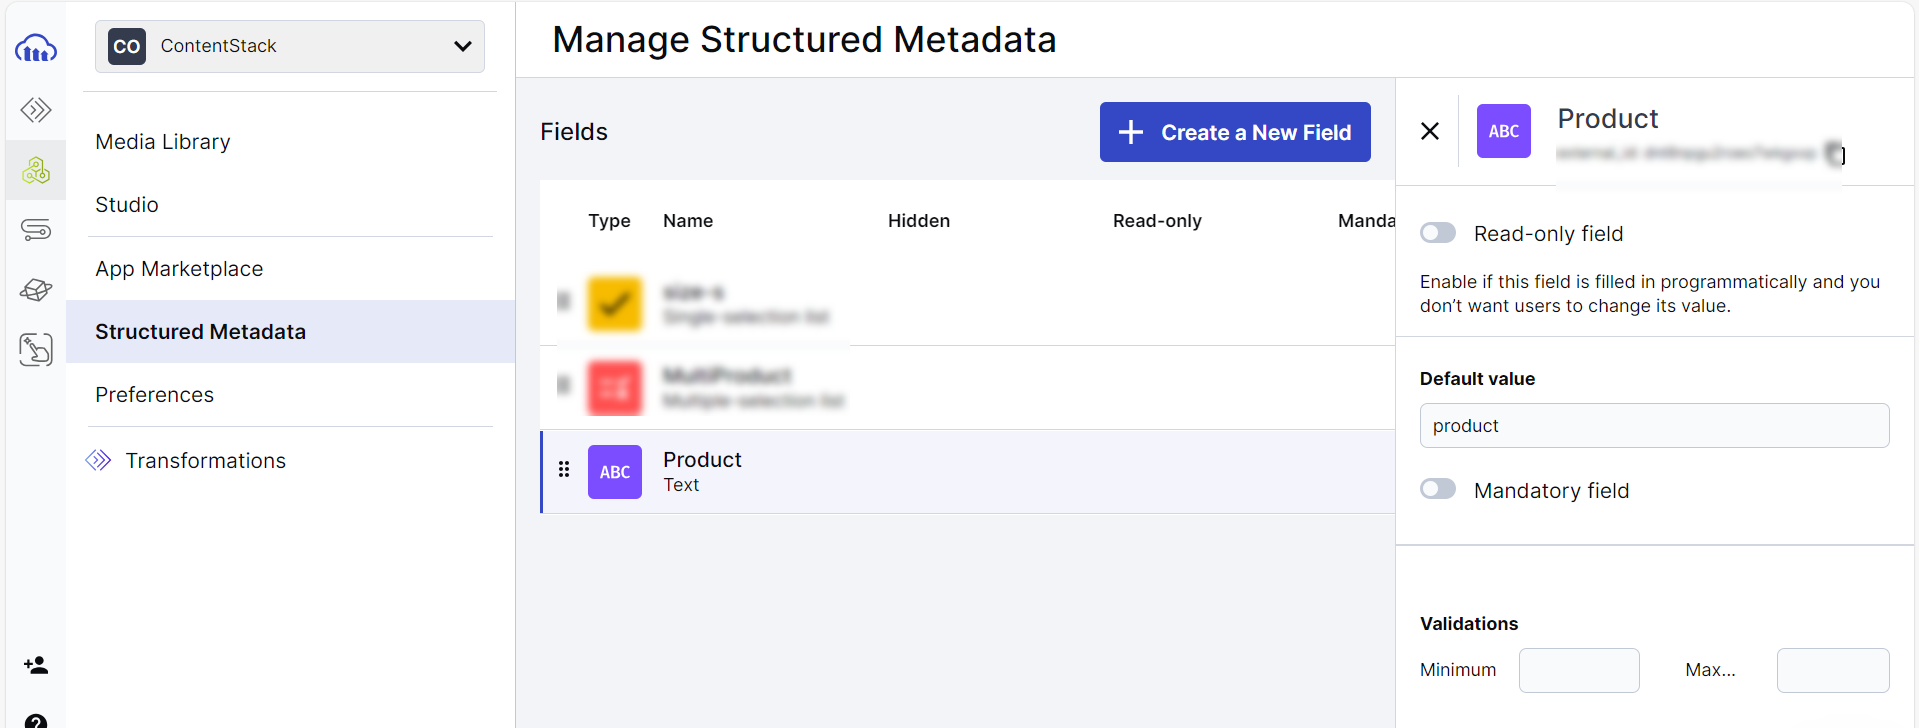
- Navigate to Cloudinary to check the progress. This output should show the mandatory field disabled.
This sets the Cloudinary action connector.
Was this article helpful?
More articles in "Digital Asset Management"
