

.svg?format=pjpg&auto=webp)
.svg?format=pjpg&auto=webp)
.png?format=pjpg&auto=webp)


.png?format=pjpg&auto=webp)
AWS S3
The AWS S3 connector stores files in AWS buckets that you can retrieve later. For example, consider a scenario where you create an entry in the Contentstack CMS. You can create a trigger that activates when you create a new entry and the backup of the created entry gets stored in the AWS bucket. With the AWS S3 Connector, you can fetch the details of all the files and also delete an existing object from your AWS bucket.
Prerequisites
To use the AWS S3 connector, you first need to add your AWS S3 account. To do so, follow the steps given below:
Connect your AWS S3 Account to Automate
- Click Configure Action Step from the left navigation panel.
- Click Action Step to configure third-party services.
- Within the Configure Action Step, click the AWS S3 connector.

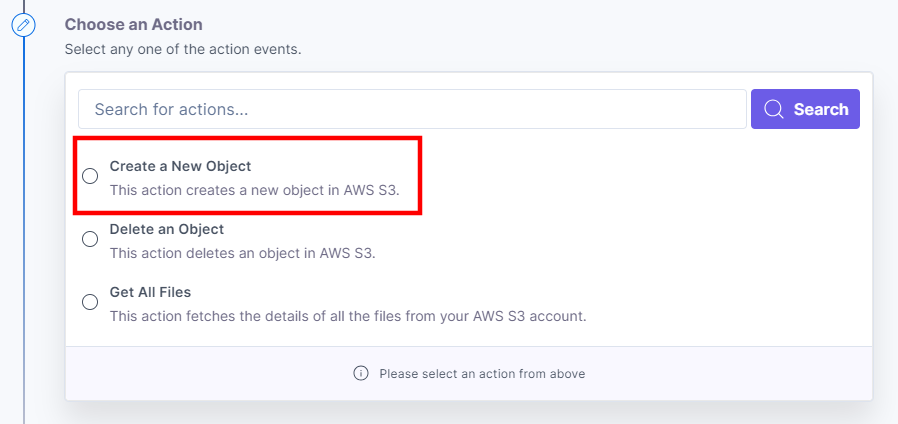
- Under Choose an Action tab, select any one action from the list. Here, we are selecting the Create a New Object action.
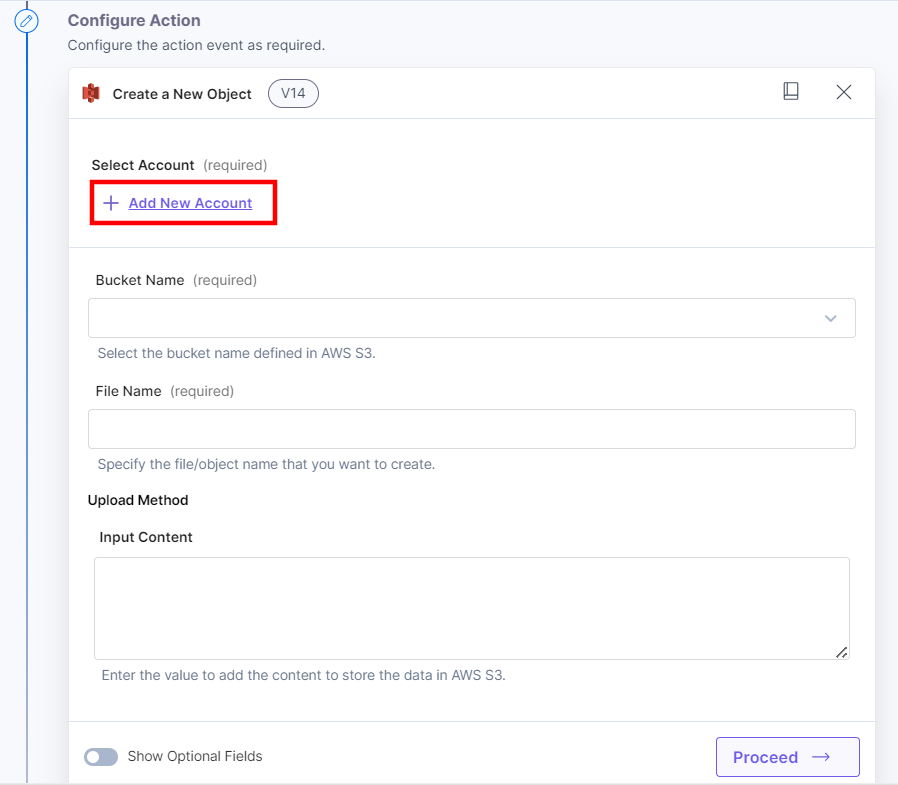
- On the Configure Action page, click the + Add New Account button to add your AWS S3 account.
- In the Authorize modal, enter a Title, enter the Access Key, Secret Key, and the Region details. You can generate the Access and Secret Key by navigating through Security credentials > Access Keys > Create New Access Key in your AWS account.
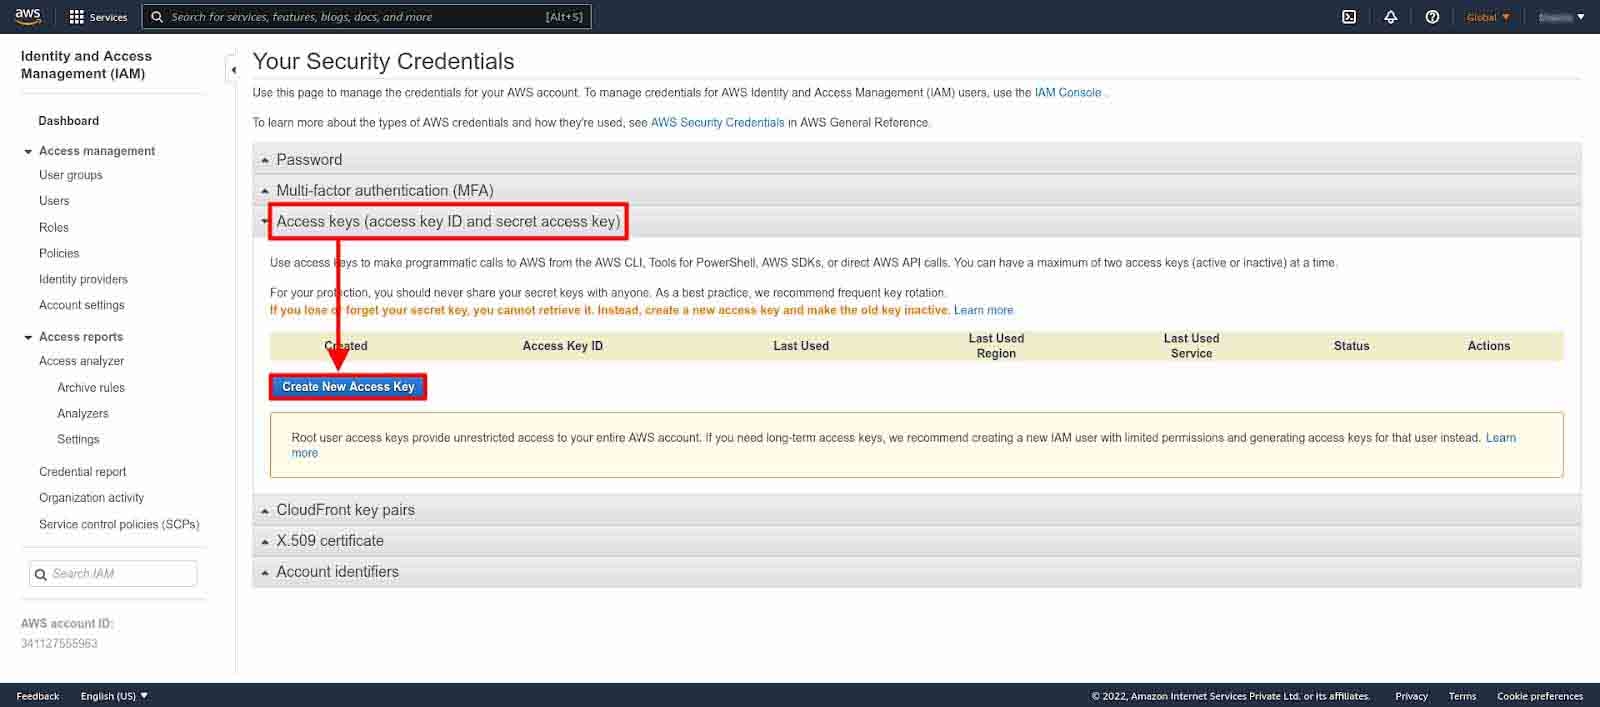
Additional Resource: For more information, refer to the Managing access keys for IAM users document.
- Then click Authorize.
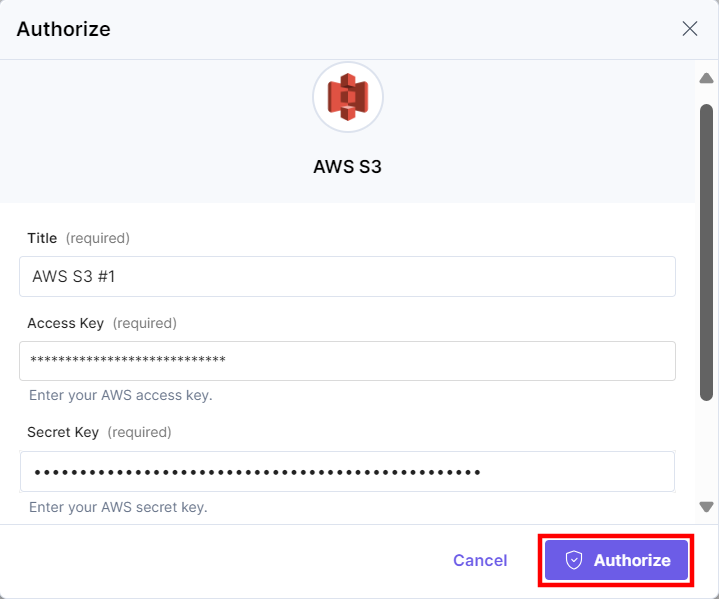
This sets up your AWS S3 account for the AWS S3 action connector.
Set up the AWS S3 Connector
Perform the following steps to set up the AWS S3 connector:
- From the left navigation panel, click Configure Action Step.
- Then, click Action Step to configure third-party services.
- Within the Configure Action Step, click the AWS S3 connector.
Note: You can sort and search the connector(s) based on the filter.
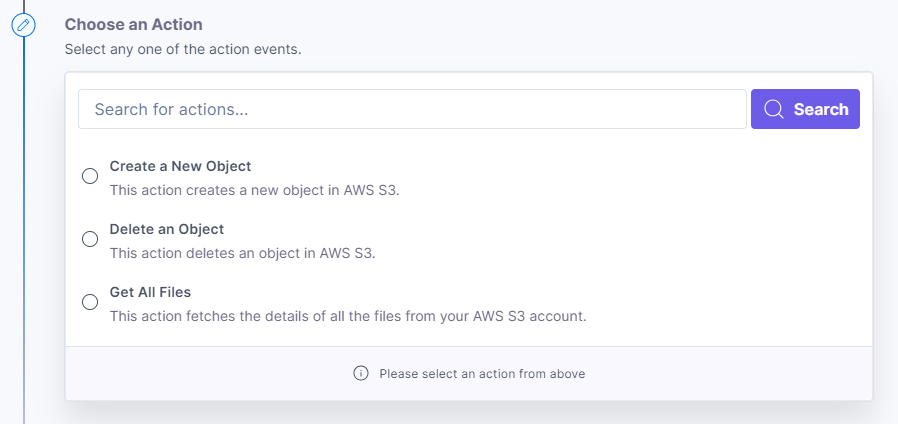
- Under Choose an Action, you will see three actions: Create a New Object, Delete an Object, and Get All Files.
Once done, you can go ahead and set up your AWS S3 connector.
Create a New Object
This action lets you create a new object in the AWS S3 bucket.
- Under Choose an Action tab, select the Create a New Object action.
- On the Create a New Object Configure Action page, enter the details given below:
- Click + Add New Account button to connect your AWS account as shown in the Connect your AWS S3 Account to Automate step.
- You can select the AWS Bucket Name from the Lookup list that appears when you click the textbox. The lookup drop-down loads the buckets already defined and present in your AWS S3 account.
- Enter the File Name (for example, File01) or/and any value from the values list.
- In the Source drop-down, select the Source of the upload (Content or File URL) and the Input Value for each source.
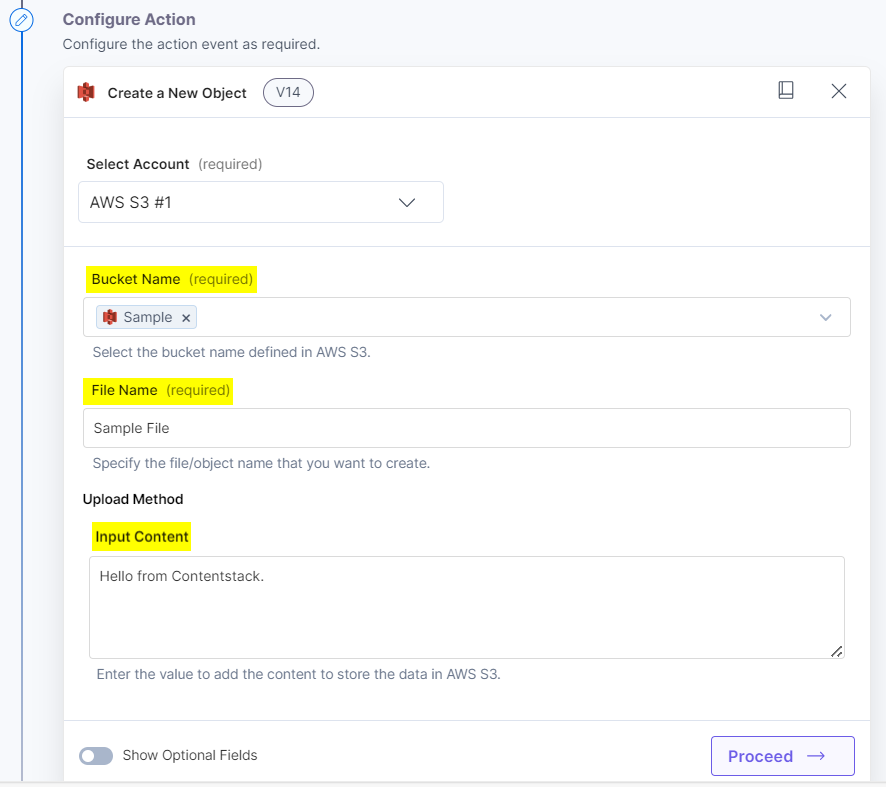
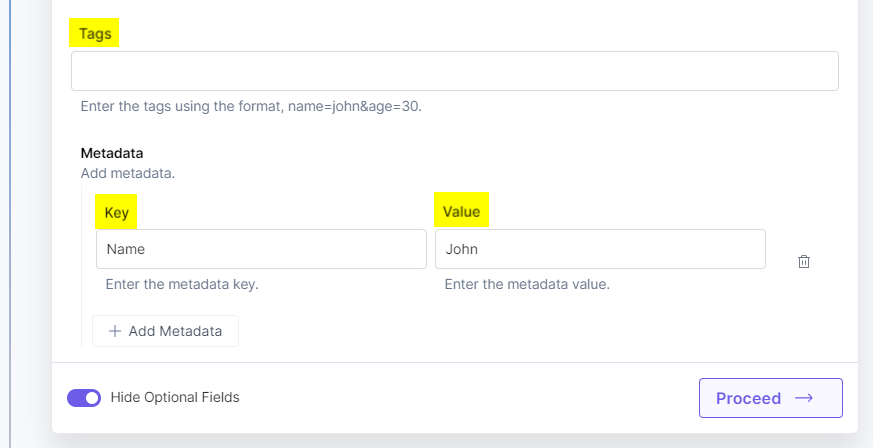
- Click the Show Optional Fields toggle button to enter the text for the Tags and Metadata optional fields.
- Click Proceed.
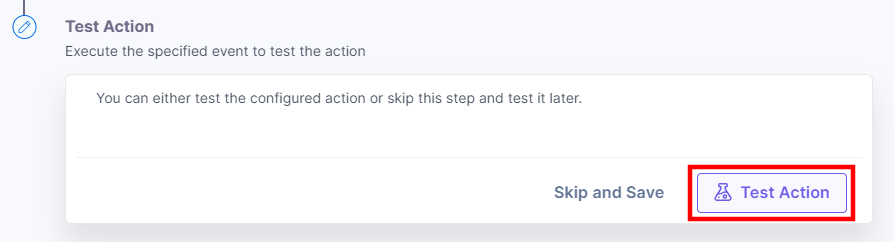
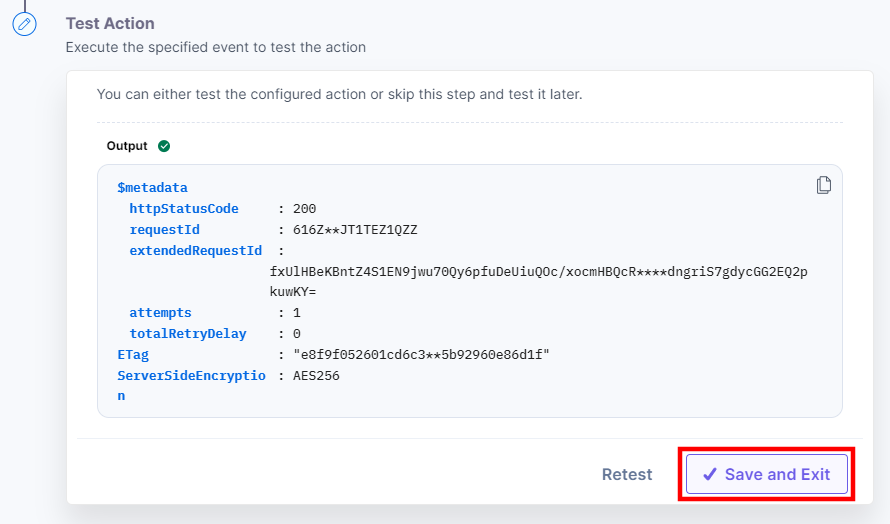
- Check if the details are correct. If yes, click Test Action.
- Once set, click Save and Exit.
- Log into your AWS account and see the list of files in the bucket. In the AWS account’s bucket, you can see the created file.
- Download the file and open it. You can see the content stored in the file.
Delete an Object
This action lets you delete an existing object from the AWS S3 bucket.
- Under Choose an Action tab, select the Delete an Object action.
- On the Delete an Object Configure Action page, enter the details given below:
- Click + Add New Account button to connect your AWS S3 account as shown in the Connect your AWS S3 Account to Automate step.
- You can select the AWS Bucket Name from the Lookup list. The drop-down loads the buckets already defined and present in your AWS S3 account.
- Select the File Name from the Lookup drop-down. You can select multiple files to delete.
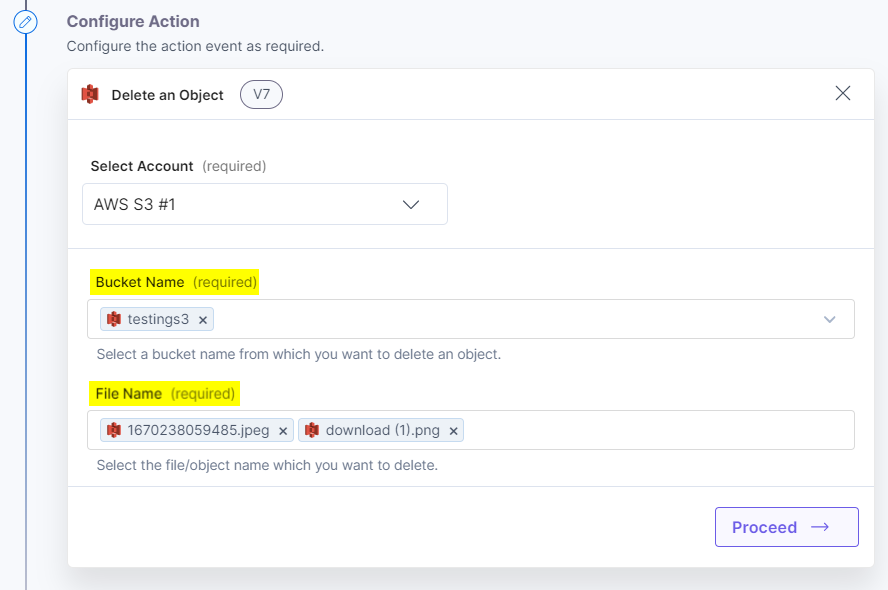
- Click Proceed.
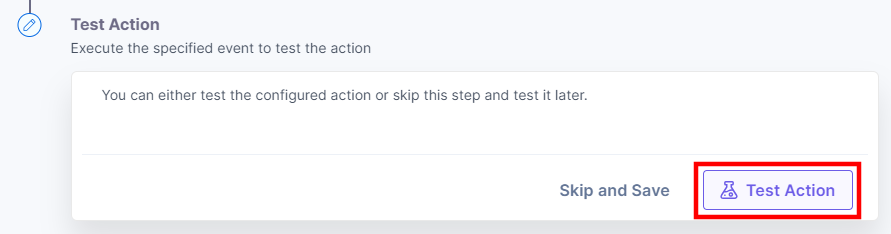
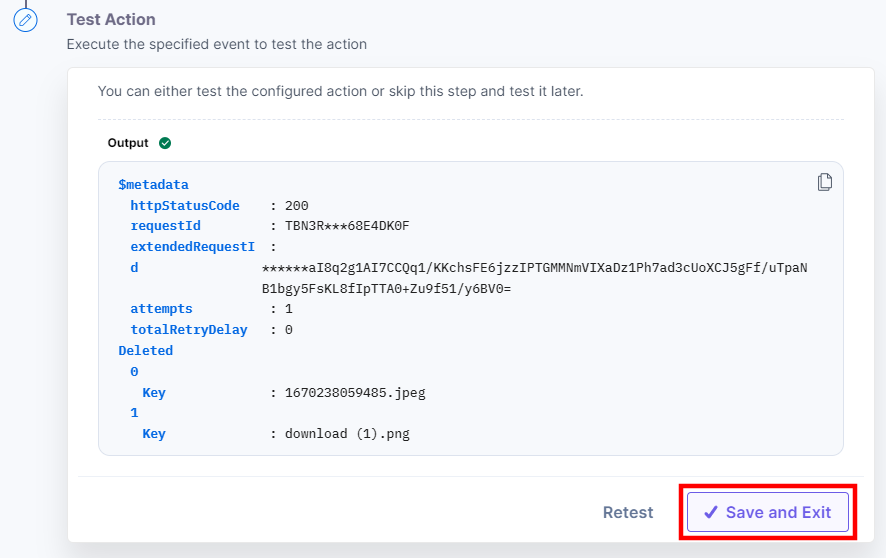
- Click the Test Action button to test the configured action.
- Once set, click Save and Exit.
Get All Files
This action lets you fetch the details of all the files from the AWS S3 bucket.
- Under Choose an Action tab, select the Get All Files action.
- On the Get All Files Configure Action page, enter the details given below:
- Click + Add New Account button to connect your AWS S3 account as shown in the Connect your AWS S3 Account to Automate step.
- Select the AWS Bucket Name from the Lookup list. The drop-down loads the buckets already defined and present in your AWS S3 account.
- Optionally, enable the Show Optional Fields toggle button to display the Folder Name field. You can select the folder to fetch all the associated files.
Note: If you do not select any folder name, all the files available in the selected AWS S3 bucket will be fetched.
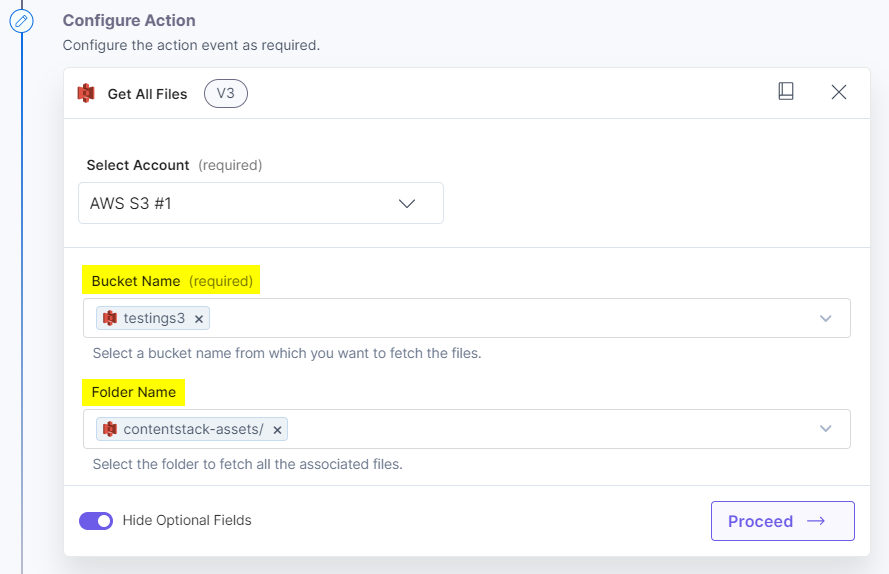
- Click Proceed.
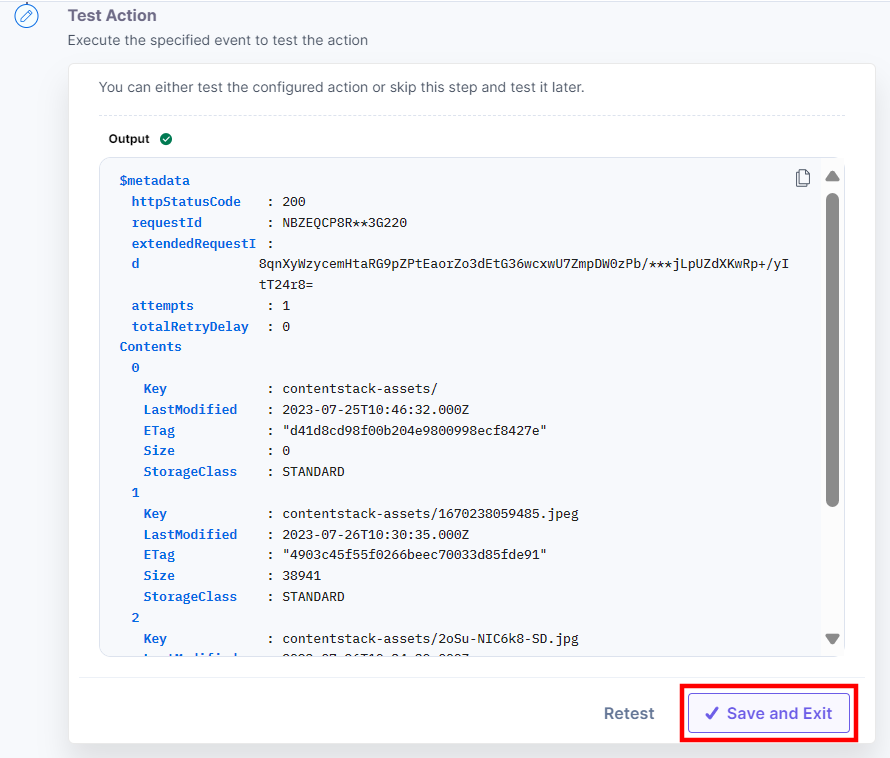
- Click the Test Action button to test the configured action.
- Once set, click Save and Exit.
This sets up your AWS S3 action connector.
More articles in "Storage"
