Live Preview - GraphQL API
How to setup Live preview with GraphQL API?
The GraphQL Content Delivery API offers a more efficient alternative to traditional Content Delivery APIs. It enables you to fetch customized responses or retrieve data from nested or multiple resources with a single API request.
GraphQL is a versatile and customizable API query language. Contentstack's GraphQL API allows you to query precisely what you need, without any excess. For example, you can fetch data from multiple content types with just one API request. You can also define the structure of your requests to customize the responses. Currently, Contentstack's GraphQL supports only queries, and the GraphQL types for each requested resource are generated in real-time, ensuring your content is always up-to-date.
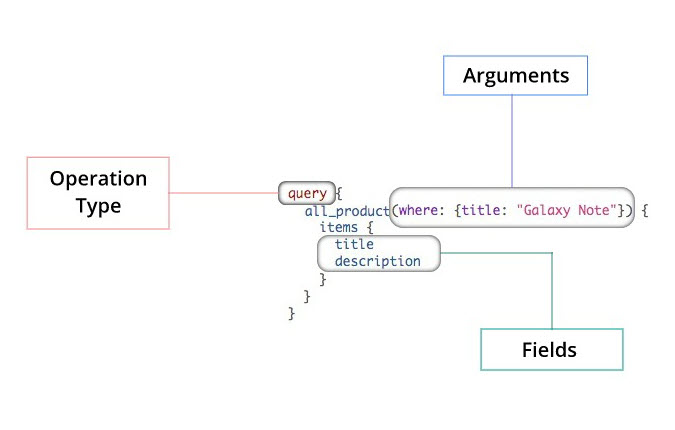
A GraphQL query like below is sent to https://{{domain}}/stacks/{{api_key}} over POST method with environment parameter and access token in headers to fetch the content.
1. Generate Preview Token
In the Basic Implementation module, we have already generated a preview token.
2. Install, Update, and Initialize the Live Preview Utils SDK
Live preview utils SDK listens to content changes and requests the GraphQl Api to preview changes in real-time. Therefore Live Preview Utils SDK is always initialized at the client side irrespective of CSR/SSR is being followed.
To use Live preview utils SDK you can either install it using npm or import it using the script tag in your HTML page.
To install the package via npm, use the following command:
npm install @contentstack/live-preview-utils
Create a new JS file and initialize Live Preview SDK:
import ContentstackLivePreview from "@contentstack/live-preview-utils";

ContentstackLivePreview.init({
    enable: true
});
or you can use Script tag to import and initialize live preview utils sdk:

ContentstackLivePreview.init() method:
init() method initializes the ive Preview Utils SDK. The init() method accepts a configuration object as a parameter.
The following explains all the options available for the configuration.
- enable: The enable property determines whether Live Preview communications have been enabled. It takes a boolean value. it is an optional property which takes the default value as true .
- ssr: The ssr property controls how data is updated for previewed content when you modify entry content. it is an optional property which takes the default value as true. Its behavior changes based on whether your application uses Server-Side Rendering (SSR) or Client-Side Rendering (CSR).
- When ssr is set to true: Your application or website is rendered on the server (SSR). This means that each time you edit content, a request is made for a new HTML page.
- When ssr is set to false: Your application is rendered on the client side (CSR). In this case, your framework (e.g., React) will fetch the updated data and reload the existing page.
- stackDetails: The stackDetails object contains stack-related information which helps you redirect to the corresponding entry when you use edit tags on your website. stackDetails object contains the following properties:
- apiKey
- branch
- environment
- clientUrlParams: The clientURLParams object represents the URL information where your stack is present which includes host, port, and protocol. AWS NA region app host is default.
{
    host: "app.contentstack.com",
    // AWS NA region app host
}
The default params take AWS NA region values.
Client host for other regions:
• AWS EU region: eu-app.contentstack.com
• Azure NA region: azure-na-app.contentstack.com
• Azure EU region: azure-eu-app.contentstack.com
• GCP NA region: gcp-na-app.contentstack.com
• GCP EU region: gcp-eu-app.contentstack.com
- cleanCslpOnProduction: When enable is set to false and cleanCslpOnProduction is set to true, the data-cslp attributes are removed from the website.
When operating in a production environment, you generally want to avoid including data-cslp attributes in your site's HTML tags or enabling the live preview feature. To manage this, you can implement conditional statements to control the live preview functionality based on the current environment.
ContentstackLivePreview.init({
  enable: process.env.CONTENTSTACK_ENVIRONMENT !== "production"
  // returns false and disables the live-preview in production environment
  cleanCslpOnProduction: process.env.CONTENTSTACK_ENVIRONMENT === "production"
  // returns true and cleans data-cslp attributes in production environment
  ...
}
- editButton: The editButton object provides functionality to manage the "Edit" button in your application, whether you're inside or outside the Live Preview portal. It offers several key features, including edit button visibility and control over the inclusion or exclusion of the "Edit" button within or outside the Live Preview panel, You can also adjust the button’s positioning based on your needs. Following keys enables you to customize editButton object:
- enable: This key accepts boolean values, which let's you specify whether you want to display the “Edit” button or not. the default values is true.
- exclude: This key provides you with the option to exclude the editButton from either inside or outside the Live Preview portal for certain conditions. It is of type “Array” with any one of the following string values:
- insideLivePreviewPortal is used when you want to remove the "Edit" button from within the Live Preview portal.
- outsideLivePreviewPortal is used when you want to remove the "Edit" button from outside the Live Preview portal.
- includeByQueryParameter: This boolean property is used to override the cslp-buttons query parameter. You can set this to true/false to enable/disable the "Edit" button option, respectively. By default it is set to true
- position: This property lets you customize the "Edit" button’s placement using one of eight predefined positions. It accepts the following values: left, right, top-left (or top), top-right, top-center, bottom-left (or bottom), bottom-right, and bottom-center.
example:
ContentstackLivePreview.init({
    ...
    editButton: {
        enable: true,
        exclude: ["outsideLivePreviewPortal"],
        includeByQueryParameter: false,
        position:'top-right',
    }
});
- debug: Setting debug: true in ContentstackLivePreview.init() enables debugging mode for the Live Preview functionality. This mode is useful for developers as it provides additional logging and detailed information about the Live Preview's internal processes and interactions.
When you're done with debugging, it's generally a good idea to set debug to false or remove the debug option to avoid unnecessary logging in a production environment.
EXAMPLE:
import ContentstackLivePreview from "@contentstack/live-preview-utils";
ContentstackLivePreview.init({
    stackDetails: {
        apiKey: "your-stack-api-key",
        enironment: "your-environment-name",
        branch: "your-branch-name"
    },
    enable: true,
    ssr: false/true,
});
3. Update GraphQL API Request
To allow graphql API to fetch preview content, we need to append live preview hash and preview token in headers of API request and update url hostname to graphql preview hostname.
- preview_token: The preview_token is used to authenticate API requests to fetch preview content.
- live_preview: When you open any entry in a stack where the live preview feature is enabled, a Live Preview Hash(Session ID) is generated in the background. This hash is a unique identifier that can be used to save and fetch data to be displayed in the live preview panel.
- hostname: The hostname property is optional and is used to define the endpoint that the application will connect to for fetching the live preview data. GraphQL API hosts according to regions:
- US (North America, or NA): graphql-preview.contentstack.com
- AWS EU: eu-graphql-preview.contentstack.com
- Azure NA: azure-na-graphql-preview.contentstack.com
- Azure EU: azure-eu-graphql-preview.contentstack.com
- GCP NA: gcp-na-graphql-preview.contentstack.com
Note: If you are using framework which does strong caching like NextJS, then add no caching in fetch request like cache: "no-store" otherwise live preview might not work properly.
import ContentstackLivePreview from "@contentstack/live-preview-utils";

const graphqlUrl = new URL(
    `https://graphql.contentstack.com/stacks/${CONTENTSTACK_API_KEY}?environment=${CONTENTSTACK_ENVIRONMENT}`,
);

const GRAPHQL_HOST_NAME = "graphql.contentstack.com";

const LIVE_PREVIEW_HOST_NAME = "graphql-preview.contentstack.com";

function getHeaders() {
    const headers = new Headers();
    headers.append("Content-Type", "application/json");
    headers.append("access_token", CONTENTSTACK_DELIVERY_TOKEN);
    return headers;
}

const gqlRequest = async (gql) => {
    const hash = ContentstackLivePreview.hash;
    const headers = getHeaders();

    if (hash) {
    headers.append("live_preview", hash);
    headers.append("preview_token", CONTENTSTACK_PREVIEW_TOKEN);
    graphqlUrl.hostname = LIVE_PREVIEW_HOST_NAME;

    } else {
        graphqlUrl.hostname = GRAPHQL_HOST_NAME;
    }

    const res = await fetch(graphqlUrl.toString(), {
        method: "POST",
        headers: headers,
        body: JSON.stringify({
            query: gql,
        }),
        cache: 'no-store',
    });

    return res;
}
Configure Live preview Across Pages - CSR Powered website
ContentstackLivePreview.onEntryChange() method executes when an entry content is being changed, inside this method, you can add logic to fetch preview content.
import React, { useEffect, useState } from "react";
import ContentstackLivePreview from "@contentstack/live-preview-utils";

const updateData = () => {
    const fetchedData = gqlRequest(query);
    setData(fetchedData);
};
React.useEffect(() => {
   ContentstackLivePreview.onEntryChange(updateData);
}, []);
In the above example
- updateData() function is responsible for fetching new data and updating the state.
- ContentstackLivePreview.onEntryChange(updateData) registers the updateData function to be called whenever an entry is updated, it fetches the draft/preview content and updates the component's state with setData i.e. data is being updated and re-rendered on every change happening in the entry.
Configure Live Preview Across Pages - SSR Powered website
Pass query parameters from the URL into the setConfigFromParams() method of Live Preview which extract and store the hash, making it accessible via ContentstackLivePreview.hash. To achieve this, create a middleware and execute the following command:
import ContentstackLivePreview from "@contentstack/live-preview-utils";
ContentstackLivePreview.setConfigFromParams(searchParams)
// You could use objects provided by the frameworks as well.