Live Edit Tags
Live Edit Tags
Live edit tags enable you to quickly navigate to the field that holds the website content shown in the Live Preview pane. By clicking the "Edit" button next to a content block in the preview pane, you'll be taken to the corresponding field within the entry. If the field contains a reference to another entry, you will be directed to the editor page of that referenced entry.The Live Preview Utils SDK searches for the elements which contain the edit tags referred to as data-cslp.
Edit tags contain the information about where your field exists in the entry. The structure of the edit tag (field location in the entry) you can pass against the data-cslp attribute is as follows:
{content_type_uid}.{entry_uid}.{locale}.{field_uid}Here's a sample field pathhome.blt80654132ff521599.en-us.modular_blocks[0].teaser.heading
Note: If the field is nested within another complex field, such as Modular Blocks, provide the field path as follows: {modular_block_field_UID}.{block_UID}.{field_UID}.
Import the addEditableTags() method
Install Contentstack Utils from npm using the following command:
npm i @contentstack/utils
import addEditableTags using the following commands:
// utils.js
import {addEditableTags} from "@contentstack/utils”
Generate edit tags for entry content
To generate entry content, navigate to the code responsible for delivering the entry content. After retrieving data from Contentstack, the resulting entry object is passed to the addEditableTags() method to add edit tags to the previewed entry content.
addEditableTags(entry, content_type_uid, tagsAsObject, locale)
here ,
- entry: entry object you fetched from Contentstack SDK/API call
- content_type_uid: is the unique ID of the current entry’s content type
- tagsAsObject: By default, tagsAsObject is set to false, and it appends data-cslp in the form of a string cause as follows:
'data-cslp=path.to.field'
- If tagsAsObject is set to true, the data-cslp attribute is returned in object format as follows
{'data-cslp: path.to.field'}- locale: The locale code used to fetch entry.
The addEditableTags() method adds a new key-value pair at every level of your entry result object. where,
- Key is denoted by $ sign
- Value is an object which contains the field name and data-cslp details.
For example, if you pass the following object to the addEditableTags method
{
    "heading": "Exploring the Vineyards: A Journey through Wine Country",
    "description": "As a seasoned traveler, you understand the allure of exploring new destinations. One such destination that has been gaining popularity is the wine country.",

    "cta": {
        "text": "Learn More",
        "url": "/explore-the-vineyards"
    },
}
The result returned will look like:
{
    "heading": "Exploring the Vineyards: A Journey through Wine Country",

    "description": "As a seasoned traveler, you understand the allure of exploring new destinations. One such destination that has been gaining popularity is the wine country.",

    "cta": {
        "text": "Learn More",
        "url": "/explore-the-vineyards",
            "$": {
                "text": {
                    "data-cslp": "text_banner.blt6fb37c46b9d17365.cta.text"
                },
                "url": {
                    "data-cslp": "text_banner.blt6fb37c46b9d17365.cta.url"
                }
            }
    },

    "$": {
        "heading": {
            "data-cslp": "text_banner.blt6fb37c46b9d17365.heading"
        },
        "description": {
            "data-cslp": "text_banner.blt6fb37c46b9d17365.description"
        },
        "cta": {
            "data-cslp": "text_banner.blt6fb37c46b9d17365.cta"
        },
    }

}
Generate Edit tags example - REST
Once you have retrieved data using the Contentstack, utilize the addEditableTags() function. Pass the retrieved entry into this function to incorporate edit tags into the draft entry content effectively. The following example is using JavaScript Delivery SDK to fetch content.
// utils.js
export const getEntryByUrl = async (contentTypeUid, locale, entryUrl) => {
    try {
        const result = Stack.ContentType(contentTypeUid)
            .Query()
            .language(locale)
            .where('url', `${entryUrl}`)
            .toJSON()
            .find()

    addEditableTags(result[0][0], contentTypeUid, true, locale)
    const data = result[0][0]
    return data

    } catch (error) {
        throw error
    }
}
Generate Edit tags example - Graph QL
Locate the section of your website's code responsible for fetching content from Contentstack. To ensure proper functionality of live editing, it's crucial to retrieve system system {uid} from GraphQL at the root of the query and system {uid, content_type_uid} for all references.
Here is an example of the gqlRequest() method for your reference:
export const getHeaderRes = async (): Promise => {
    const gql = `
query HeaderQuery {
    all_header {
        total
        items {
            title
            logoConnection {
                edges {
                    node {
                        url
                        filename
                    }
                }
            }
            navigation_menu {
                label
                page_referenceConnection {
                    totalCount
                    edges {
                        node {
                            ... on Page {
                                title
                                url
                                system {
                                    uid
                                    content_type_uid
                                }
                            }
                        }
                    }
                }
            }
            notification_bar {
                show_announcement
                announcement_text {
                    json
                }
            }
            system {
                uid
            }
        }
    }
}
`;
Next, include _content_type_uid and uid alongside system, and assign the values from system.content_type_uid to _content_type_uid and system.uid to uid:
const transformed = {
    ...header,
    logo: header.logoConnection.edges[0].node,
    navigation_menu: header.navigation_menu.map((item: any) => ({
        ...item,
        page_reference: item.page_referenceConnection.edges.map((edge: any) => ({
            ...edge.node,
            uid: edge.node.system.uid,
            _content_type_uid: edge.node.system.content_type_uid,
        })),
    })),
    uid: header.system.uid,
    notification_bar: {
        ...header.notification_bar,
    },
};
Include data-cslp parameters in transformed response by using addEditableTags() method from @contentstack/utils
addEditableTags(transformed, "header", true);
Set up the Live Preview Utils SDK
To navigate to the correct stack it is required to provide the stackDetails object parameter to the live preview initialization method.
ContentstackLivePreview.init({
    ...
    stackDetails: {
        apiKey: "your api key",
        environment: "your environment",
        branch: "your branch"
    },
    clientUrlParams: {
        host: "app.contentstack.com",// NA region host
    },
})
Note: The host value is based on the region where your stack is located
- US (NA) region host: app.contentstack.com
- EU region host: eu-app.contentstack.com
- Azure NA region host: azure-na-app.contentstack.com
- Azure EU region host: azure-eu-app.contentstack.com
- GCP NA region host: gcp-na-app.contentstack.com
Configure live edit tags across webpages
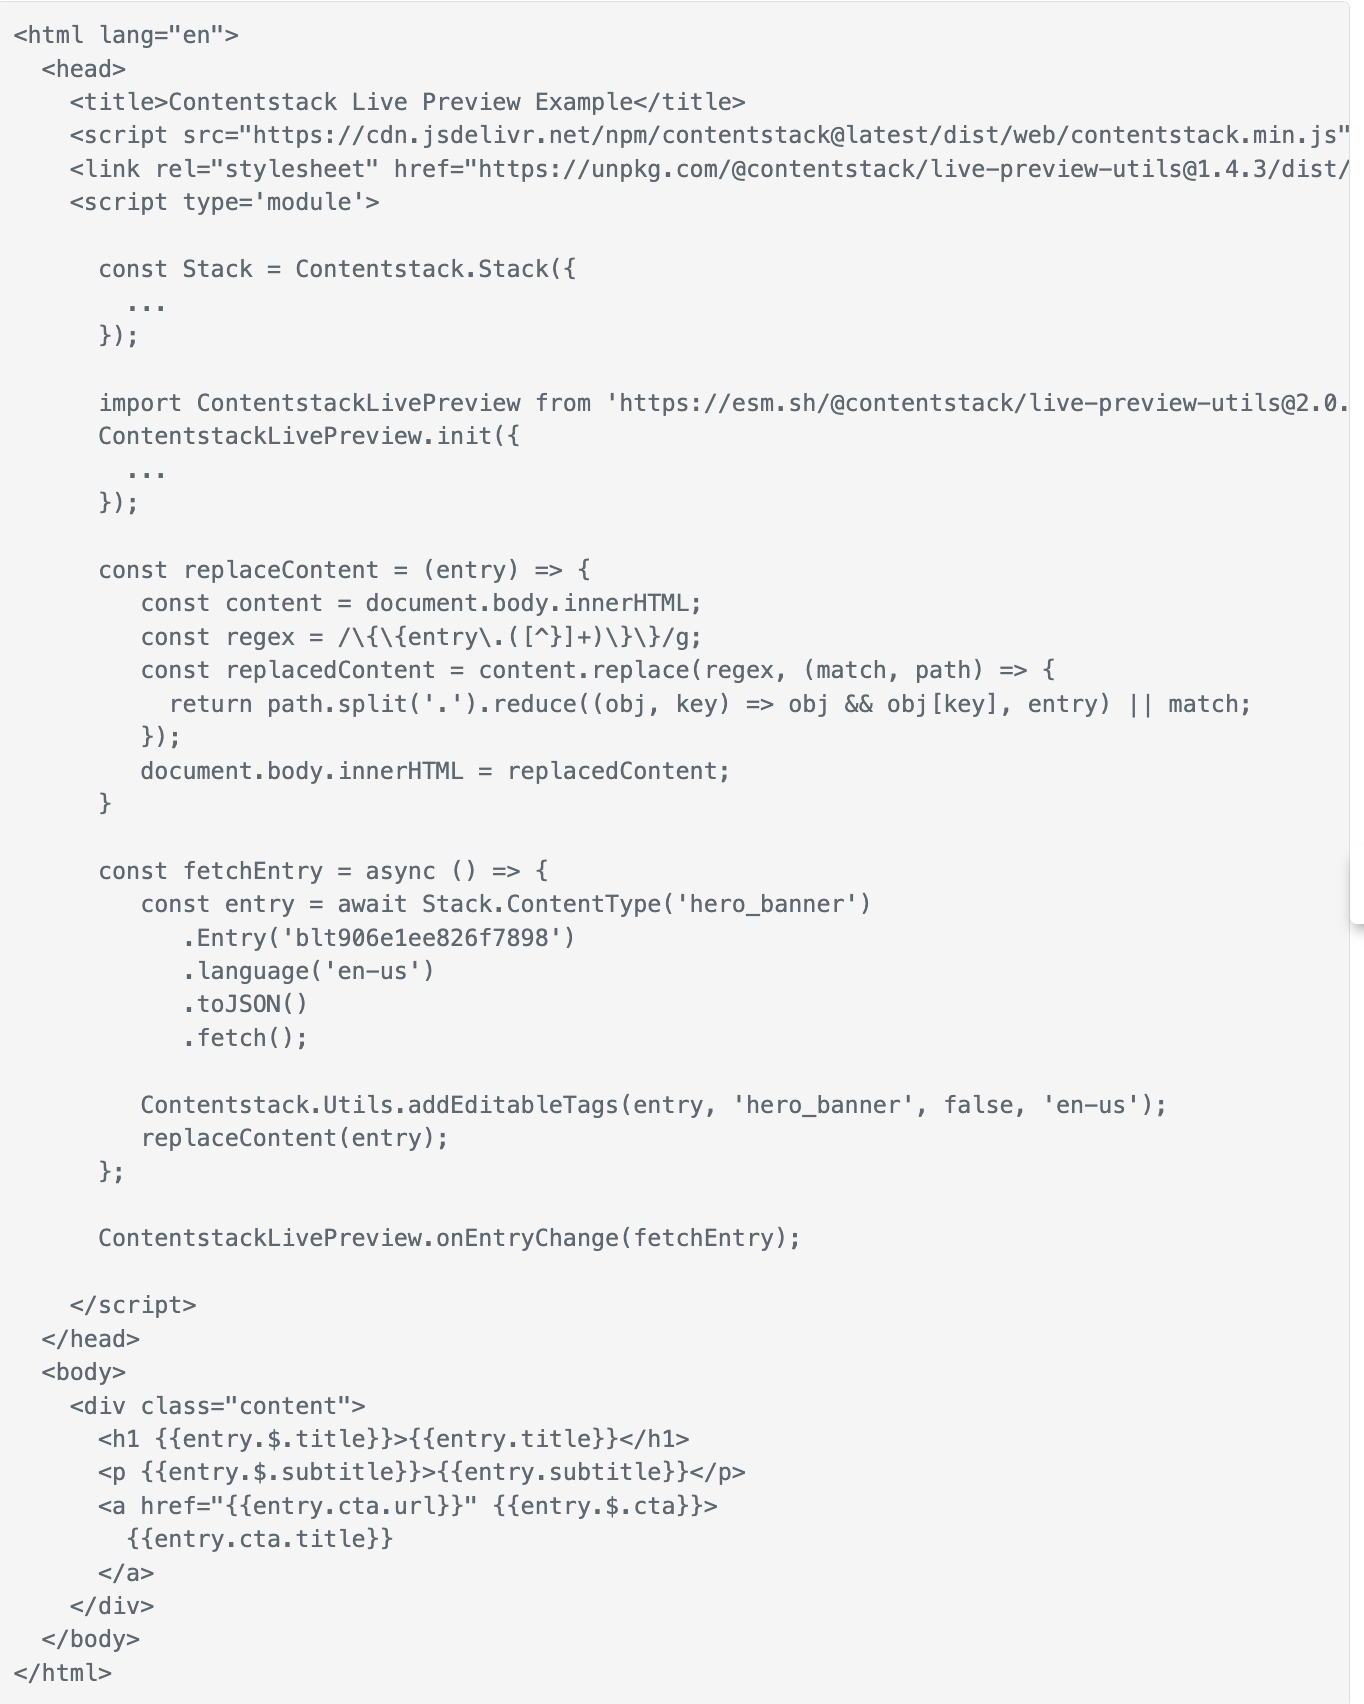
For pure HTML tags (tagsAsObject:false) example:
To add edit tags to your website's HTML:
- Find the HTML Section: Locate the part of your HTML code where you want to include edit tags.
- Add Edit Tags: To access an edit tag, fetch the path to the field in your entry data and add a dollar sign ($) before the last field in the path.
- For instance, if the path to your data is data.description.height, the edit tag should be data.description.$.height.
Example snippet:
React-based Components (tagsAsObject:true) example:
For React-based Applications you can set tagsAsObject to true, by enabling this you will receive edit tag details in object format. You need to destructure the object while passing it within the JSX element.Let's add edit tags to following JSX snippet:
After adding edit tags the above JSX will be:
