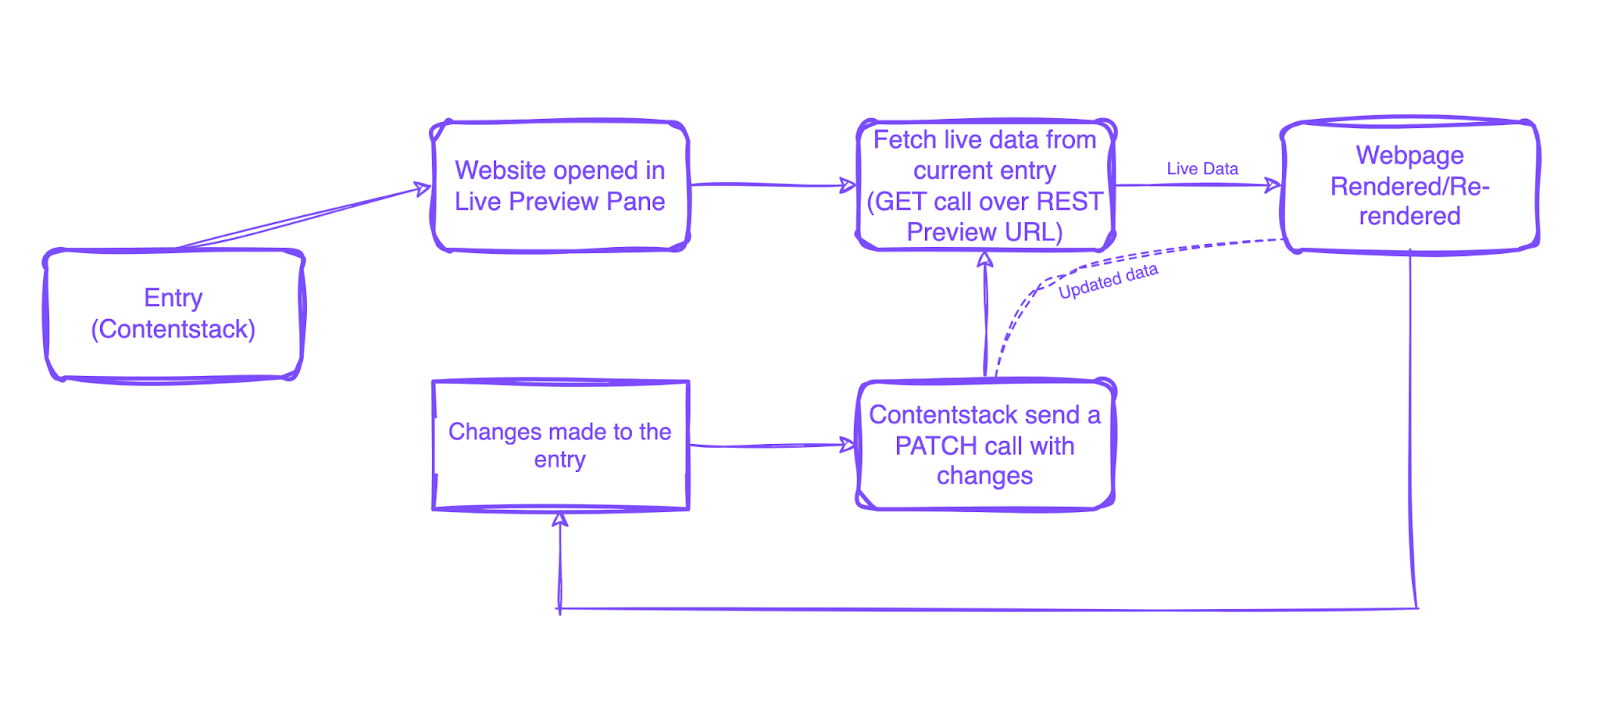
Live preview: REST Delivery SDK
1. Generate Preview Token
In the Basic Implementation module, we have already generated a preview token.
2. Update Contentstack's delivery SDK
To update the package via npm, use the following command:
npm install contentstack
To allow delivery SDK to fetch preview content, we need to add live preview configs to the stack initialization method i.e. to Contenstack.Stack() method.
Contenstack.Stack() method takes the live_preview object which includes following parameters:
- preview_token: The preview_token is used to authenticate API requests to fetch preview content.
- enable: This boolean property lets you enable the live preview on your client-side. Setting this to true turns on the live preview feature, allowing real-time updates to be shown in the application. If set to false, the live preview functionality will be disabled.
- host: The host property is optional and is used to define the endpoint that the application will connect to for fetching the live preview data. REST API hosts according to regions:
- AWS NA: rest-preview.contentstack.com
- AWS EU: eu-rest-preview.contentstack.com
- Azure NA: azure-na-rest-preview.contentstack.com
- Azure EU: azure-eu-rest-preview.contentstack.com
- GCP NA: gcp-na-rest-preview.contentstack.com
import Contentstack from 'contentstack'

const Stack = Contentstack.Stack({
    ... // update your configs here
    live_preview: {
        preview_token: preview_token,
        enable: true,
        host: 'rest-preview.contentstack.com' //optional for AWS-NA region
    },
    ...
})
3. Install / Update and Initialize the Live Preview Utils SDK
Live preview utils SDK listens to content changes and requests the delivery SDK to preview changes in real-time. Therefore Live Preview Utils SDK is always initialized at the client side irrespective of CSR/SSR is being followed.
To use Live preview utils SDK you can either install it using npm or import it using the script tag in your HTML page.
To install the package via npm, use the following command:
npm install @contentstack/live-preview-utils
initialization :
import ContentstackLivePreview from "@contentstack/live-preview-utils";

ContentstackLivePreview.init({
    enable: true
});
or you can use Script tag to import and initialize live preview utils sdk:
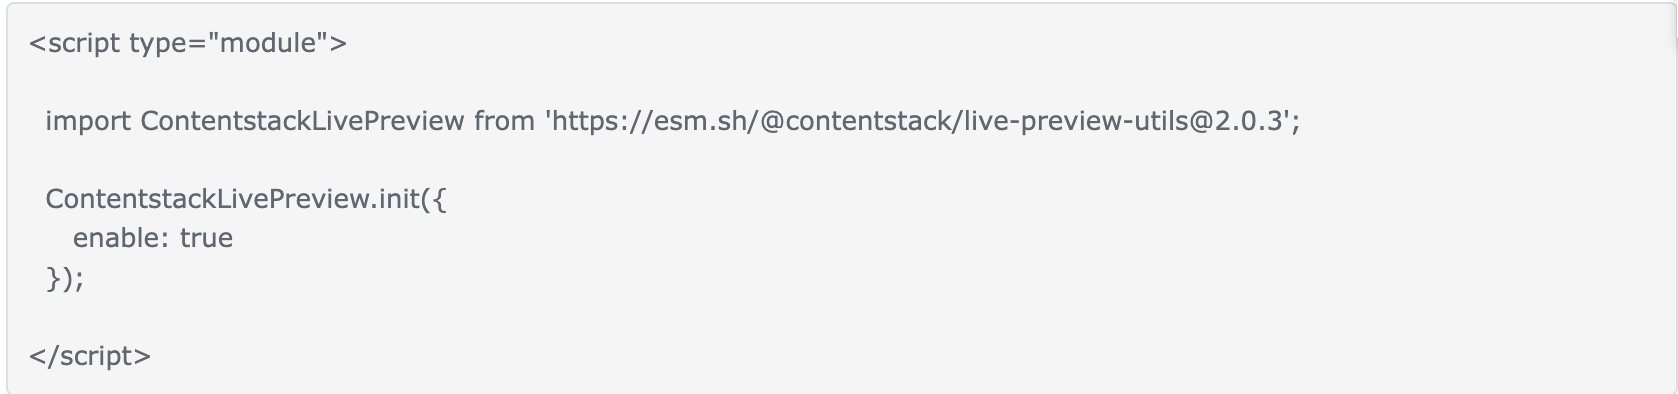
ContentstackLivePreview.init() method:
init() method initializes the Live Preview Utils SDK. The init() method accepts a configuration object as a parameter.
The following explains all the configuration options available.
- enable: The enable property determines whether Live Preview communications have been enabled. It takes a boolean value. It is an optional property which takes the default value as true.
- ssr: The ssr property controls how data is updated for previewed content when you modify entry content. It is an optional property which takes the default value as true. Its behavior changes based on whether your application uses Server-Side Rendering (SSR) or Client-Side Rendering (CSR).
- When ssr is set to true: Your application or website is rendered on the server (SSR). This means that each time you edit content, a request is made for a new HTML page.
- When ssr is set to false: Your application is rendered on the client side (CSR). In this case, your framework (e.g., React) will fetch the updated data and reload the existing page.
- stackSdk: The stackSdk represents the stack object. For CSR mode stackSdk object is required. When stackSdk object is provided utils SDK initialization switches to CSR mode. It is required to override default SSR configs.
- stackDetails: The stackDetails object contains
stack-related information which helps you redirect to the corresponding entry when you use edit tags on your website. The stackDetails object contains the following properties: - apiKey
- branch
environment
- clientUrlParams: The clientUrlParams object represents the URL information where your stack is present which includes host, port, and protocol. AWS NA region app host is default
{
host: "app.contentstack.com", // AWS NA region app host
}
The default params take AWS NA region values.
Client host for other regions:
• AWS EU region: eu-app.contentstack.com
• Azure NA region: azure-na-app.contentstack.com
• Azure EU region: azure-eu-app.contentstack.com
• GCP NA region: gcp-na-app.contentstack.com
• GCP EU region: gcp-eu-app.contentstack.com
- cleanCslpOnProduction: When enable is set to false and cleanCslpOnProduction is set to true, the data-cslp attributes are removed from the website.
When operating in a production environment, you generally want to avoid including data-cslp attributes in your site's HTML tags or enabling the live preview feature. To manage this, you can implement conditional statements to control the live preview functionality based on the current environment.
ContentstackLivePreview.init({
    enable: process.env.CONTENTSTACK_ENVIRONMENT !== "production" // returns false and disables the live-preview in production environment
    cleanCslpOnProduction: process.env.CONTENTSTACK_ENVIRONMENT === "production" // returns true and cleans data-cslp attributes in production environment
    ...
}- editButton: The editButton object provides functionality to manage the "Edit" button in your application, whether you're inside or outside the Live Preview portal. It offers several key features, including edit button visibility and control over the inclusion or exclusion of the "Edit" button within or outside the Live Preview panel, You can also adjust the button’s positioning based on your needs. Following keys enables you to customize editButton object:
- enable: This key accepts boolean values, which let's you specify whether you want to display the “Edit” button or not. the default values is true.
- exclude: This key provides you with the option to exclude the editButton from either inside or outside the Live Preview portal for certain conditions. It is of type “Array” with any one of the following string values:
- insideLivePreviewPortal is used when you want to remove the “Edit” button from within the Live Preview portal.
- outsideLivePreviewPortal is used when you want to remove the “Edit” button from outside the Live Preview portal.
- includeByQueryParameter: This boolean property is used to override the cslp-buttons query parameter. You can set this to true/false to enable/disable the "Edit" button option, respectively. By default it is set to true
- position: This property lets you customize the "Edit" button’s placement using one of eight predefined positions. It accepts the following values: left, right, top-left (or top), top-right, top-center, bottom-left (or bottom), bottom-right, and bottom-center.
example:
ContentstackLivePreview.init({
    ...
    editButton: {
        enable: true,
        exclude: ["outsideLivePreviewPortal"],
        includeByQueryParameter: false,
        position:'top-right',
    }
});- debug: Setting debug: true in ContentstackLivePreview.init() enables debugging mode for the Live Preview functionality. This mode is useful for developers as it provides additional logging and detailed information about the Live Preview's internal processes and interactions.
When you're done with debugging, it's generally a good idea to set debug to false or remove the debug option to avoid unnecessary logging in a production environment.
Configure Live preview Across Pages - CSR Powered website
ContentstackLivePreview.onEntryChange() method executes when an entry content is being changed, inside this method, you can add logic to fetch preview content.
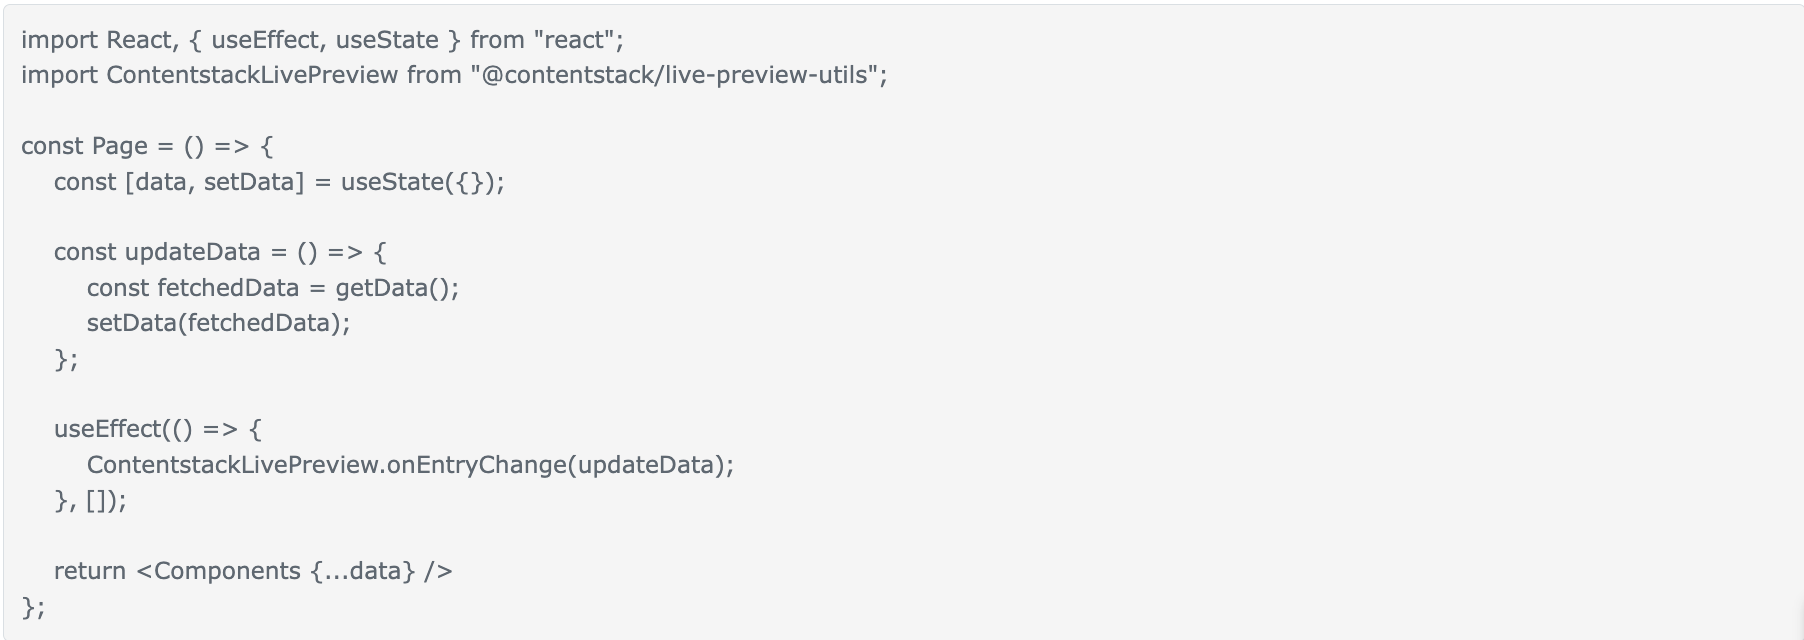
In the above example
updateData() function is responsible for fetching new data and updating the state.ContentstackLivePreview.onEntryChange(updateData) registers the updateData function to be called whenever an entry is updated, it fetches the draft/preview content and updates the component's state with setData i.e. data is being updated and rerendered on every change happening in the entry.
Configure Live Preview Across Pages - SSR Powered website
Set up a middleware to track all new changes being made to the entry content. This middleware injects the live preview hash and content type UID into the Stack class using the livePreviewQuery() method.
app.use((req, response, next) => {
    // this will get live_preview hash and ContentType to the request
    Stack.livePreviewQuery(req.query);
    next();
});
In other Javascript frameworks like next.js, you can directly update the live preview query from the page component itself.
Next.js (SSR) example:
- Set up a middleware: After initialization of live preview SDK in the client component, Let's set up a middleware to track all new changes being made to the entry content. This middleware injects the live preview hash and content type UID into the Stack instance using the livePreviewQuery() method.
// utils.js ...
export const setLivePreviewQueryParams = (queryParams) => {
    if(queryParams?.live_preview) {
        Stack.livePreviewQuery(queryParams)
    }
}
...
Configure Pages: setLivePreviewQueryParams() updates the live preview query parameters based on the searchParams passed to the page which enables live content updates. This ensures that every time the page loads or search parameters change, we’re checking for and updating live preview functionality parameters.
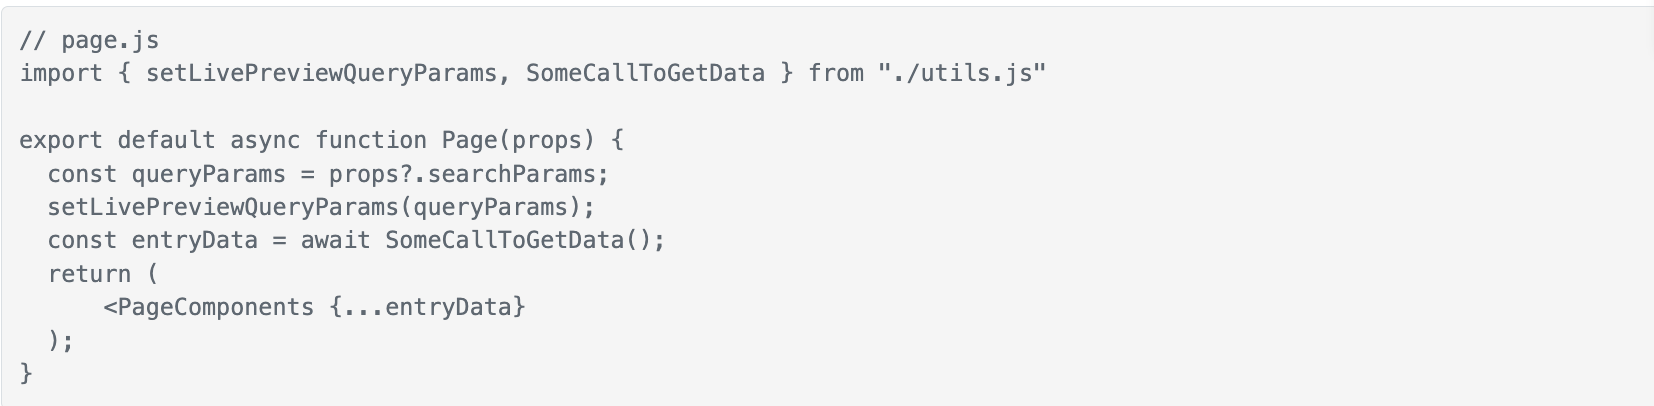
After implementing these steps you are all set to live preview your first page.
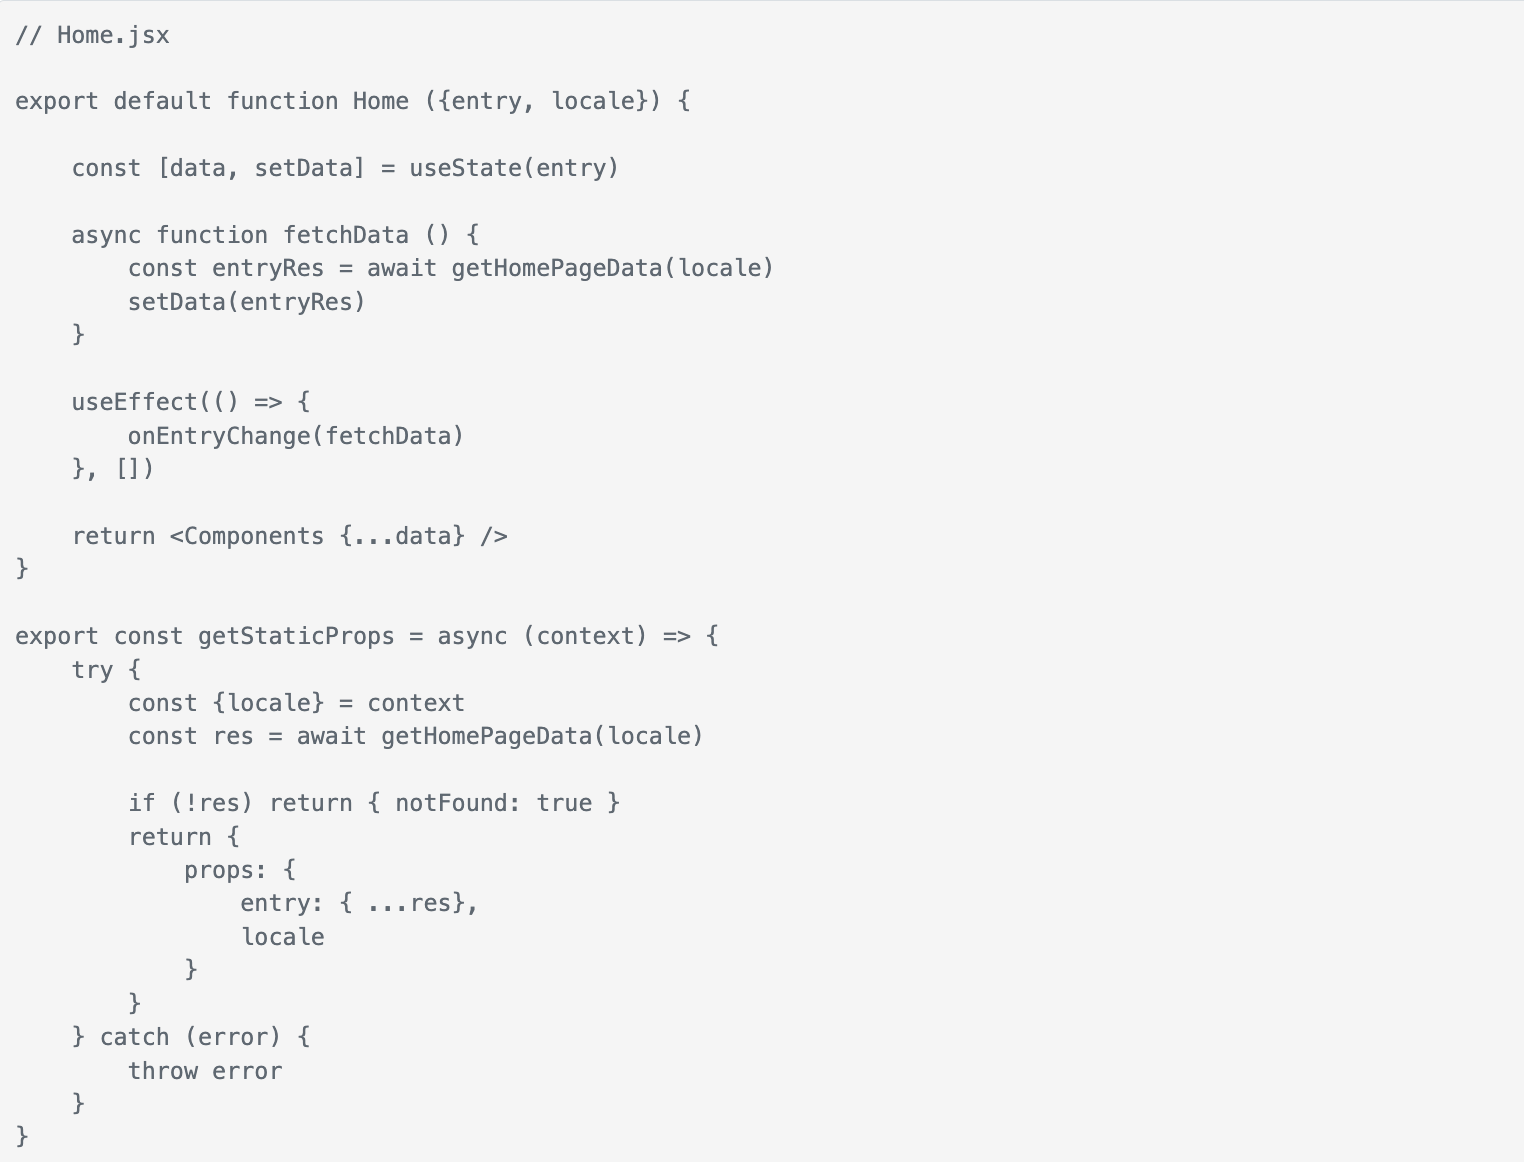
Configure Live preview - SSG-powered Website
Static site generation (SSG) is a web development strategy that generates HTML pages at build time using available data and templates. This results in pre-rendered static files that are served directly from a web server. In contrast, server-side rendering (SSR) and client-side rendering (CSR) generate pages dynamically for each request. SSG is used where the website needs minimal dynamic content
When working with Live Preview the server side generates and serves static HTML files with initial/published data and the client-side handles the Live Preview in CSR mode.
 SSG Live preview example: