sebastian-rodrigues.jpg

Sebastian Rodrigues

Technical Writer

Sebastian is a Technical Writer with over seven years of experience. He has worked as a Proposal Writer at Capgemini, helping collate engaging content for client RFPs and creating internal documents. He also has an editorial background, editing books on Java, SQL, etc. while at Packt Publishing. Sebastian loves playing football, carrom. and dancing to jive and Bollywood songs.

Posts by Sebastian Rodrigues

Mar 14, 2022

Contentstack Branches Empower Business and Development Teams to Innovate in Tandem

In 2022, the name of the game when it comes to enterprise success is innovation. Not only did an impressive 95% of people say they changed their lives in a permanent way over the last year—an equally remarkable 88% now expect brands to change and innovate in a similar way, specifically when it comes to their digital initiatives. It has never been more important to experiment with and release innovative new online experiences. And, ​​with Contentstack Branches, it has never been easier or faster to do confidently. Innovation's New Safe Place: Contentstack Branches Similar to Git’s branching methodology with which many developers are familiar, Contentstack Branches enables developers to create branches, or “versions,” of code and content. These separate branches both accelerate and remove risk from the innovation process by creating safe spaces where your business can build out “experience variations” without worrying about breaking the functionality you already have in place. What makes our Branches feature so unique is that Contentstack is the only headless content management system (CMS) where businesses can work with branches in production environments. Unlike other CMSs that only support experimentation in development and QA environments, with Contentstack Branches you can build and test each experience variation on key segments of your audience to make sure it’s perfected before being rolled out to your entire customer base. This is how Contentstack Branches empowers even the biggest enterprises to employ cross-functional growth-hacking methodologies that will accelerate development and increase the returns from your innovative digital initiatives. How Your Business Can Use Contentstack Branches There are many ways that Branches can be applied across the enterprise business, including: One of the most important benefits of Contentstack Branches is that it enables businesses to test — including A/B test — the effectiveness of innovative new changes quickly and on small audience segments before committing to rolling them out on a large scale. In addition to user testing, with Contentstack Branches, innovative new developments can be “QA’d” (Quality Assurance tested) in a realistic environment to make sure they’re in tip-top functional shape. The Contentstack Branches functionality allows for different teams to innovate on dedicated aspects of the experience in tandem, with none “overlapping” in a way that affects each other’s projects — or the live experience. Branches doesn’t just support developers. It also supports key Contentstack functionality like roles and workflows so business teams and technical teams can collaborate on the same playing field. For situations where you’re launching a large update or managing multiple brands, Contentstack Branches allows businesses to run development teams in parallel to accelerate delivery without taking any rushed shortcuts. Branches makes it easy for development teams to enact continuous integration and continuous delivery (CI/CD), a modern best practice in the IT world. Whether you’re rolling out cutting-edge innovations or just keeping up with changing world events, Contentstack Branches enables robust new campaigns to be designed, developed, and launched quickly. And these campaigns can just as easily live on permanently or be rolled back as needed. Current customers will be able to save incalculable effort by replacing a large number of their stacks with Contentstack Branches, which can be easier to sync, faster to spin up, and help take the load off your system. See for Yourself How Contentstack Can Empower Innovation Across Your Whole Business At Contentstack, we continue to invest equally in both business and technology stakeholders. And it’s because of this uniquely close and thoughtful relationship with our customers that we uncovered a need that most modern enterprises have—the need for a feature-rich CMS that doesn’t just support developers, but also empowers the entire business to collaborate on digital innovation. Are you ready to differentiate your brand, enable powerful cross-departmental collaboration, and remove risk from your digital operations all with a single platform? Get in touch with our team today or schedule a free demo to “Next Your CMS” and take advantage of our innovative Contenstack Branches feature.

Feb 28, 2022

Manage Development Workflows with ‘Branches’

If you have worked with Git, Mercurial or other software with version or source control capabilities, you’re familiar with the concept of branching. Branches allow you to create copies of content-type structures (schemas) to make changes and iterate without the risk of affecting what’s live on the production server. Working with branches makes life extremely easy for developers. To that end, we are excited to announce that Contentstack now offers branches. Branching capabilities support roles and workflows for better collaboration between developers and business users. Branches make it easier for developers to work concurrently on multiple releases without affecting content creation. Branches are covered by your plan’s production SLAs, allowing you to test the effectiveness of experience variations against live audience segments. Let’s look at how this feature works and the benefits it offers. How Branches Work in Contentstack If you have used any CMS as a developer, you know how risky it is to make changes to the content type or structure of a page that’s already live. Any unintentional error may cause data loss or even take your application down. Thankfully, you now have branches in Contentstack. If you want to change an existing content type, you can create a new branch, even on the production server. Adding a branch creates a copy of all the current content types, entries, assets, languages, extensions and releases of the source branch. Any subsequent changes that you make to the content of this new branch will have no impact on the content of the source branch (or any other branch that your production server uses). It will start an independent line of development and content changes. You can try new changes, iterate and publish in a testing environment with this new branch. Branches can have separate tokens, webhooks and audit logs, so developers can try out changes and track all activities. It’s like having a separate space for your development work. Each branch has a dedicated publish queue, content trash and workflows, enabling cross-functional collaboration with content managers who are modifying content. Once you are sure that changes are correct, you can make this new branch your main branch for an environment. In a multi-environment setting, changing the main branch often would mean making frequent changes to the branch configuration in your front-end code. To make mapping in multi-environments easier, we have aliases. What Are Aliases? An alias acts as a pointer to a particular branch. You need to use the alias ID in your front-end code. Once changes in your branch are ready to go, you can set that branch as the target branch for an alias. You are not required to make changes to your code every time. In other words, when you point a branch to an alias, that branch acts as the main branch for the corresponding environment. You can read our documentation on aliases to learn more about them. Why Do You Need Branches? Here are some reasons why branches are helpful to you and your company: Branches allow you to easily manage your “in-progress” work, which can be separate from your live and stable work in the production environment. For companies targeting higher release velocity, branches allow teams to work in parallel instead of one after the other. With separate roles and workflows set up for each branch, development teams can work together with business and marketing in a more collaborative, organized and structured manner. Should something go wrong, branches make rolling back changes incredibly easy. Breaking Changes to Keep in Mind This feature release will introduce a change in the API responses returned for several Content Delivery API (CDA) / CDN and Content Management API (CMA) requests. To ensure a smooth transition when you start using branches, we have listed below a few breaking changes in the API that you might need to update within your back-end code. [Breaking] Additional "branch" Key in Webhook-related API Responses If the "Branches'' feature is part of your plan, all webhook-related API requests that hit the Content Management API (CMA) will return the branch key in the response body. This key specifies the unique ID of the branch on which the concerned webhook was triggered. Here's a sample of the webhook data with the branch key: { "module":"entry", "api_key":"blt38776c9acaae33b3", "event":"update", "triggered_at":"2020-10-14T14:40:54.157Z", "data":{ "entry":{ "uid":"blt36952eb1aa651010", "title":"Sample Entry", "locale":"en-us", "_version":7 }, "content_type":{ "uid":"footer", "title":"Footer" }, "branch":{ "uid":"main" } } } Additional "branches" and "branch_aliases" Keys to Specify Branch/Alias Scope in Responses If the Branches feature is part of your plan, you will see additional keys named branches and branch_aliases in the API responses in some of the Contentstack modules (listed below). These keys specify the unique IDs of the branches and aliases selected within the scope for the concerned modules. Webhooks, Workflows and Publish Rules-related API requests that hit the Content Management API (CMA) will return a top-level branches key in the response body. This key specifies the unique IDs of the branches to which these modules are applicable. For instance, here’s the response that you will get for the get all webhooks API request: { "webhooks":[ { "uid":"blt789920f4d2650336", "branches":[ "main" ], "channels":[ "content_types.update" ], "disabled":false, "concise_payload":true, "Name":"Sample Webhook", "destinations":[ { "target_url":"https://example-site.com", "http_basic_auth":"", "http_basic_password":"", "custom_header":[ { "value":"", "header_name":"" } ] } ], "retry_policy":"manual", "org_uid":"bltd1cd127c7b51f410", "updated_by":"blt1fd0057b90905592", "created_by":"blt1fd0057b90905592", "created_at":"2021-08-26T19:38:29.596Z", "updated_at":"2021-08-26T19:38:29.596Z" } ] } Delivery Token and Management Token-related API requests that hit the Content Management API (CMA) will return the branches and branch_aliases keys under the scope section in the response body. These keys specify the unique IDs of the branches and branch aliases for which a delivery or management token is applicable. For instance, here’s the response that you will get for the get all delivery tokens API request: { "tokens": [ { "description": "Sample token to fetch content.", "name": "Sample Delivery Token", "scope": [ { "environments": [ ... ], "module": "environment", "acl": { "read": true }, "_metadata": { "uid": "cs48231eccb8125898" } }, { "module": "branch", "acl": { "read": true }, "branches": [ "main", "development" ], "_metadata": { "uid": "cs81f7766198897700" } }, { "module": "branch_alias", "acl": { "read": true }, "branch_aliases": [ "demo", "release" ], "_metadata": { "uid": "cs7e7ee9b555e9f021" } } ], ... } } ] } Organization User-related API requests that hit the Content Management API (CMA) will return the branches and branch_aliases keys under the rules section in the response body. These keys specify the unique IDs of the branches and branch aliases of which a particular user role can access data. If a user has access to the content present in all the stack branches, then the branches or branch_aliases keys return the $all value. For instance, here’s how the "rules" section would look in the response for the get user API request: { "uid":"blt969408c7c448a4d5", "name":"Content Manager", "description":"Content Manager Role.", "users":[ "blt1fd0057b90905592" ], "roles":[ ], "created_at":"2021-07-26T10:04:20.765Z", "updated_at":"2021-07-27T07:22:08.875Z", "api_key":"bltadd6b6032484ce86", "rules":[ { "module":"branch", "branches":[ "main" ] }, { "module":"branch_alias", "branch_aliases":[ "$all" ] }, { "module":"locale", "locales":[ "$all" ] }, { "module":"environment", "environments":[ "$all" ] }, { "module":"asset", "assets":[ "$all" ], "acl":{ ... } } ] } [Breaking] Updated Asset Download URL Format as per Branch If the Branches feature is part of your plan, you will see an updated download URL format for all assets part of any branch, except the default main branch. The branch={branch_UID} query parameter is attached to the download URL. For instance, if you upload an asset to the development branch, Contentstack generates the following asset download URL: https://assets.contentstack.com/v3/assets/blt252b550c5ccdae26/bltc56f275260214c0b/61280d9625aca65092ce7f15/Sample_Image.jpg?branch=development For any asset that you upload to the main branch, Contentstack will continue to generate asset download URLs in the earlier format: https://assets.contentstack.com/v3/assets/blt252b550c5ccdae26/bltc56f275260214c0b/61280d9625aca65092ce7f15/Sample_Image.jpg Support "include_branch" as Query Parameter in CMA and CDA API Requests If the Branches feature is part of your plan, you can pass the include_branch query parameter while running Content Delivery API (CDA) / CDN and Content Management API (CMA) requests. Set the include_branch key to true to allow the API to return the _branch key in the response. This key specifies the unique ID of the branch and helps identify where the concerned Contentstack module resides. Here’s the list of the components that support the include_branch query parameter: Content Types [CDA / CMA] Global fields [CDA / CMA] Assets [CDA / CMA] Entries [CDA / CMA] Extensions Languages Releases Audit Log Publish Queue Workflows Publish Rules Webhooks Let’s look at an example of how the response would look when you pass the include_branch query parameter. Here’s the response you will get for the get all content types API request: { "content_types": [ { ..., "schema": [ { "display_name": "Title", ... }, { "display_name": "URL", ... }, ], "last_activity": {}, "maintain_revisions": true, "description": "", "DEFAULT_ACL": { "others": { "read": false, "create": false }, "users": [ { "read": true, "sub_acl": { "read": true }, "uid": "blt690a3fed2a593445" } ], "management_token": { "read": true } }, "SYS_ACL": { "roles": [ { "uid": "bltdc9d89cd41565777", "read": true, "sub_acl": { ... }, "update": true, "delete": true }, { ... } }, { ... }, ... } ], "others": { ... } } }, "_branch": "development", "options": { "title": "title", "publishable": true, "is_page": true, "singleton": false, "sub_title": [ "url" ], "url_pattern": "/:title", "url_prefix": "/" }, "abilities": { "get_one_object": true, "get_all_objects": true, "create_object": true, "update_object": true, "delete_object": true, "delete_all_objects": true } } ] } Get Started With Branches The Branches feature will be rolled out to all customers gradually over the next few weeks. It is available in Contentstack only for the new interface. All the stacks in your organization will now have a “default” branch, and you can create more branches from there. The number of branches available depends on your plan. You can read our documentation on branches to learn more or reach out to support@contentstack.com

Oct 19, 2021

Introducing “Live Preview” – Preview Content Updates on the Go

Using a headless CMS is critical in today’s omnichannel-driven digital world, where content delivery is not limited to websites. Equally important is that marketers can see how content appears on various channels before publishing content on the live site. Using a headless system typically meant publishing the content to staging or preview environments after content creation and checking different resolutions or devices. And if there are changes, then save, publish, and check again. In short: too many clicks, too many steps. Introducing Live Preview: See how your content and pages look on various channels in real-time while creating content without having to save and publish. This preview speeds up content creation and ensures your brand looks precisely like you intended. At the same time, Contentstack retains the power of headless CMS for omnichannel delivery. How Live Preview Works in Contentstack Live Preview is not an add-on or an extension. It is part of the native Contentstack application. Enable it, and all your content editors will see the preview right on the entry editor page, within the sidebar panel, or in full-screen mode. Let’s check out what you can do with Live Preview. Preview Content on Different Devices The Live Preview pane allows you to preview content across three default platforms: Mobile, Tablet, and Desktop. Selecting one of these options sets the Live Preview pane to the width of the specified digital platform. Track and Edit Content in Real-Time Marketers can click on a specific content block in the Live Preview window to quickly traverse to the corresponding field and edit and preview the changes side by side. This includes changing the block layout of the page. Preview Content on Different Environments Within the preview window, you can switch between different environments, e.g., production and development, to check whether your content looks the same throughout. Varied Preview Window Sizes For Legibility With a simple click of a button, you can instantly maximize or minimize the preview window or preview content in a new browser window. Benefits of Live Preview For Content Managers and Business Users: Omnichannel preview experience: Content managers can seamlessly preview content across multiple channels, such as mobile devices, tablets, and desktops. Real-time content edits: Content managers can click on the “Edit” icon beside any content sections in the Live Preview window to navigate to the corresponding field in the editor, where they can edit and watch the changes reflected in real-time. Test website content changes instantly: You can preview content to see how it displays across different digital platforms without publishing or saving the changes. Live Preview lets you test content changes in different website sections to see how it appears on a webpage. For Developers: Scope for innovation and enhancement: Live Preview is part of the native Contentstack app, rather than an add-on or an extension. This ensures that the feature stays in sync with core development and innovation. Content schema remains intact: The actual content entry remains JSON-structured, so developers can keep modeling content as and when required and deliver it into any frontend framework. How to Set Up Live Preview for Contentstack-powered Websites To allow content managers to use the “Live Preview” option in all of the entries in your stack, you need to perform the following steps: Navigate to the Live Preview section under stack’s “Settings.” Select the Enable Live Preview checkbox. Select a default URL and environment for previewing live content across all entries of your stack. Save the settings. You will now see a live preview of the default environment and URL in all entries. These settings can also be updated when on the entry page to preview content across different scenarios. Try Out Live Preview “Live Preview” is a plan-based feature and is only available in the new Contentstack interface. You can read our documentation on Live Preview to learn more or reach out to our Support team if you have any questions.

Jul 19, 2021

Introducing the New JSON-powered, Block-Style Rich Text Editor

Among all the components of a modern content editor platform, the rich text editor remains an integral part of the content creation process. And for developers, it continues to be a huge pain. As newer channels of consumption emerge, rendering rich-text content across all digital platforms is becoming harder. With the introduction of the new JSON Rich Text Editor (RTE), we intend to make life easier for content managers and developers. Editors no longer have to undergo the hassle of handling HTML source code while editing rich text content. And since the editor returns the saved content in JSON format, developers can easily serialize the data in any human-readable format, paving the way for a truly omnichannel experience for customers. Note: The JSON RTE is available only in the new Contentstack interface. A Delightful, Focused Writing Experience for Content Editors The new JSON RTE field offers a beautiful editor for content managers with all the formatting options and functionalities of our existing HTML-based RTE, minus the HTML code view. This editor frees the content managers from the hassle of handling HTML source code, so they can focus on creating quality content and nothing else. Each element, such as paragraphs, images, lists, etc., is treated as a separate block, so editors can simply drag and drop them within the body text instead of cutting and pasting content. To apply custom styles, editors can choose from the many “properties” that the developer can add to the RTE. The rest of the components are the same as our HTML-based RTE, visually. We Love Our HTML Rich-Text Editor, but... Our HTML-based RTE field is incredible. There is no doubt about it. It provides a single content-editable element for adding HTML markup, allowing web browsers to consume and render content easily. It serves its purpose well, and it works like a charm… until you want to cater to a variety of platforms; or you want to reuse content for a separate frontend framework; or you want to save the data for what it is, without coupling it with the way it should be presented. The content of an HTML-based RTE is stored in raw HTML format, which means it stores content data along with markups for content appearance. This may have specific limitations, especially for cases that require quick and easy backend processing, rendering content on different channels, and evolving faster. Data in this format makes it challenging to write code that can transform rich text quickly or display it in different channels. The New JSON RTE Helps Developers Become Future-Ready Structured Data for Easy Parsing The new block-style JSON editor stores and returns data in a structured JSON format. Each element (such as a paragraph) is a block; each block is an array; each array has multiple children, storing the actual text and the different nodes associated with the text. This format gives developers more control over the information, ease of performing any backend processing, and the ability to serialize the data in any human-readable format. Data in this format enables you to use any frontend of your choice for a true omnichannel experience: HTML for web browsers, render natively for mobile apps, audio versions for voice assistants, and so on, making your rich-text content truly reusable and future proof, especially for cases such as moving to a new presentation layer or redesigning an app. Let’s look at an example to understand how the new JSON RTE stores and returns rich-text data. If the JSON RTE contains the following text: The field output in the API response will be as follows: { "entry": { "title": "Entry 1", "url": "/entry-1", "tags": [ "first entry" ], "locale": "en-us", "uid": "bltb6ea3a0ab9699748", "created_by": "blt702565fb0d35107f", "updated_by": "blt702565fb0d35107f", "created_at": "2020-11-13T14:15:50.389Z", "updated_at": "2021-07-09T11:41:05.883Z", "ACL": {}, "_version": 2, "_in_progress": false, "json_rte": [ { "uid": "fb1006018d73482aad018eadc8e6818f", "_version": 2, "attrs": {}, "children": [ { "type": "p", "attrs": {}, "uid": "d0efa7610f06413499d09c8f61389d4c", "children": [ { "text": "This RTE is " }, { "text": "amazing", "bold": true }, { "text": "." } ] } ], "type": "doc" } ] } } While you can convert this data back to HTML, we have a serializer package that can help you do that quickly. Excited? Migrate Content From HTML RTE to JSON RTE There are certainly a ton of benefits of moving your content to the new JSON RTE. You can use our CLI to migrate the content of your existing HTML RTE fields to the new JSON RTE fields for all entries of a content type in just a few minutes. Refer to our migration guide to perform the steps, understand the different flags you can use, and migrate the content safely without any data loss. Helpful Resources This blog only scratches the surface of the endless possibilities available using our new JSON RTE field. Read our documentation to understand how to use, configure, and customize this new field to do more with your content. The new JSON RTE field Migrating content from the HTML-based RTE field to the JSON RTE field using CLI

Mar 15, 2021

Access Governance With SCIM (Beta)

Managing access governance over a composable technology stack is crucial for both security and end-user experience. Contentstack SAML 2.0 support enabled companies to provide seamless user management through Single Sign-On (SSO) since its introduction three years ago. We are excited to announce support for SCIM 2.0 (in Beta), to simplify the automation of user provisioning further. This Beta release includes SCIM support for OneLogin and our SCIM 2.0 API. SCIM 2.0 And How It Works SCIM (System for Cross-Domain Identity Management) is a proven and secure protocol for exchanging user identity information between various IT systems and services. Major identity providers (IdP), such as OneLogin, support SCIM as a common language to communicate with service providers such as Contentstack or other applications. SCIM allows administrators to manage all users from a central location, enabling onboarding, offboarding, or changing user access in hundreds of applications from a single IdP. Here’s an example of how it works: When a new employee joins your organization, your system admin will create a new user in your IdP and add the user to the Contentstack app in the IdP. The IdP then communicates about the new user’s identity to Contentstack (and other apps you use) and automatically adds the user to Contentstack. Likewise, when your system admin removes a user from the IdP, it automatically removes the user from Contentstack. What’s In This Release This release includes everything you need to use SCIM (with OneLogin) for your organization. It’s in ‘Beta’ because we are releasing SCIM support for just one IdP (OneLogin) at the moment, and we are in the process of enhancing the performance of some SCIM API requests. But that shouldn’t stop you from using our SCIM integration for your organization. It’s completely secure. The following explains what’s in this release. SCIM Support for OneLogin If you have been using OneLogin as your IdP for automatically provisioning or deprovisioning users, you can now manage Contentstack users as well through your IdP. Here’s a detailed step-by-step guide on how to set up SCIM with OneLogin and Contentstack. Contentstack SCIM API We also provide SCIM API built using the SCIM 2.0 protocol. You may not need to use these APIs directly if you are using OneLogin as your IdP. However, if you have built a custom IdP client or want to manage user provisioning in Contentstack programmatically, these APIs would be useful. Refer to our SCIM API reference for more details. What This Release Means For You Ease in Managing Users Our SCIM integration ensures that your new employees get access to Contentstack with the right permissions at the right time, without admins having to access the Contentstack app every time. This automation saves considerable time, effort, and headaches for the admins that otherwise have to do this manually. Improved Security and Reduced Human Error Your company’s data and resources become safe as SCIM integration eliminates any security threats caused by unauthorized access due to manual errors. Quick User Onboarding SCIM support for Contentstack helps your IT department and new employees, so they don’t have to wait to access Contentstack. The relevant access with appropriate permissions is already in place, even before they log in for the first time. Helpful resources Contentstack SCIM API reference Set up SCIM with OneLogin More SCIM docs

Feb 25, 2021

Announcing General Availability of Contentstack’s GraphQL Content Delivery API

It’s official. Contentstack’s GraphQL Content Delivery API is now available to all customers. When we first added support for GraphQL about two years ago, we saw it as a natural addition to a developers’ arsenal. We knew that providing more stable support would unlock tremendous value for developers and provide an efficient way to query data, no matter what they plan to build. In the last two years, we worked hard to achieve that. We brought significant improvements in terms of capability, stability, and performance. Having proven itself over many months with customers using it in production, we are moving our GraphQL Content Delivery API from limited availability to general availability. Additionally, this latest release offers further rate limit increases, better stability, the ability to query multiple content types in a single request, and more. Before we dig into what has changed from our Limited Availability version, here are highlights of the capabilities of our GA GraphQL API: Rate limit of 80 requests per second per organization, in addition to the existing REST rate limit Query entries of up to three content types in a single request Paginate responses for referenced data and assets Use relay specification logic to traverse through Reference field data Retrieve data of different types of custom fields Paginate introspection schema details Use postman collection to test our GraphQL API Now let’s look at some of the changes we have brought in this GA release from our Limited Availability version. Higher Rate Limits Our Limited Availability version had a rate limit of 3 requests per second per organization. We have increased the default limit to 80 requests per second per organization for uncached GraphQL requests to accommodate more production use cases. For requests that fetch content from our CDN cache, there is no rate limit. Query More Content Types in a Single Request You can now retrieve entries of up to three content types in a single GraphQL API request. Here’s an example request that shows how you can fetch values of the Title field of entries of multiple content types.query { all_product { total items { title } } all_category { total items { title } } all_brand { total items { title } } } Limits on Query Complexity and Cost GraphQL gives developers the ability to make complex queries. While this is an advantage for the requester, it also opens up certain security risks. A malicious attacker can request a heavy, nested query that can overload the server or database. Or even legitimate users can inadvertently request data that may cause performance issues. One of the best strategies to mitigate such risks is to set the following standards: A single GraphQL query can fetch a maximum of 7,500 records A single GraphQL query can fetch a maximum of 100 referenced records for a single Reference field connection You can use the skip and limit pagination parameters to fetch more reference connection records We do a cost and complexity analysis before executing the query and restrict the query from being executed if it exceeds the set limits. Let’s look at an example to understand how we do this: { all_blogs(limit:100) { items { related_blogsConnection(limit:75) { totalCount edges { node { ... on Blogs { title } } } } } } } Now, we calculate the total records (entries) the above query is trying to fetch: Depth 0 (Blogs Content Type) = 100 blog entries Depth 1 (Related Blogs Reference Field): 100 x 75 = 7,500 related blog entries Total Blog Entries: 100 blog entries + 7,500 related blog entries = 7,600 entries Since the total entry count exceeds the maximum allowed limit of 7,500, we can prevent this query from connecting to the database. If you intend to fetch more data, we recommend you paginate the references effectively and make multiple requests. Refer to our documentation to learn more about how we calculate query cost and complexity. Breaking Changes to Keep in Mind Contentstack will continue to support the GraphQL Content Delivery API Limited Availability version for 30 days post the GA release. To facilitate a smooth transition to the newer version of the API, we have listed below a few breaking changes in the API that you need to update within your backend code. You can incorporate these changes before the duration (mentioned above) to avoid schema build errors. Update to All Asset Related Typenames Contentstack converts every field UID to its corresponding GraphQL typename that follows the Pascal naming convention. However, a few instances may involve two different fields or objects having the same typename. This occurrence is referred to as a Typename Collision. In our endeavor to avoid typename collisions, we prefix all asset-related GraphQL typenames with “SysAsset” instead of “Asset.” Here’s a list of all the system-defined fields that have changed: "Asset" to "SysAsset" "AssetWhere" to "SysAssetWhere" "AssetConnection" to "SysAssetConnection" "AssetEdge" to "SysAssetEdge" "AllAssets" to "AllSysAsset" "AssetSystemField" to "SysAssetSystemField" "AssetDimension" to "SysAssetDimension" "AssetDimensionWhere" to "SysAssetDimensionWhere" "AssetOrderBy" to "SysAssetOrderBy" "TransformUrl" to "SysAssetTransformUrl" "ImageFormats" to "SysAssetImageFormats" "DisableValues" to "SysAssetDisableValues" "FitValues" to "SysAssetFitValues" "OrientValues" to "SysAssetOrientValues" "OverlayAlignValues" to "SysAssetOverlayAlignValues" "OverlayRepeatValues" to "SysAssetOverlayRepeatValues" "AutoValues" to "SysAssetAutoValues" "DispositionValues" to "SysAssetDispositionValues" Introduction of the X-Resolver-Cost Response Header To prevent malicious queries from hitting our backend database, we now perform a static analysis of each query before it hits the database. The x-resolver-cost response header calculates the worst-case response size that can be fetched by the query and provides an apt query cost analysis. This response header returns the total number of database round trips made for a single GraphQL query. Future Steps Contentstack will continue to add more capabilities to our GraphQL Content Delivery API as we go forward. Check our Change Log section to see the complete list of changes. To get started with your GraphQL API, check out our developer documentation.

Sep 25, 2020

Collaborate Better With Entry Comments

Quick and easy collaboration among team members is crucial, especially for teams that regularly create a lot of content, as it directly impacts the delivery speed and quality of content. Contentstack provides several tools that enable easy collaboration, such as entry presence, workflow stages, task assignment, etc. Today, we are glad to introduce another powerful collaboration tool: the ability to add comments to entry fields. With this feature, content managers can add comments to fields of an entry and reply inline, letting them initiate discussions around the content to collaborate efficiently. Let’s explore this feature in detail and understand what’s new for content managers. While editing an entry, the ability to comment on entry fields helps streamline content creation and review. And the collaboration is even more powerful than just leaving comments. Here’s a list of actions that you can perform with the new commenting feature: Add comments to a field You can start a discussion on a field, and you can add several comments within that discussion. To create a comment, hover your mouse pointer over a field and click the comment icon. Reply to comments You or other content editors can reply to an existing comment by adding a comment below. Mention users or roles in comments If you want to tag specific users in a comment, you can mention them using “@.” They will get an email as well as in-app notification about their mention. You can also tag roles. Resolve discussions When you complete a discussion, you can resolve the discussion, and make way for new discussions. Once resolved, the comment disappears from the field view, but it is always available in the right-hand panel, under “Resolved Discussions.” Reopen discussions You can reopen a resolved discussion in a single click. It then becomes an active discussion that starts appearing in the field view. You can then start adding comments to continue the discussion. View a timeline of comments and discussions The timeline section gives a quick overview of all the comments and discussions added to all the fields of an entry. From here, you can also perform common actions, such as “Resolve,” “Reopen,” etc. View your mentions When someone mentions you in a comment, you get in-app notifications within the stack. You can view them by clicking the notification icon on the top right corner. “Mark as read” or clear comment notifications Notifications about your mentions remain as unread in your “Notifications” tab until you mark them as read. You can also clear the notifications section if you don’t want them anymore.  Now that you know how this feature works, it’s time to start collaborating with your team members. Read our documentation on Commenting Within Entries to learn more.

Jul 23, 2020

Our Content Delivery GraphQL API Beta Version is Now Public

After several months of testing, Contentstack’s Content Delivery GraphQL API Beta version is now live and available for you to explore. We have also released a Postman collection for this API.  Our Content Delivery GraphQL API Beta version now facilitates optimized schema handling, returns error debugging responses, uses database resources efficiently, and prevents malicious requests to the database. In other words, the API is now more stable, with better performance and improved security features. Here’s a quick look at some of the significant changes that we have introduced since the alpha version: Paginate responses for referenced data and assets Query multiple content types in a single request Pass access tokens in the header of the API request instead of the URL Search using more flexible regular expressions Batch multiple API requests to the server Retrieve data for custom fields through GraphQL queries Traditional Reference field schema has been deprecated New and improved error response bodies Higher rate limit The release of a postman collection for our GraphQL API Let’s dig a little deeper to understand the changes in detail. Use Relay Specification to Paginate and Traverse Reference and Asset Field Data Contentstack’s GraphQL API Beta now supports relay specification for Reference fields and assets. This means that you can paginate the list of referenced entries or assets returned in the response using the skip and limit parameters. You can sort and filter the response data to request only for a specific list of nested references. This helps avoid overloading the database with unnecessarily large data requests. Relay specifications take into account the data graph for an application. The data graph specifies the different connections that exist between each entity of the stack. This data graph consists of the following entities: Node: A node represents individual resources within the stack, for example, a particular content type (e.g., Product) or asset. Edges: Edges represent the contextual data that defines the connection between two content types, for instance, when a Product content type refers to the entries of another content type (e.g., Categories). Connection: Connection represents a standardized connection model to specify one-to-many relationships between a parent content type and its referenced child content types. You can paginate the referenced content returned in the response body using the skip and limit parameters. Let’s look at an example to understand how relay specification works in Contentstack. Consider a scenario where a few Blogs have references to related blog posts of the same content type or other related blog posts such as Sales Blogs and Marketing Blogs. Let’s say you want to fetch the value of the Title field of the basic blogs along with the values for the Title field of the Sales Blogs and Marketing Blogs. The GraphQL API request for this appears as follows:{ all_blogs { items { related_blogsConnection( limit: 5 ) { totalCount edges { node { ... on Blogs { title } ... on SalesBlogs { title } ... on MarketingBlogs { title } } } } } } } If you want to view only the first five titles of the referenced blogs, you can use the limit parameter to paginate the list of referenced entries in the response body. The GraphQL API request for this appears as follows:{ all_blogs { items { related_blogsConnection( limit: 5 ) { totalCount edges { node { ... on Blogs { title } ... on SalesBlogs { title } ... on MarketingBlogs { title } } } } } } } Note: You can only paginate response data for multi-content type referencing fields and single content type referencing fields that have been marked as “Multiple.” Do Away with the Traditional Reference Field Schema We have deprecated the traditional GraphQL query schema used to traverse through Reference fields. Now, you can use the relay specification logic to traverse through Reference field data. However, one thing to keep in mind is that you can only paginate referenced entries for single content type referencing fields that have been marked as “Multiple” and multi-content type referencing fields in the response body. The following table indicates the change in the schema of API requests that fetch Reference field data: Old Reference Field SchemaNew Reference Field Schemaquery { all_product { items { title home_appliances { ... on Electronics { title appliance_details } ... on KitchenAppliances { title kitchen_appliance_details } } } } } query { all_product { items { title home_appliancesConnection { edges { node { ... on Electronics { title appliance_details } ... on KitchenAppliances { title kitchen_appliance_details } } } } } } } Query Multiple Content Types in a Single Request Contentstack’s Content Delivery GraphQL API Beta allows you to fetch the values of fields belonging to multiple content types in a single request. You can run a complex query to fetch data from multiple content types of the schema with a single request. Consider a scenario in which you want to fetch all the values of the Title field of all Blogs and of Authors who have written a blog. The GraphQL query for this request appears as follows:{ all_blogs { items { related_blogsConnection { edges { node { ... on Blogs { title } } } } } } all_author_details { items { title } } } Regulated Rate Limiting to Shield the Origin Server Contentstack's GraphQL API Beta now sets a maximum rate limit of 3 requests per second per organization for uncached GraphQL requests. Request-based rate limiting safeguards our origin server from malicious queries and provides a stable platform for any app that consumes our GraphQL API. We do not set any rate limits on the GraphQL requests that fetch content from our CDN cache. Retrieve Data Using More Flexible Regex Search The Content Delivery GraphQL API Beta uses regular expression objects to define the search criteria for a query. The regex queries will now use the pattern parameter to filter out query results. Here is how the syntax for regex searches has changed in Beta: Old Regex SyntaxNew Regex Syntaxwhere: { field_uid_regex: "regex_value" }where: { field_uid_regex: { pattern: "regex_value" } } Paginate Documents Within Your Introspection Schema Contentstack’s Content Delivery GraphQL Explorer only creates an introspection schema for the first 100 content types fetched from your stack. It was not possible to refer to content types other than the first 100 available. Querying content types that failed to load within the introspection schema resulted in breaking changes. This restriction no longer exists. While fetching all the content types within your stack, you can provide arguments in the introspection query to paginate the introspection schema details. For example, if you have more than 100 content types in your stack, you can get the rest of the batches’ items using the skip parameter in subsequent requests. To paginate the output of the request for introspection schema, you can use the limit parameter. So, for instance, let’s say the Product Catalog stack contains more than 100 content types. To fetch content types other than the first 100 in batches, use the skip=100 and limit=4 query parameters to get only the first four content types other than the first 100:  https://graphql.contentstack.com/stacks/blt20962a819b57e233?environment=production&skip=100&limit=4 Dataloaders to Batch GraphQL API Requests Our Content Delivery GraphQL API Beta uses dataloaders to traverse the relationship between a Reference field and its referenced entries. Possessing the ability to accept an array of keys and return an array of values as requested, Dataloaders reduce the number of calls made to the database. This supersedes the basic resolver functions that instead make a host of calls to the database while traversing the referenced entries of a Reference field. Consider a scenario where you need to fetch the values of the Title field of a Product and the title of the Category to which it belongs. The GraphQL API request appears as follows:query { all_product( total items { title categoriesConnection { totalCount edges { node { title } } } } } } Here, a single product may be grouped under several categories, or a category can relate to several products. The resolver function that returns products cannot assume how many categories can be returned. This means that resolver functions will make several round trips to the database to fetch content. The dataloader function instead batches multiple requests and makes a single call to the database for all the data related to products. Fetch Data for Different Types of Custom Fields Our Content Delivery GraphQL API Beta now allows you to retrieve data relayed by a custom field extension of a content type. Whether it may be a custom field of “boolean” data type or “JSON” data type, you can easily specify the “extension UID” to fetch field data. Let’s consider a simple scenario to understand the query structure. To retrieve the value for the “Product Description” JSON Editor field, your query will appear as follows.query { product { title product_description } } The response body of this query includes details of the “Product Description” custom field in JSON format. Detect and Debug Errors On the Go Contentstack now follows GraphQL’s error specifications while returning error messages for an API request that failed to execute. Error responses now state the exact reason for failure, hints to detect the erroneous entity, and requests to debug the error. Let’s look at an error message that is returned when an API request does not specify the publishing environment to better understand this improvement: The error message appears as follows:{ code: 'MISSING_ENVIRONMENT', message: `The environment query parameter is required.`, details: { hint: "The url pattern should be '/stacks/{stack_api_key}?environment={env_name}'." } } Postman Collection for Our Content Delivery GraphQL API We’re excited to announce Postman Collections for our Content Delivery GraphQL API. This collection lets you connect to your Contentstack account and try out our APIs using Postman’s native app. Click on the button below to get started. Now that you know the benefits of our Content Delivery GraphQL Beta, check out our documentation to learn more about it and try out these new features.

Jul 03, 2020

Introducing Trash - Recover Lost Data and Accidental Deletions

We all make mistakes. But the damage may be expensive if we accidentally delete important data, with no means to restore it. To make sure it doesn’t happen for Contentstack users, we now provide the “Trash” feature that stores deleted items for a certain number of days and allows restoring these items before they are automatically deleted permanently. The following explains the Trash feature in detail. The Trash - A Content Recovery Solution The Trash serves as a backup that stores all the deleted items – entries, assets, content types, and global fields – for up to 14 days from deletion. Within this duration, you can restore any deleted items in a single click, and you will find the items just as they were before you deleted them. Another important feature is that you can restore items in bulk for some modules. For example, when restoring a content type, you can restore all the entries that were deleted with the content type. Likewise, you can restore assets while restoring an asset folder. This makes restoring easier, especially if the content type or asset folder contains hundreds of items. An important point to remember while using the Trash is that Items within the Trash are automatically deleted forever after 14 days. So, make sure you restore accidentally deleted items before you lose them permanently. The following explains how to restore content from the Trash. Restore Deleted Items from the Trash To restore deleted items from a stack, perform the following steps: Go to your stack, and then choose Settings > Trash. Click on the Entries tab, and go to the entry you want to restore (e.g., Bio for John Smith). Click on the Restore button that appears at the right. The entry is restored from the Trash and available in the content type where it was earlier. When restoring a content type, you can select the “Restore With Entries” option to restore all the entries that were deleted with the content type. When restoring an asset folder, you can select the “Restore With Assets” option to restore all the assets that were deleted with the folder. Check out the documentation on the Trash feature to understand how it works in Contentstack.

Apr 24, 2020

Define Entry Editing Permissions on Workflow Stages

If your organization has a lengthy content creation lifecycle, a well-defined workflow is like an automated conveyor system that ensures that the progression of tasks is flowing in the right direction. The more control over your workflow, the better you can streamline the content creation process. That’s why we introduced more granularity to control permissions in our workflows. You can now define which users or roles can edit the entries at different stages of the workflow. This ensures that only the right people can edit content at the right stage. The following explains what’s new in our workflows. Set Edit Permissions on Specific Workflow Stages Until now, the “stage transition rules” option in workflow settings allowed developers to define transitioning rules and enabled content creators to easily pass content from one stage to another in the content creation lifecycle. It also ensured that only the authorized users could change the entry stage. However, the actual content, i.e., the entry, was open to everyone for editing, irrespective of the workflow stage it belonged to. This diluted the importance of a workflow. Imagine that the content is in its final stage, ready to be published on your website, and the author makes major changes to the content, or someone accidentally deletes a paragraph at the last minute. It could lead to an unwanted disaster, couldn’t it? Not anymore. We have now added a new option under the workflow settings that lets you define the users or roles that can edit the entry when in a particular stage. For example, you can specify that only the users with the “Editors” role can edit the entry when in the “Review” stage, or only “Media Specialists” can make changes when the entry is on the “Images and Media” stage. This ensures that there is never any unwanted modification to your content, especially by someone who shouldn’t be making the change in a specific stage. Read our documentation on Workflows to get an in-depth understanding of this enhancement. How to Set Edit Permissions on a Workflow Stage To set edit access permissions on an entry that has been moved to a particular workflow stage, follow the below steps: Go to your stack, and then choose Settings > Workflows. Click on the workflow you want to update. Go to the stage you want to edit permissions for, and click on “Stage transition and access rules” to expand the options. Under the Users/roles who can edit the entry in this stage section, select the person or the role that you want to enable edit access (for example, Current stage user(s)). Once you have made the changes, click on Save. This ensures that only the users who are allowed to transition the entry stage from one to the other are allowed to edit the entry in that stage. Read more about adding Workflow stages and setting edit access permissions for specific stages.

Apr 17, 2020

Global Fields Are Now More Powerful and Flexible

Modeling content or defining the structure of your app can be grueling at times. But with the right tools, you can create even the most intricate structures with ease. That’s why, a few months ago, we introduced “Global fields.” A Global field is a reusable field (or group of fields) that you can define once and reuse in any content type of your stack. This makes content modeling easier and more flexible for developers. In our latest release last week, we added more flexibility and capabilities to this field by removing certain restrictions. When creating content types, developers can now add “Reference,” “Group,” and “Modular Blocks” fields, among others, within the Global field. Also, Global fields can now be added within the “Group” fields or can be referenced as blocks within the “Modular Blocks” fields. This opens up a lot of possibilities and saves a vast amount of time and effort for developers. Add “Reference,” “Group,” and “Modular Blocks” fields to Global fields The “Reference,” “Group,” and “Modular Blocks” fields are some of the fields that help you create complex structures. Until now, it was not possible to use these within a Global field, which meant going through the pain of manually creating repetitive structures over and over again. The restrictions have been removed, and you can now add these fields to the Global fields. Let’s look at an example where you might use a Modular Blocks field within a Global field. Most content types, for instance, may require multiple SEO fields, complex taxonomy fields, or embedded web form fields. To avoid adding these fields individually to several content types, developers can create a Global field with a Modular Blocks field within it, and add the above three sets of fields as blocks. Then you add the Global field to all the content types. The content manager can then add the required block as needed while creating entries. Likewise, there are several use cases where developers might use “Reference” and “Group” fields within the Global fields. Read more about Global fields and their limitations. Use Global fields within “Group” fields or as blocks of “Modular Blocks” fields When creating content types, developers can now add Global fields to “Group” fields. Similarly, Global fields can be referenced as blocks within the “Modular Blocks” field. This makes things easier for developers, since using predefined structures within these fields is much quicker than creating them repeatedly. Additional Resources Global Fields Global Fields Limitations Modular Blocks Fields

Dec 10, 2019

Contentstack’s In-App Search Just Got Stronger and More Flexible

We know that a key part of managing content is being able to quickly find it. When an enterprise has thousands of content types and multiple editors, a content solution that requires you to spend time sifting through thousands of loosely-matching records is a major waste of time and money. This is why, at Contentstack, we continuously strive to make our in-app search function more powerful, accurate, and actionable. To that end, we are excited to announce a set of new features that adds more capabilities to our in-app search and helps content managers find content easily. Let’s go through what’s new in this release. Perform Bulk Operations on Search Results We realize that content managers don’t only want to find content using search, they also intend to take action with the results. That’s why we introduced the ability to perform bulk actions on the result set. Content managers can now mark multiple items from the results and either ‘publish’, ‘unpublish’ or ‘delete’ them, or ‘change workflow details’ of entries in bulk. Of these four actions, the first three actions were previously available on the entry list page. We just brought them to our search page for ease of use. Read more about how to publish, unpublish or delete items in bulk. The ‘Change Workflow Details’ action is a new option that we introduced with this release. It allows you to change workflow details (such as stage, assignee, due date, and comments) of multiple entries. Read more about how this option works. Note: The options to perform bulk actions are available for the results of both Basic as well as Advanced searches. Learn how to perform bulk operations on search. Perform Advanced Search within Multiple Content Types Previously, Contentstack’s Advanced Search functionality allowed searching within either a single content type or all content types. With our latest release, you can custom define the scope. You can select multiple content types within which you want to perform the search. This allows content managers to narrow down the search for more accurate results. For example, it is now possible to look for all products that are priced below $500 in the ‘Watches’ and ‘Fragrances’ content types, and exclude results from other content types. Added Support for ‘Workflow Stage’ Option in Advanced Search You can now search for entries based on their Workflow Stage. For example, you need to find all entries that are currently in the “Draft” stage. In your Advanced Search query, you can select the “Workflow Stage” field, use the Is operator, and enter the workflow stage value “Draft” to get a list of all applicable entries. To learn more about how search works in Contenstack, read our documentation on Global Search.

Nov 25, 2019

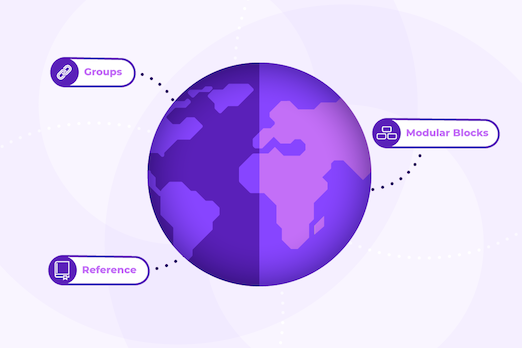
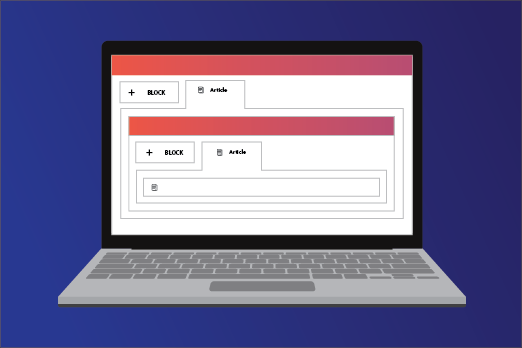
Build Nested Data Structures with Embedded Modular Blocks

Contentstack now allows nesting of modular blocks. This means that developers can, while creating content types, add Modular Blocks within a Modular Block field. This provides content managers with the flexibility to create deeply nested data structures without the need to engage a developer for changes in the content type structure. Modular Blocks Overview Modular Blocks is a field that allows content managers to dynamically create and modify components of a page or app on the go. While creating content types, a developer can add various blocks (a group of fields) within a Modular Block field. For example, ‘Banner’ block (Single-line Textbox and Image fields), ‘Product Details’ block (Title, RTE, and Image fields), or ‘Video’ block (File and Multi-line Textbox fields). Content managers can then, while creating entries, select the required block or multiple blocks from these options, move blocks up or down, and remove them as and when required. This offers content managers the flexibility to create dynamic and rich pages, without needing developers’ help for changes in the content type structure. Read more about Modular Blocks. What’s New: Nested Modular Blocks Previously, nesting was not possible with the Modular Blocks field. This meant that having a Modular Block as a choice for a field in another Modular Block was not possible. With the latest release, it’s now possible. This gives more depth to the flexibility of Modular Blocks, and more power to content managers. Developers can add up to 5 Modular Blocks in a content type, and add up to 20 blocks within each Modular Block field, with the max limit of total fields being 100 for each content type. Only one level of nesting is allowed for the Modular Blocks field. This means that you cannot add a Modular Block field to a Modular Block that is already a part of a Modular Block field. Learn more about the limitations of Modular Blocks. Let’s look at an example to understand this well. You want to offer flexibility to news authors by providing page structures that allow them to create either standard news articles or submit a set of photos. Further, when creating standard news articles, there should be flexibility in the usage of images, image description and body content as required. To achieve this, you can create a content type by adding a Modular Blocks field, and add two blocks within it: “Standard News Article” and “Image Gallery”. Within the first block (i.e., Standard News Article), add another (nested) Modular Blocks field, and add a block each for the following fields: ‘File’, ‘Single Line Textbox’ and ‘Rich Text Editor’. For the “Image Gallery” Modular Blocks field, add a ‘File’ field and mark it as Multiple. Save this content type. Now, while creating entries for this content type, news authors can choose between ‘Standard News Article’ format or the ‘Image Gallery’ format. Further, they can create varieties of Standard News Articles by adding any of the three given fields anywhere in the page multiple times. Another example where Nested Modular Blocks could be used is a super menu navigation of a website where each of the submenus contain a different dropdown structure. Additional Resources Log in to your Contentstack account and try adding a Nested Modular Blocks field to your content type to check out its flexible use cases. For more information, refer to the links below: Modular Blocks Field Add Nested Modular Blocks to Content Types

Nov 18, 2019

Create Reusable Fields Using Global Fields

Last week, we released a feature that gives more power to developers by eliminating manual, recurring work. Introducing: Global fields. What Is a Global Field, You Ask? A ‘Global field’ is a standalone, reusable field (or group of fields) that you define once and reuse in any content type within your stack. An apt use-case is ‘SEO’. You can create a Global field called ‘SEO’ by adding ‘Meta Title’ (Single-line Textbox) and ‘Meta Description’ (Multi-line Textbox) subfields within it. Now, simply add this SEO Global field in any content type, and the subfields will be added automatically. The content within those subfields can be changed per instance, i.e. each blog can have a unique meta description. This eliminates the need to create the same collection of fields repeatedly for different content types. Another important benefit is that Global fields can be managed from a central location. If the developer changes the structure or settings of a Global field, the changes are reflected across all content types where this field is being used. How Global Fields Benefit Developers Let us look at a few situations where using Global fields is particularly helpful. Reduce manual work: Instead of adding and configuring the same field in multiple content types, define a Global field and use this field in multiple content types. This cuts down developers’ time and effort considerably. Auto-update changes: Global fields can be managed from a separate, dedicated section. If a Global field is updated, the changes are reflected automatically in all the content types. This further reduces manual work for developers and gives better control over the fields. When to Use a Global Field Here’s a rule of thumb: While creating a content type, if a field (or a group of fields) takes time to build, and you are likely to create the same field for different content types, it’s best to create a Global field instead, and then reuse this field in the required content types. Global field use cases include: SEO group field Address group field Taxonomy group field Any other field used repeatedly in multiple content types Does Global Field Help Content Managers? Not directly, as it is a feature for developers. However, since it helps accelerate creating and updating content types, it cuts down the wait time for content managers in case of change requests. Visually, a Global field looks like any other field (or a group of fields) to content managers. How to Create and Use a Global Field Perform the following steps to start creating your Global field: Log in to your Contentstack account, and go to stack. Navigate to Settings > Content. Click on the Global Fields tab and then the + New Global Field button. You will be led to the Create New Global Field form. Provide a Name and Description for your Global field, and click on Create and Add fields. You can now drag and drop fields into your Global field, just like you do for content types. Create a new content type, and add a Global field to it. Under Edit Properties on the right-hand side, select the Global field that you want to use. Read more about Global fields.

Oct 22, 2019

Introducing Management Tokens for Content Management API Requests

What Are Management Tokens? Management Tokens are stack-specific, read-write tokens, used along with the Stack API key to make authorized Content Management API (CMA) requests. These tokens are not user-specific and can be used by anyone who has access to these tokens. They can be used to make the create, read, update, and delete requests on all modules of the stack. The stack owner or admin can create such tokens. How Are They Different from Authtokens? An ‘Authtoken’ is also a read-write token used to make authorized CMA requests, but it is a user-specific token. This means that your personal user details are attached to every API request that you make using the ‘Authtoken’. So, if a person were to obtain access to your Authtoken, and knows the Stack API key, this person would be able to make API requests that appeared to be coming from you. Management Tokens, on the other hand, are stack-level tokens, with no users attached to them. They can do everything that Authtokens can do. Since they are not personal tokens, no role-specific permissions are applicable to them. It is recommended to use these tokens for automation scripts, third-party app integrations, and for Single Sign On (SSO)-enabled organizations. Why Use Management Tokens? A relief for SSO-enabled organizationsSince users of SSO-enabled organizations log in to the Contentstack app via Identity Providers (IdP), and not through a traditional login, they do not get an Authtoken for making CMA requests. Previously, the workaround was to disable ‘Strict Mode’, log in using the Email-password combination, and get the Authtoken. Now, Management Tokens solve this problem. Irrespective of the way you log in, you can use Management Tokens to make CMA requests. A token for your scripts and integrations Management Tokens can be used for automation scripts and third-party app integrations, as these tokens can perform all content management actions. This eliminates the need to share your personal Authtoken, thereby cutting down potential security risks. On-demand expiry to mitigate risks If your Stack Management Token has been compromised, there is an option to invalidate the token by changing the expiry date or deleting the token instantly. You can, subsequently, create and use another token as a replacement. A Few Things to Remember: Management Tokens can be created only by stack owner and admin users. While creating a Management Token, you can define if the token should or should not have an expiry date. You can also define if the token has read-only or read-write permissions. A maximum of 10 tokens can be created in a stack. To create more tokens, reach out to our customer support team or your dedicated account manager. A Management Token can be invalidated at will (by the stack owner or admin users) by setting the expiry to the current day or by deleting the token. A management token cannot be used to accept/reject a received publish/unpublish request for an entry. A management token cannot be used to invite users to and remove users from the stack More Resources How to use Management Tokens Different types of tokens

Oct 01, 2019

Asset Folder-Level Permissions and Improved Error Messages

We are excited to introduce our latest feature enhancements, as they are two of the most popular requests by our customers: Asset folder-level permissions and improved error messages on the content type builder page. Control Access to Asset Folders Contentstack offers developers the ability to control users’ access to data through custom roles. In our latest release, we have added more flexibility and granularity to the permissions that developers can assign to roles. In addition to being able to assign permissions to an individual asset, developers can now assign permissions to asset folders for specific roles. Understanding Asset Folder-Level Permissions By default, all users have full access to all the data created within a stack. As a stack owner or developer, you can define different roles with varying permissions and restrict certain users from accessing or writing data within a specific asset folder. For example, the “Marketing” role can be assigned full access to the “Marketing Images” asset folder and read-only access to the “Sales Presentations” asset folder. This is an efficient way to ensure all users with the “Marketing” role can create and update marketing images and can view, but not edit, sales presentation assets. Subfolders Inherit Permissions of the Parent Folder If you assign permissions to a folder, the same permissions are applied to all subfolders and assets within that folder. For example, let’s say that the “Marketing Images” folder contains a “Logos” folder, which contains the subfolders “Old Logos” and “New Logos.” If you assign read-only access to a role for the “Marketing Images” folder, this role will be able to read all assets of the “Marketing Images” folder, including of the subfolders “Logos,” “Old Logos,” and “New Logos.” If you give the same role full access to “Logos”, the role will have full access to “Logos”, “Old Logos”, and “New Logos”, while still having read-only access to all other assets in the “Marketing Images” folder. How to Set Permissions on Asset Folders To set permissions on asset folders, follow these steps: After logging in to your account, hover over the settings gear icon and click Roles. Click + New Role and add a Name and Description. Under Assets in the Permissions section, click + Add rule. Select the required permissions (e.g., Read) in the Select Permissions field. In the next field, select Specific Folders. Click the Select Folders button that appears. You can then choose the folder to which you want to assign the selected permissions. Save the role. Note: The permissions assigned to the parent folder apply to all the assets and subfolders within the selected folder. Read more about asset folder-level permissions. New and Improved Error Messages on the Content-Type Builder Page The next release we would like to introduce has been designed based on customer feedback regarding the validation error messages on the content-type builder page. The feedback we received was that, while these messages were helpful, they were not very user-friendly, especially when dealing with errors within nested fields. In an effort to enhance the experience for our users, we have cleaned and clarified the messages to make it easier for users to quickly identify and fix the errors instead of spending time trying to diagnose them. What Has Been Improved: The validation error messages are now crisper and more user-friendly. Errors within nested fields are now more easily recognizable. Field properties with errors are now clearly listed. With better spacing and alignment, the validation error messages are now easier to read. Here’s the Difference: