Add Taxonomy to a Content Type
Here's a step-by-step guide for adding a taxonomy to a content type in your Contentstack account:
1. Log in to Your Contentstack Account:
Open your web browser and navigate to the Contentstack login page. Enter your credentials to log in to your account.
2. Access Content Models:
Once logged in, you'll be directed to your dashboard. On the left navigation panel, click the "Content Models" icon. Then, either create a new content type or select an existing one where you want to add the taxonomy.
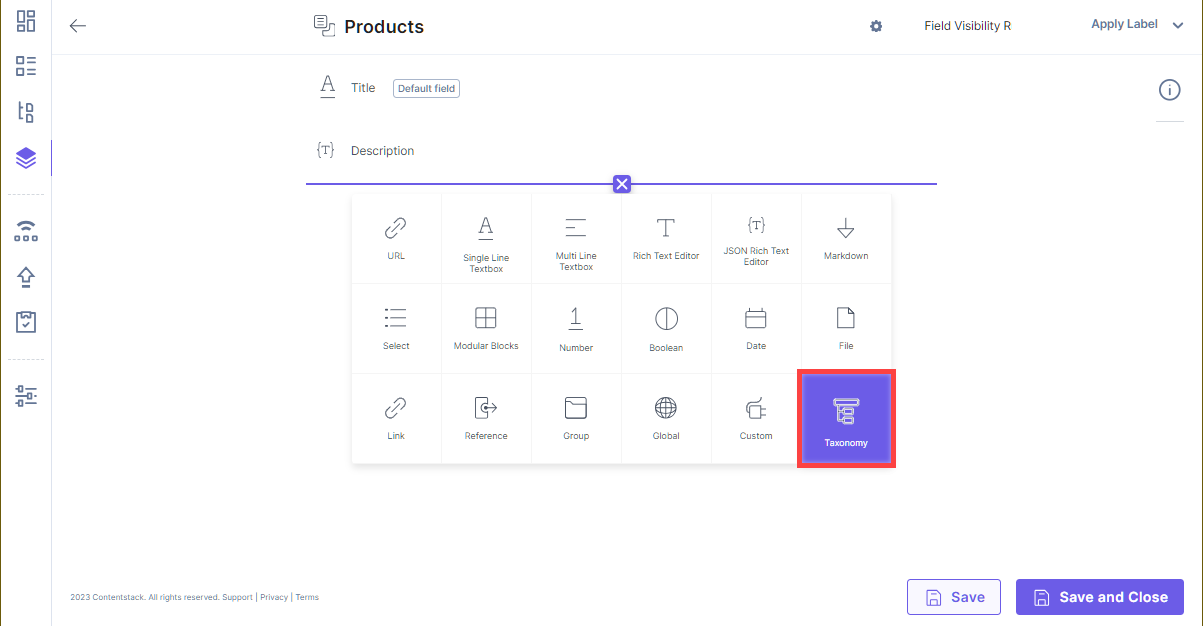
3. Open Content Type Builder:
On the "Content Type Builder" page, you'll see the fields of your selected content type. To add a new field, click the "Insert a field" (+ icon) that appears when you hover the cursor.
4. Select Taxonomy Field:
From the list of available fields, choose "Taxonomy."
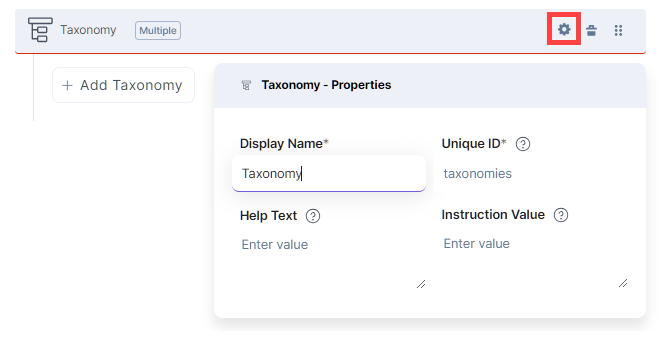
5. Configure Taxonomy Field Properties:
Click on the properties (cog icon) to configure the properties of the taxonomy field.
Note: that the default UID for the taxonomy field is set to "taxonomies" and cannot be updated.
 6. Add Taxonomy:
Click the "+ Add Taxonomy" button. A dropdown menu will appear with available taxonomies within the stack. Select the taxonomy you want to add.
Note: You can include multiple taxonomies within a single taxonomy field in a content type.
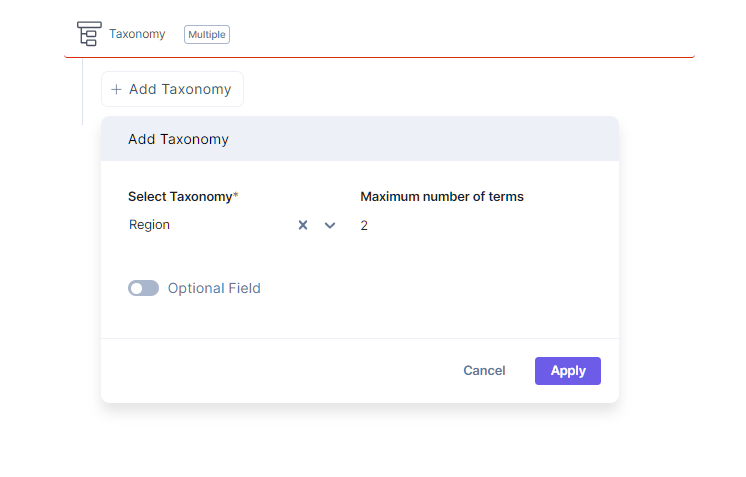
7. Set Maximum Number of Terms:
You can limit the maximum number of terms for the taxonomy field by entering a number in the "Maximum Number of Terms" field.
Note that the maximum number of terms allowed per entry is 25.
8. Make Field Mandatory (Optional):
If you want to make this taxonomy field mandatory, disable the "Optional Field" toggle.
9. Apply Changes:
Once you've configured the taxonomy field according to your requirements, click "Apply" to add the taxonomy to the content type.
11. Start Categorizing Entries:
With the taxonomy field added to your content type, you can begin adding entries and categorizing them using your selected taxonomy.
10. Confirmation:
Upon successful addition, you'll receive a confirmation message. You can now see the taxonomy field included in your content type.
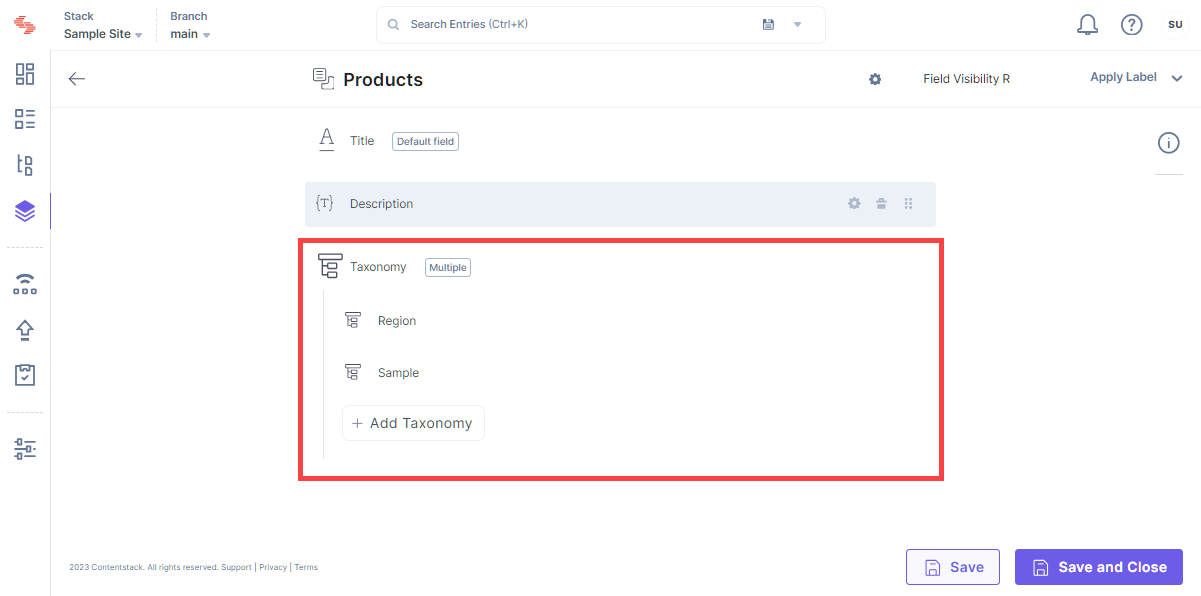 By following these steps, you can seamlessly integrate taxonomy into your content types and efficiently organize your content.