

.svg?format=pjpg&auto=webp)
.svg?format=pjpg&auto=webp)
.png?format=pjpg&auto=webp)


.png?format=pjpg&auto=webp)
Introducing “Gatsby Preview” – Preview Content Changes in Real Time
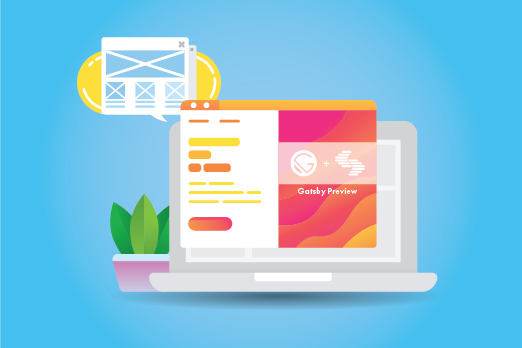

We’re excited to announce Gatsby Preview — the newest addition to our Experience Extension family. The “Gatsby Preview” widget makes it easier for content managers to instantly preview content changes on their “Contentstack + Gatsby” websites.
Gatsby, a modern framework for building blazing fast websites and web apps, offers “Preview” to let editors view content changes as soon as they’re made. This is a powerful tool for Gatsby-powered websites.
Since you can build incredible websites with Gatsby and Contentstack, accessing “Gatsby Preview” from the CMS to view changes makes a lot of sense. The result: Contentstack introduces the Gatsby Preview pre-built widget extension. Use this extension (embedded within our product), to preview content changes in real-time.
Here’s a walkthrough of how to set up a blazing fast website using Gatsby and Contentstack headless CMS, and how to use this extension within your stack.
Step 1 – Set up your “Contentstack+Gatsby” Site
Step 2 – Set Up Gatsby Preview for Your Site
Step 3 – Add “Gatsby Preview” widget to your stack
Step 4 – Test Your Gatsby Preview instance
Step 1 – Set up Your “Contentstack+Gatsby” Site
To use the “Gatsby Preview” widget extension, it is imperative to set up your site using Gatsby. The source code of the site needs to live on GitHub.
To get started with creating your “Contentstack+Gatsby” site, perform the steps given below:
- Set up your site using Contentstack’s starter kit: The Contentstack provided gatsby-starter-contentstack starter kit that lets you build your “Contentstack+Gatsby” site with ease.
Note: Skip this step if you’re using an existing “Contentstack+Gatsby” site. - Establish a connection between Contentstack and Gatsby Preview: Use the gatsby-source-contentstack plugin to establish a connection between Gatsby Preview and Contentstack. This plugin pulls data from Contentstack and displays it on Gatsby Preview.
For a detailed explanation, refer to the Getting started with Gatsby Preview and Contentstack documentation.
Step 2 – Set Up Gatsby Preview for Your Site
Next, authorize Gatsby Preview to access your Gatsby site. Click on Sign in with GitHub and sign in to Gatsby Preview with your GitHub credentials.
Select Your GitHub Repository
Once authenticated with Preview and GitHub, create a preview instance from the dashboard/sites/create page. This instance URL is where you will be seeing your content changes.
Click on Select a repository, select your Organization, and then, select your site’s GitHub repository from the list or by using the search bar.
Configure Your Gatsby Site
Provide Gatsby Preview with the branch and publish directory that includes the gatsby-config.js file.
Note: If you leave the repository field blank, it defaults to the root of the site.
Set Up Environment Variables in Gatsby Preview and Contentstack
Base URL after generating the “Preview” instance URL that will be generated.
Then, click on Create Preview Site on Gatsby to create your instance of Gatsby Preview.
This creates a shareable instance of Gatsby Cloud configured with environment variables. Now, update the Base URL of your Contentstack “Preview” environment with this instance URL.
Configure Preview Webhooks
Add preview webhooks in Contentstack that will notify Gatsby Preview whenever you make changes to your website.
To do so, copy the webhook URL in the Settings page of your Gatsby Preview instance, and pass it in the URL to notify the field of your “Gatsby Preview” webhook in Contentstack. You can add multiple webhooks for different events, such as create, update, delete, publish, and unpublish, that you can perform on your content. Read more.
Next, integrate the Gatsby widget within your Contentstack stack.
Step 3 – Add “Gatsby Preview” Widget to Your Stack
When creating a new extension in your stack, click on Pre-built, and select the “Gatsby Preview” widget.
In the details page, provide the necessary details for the widget as per your requirement. When setting up the configuration details, make sure you pass the “Gatsby Preview instance URL” under the “siteUrl” parameter.
You are now ready to use it in your entry.
Step 4 – Test Your Gatsby Preview Instance
Create an entry and select Gatsby Preview from the Widgets dropdown on the top. This opens the Widget sidebar. Click on the Open Preview button to open the Gatsby Preview instance URL. Once you open this URL, all the changes that you publish to your entry can be previewed instantly on this URL. Do not close the page until you are done working on the content.
More Information
For more information on this headless CMS widget, you can read the following articles:
About Contentstack
The Contentstack team comprises highly skilled professionals specializing in product marketing, customer acquisition and retention, and digital marketing strategy. With extensive experience holding senior positions at renowned technology companies across Fortune 500, mid-size, and start-up sectors, our team offers impactful solutions based on diverse backgrounds and extensive industry knowledge.
Contentstack is on a mission to deliver the world’s best digital experiences through a fusion of cutting-edge content management, customer data, personalization, and AI technology. Iconic brands, such as AirFrance KLM, ASICS, Burberry, Mattel, Mitsubishi, and Walmart, depend on the platform to rise above the noise in today's crowded digital markets and gain their competitive edge.
In January 2025, Contentstack proudly secured its first-ever position as a Visionary in the 2025 Gartner® Magic Quadrant™ for Digital Experience Platforms (DXP). Further solidifying its prominent standing, Contentstack was recognized as a Leader in the Forrester Research, Inc. March 2025 report, “The Forrester Wave™: Content Management Systems (CMS), Q1 2025.” Contentstack was the only pure headless provider named as a Leader in the report, which evaluated 13 top CMS providers on 19 criteria for current offering and strategy.
Follow Contentstack on LinkedIn.

Recommended posts


