

.svg?format=pjpg&auto=webp)
.svg?format=pjpg&auto=webp)
.png?format=pjpg&auto=webp)


.png?format=pjpg&auto=webp)
Easily Integrate with Your Marketing Technologies with Contentstack CMS Custom Fields
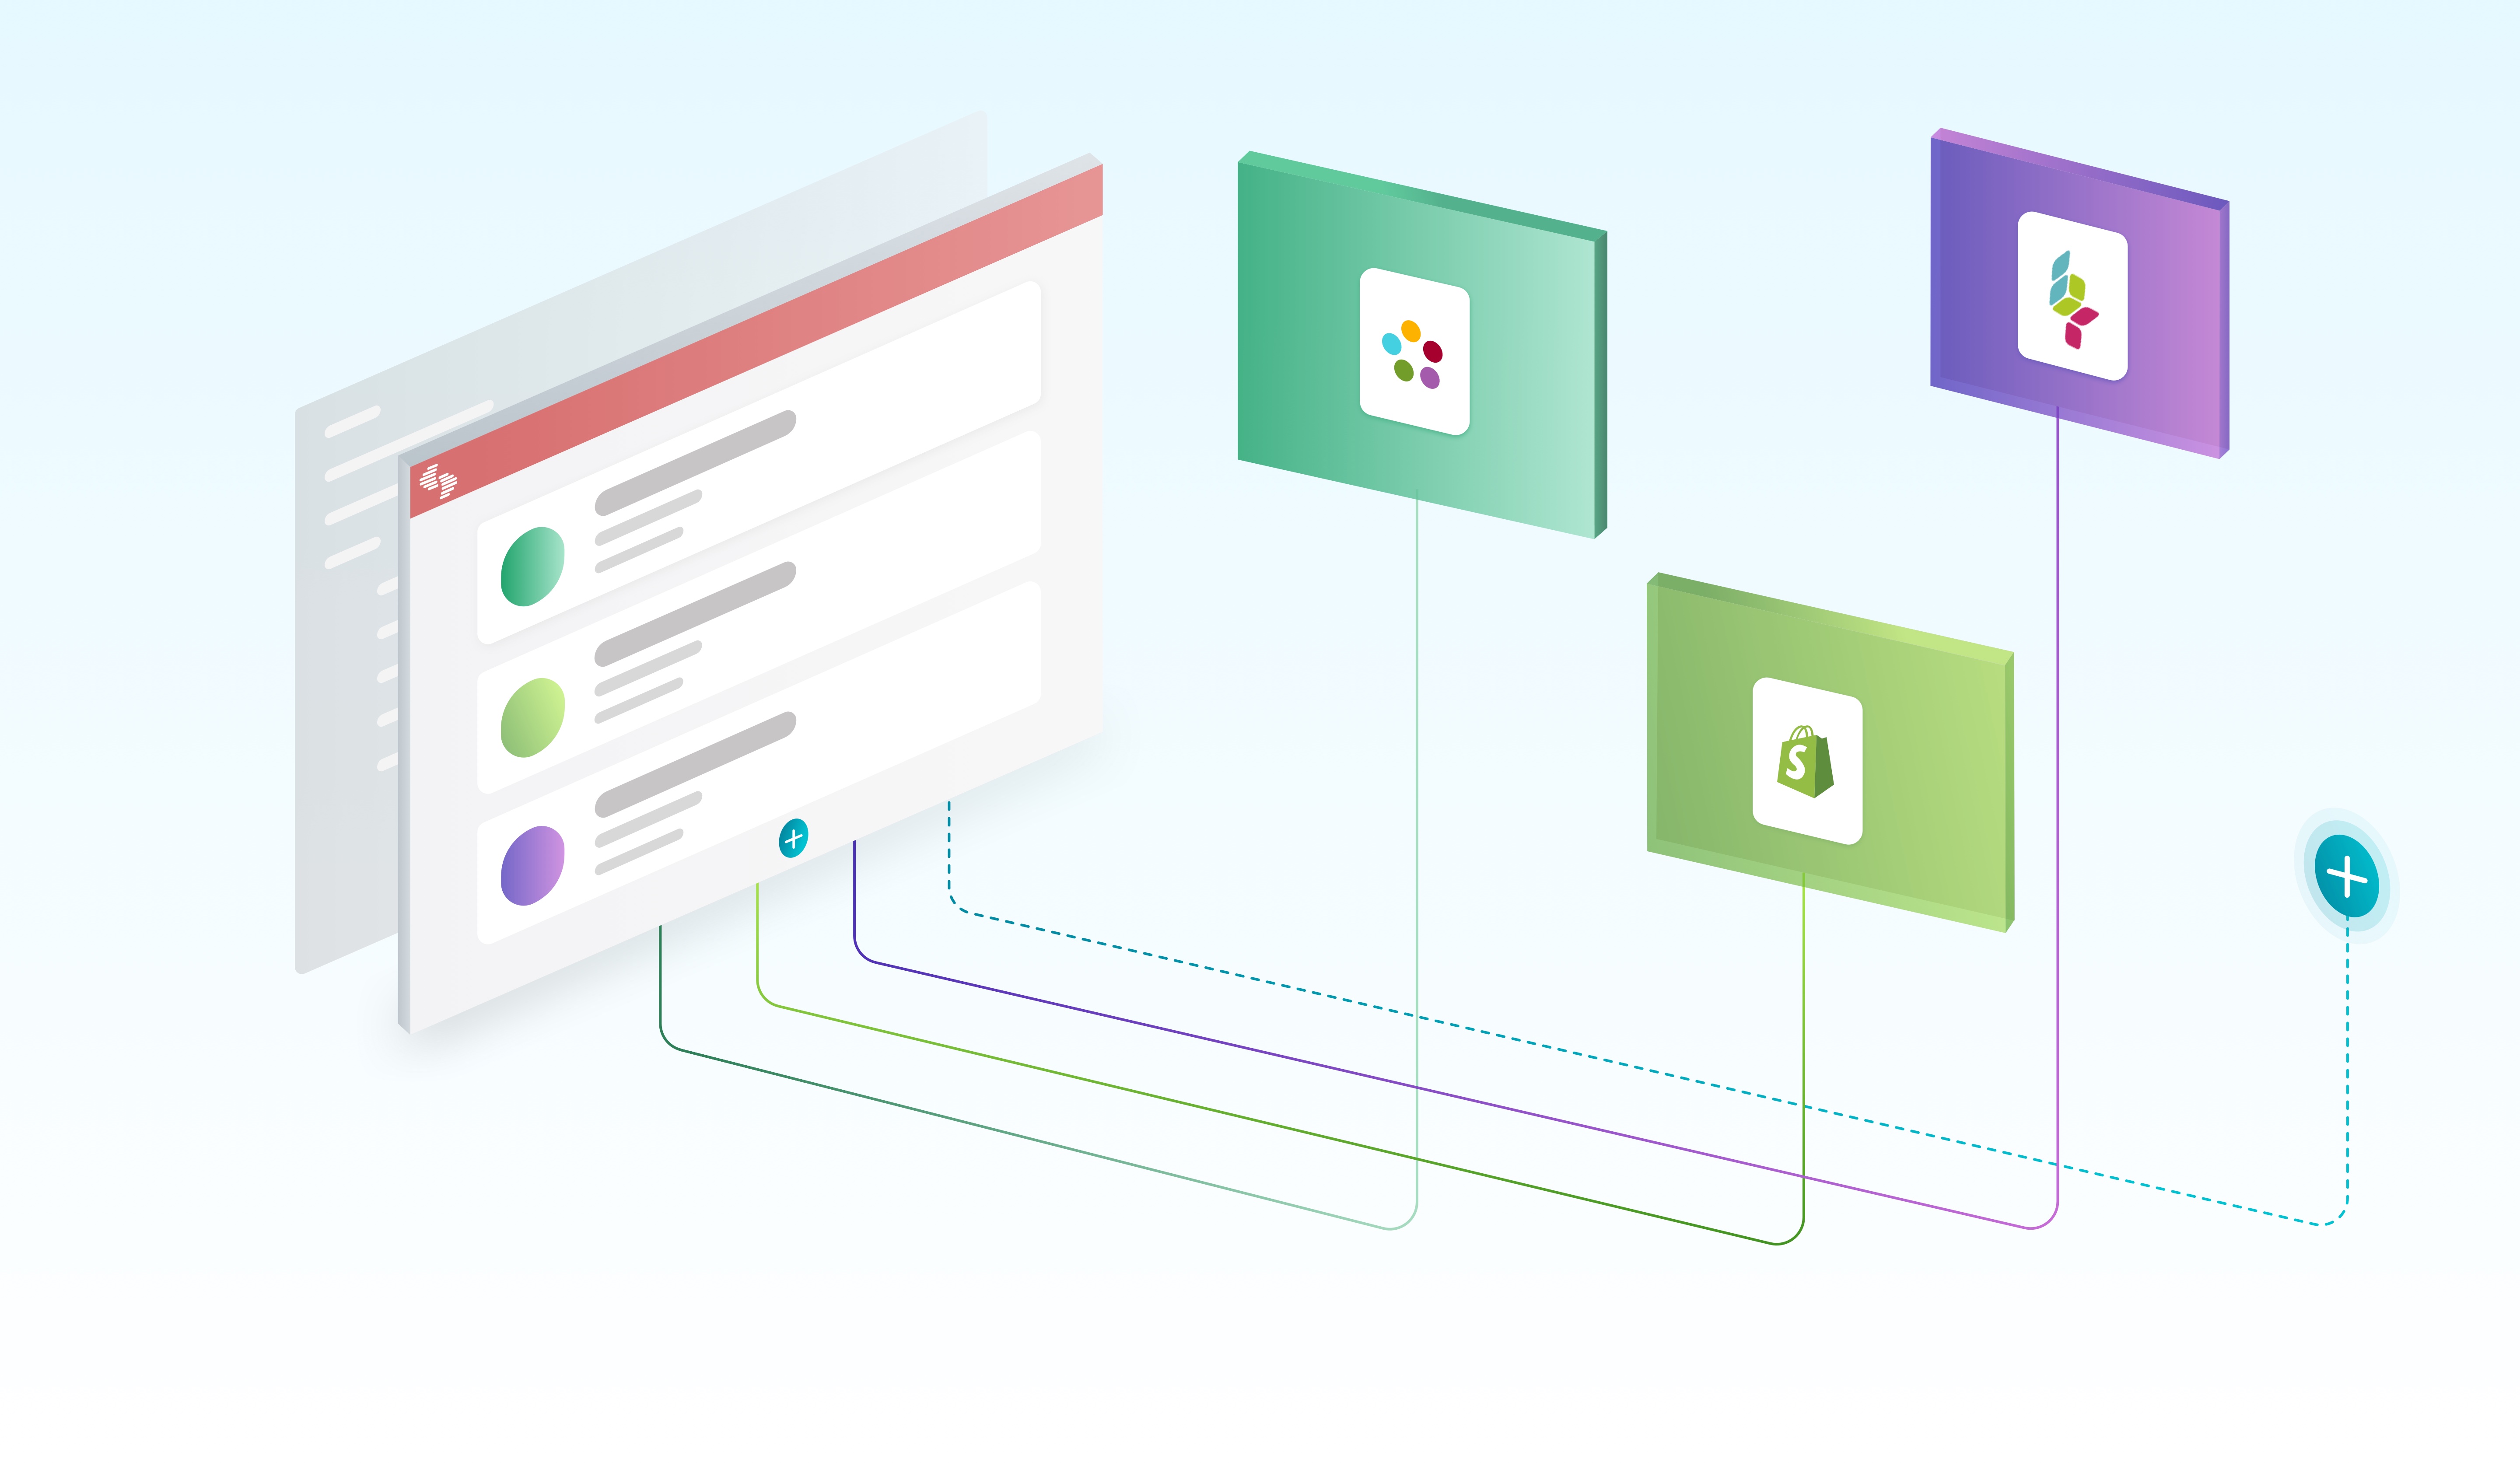

This is one of our biggest announcements ever: Contentstack introduces Experience Extensions, a series of features and a new integration architecture to extend the capabilities of Contentstack. Experience Extensions allows the content editor experience to be customized and extended. It also allows Contentstack developers to create richer content experiences for their end-user audiences. This is big news in the CMS world, where traditionally you were limited to the capabilities provided by a single vendor’s CMS product or suite, or you would create a custom CMS stack using a mix of third party and open source plugins. The latter typically resulted in a ‘Frankenstein’ CMS stack that was both difficult to support and scale.
Custom Fields for Custom Needs
In the first installment to Experience Extensions, we just released a feature called “Custom Fields." As the name implies, a Custom Field allows a developer to create a non-standard field (i.e., one that isn’t provided by Contentstack’s editor by default). It provides a place to capture new information or properties about a content entry and can be either static or dynamic in nature. After a developer creates the Custom Field, content managers can use it as part of their content updates, i.e., creating or editing content entries.
You can add just about any kind of field—from simple ones such as a color picker for your ecommerce site or a YouTube video selector for your video streaming site to more complex ones such as video editors or a selection field that fetches values through APIs—in your content types.
Imagine the power it gives to you.
This flexibility for developers, in turn, makes the CMS more rewarding and valuable for content managers. They are no longer bound to the predefined fields or UI that Contentstack offers. Adding a new custom field is as simple as forwarding your request to the developer of your stack (and writing a few lines of code on the developer’s end).
What Can You Build with Custom Fields?
A lot.
Since it accepts custom code, you can create just about any kind of field. Let’s look at some common types of custom fields that you can create and use.
Star Rating field – Provide ratings by selecting stars
This field lets a user provide a rating (e.g., three out of five) through selecting visual stars. When stars are selected, it saves a corresponding integer in the CMS backend.
Video selector – Browse and select videos
This field displays the visual interface of a video platform – such as Brightcove or Ooyala – to the user. The user can browse videos and select the required one from the available videos directly from within Contentstack’s editor.
Conditional fields — Auto populate list of states based on a selected country
When an option is selected in the ‘Country’ field (e.g., US), the other field ‘Languages’ automatically populates the languages of that country (e.g., English, Spanish, French, Chinese). The user can then choose from the options provided.
Color picker – Pick a color from a list of options
This displays a set of colors to choose from. When a color is chosen, the corresponding color code or color ID is saved in the backend. This is ideal for e-commerce sites where the user can pick a color for the selected shirt or t-shirt.
Photo capturer – Capture images through the device’s camera
This field lets the user capture photos through the device’s camera. The photos may be saved as assets in the backend. It is ideal for food review forms, customer feedback forms, etc.
Code editor – Input and edit any code in the code editor
This field provides a code-editor interface to users for entering code. It helps the user format the code and enter relevant syntaxes, methods, etc.
Key-value field – Enter a key and a corresponding value in the field
The user can provide a key and associate a value with it.
Product Catalog – Search external product databases
This displays all the products of your e-commerce website to the Contentstack user within the field. The user can simply pick any product as the value of that field.
Add Marketo / Salesforce cookie – Track user interaction across web/Marketo/Salesforce
This field lets you track the details/information of the users of your website, Marketo account or Salesforce account by simply dropping in a .JS code snippet.
Marketo Tracking – Apply lead scoring
Pull the Marketo code snippet and add it to the contentstack global content type.
Integrate field storage system – Fetch files saved in your DAM
This field fetches and displays the files that you have saved in your DAM platform, e.g. Egnyte. The user can then browse these files and select the required one from the available options.
How do Custom Fields and Experience Extensions Work in Contentstack?
Working with Custom Fields as part of Contenstack’s Experience Extensions is easy. Contentstack provides an Experience Extensions SDK that has all the functions and methods that you will need. This SDK is the link between your custom Experience Extension and Contentstack. Learn more about the Experience Extensions SDK.
Your custom code, which resides inside an ‘iframe,’ communicates with Contentstack through the SDK. Contentstack lets you include its design stylesheet so that your custom field’s design blends perfectly with our UI. Learn how to configure your custom code.
You can either use one of the pre-built templates provided by Contentstack or create a new one from scratch. Let’s look at an example where we create a color picker field.
In Contentstack, under ‘Extensions,’ create a new Extension, and provide the HTML code as shown below.
<html>
<head>
    <meta name="viewport" content="width=device-width, initial-scale=1.0"/>
    <script src="https://www.contentstack.com/sdks/contentstack-ui-extensions/dist/latest/ui-extensions-sdk.js"></script>
    <link href="https://www.contentstack.com/sdks/contentstack-ui-extensions/dist/latest/ui-extension-sdk.min.css" rel="stylesheet" type="text/css" media="all">
</head>
<body>
    <input type="color" id="html5colorpicker">
</body>
</html>
You can see that we have included Contentstack’s stylesheet in the code so that your customization doesn’t look out of place. We have also included the Experience Extensions SDK in the next line.
Next, you need to provide the custom code of your extension. Here’s the sample code for the ‘Color Picker’ custom field.
<html>
<head>
    <meta name="viewport" content="width=device-width, initial-scale=1.0"/>
    <script src="https://www.contentstack.com/sdks/contentstack-ui-extensions/dist/latest/ui-extensions-sdk.js"></script>
    <link href="https://www.contentstack.com/sdks/contentstack-ui-extensions/dist/latest/ui-extension-sdk.min.css" rel="stylesheet" type="text/css" media="all">
</head>
<body>
    <input type="color" id="html5colorpicker" onchange="colorChange()">
    <script>
      // initialise Field Extension
      window.extensionField = {};
      // find color input element
      var colorPickerElement = document.getElementById("html5colorpicker");
      ContentstackUIExtension.init().then(function(extension) {
          // make extension object globally available
          extensionField = extension;
          // Get current color field value from Contentstack and update the color picker input element
          colorPickerElement.value = extensionField.getData();
      })
        // On color change event, pass new value to Contentstack
        function colorChange(){
          extensionField.field.setData(colorPickerElement.value);
        }
    </script>
</body>
</html>
The ‘set.data’ method is the most crucial element of the code given above. It fetches and saves the given input value in Contentstack.
Once you have configured the code, go to the Content Type builder, and look for the ‘Extension’ field on the left-hand side panel. Drag it onto your content type. In the dropdown list, you will now see the Custom Field that you just added. Select it and save the content type.
Now, when content managers create an entry for this content type, they will see the Custom Field within the entry page.
Do More with Experience Extensions and Custom Fields
With Experience Extensions, possibilities are endless. Read our documentation to get started with this feature. You can create a new Custom Field from scratch—see our step-by-step tutorial—or use our pre-built templates to get started instantly. And watch this space for even more enhancements to follow soon!
About Contentstack
The Contentstack team comprises highly skilled professionals specializing in product marketing, customer acquisition and retention, and digital marketing strategy. With extensive experience holding senior positions at renowned technology companies across Fortune 500, mid-size, and start-up sectors, our team offers impactful solutions based on diverse backgrounds and extensive industry knowledge.
Contentstack is on a mission to deliver the world’s best digital experiences through a fusion of cutting-edge content management, customer data, personalization, and AI technology. Iconic brands, such as AirFrance KLM, ASICS, Burberry, Mattel, Mitsubishi, and Walmart, depend on the platform to rise above the noise in today's crowded digital markets and gain their competitive edge.
In January 2025, Contentstack proudly secured its first-ever position as a Visionary in the 2025 Gartner® Magic Quadrant™ for Digital Experience Platforms (DXP). Further solidifying its prominent standing, Contentstack was recognized as a Leader in the Forrester Research, Inc. March 2025 report, “The Forrester Wave™: Content Management Systems (CMS), Q1 2025.” Contentstack was the only pure headless provider named as a Leader in the report, which evaluated 13 top CMS providers on 19 criteria for current offering and strategy.
Follow Contentstack on LinkedIn.

Recommended posts


