Scheduling Repeatable Releases Using Management APIs and AWS Lambda
Releases in Contentstack help you to create a set of entries or assets you want to deploy (for publishing or unpublishing). This is, however, a manual task where you need to create a release and add items to it. If you add items to a release frequently this manual process can be cumbersome.
In this guide, we will look at the steps required to create an automated system for scheduling repeatable releases using AWS Lambda and Contentstack's Content Management APIs.
Once the system creates a release automatically, you can add items (entries and assets) to it, and they will be deployed automatically at the scheduled time. This is a continuous process where the release gets created every day, and if there are items added to it, they get deployed.
Process Overview
In this example, we will use two Lambda Functions: one for creating a release and another one for deploying the release. The “create release” lambda function will create a new release for every new day. For example, a release will be scheduled every midnight after 12:00 AM, a new day, and create a release for this specific day using the Releases API.
Note: You can change the date as per your convenience, but ensure that it is after 12:00 AM or a new date 00:01 (24 hr format).
In the following image, you can see that Thu May 14 2020 is the release name and created by using the Create Release Lambda function every new day for entries and assets required to be deployed on that day, that is, “Thu May 14 2020.
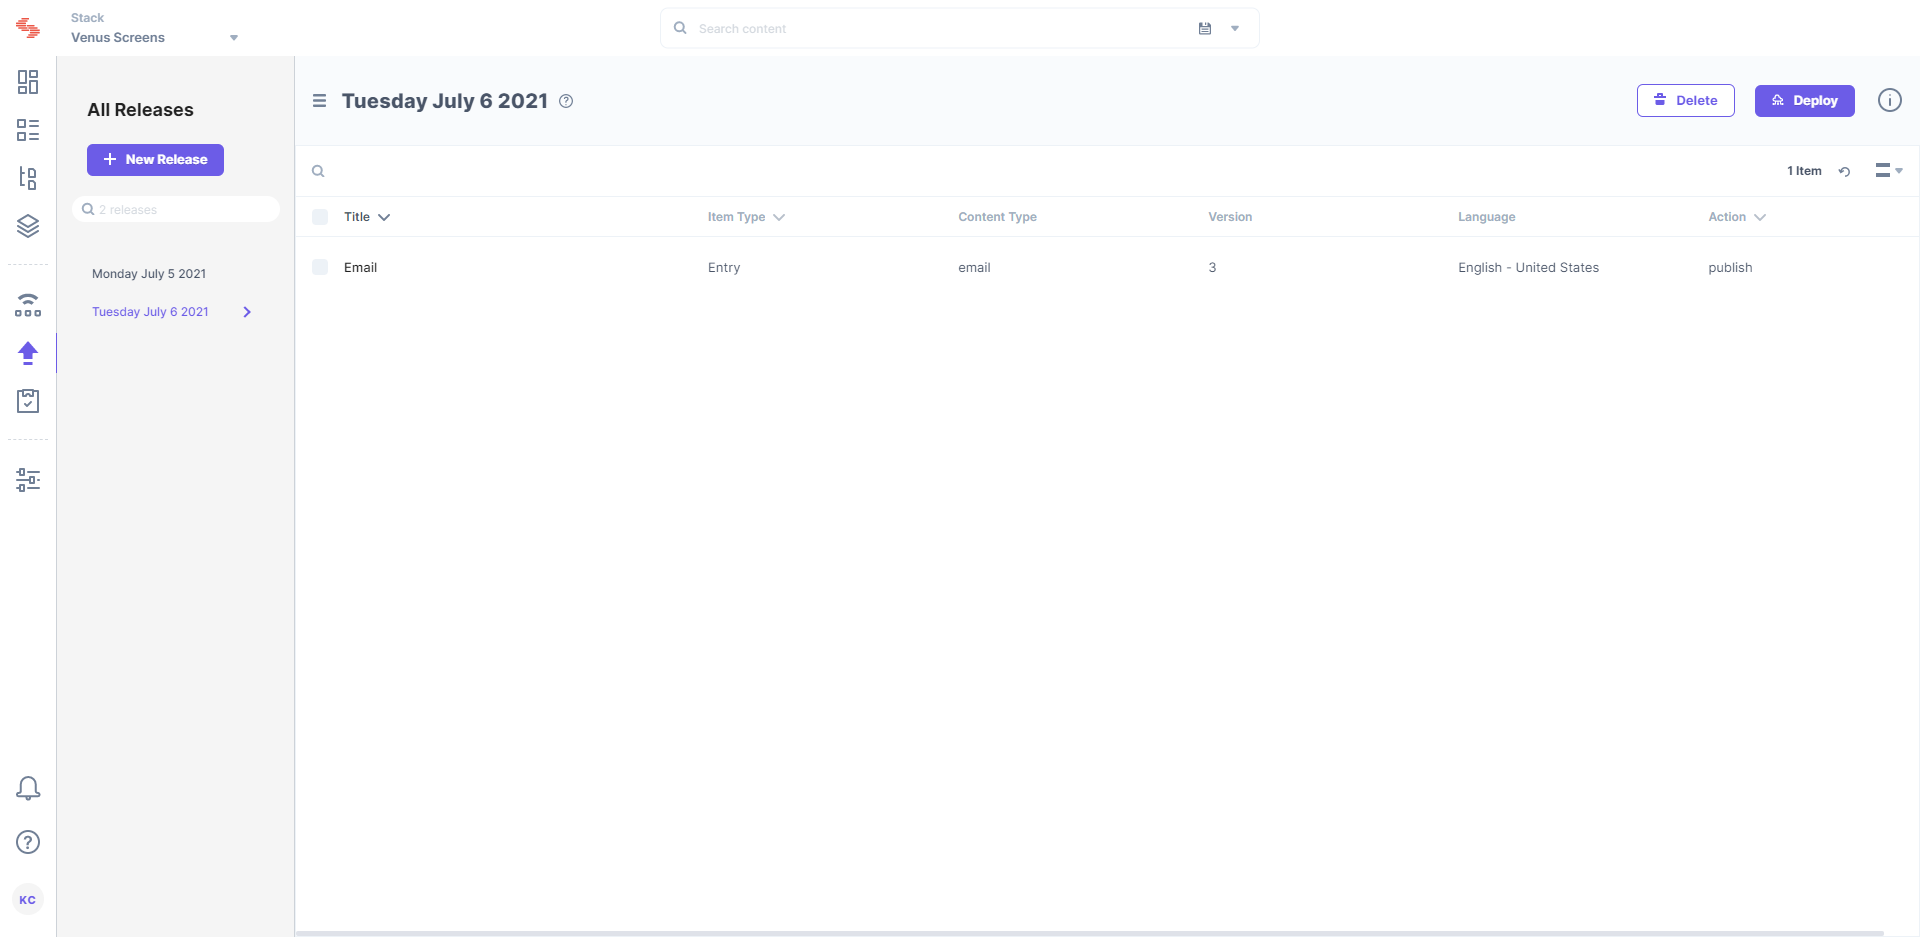
The Deploy Release Lambda Function deploys the release created on that specific date. For example, if the release is scheduled for “Thu May 14 2020,” the Deploy Release lambda will look for a release created for that day.
If the lambda function detects any release for the scheduled day, it then fetches that release’s UID and checks for any entries/assets within the release. And if there are any entries or assets within that release, it deploys the release. If there are no entries or assets for deployment in the release, it does nothing as there is nothing to deploy.
The next day, the Create Release lambda function will be triggered again to create another release. And this continues making it repeatable. If the release with entries and assets is deployed, it locks the release (as shown in the above screenshot), and you cannot access it for adding new entries or assets (it will be disabled).
Note: These lambda functions can be “enabled” or “disabled” to stop lambda from creating and deploying releases.
Prerequisites
- Contentstack account
- AWS account and access to AWS Lambda
- Working knowledge of AWS Lambda
- AWS CloudWatch events access
- Knowledge of CRON expression for scheduling Lambda Function in CloudWatch Events
Steps for Execution
- Generate Management Token
- Download the code
- Set up the Create Release Lambda Function
- Set up the Deploy Release Lambda Function
- Try out the Setup
Let's now move ahead with the steps and create the required system.
-
Generate Management Token
For the Lambda function to create and deploy release(s), you’ll need a management token having read and write access. To generate one, perform the steps specified in the Generate Management Token guide.
-
Download the Code
-
Download the code for the Create Release and Deploy Release lambda functions from our Github page.
-
Unzip the downloaded code and open your terminal (command prompt). Point it to the createRelease code folder, and run the following command to install the required dependencies:
npm install
-
Likewise, install dependencies for the deployRelease code folder as well.
-
Finally, zip the createRelease and deployRelease code folders as you’ll need to upload them to AWS Lambda.
-
-
Set up the Create Release Lambda Function
Perform the following steps to set up a lambda function that will help us create the releases automatically:
- Login to your AWS Management Console and select Lambda from the Services list.
- On the Functions page, click on the Create function button to create a lambda function.
- Then, on the Create function page, select the Author from Scratch option, enter the Function name, and choose Runtime as the latest version of Node.js.
- Click on the Create function button. The function is now created and we will now upload the code for our function.
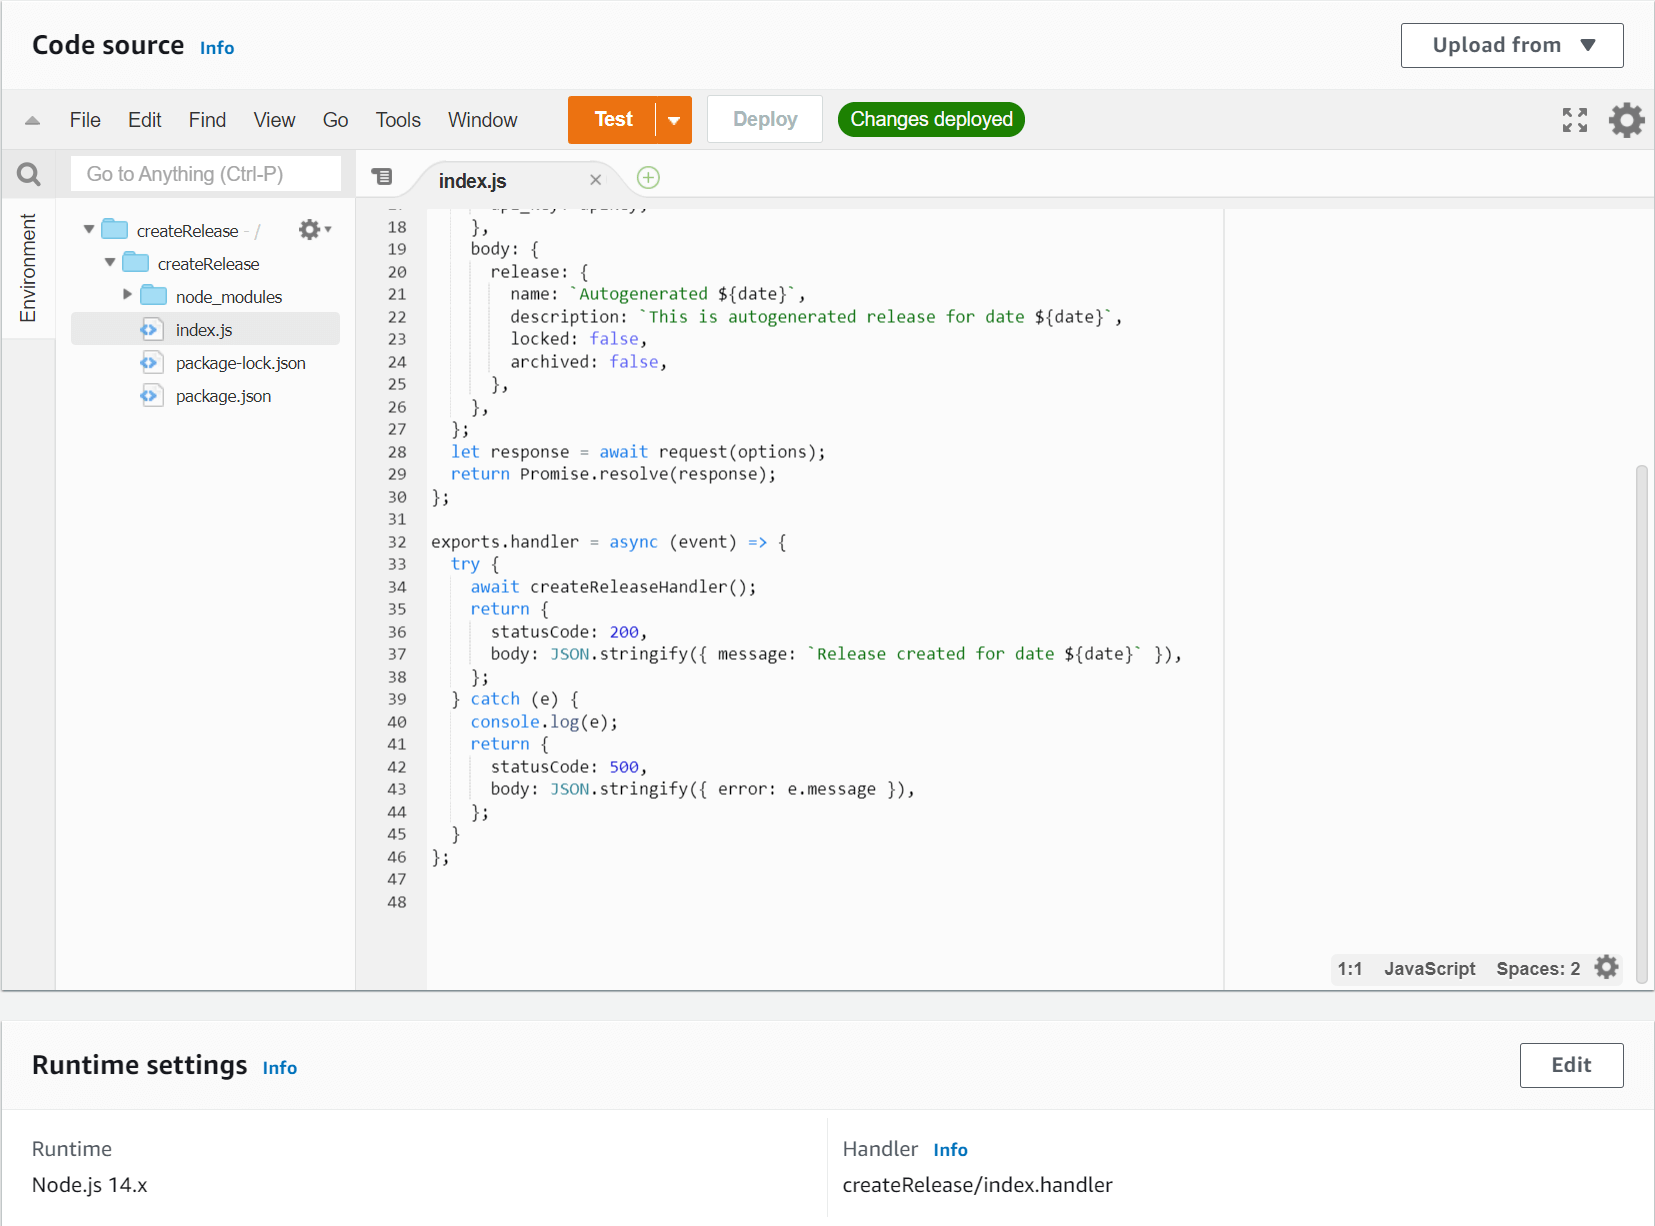
- Now scroll down to the Code source section, click on the Upload from dropdown menu, select the .zip file option, and upload the createRelease.zip file.
- Keep Handler as createRelease/index.handler and click on Save. The code editor section should look similar to the following:
-
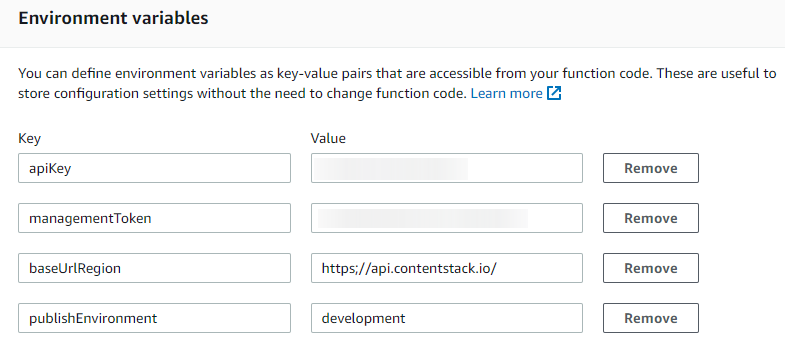
To add environment variables, go to the Configuration tab, click on Environment variables, then click Edit button, and then add the following environment variables:
- apiKey: API key of your stack.
- baseUrlRegion: For North American region: https://api.contentstack.io/. For Europe region: https://eu-api.contentstack.com/. For Azure NA region: https://azure-na-api.contentstack.com/. For Azure EU region: https://azure-eu-api.contentstack.com/.
-
managementToken: Value of the management token generated in Step 1

- Once you have added these environment variables, click on Save.
With these steps, we have set up our Lambda Function. Let's now move ahead with creating a trigger for this Lambda Function. - Next, create a trigger that forms a connection between Contentstack and Lambda function. To do so, on your lambda function’s page, in the Function overview section, click the + Add trigger button.
- From the Trigger configuration dropdown menu, select the EventBridge (CloudWatch events) option.
- Select the Create a new rule option, enter a name for the rule, and add an optional description to the rule
- Select Rule type as Schedule expression.
- Then, provide this “CRON” expression in order to trigger the lambda at a scheduled time: cron(00 01 * * ? *)
- Ensure to check the Enable trigger option and click on Add.
Additional Resources: Refer to Cron-Generator and AWS-guide-on-using-cron for more information. Also, refer to the AWS guide on How-to-schedule-lambda-using-cloudwatch-events.
For the Create Release Lambda Function, the scheduled cron expression that we just set will trigger on cron(00 01 * * ? *), that is, at 1:00 AM (which will be on a new day). You can adjust the scheduled cron expression but make sure it is on a new date, that is, after 12:00 AM.
Note: You can use cron or rate expression to create self-trigger rules on an automated schedule in CloudWatch Events. All your created scheduled events use the UTC time zone with the minimum precision of 1 minute for the schedule.
After you have set up the trigger, this is how it will look in the Lambda dashboard: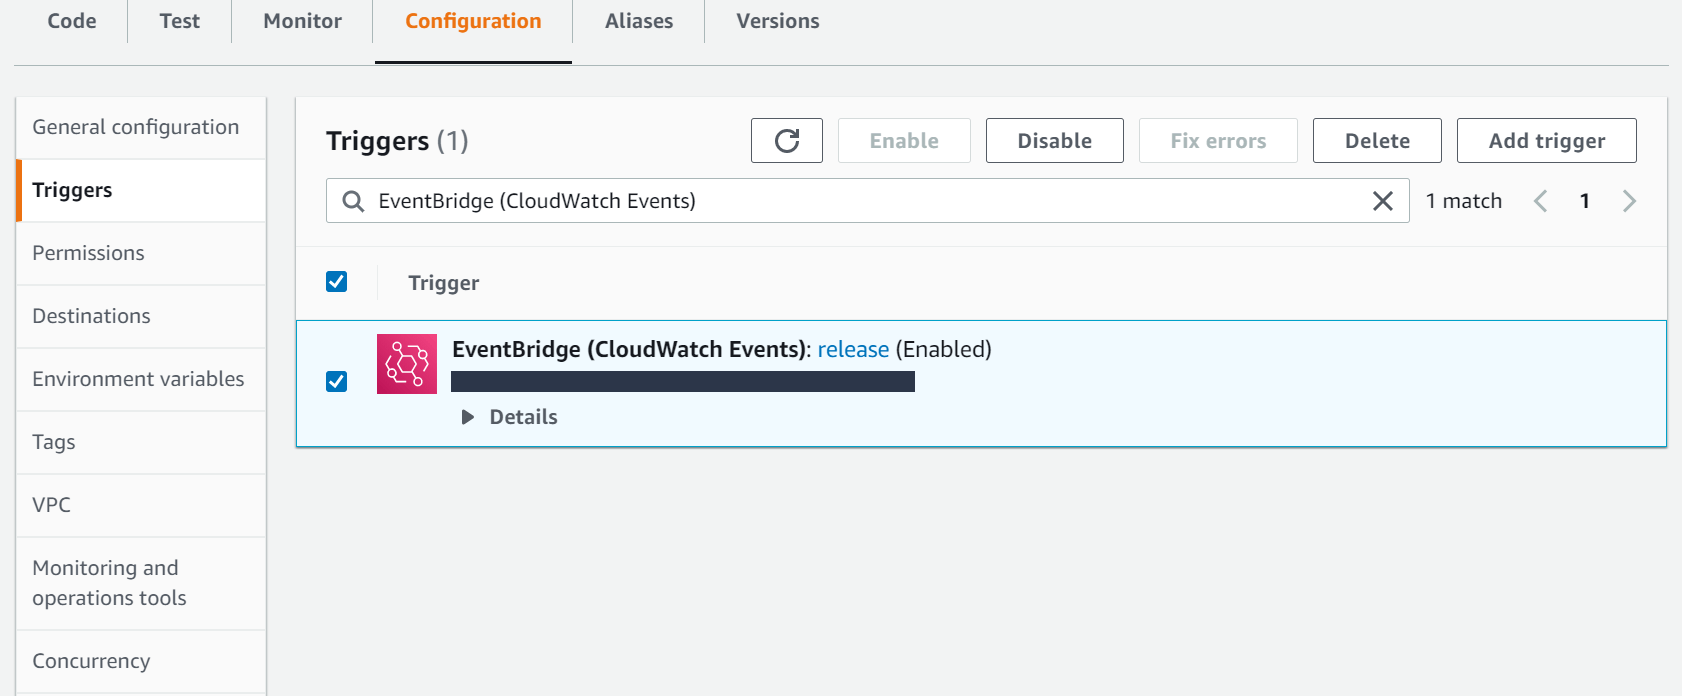
Note: You can disable or enable events rules using the options shown in the above screenshot.
-
Set up the Deploy Release Lambda Function
Perform the following steps to set up a lambda function to deploy release automatically:
- Go to the Lambda functions page and click on the Create function button.
- Then, on the Create function page, select the Author from Scratch option, enter the function name, and choose Runtime as the latest version of Node.js.
- AWS Lambda provides an inline code editor where you can write your lambda code or upload your code folder. To do so, scroll down to the Code source section, click on the Upload from dropdown menu, select the .zip file option, and upload the deployRelease.zip file.
- Keep Handler as deployRelease/index.handler and click on Save.
-
To add environment variables, go to the Configuration tab, click on Environment variables, then click Edit button, and then add the following environment variables:
- apiKey: API key of your stack.
- baseUrlRegion: For North American region: https://api.contentstack.io/. For Europe region: https://eu-api.contentstack.com/. For Azure NA region: https://azure-na-api.contentstack.com/. For Azure EU region: https://azure-eu-api.contentstack.com/.
- managementToken: Value of the management token generated in Step 1
-
publishEnvironment: Environment name where you want to deploy the items added to release
Note: If you plan to deploy your release on multiple environments, you can click on the Add environment variable button and add more environments. If you have added more environment for deployment make sure to add the name of those environments in the deployRelease code as shown:
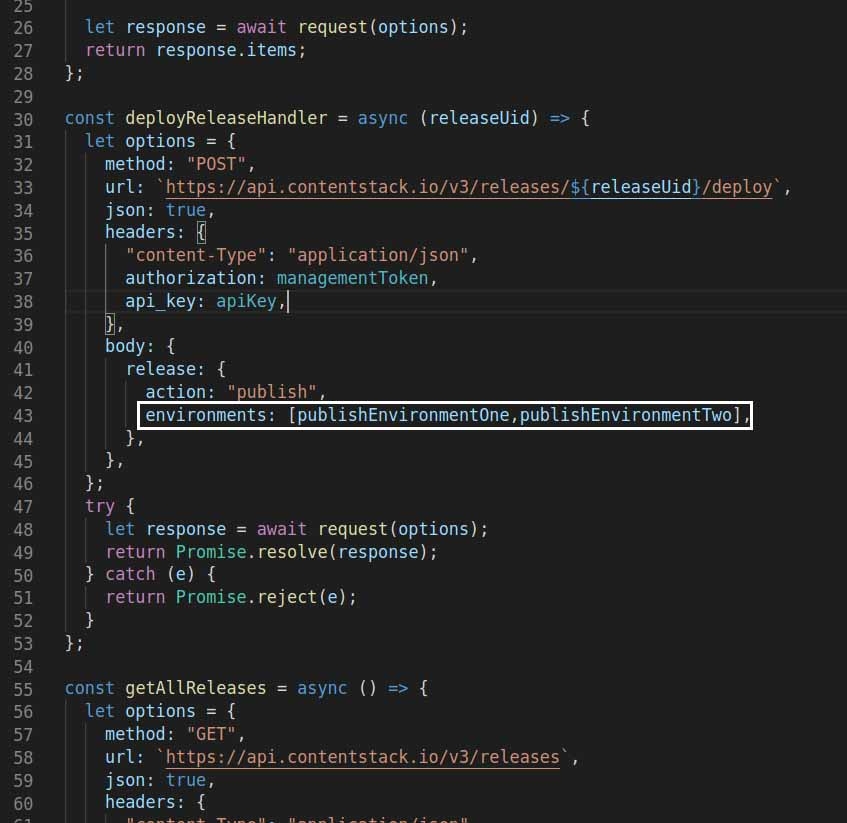 In the above code, publishEnvironmentOne and publishEnvironmentTwo are the names of our multiple environments.
With these steps, you’ve configured the lambda function to deploy the release. Let's now add a trigger to this lambda function.
- To create a trigger, on your lambda function’s page, in the Function overview section, click the + Add trigger button.
- From the Trigger configuration dropdown menu, select the EventBridge (CloudWatch events) option.
- Select the Create a new rule option, enter a name for the rule, and add an optional description to the rule.
- Select Rule type as Schedule expression.
- Then, provide a “CRON” expression in order to trigger the lambda at a scheduled time.
The cron expression used for deployRelease lambda function is cron(40 23 * * ? *), that is, the lambda will trigger at 11:40 PM or 23:40 (24 hr format).
You can change it based on your requirement but make sure that the date on which “createRelease” is created and the date on which “deployRelease” is triggered should be of the same date/same day. - Ensure to check the Enable trigger option and click on Add.
-
Once you configure the trigger, you’ll get the following page:
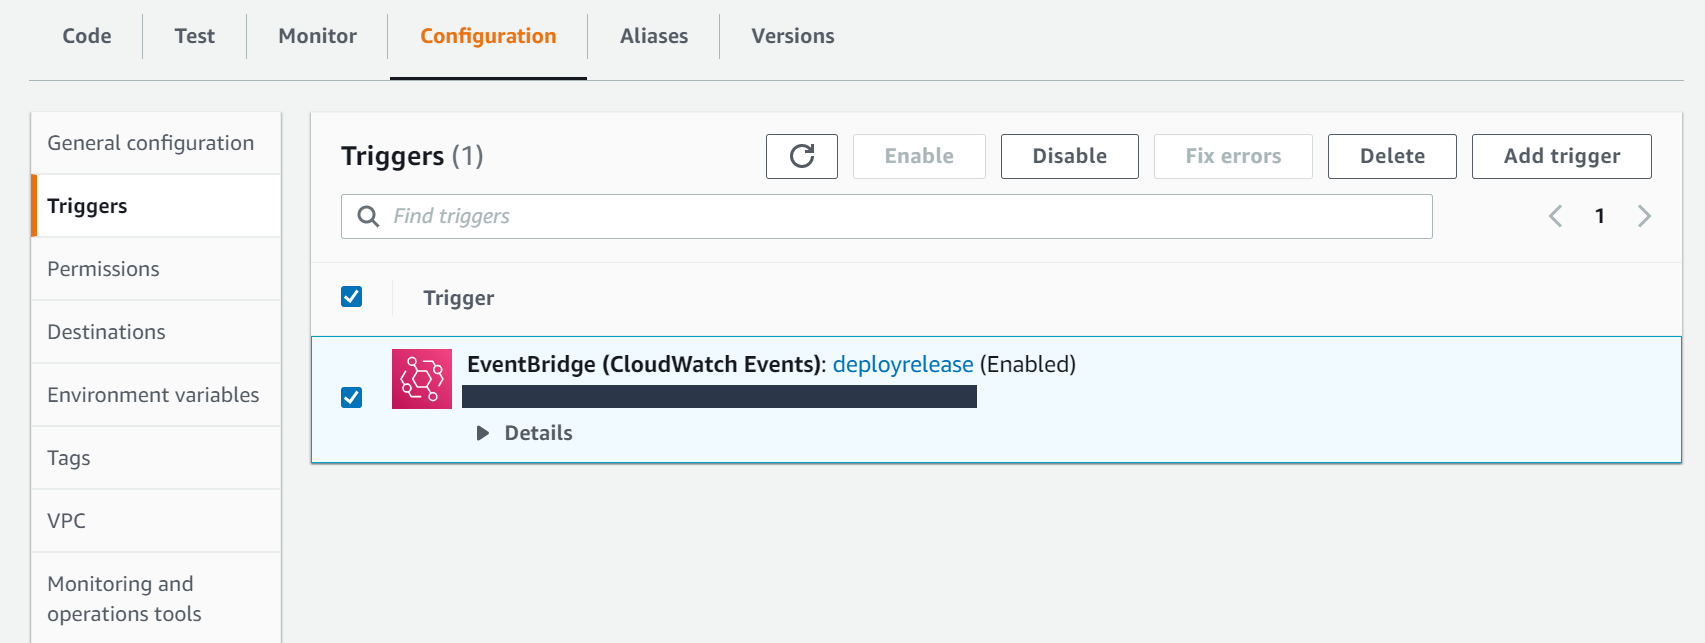
Note: You can disable or enable events rules using the options as shown in the above screenshot.
-
Try out the Setup
With these steps, we have the set up ready. On the scheduled time and date, the lambda function to create release will be invoked, thus creating a release. Likewise, the lambda function to deploy a release function will be invoked at the scheduled time, deploying the release if it contains any entries or assets.
Once the release is created, this is how appears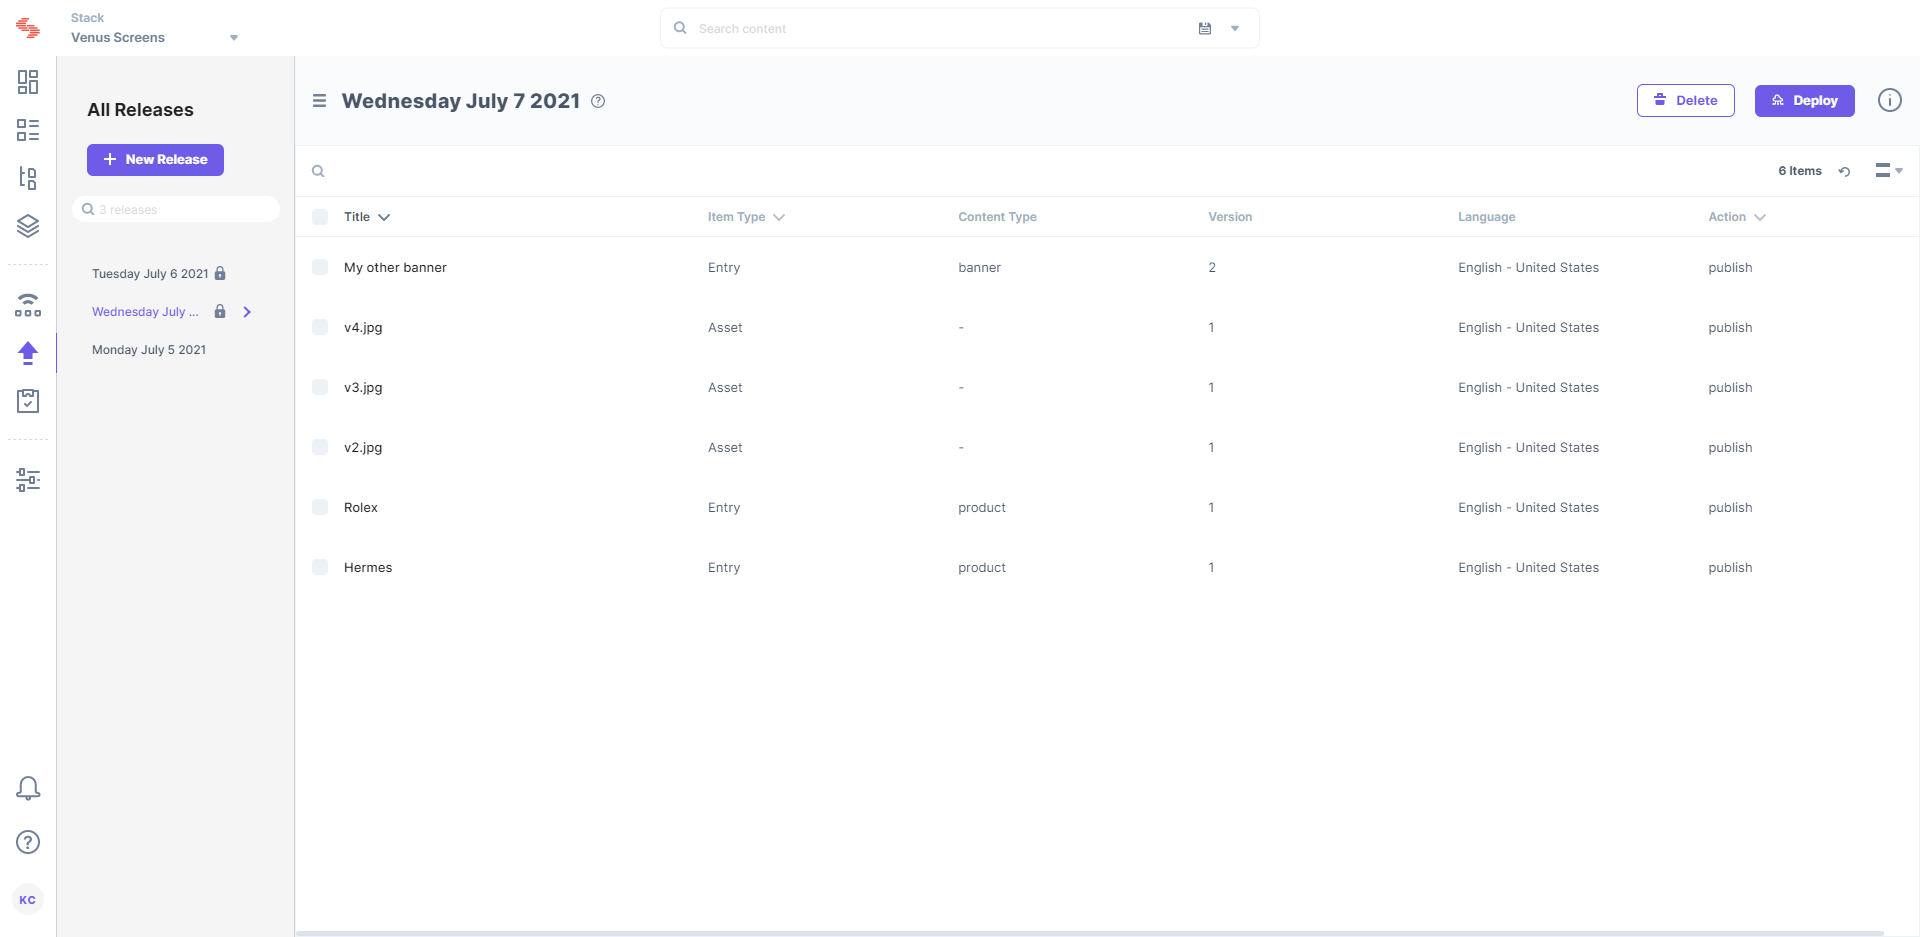
More Resources
We have created various other guides that cover the use of AWS Lambda functions. You may refer to our Webhook Integrations page for more details.


.jpg?format=pjpg&auto=webp)


