Create a Global Field
To understand how to use Global fields, let us try and create the “Address” Global field such that it can be used to enter address details of multiple employees within an organization.
Note: Global fields added or updated will be specific to a particular branch. For example, if you create an SEO global field within the development branch, you will be able to use or access this global field only within the development branch. Refer to our Branch-specific Modules document for more information.
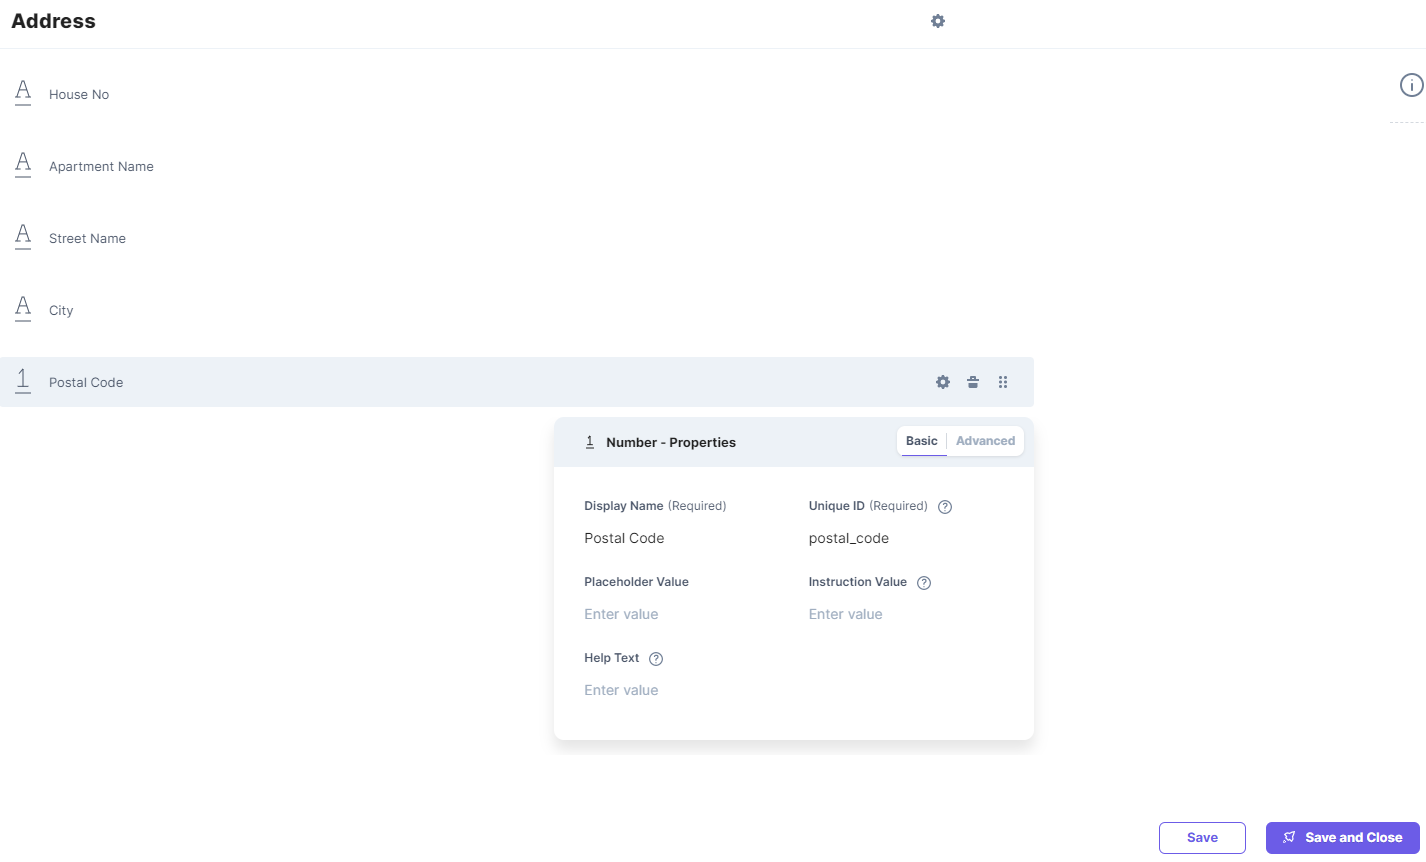
Consider that the “Address” Global field consists of the following fields:
- House No
- Apartment Name
- Street Name
- City
- Postal Code
All the entries in the “Address” Global field will share the same attributes. However, they will have different content.
To create a Global Field, log in to your Contentstack account, go to your stack, and perform the following steps:
- Click on the “Content Models” icon on the left navigation panel, and select Global Fields at the bottom.
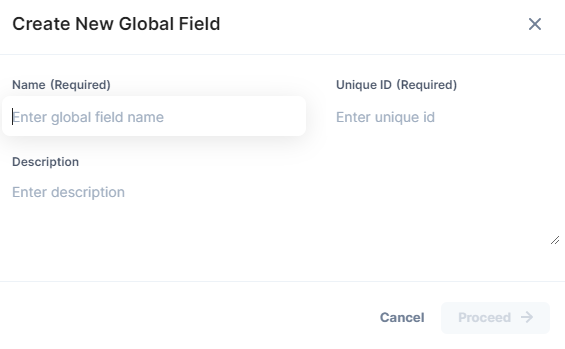
- Click on +New Global Field. This will direct you to the Create New Global form as shown below:

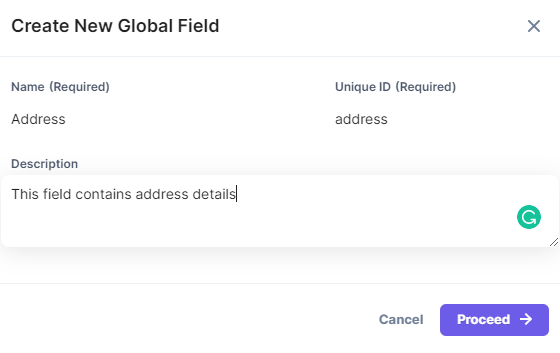
- Name the Global field Address and provide a suitable Description.

Tip: Refer to the Restricted keywords for UIDs section to understand which keywords aren't used as UIDs for Global fields.
- Click on Proceed.
Now that you have created the Global field, let us add fields and modify its properties as per your requirements.
The Global Field Builder page does not contain any fields by default. We will add fields such as “House Number,” “Apartment Name,” “Street Name,” “City,” and “Postal Code.”
To add custom fields to your Global field, click on the “Insert a field” icon and select the fields from the Fields list that appear.
Let us go through the steps to add each of these fields.
- For the House No field, use the Single Line Textbox field.
- Drag and drop the Single Line Textbox field for Apartment Name.
- Use the Single Line Textbox field for Street Name.
- Drag and drop the Single Line Textbox field for City.
- Finally, we will use the Number field for Postal Code.
- Click on either Save or Save and Close.
Modify the behavior of your added fields by clicking on the respective fields and editing their properties which you can access by clicking on the “settings” gear icon.
Your finished “Address” Global field should be something similar to the following screenshot:

API Reference
Refer to the Create a Global Field API request to perform the Create action via API.


.jpg?format=pjpg&auto=webp)

