Working with Branches | About Aliases
What are Aliases?
Contentstack introduces a powerful feature allowing users to assign aliases to branches within their stack. These aliases serve as pointers, allowing an application to point directly to an alias instead of a branch.
Aliases offer a streamlined approach to front-end application development by providing an alternative means to reference branches. Developers can circumvent the need for extensive code modifications by defining a target branch for an alias. Moreover, aliases facilitate flexibility by enabling developers to redirect them to different target branches as needed, ensuring the application renders content from the specified branch.
For instance, consider a scenario where a stack incorporates a "production" alias, directing to the "main" branch. Contentstack automatically generates backups of the merged branch during merges for added safety. In case of any issues, redirect the "production" alias to the new "backup" branch, ensuring uninterrupted operations.
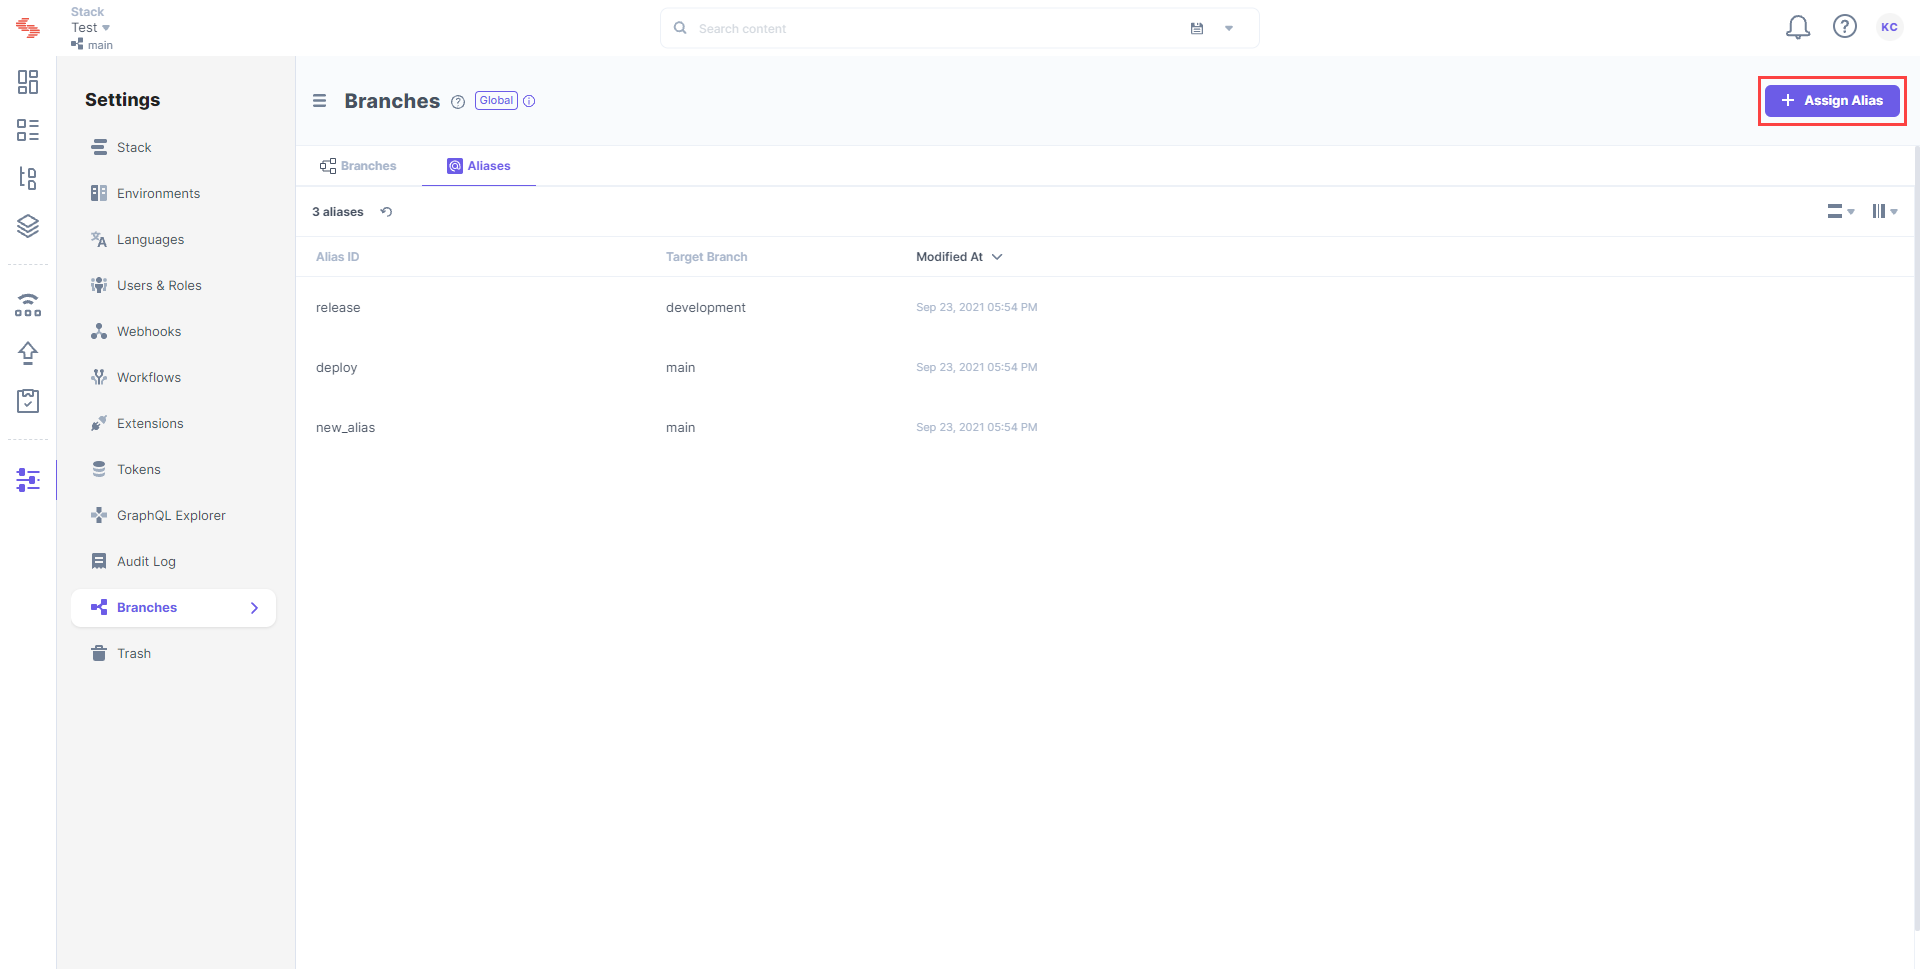
Effective management of aliases is essential for optimizing branch workflows. Users can conveniently manage their stack's aliases through the dedicated Aliases section, allowing seamless navigation and configuration.
Assign an Alias to a Branch
An Alias helps point to a particular branch in your stack. When your alias points to a specific branch, that branch acts as the primary branch from which you deliver content to your website. You can display the modifications made in this branch on your website without altering any code.
To create an alias, log in to your Contentstack account, go to your stack, and perform the following steps:
-
Click the “Settings” icon on the left navigation panel, select Branches, and click on the Aliases tab.
-
Click on + Assign Alias.
-
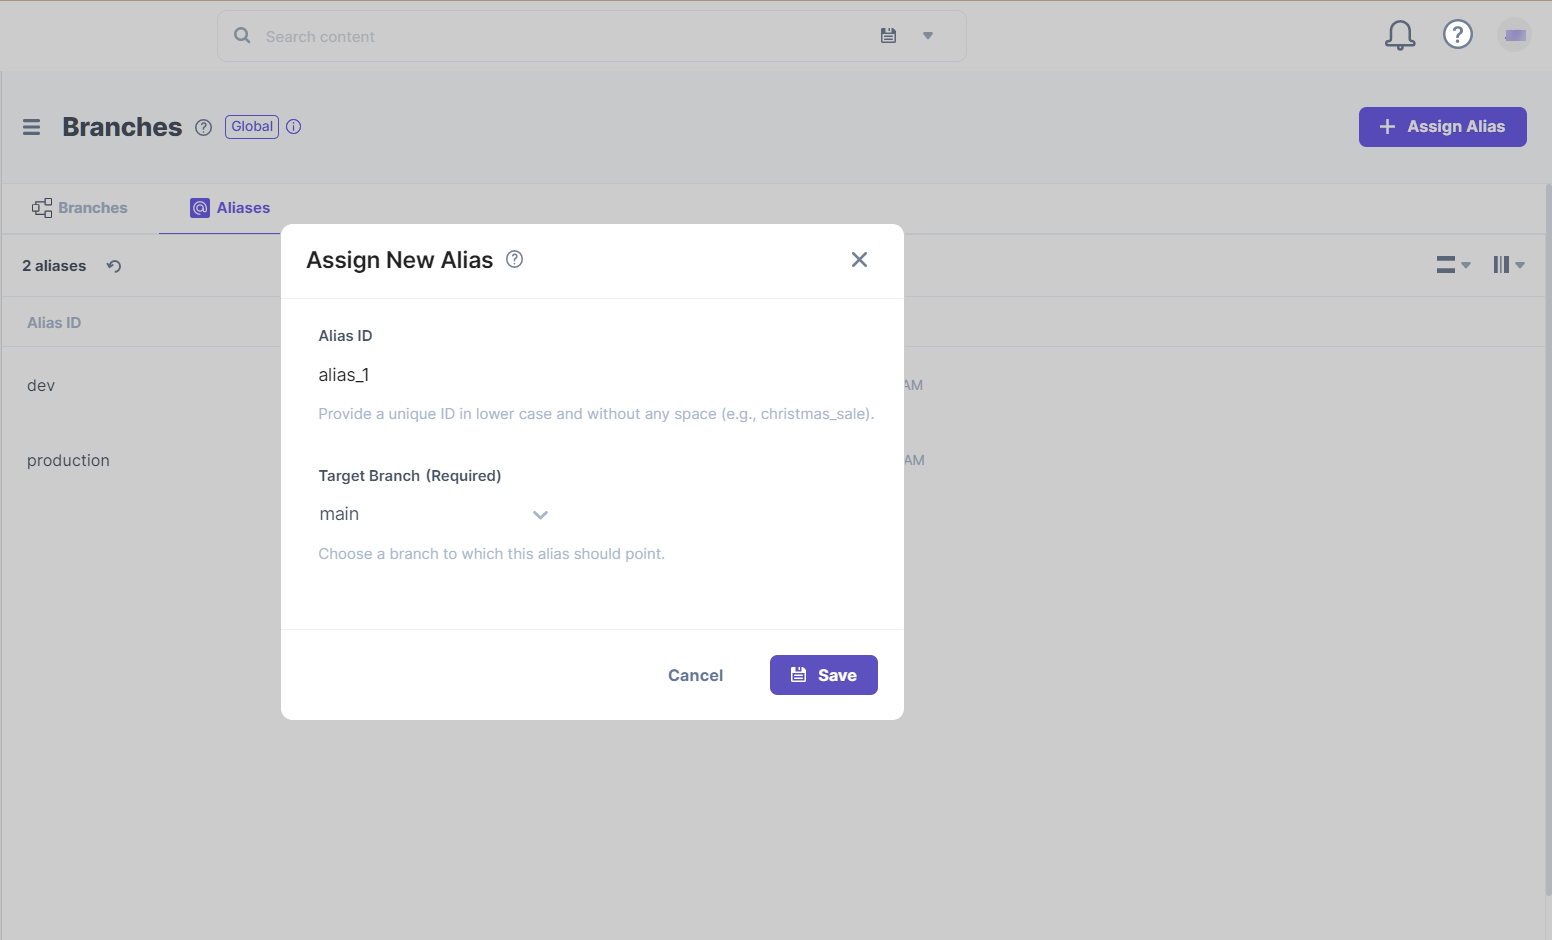
The Assign New Alias form appears for you to add the following details:
-
Alias ID: Enter a name for the alias, such as “alias_1,” “manager_alias,” or so on.
-
Target Branch: Select a branch you want your alias to point from the dropdown.
-
-
Finally, click Save to save your alias.
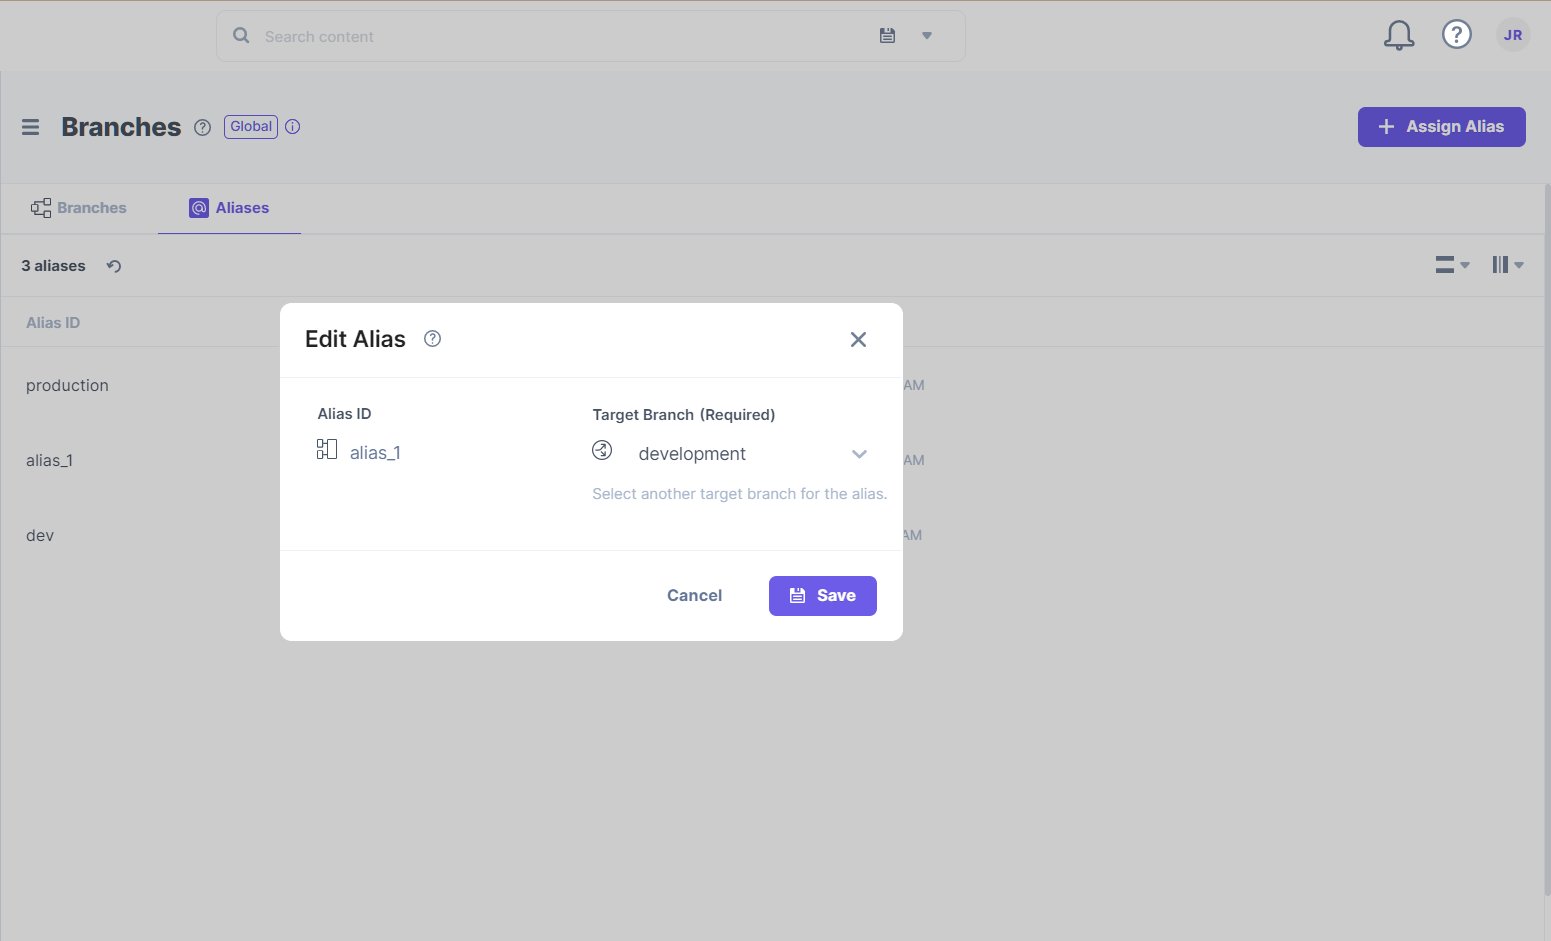
Edit an Alias
Once created, you can edit an alias to make changes, such as edit the name and description, or change the target branch.
To edit an alias, log in to your Contentstack account, go to your stack, and perform the following steps:
-
Click the “Settings” icon on the left navigation panel, select Branches, and click on the Aliases tab.
-
Hover over the alias you want to edit, and click on the “Edit” icon (pencil) that appears at the extreme right.

-
The Edit Alias form opens up, and you can also see the current target branch. Change the target branch to suit your needs.
Note: Once you edit and assign the alias to another branch, it will stop pointing to the existing target branch and instead point to the newly selected target branch.
-
After making the necessary changes, click Save to save your changes.
Note: An Alias can point only to a single branch at a time.
Note: The content from the new target branch can now be displayed on your website.
Deleting an Alias
Contentstack allows you to delete an alias that you created in your stack.
Note: Unless you are the Owner or Admin of the stack, you cannot delete aliases created by other stakeholders.
To delete an alias, log in to your Contentstack account, go to your stack, and perform the following steps:
-
Click the “Settings” icon on the left navigation panel, select Branches, and click on the Aliases tab to view the list of available aliases.
-
Hover over the alias you want to delete, click the “More Options” icon (three vertical dots) at the extreme right end, and select Delete.
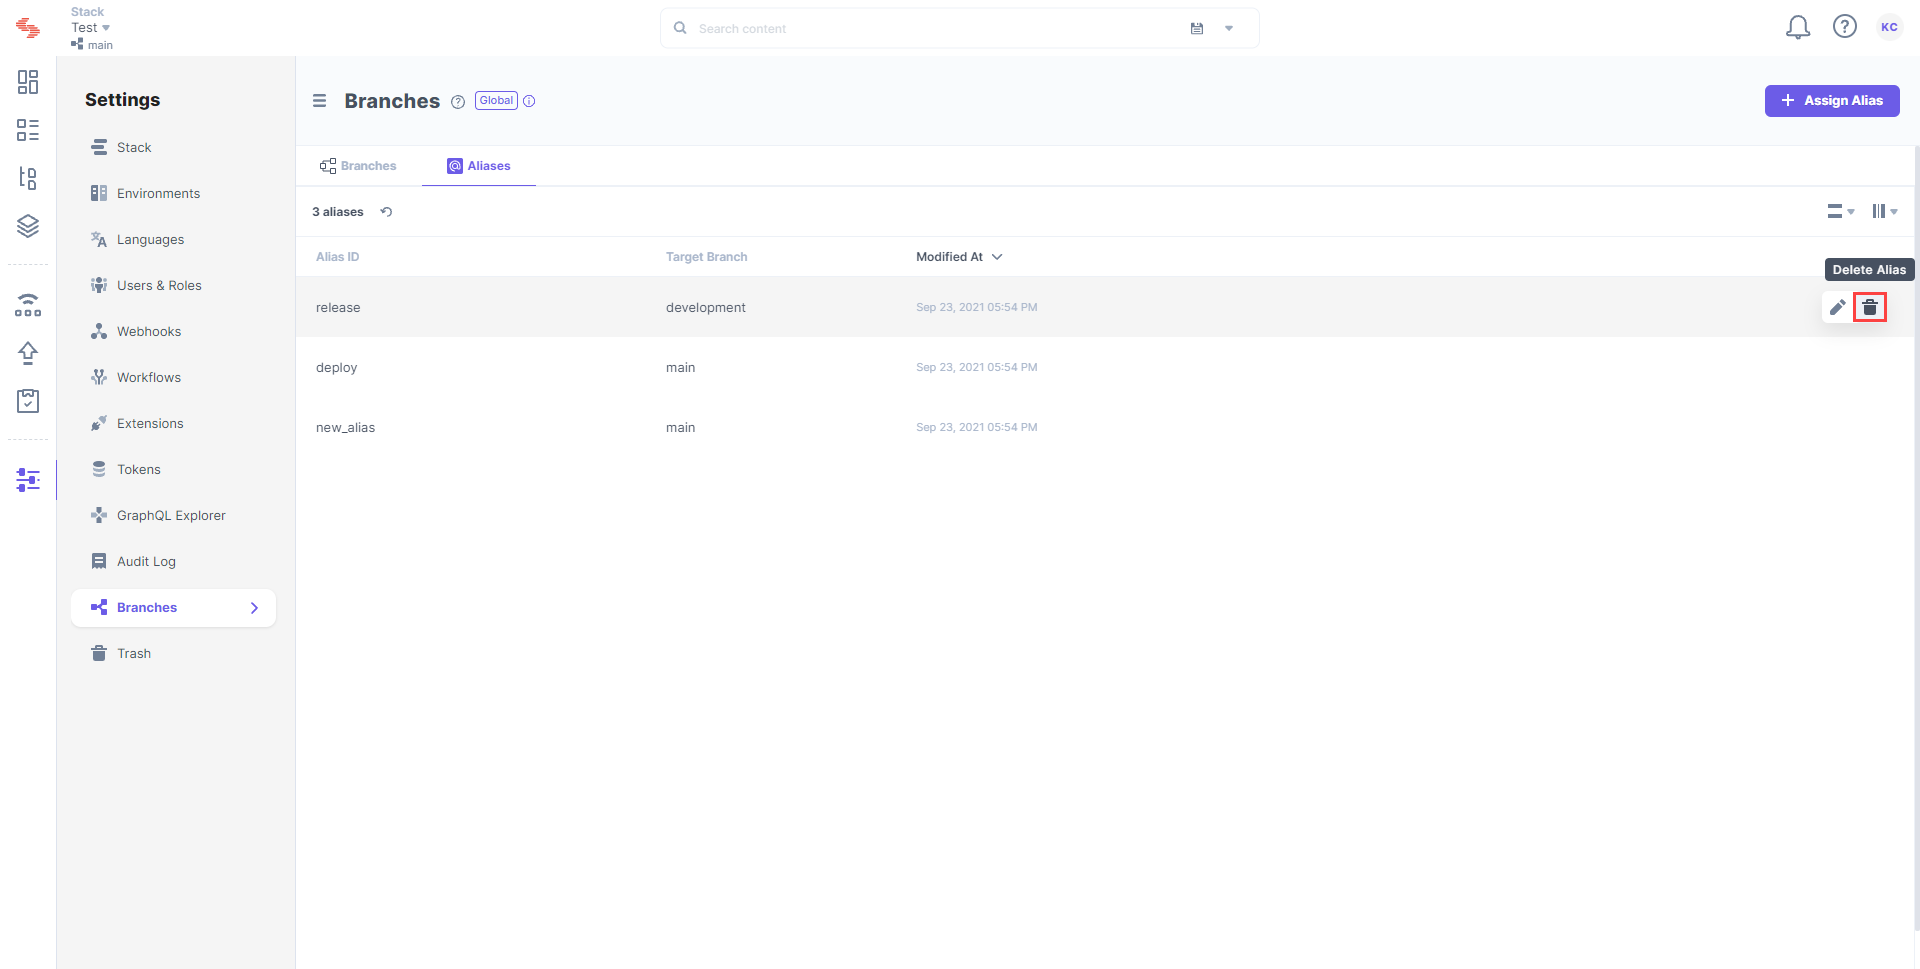
-
Type in your alias ID and confirm the Delete action.
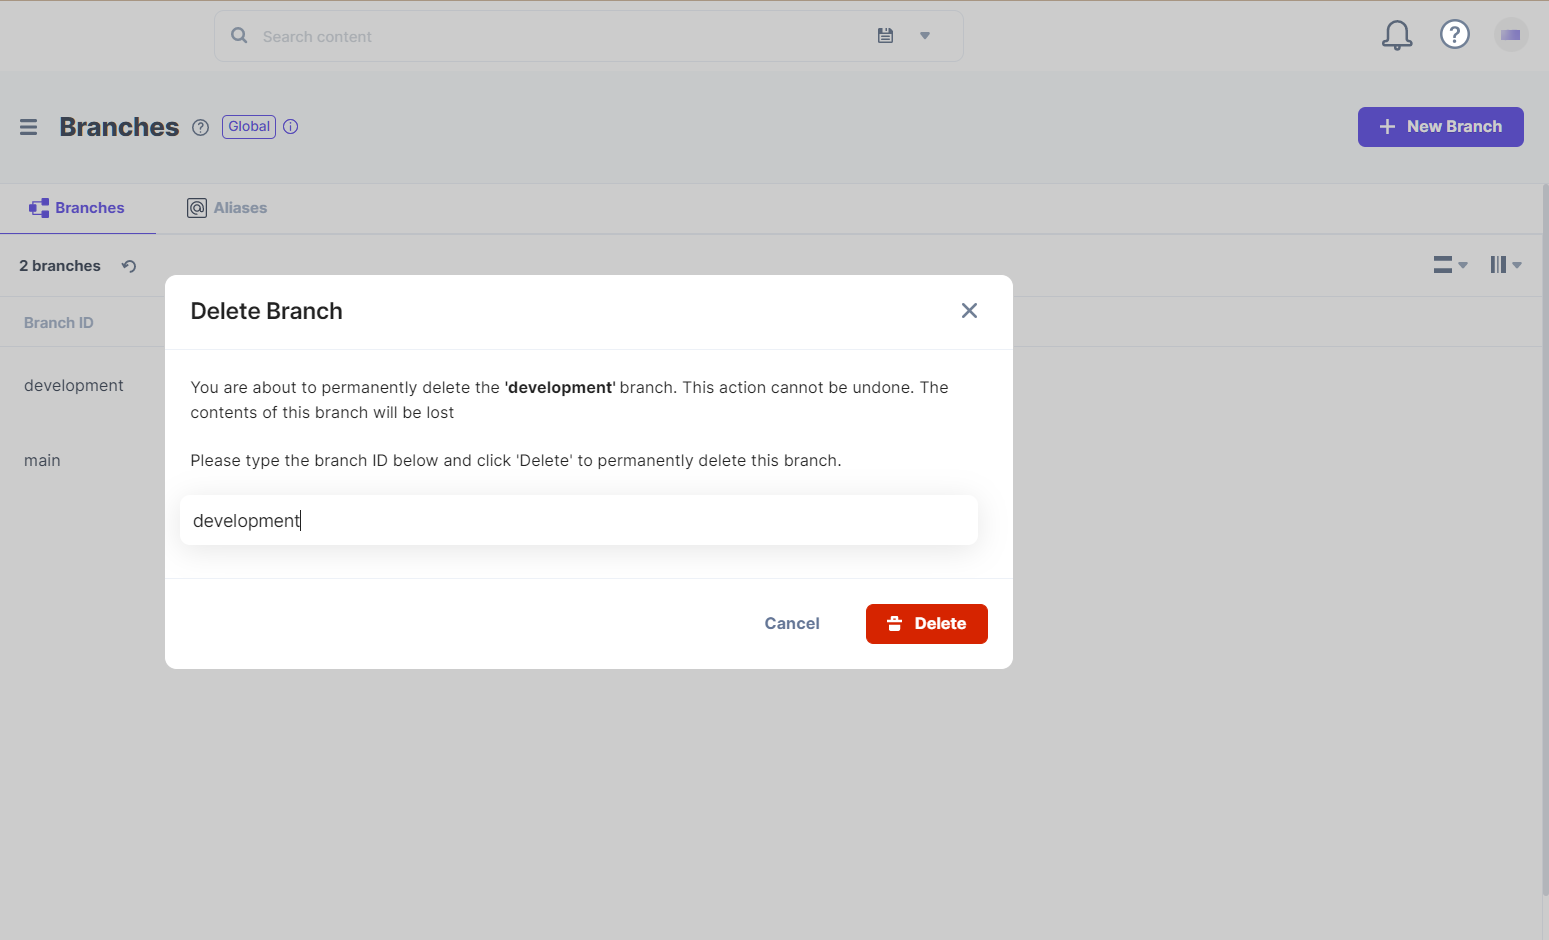
Warning: These steps will permanently delete the alias.
Alias Operations using the API
Get All Aliases
The get-all-aliases request returns comprehensive information about all the aliases available in a particular stack in your account.


GET: https://api.contentstack.io/v3/stacks/branch_aliases?limit={limit_value}&skip={skip_value}&include_count={boolean_value}
curl --location 'https://api.contentstack.io/v3/stacks/branch_aliases' \

--header 'api_key: **************' \

--header 'authorization: ******************' \

--header 'Content-Type: application/json' \

--data ''
Result
{

    "branch_aliases": [

        {

            "uid": "dev",

            "source": "main",

            "created_by": "*********************",

            "updated_by": "********************",

            "created_at": "2024-02-01T07:34:54.356Z",

            "updated_at": "2024-02-01T07:36:52.330Z",

            "deleted_at": false,

            "alias": "dev_alias"

        },

        {

            "uid": "main",

            "source": "",

            "created_by": "******************",

            "updated_by": "******************",

            "created_at": "2023-12-01T07:04:10.294Z",

            "updated_at": "2024-02-01T07:36:21.706Z",

            "deleted_at": false,

            "alias": "main_alias"

        },

        {

            "uid": "staging",

            "source": "main",

            "created_by": "******************",

            "updated_by": "******************",

            "created_at": "2024-02-01T07:33:22.139Z",

            "updated_at": "2024-02-01T07:37:06.284Z",

            "deleted_at": false,

            "alias": "stage_alias"

        }

    ]

}

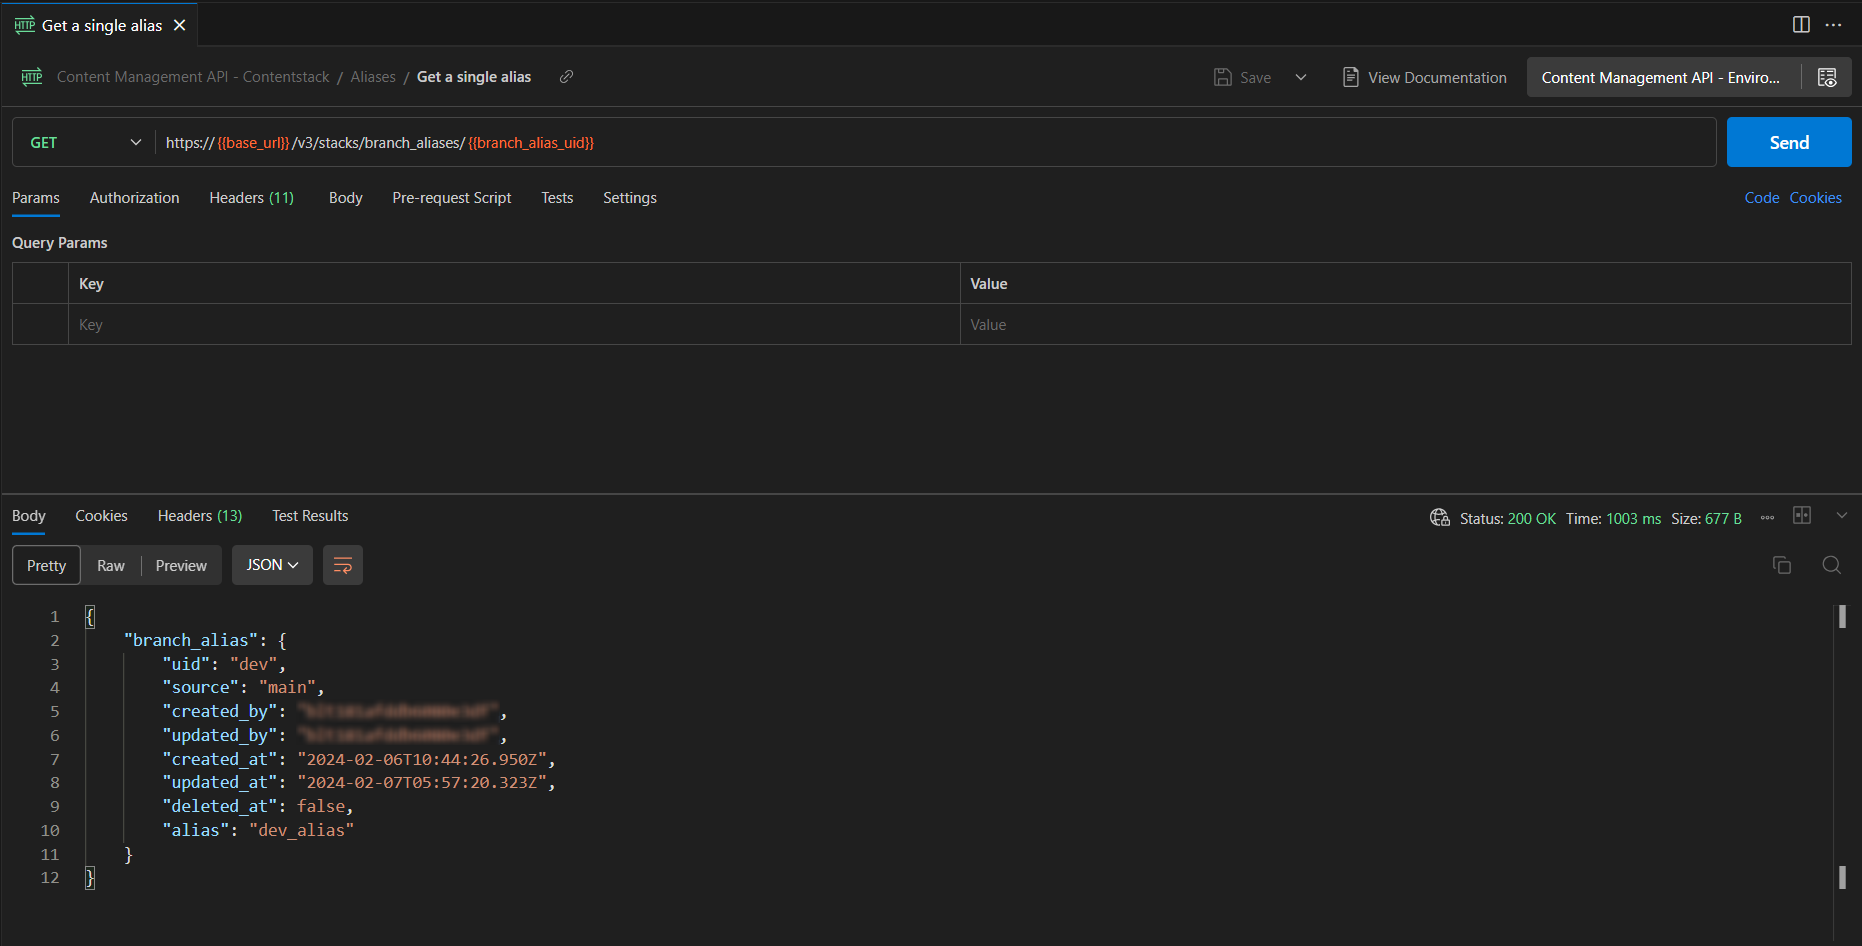
Get a Single Alias
The get-a-single-alias request returns information about a specific alias.
GET: https://api.contentstack.io/v3/stacks/branch_aliases/{branch_alias_uid}
curl --location 'https://api.contentstack.io/v3/stacks/branch_aliases/main_alias' \

--header 'api_key: *****************' \

--header 'authorization: ****************' \

--header 'Content-Type: application/json' \

--data ''
Result :

{

    "branch_alias": {

        "uid": "main",

        "source": "",

        "created_by": "*******************",

        "updated_by": "*******************",

        "created_at": "2023-12-01T07:04:10.294Z",

        "updated_at": "2024-02-01T07:36:21.706Z",

        "deleted_at": false,

        "alias": "main_alias"

    }

}

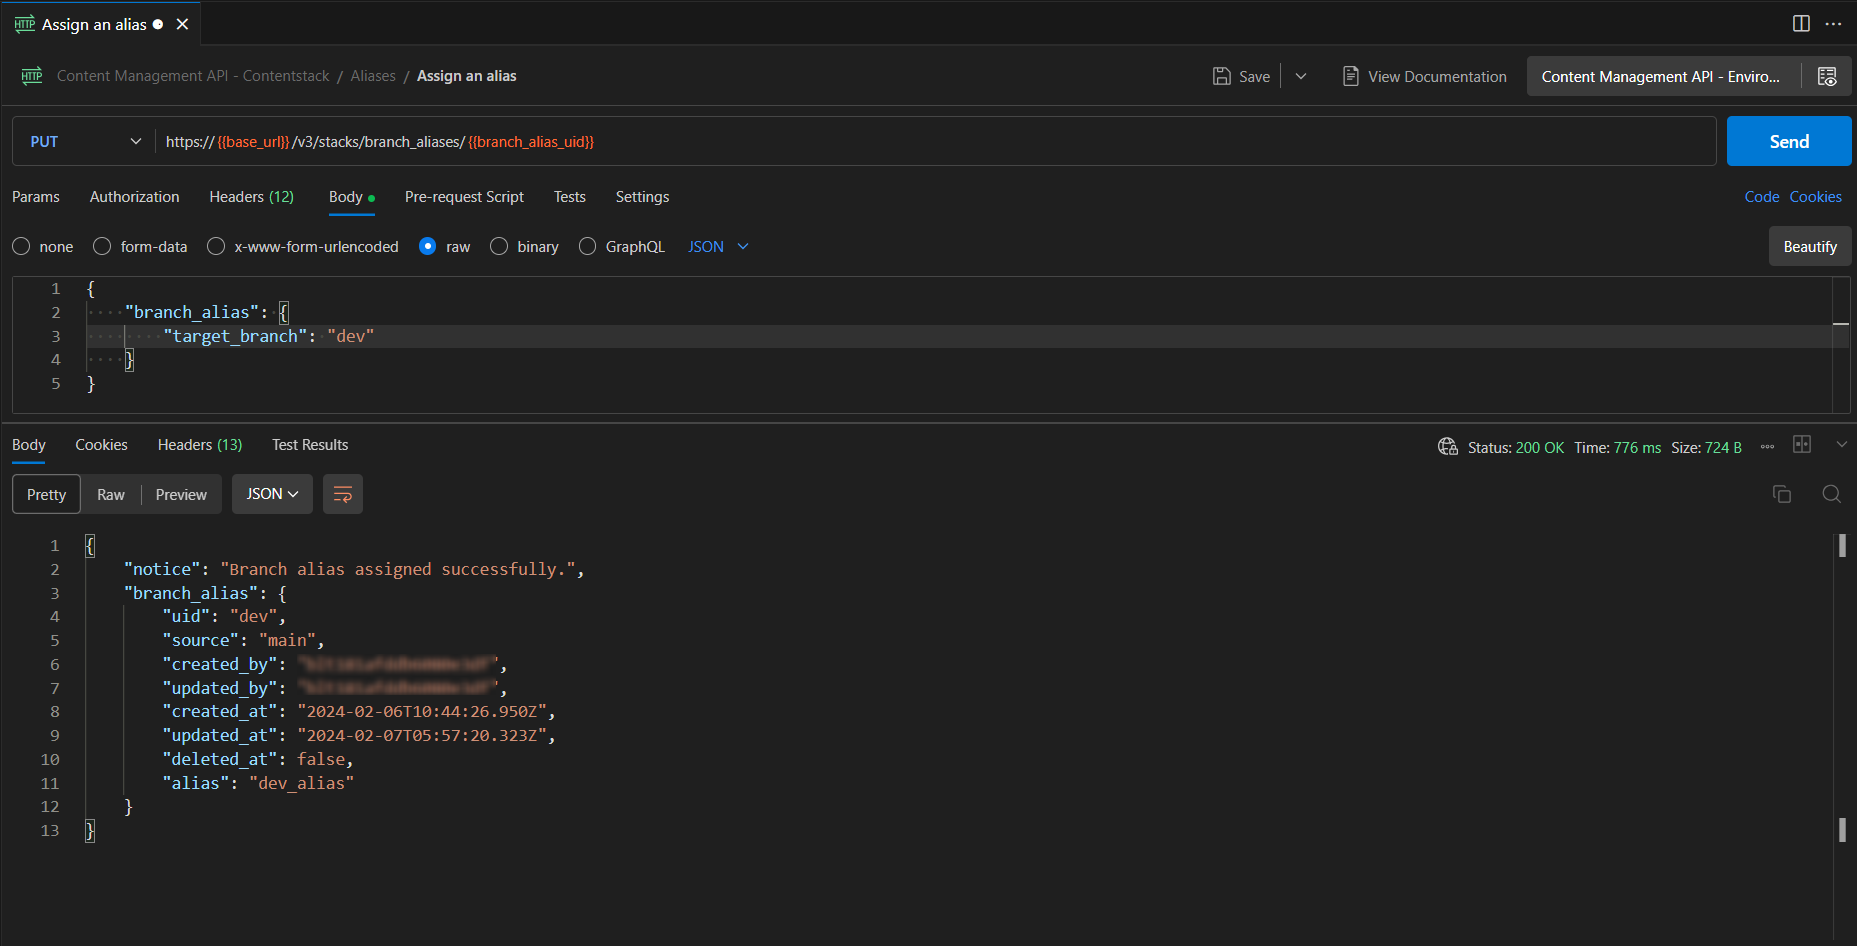
Assign an Alias
The assign-an-alias request creates a new alias in a particular stack of your organization. This alias can point to your stack's existing branch (target branch).
Note: Only stack owners, admins, and developers can assign a new alias to a branch. You must only use the authtoken to assign an alias.
PUT: https://api.contentstack.io/v3/stacks/branch_aliases/{branch_alias_uid}


curl --location --request PUT 'https://api.contentstack.io/v3/stacks/branch_aliases/dev_alias' \

--header 'Content-Type: application/json' \

--header 'api_key: ********************' \

--header 'authtoken: ******************' \

--header 'Content-Type: application/json' \

--data '{

    "branch_alias": {

        "target_branch": "dev"

    }

}'


Result
{
"notice": "Branch alias assigned successfully.",
"branch_alias": {
"uid": "dev",
"source": "main",
"created_by": "****************",
"updated_by": "****************",
"created_at": "2024-02-01T07:34:54.356Z",
"updated_at": "2024-02-01T09:05:02.160Z",
"deleted_at": false,
"alias": "dev_alias"
}
}
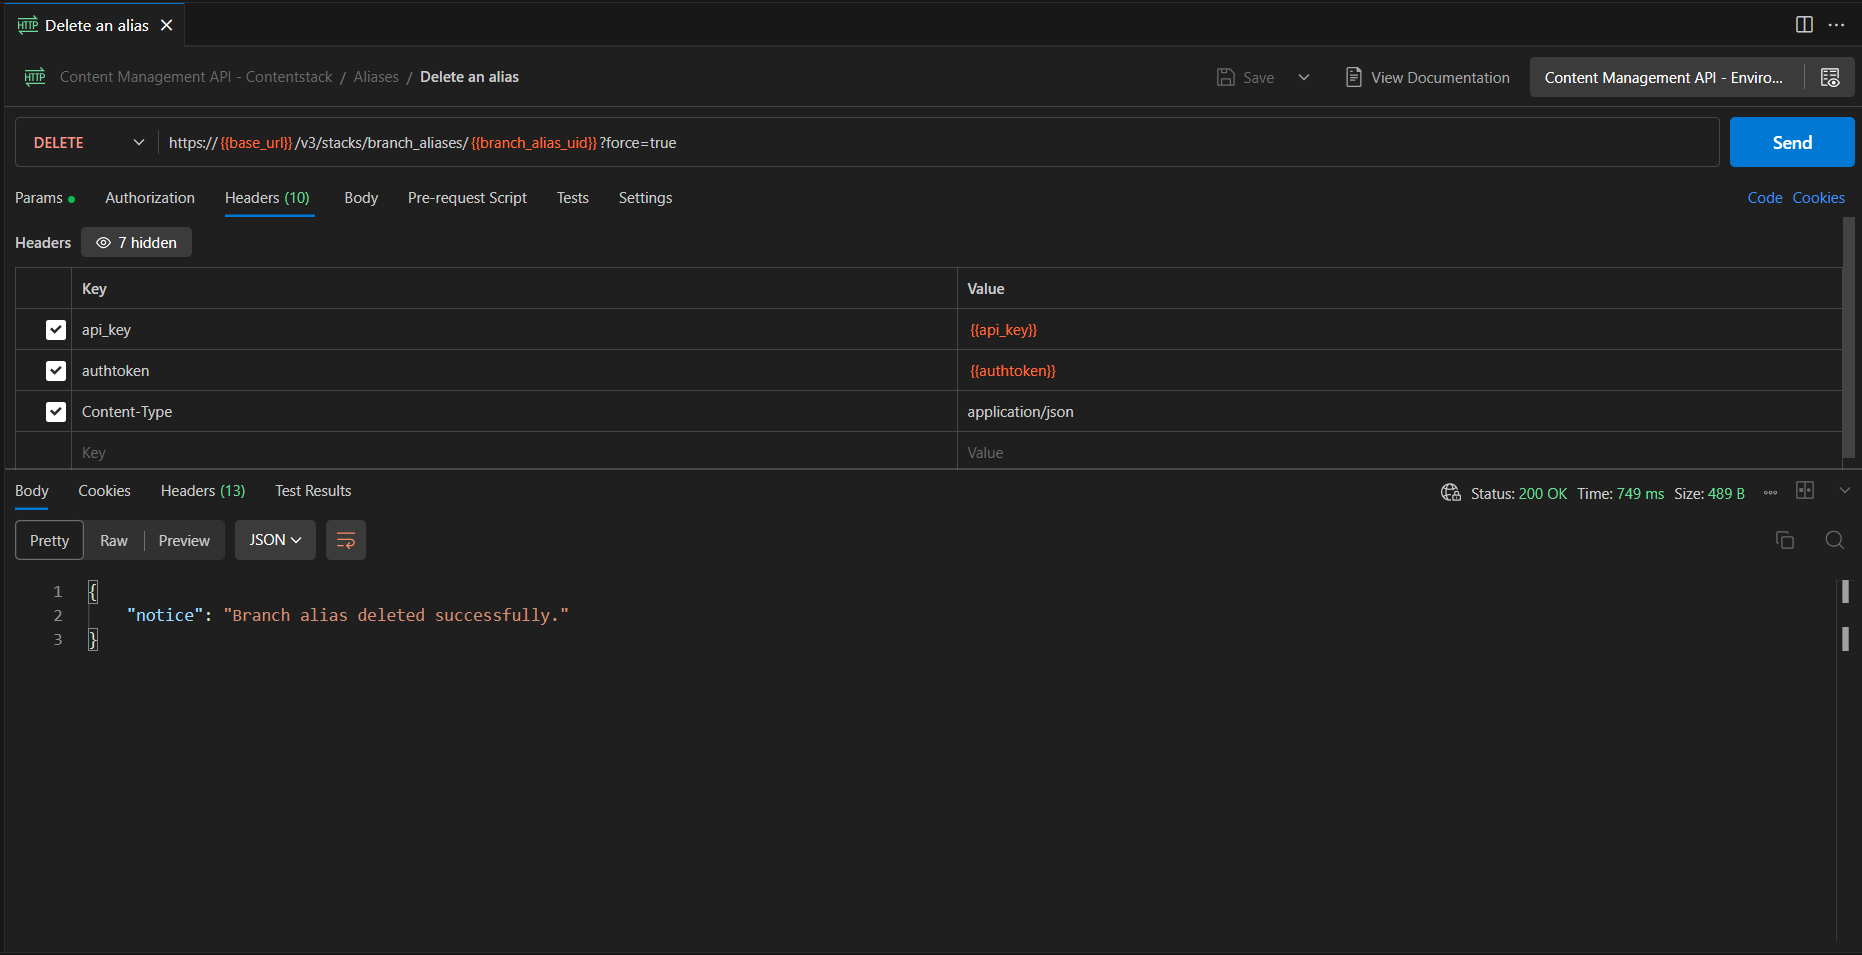
Delete an Alias
The delete-an-alias request deletes an existing alias.
To confirm the deletion of an alias, you need to specify the force=true query parameter.
When executing the API call, provide the UID of your alias in the “URL Parameters” section.
Note: You must only use the authtoken to delete an alias.


DELETE: https://api.contentstack.io/v3/stacks/branch_aliases/{branch_alias_uid}?force={boolean_value}


curl --location --request DELETE 'https://api.contentstack.io/v3/stacks/branch_aliases/dev_alias?force=true' \

--header 'api_key: ****************' \

--header 'authtoken: ***************' \

--header 'Content-Type: application/json' \

--data ''
Result
{

    "notice": "Branch alias deleted successfully."

}

Alias Operations using the API
Get All Aliases
The get-all-aliases request returns comprehensive information about all the aliases available in a particular stack in your account.


GET: https://api.contentstack.io/v3/stacks/branch_aliases?limit={limit_value}&skip={skip_value}&include_count={boolean_value}
curl --location 'https://api.contentstack.io/v3/stacks/branch_aliases' \

--header 'api_key: **************' \

--header 'authorization: ******************' \

--header 'Content-Type: application/json' \

--data ''
Result
{

    "branch_aliases": [

        {

            "uid": "dev",

            "source": "main",

            "created_by": "*********************",

            "updated_by": "********************",

            "created_at": "2024-02-01T07:34:54.356Z",

            "updated_at": "2024-02-01T07:36:52.330Z",

            "deleted_at": false,

            "alias": "dev_alias"

        },

        {

            "uid": "main",

            "source": "",

            "created_by": "******************",

            "updated_by": "******************",

            "created_at": "2023-12-01T07:04:10.294Z",

            "updated_at": "2024-02-01T07:36:21.706Z",

            "deleted_at": false,

            "alias": "main_alias"

        },

        {

            "uid": "staging",

            "source": "main",

            "created_by": "******************",

            "updated_by": "******************",

            "created_at": "2024-02-01T07:33:22.139Z",

            "updated_at": "2024-02-01T07:37:06.284Z",

            "deleted_at": false,

            "alias": "stage_alias"

        }

    ]

}
Get a Single Alias
The get-a-single-alias request returns information about a specific alias.
GET: https://api.contentstack.io/v3/stacks/branch_aliases/{branch_alias_uid}
curl --location 'https://api.contentstack.io/v3/stacks/branch_aliases/main_alias' \

--header 'api_key: *****************' \

--header 'authorization: ****************' \

--header 'Content-Type: application/json' \

--data ''
Result :

{

    "branch_alias": {

        "uid": "main",

        "source": "",

        "created_by": "*******************",

        "updated_by": "*******************",

        "created_at": "2023-12-01T07:04:10.294Z",

        "updated_at": "2024-02-01T07:36:21.706Z",

        "deleted_at": false,

        "alias": "main_alias"

    }

}
Assign an Alias
The assign-an-alias request creates a new alias in a particular stack of your organization. This alias can point to your stack's existing branch (target branch).
Note: Only stack owners, admins, and developers can assign a new alias to a branch. You must only use the authtoken to assign an alias.
PUT: https://api.contentstack.io/v3/stacks/branch_aliases/{branch_alias_uid}


curl --location --request PUT 'https://api.contentstack.io/v3/stacks/branch_aliases/dev_alias' \

--header 'Content-Type: application/json' \

--header 'api_key: ********************' \

--header 'authtoken: ******************' \

--header 'Content-Type: application/json' \

--data '{

    "branch_alias": {

        "target_branch": "dev"

    }

}'


Result
{
"notice": "Branch alias assigned successfully.",
"branch_alias": {
"uid": "dev",
"source": "main",
"created_by": "****************",
"updated_by": "****************",
"created_at": "2024-02-01T07:34:54.356Z",
"updated_at": "2024-02-01T09:05:02.160Z",
"deleted_at": false,
"alias": "dev_alias"
}
}

Delete an Alias
The delete-an-alias request deletes an existing alias.
To confirm the deletion of an alias, you need to specify the force=true query parameter.
When executing the API call, provide the UID of your alias in the “URL Parameters” section.
Note: You must only use the authtoken to delete an alias.


DELETE: https://api.contentstack.io/v3/stacks/branch_aliases/{branch_alias_uid}?force={boolean_value}


curl --location --request DELETE 'https://api.contentstack.io/v3/stacks/branch_aliases/dev_alias?force=true' \

--header 'api_key: ****************' \

--header 'authtoken: ***************' \

--header 'Content-Type: application/json' \

--data ''
Result
{

    "notice": "Branch alias deleted successfully."

}